Prehistoric Path: Difference between revisions
(I rephrased a few things, but nothing bad.) Tag: Mobile edit |
(This was more specific and didn't need rephrasing) |
||
| Line 17: | Line 17: | ||
==Overview== | ==Overview== | ||
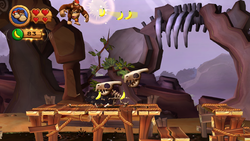
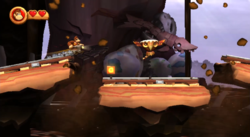
[[File:DKCR Prehistoric Path 2.png|thumb|250px|left|Donkey Kong goes up against two Skellirexes]] | [[File:DKCR Prehistoric Path 2.png|thumb|250px|left|Donkey Kong goes up against two Skellirexes]] | ||
The Kongs begin the level near a cactus and a bridge. This bridge helps them avoid the tar pit below. | The Kongs begin the level near a cactus and a bridge. This bridge helps them avoid the tar pit below. There are wooden platforms are ahead of this in the tar, causing them to sink with any of the Kongs' weight. The wooden platform in the center of the area is longer than the other two, holding two [[Skellirex]]es and some [[banana]]s. After the three wooden platforms is a [[Barrel Cannon]] that shoots the Kongs into a minecart on a nearby track. After the Kongs head down a ramp covered in bananas, they fly over a pit of tar onto a new track that is situated on a platform that sinks into the tar as they ride on it; only jumping can make the platform rise. In this area, the Kongs travel across a long platform and then come up to a few broken parts of the track. They must jump over the gaps, grabbing the letter K along the way, to reach a long path with a floating platform above it. On the floating platform are many spikes that the Kongs have to crouch under. If they manage to dodge the spikes and head onto the following stone platform, they reach a group of three Bonehead Jeds. The platform ahead of this one is positioned on another sinking set of platforms. Spikes hang under floating objects that hold dinosaur eggs. They must be crouched under to avoid. Between two of these spiked-covered ceilings is a Bonehead Jed and a sinking pathway leading to the letter O. | ||
Above the track leading to the letter is another that leads to a gap with a [[Tiki Buzz]] hovering above it. The Kongs must use this enemy to bounce over the tar under it and access a track that curves upwards under an object with spikes under it. After the | Above the track leading to the letter is another that leads to a gap with a [[Tiki Buzz]] hovering above it. The Kongs must use this enemy to bounce over the tar under it and access a track that curves upwards under an object with spikes under it. After the Kongs pass this by crouching, they come up to another gap full of tar that must be crossed by bouncing on Tiki Buzzes and a [[Tiki Tork]]. Between three Tiki Buzzes and a Tiki Tork here is a stone structure that the Kongs must bounce over as well. Once the primates bounce off of the Tiki Tork, they land on a slanted platform that has just fallen off of a solid platform. This solid platform piece tilts at an angle when the Kongs ride on it, causing it to bump into a rock wall in their way. The rock wall then falls on top of the tar, creating a new path for them to travel on and reach the next gap, which must be crossed by using a hovering Tiki Tork. When they land on the platform after the abyss, it breaks in half. If the primates manage to reach the second half of the broken platform before sinking into the tar, they are taken to a flat, solid area as the platform tilts towards it. As they crouch under a narrow passage with spikes, they pass the [[Professor Chops|Tutorial Pig]] and the checkpoint above the spikes. | ||
Following the checkpoint is a gap that separates the Kongs from a part of the track the stretches under a ceiling of spikes that they must crouch under. Once they cross the gap and dodge the spikes, they come up to another gap with some Tiki Buzzes floating above it. They must bounce on them to avoiding falling. There are two Tiki Buzzes parallel to each other after the first Tiki Buzz; the enemy on the top has the letter N above it, while the one below has a [[Banana|Banana Bunch]]. Two tracks are placed immediately after this, with both of them at different heights. The track at the top of the area has less gaps in it, while the one below it has one before letting the Kongs over a tar pit with a Tiki Tork above it. The way that the Kongs bounce off of the last Tiki Buzz in the previous area makes them land on a certain track; therefore, a bigger jump is needed to reach the higher track. Following these tracks is the aforementioned Tiki Tork that must be bounced off of to reach a new part of the track, which is placed on top of a large, flat platform that tilts along the tar as the | Following the checkpoint is a gap that separates the Kongs from a part of the track the stretches under a ceiling of spikes that they must crouch under. Once they cross the gap and dodge the spikes, they come up to another gap with some Tiki Buzzes floating above it. They must bounce on them to avoiding falling. There are two Tiki Buzzes parallel to each other after the first Tiki Buzz; the enemy on the top has the letter N above it, while the one below has a [[Banana|Banana Bunch]]. Two tracks are placed immediately after this, with both of them at different heights. The track at the top of the area has less gaps in it, while the one below it has one before letting the Kongs over a tar pit with a Tiki Tork above it. The way that the Kongs bounce off of the last Tiki Buzz in the previous area makes them land on a certain track; therefore, a bigger jump is needed to reach the higher track. Following these tracks is the aforementioned Tiki Tork that must be bounced off of to reach a new part of the track, which is placed on top of a large, flat platform that tilts along the tar as the Kongs move on it. It takes them to another platform that snaps in half when landed on. A ceiling of spikes is at the end of the first half of this platform, while the second half of it tilts the Kongs towards a solid platform. However, this platform soon breaks into three, with the letter G on the center platform under a Tiki Tork. | ||
The two broken platform parts around it are angled slightly, and the last of the three has a ceiling covered in spikes above it that the Kongs must crouch under. Ahead of this is a solid platform that leads under more spikes. | The two broken platform parts around it are angled slightly, and the last of the three has a ceiling covered in spikes above it that the Kongs must crouch under. Ahead of this is a solid platform that leads under more spikes and onto a giant egg. As soon as the duo lands on this, the front of the egg breaks in half and the Kongs ride on the remaining part of it. While the egg rolls, they ride over it, coming up to bananas, Tiki Buzzes, and [[Flaming Tiki Buzz]]es on the way. After jumping over the Tiki Buzzes, the Kongs fall into a gap in the egg that has broken off due to hitting a fossilized tooth found earlier protruding from the ground. The primates must jump over a few gaps and teeth while riding inside of the egg, until the object eventually breaks apart and releases the Kongs from inside of it. Once the egg breaks, the Kongs come across a pit of tar and fall onto a wooden platform that jerks down into more tar when landed on. There are similar platforms ahead, with each platform getting progressively smaller, making them have to time their jumps more precisely. After they hop off of the final of these platforms, they land on a bumpy part of the track that causes them to fall out of their cart and land on a solid platform with the [[Slot Machine Barrel]] on it; the level is complete when this is hit. | ||
==Enemies== | ==Enemies== | ||
Revision as of 00:03, July 21, 2024
| Level | |
|---|---|
| Prehistoric Path | |
| |
| Level code | 6-2 |
| World | Cliff |
| Game | Donkey Kong Country Returns (3D) |
| Music track | Clifftop Concert Prehistoric Path |
| << Directory of levels >> ** | |
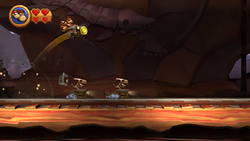
Prehistoric Path is the thirty-ninth level in Donkey Kong Country Returns and Donkey Kong Country Returns 3D and the second level in the Cliff world.
This level takes place on a high mountain, where Donkey and Diddy Kong must ride a Mine Cart over many falling rock platforms through much of the stage. The area around them is constantly changing, with platforms moving or falling and Skellirexes riding their own mine carts heading near them. Tar is also under some parts of the track, causing the pathway to sink down if the Kongs stay on them for too long, only to rise back up when they jump. Additionally, spikes are placed in tight spaces where the Kongs must crouch down into the cart to avoid them. While most of the level takes place in a minecart, the beginning takes place on land, where the Kongs still have to travel along sinking platforms over a tar. Near the end, an egg breaks apart from the wall, and the Kongs have to ride on top of it and later inside of it, while avoiding the enemies and spiked protruding from the ground.
In the Time Attack mode of the game, a time of 1:34:00 is needed to get a gold medal, a time of 1:35:00 for silver, and a time of 1:37:00 for bronze.
Overview
The Kongs begin the level near a cactus and a bridge. This bridge helps them avoid the tar pit below. There are wooden platforms are ahead of this in the tar, causing them to sink with any of the Kongs' weight. The wooden platform in the center of the area is longer than the other two, holding two Skellirexes and some bananas. After the three wooden platforms is a Barrel Cannon that shoots the Kongs into a minecart on a nearby track. After the Kongs head down a ramp covered in bananas, they fly over a pit of tar onto a new track that is situated on a platform that sinks into the tar as they ride on it; only jumping can make the platform rise. In this area, the Kongs travel across a long platform and then come up to a few broken parts of the track. They must jump over the gaps, grabbing the letter K along the way, to reach a long path with a floating platform above it. On the floating platform are many spikes that the Kongs have to crouch under. If they manage to dodge the spikes and head onto the following stone platform, they reach a group of three Bonehead Jeds. The platform ahead of this one is positioned on another sinking set of platforms. Spikes hang under floating objects that hold dinosaur eggs. They must be crouched under to avoid. Between two of these spiked-covered ceilings is a Bonehead Jed and a sinking pathway leading to the letter O.
Above the track leading to the letter is another that leads to a gap with a Tiki Buzz hovering above it. The Kongs must use this enemy to bounce over the tar under it and access a track that curves upwards under an object with spikes under it. After the Kongs pass this by crouching, they come up to another gap full of tar that must be crossed by bouncing on Tiki Buzzes and a Tiki Tork. Between three Tiki Buzzes and a Tiki Tork here is a stone structure that the Kongs must bounce over as well. Once the primates bounce off of the Tiki Tork, they land on a slanted platform that has just fallen off of a solid platform. This solid platform piece tilts at an angle when the Kongs ride on it, causing it to bump into a rock wall in their way. The rock wall then falls on top of the tar, creating a new path for them to travel on and reach the next gap, which must be crossed by using a hovering Tiki Tork. When they land on the platform after the abyss, it breaks in half. If the primates manage to reach the second half of the broken platform before sinking into the tar, they are taken to a flat, solid area as the platform tilts towards it. As they crouch under a narrow passage with spikes, they pass the Tutorial Pig and the checkpoint above the spikes.
Following the checkpoint is a gap that separates the Kongs from a part of the track the stretches under a ceiling of spikes that they must crouch under. Once they cross the gap and dodge the spikes, they come up to another gap with some Tiki Buzzes floating above it. They must bounce on them to avoiding falling. There are two Tiki Buzzes parallel to each other after the first Tiki Buzz; the enemy on the top has the letter N above it, while the one below has a Banana Bunch. Two tracks are placed immediately after this, with both of them at different heights. The track at the top of the area has less gaps in it, while the one below it has one before letting the Kongs over a tar pit with a Tiki Tork above it. The way that the Kongs bounce off of the last Tiki Buzz in the previous area makes them land on a certain track; therefore, a bigger jump is needed to reach the higher track. Following these tracks is the aforementioned Tiki Tork that must be bounced off of to reach a new part of the track, which is placed on top of a large, flat platform that tilts along the tar as the Kongs move on it. It takes them to another platform that snaps in half when landed on. A ceiling of spikes is at the end of the first half of this platform, while the second half of it tilts the Kongs towards a solid platform. However, this platform soon breaks into three, with the letter G on the center platform under a Tiki Tork.
The two broken platform parts around it are angled slightly, and the last of the three has a ceiling covered in spikes above it that the Kongs must crouch under. Ahead of this is a solid platform that leads under more spikes and onto a giant egg. As soon as the duo lands on this, the front of the egg breaks in half and the Kongs ride on the remaining part of it. While the egg rolls, they ride over it, coming up to bananas, Tiki Buzzes, and Flaming Tiki Buzzes on the way. After jumping over the Tiki Buzzes, the Kongs fall into a gap in the egg that has broken off due to hitting a fossilized tooth found earlier protruding from the ground. The primates must jump over a few gaps and teeth while riding inside of the egg, until the object eventually breaks apart and releases the Kongs from inside of it. Once the egg breaks, the Kongs come across a pit of tar and fall onto a wooden platform that jerks down into more tar when landed on. There are similar platforms ahead, with each platform getting progressively smaller, making them have to time their jumps more precisely. After they hop off of the final of these platforms, they land on a bumpy part of the track that causes them to fall out of their cart and land on a solid platform with the Slot Machine Barrel on it; the level is complete when this is hit.
Enemies
| Image | Name | Count |
|---|---|---|
| Bonehead Jed | 6 | |
| Flaming Tiki Buzz | 2 | |

|
Skellirex | 2 |
| Tiki Buzz | 8 | |
| Tiki Tork | 6 |
Items
| Image | Name | Count |
|---|---|---|
| Banana Coin | 5 | |
| Extra Life Balloon | 1 |
K-O-N-G Letters
Puzzle Pieces
| Image | Number | Location |
|---|---|---|
|
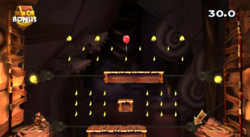
1 | Before the Kongs get in the Barrel Cannon at the beginning of the level, they should roll jump under it and head over the tar pit to reach a platform with a hidden tunnel. If they go into the tunnel, they are taken to a Bonus Level, where they must move around two large, moving platforms in order to collect forty-seven bananas, two Banana Coins, and an Extra Life Balloon. Once everything is collected, a Puzzle Piece appears. |
|
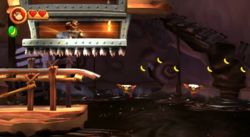
2 | Before the Kongs head under the first ceiling of spikes after the letter O, they should jump into the side of the object holding the spikes to reveal a hidden area with the second Puzzle Piece. |
|
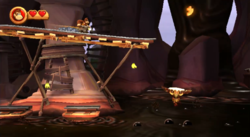
3 | Immediately after the letter N, the primates must make a high-bounce off of the final Tiki Buzz to land on a high track that is positioned above another. At the end of this track is the Puzzle Piece above the gap between the next platform. |
|
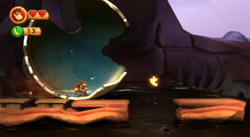
4 | Near the end of the level just before the Kongs escape the giant egg, the fourth Puzzle Piece can be found above a small gap. |
|
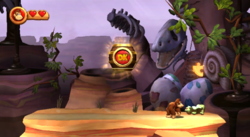
5 | If the primates pound on the cactus just after the Slot Machine Barrel, they can reveal the fifth and final Puzzle Piece. |
Names in other languages
| Language | Name | Meaning | Notes |
|---|---|---|---|
| French (NOA) | Trafic Préhistorique[?] | Prehistoric Traffic | |
| German | Auf Antiken Pfaden[?] | On Prehistoric Pathways | |
| Italian | Passo cretaceo[?] | Cretaceous Pass | |
| Spanish | Ruta Prehistórica[?] | Prehistoric Route |
