|
|
| Line 77: |
Line 77: |
| |Spa=Mecanismo Machacamonos | | |Spa=Mecanismo Machacamonos |
| |SpaM=Monkey-crusher Mechanism | | |SpaM=Monkey-crusher Mechanism |
| |FraA=Blocs de Choc | | |FreA=Blocs de Choc |
| |FraAM=Shock Blocks | | |FreAM=Shock Blocks |
| |Ger=Schiebestampfer | | |Ger=Schiebestampfer |
| |GerM=Shifty Smashers | | |GerM=Shifty Smashers |
Revision as of 02:47, January 8, 2024
Shifty Smashers is the twenty-second level in the Donkey Kong Country Returns and Donkey Kong Country Returns 3D. It is also the seventh and final level in the Ruins world. This level is the Ruins world's Key Temple, as it can only be unlocked if all of the K-O-N-G Letters are collected in other Ruins levels. As a result, the level is not required to beat the game and does not feature any K-O-N-G Letters.
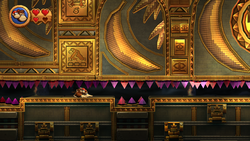
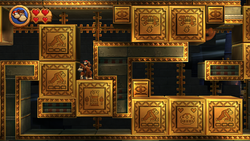
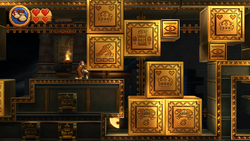
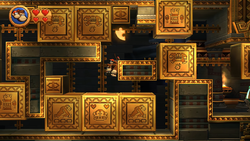
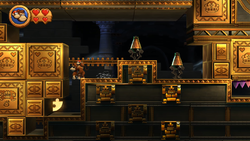
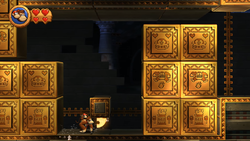
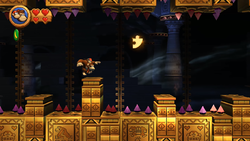
Shifty Smashers introduces many golden blocks, which appear to have Donkey Kong themed pictures shown on them. These dangerous platforms are scattered throughout the whole temple, taking up most of its space. They constantly move back and forth about every second, so Donkey Kong and Diddy Kong must carefully maneuver around them as they move to progress and avoid being crushed. The level also features some spikes, which are attached to ceilings that slowly move up and down; they move so far down that the Kongs must crouch down to dodge them. This level does not feature many enemies, and only has a few Tiki Tanks in it.
In the Time Attack mode of the game, a time of 1:05:00 is needed to get a gold medal, a time of 1:20:00 for silver, and a time of 1:35:00 for bronze.
Overview

The Kongs in a large area of blocks
The level begins with a straight pathway with two urns, followed by two large, golden cubes, which move up and down. Next to them are two more urns with collectibles in them. The Kongs must maneuver under the cubes to reach the next area, where there are more of these golden cubes. After them is a group of bananas and an even larger area of moving cube platforms. The Kongs must pass through the area as the blocks move back and fourth in order to get to a much larger area of blocks. The Kongs can not cut right through the center of the room, as it is being blocked by the cubes, so they must travel to the bottom of the area and under the platforms to get around. After falling between two blocks, the Kongs can reach a small, empty area. They must travel over a few blocks just ahead of here and then climb on top of them to enter a higher area, where some urns holding items can be found. In the hallway after this, the Kongs can find some spikes hanging over the ceiling. The spikes move up and down, forcing them to crouch when they get at their lowest point. Spikes are also on the floor, along with a Tiki Tank.
A raised platform in the middle of the hallway is high enough that the Kongs can be crushed no matter what if they are standing on it while the spikes lower that whole way. Another empty area of nothing but two urns is ahead, followed by more golden, moving blocks. The Kongs must climb around these large platforms like stairs to get around them. Eventually, they can reach a small platform with a Puzzle Piece on it. They can not reach the golden blocks at this point because they are too high, so the primates must instead jump from the previous blocks to them to advance through the level. An area full of bananas is in the hallway ahead. When the Kongs enter this area, a wall comes from behind them and pushes them forward into an area full of spikes, which are placed between many small platforms. The heroes must quickly run through this area, as the ground and the ceiling move together while they run through. After they travel away from this area and head down a flat, empty pathway, they can find the third Rare Orb. If they collect it, the level is complete.
Enemies
Items
Puzzle Pieces
| Image
|
Number
|
Location
|

|
1
|
After passing a group of bananas early on in the level, the primates can travel to the left side of the next set of blocks to find a Puzzle Piece in the corner of the area.
|

|
2
|
In the large set of blocks where the heroes must travel to the bottom of the area and them climb up the other side of the blocks, they can find the Puzzle Piece in a small alcove between some golden cubes and a solid, stationary platform.
|

|
3
|
Before the primates head into the first area with spikes, they should head into a small alcove at the corner of the area under some of the blocks to spot a Puzzle Piece.
|

|
4
|
As the Kongs approach the end of the level, along with the second and final area of spikes, they should travel under a small platform that is located between two large sets of cubes to encounter the fourth Puzzle Piece.
|

|
5
|
In the final area of spikes at the end of the level, the fifth and final Puzzle Piece can be found in the center of the hallway.
|
Names in other languages
| Language
|
Name
|
Meaning
|
Notes
|
| French (NOA)
|
Blocs de Choc[?]
|
Shock Blocks
|
|
| German
|
Schiebestampfer[?]
|
Shifty Smashers
|
|
| Italian
|
Sala schiacciatutto[?]
|
Crush-Everything Room
|
|
| Spanish
|
Mecanismo Machacamonos[?]
|
Monkey-crusher Mechanism
|
|
| Donkey Kong Country Returns / Donkey Kong Country Returns 3D / Donkey Kong Country Returns HD
|
| Characters
|
Protagonists
|
Donkey Kong • Diddy Kong • Cranky Kong • Rambi • Squawks • Super Kong • Tutorial Pig • Wigglevine
|
| Bosses
|
Mugly • Scurvy Crew • Stu • Mole Miner Max/Train • Mangoruby • Thugly • Colonel Pluck • Tiki Tong
|
| Enemies and obstacles
|
Tiki Tak Tribe
|
Fireball • Flaming Tiki Buzz • Giga Goro Ball • Screaming Pillar • Screaming Pillar (big) • Tiki Boing • Tiki Bomber • Tiki Buzz • Tiki Doom • Tiki Goon • Tiki Pilot • Tiki Pop • Tiki Seeker • Tiki Tank • Tiki Tong Tower • Tiki Torch • Tiki Tork • Tiki Zing • Tiki Zing (big) • Tiki Zing (Foggy Fumes)
|
| Other
|
Ack • AckStack • Ape-Eating Plant • Awk • Big Squeekly • Bonehead Jed • Bopapodamus • Bowling bird • BuckBomb • BuckBot • Buzzbite • Cageberry • Char-Char • Chomp • Chū Komorin • Electrasquid • Electroid • Fireball • Firebite • Frogoon • Giant Chomp • Giga Rangwi • Green Chomp • Hopgoon • Hothead Jed • Humzee • Jellybob • Kowalee • Leaping flame • Mimic • Mole Guard • Mole Miner • Muncher • Pinchly • Rawk • Ready-Bots (Pogobot · Pyrobot) • Rentamaguma • Robobee • Shooting Chomp • Skellirex • Skittler • Skittler Pillar • Skullyrex • Snaggles • Snippys • Squeekly • Squiddicus • Squidly • Stilts • Toothberry • Wiggle • Yellow Snaggles
|
| Objects
|
Items
|
Banana • Banana Bunch • Banana Coin • Banana Juice • Crash Guard2 • Green Balloon2 • Hanging vine • Heart • Heart Boost • K-O-N-G Letters • Map Key • Puzzle Piece • Rare Orb • Red Balloon
|
| Barrels
|
Barrel Cannon • Blast Barrel • DK Barrel • Regular Barrel • Slot Machine Barrel
|
| Miscellaneous
|
Bag • Container • Green surface • Rambi Crate • Red and blue blocks • Tire • Train • Trapdoor
|
| Vehicles
|
Mine Cart • Rocket Barrel
|
| Moves
|
Barrel Roll (Cartwheel Attack) • Blow • Cling • Ground Pound (Popgun Pound) • Ranged attack
|
| Levels
|
Jungle
|
1-1: Jungle Hijinxs • 1-2: King of Cling • 1-3: Tree Top Bop • 1-4: Sunset Shore • 1-5: Canopy Cannons • 1-6: Crazy Cart • 1-K: Platform Panic • 1-B: Mugly's Mound
|
| Beach
|
2-1: Poppin' Planks • 2-2: Sloppy Sands • 2-3: Peaceful Pier • 2-4: Cannon Cluster • 2-5: Stormy Shore • 2-6: Blowhole Bound • 2-7: Tidal Terror • 2-K: Tumblin' Temple • 2-B: Pinchin' Pirates
|
| Ruins
|
3-1: Wonky Waterway • 3-2: Button Bash • 3-3: Mast Blast • 3-4: Damp Dungeon • 3-5: Itty Bitty Biters • 3-6: Temple Topple • 3-K: Shifty Smashers • 3-B: Ruined Roost
|
| Cave
|
4-1: Rickety Rails • 4-2: Grip 'n' Trip • 4-3: Bombs Away • 4-4: Mole Patrol • 4-5: Crowded Cavern • 4-K: Jagged Jewels • 4-B: The Mole Train
|
| Forest
|
5-1: Vine Valley • 5-2: Clingy Swingy • 5-3: Flutter Flyaway • 5-4: Tippin' Totems • 5-5: Longshot Launch • 5-6: Springy Spores • 5-7: Wigglevine Wonders • 5-8: Muncher Marathon • 5-K: Blast & Bounce • 5-B: Mangoruby Run
|
| Cliff
|
6-1: Sticky Situation • 6-2: Prehistoric Path • 6-3: Weighty Way • 6-4: Boulder Roller • 6-5: Precarious Plateau • 6-6: Crumble Canyon • 6-7: Tippy Shippy • 6-8: Clifftop Climb • 6-K: Perilous Passage • 6-B: Thugly's Highrise
|
| Factory
|
7-1: Foggy Fumes • 7-2: Slammin' Steel • 7-3: Handy Hazards • 7-4: Gear Getaway • 7-5: Cog Jog • 7-6: Switcheroo • 7-7: Music Madness • 7-R: Lift-off Launch • 7-K: Treacherous Track • 7-B: Feather Fiend
|
| Volcano
|
8-1: Furious Fire • 8-2: Hot Rocket • 8-3: Roasting Rails • 8-4: Smokey Peak • 8-5: Bobbing Basalt • 8-6: Moving Melters • 8-7: Red Red Rising • 8-K: Five Monkey Trial • 8-B: Tiki Tong Terror
|
| Cloud2,3
|
9-1: Crushin' Columns2,3 • 9-2: Gushin' Geysers2,3 • 9-3: Spiky Surprise2,3 • 9-4: Mischievous Moles2,3 • 9-5: Topsy Turvy2,3 • 9-6: Tar Ball Fall2,3 • 9-7: Robo Factory2,3 • 9-8: Lavawheel Volcano2,3 • 9-11/9-9 2,3: Golden Temple
|
| Further info
|
Donkey Kong Returns Original Sound Track • Extras (image names in other languages) • Gallery • Mine Menace • Staff (3D2)
|
|
|
Related Play Nintendo activities:
Can’t-miss games • Who are these jerks of the jungle?
|
