Gear Getaway: Difference between revisions
No edit summary Tag: Mobile edit |
No edit summary Tag: Mobile edit |
||
| Line 4: | Line 4: | ||
|code=7-4 | |code=7-4 | ||
|world=[[Factory (Donkey Kong Country Returns)|Factory]] | |world=[[Factory (Donkey Kong Country Returns)|Factory]] | ||
|game=''[[Donkey Kong Country Returns]]'' (''[[Donkey Kong Country Returns 3D|3D]]'') | |game=''[[Donkey Kong Country Returns]]'' (''[[Donkey Kong Country Returns 3D|3D]]''/''[[Donkey Kong Country Returns HD|HD]]'') | ||
|before=[[Slammin' Steel|<<]] | |before=[[Slammin' Steel|<<]] | ||
|after=[[Cog Jog (level)|>>]] | |after=[[Cog Jog (level)|>>]] | ||
Revision as of 01:30, January 5, 2025
| Level | |
|---|---|
| Gear Getaway | |
| |
| Level code | 7-4 |
| World | Factory |
| Game | Donkey Kong Country Returns (3D/HD) |
| Music track | Factory Friction Mine Menace |
| << Directory of levels >> | |
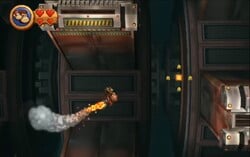
Gear Getaway is the fiftieth level in the game Donkey Kong Country Returns and its Nintendo 3DS and Nintendo Switch ports, as well as the fourth level in the Factory world.
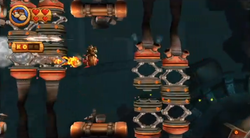
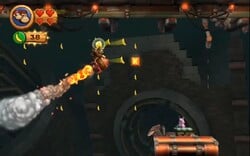
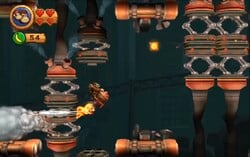
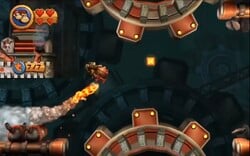
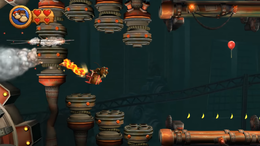
Almost the whole level uses the Rocket Barrel. The main obstacle of this level are rotating gears that destroy the Rocket Barrel on contact. A few other obstacles include machinery that smashes in an upward and downward direction. Some machinery can also create a very narrow gap that requires good timing and coordination to get through. Giant cogs in which Donkey and Diddy Kong must avoid also appear at the end of the level. Tiki Buzzes are the only enemies in this level.
In the Time Attack mode of the game, a time of 1:45:00 is needed to get a gold medal, a time of 1:55:00 for silver, and a time of 2:00:00 for bronze.
A cover of the version of Mine Menace that plays while using the Rocket Barrel in this level appears in the Jungle Japes stage in Super Smash Bros. for Nintendo 3DS, and in the Jungle Hijinxs stage in Super Smash Bros. for Wii U.
Overview
The level begins on a straight pathway leading towards some platforms that quickly move up and down, pausing for about a second every time they finish reaching their highest or lowest point. There are four of these platforms that are spaced out so that the Kongs can fall between them. A Tiki Buzz is between the first and last two platforms, while bananas are around the middle two. More machinery is ahead that opens when approached to reveal a passage for the heroes as they head for the Rocket Barrel at the end of this area. When they start up the rocket, they immediately begin to fly between walls that open when approached, much like the opening machinery in the previous area. A curved banana trail leads the primates between large cogs. If they manage to avoid hitting into the cogs, they find themselves in an area full of bananas and Banana Bunches. The last column of bananas has the letter K of the K-O-N-G Letters in it. After the letter is the Tutorial Pig and the checkpoint on a solid platform.
Two large cogs move on the top and bottom of the area, and machinery that opens to create a passage for the Kongs when they approach is after them. Two larger cogs are after these objects that are so close that they slightly scrape against each other as they rotate. The cogs here are followed by two more sections with machinery that moves along the sides of the area when approached. After them are some collectibles located in a wide space; the top part of the area has an Extra Life Balloon, while the bottom has some bananas. Three pairs of machinery that open a passage when approached are after this, with the letter O between the first two of the groups. A longer section of these same objects is after some cogs that the heroes must ride through. At the end of this area is another Tutorial Pig and checkpoint on a solid platform.
Ahead of here are three sets of machinery that are placed on the top and bottom of the area. The objects move up and down, pausing every time they reach their highest or lowest point. Between the platforms at the top and bottom of this area are always small gaps that the Kongs can go through, but they change when the machinery moves up or down. More cogs are placed after this section of the level, and they are followed by a banana trail that leads the heroes under and above walls that can smash into them as they jerk up and down. More cogs are after this with the letter N between them, followed by more machinery that jerks up and down. Like the machinery right after the second section, this machinery is on the top and bottom of the area. The Kongs must ride through the moving gaps between them to reach a large area full of many giant cogs. These cogs are many times larger than the cogs discovered previously. The primates must maneuver around the large bars on these cogs, while finding the letter G between the second and third cogs, to make their way through a gap placed between two much smaller cogs. At this point, the Rocket Barrel begins to lose fuel and drops the Kongs onto a solid platform with the level's Slot Machine Barrel.
Enemies
| Image | Name | Count |
|---|---|---|

|
Tiki Buzz | 2 |
Items
| Image | Name | Count |
|---|---|---|
| Banana Coin | 5 | |
| DK Barrel | 1 | |
| Extra Life Balloon | 3 |
K-O-N-G Letters
Puzzle Pieces
| Image | Number | Location |
|---|---|---|
|
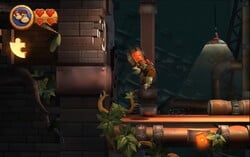
1 | The first Puzzle Piece can be seen at the beginning of the level in a space in the wall that is blocked off by a wooden barricade. If they throw the nearby DK Barrel at it, the way to the Puzzle Piece opens. |
|
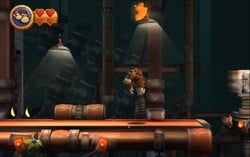
2 | At the beginning of the level, the Kongs can discover two lamps hanging above them. They should use a nearby platform to reach the second lamp. When they hit it, a Puzzle Piece appears. |
|
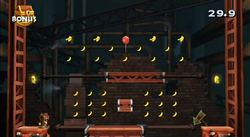
3 | When the heroes get to the first area of platforms at the beginning of the level, they should drop into the gap right after the first Tiki Buzz to land in a hidden Barrel Cannon that shoots them into a bonus room. There, they must move around two moving platforms in order to collect 47 bananas, two Banana Coins, and an Extra Life Balloon. If everything is collected within thirty seconds, a Puzzle Piece appears. |
|
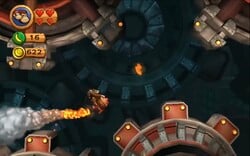
4 | Shortly after the Kongs start up the Rocket Barrel, they come up to a long trail of items. They should collect everything in the line of items to make the fourth Puzzle Piece appear nearby. |
|
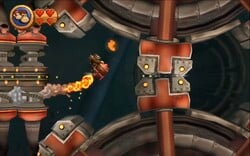
5 | After the letter K, the primates ride between a large cog. On the way, the Puzzle Piece rotates with the cog where the Kongs can ride. |
|
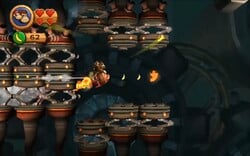
6 | Just before the second checkpoint the heroes ride between some machinery that opens when they approach it. Between the machinery is a trail of bananas followed by a Puzzle Piece. |
|
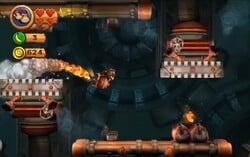
7 | Shortly after the second checkpoint, the primates come towards a long trail of bananas and other collectibles. If they grab everything in the line of items, the seventh and final Puzzle Piece appears. |
Names in other languages
| Language | Name | Meaning | Notes |
|---|---|---|---|
| French (NOA) | Échappée Industrielle[?] | Industrial Escape | |
| German | Getriebsausflug[?] | "Gear Mechanism Trip" (pun on Getriebe (gear mechanism) and Betriebsausflug (company outing) | |
| Italian | Congegno maligno[?] | Malicious Device | |
| Korean | 스릴! 기어 플라이트[?] Seuril! Gi'eo Feulaiteu |
Thrill! Gear Flight | |
| Spanish | Fuga en la Fábrica[?] | Escape at the Factory |
