Peaceful Pier: Difference between revisions
Reddragon19k (talk | contribs) |
m (Text replacement - "(\| *)Jap([RMCN\d]* *=)" to "$1Jpn$2") |
||
| (58 intermediate revisions by 41 users not shown) | |||
| Line 1: | Line 1: | ||
{{level | {{level infobox | ||
|image=[[File:PeacefulPier.png|250px]] | |||
|image=[[File:PeacefulPier. | |code=2-3 | ||
|code=2 - 3 | |world=[[Beach]] | ||
|game=''[[Donkey Kong Country Returns]] | |game=''[[Donkey Kong Country Returns]]'' (''[[Donkey Kong Country Returns 3D|3D]]''/''[[Donkey Kong Country Returns HD|HD]]'') | ||
| | |||
|before=[[Sloppy Sands|<<]] | |before=[[Sloppy Sands|<<]] | ||
|after=[[Cannon Cluster|>>]] | |after=[[Cannon Cluster|>>]] | ||
|secret=[[Blowhole Bound|**]] | |||
|track=[[Mine Menace]] | |||
}} | }} | ||
'''Peaceful Pier''' is the tenth level in ''[[Donkey Kong Country Returns]]'', as well as the third level in the [[Beach]] world. | '''Peaceful Pier''' is the tenth level in ''[[Donkey Kong Country Returns]]'' and its [[Donkey Kong Country Returns 3D|Nintendo 3DS]] and [[Donkey Kong Country Returns HD|Nintendo Switch]] ports, as well as the third level in the [[Beach]] world. | ||
This beach level is the first to feature a [[Rocket Barrel]]. Throughout the whole level, [[Donkey Kong|Donkey]] and [[Diddy Kong]] must ride on | This beach level is the first to feature a [[Rocket Barrel]]. Throughout the whole level, [[Donkey Kong|Donkey]] and [[Diddy Kong]] must ride on it over the water and coral reefs. The level does not contain many obstacles, and the pathway for the [[Kong]]s to ride through is very wide and empty, with only many [[banana]]s scatted throughout the air. A couple of [[Snaggles]] jump out of the water in the level, and a ship run by two of the members of the [[Scurvy Crew]] shoot several bombs at the Kongs. A single [[Tiki Torch]] appears at the start of the level. | ||
In the [[Donkey Kong Country Returns#Time Attack|Time Attack]] mode | In the [[Donkey Kong Country Returns#Time Attack|Time Attack]] mode, a time of 1:49:00 is needed to get a shiny gold medal, a time of 1:50:00 for gold, a time of 1:51:00 for silver, and a time of 2:58:00 for bronze. | ||
==Overview== | ==Overview== | ||
[[File: | [[File:DKCR Peaceful Pier 2.png|thumb|left|250px|Donkey Kong blows out a Tiki Torch]] | ||
The stage starts in the beach. Donkey Kong can find a pier with a Tiki Torch invading the zone. Blowing out the Tiki's flames, DK can defeat it by jumping on it. The pier also has a [[DK Barrel]], which Diddy Kong lies trapped inside. Breaking up the barrel, DK frees Diddy and | The stage starts in the beach. Donkey Kong can find a pier with a Tiki Torch invading the zone. Blowing out the Tiki's flames, DK can defeat it by jumping on it. The pier also has a [[DK Barrel]], which Diddy Kong lies trapped inside. Breaking up the barrel, DK frees Diddy and they see the pier broken with a [[Barrel Cannon]] nearby. The Kongs must get in the barrel to follow and land on a part of the broken pier, then take another Barrel Cannon that aims to the [[Rocket Barrel]] floating in the air. Once inside the Rocket Barrel, they must activate it to ride on it and navigate throughout the rest of the level over the vast sea. At the beginning of this part, there is an [[Extra Life Balloon]] and plenty of [[Banana]]s and Banana Bunches that can be picked up. | ||
After taking a chain of Bananas, the letter K of the [[K-O-N-G Letters]] is found and another set of Bananas follow. The Kongs must take care not to land or ride near the water's surface, as | After taking a chain of Bananas, the letter K of the [[K-O-N-G Letters]] is found and another set of Bananas follow. The Kongs must take care not to land or ride near the water's surface, as [[Snaggles]] swim near to them and eventually jump up to bite the barrel and destroy it. Following the third chain of Bananas, the Kongs find the letter O while the Snaggles keeps attacking them, jumping once more while they try to take the O. After the Snaggle's pursuit, the Kongs can also pick some [[Banana Coin]]s. The ride continues passing next to a pirate ship, in which members of the [[Scurvy Crew]] see the Kongs and chase them to attack. Over a small island, the [[Professor Chops|Tutorial Pig]] holds the only check point of the course so that the heroes can keep going just starting in that spot. | ||
[[File:DKCR Peaceful Pier 3.png|thumb|250px|The Kongs pass the checkpoint]] | |||
In the second part of the pursuit, the ship is the main obstacle that the heroes must face. During the chase, the Scurvy Crew shoots a few bombs to the air to stop the Kongs and their machine. These bombs explode in the air and the blasts remaining from these can destroy the rocket and let Donkey and Diddy Kong plummet to their doom. The first bomb shot explodes in the middle of the scene; the primates just have to avoid it. The second bomb explodes at greater height and the third at lower height. Just in that moment, the cannons begin to shoot more bombs: one at greater height and another at lower height. The cannon then shoots two bombs at the same time that explode both in the upper and lower parts of the scene. The Kongs must avoid these hazards by going in the middle. The ship stops attacking to dodge a series of rocks over the water. Now the Kongs can have some time to take another chain of bananas and pick up the letter N there before meeting the pirate ship again. | |||
[[File:Peaceful Pier DKCR end.png|thumb|250px|left|The Kongs reach the Slot Machine Barrel]] | |||
The ship reappears, and this time shoots more bombs. The ship first shoots a row of bombs in the upper part of the screen, and then another in the lower part. At last, the ship shoots bombs at both parts but in the middle. Frustrated, the Scurvy Crew tries to defeat the Kongs with the last blow using the biggest cannon of the vessel. The Kongs must now avoid to be the target of the cannon, as it aims first with a cursor that appears in the screen. The cannon then shoots the ship's anchor to the targeted zone. If DK and Diddy avoid the attack successfully, the ship keeps going forward but the crew does not realize that they dropped the anchor, which is connected to the ship by a cable. The pirate ship is brought to a sudden halt and, according to the next level, crashes into a pier. DK and Diddy now can take the last set of bananas and the letter G for the word KONG before arriving to their destiny. The rocket then stops working and falls in another part of the beach, ending the rocket ride with the [[Slot Machine Barrel]] and a [[Bonus Barrel]] right after it. Hitting the Slot Machine Barrel finishes the course. | |||
{{br}} | |||
[[File: | ==Enemies== | ||
{|class="wikitable dk" width=25% | |||
|- | |||
!Image | |||
!Name | |||
!Amount | |||
|- | |||
|align="center"|[[File:Snaggles-DKCR.png|x50px]] | |||
|align="center"|[[Snaggles]] | |||
|2 | |||
|- | |||
|align="center"|[[File:Tiki Torch.png|x50px]] | |||
|align="center"|[[Tiki Torch]] | |||
|1 | |||
|} | |||
==Items== | |||
{|class="wikitable dk" width=25% | |||
== | |- | ||
!Image | |||
!Name | |||
!Amount | |||
|- | |||
|align="center"|[[File:BananacoinDKCR.png|x50px]] | |||
|align="center"|[[Banana Coin]] | |||
|5 | |||
|- | |||
|align="center"|[[File:DKBarrelDKCR.png|x50px]] | |||
|align="center"|[[DK Barrel]] | |||
|1 | |||
|- | |||
|align="center"|[[File:BalloonDKCR.png|x50px]] | |||
|align="center"|[[Extra Life Balloon]] | |||
|2 | |||
|} | |||
===K-O-N-G Letters=== | ===K-O-N-G Letters=== | ||
{|class="wikitable dk" width=70% | |||
|- | |||
!Image | |||
!Letter | |||
!Location | |||
|- | |||
|align="center"|[[File:DKCR Peaceful Pier Letter K.png|250px]] | |||
|align="center"|K | |||
|The letter K can be found immediately after the Puzzle Piece and second line of bananas. | |||
|- | |||
|align="center"|[[File:DKCR Peaceful Pier Letter O.png|250px]] | |||
|align="center"|O | |||
|As the Kongs fly over a Snaggles, they move along a line of bananas, which the letter O is at the end of. | |||
|- | |||
|align="center"|[[File:DKCR Peaceful Pier Letter N.png|250px]] | |||
|align="center"|N | |||
|After the Kongs escape from the Scurvy Crew's first set of cannonballs, they come up to a line of bananas and the letter N. | |||
|- | |||
|align="center"|[[File:DKCR Peaceful Pier Letter G.png|250px]] | |||
|align="center"|G | |||
|Shortly after the pirate ship is destroyed at the end of the level, the Kongs can find a line of bananas and the letter G. | |||
|} | |||
===Puzzle Pieces=== | ===Puzzle Pieces=== | ||
[[File: | {|class="wikitable dk" width=70% | ||
|- | |||
!Image | |||
!Number | |||
!Location | |||
|- | |||
|align="center"|[[File:DKCR Peaceful Pier Puzzle Piece 1.png|250px]] | |||
|align="center"|1 | |||
|At the beginning of the level, the Kongs can find dandelions growing next to the pier. If they blow on them, a [[Puzzle Piece (Donkey Kong Country Returns)|Puzzle Piece]] appears. | |||
|- | |||
|align="center"|[[File:DKCR Peaceful Pier Puzzle Piece 2.png|250px]] | |||
|align="center"|2 | |||
|If the Kongs grab all of the second line of bananas in the level, the second Puzzle Piece appears at the end of the line. | |||
|- | |||
|align="center"|[[File:DKCR Peaceful Pier Puzzle Piece 3.png|250px]] | |||
|align="center"|3 | |||
|After the letter N, when the pirates fire the first group of cannonballs at the top part of the screen, the Kongs must avoid them and pull up at the end of the blast remains to grab the third Puzzle Piece. | |||
|- | |||
|align="center"|[[File:DKCR Peaceful Pier Puzzle Piece 4.png|250px]] | |||
|align="center"|4 | |||
|Immediately after the third Puzzle Piece, the pirates shoot a second group of consecutive cannons at the bottom. The Kongs must fly high and then dive low to collect the fourth Puzzle Piece. | |||
|- | |||
|align="center"|[[File:DKCR Peaceful Pier Bonus Room.png|250px]] | |||
|align="center"|5 | |||
|At the end of the level, if the Kongs pass the Slot Machine Barrel, they can pound a spot on the ground to reach an underground area. There is a Blast Barrel that shoots them into a [[bonus room]]. In it, the Kongs must use a horizontally-moving Barrel Cannon to blast up to 57 bananas, two Banana Coins, and a Red Balloon for the last Puzzle Piece to appear. | |||
|} | |||
==Names in | ==Names in other languages== | ||
{{ | {{foreign names | ||
|Jpn=どきどきロケットバレル | |||
|JpnR=Dokidoki Roketto Bareru | |||
|JpnM=Heart-pounding Rocket Barrel | |||
|Spa=Persecución en el Muelle | |Spa=Persecución en el Muelle | ||
|SpaM=Pier Pursuit}} | |SpaM=Pier Pursuit | ||
|FreA=Poursuite en Fusée | |||
|FreAM=Rocket Pursuit | |||
|Ger=Unter Beschuss | |||
|GerM=Under Fire | |||
|Ita=Molo marecalmo | |||
|ItaM=Calm-sea Pier | |||
|Kor=두근두근! 로켓나무통 | |||
|KorR={{nw|Dugeundugeun! Roket Namutong}} | |||
|KorM=Heart-pounding! Rocket Barrel | |||
|Chi=心跳!火箭桶 | |||
|ChiR=Xīntiào! Huǒjiàntǒng | |||
|ChiM=Heart-pounding! Rocket Barrel | |||
}} | |||
{{DKCR}} | {{DKCR}} | ||
[[Category: | [[Category:Beaches]] | ||
[[Category: | [[Category:Pirate areas]] | ||
[[Category:Donkey Kong Country Returns | [[Category:Donkey Kong Country Returns levels]] | ||
Latest revision as of 15:27, January 7, 2025
| Level | |
|---|---|
| Peaceful Pier | |
| |
| Level code | 2-3 |
| World | Beach |
| Game | Donkey Kong Country Returns (3D/HD) |
| Music track | Mine Menace |
| << Directory of levels >> ** | |
Peaceful Pier is the tenth level in Donkey Kong Country Returns and its Nintendo 3DS and Nintendo Switch ports, as well as the third level in the Beach world.
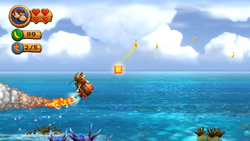
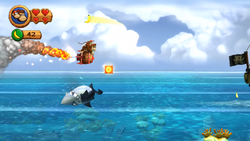
This beach level is the first to feature a Rocket Barrel. Throughout the whole level, Donkey and Diddy Kong must ride on it over the water and coral reefs. The level does not contain many obstacles, and the pathway for the Kongs to ride through is very wide and empty, with only many bananas scatted throughout the air. A couple of Snaggles jump out of the water in the level, and a ship run by two of the members of the Scurvy Crew shoot several bombs at the Kongs. A single Tiki Torch appears at the start of the level.
In the Time Attack mode, a time of 1:49:00 is needed to get a shiny gold medal, a time of 1:50:00 for gold, a time of 1:51:00 for silver, and a time of 2:58:00 for bronze.
Overview[edit]
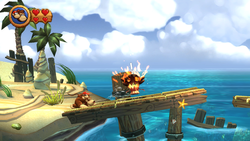
The stage starts in the beach. Donkey Kong can find a pier with a Tiki Torch invading the zone. Blowing out the Tiki's flames, DK can defeat it by jumping on it. The pier also has a DK Barrel, which Diddy Kong lies trapped inside. Breaking up the barrel, DK frees Diddy and they see the pier broken with a Barrel Cannon nearby. The Kongs must get in the barrel to follow and land on a part of the broken pier, then take another Barrel Cannon that aims to the Rocket Barrel floating in the air. Once inside the Rocket Barrel, they must activate it to ride on it and navigate throughout the rest of the level over the vast sea. At the beginning of this part, there is an Extra Life Balloon and plenty of Bananas and Banana Bunches that can be picked up.
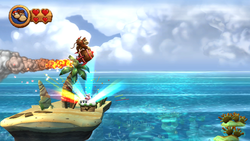
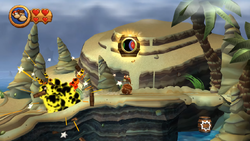
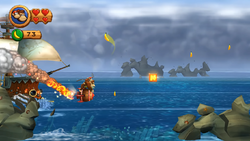
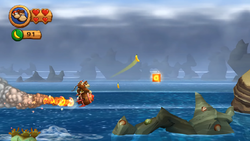
After taking a chain of Bananas, the letter K of the K-O-N-G Letters is found and another set of Bananas follow. The Kongs must take care not to land or ride near the water's surface, as Snaggles swim near to them and eventually jump up to bite the barrel and destroy it. Following the third chain of Bananas, the Kongs find the letter O while the Snaggles keeps attacking them, jumping once more while they try to take the O. After the Snaggle's pursuit, the Kongs can also pick some Banana Coins. The ride continues passing next to a pirate ship, in which members of the Scurvy Crew see the Kongs and chase them to attack. Over a small island, the Tutorial Pig holds the only check point of the course so that the heroes can keep going just starting in that spot.
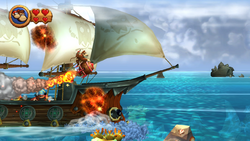
In the second part of the pursuit, the ship is the main obstacle that the heroes must face. During the chase, the Scurvy Crew shoots a few bombs to the air to stop the Kongs and their machine. These bombs explode in the air and the blasts remaining from these can destroy the rocket and let Donkey and Diddy Kong plummet to their doom. The first bomb shot explodes in the middle of the scene; the primates just have to avoid it. The second bomb explodes at greater height and the third at lower height. Just in that moment, the cannons begin to shoot more bombs: one at greater height and another at lower height. The cannon then shoots two bombs at the same time that explode both in the upper and lower parts of the scene. The Kongs must avoid these hazards by going in the middle. The ship stops attacking to dodge a series of rocks over the water. Now the Kongs can have some time to take another chain of bananas and pick up the letter N there before meeting the pirate ship again.
The ship reappears, and this time shoots more bombs. The ship first shoots a row of bombs in the upper part of the screen, and then another in the lower part. At last, the ship shoots bombs at both parts but in the middle. Frustrated, the Scurvy Crew tries to defeat the Kongs with the last blow using the biggest cannon of the vessel. The Kongs must now avoid to be the target of the cannon, as it aims first with a cursor that appears in the screen. The cannon then shoots the ship's anchor to the targeted zone. If DK and Diddy avoid the attack successfully, the ship keeps going forward but the crew does not realize that they dropped the anchor, which is connected to the ship by a cable. The pirate ship is brought to a sudden halt and, according to the next level, crashes into a pier. DK and Diddy now can take the last set of bananas and the letter G for the word KONG before arriving to their destiny. The rocket then stops working and falls in another part of the beach, ending the rocket ride with the Slot Machine Barrel and a Bonus Barrel right after it. Hitting the Slot Machine Barrel finishes the course.
Enemies[edit]
| Image | Name | Amount |
|---|---|---|
| Snaggles | 2 | |
| Tiki Torch | 1 |
Items[edit]
| Image | Name | Amount |
|---|---|---|
| Banana Coin | 5 | |
| DK Barrel | 1 | |
| Extra Life Balloon | 2 |
K-O-N-G Letters[edit]
Puzzle Pieces[edit]
| Image | Number | Location |
|---|---|---|
|
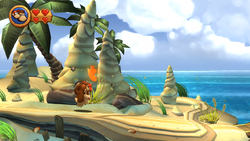
1 | At the beginning of the level, the Kongs can find dandelions growing next to the pier. If they blow on them, a Puzzle Piece appears. |
|
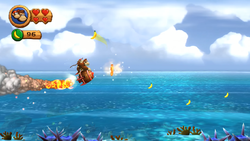
2 | If the Kongs grab all of the second line of bananas in the level, the second Puzzle Piece appears at the end of the line. |
|
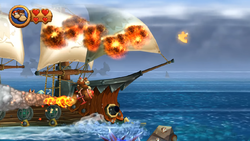
3 | After the letter N, when the pirates fire the first group of cannonballs at the top part of the screen, the Kongs must avoid them and pull up at the end of the blast remains to grab the third Puzzle Piece. |
|
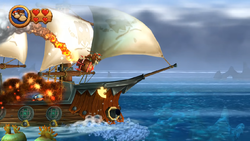
4 | Immediately after the third Puzzle Piece, the pirates shoot a second group of consecutive cannons at the bottom. The Kongs must fly high and then dive low to collect the fourth Puzzle Piece. |
|
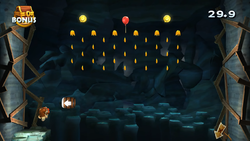
5 | At the end of the level, if the Kongs pass the Slot Machine Barrel, they can pound a spot on the ground to reach an underground area. There is a Blast Barrel that shoots them into a bonus room. In it, the Kongs must use a horizontally-moving Barrel Cannon to blast up to 57 bananas, two Banana Coins, and a Red Balloon for the last Puzzle Piece to appear. |
Names in other languages[edit]
| Language | Name | Meaning | Notes |
|---|---|---|---|
| Japanese | どきどきロケットバレル[?] Dokidoki Roketto Bareru |
Heart-pounding Rocket Barrel | |
| Chinese | 心跳!火箭桶[?] Xīntiào! Huǒjiàntǒng |
Heart-pounding! Rocket Barrel | |
| French (NOA) | Poursuite en Fusée[?] | Rocket Pursuit | |
| German | Unter Beschuss[?] | Under Fire | |
| Italian | Molo marecalmo[?] | Calm-sea Pier | |
| Korean | 두근두근! 로켓나무통[?] Dugeundugeun! Roket Namutong |
Heart-pounding! Rocket Barrel | |
| Spanish | Persecución en el Muelle[?] | Pier Pursuit |
