Golden Temple: Difference between revisions
(moved Golden Temple to Golden Temple (level)) |
mNo edit summary |
||
| (110 intermediate revisions by 64 users not shown) | |||
| Line 1: | Line 1: | ||
# | {{level infobox | ||
|title=Golden Temple | |||
|image=[[File:DKCR Golden Temple 1.png|260px]] | |||
|code=9-1 (Wii)<br> | |||
9-9 (3DS) | |||
|world=[[Cloud (world)|Cloud]] | |||
|game=''[[Donkey Kong Country Returns]]'' (''[[Donkey Kong Country Returns 3D|3D]]'') | |||
|before=[[Tiki Tong Terror|<< (''DKCR'')]] or [[Lavawheel Volcano|<< (''DKCR3D'')]]<br> | |||
|after=>> | |||
}} | |||
{{quote|They say there is a [[Golden Banana|banana]] out there that not only tastes great, but warps you to an alternate dimension. I say, yes please!|[[Cranky Kong]]|[[Donkey Kong Country Returns]]}} | |||
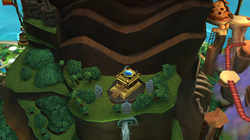
The '''Golden Temple''' is the ninth world, as well as the sixty-fourth (seventy-second in the 3DS version) and final level in ''[[Donkey Kong Country Returns]]'' and ''[[Donkey Kong Country Returns 3D]]'', as well as the final unlockable level in the game. Most of it cannot be accessed until eight [[Rare Orb|Rare Orbs]] are collected from the game's secret temple levels. In the original Wii version, this level would be accessed immediately after the orbs were collected, while in the [[Nintendo 3DS|3DS]] version, it was the final level of a brand-new world, [[Cloud (world)|Cloud]], which was also accessible with the orbs. | |||
[[File:DKCR - Golden Temple.png|thumb|250px|left|The Golden Temple world]] | |||
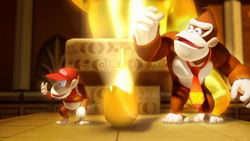
This level is much different than any other stage in the game, although in the Wii version it begins in a normal jungle similar to those in the [[Jungle (Donkey Kong Country Returns)|Jungle]] world. From in the jungle, the entrance to the temple can be seen, but the [[Kong]]s can only get in if they have the eight orbs. When the orbs are all collected and the primates head in, a cutscene can be seen of [[Donkey Kong|Donkey]] and [[Diddy Kong]] finding a giant, golden banana. After eating some of the fruit, they are sent into the remaining part of the Golden Temple level. In the 3DS version, this part of the level cannot be replayed upon unlocking the Cloud world, since it becomes the Cloud Gateway which immediately warps the Kongs to the Cloud world. | |||
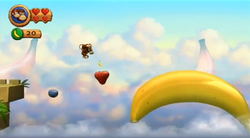
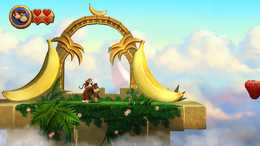
The main part of the level features a theme different than all other level themes in the [[Donkey Kong Country (series)|''Donkey Kong Country'' series]]; it takes place in the sky, where there are many floating [[fruit]]s, including tilting, slippery [[banana]]s, [[strawberry|strawberries]], blueberries, falling oranges, and even exploding [[cherry|cherries]] on tilting, rod shaped platforms. The primates must be careful, as if they fall off any of the fruits, they lose a life. This level also features many enemies, some new and old, including [[Tiki Doom]]s, [[Tiki Buzz]]es, [[Tiki Tork]]s, [[Awk]]s, [[Kowalee]]s, and [[Tiki Seeker]]s. The reward for beating the level is Mirror Mode, a game mode where levels are reversed and Donkey Kong must clear them without the aid of Diddy Kong or items, and with only one heart (two hearts in New Mode of ''Donkey Kong Country Returns 3D''). | |||
In the [[Donkey Kong Country Returns#Time Attack|Time Attack]] mode of the game, a time of 1:04:00 is needed to get a gold medal, a time of 1:30:00 for silver, and a time of 2:14:00 for bronze. | |||
The Golden Temple reappears in ''[[Mario Kart 7]]'', being on the last part of the [[3DS DK Jungle|DK Jungle]] course (which is based on ''Donkey Kong Country Returns''). Here it has a much more simplistic inside, that contains a single route with a giant [[Golden Banana]] statue near the exit. The Golden Temple reappears in ''[[Mario Kart 8]]'' and ''[[Mario Kart 8 Deluxe]]'' with the [[anti-gravity]] section on the inside. | |||
==Overview== | |||
[[File:Golden Banana DKCR.png|left|250px|thumb|Donkey and Diddy begin to glow from eating the Golden Banana]] | |||
The level begins with the Kongs needing to climb up the stairs so they can reach the entrance to the Golden Temple. Once they enter, they are shown finding a Golden Banana, eating it, and being sent into the main part of the level. This part of the level was made into a separate level in the 3DS version, but after completing it, it is replaced with a transition to the [[Cloud (world)|Cloud]] world map and cannot be replayed. | |||
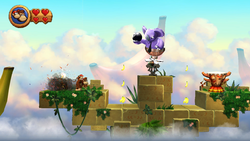
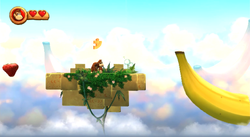
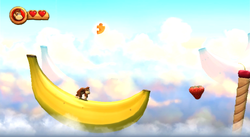
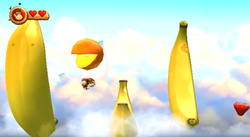
In the main level itself, the Kongs find themselves on a floating platform swaying slightly in the air. A wide abyss is ahead with a giant banana platform and two strawberries to help the primates progress to a smaller platform with a Tiki Doom and [[banana]]s on it. Half of a banana platform floats nearby with two strawberries following it that must lead the heroes towards another banana platform covered in collectible bananas. Tiki Seekers attack the Kongs here. A long, stone platform is after this place with a raised area in the center of it. An urn sits here, and a Kowalee also attacks from the raised section. Bananas and [[Banana|Banana Bunch]]es form straight, vertical lines around the raised area. | |||
[[File:DKCR Golden Temple Kowalee.png|thumb|250px|The first Kowalee in the level]] | |||
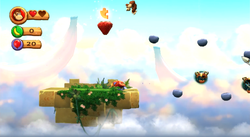
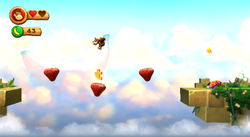
A floating blueberry platform nearby helps the duo reach another giant banana to help them cross an abyss. The banana is cut in half but is immediately followed by another blueberry platform that has a Tiki Tork and a strawberry platform after it. Once Donkey and Diddy hop across these platforms and enemies, they can access a solid platform with a Rawk on it. A row a blueberries are placed ahead, and Tiki Seekers attack around them. Another row of blueberries is also above this first row, and if the Kongs jump on the strawberry located just before the first blueberry in the top row, they are given a [[Puzzle Piece (Donkey Kong Country Returns)|Puzzle Piece]]. Another solid platform is placed after all of the blueberries. A Tiki Doom and an Awk are on it. There is a longer platform following this with a Tiki Buzz flying in a gap just before it. When the heroes reach the center of this platform, two Kowalees attack them, with one in front of them and another behind. A Tiki Doom and some bananas are between the Kowalees. If the Kongs manage to pass the koala enemies, they are able to reach a blueberry platform and another large banana platform with many bananas circling above it. Cherries on tipping rod-like pillars are ahead after a strawberry platform. The cherries explode shortly after the Kongs stand on them. A strawberry and a Tiki Buzz are between the first two cherries to help the primates avoid falling into a gap. | |||
Two Tiki Buzzes and a Tiki Doom float in a gap after the fourth cherry, and Donkey and Diddy must jump on them to avoid falling. A solid platform is near them with another Tiki Doom and a Rawk on it. Three rods with cherries on them are in the gap ahead. Tiki Seekers shoot at the Kongs here. Another platform with bananas and a Tiki Doom appear again after this area, with three strawberry platforms in a gap following them. Banana Bunches fall onto the trio of strawberries. A Tiki Seeker shoots spikes at the duo as they approach the platform ahead that has two Rawks on it. A larger platform is after a gap nearby with three Kowalees on it. The Kongs must pass all of the foes to reach a blueberry platform, followed by a strawberry platform. A turned-over banana floats nearby and has banana items moving around it. Three Tiki Seekers also surround it. Shortly after jumping off of the banana platform, the primates reach a pair a blueberry platforms. Oranges fall between them. | |||
[[File:DKCR Golden Temple 2.png|thumb|250px|left|The Kongs head towards an upside-down banana]] | |||
More oranges fall ahead between the nearby strawberry and banana platforms. A Tiki Tork and a Tiki Buzz follow the banana, with several blueberry platforms after them. Oranges fall between each of the blueberries. Eventually, the heroes can reach an area with banana platforms moving in a circular motion from the background. As they curve into the foreground, the Kongs must jump on them to avoid falling. Oranges shoot downwards between these bananas as well. A nearby strawberry platform can then help the duo reach a [[Barrel Cannon]] that blasts them to a solid area with another Barrel Cannon. When the Kongs get into the cannon, two more Barrel Cannons appear in view. They must shoot through the three barrels several times, constantly repeating their path, as each of the Barrel Cannons only lead to another of the three barrels. As they shoot, the barrels become closer and closer and eventually make a giant statue appear in the background that gives the Kongs a [[Slot Machine Barrel]] with a mirror from its mouth. Once it is hit, the level is completed and the primates are awarded with the new Mirror Mode. | |||
{{br|left}} | |||
==Enemies== | |||
{| class="wikitable dk" | |||
!Image | |||
!Name | |||
!Count | |||
|- | |||
|align="center"|[[File:Kowalee.png|x50px]] | |||
|align="center"|[[Kowalee]] | |||
|6 | |||
|- | |||
|align="center"|[[File:Rawk.png|x50px]] | |||
|align="center"|[[Rawk]] | |||
|6 | |||
|- | |||
|align="center"|[[File:TikiBuzz.png|x50px]] | |||
|align="center"|[[Tiki Buzz]] | |||
|5 | |||
|- | |||
|align="center"|[[File:TikiDoom.png|x50px]] | |||
|align="center"|[[Tiki Doom]] | |||
|6 | |||
|- | |||
|align="center"|[[File:TikiSeeker.png|x50px]] | |||
|align="center"|[[Tiki Seeker]] | |||
|16 | |||
|- | |||
|align="center"|[[File:Tiki_Tork_DKCR.png|x50px]] | |||
|align="center"|[[Tiki Tork]] | |||
|3 | |||
|} | |||
==Items== | |||
{|class="wikitable dk" width=15% | |||
|- | |||
!Image | |||
!Name | |||
!Count | |||
|- | |||
|align="center"|[[File:BananacoinDKCR.png|x50px]] | |||
|align="center"|[[Banana Coin]] | |||
|5 | |||
|- | |||
|align="center"|[[File:Heart.png|x50px]] | |||
|align="center"|[[Heart (item)|Heart]] | |||
|2 | |||
|} | |||
===Puzzle Pieces=== | |||
{|class="wikitable dk" width=70% | |||
|- | |||
!Image | |||
!Number | |||
!Location | |||
|- | |||
|align="center"|[[File:DKCR Golden Temple Puzzle Piece 1.png|250px]] | |||
|align="center"|1 | |||
|An urn is placed at the bottom of the second solid platform at the beginning of the level, which has a Tiki Doom on it. If the Kongs pound on the top of the platform above where the urn is, a Puzzle Piece falls from the sky for them to grab. | |||
|- | |||
|align="center"|[[File:DKCR Golden Temple Puzzle Piece 2.png|250px]] | |||
|align="center"|2 | |||
|In the area full of floating blueberries, the primates must climb to the top row of blueberries by jumping from the platform after the floating fruits. If they manage to jump along all of the foods, they can reach a strawberry, which a Puzzle Piece appears on as they approach. | |||
|- | |||
|align="center"|[[File:DKCR Golden Temple Puzzle Piece 3.png|250px]] | |||
|align="center"|3 | |||
|There is a large floating banana platform after a pair of Kowalees with many bananas circling above it. If the primates collect all of the bananas, a Puzzle Piece appears high in the air. They must stand on the edge of the banana platform as it rises and then jump to the item to reach it. | |||
|- | |||
|align="center"|[[File:DKCR Golden Temple Puzzle Piece 4.png|250px]] | |||
|align="center"|4 | |||
|As Donkey and Diddy Kong progress, they come up to a group of three strawberries floating above a gap. When the Kongs collect a Banana Bunch on one of them, another appears on a different strawberry in the trio. The Kongs must collect all of the Banana Bunches that appear to make a Puzzle Piece fall onto the middle strawberry. | |||
|- | |||
|align="center"|[[File:DKCR Golden Temple Puzzle Piece 5.png|250px]] | |||
|align="center"|5 | |||
|The duo should wait on the final banana platform in the level just before a Barrel Cannon to grab the final Puzzle Piece. They then have to jump off of it quickly to continue unharmed. | |||
|} | |||
==Names in other languages== | |||
{{foreign names | |||
|Jap={{hover|黄金|おうごん}}のしんでん | |||
|JapR=Ōgon no Shinden | |||
|JapM=Golden Temple | |||
|Spa=Templo Dorado | |||
|SpaM=Golden Temple | |||
|Ita=Piramide scintillante | |||
|ItaM=Sparkling Pyramid | |||
|Fre=Temple d'Or | |||
|FreM=Golden Temple | |||
|Ger=Goldener Tempel | |||
|GerM=Golden Temple | |||
}} | |||
==Trivia== | |||
*The music that plays in the sky area is an arranged medley of the ''[[Donkey Kong Jr. (game)|Donkey Kong Jr.]]'' ending, stage, and title themes. | |||
*The tablet at the entrance of the temple where the Rare Orbs are placed resembles the [[wikipedia:Aztec calendar|Aztec calendar]]. | |||
*Cranky Kong briefly alludes to the Golden Temple, where he mentions rumors of a Golden Banana that warps people to another dimension, and thinks that is a good way to get rid of Donkey Kong and Diddy Kong for a while. | |||
*A number of unused concepts for other Golden Temple levels were considered and can be seen as concept art if the Puzzle Pieces are obtained on this level. Unused ideas include a "Banana Coaster" (which, as the name implies, involves Donkey Kong riding a mine cart through a level with several banana structures), "Paper Cutouts", "Wacky Blocks" (including blocks from ''[[Super Mario Bros. 3]]''), and "Virtual Boy Tracks" (a mine cart level rendered entirely in red outlines on black, as a homage to the [[Virtual Boy]]), and "Crackers and Pudding". The final stage uses elements from the "Golden Bananas" artwork and "Pudding Wonderland". It is not known if these stage ideas were originally intended to be included in addition to the Golden Temple level, or were alternate ideas for a final level. | |||
{{DKCR}} | |||
[[Category:Secret levels]] | |||
[[Category:Food areas]] | |||
[[Category:Sky areas]] | |||
[[Category:Temples]] | |||
[[Category:Donkey Kong Island]] | |||
[[Category:Donkey Kong Country Returns levels]] | |||
Latest revision as of 10:15, June 24, 2024
| Level | |
|---|---|
| Golden Temple | |
| |
| Level code | 9-1 (Wii) 9-9 (3DS) |
| World | Cloud |
| Game | Donkey Kong Country Returns (3D) |
| << (DKCR) or << (DKCR3D) Directory of levels >> | |
- “They say there is a banana out there that not only tastes great, but warps you to an alternate dimension. I say, yes please!”
- —Cranky Kong, Donkey Kong Country Returns
The Golden Temple is the ninth world, as well as the sixty-fourth (seventy-second in the 3DS version) and final level in Donkey Kong Country Returns and Donkey Kong Country Returns 3D, as well as the final unlockable level in the game. Most of it cannot be accessed until eight Rare Orbs are collected from the game's secret temple levels. In the original Wii version, this level would be accessed immediately after the orbs were collected, while in the 3DS version, it was the final level of a brand-new world, Cloud, which was also accessible with the orbs.
This level is much different than any other stage in the game, although in the Wii version it begins in a normal jungle similar to those in the Jungle world. From in the jungle, the entrance to the temple can be seen, but the Kongs can only get in if they have the eight orbs. When the orbs are all collected and the primates head in, a cutscene can be seen of Donkey and Diddy Kong finding a giant, golden banana. After eating some of the fruit, they are sent into the remaining part of the Golden Temple level. In the 3DS version, this part of the level cannot be replayed upon unlocking the Cloud world, since it becomes the Cloud Gateway which immediately warps the Kongs to the Cloud world.
The main part of the level features a theme different than all other level themes in the Donkey Kong Country series; it takes place in the sky, where there are many floating fruits, including tilting, slippery bananas, strawberries, blueberries, falling oranges, and even exploding cherries on tilting, rod shaped platforms. The primates must be careful, as if they fall off any of the fruits, they lose a life. This level also features many enemies, some new and old, including Tiki Dooms, Tiki Buzzes, Tiki Torks, Awks, Kowalees, and Tiki Seekers. The reward for beating the level is Mirror Mode, a game mode where levels are reversed and Donkey Kong must clear them without the aid of Diddy Kong or items, and with only one heart (two hearts in New Mode of Donkey Kong Country Returns 3D).
In the Time Attack mode of the game, a time of 1:04:00 is needed to get a gold medal, a time of 1:30:00 for silver, and a time of 2:14:00 for bronze.
The Golden Temple reappears in Mario Kart 7, being on the last part of the DK Jungle course (which is based on Donkey Kong Country Returns). Here it has a much more simplistic inside, that contains a single route with a giant Golden Banana statue near the exit. The Golden Temple reappears in Mario Kart 8 and Mario Kart 8 Deluxe with the anti-gravity section on the inside.
Overview[edit]
The level begins with the Kongs needing to climb up the stairs so they can reach the entrance to the Golden Temple. Once they enter, they are shown finding a Golden Banana, eating it, and being sent into the main part of the level. This part of the level was made into a separate level in the 3DS version, but after completing it, it is replaced with a transition to the Cloud world map and cannot be replayed.
In the main level itself, the Kongs find themselves on a floating platform swaying slightly in the air. A wide abyss is ahead with a giant banana platform and two strawberries to help the primates progress to a smaller platform with a Tiki Doom and bananas on it. Half of a banana platform floats nearby with two strawberries following it that must lead the heroes towards another banana platform covered in collectible bananas. Tiki Seekers attack the Kongs here. A long, stone platform is after this place with a raised area in the center of it. An urn sits here, and a Kowalee also attacks from the raised section. Bananas and Banana Bunches form straight, vertical lines around the raised area.
A floating blueberry platform nearby helps the duo reach another giant banana to help them cross an abyss. The banana is cut in half but is immediately followed by another blueberry platform that has a Tiki Tork and a strawberry platform after it. Once Donkey and Diddy hop across these platforms and enemies, they can access a solid platform with a Rawk on it. A row a blueberries are placed ahead, and Tiki Seekers attack around them. Another row of blueberries is also above this first row, and if the Kongs jump on the strawberry located just before the first blueberry in the top row, they are given a Puzzle Piece. Another solid platform is placed after all of the blueberries. A Tiki Doom and an Awk are on it. There is a longer platform following this with a Tiki Buzz flying in a gap just before it. When the heroes reach the center of this platform, two Kowalees attack them, with one in front of them and another behind. A Tiki Doom and some bananas are between the Kowalees. If the Kongs manage to pass the koala enemies, they are able to reach a blueberry platform and another large banana platform with many bananas circling above it. Cherries on tipping rod-like pillars are ahead after a strawberry platform. The cherries explode shortly after the Kongs stand on them. A strawberry and a Tiki Buzz are between the first two cherries to help the primates avoid falling into a gap.
Two Tiki Buzzes and a Tiki Doom float in a gap after the fourth cherry, and Donkey and Diddy must jump on them to avoid falling. A solid platform is near them with another Tiki Doom and a Rawk on it. Three rods with cherries on them are in the gap ahead. Tiki Seekers shoot at the Kongs here. Another platform with bananas and a Tiki Doom appear again after this area, with three strawberry platforms in a gap following them. Banana Bunches fall onto the trio of strawberries. A Tiki Seeker shoots spikes at the duo as they approach the platform ahead that has two Rawks on it. A larger platform is after a gap nearby with three Kowalees on it. The Kongs must pass all of the foes to reach a blueberry platform, followed by a strawberry platform. A turned-over banana floats nearby and has banana items moving around it. Three Tiki Seekers also surround it. Shortly after jumping off of the banana platform, the primates reach a pair a blueberry platforms. Oranges fall between them.
More oranges fall ahead between the nearby strawberry and banana platforms. A Tiki Tork and a Tiki Buzz follow the banana, with several blueberry platforms after them. Oranges fall between each of the blueberries. Eventually, the heroes can reach an area with banana platforms moving in a circular motion from the background. As they curve into the foreground, the Kongs must jump on them to avoid falling. Oranges shoot downwards between these bananas as well. A nearby strawberry platform can then help the duo reach a Barrel Cannon that blasts them to a solid area with another Barrel Cannon. When the Kongs get into the cannon, two more Barrel Cannons appear in view. They must shoot through the three barrels several times, constantly repeating their path, as each of the Barrel Cannons only lead to another of the three barrels. As they shoot, the barrels become closer and closer and eventually make a giant statue appear in the background that gives the Kongs a Slot Machine Barrel with a mirror from its mouth. Once it is hit, the level is completed and the primates are awarded with the new Mirror Mode.
Enemies[edit]
| Image | Name | Count |
|---|---|---|
| Kowalee | 6 | |

|
Rawk | 6 |

|
Tiki Buzz | 5 |

|
Tiki Doom | 6 |

|
Tiki Seeker | 16 |

|
Tiki Tork | 3 |
Items[edit]
| Image | Name | Count |
|---|---|---|
| Banana Coin | 5 | |

|
Heart | 2 |
Puzzle Pieces[edit]
Names in other languages[edit]
| Language | Name | Meaning | Notes |
|---|---|---|---|
| Japanese | 黄金のしんでん[?] Ōgon no Shinden |
Golden Temple | |
| French | Temple d'Or[?] | Golden Temple | |
| German | Goldener Tempel[?] | Golden Temple | |
| Italian | Piramide scintillante[?] | Sparkling Pyramid | |
| Spanish | Templo Dorado[?] | Golden Temple |
Trivia[edit]
- The music that plays in the sky area is an arranged medley of the Donkey Kong Jr. ending, stage, and title themes.
- The tablet at the entrance of the temple where the Rare Orbs are placed resembles the Aztec calendar.
- Cranky Kong briefly alludes to the Golden Temple, where he mentions rumors of a Golden Banana that warps people to another dimension, and thinks that is a good way to get rid of Donkey Kong and Diddy Kong for a while.
- A number of unused concepts for other Golden Temple levels were considered and can be seen as concept art if the Puzzle Pieces are obtained on this level. Unused ideas include a "Banana Coaster" (which, as the name implies, involves Donkey Kong riding a mine cart through a level with several banana structures), "Paper Cutouts", "Wacky Blocks" (including blocks from Super Mario Bros. 3), and "Virtual Boy Tracks" (a mine cart level rendered entirely in red outlines on black, as a homage to the Virtual Boy), and "Crackers and Pudding". The final stage uses elements from the "Golden Bananas" artwork and "Pudding Wonderland". It is not known if these stage ideas were originally intended to be included in addition to the Golden Temple level, or were alternate ideas for a final level.
