Furious Fire: Difference between revisions
No edit summary |
Nintendo101 (talk | contribs) mNo edit summary |
||
| (58 intermediate revisions by 38 users not shown) | |||
| Line 1: | Line 1: | ||
{{level | {{image|more=yes|''Donkey Kong Country Returns 3D'' screenshot}} | ||
{{level infobox | |||
|title=Furious Fire | |title=Furious Fire | ||
|image=[[File: | |image=[[File:DKCR Furious Fire 2.png|250px]] | ||
|code=8 - 1 | |code=8-1 | ||
|game=''[[Donkey Kong Country Returns]] | |world=[[Volcano (world)|Volcano]] | ||
| | |game=''[[Donkey Kong Country Returns]]'' (''[[Donkey Kong Country Returns 3D|3D]]''/''[[Donkey Kong Country Returns HD|HD]]'') | ||
|before=[[ | |before=[[Feather Fiend|<<]] | ||
|after=[[Hot Rocket|>>]] | |after=[[Hot Rocket|>>]] | ||
|track=Burnin' Bop | |||
}} | }} | ||
'''Furious Fire''' is the fifty-sixth level in | '''Furious Fire''' is the fifty-sixth level in ''[[Donkey Kong Country Returns]]'' and its [[Donkey Kong Country Returns 3D|Nintendo 3DS]] and [[Donkey Kong Country Returns HD|Nintendo Switch]] ports, as well as the first level in the [[Volcano (world)|Volcano]] world. | ||
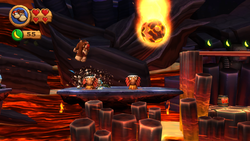
This level | This level's main enemies are [[Char-Char]]s and [[Rentamaguma]] that hover around most areas of the level. They travel all over the place in all directions, so the [[Kong]]s must carefully maneuver around them. This level is also the first to feature [[lava]] that [[Donkey Kong|Donkey]] and [[Diddy Kong]] can fall into. They must avoid this lava by hopping along large volcanic rocks and falling platforms. Enemies in this level include Char-Chars, [[Tiki Goon]]s, [[Tiki Torch]]es, [[Tiki Buzz]]es, and [[Tiki Bomber]]s. | ||
In the [[Time Attack | In the [[Donkey Kong Country Returns#Time Attack|Time Attack]] mode of the game, a time of 1:40:00 is needed to get a gold medal, a time of 2:01:00 for silver, and a time of 2:11:00 for bronze. | ||
==Overview== | ==Overview== | ||
The level begins | The level begins outside the factory on a slanted path of basalt with a Char-Char on it. Ahead is a high platform that the Kongs must climb over the reach an area with two spaced-out, solid, stone platforms. Tiki Goons infest the last to the two platforms, but a giant Char-Char moves above the first. There is a platform connected to a piece of basalt rock for the heroes to climb over. Under it is a [[DK Barrel]]. | ||
[[File:DKCR Furious Fire 1.png|thumb|250px|left|The Kongs attack some Tiki Goons]] | |||
A pathway composed of basalt is farther ahead. The basalt shortly after the DK Barrel supports a stone platform with Tiki Goons on it. Near here is a red platform with the letter K of the [[KONG Letters|K-O-N-G Letters]] on it. Char-Chars travel all around this area, even in the following part of the level, where there are three small sections of basalt that are separated by small gaps. A giant Char-Char floats above the Kongs here too, as well as on the above stone platforms that lead to a [[Puzzle Piece (Donkey Kong Country Returns)|Puzzle Piece]]. A thick stone platform with a Tiki Torch is after this, along with another platform, which has a Tiki Goon on it, with the letter O under it. More solid platforms being supported by basalt are ahead, and Tiki Bombers attack from them. Between two of these platforms is a switch that can quickly rise and take the primates to the next part of the level if they pound on it three times. When they reach the higher area with the switch, they come across the [[Professor Chops|Tutorial Pig]] and the checkpoint. | |||
Now about halfway through the level, the primates can find two platforms ahead that crumble with their weight. After them is a solid area with a stone pathway. Large | Now about halfway through the level, the primates can find two platforms ahead that crumble with their weight. After them is a solid area with a stone pathway. Large Char-Chars hover around this area. On the other side of a gap nearby is a Tiki Torch and the letter N, while on a few platforms before it is a Tiki Bomber and a Tiki Goon. These platforms aid the heroes in reaching a higher area, where they can find a few cracked stones to smash. When they break through them, they can find themselves in a lower area, where there is a large Char-Char and a platform with a DK Barrel ahead. After this platform is another area with a solid, stone pathway. A vine switch is above the ground here, and a platform infested with a Tiki Torch and a Tiki Goon is nearby. More stone platforms, which are surrounded by moving Char-Chars, are farther ahead. One of these platforms found in a higher area has some collectibles on it, while the one after it has a Tiki Bomber. Sections of basalt separated by small gaps are farther ahead, which have a small Char-Char bouncing around them. After passing a Tiki Goon, the group can find an area with some curved pathways that make up a small maze. If the heroes stay on the upper part of the maze, they can progress. Large Char-Chars float around this area. If the heroes maneuver around the maze-like area, they can find the letter G at a dead end. Eventually, the Kongs can make their way through a curved passage to make it to a Tiki Bomber on a solid platform. A few platforms that crumble when landed on are farther ahead, some of which that have Tiki Buzzes and a [[Red Balloon]] between them. Above a group of four of these platforms is the [[Slot Machine Barrel]]. | ||
== | |||
==Enemies== | |||
{|class="wikitable dk" | |||
!Image | |||
!Name | |||
!Count | |||
|- | |||
|align="center"|[[File:Charchar.png|x50px]] | |||
|align="center"|[[Char-Char]] | |||
|7 | |||
|- | |||
|align="center"|[[File:Ultracharchar.png|x50px]] | |||
|align="center"|[[Rentamaguma]] | |||
|19 | |||
|- | |||
|align="center"|[[File:TikiBomber.png|x50px]] | |||
|align="center"|[[Tiki Bomber]] | |||
|5 | |||
|- | |||
|align="center"|[[File:TikiBuzz.png|x50px]] | |||
|align="center"|[[Tiki Buzz]] | |||
|2 | |||
|- | |||
|align="center"|[[File:Tiki_Torch.png|x50px]] | |||
|align="center"|[[Tiki Torch]] | |||
|5 | |||
|- | |||
|align="center"|[[File:TikiGoon.png|x50px]] | |||
|align="center"|[[Tiki Goon]] | |||
|12 | |||
|} | |||
==Items== | |||
{|class="wikitable dk"width=15% | |||
|- | |||
!Image | |||
!Name | |||
!Count | |||
|- | |||
|align="center"|[[File:BananacoinDKCR.png|x50px]] | |||
|align="center"|[[Banana Coin]] | |||
|12 | |||
|- | |||
|align="center"|[[File:DKBarrelDKCR.png|x50px]] | |||
|align="center"|[[DK Barrel]] | |||
|1 | |||
|- | |||
|align="center"|[[File:Heart.png|x50px]] | |||
|align="center"|[[Heart (item)|Heart]] | |||
|1 | |||
|- | |||
|align="center"|[[File:BalloonDKCR.png|x50px]] | |||
|align="center"|[[Red Balloon]] | |||
|2 | |||
|} | |||
===K-O-N-G Letters=== | ===K-O-N-G Letters=== | ||
{|class="wikitable dk"width=70% | |||
|- | |||
!Image | |||
!Letter | |||
!Location | |||
|- | |||
|align="center"|[[File:DKCR Furious Fire Letter K.png|250px]] | |||
|align="center"|K | |||
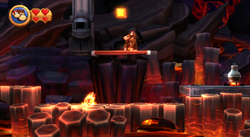
|Shortly after the first DK Barrel, the primates can find the letter K on a red platform hanging off of a wall. They can jump up from a raised, stone pathway to reach it. | |||
|- | |||
|align="center"|[[File:DKCR Furious Fire Letter O.png|250px]] | |||
|align="center"|O | |||
|The letter O is under the last small platform before a large switch and the checkpoint. A roll-jump must be used to grab it. | |||
|- | |||
|align="center"|[[File:DKCR Furious Fire Letter N.png|250px]] | |||
|align="center"|N | |||
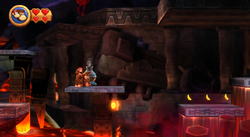
|Shortly after the checkpoint, the Kongs come up to an area infested with Tiki enemies. A platform in this area can take them to a higher place, where they must smash a few cracked stones to progress. Under this area near a wall and above a Tiki Torch is the letter N. | |||
|- | |||
|align="center"|[[File:DKCR Furious Fire Letter G.png|250px]] | |||
|align="center"|G | |||
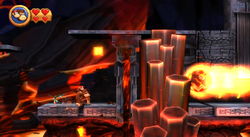
|After the fifth and final Puzzle Piece, the Kongs can find the letter G in the maze area. If they head under a few platforms, they can find the letter G in the air at a dead-end. | |||
|} | |||
===Puzzle Pieces=== | ===Puzzle Pieces=== | ||
[[File: | {|class="wikitable dk"width=70% | ||
|- | |||
!Image | |||
!Number | |||
!Location | |||
|- | |||
|align="center"|[[File:DKCR Furious Fire Puzzle Piece 1.png|250px]] | |||
|align="center"|1 | |||
|At the beginning of the level, the Kongs can uncover a hidden area in the first wall of basalt that is under a red platform. A Puzzle Piece is in it. | |||
|- | |||
|align="center"|[[File:DKCR Furious Fire Puzzle Piece 2.png|250px]] | |||
|align="center"|2 | |||
|When the heroes arrive in front of the letter O, they should turn around and hop along the raised platforms behind them. If they travel along all of the platforms and make it to a wall, they can find a Puzzle Piece next to it. | |||
|- | |||
|align="center"|[[File:DKCR Furious Fire Bonus Room.png|250px]] | |||
|align="center"|3 | |||
|After the letter N when the group smashes through some stones, they should head backwards and make their way into a hidden alcove behind basalt rocks. A barrel is here that shoots them into a [[bonus room]], where they must bounce on a moving trampoline to grab forty [[banana]]s and four [[Banana Coin]]s. When all of the items are collected before the thirty seconds are up, a Puzzle Piece appears. | |||
|- | |||
|align="center"|[[File:DKCR Furious Fire Puzzle Piece 4.png|250px]] | |||
|align="center"|4 | |||
|Soon after the exit to the first bonus room, the Kongs can find a vine switch. If they pull this switch, platforms appear above them for a limited amount of time. The primates should travel up these platforms to reach a Puzzle Piece high in the air. | |||
|- | |||
|align="center"|[[File:DKCR Furious Fire Puzzle Piece 5.png|250px]] | |||
|align="center"|5 | |||
|At the beginning of the maze-like area, the Kongs can head under some platforms to find some basalt rocks at a dead-end. They can find a hidden area behind these volcanic rocks to reveal a Puzzle Piece. | |||
|} | |||
==Names in | ==Names in other languages== | ||
{{ | {{foreign names | ||
|Jpn=ファイヤーキャッスル | |||
|JpnR=Faiyā Kyassuru | |||
|JpnM=Fire Castle | |||
|Spa=Fuego Furioso | |Spa=Fuego Furioso | ||
|SpaM= | |SpaM=Furious Fire | ||
|FreA=Feux Furieux | |||
|FreAM=Furious Fires | |||
|Ger=Feuer und Flamme | |||
|GerM=Fire and Flame (''Feuer und Flamme'' is a German phrase meaning "great enthusiasm".) | |||
|Ita=Furore fiammante | |||
|ItaM=Flaming Fury | |||
}} | |||
{{DKCR}} | {{DKCR}} | ||
[[Category: | [[Category:Volcanic areas]] | ||
[[Category:Donkey Kong Country Returns levels]] | |||
[[Category:Donkey Kong Country Returns | |||
Latest revision as of 17:08, January 19, 2025
It has been requested that more images be uploaded for this article. Remove this notice only after the additional images have been added. Specifics: Donkey Kong Country Returns 3D screenshot
| Level | |
|---|---|
| Furious Fire | |
| |
| Level code | 8-1 |
| World | Volcano |
| Game | Donkey Kong Country Returns (3D/HD) |
| Music track | Burnin' Bop |
| << Directory of levels >> | |
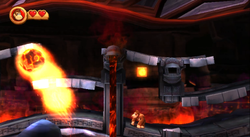
Furious Fire is the fifty-sixth level in Donkey Kong Country Returns and its Nintendo 3DS and Nintendo Switch ports, as well as the first level in the Volcano world.
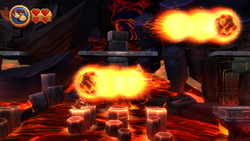
This level's main enemies are Char-Chars and Rentamaguma that hover around most areas of the level. They travel all over the place in all directions, so the Kongs must carefully maneuver around them. This level is also the first to feature lava that Donkey and Diddy Kong can fall into. They must avoid this lava by hopping along large volcanic rocks and falling platforms. Enemies in this level include Char-Chars, Tiki Goons, Tiki Torches, Tiki Buzzes, and Tiki Bombers.
In the Time Attack mode of the game, a time of 1:40:00 is needed to get a gold medal, a time of 2:01:00 for silver, and a time of 2:11:00 for bronze.
Overview[edit]
The level begins outside the factory on a slanted path of basalt with a Char-Char on it. Ahead is a high platform that the Kongs must climb over the reach an area with two spaced-out, solid, stone platforms. Tiki Goons infest the last to the two platforms, but a giant Char-Char moves above the first. There is a platform connected to a piece of basalt rock for the heroes to climb over. Under it is a DK Barrel.
A pathway composed of basalt is farther ahead. The basalt shortly after the DK Barrel supports a stone platform with Tiki Goons on it. Near here is a red platform with the letter K of the K-O-N-G Letters on it. Char-Chars travel all around this area, even in the following part of the level, where there are three small sections of basalt that are separated by small gaps. A giant Char-Char floats above the Kongs here too, as well as on the above stone platforms that lead to a Puzzle Piece. A thick stone platform with a Tiki Torch is after this, along with another platform, which has a Tiki Goon on it, with the letter O under it. More solid platforms being supported by basalt are ahead, and Tiki Bombers attack from them. Between two of these platforms is a switch that can quickly rise and take the primates to the next part of the level if they pound on it three times. When they reach the higher area with the switch, they come across the Tutorial Pig and the checkpoint.
Now about halfway through the level, the primates can find two platforms ahead that crumble with their weight. After them is a solid area with a stone pathway. Large Char-Chars hover around this area. On the other side of a gap nearby is a Tiki Torch and the letter N, while on a few platforms before it is a Tiki Bomber and a Tiki Goon. These platforms aid the heroes in reaching a higher area, where they can find a few cracked stones to smash. When they break through them, they can find themselves in a lower area, where there is a large Char-Char and a platform with a DK Barrel ahead. After this platform is another area with a solid, stone pathway. A vine switch is above the ground here, and a platform infested with a Tiki Torch and a Tiki Goon is nearby. More stone platforms, which are surrounded by moving Char-Chars, are farther ahead. One of these platforms found in a higher area has some collectibles on it, while the one after it has a Tiki Bomber. Sections of basalt separated by small gaps are farther ahead, which have a small Char-Char bouncing around them. After passing a Tiki Goon, the group can find an area with some curved pathways that make up a small maze. If the heroes stay on the upper part of the maze, they can progress. Large Char-Chars float around this area. If the heroes maneuver around the maze-like area, they can find the letter G at a dead end. Eventually, the Kongs can make their way through a curved passage to make it to a Tiki Bomber on a solid platform. A few platforms that crumble when landed on are farther ahead, some of which that have Tiki Buzzes and a Red Balloon between them. Above a group of four of these platforms is the Slot Machine Barrel.
Enemies[edit]
| Image | Name | Count |
|---|---|---|

|
Char-Char | 7 |

|
Rentamaguma | 19 |

|
Tiki Bomber | 5 |

|
Tiki Buzz | 2 |
| Tiki Torch | 5 | |
| Tiki Goon | 12 |
Items[edit]
| Image | Name | Count |
|---|---|---|
| Banana Coin | 12 | |
| DK Barrel | 1 | |

|
Heart | 1 |
| Red Balloon | 2 |
K-O-N-G Letters[edit]
Puzzle Pieces[edit]
| Image | Number | Location |
|---|---|---|
|
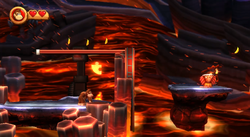
1 | At the beginning of the level, the Kongs can uncover a hidden area in the first wall of basalt that is under a red platform. A Puzzle Piece is in it. |
|
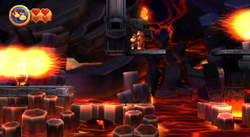
2 | When the heroes arrive in front of the letter O, they should turn around and hop along the raised platforms behind them. If they travel along all of the platforms and make it to a wall, they can find a Puzzle Piece next to it. |
|
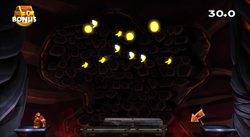
3 | After the letter N when the group smashes through some stones, they should head backwards and make their way into a hidden alcove behind basalt rocks. A barrel is here that shoots them into a bonus room, where they must bounce on a moving trampoline to grab forty bananas and four Banana Coins. When all of the items are collected before the thirty seconds are up, a Puzzle Piece appears. |
|
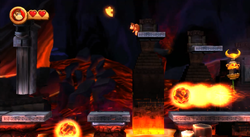
4 | Soon after the exit to the first bonus room, the Kongs can find a vine switch. If they pull this switch, platforms appear above them for a limited amount of time. The primates should travel up these platforms to reach a Puzzle Piece high in the air. |
|
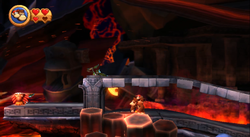
5 | At the beginning of the maze-like area, the Kongs can head under some platforms to find some basalt rocks at a dead-end. They can find a hidden area behind these volcanic rocks to reveal a Puzzle Piece. |
Names in other languages[edit]
| Language | Name | Meaning | Notes |
|---|---|---|---|
| Japanese | ファイヤーキャッスル[?] Faiyā Kyassuru |
Fire Castle | |
| French (NOA) | Feux Furieux[?] | Furious Fires | |
| German | Feuer und Flamme[?] | Fire and Flame (Feuer und Flamme is a German phrase meaning "great enthusiasm".) | |
| Italian | Furore fiammante[?] | Flaming Fury | |
| Spanish | Fuego Furioso[?] | Furious Fire |
