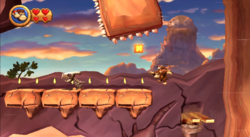
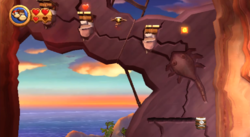
Clifftop Climb: Difference between revisions
(→Trivia) |
m (Text replacement - "(\| *)Jap([RMCN\d]* *=)" to "$1Jpn$2") |
||
| (58 intermediate revisions by 34 users not shown) | |||
| Line 1: | Line 1: | ||
{{level | {{level infobox | ||
|title=Clifftop Climb | |title=Clifftop Climb | ||
|image=[[File:ClifftopClimb.png|250px]] | |image=[[File:ClifftopClimb.png|250px]] | ||
|code=6 - 8 | |code=6-8 | ||
|game=''[[Donkey Kong Country Returns]] | |world=[[Cliff (world)|Cliff]] | ||
| | |game=''[[Donkey Kong Country Returns]]'' (''[[Donkey Kong Country Returns 3D|3D]]''/''[[Donkey Kong Country Returns HD|HD]]'') | ||
|before=[[Tippy Shippy|<<]] | |before=[[Tippy Shippy|<<]] | ||
|after=[[ | |after=[[Thugly's Highrise|>>]] | ||
|track=Sticky Situation | |||
}} | }} | ||
'''Clifftop Climb''' is the forty-fifth level in the [[ | '''Clifftop Climb''' is the forty-fifth level in the game ''[[Donkey Kong Country Returns]]'' and its [[Donkey Kong Country Returns 3D|Nintendo 3DS]] and [[Donkey Kong Country Returns HD|Nintendo Switch]] ports, as well as the eighth and final regular level in the [[Cliff (world)|Cliff]] world. | ||
This level involves [[Donkey Kong|Donkey]] and [[Diddy]] climbing to a high clifftop by using [[Barrel Cannon]]s, most of which explode when shot out of, springs, and fragile platforms that can crumble and fall. The [[Kong]]s also encounter many swinging platforms with spikes on the sides of them, which can be used as platforms. While most Barrel Cannons in this level are stationary, several at the end move from left to right. Overall, the obstacles in this level force the primates to move quickly and to not turn back | This level involves [[Donkey Kong|Donkey Kong]] and [[Diddy Kong]] climbing to a high clifftop by using [[Barrel Cannon]]s, most of which explode when shot out of, springs, and fragile platforms that can crumble and fall. The [[Kong]]s also encounter many swinging platforms with spikes on the sides of them, which can be used as platforms. While most Barrel Cannons in this level are stationary, several at the end move from left to right. Overall, the obstacles in this level force the primates to move quickly and to not turn back. Enemies in this level include [[Skellirex]]es, [[Tiki Zing]]s, and [[Tiki Buzz]]es. Throughout the level, [[Thugly]]'s lair can also be seen in the background; finishing the level grants access to [[Thugly's Highrise]], the Cliff's boss stage. | ||
In the [[Time Attack | In the [[Donkey Kong Country Returns#Time Attack|Time Attack]] mode of the game, a time of 1:19:00 is needed to get a gold medal, a time of 1:33:00 for silver, and a time of 1:50:00 for bronze. | ||
==Overview== | ==Overview== | ||
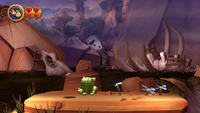
The level begins with a flat bridge that leads to a tar pit with a large switch in it. If the switch is hit three times, three dinosaur skeletons emerge from the tar. The skull of the middle skeleton holds a [[Puzzle Piece (Donkey Kong Country Returns)|Puzzle Piece]], while the two around it have [[Banana Coin]]s. Ahead of the switch is a solid area of ground with | [[File:Cliff (scenery).png|thumb|The starting area before the climb]] | ||
The level begins with a flat bridge that leads to a tar pit with a large switch in it. If the switch is hit three times, three dinosaur skeletons emerge from the tar. The skull of the middle skeleton holds a [[Puzzle Piece (Donkey Kong Country Returns)|Puzzle Piece]], while the two around it have [[Banana Coin]]s. Ahead of the switch is a solid area of ground with Skellirexes and the first [[DK Barrel]] on it. Blue flowers and a cactus that hold items also grow here. On the other side of the ground area is a Barrel Cannon that shoots the Kongs to a spring. The spring is placed on a rock platform that crumbles every time they bounce on it. Eventually, the spring can fall. The spring is able to bounce the Kongs to three higher platforms that can only hold the heroes' weight for a few seconds. After the three platforms is a Barrel Cannon that shoots the Kongs to some rock platforms. They crumble more and more as they stand on them, eventually breaking. A Skellirex and some [[banana]]s are on the platforms, and a Tiki Buzz is after it next to a spring. The spring can help the Kongs bounce to a high Barrel Cannon, which is located right next to a fragile platform with the letter K of the [[K-O-N-G Letters]] on it. The Barrel Cannon shoots them to an Auto Fire Barrel higher up that then sends them into a group of fragile platforms and springs. There is a small fork-in-the-road here, with the left path having smaller platforms and more collectibles than the path to the right. The springs in this area are placed on crumbling rock platforms and a few Tiki Zings fly around here as well. Eventually, the Kongs can reach a Barrel Cannon that shoots them to another cannon and then to two Auto Fire Barrels. The last of these barrels then blasts them onto a rather solid platform made of wooden boards that does not fall. The [[Professor Chops|Tutorial Pig]] and the checkpoint are here. | |||
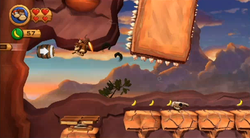
[[File:DKCR Clifftop Climb 2.png|thumb|left|250px|The Kongs climb the mountain]] | |||
To the left of the checkpoint is a platform with the second DK Barrel, while to the right is a fragile platform that breaks with the slightest amount of weight from the Kongs. Next to it is a Barrel Cannon that fires the primates high up to another Auto Fire Barrel. This barrel then shoots them onto a platform that crumbles and then falls when landed on. Next to it is a large gap with some rectangular platforms with spikes on the sides of them swinging above it. On the platforms are [[Banana|Banana Bunch]]es, and between them is the letter O. There is a Barrel Cannon at the end of this area that shoots the Kongs to an Auto Fire Barrel and then onto a wooden platform that breaks when landed on, which is followed by a similar platform right above it. Above this platform is a Barrel Cannon that can shoot them up into the air, where they can shift to the side to land on a fragile platform. | |||
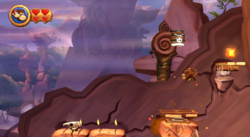
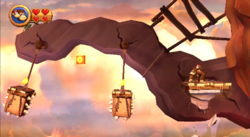
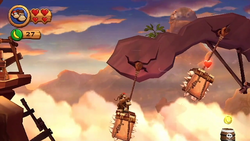
Next to the platform above a large abyss are two spaced-out Barrel Cannons with two swinging platforms above them. The swinging platforms have spikes on their sides and bottom. The primates must shoot onto them with the Barrel Cannons and then jump along them to reach another Barrel Cannon. This shoots them to an Auto Fire Barrel, and then onto a spring that is positioned on a crumbling rock. It can bounce them to more rock platforms and a single wooden platform, all of which that fall when stood on too long. A Skellirex is on the rock platforms, which are placed under a large, swinging platform that has the letter N near it. To get on this swinging object, the Kongs must reach a Barrel Cannon by using a nearby spring. The Barrel Cannon blasts them onto a solid platform that they can jump off of to reach the said object, which has a Banana Coin on it. After the swinging platform is another Barrel Cannon that shoots them to an Auto Fire Barrel. This barrel then blasts them to a solid platform with the Tutorial Pig and the second checkpoint. | |||
After the Tutorial Pig is a Barrel Cannon that helps the Kongs reach another cannon and a fragile platform. Ahead of this is a similar platform followed by a Tiki Buzz and a spring that is placed on a crumbling rock. The spring can bounce the Kongs into a Barrel Cannon that moves left and right. They can aim the barrel to make it blast them between some rock platforms that they can land on. They crumble if they stand on them too long. On a lone rock on the left is the third DK Barrel, while the rock platforms across from it hold a Skellirex and lead to a moving Barrel Cannon that the Kongs can aim to the right of a few high-up platforms. When they shoot here, the platforms, which have a Skellirex on them, begin to crumble and eventually break. After the last platform is a Barrel Cannon that they can aim to another Barrel Cannon higher up as they move back and fourth. When they reach the other Barrel Cannon, they can then shoot up to a spring above it that is positioned on a crumbling rock. Ahead of the spring are some fragile platforms that fall with the Kongs' weight and a Tiki Buzz. There is also a spring after all of these platforms that can bounce the primates to a Barrel Cannon that moves left and right. It can shoot them up to the letter G and onto a group of platforms the collapse when landed on. Around them is another Tiki Buzz and a Barrel Cannon that moves left and right. This Barrel Cannon is followed by two more cannons above it. They must shoot up the area with the cannons to eventually make their way to a fourth Barrel Cannon, which is stationary. Above this barrel is a large group of Tiki Zings that the heroes can shoot past to reach the [[Slot Machine Barrel]]. | |||
==Enemies== | |||
== | {|class="wikitable dk" | ||
!Image | |||
!Name | |||
!Count | |||
|- | |||
|align="center"|[[File:DKCR_Skellirex_Screenshot.png|x50px]] | |||
|align="center"|[[Skellirex]] | |||
|6 | |||
|- | |||
|align="center"|[[File:TikiBuzz.png|x50px]] | |||
|align="center"|[[Tiki Buzz]] | |||
|6 | |||
|- | |||
|align="center"|[[File:Tiki_Zing.png|x50px]] | |||
|align="center"|[[Tiki Zing]] | |||
|12 | |||
|} | |||
==Items== | |||
{|class="wikitable dk"width=15% | |||
|- | |||
!Image | |||
!Name | |||
!Count | |||
|- | |||
|align="center"|[[File:BananacoinDKCR.png|x50px]] | |||
|align="center"|[[Banana Coin]] | |||
|14 | |||
|- | |||
|align="center"|[[File:DKBarrelDKCR.png|x50px]] | |||
|align="center"|[[DK Barrel]] | |||
|3 | |||
|- | |||
|align="center"|[[File:BalloonDKCR.png|x50px]] | |||
|align="center"|[[Extra Life Balloon]] | |||
|1 | |||
|- | |||
|align="center"|[[File:Heart.png|x50px]] | |||
|align="center"|[[Heart (item)|Heart]] | |||
|3 | |||
|} | |||
===K-O-N-G Letters=== | ===K-O-N-G Letters=== | ||
[[File: | {|class="wikitable dk"width=70% | ||
|- | |||
!Image | |||
!Letter | |||
!Location | |||
|- | |||
|align="center"|[[File:DKCR Clifftop Climb K Letter.png|250px]] | |||
|align="center"|K | |||
|Just before the third Barrel Cannon is the letter K on a fragile platform that can be reached with a spring board. | |||
|- | |||
|align="center"|[[File:DKCR Clifftop Climb O Letter.png|250px]] | |||
|align="center"|O | |||
|Between two swinging platforms shortly after the first checkpoint is the letter O. | |||
|- | |||
|align="center"|[[File:DKCR Clifftop Climb N Letter.png|250px]] | |||
|align="center"|N | |||
|After the fourth Puzzle Piece is the letter N under a swinging object covered in spikes. The Kongs must avoid falling through the crumbling rock platforms below and perform a small jump to grab it without hitting the spikes. | |||
|- | |||
|align="center"|[[File:DKCR Clifftop Climb Letter G.png|250px]] | |||
|align="center"|G | |||
|As the Kongs shoot through the Barrel Cannons near the end of the level that move from left to right and back, they can find the letter G. They must shoot to it and then quickly move to the fragile platform to the left to avoid falling, as the Barrel Cannon they shoot out of breaks after use. | |||
|} | |||
===Puzzle Pieces=== | ===Puzzle Pieces=== | ||
{|class="wikitable dk"width=70% | |||
|- | |||
!Image | |||
!Number | |||
!Location | |||
|- | |||
|align="center"|[[File:DKCR Clifftop Climb Puzzle Piece 1.png|250px]] | |||
|align="center"|1 | |||
|At the beginning of the level, the Kongs should pound on a strange switch above a tar pit to release three dinosaur skeletons from the tar. The first Puzzle Piece is in the mouth of the skeleton that is between the two others. It can be reached by jumping from these two skeletons. | |||
|- | |||
|align="center"|[[File:DKCR Clifftop Climb Bonus Room 1.png|250px]] | |||
|align="center"|2 | |||
|Under the first Barrel Cannon is a hidden Banana Bunch that the Kongs should follow to land in an Auto Fire Barrel that shoots them into a [[bonus room]]. There, they must shoot between two Barrel Cannons to collect eighty bananas and two Banana Coins, while trying to avoid the Auto Fire Barrel between them that can shoot them out of the bonus. Once all of the items are collected within thirty seconds, a Puzzle Piece appears. | |||
|- | |||
|align="center"|[[File:DKCR Clifftop Climb Puzzle Piece 3.png|250px]] | |||
|align="center"|3 | |||
|After the Barrel Cannon and Auto Fire Barrel directly after the letter K, the Kongs should traverse the left-hand set of platforms to reach a ledge with a cactus growing on it. Inside of it is a Puzzle Piece. | |||
|- | |||
|align="center"|[[File:DKCR Clifftop Climb Bonus Room 2.png|250px]] | |||
|align="center"|4 | |||
|When the Kongs reach the second set of swinging platforms in the level, they should roll-jump to the left from the first of these platforms to reach a hidden opening on a ledge leading into a bonus room. There, the Kongs must bounce on a moving trampoline to grab four Banana Coins and forty bananas flying around. If they are all collected within thirty seconds, a Puzzle Piece is earned. | |||
|- | |||
|align="center"|[[File:DKCR Clifftop Climb Puzzle Piece 5.png|250px]] | |||
|align="center"|5 | |||
|Before the Kongs land into the level's final Barrel Cannon, they should shift over to the left to land on a ledge with a cactus on it. Inside the object is the fifth and final Puzzle Piece. | |||
|} | |||
==Names in | ==Names in other languages== | ||
{{ | {{foreign names | ||
|Jpn=めざせてっぺん!ジャンピング | |||
|JpnR=Mezase Teppen! Janpingu | |||
|JpnM=Aim for the Top! Jumping | |||
|Spa=Escalando el Acantilado | |Spa=Escalando el Acantilado | ||
|SpaM=Climbing the Cliff}} | |SpaM=Climbing the Cliff | ||
|FreA=Ascension à Sensations | |||
|FreAM=Ascension with Sensations | |||
|Ger=Klippenkletterei | |||
|GerM=Cliff Climb | |||
|Ita=Vetta suincima | |||
|ItaM=Up on Top Peak | |||
}} | |||
{{DKCR}} | {{DKCR}} | ||
[[Category:Mountains]] | [[Category:Mountains]] | ||
[[Category:Donkey Kong Country Returns levels]] | |||
Latest revision as of 12:30, January 7, 2025
| Level | |
|---|---|
| Clifftop Climb | |
| |
| Level code | 6-8 |
| World | Cliff |
| Game | Donkey Kong Country Returns (3D/HD) |
| Music track | Sticky Situation |
| << Directory of levels >> | |
Clifftop Climb is the forty-fifth level in the game Donkey Kong Country Returns and its Nintendo 3DS and Nintendo Switch ports, as well as the eighth and final regular level in the Cliff world.
This level involves Donkey Kong and Diddy Kong climbing to a high clifftop by using Barrel Cannons, most of which explode when shot out of, springs, and fragile platforms that can crumble and fall. The Kongs also encounter many swinging platforms with spikes on the sides of them, which can be used as platforms. While most Barrel Cannons in this level are stationary, several at the end move from left to right. Overall, the obstacles in this level force the primates to move quickly and to not turn back. Enemies in this level include Skellirexes, Tiki Zings, and Tiki Buzzes. Throughout the level, Thugly's lair can also be seen in the background; finishing the level grants access to Thugly's Highrise, the Cliff's boss stage.
In the Time Attack mode of the game, a time of 1:19:00 is needed to get a gold medal, a time of 1:33:00 for silver, and a time of 1:50:00 for bronze.
Overview[edit]
The level begins with a flat bridge that leads to a tar pit with a large switch in it. If the switch is hit three times, three dinosaur skeletons emerge from the tar. The skull of the middle skeleton holds a Puzzle Piece, while the two around it have Banana Coins. Ahead of the switch is a solid area of ground with Skellirexes and the first DK Barrel on it. Blue flowers and a cactus that hold items also grow here. On the other side of the ground area is a Barrel Cannon that shoots the Kongs to a spring. The spring is placed on a rock platform that crumbles every time they bounce on it. Eventually, the spring can fall. The spring is able to bounce the Kongs to three higher platforms that can only hold the heroes' weight for a few seconds. After the three platforms is a Barrel Cannon that shoots the Kongs to some rock platforms. They crumble more and more as they stand on them, eventually breaking. A Skellirex and some bananas are on the platforms, and a Tiki Buzz is after it next to a spring. The spring can help the Kongs bounce to a high Barrel Cannon, which is located right next to a fragile platform with the letter K of the K-O-N-G Letters on it. The Barrel Cannon shoots them to an Auto Fire Barrel higher up that then sends them into a group of fragile platforms and springs. There is a small fork-in-the-road here, with the left path having smaller platforms and more collectibles than the path to the right. The springs in this area are placed on crumbling rock platforms and a few Tiki Zings fly around here as well. Eventually, the Kongs can reach a Barrel Cannon that shoots them to another cannon and then to two Auto Fire Barrels. The last of these barrels then blasts them onto a rather solid platform made of wooden boards that does not fall. The Tutorial Pig and the checkpoint are here.
To the left of the checkpoint is a platform with the second DK Barrel, while to the right is a fragile platform that breaks with the slightest amount of weight from the Kongs. Next to it is a Barrel Cannon that fires the primates high up to another Auto Fire Barrel. This barrel then shoots them onto a platform that crumbles and then falls when landed on. Next to it is a large gap with some rectangular platforms with spikes on the sides of them swinging above it. On the platforms are Banana Bunches, and between them is the letter O. There is a Barrel Cannon at the end of this area that shoots the Kongs to an Auto Fire Barrel and then onto a wooden platform that breaks when landed on, which is followed by a similar platform right above it. Above this platform is a Barrel Cannon that can shoot them up into the air, where they can shift to the side to land on a fragile platform.
Next to the platform above a large abyss are two spaced-out Barrel Cannons with two swinging platforms above them. The swinging platforms have spikes on their sides and bottom. The primates must shoot onto them with the Barrel Cannons and then jump along them to reach another Barrel Cannon. This shoots them to an Auto Fire Barrel, and then onto a spring that is positioned on a crumbling rock. It can bounce them to more rock platforms and a single wooden platform, all of which that fall when stood on too long. A Skellirex is on the rock platforms, which are placed under a large, swinging platform that has the letter N near it. To get on this swinging object, the Kongs must reach a Barrel Cannon by using a nearby spring. The Barrel Cannon blasts them onto a solid platform that they can jump off of to reach the said object, which has a Banana Coin on it. After the swinging platform is another Barrel Cannon that shoots them to an Auto Fire Barrel. This barrel then blasts them to a solid platform with the Tutorial Pig and the second checkpoint.
After the Tutorial Pig is a Barrel Cannon that helps the Kongs reach another cannon and a fragile platform. Ahead of this is a similar platform followed by a Tiki Buzz and a spring that is placed on a crumbling rock. The spring can bounce the Kongs into a Barrel Cannon that moves left and right. They can aim the barrel to make it blast them between some rock platforms that they can land on. They crumble if they stand on them too long. On a lone rock on the left is the third DK Barrel, while the rock platforms across from it hold a Skellirex and lead to a moving Barrel Cannon that the Kongs can aim to the right of a few high-up platforms. When they shoot here, the platforms, which have a Skellirex on them, begin to crumble and eventually break. After the last platform is a Barrel Cannon that they can aim to another Barrel Cannon higher up as they move back and fourth. When they reach the other Barrel Cannon, they can then shoot up to a spring above it that is positioned on a crumbling rock. Ahead of the spring are some fragile platforms that fall with the Kongs' weight and a Tiki Buzz. There is also a spring after all of these platforms that can bounce the primates to a Barrel Cannon that moves left and right. It can shoot them up to the letter G and onto a group of platforms the collapse when landed on. Around them is another Tiki Buzz and a Barrel Cannon that moves left and right. This Barrel Cannon is followed by two more cannons above it. They must shoot up the area with the cannons to eventually make their way to a fourth Barrel Cannon, which is stationary. Above this barrel is a large group of Tiki Zings that the heroes can shoot past to reach the Slot Machine Barrel.
Enemies[edit]
| Image | Name | Count |
|---|---|---|
| Skellirex | 6 | |

|
Tiki Buzz | 6 |
| Tiki Zing | 12 |
Items[edit]
| Image | Name | Count |
|---|---|---|
| Banana Coin | 14 | |
| DK Barrel | 3 | |
| Extra Life Balloon | 1 | |

|
Heart | 3 |
K-O-N-G Letters[edit]
Puzzle Pieces[edit]
| Image | Number | Location |
|---|---|---|
|
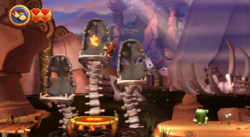
1 | At the beginning of the level, the Kongs should pound on a strange switch above a tar pit to release three dinosaur skeletons from the tar. The first Puzzle Piece is in the mouth of the skeleton that is between the two others. It can be reached by jumping from these two skeletons. |
|
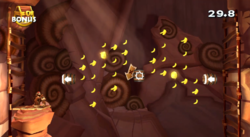
2 | Under the first Barrel Cannon is a hidden Banana Bunch that the Kongs should follow to land in an Auto Fire Barrel that shoots them into a bonus room. There, they must shoot between two Barrel Cannons to collect eighty bananas and two Banana Coins, while trying to avoid the Auto Fire Barrel between them that can shoot them out of the bonus. Once all of the items are collected within thirty seconds, a Puzzle Piece appears. |
|
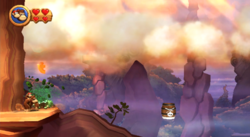
3 | After the Barrel Cannon and Auto Fire Barrel directly after the letter K, the Kongs should traverse the left-hand set of platforms to reach a ledge with a cactus growing on it. Inside of it is a Puzzle Piece. |
|
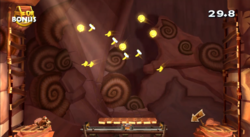
4 | When the Kongs reach the second set of swinging platforms in the level, they should roll-jump to the left from the first of these platforms to reach a hidden opening on a ledge leading into a bonus room. There, the Kongs must bounce on a moving trampoline to grab four Banana Coins and forty bananas flying around. If they are all collected within thirty seconds, a Puzzle Piece is earned. |
|
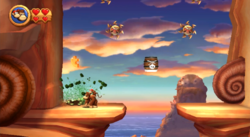
5 | Before the Kongs land into the level's final Barrel Cannon, they should shift over to the left to land on a ledge with a cactus on it. Inside the object is the fifth and final Puzzle Piece. |
Names in other languages[edit]
| Language | Name | Meaning | Notes |
|---|---|---|---|
| Japanese | めざせてっぺん!ジャンピング[?] Mezase Teppen! Janpingu |
Aim for the Top! Jumping | |
| French (NOA) | Ascension à Sensations[?] | Ascension with Sensations | |
| German | Klippenkletterei[?] | Cliff Climb | |
| Italian | Vetta suincima[?] | Up on Top Peak | |
| Spanish | Escalando el Acantilado[?] | Climbing the Cliff |
