Canopy Cannons: Difference between revisions
Fawfulfury65 (talk | contribs) (Jungle levels are all created.) |
m (Text replacement - "(\| *)Jap([RMCN\d]* *=)" to "$1Jpn$2") |
||
| (57 intermediate revisions by 34 users not shown) | |||
| Line 1: | Line 1: | ||
{{ | {{distinguish|Canopy Chaos}} | ||
{{level | {{level infobox | ||
|image=[[File:DKCR Canopy Cannons 1.png|250px]] | |||
|image=[[File: | |code=1-5 | ||
|code=1 - 5 | |world=[[Jungle (Donkey Kong Country Returns)|Jungle]] | ||
|game=''[[Donkey Kong Country Returns]] | |game=''[[Donkey Kong Country Returns]]'' (''[[Donkey Kong Country Returns 3D|3D]]''/''[[Donkey Kong Country Returns HD|HD]]'') | ||
| | |||
|before=[[Sunset Shore|<<]] | |before=[[Sunset Shore|<<]] | ||
|after=[[Crazy Cart|>>]] | |after=[[Crazy Cart|>>]] | ||
|track=King of Cling | |||
}} | |||
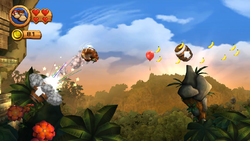
'''Canopy Cannons''' is the fifth level in ''[[Donkey Kong Country Returns]]'' and its [[Donkey Kong Country Returns 3D|Nintendo 3DS]] and [[Donkey Kong Country Returns HD|Nintendo Switch]] ports, as well as the fifth level in the [[Jungle (Donkey Kong Country Returns)|Jungle]] world. The level is optional because if the [[Kong]]s have a [[Map Key]], they can access [[Sunset Shore]] instead. | |||
==Summary== | |||
Similar to [[Barrel Cannon Canyon]], the fifth level of ''[[Donkey Kong Country]]'', Canopy Cannons involves [[Donkey Kong]] and [[Diddy Kong]] shooting through many [[Barrel Cannon]]s to get across large gaps in the jungle; some of the Barrel Cannons move back and forth or tilt. There are many large stone structures which the [[Kong]]s must blast through, and most are in the path of the Barrel Cannons. Sometimes either a [[Banana Coin]] or a [[Red Balloon]] is between the Barrel Cannons, and the Kongs can obtain the items if their blast is properly timed. Even [[Puzzle Piece (Donkey Kong Country Returns)|Puzzle Piece]]s and [[KONG Letters|K-O-N-G Letters]] are obtained by using the cannons' alternate shooting trajectories. Other obstacles include large, spiky stone blocks that bounce on drum-like trampolines and [[Screaming Pillar (big)|big Screaming Pillar]]s. | |||
In the [[Donkey Kong Country Returns#Time Attack|Time Attack]] mode, a time of 1:02:00 is needed to get a gold medal, a time of 1:13:00 for silver, and a time of 1:35:00 for bronze. | |||
==Overview== | |||
[[File:DKCR Canopy Cannons 2.png|thumb|250px|left|The Kongs aim at a spiky, bouncing object]] | |||
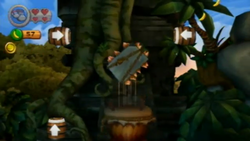
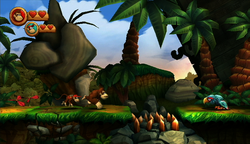
The level begins in the jungle, where there are many strange, item bearing plants growing all over the place. Some stone blocks are also on the pathway through the jungle, as well as a Frogoon that is followed by an Awk. The edge of a cliff is immediately after the Awk, but a Barrel Cannon floats near it. If the Kongs get in and shoot themselves out of it, they land in a barrel in the background that shoots them through a stone wall to a moving barrel. The barrel can be missed, causing the heroes to plummet to their death. The barrel can move the Kongs upwards through another stone wall and to the letter K of the [[K-O-N-G Letters]]. A barrel on the other side of this stone wall to catch and shoot them to a barrel in the foreground. This moving barrel can aim the Kongs at another barrel, which can then blast them to the following barrel when it has moved in the correct area. They barrel it shoots the primates to does not move, but it aims directly at the target: the next barrel. This barrel is surrounded by many [[banana]]s, a [[Banana Coin]], and a Tiki Zing. When the Kongs shoot to the barrel, the foe and the objects fall, allowing the barrel to move under the next barrel, which they must shoot to. This barrel aims directly at the following barrel, but a bouncing, spiky object is between them. | |||
[[File:DKCR Canopy Cannons 3.png|thumb|250px|The Kongs come up to an Awk]] | |||
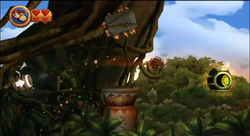
When the object falls downwards, they can shoot to the next barrel, which can them blast them on solid ground on an Awk. In this area, there are many red, helicopter-like plants at the edge of the cliff and another strange plant next to a dandelion. After a group of spikes, the primates come up to two Frogoons and a [[DK Barrel]]. Barrels are in the gap ahead of this tree canopy area. The three barrels each tilt in three different directions; when they are aiming at the correct angle, the Kongs can shoot to reach the next barrel. The first barrel in this group can shoot the group to the letter O, which is right above it, or the barrel positioned above it to the right. This barrel can then shoot them down to the third barrel that is to the right of it. This final barrel in the area is next to a stone wall that supports the above platform which can be shot to in order to progress. If the heroes shoot at the wall here, they can also bounce back while grabbing a Banana Coin. On the platform above this, the primates can find two red Rawks and a strange plant that can be broken open to reveal and item. Spikes are ahead of here, along with an Awk. At the end of the area is the [[Professor Chops|Tutorial Pig]], who marks the checkpoint. | |||
A DK Barrel is immediately after this, followed by a few large, bouncy, red flowers. A trail of bananas are above each of them, and a Barrel Cannon is above the last of the flowers. It can shoot the Kongs past a bouncing, spiky object, when the obstacle jumps upwards, to get to another barrel. This cannon can shoot them farther into the background, where there is another barrel that is surrounded by bananas, a Banana Coin, and a Tiki Zing. The two barrels following this are surrounded by similar objects, including the letter N and a [[Red Balloon]], which fall when the barrels are reached. Eventually, the heroes reach a barrel that can shoot them under a bouncing object to access another cannon that aims into a wall. They can shoot through this wall and come up to a moving barrel while in mid-air, which they must try to land in. This barrel, along with the barrels following it, moves back and fourth, so the Kongs must shoot out only when it is aiming towards the next barrel to avoid falling. After blasting through many different barrels, the Kongs reach an Auto Fire Barrel that blasts them to a barrel that is able to shoot them into the background through some stone structures. | |||
[[File:Canopy Cannons DKCR Slot Machine Barrel.png|thumb|250px|left|The Kongs reach the Slot Machine Barrel]] | |||
On the other side of the structures is another cannon, which can shoot them into the air so they can reach a moving Auto Fire Barrel, which has the letter G above it. This barrel can fire them to the next barrel, which then blasts them through a wall. When they shoot through this, the heroes area attacked by many giant Sleeping Pillars behind them. They must quickly shoot through several Barrel Cannons towards the foreground to avoid them. The last two of these barrels aim at different angles, while the ones before it only aim to the next barrel. When the heroes shoot to land, they crash into a structure that they cause to fall over. They can use this to help them reach a higher area, where there are two dandelions, followed by several bouncy, red flowers. The primates can bounce along these to get to a Barrel Cannon at the end of the area. Auto Fire Barrels are positioned between the flowers to help the Kongs in case they fall between the plants. The Barrel Cannon at the end of the area can shoot the group into the mouth of a nearby structure, which has a Barrel Cannon in it. This cannon can blast them to other cannons inside the structure. Eventually, they shoot out of the statue and blast to the level's final Barrel Cannon, which aims past a bouncing, spiky object to the [[Slot Machine Barrel]]. | |||
{{br}} | |||
==Enemies== | |||
{|class="wikitable dk" width=25% | |||
|- | |||
!Image | |||
!Name | |||
!Amount | |||
|- | |||
|align="center"|[[File:Awk.png|x50px]] | |||
|align="center"|[[Awk]] | |||
|5 | |||
|- | |||
|align="center"|[[File:Frogoon_screenshot.png|x50px]] | |||
|align="center"|[[Frogoon]] | |||
|3 | |||
|- | |||
|align="center"|[[File:Rawk.png|x50px]] | |||
|align="center"|[[Rawk]] | |||
|3 | |||
|- | |||
|align="center"|[[File:Giant_Pillar.png|x50px]] | |||
|align="center"|[[Screaming Pillar (big)]] | |||
|5 | |||
|- | |||
|align="center"|[[File:Tiki_Zing.png|x50px]] | |||
|align="center"|[[Tiki Zing]] | |||
|3 | |||
|} | |||
==Items== | |||
{|class="wikitable dk" width=25% | |||
|- | |||
!Image | |||
!Name | |||
!Amount | |||
|- | |||
|align="center"|[[File:BananacoinDKCR.png|x50px]] | |||
|align="center"|[[Banana Coin]] | |||
|7 | |||
|- | |||
|align="center"|[[File:DKBarrelDKCR.png|x50px]] | |||
|align="center"|[[DK Barrel]] | |||
|2 | |||
|- | |||
|align="center"|[[File:BalloonDKCR.png|x50px]] | |||
|align="center"|[[Red Balloon]] | |||
|1 | |||
|} | |||
===K-O-N-G Letters=== | |||
{|class="wikitable dk" width=70% | |||
|- | |||
!Image | |||
!Letter | |||
!Location | |||
|- | |||
|align="center"|[[File:CanopyCannonsK.png|250px]] | |||
|align="center"|K | |||
|When the Kongs reach the third Barrel Cannon in the level, they must shoot across the cracked stone wall to reach letter K. | |||
|- | |||
|align="center"|[[File:DKCR Canopy Cannons Letter O.png|250px]] | |||
|align="center"|O | |||
|Right after the first [[Puzzle Piece (Donkey Kong Country Returns)|Puzzle Piece]] and the first DK Barrel, the Kongs can enter a Barrel Cannon and blast to the letter O above it. | |||
|- | |||
|align="center"|[[File:DKCR Canopy Cannons Letter N.png|250px]] | |||
|align="center"|N | |||
|In the third sequence of Barrel Cannons, the Kongs shoot to some Barrel Cannons that are surrounded by collectibles. The letter N orbits one of these Barrel Cannons. | |||
|- | |||
|align="center"|[[File:DKCR Canopy Cannons Letter G.png|250px]] | |||
|align="center"|G | |||
|After the Kongs blast into the background before encountering the big Screaming Pillars, their Barrel Cannon points straight up to the letter G. The Kongs must avoid a Blast Barrel which moves under the letter G. | |||
|} | |||
===Puzzle Pieces=== | |||
{|class="wikitable dk" width=70% | |||
|- | |||
!Image | |||
!Number | |||
!Location | |||
|- | |||
|align="center"|[[File:DKCR Canopy Cannons Puzzle Piece 1.png|250px]] | |||
|align="center"|1 | |||
|When the Kongs land on the ground after shooting through the first set of Barrel Cannons, they must Ground Pound a gourd to reveal a Puzzle Piece. | |||
|- | |||
|align="center"|[[File:DKCR Canopy Cannons Puzzle Piece 2.png|250px]] | |||
|align="center"|2 | |||
|After collecting the letter O, the Kongs must blast into the next Barrel Cannon and then aim straight down the gap. By doing so, the Kongs are caught in a Blast Barrel, which blasts them left to the second Puzzle Piece, and into another Blast Barrel which blasts them back up to the Barrel Cannon that had the letter O above it. | |||
|- | |||
|align="center"|[[File:DKCR Bonus Room 5.png|250px]] | |||
|align="center"|3 | |||
|After the letter O, the Kongs must continue onto a nearby area of ground. They must pass two Rawks and Ground Pound a grass trapdoor left of the Frogoon to fall into a Blast Barrel which takes them into a [[Bonus Level]] to the right. The Kongs have thirty seconds to collect many vertically moving bananas and two Banana Coins while blasting back and forth between two Barrel Cannons. The Kongs must avoid blasting into a Blast Barrel that slowly moves in the center. When the Kongs collect every item, the Puzzle Piece appears beneath the Blast Barrel, and the Kongs must enter it to automatically blast down to the Puzzle Piece. | |||
|- | |||
|align="center"|[[File:DKCR Canopy Cannons Puzzle Piece 4.png|250px]] | |||
|align="center"|4 | |||
|Just before the checkpoint, the Kongs must pound a gourd around three Awks to release the fourth Puzzle Piece. | |||
|- | |||
|align="center"|[[File:DKCR Canopy Cannons Puzzle Piece 5.png|250px]] | |||
|align="center"|5 | |||
|During the third set of Barrel Cannons, the Kongs must blast northeast to a banana, leading to a few more bananas and into a Barrel Cannon. From the Barrel Cannon, the Kongs must blast to the bottom-right to collect the Puzzle Piece. | |||
|} | |||
==Names in other languages== | |||
{{foreign names | |||
|Jpn=さけぶ柱とタルたいほう | |||
|JpnR=Sakebu Hashira to Taru Taihō | |||
|JpnM=Crying Pillars and Barrel Cannons | |||
|Spa=Cañones y Columnas | |||
|SpaM=Cannons and Columns | |||
|Ita=Chioma cannone | |||
|ItaM=Cannon Foliage | |||
|Fre=Canons de la Canopée | |||
|FreM=Cannons of the Canopy | |||
|Ger=Baumkronen-Kanonen | |||
|GerM=Tree Top Cannons | |||
|Chi=吼吼石柱和木桶大炮 | |||
|ChiR=Hǒuhǒu Shízhù hé Mùtǒng Dàpào | |||
|ChiM=Crying Pillars and Barrel Cannons | |||
}} | }} | ||
{{DKCR}} | {{DKCR}} | ||
[[Category: | [[Category:Jungles]] | ||
[[Category:Donkey Kong | [[Category:Donkey Kong Country Returns levels]] | ||
[[ | [[de:Baumkronen-Kanonen]] | ||
Latest revision as of 12:59, January 7, 2025
- Not to be confused with Canopy Chaos.
| Level | |
|---|---|
| Canopy Cannons | |
| |
| Level code | 1-5 |
| World | Jungle |
| Game | Donkey Kong Country Returns (3D/HD) |
| Music track | King of Cling |
| << Directory of levels >> | |
Canopy Cannons is the fifth level in Donkey Kong Country Returns and its Nintendo 3DS and Nintendo Switch ports, as well as the fifth level in the Jungle world. The level is optional because if the Kongs have a Map Key, they can access Sunset Shore instead.
Summary[edit]
Similar to Barrel Cannon Canyon, the fifth level of Donkey Kong Country, Canopy Cannons involves Donkey Kong and Diddy Kong shooting through many Barrel Cannons to get across large gaps in the jungle; some of the Barrel Cannons move back and forth or tilt. There are many large stone structures which the Kongs must blast through, and most are in the path of the Barrel Cannons. Sometimes either a Banana Coin or a Red Balloon is between the Barrel Cannons, and the Kongs can obtain the items if their blast is properly timed. Even Puzzle Pieces and K-O-N-G Letters are obtained by using the cannons' alternate shooting trajectories. Other obstacles include large, spiky stone blocks that bounce on drum-like trampolines and big Screaming Pillars.
In the Time Attack mode, a time of 1:02:00 is needed to get a gold medal, a time of 1:13:00 for silver, and a time of 1:35:00 for bronze.
Overview[edit]
The level begins in the jungle, where there are many strange, item bearing plants growing all over the place. Some stone blocks are also on the pathway through the jungle, as well as a Frogoon that is followed by an Awk. The edge of a cliff is immediately after the Awk, but a Barrel Cannon floats near it. If the Kongs get in and shoot themselves out of it, they land in a barrel in the background that shoots them through a stone wall to a moving barrel. The barrel can be missed, causing the heroes to plummet to their death. The barrel can move the Kongs upwards through another stone wall and to the letter K of the K-O-N-G Letters. A barrel on the other side of this stone wall to catch and shoot them to a barrel in the foreground. This moving barrel can aim the Kongs at another barrel, which can then blast them to the following barrel when it has moved in the correct area. They barrel it shoots the primates to does not move, but it aims directly at the target: the next barrel. This barrel is surrounded by many bananas, a Banana Coin, and a Tiki Zing. When the Kongs shoot to the barrel, the foe and the objects fall, allowing the barrel to move under the next barrel, which they must shoot to. This barrel aims directly at the following barrel, but a bouncing, spiky object is between them.
When the object falls downwards, they can shoot to the next barrel, which can them blast them on solid ground on an Awk. In this area, there are many red, helicopter-like plants at the edge of the cliff and another strange plant next to a dandelion. After a group of spikes, the primates come up to two Frogoons and a DK Barrel. Barrels are in the gap ahead of this tree canopy area. The three barrels each tilt in three different directions; when they are aiming at the correct angle, the Kongs can shoot to reach the next barrel. The first barrel in this group can shoot the group to the letter O, which is right above it, or the barrel positioned above it to the right. This barrel can then shoot them down to the third barrel that is to the right of it. This final barrel in the area is next to a stone wall that supports the above platform which can be shot to in order to progress. If the heroes shoot at the wall here, they can also bounce back while grabbing a Banana Coin. On the platform above this, the primates can find two red Rawks and a strange plant that can be broken open to reveal and item. Spikes are ahead of here, along with an Awk. At the end of the area is the Tutorial Pig, who marks the checkpoint.
A DK Barrel is immediately after this, followed by a few large, bouncy, red flowers. A trail of bananas are above each of them, and a Barrel Cannon is above the last of the flowers. It can shoot the Kongs past a bouncing, spiky object, when the obstacle jumps upwards, to get to another barrel. This cannon can shoot them farther into the background, where there is another barrel that is surrounded by bananas, a Banana Coin, and a Tiki Zing. The two barrels following this are surrounded by similar objects, including the letter N and a Red Balloon, which fall when the barrels are reached. Eventually, the heroes reach a barrel that can shoot them under a bouncing object to access another cannon that aims into a wall. They can shoot through this wall and come up to a moving barrel while in mid-air, which they must try to land in. This barrel, along with the barrels following it, moves back and fourth, so the Kongs must shoot out only when it is aiming towards the next barrel to avoid falling. After blasting through many different barrels, the Kongs reach an Auto Fire Barrel that blasts them to a barrel that is able to shoot them into the background through some stone structures.
On the other side of the structures is another cannon, which can shoot them into the air so they can reach a moving Auto Fire Barrel, which has the letter G above it. This barrel can fire them to the next barrel, which then blasts them through a wall. When they shoot through this, the heroes area attacked by many giant Sleeping Pillars behind them. They must quickly shoot through several Barrel Cannons towards the foreground to avoid them. The last two of these barrels aim at different angles, while the ones before it only aim to the next barrel. When the heroes shoot to land, they crash into a structure that they cause to fall over. They can use this to help them reach a higher area, where there are two dandelions, followed by several bouncy, red flowers. The primates can bounce along these to get to a Barrel Cannon at the end of the area. Auto Fire Barrels are positioned between the flowers to help the Kongs in case they fall between the plants. The Barrel Cannon at the end of the area can shoot the group into the mouth of a nearby structure, which has a Barrel Cannon in it. This cannon can blast them to other cannons inside the structure. Eventually, they shoot out of the statue and blast to the level's final Barrel Cannon, which aims past a bouncing, spiky object to the Slot Machine Barrel.
Enemies[edit]
| Image | Name | Amount |
|---|---|---|

|
Awk | 5 |

|
Frogoon | 3 |

|
Rawk | 3 |
| Screaming Pillar (big) | 5 | |
| Tiki Zing | 3 |
Items[edit]
| Image | Name | Amount |
|---|---|---|
| Banana Coin | 7 | |
| DK Barrel | 2 | |
| Red Balloon | 1 |
K-O-N-G Letters[edit]
| Image | Letter | Location |
|---|---|---|
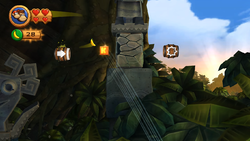
|
K | When the Kongs reach the third Barrel Cannon in the level, they must shoot across the cracked stone wall to reach letter K. |
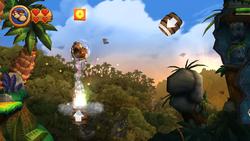
|
O | Right after the first Puzzle Piece and the first DK Barrel, the Kongs can enter a Barrel Cannon and blast to the letter O above it. |
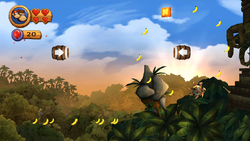
|
N | In the third sequence of Barrel Cannons, the Kongs shoot to some Barrel Cannons that are surrounded by collectibles. The letter N orbits one of these Barrel Cannons. |
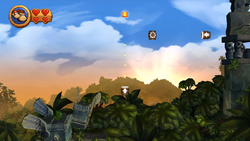
|
G | After the Kongs blast into the background before encountering the big Screaming Pillars, their Barrel Cannon points straight up to the letter G. The Kongs must avoid a Blast Barrel which moves under the letter G. |
Puzzle Pieces[edit]
| Image | Number | Location |
|---|---|---|
|
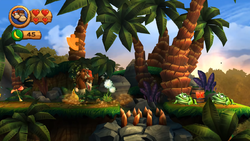
1 | When the Kongs land on the ground after shooting through the first set of Barrel Cannons, they must Ground Pound a gourd to reveal a Puzzle Piece. |
|
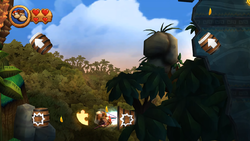
2 | After collecting the letter O, the Kongs must blast into the next Barrel Cannon and then aim straight down the gap. By doing so, the Kongs are caught in a Blast Barrel, which blasts them left to the second Puzzle Piece, and into another Blast Barrel which blasts them back up to the Barrel Cannon that had the letter O above it. |
|
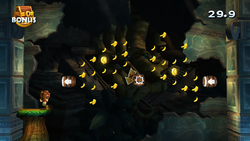
3 | After the letter O, the Kongs must continue onto a nearby area of ground. They must pass two Rawks and Ground Pound a grass trapdoor left of the Frogoon to fall into a Blast Barrel which takes them into a Bonus Level to the right. The Kongs have thirty seconds to collect many vertically moving bananas and two Banana Coins while blasting back and forth between two Barrel Cannons. The Kongs must avoid blasting into a Blast Barrel that slowly moves in the center. When the Kongs collect every item, the Puzzle Piece appears beneath the Blast Barrel, and the Kongs must enter it to automatically blast down to the Puzzle Piece. |
|
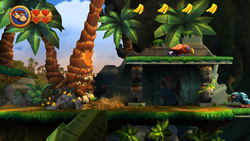
4 | Just before the checkpoint, the Kongs must pound a gourd around three Awks to release the fourth Puzzle Piece. |
|
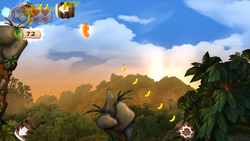
5 | During the third set of Barrel Cannons, the Kongs must blast northeast to a banana, leading to a few more bananas and into a Barrel Cannon. From the Barrel Cannon, the Kongs must blast to the bottom-right to collect the Puzzle Piece. |
Names in other languages[edit]
| Language | Name | Meaning | Notes |
|---|---|---|---|
| Japanese | さけぶ柱とタルたいほう[?] Sakebu Hashira to Taru Taihō |
Crying Pillars and Barrel Cannons | |
| Chinese | 吼吼石柱和木桶大炮[?] Hǒuhǒu Shízhù hé Mùtǒng Dàpào |
Crying Pillars and Barrel Cannons | |
| French | Canons de la Canopée[?] | Cannons of the Canopy | |
| German | Baumkronen-Kanonen[?] | Tree Top Cannons | |
| Italian | Chioma cannone[?] | Cannon Foliage | |
| Spanish | Cañones y Columnas[?] | Cannons and Columns |
