Wigglevine Wonders: Difference between revisions
No edit summary |
LinkTheLefty (talk | contribs) mNo edit summary |
||
| (68 intermediate revisions by 33 users not shown) | |||
| Line 1: | Line 1: | ||
{{level infobox | |||
{{level | |||
|title=Wigglevine Wonders | |title=Wigglevine Wonders | ||
|image=[[File:WigglevineWonders. | |image=[[File:WigglevineWonders.png|250px]] | ||
|code=5 - 7 | |code=5-7 | ||
|game=''[[Donkey Kong Country Returns]] | |world=[[Forest (Donkey Kong Country Returns)|Forest]] | ||
|game=''[[Donkey Kong Country Returns]]'' (''[[Donkey Kong Country Returns 3D|3D]]'') | |||
|before=[[Springy Spores|<<]] | |before=[[Springy Spores|<<]] | ||
|after=[[Muncher Marathon|>>]] | |after=[[Muncher Marathon|>>]] | ||
|track=Forest Frenzy Returns | |||
}} | }} | ||
'''Wigglevine Wonders''' is the thirty-fifth level in ''[[Donkey Kong Country Returns]]'' and ''[[Donkey Kong Country Returns 3D]]'', as well as the seventh level in the [[Forest (Donkey Kong Country Returns)|Forest]] world. | |||
This level revolves around the use of [[Wigglevine]]s to move across the level. Aside from Wigglevines, there are normal vines throughout the level as well. Some of these Wigglevines take the [[Kong]]s across the level while others slowly descend and disappear. On many occasions in the level, the Kongs are attacked by [[Tiki Zing]]s as they ride of large gaps on Wigglevines. They must climb up and down on the creature's vines to dodge them. Other common enemies here include [[Tiki Goon]]s, [[Tiki Doom]]s, and [[Chomp (Donkey Kong Country series)|Chomps]]. | |||
In the [[Donkey Kong Country Returns#Time Attack|Time Attack]] mode of the game, a time of 1:57:00 is needed to get a gold medal, a time of 2:01:00 for silver, and a time of 2:22:00 for bronze. | |||
==Overview== | |||
[[File:DKCR Wigglevine Wonders 2.png|thumb|left|250px|The beginning of the level]] | |||
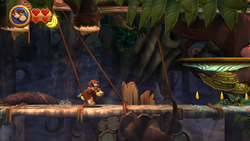
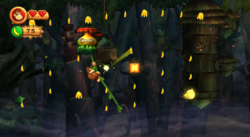
The level begins with a straight pathway surrounded by giant trees. A few plants grow on the pathway that can give the Kongs collectibles, and a mushroom with a Tiki Goon on it is also raised above the pathway. If they Kongs jump to a hidden area covered by tree branches and leaves above this mushroom, they can find a [[DK Barrel]] and even a [[Puzzle Piece (Donkey Kong Country Returns)|Puzzle Piece]]. The only way to exit this area is by pounding on the cracked, cylinder-shaped object at the end of it, which has a [[Banana Coin]] under it. Farther ahead of the beginning area is a vine next to a Wigglevine. When the heroes grab onto this creature, it begins to pull them across a large abyss. On the way over, [[banana]]s, along with the letter K of the [[KONG Letters|K-O-N-G Letters]], fly towards them in a curvy path. | |||
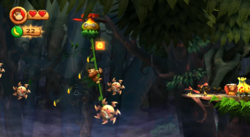
== | When the primates reach land again, they can find a Tiki Goon and a strange, item-bearing plants on a small platform. Another Wigglevine is near here that can help the heroes slowly descend to a lower area, where the Kongs can find themselves in an area under the canopy. If they jump up to a hidden platform at the beginning of the area, they can find two Wigglevines and a barrel leading to a [[Bonus Level]], while under the canopy is a Tiki Doom and a strange plant with an item in it. Just ahead is a [[green Chomp]] with a spring in its mouth. The Kongs can bounce on it before getting eaten by the carnivorous plant to reach a Wigglevine. The Wigglevine carries them over a large abyss. On the way, Tiki Zings attack the heroes and bananas, along with the letter O, fly towards them. If they manage to pass all of the Tiki Zings safely, they can make it to a platform with a long vine leading to another Wigglevine after it. Additionally, the Kongs can pound on a cracked part of this platform to find a hidden [[Barrel Cannon]] that can take them on top of the Wigglevine, who rides them over a gap full of bananas, [[Banana|Banana Bunch]]es, and the letter N. On the other side of the gap is the [[Professor Chops|Tutorial Pig]] at the checkpoint. | ||
[[File:DKCR Wigglevine Wonders 3.png|thumb|250px|A hungry plant exists after a set of Wigglevines]] | |||
A few stair like platforms are ahead that lead to a Tiki Goon and a strange, empty plant. A hidden platform hidden behind tree leaves holds a DK Barrel. A sand bag is next to this barrel. Farther into the level is an area with some Tiki Zings between two small gaps. A Tiki Doom is on the platform right after them, while a hidden area behind the canopy is above, full of collectibles. It can be reached by using a barrel hidden under a cracked platform between two Tiki Zings. A Wigglevine is at the end of this area to help the Kongs cross another large abyss. Tiki Zings continue to attack on the way, but the letter G flies towards the primates as well. There is a platform with a Tiki Goon and a Tiki Doom on it after this, followed by a long, swinging vine. The vine helps them reach two shorter vines after it and then a small Wigglevine that can lower them under a large Tiki Zing blocking the next mushroom platform. This is followed by two more mushrooms with Tiki Zings between them. A set of three small Wigglevines are after the last mushroom, which is placed slightly above the second one. They can aid the group in reaching a long vine that appears to be the tongue of an [[Ape-Eating Plant]]. They should jump off the tongue before being consumed and then bounce on the spring in another green Chomp. The spring can help them reach a platform next to the level's final Wigglevine. This vine creature helps carry them northeast over a large gap infested with Tiki Zings. Eventually, it stops in front of a [[Slot Machine Barrel]] that makes the level complete when hit. | |||
{{br}} | |||
==Enemies== | |||
{|class="wikitable dk" | |||
!Image | |||
!Name | |||
!Count | |||
|- | |||
|align="center"|[[File:Green Chomp.png|50px]] | |||
|align="center"|[[Green Chomp]] | |||
|3 | |||
|- | |||
|align="center"|[[File:Vine Chomp.png|50px]] | |||
|align="center"|[[Ape-Eating Plant]] | |||
|1 | |||
|- | |||
|align="center"|[[File:TikiDoom.png|50px]] | |||
|align="center"|[[Tiki Doom]] | |||
|3 | |||
|- | |||
|align="center"|[[File:TikiGoon.png|50px]] | |||
|align="center"|[[Tiki Goon]] | |||
|5 | |||
|- | |||
|align="center"|[[File:Tiki Zing.png|50px]] | |||
|align="center"|[[Tiki Zing]] | |||
|54 | |||
|- | |||
|align="center"|[[File:Big Zing.png|50px]] | |||
|align="center"|[[Tiki Zing (big)]] | |||
|4 | |||
|- | |||
|align="center"|[[File:Wigglevine2-DKCR.png|50px]] | |||
|align="center"|[[Wigglevine]] | |||
|10 | |||
|} | |||
==Items== | |||
{|class="wikitable dk"width=15% | |||
|- | |||
!Image | |||
!Name | |||
!Count | |||
|- | |||
|align="center"|[[File:BananacoinDKCR.png|x50px]] | |||
|align="center"|[[Banana Coin]] | |||
|19 | |||
|- | |||
|align="center"|[[File:DKBarrelDKCR.png|x50px]] | |||
|align="center"|[[DK Barrel]] | |||
|2 | |||
|- | |||
|align="center"|[[File:Heart.png|x50px]] | |||
|align="center"|[[Heart (item)|Heart]] | |||
|3 | |||
|- | |||
|align="center"|[[File:BalloonDKCR.png|x50px]] | |||
|align="center"|[[Red Balloon]] | |||
|3 | |||
|} | |||
== | ===K-O-N-G Letters=== | ||
{|class="wikitable dk"width=70% | |||
|- | |||
!Image | |||
!Letter | |||
!Location | |||
|- | |||
|align="center"|[[File:DKCR Wigglevine Wonders K Letter.png|250px]] | |||
|align="center"|K | |||
|When the Kongs ride over a large abyss with a Wigglevine for the first time, the letter K flies up to them with a trail of bananas. | |||
|- | |||
|align="center"|[[File:DKCR Wigglevine Wonders O Letter.png|250px]] | |||
|align="center"|O | |||
|In the second part of the level where the Kongs must use a Wigglevine to cross a large gap, they should climb between two Tiki Zings to grab the letter O that flies towards them. | |||
|- | |||
|align="center"|[[File:DKCR Wigglevine Wonders N Letter.png|250px]] | |||
|align="center"|N | |||
|On the Wigglevine just before the checkpoint, the Kongs can find a large group of bananas with the letter N in it. The Kongs should maneuver along the vine of the Wigglevine to grab it. | |||
|- | |||
|align="center"|[[File:DKCR Wigglevine Wonders G Letter.png|250px]] | |||
|align="center"|G | |||
|In the third part of the level where the Kongs must ride a Wigglevine over a large gap, the letter G flies up to the primates just before they reach the other side of the pit. | |||
|} | |||
== | ===Puzzle Pieces=== | ||
{|class="wikitable dk"width=70% | |||
|- | |||
!Image | |||
!Number | |||
!Location | |||
|- | |||
|align="center"|[[File:DKCR Wigglevine Wonders Puzzle Piece 1.png|250px]] | |||
|align="center"|1 | |||
|At the beginning of the level, the Kongs should jump up from a mushroom with a Tiki Goon on it to find an area hidden in the canopy. A Puzzle Piece is in this area in plain sight. | |||
|- | |||
|align="center"|[[File:DKCR Wigglevine Wonders Puzzle Piece 2.png|250px]] | |||
|align="center"|2 | |||
|When the heroes land on the platform right after crossing the abyss with the letter K, they should pound on a strange plant to reveal a Puzzle Piece. | |||
|- | |||
|align="center"|[[File:DKCR Wigglevine Wonders Bonus Room.png|250px]] | |||
|align="center"|3 | |||
|Shortly after the Kongs lower themselves with the small Wigglevine right after the second Puzzle Piece, the primates should jump on a platform hidden in the canopy and climb upwards to a series of Wigglevines. They can jump across all of these creature's vines to reach a Barrel Cannon that shoots them into a Bonus Level. There, they must grab eighty bananas, two Banana Coins, and one [[Red Balloon]] placed around several small, stationary platforms within thirty seconds. If they collect everything fast enough, a Puzzle Piece appears. | |||
|- | |||
|align="center"|[[File:DKCR Wigglevine Wonders Puzzle Piece 4.png|250px]] | |||
|align="center"|4 | |||
|Hidden in the canopy just after the checkpoint is a DK Barrel. The Kongs should pick it up and throw it at the sand bag nearby to reveal the fourth Puzzle Piece. | |||
|- | |||
|align="center"|[[File:DKCR Wigglevine Wonders Puzzle Piece 5.png|250px]] | |||
|align="center"|5 | |||
|On the platform located immediately after the fourth Puzzle Piece, the primates should use their [[Ground Pound]] move to smash the cracked piece of ground. When it breaks, they fall downwards into a Barrel Cannon that shoots them up into a hidden area in the canopy. Above the exit to this hidden area is the fifth Puzzle Piece. | |||
|- | |||
|align="center"|[[File:DKCR Wigglevine Wonders Puzzle Piece 6.png|250px]] | |||
|align="center"|6 | |||
|On the platform following the area with the letter G, the heroes should pound on a strange flower to make it spit out a Puzzle Piece. | |||
|- | |||
|align="center"|[[File:DKCR Wigglevine Wonders Puzzle Piece 7.png|250px]] | |||
|align="center"|7 | |||
|Immediately before the final area where the Kongs must ride on a Wigglevine, they should pound on a strange plant to reveal the final Puzzle Piece. | |||
|} | |||
==Names in | ==Names in other languages== | ||
{{ | {{foreign names | ||
|Jap={{ruby|森|はこ}}のはこび{{ruby|屋|や}}さん | |||
|JapR=Mori no Hakobiya-san | |||
|JapM=Courier/Smuggler of the Forest | |||
|Spa=Lío de Lianas | |Spa=Lío de Lianas | ||
|SpaM=Vine Mess}} | |SpaM=Vine Mess | ||
|FreA=Lianes Aliénantes | |||
|FreAM=Alienating Vines | |||
|Ger=Lianengehangel | |||
|GerM=Vine Layback | |||
|Ita=Liana meraviglia | |||
|ItaM=Vine Wonder | |||
}} | |||
==Trivia== | |||
*This level has the same Spanish name of ''[[Donkey Kong Country]]''{{'}}s second level, [[Ropey Rampage]]. | |||
*Wigglevine Wonders is the equivalent to [[Forest Frenzy]], as both levels have [[Donkey Kong]] and [[Diddy Kong]] hang tightly to a rope that guides them through a path of enemies while the Kongs maneuver up and down the rope to avoid them. | |||
{{DKCR}} | {{DKCR}} | ||
[[Category: | [[Category:Forests]] | ||
[[Category:Donkey Kong | [[Category:Donkey Kong Country Returns levels]] | ||
Latest revision as of 16:50, March 7, 2024
| Level | |
|---|---|
| Wigglevine Wonders | |
| |
| Level code | 5-7 |
| World | Forest |
| Game | Donkey Kong Country Returns (3D) |
| Music track | Forest Frenzy Returns |
| << Directory of levels >> | |
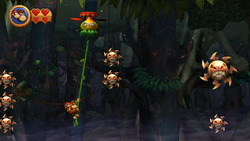
Wigglevine Wonders is the thirty-fifth level in Donkey Kong Country Returns and Donkey Kong Country Returns 3D, as well as the seventh level in the Forest world.
This level revolves around the use of Wigglevines to move across the level. Aside from Wigglevines, there are normal vines throughout the level as well. Some of these Wigglevines take the Kongs across the level while others slowly descend and disappear. On many occasions in the level, the Kongs are attacked by Tiki Zings as they ride of large gaps on Wigglevines. They must climb up and down on the creature's vines to dodge them. Other common enemies here include Tiki Goons, Tiki Dooms, and Chomps.
In the Time Attack mode of the game, a time of 1:57:00 is needed to get a gold medal, a time of 2:01:00 for silver, and a time of 2:22:00 for bronze.
Overview[edit]
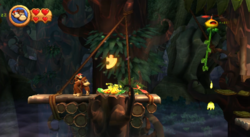
The level begins with a straight pathway surrounded by giant trees. A few plants grow on the pathway that can give the Kongs collectibles, and a mushroom with a Tiki Goon on it is also raised above the pathway. If they Kongs jump to a hidden area covered by tree branches and leaves above this mushroom, they can find a DK Barrel and even a Puzzle Piece. The only way to exit this area is by pounding on the cracked, cylinder-shaped object at the end of it, which has a Banana Coin under it. Farther ahead of the beginning area is a vine next to a Wigglevine. When the heroes grab onto this creature, it begins to pull them across a large abyss. On the way over, bananas, along with the letter K of the K-O-N-G Letters, fly towards them in a curvy path.
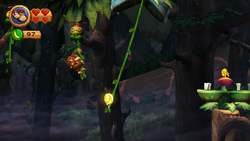
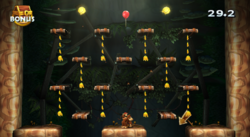
When the primates reach land again, they can find a Tiki Goon and a strange, item-bearing plants on a small platform. Another Wigglevine is near here that can help the heroes slowly descend to a lower area, where the Kongs can find themselves in an area under the canopy. If they jump up to a hidden platform at the beginning of the area, they can find two Wigglevines and a barrel leading to a Bonus Level, while under the canopy is a Tiki Doom and a strange plant with an item in it. Just ahead is a green Chomp with a spring in its mouth. The Kongs can bounce on it before getting eaten by the carnivorous plant to reach a Wigglevine. The Wigglevine carries them over a large abyss. On the way, Tiki Zings attack the heroes and bananas, along with the letter O, fly towards them. If they manage to pass all of the Tiki Zings safely, they can make it to a platform with a long vine leading to another Wigglevine after it. Additionally, the Kongs can pound on a cracked part of this platform to find a hidden Barrel Cannon that can take them on top of the Wigglevine, who rides them over a gap full of bananas, Banana Bunches, and the letter N. On the other side of the gap is the Tutorial Pig at the checkpoint.
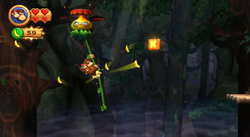
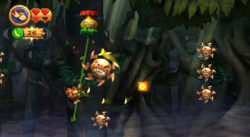
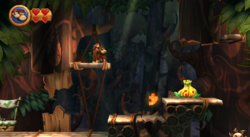
A few stair like platforms are ahead that lead to a Tiki Goon and a strange, empty plant. A hidden platform hidden behind tree leaves holds a DK Barrel. A sand bag is next to this barrel. Farther into the level is an area with some Tiki Zings between two small gaps. A Tiki Doom is on the platform right after them, while a hidden area behind the canopy is above, full of collectibles. It can be reached by using a barrel hidden under a cracked platform between two Tiki Zings. A Wigglevine is at the end of this area to help the Kongs cross another large abyss. Tiki Zings continue to attack on the way, but the letter G flies towards the primates as well. There is a platform with a Tiki Goon and a Tiki Doom on it after this, followed by a long, swinging vine. The vine helps them reach two shorter vines after it and then a small Wigglevine that can lower them under a large Tiki Zing blocking the next mushroom platform. This is followed by two more mushrooms with Tiki Zings between them. A set of three small Wigglevines are after the last mushroom, which is placed slightly above the second one. They can aid the group in reaching a long vine that appears to be the tongue of an Ape-Eating Plant. They should jump off the tongue before being consumed and then bounce on the spring in another green Chomp. The spring can help them reach a platform next to the level's final Wigglevine. This vine creature helps carry them northeast over a large gap infested with Tiki Zings. Eventually, it stops in front of a Slot Machine Barrel that makes the level complete when hit.
Enemies[edit]
| Image | Name | Count |
|---|---|---|
| Green Chomp | 3 | |

|
Ape-Eating Plant | 1 |
| Tiki Doom | 3 | |

|
Tiki Goon | 5 |

|
Tiki Zing | 54 |
| Tiki Zing (big) | 4 | |

|
Wigglevine | 10 |
Items[edit]
| Image | Name | Count |
|---|---|---|
| Banana Coin | 19 | |
| DK Barrel | 2 | |

|
Heart | 3 |
| Red Balloon | 3 |
K-O-N-G Letters[edit]
Puzzle Pieces[edit]
| Image | Number | Location |
|---|---|---|
|
1 | At the beginning of the level, the Kongs should jump up from a mushroom with a Tiki Goon on it to find an area hidden in the canopy. A Puzzle Piece is in this area in plain sight. |
|
2 | When the heroes land on the platform right after crossing the abyss with the letter K, they should pound on a strange plant to reveal a Puzzle Piece. |
|
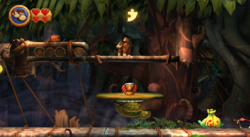
3 | Shortly after the Kongs lower themselves with the small Wigglevine right after the second Puzzle Piece, the primates should jump on a platform hidden in the canopy and climb upwards to a series of Wigglevines. They can jump across all of these creature's vines to reach a Barrel Cannon that shoots them into a Bonus Level. There, they must grab eighty bananas, two Banana Coins, and one Red Balloon placed around several small, stationary platforms within thirty seconds. If they collect everything fast enough, a Puzzle Piece appears. |
|
4 | Hidden in the canopy just after the checkpoint is a DK Barrel. The Kongs should pick it up and throw it at the sand bag nearby to reveal the fourth Puzzle Piece. |
|
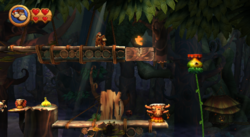
5 | On the platform located immediately after the fourth Puzzle Piece, the primates should use their Ground Pound move to smash the cracked piece of ground. When it breaks, they fall downwards into a Barrel Cannon that shoots them up into a hidden area in the canopy. Above the exit to this hidden area is the fifth Puzzle Piece. |
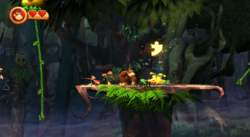
|
6 | On the platform following the area with the letter G, the heroes should pound on a strange flower to make it spit out a Puzzle Piece. |
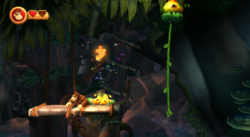
|
7 | Immediately before the final area where the Kongs must ride on a Wigglevine, they should pound on a strange plant to reveal the final Puzzle Piece. |
Names in other languages[edit]
| Language | Name | Meaning | Notes |
|---|---|---|---|
| Japanese | Mori no Hakobiya-san |
Courier/Smuggler of the Forest | |
| French (NOA) | Lianes Aliénantes[?] | Alienating Vines | |
| German | Lianengehangel[?] | Vine Layback | |
| Italian | Liana meraviglia[?] | Vine Wonder | |
| Spanish | Lío de Lianas[?] | Vine Mess |
Trivia[edit]
- This level has the same Spanish name of Donkey Kong Country's second level, Ropey Rampage.
- Wigglevine Wonders is the equivalent to Forest Frenzy, as both levels have Donkey Kong and Diddy Kong hang tightly to a rope that guides them through a path of enemies while the Kongs maneuver up and down the rope to avoid them.
