Longshot Launch: Difference between revisions
No edit summary Tag: Mobile edit |
m (Text replacement - "(\| *)Jap([RMCN\d]* *=)" to "$1Jpn$2") |
||
| Line 132: | Line 132: | ||
==Names in other languages== | ==Names in other languages== | ||
{{foreign names | {{foreign names | ||
| | |Jpn=タルたいほうの{{ruby|森|もり}} | ||
| | |JpnR=Taru Taihō no Mori | ||
| | |JpnM=Barrel Cannon Forest | ||
|Spa=Cañones al Quinto Pino | |Spa=Cañones al Quinto Pino | ||
|SpaM=Far Away Cannons | |SpaM=Far Away Cannons | ||
Latest revision as of 13:22, January 7, 2025
| Level | |
|---|---|
| Longshot Launch | |
| |
| Level code | 5-5 |
| World | Forest |
| Game | Donkey Kong Country Returns (3D/HD) |
| Music track | Tree Top Rock Returns |
| << Directory of levels >> | |
Longshot Launch is the thirty-third level in Donkey Kong Country Returns and its Nintendo 3DS and Nintendo Switch ports, as well as the fifth level in the Forest world.
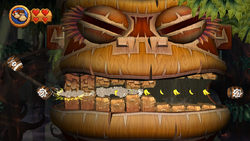
This level is set in a forest where Barrel Cannons are the only way to move from one place to another. The bulk of the level uses Barrel Cannons to reach higher and farther places. Some of these Barrel Cannons are stationary while others move erratically. Towards the middle of the level, the Kongs have to time their cannon blasts as there are now wooden Tiki statues they have to fly through. If they hit one, they bounce right off and fall to their doom. Some of the barrels fire the Kongs long distances across the forest. There is also a giant Tiki statue with moving teeth that can easily crush the monkeys. Common enemies here are Tiki Boings, Skittlers, Tiki Zings, and Flaming Tiki Buzzes.
In the Time Attack mode of the game, a time of 1:01:00 is needed to get a gold medal, a time of 1:34:00 for silver, and a time of 1:37:00 for bronze.
The level shares its music with Flutter Flyaway and the first section of Muncher Marathon.
Overview[edit]
The level begins on a flat pathway with some item-bearing plants and a DK Barrel on it. A Tiki Boing jumps around just before a slanted part of the path, which is followed by another flat area of land with some Skittlers dropping down on it. A spring attached to a Chomp foe is located in a gap just after a Tiki Boing and some plants. If the Kongs bounce on the spring before the Chomp eats them, they can reach a Barrel Cannon above it that they can use to travel upwards. With two other barrels that move horizontally at a quick pace when entered, the heroes can make it to another Barrel Cannon with a Flaming Tiki Buzz next to it. The cannon moves them horizontally to another barrel with a Flaming Tiki Buzz next to it. The letter K of the K-O-N-G Letters is right above this barrel, and an additional Barrel Cannon is placed in the air at the end of its horizontal path. This cannon moves diagonally, along with the two barrels after it. They primates must shoot barrel-to-barrel with these to be blasted towards some bouncy, red flowers growing on the sides of giant tree-like structures. The flowers are angled so that they soon bounce to the ground below, which is flat and solid. Tiki Boings and some item-containing plants are in this area. A hidden area is also below here that the primates can access to find bananas and even a Puzzle Piece.
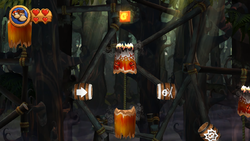
When the duo passes through this part of the level, they come under a small tunnel that is placed in a tree-like structure and then to a Barrel Cannon. The cannon shoots them to a nearby solid platform with a plant growing on it. A Barrel Cannon is in a gap next to the platform that moves back and forth horizontally. Two Tiki Zings are in the Kongs' way as they try to aim for the above platform in this barrel. They can grab the letter O and reach the higher platform safely if they shoot between the foes. Another Barrel Cannon is next to this platform. It blasts the heroes upwards while moving in a horizontal path. With two similar barrels, the Kongs can reach a stationary Barrel Cannon high up that can blast them far through the air. The primates fly at a fast speed through a large portion of the jungle, landing in a Blast Barrel that then fires them onto a solid area of land, where the Tutorial Pig and the checkpoint are located.
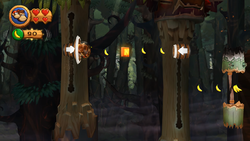
A Tiki Boing and another Barrel Cannon are after the checkpoint. The Barrel Cannon can move in a vertical path to shoot the Kongs to a Barrel Cannon ahead. A strange, wooden object is between the two cannons that they must blast through to progress. The duo must continue to shoot through vertically-moving Barrel Cannons while blasting through wooden objects to progress. Once they reach a Barrel Cannon that moves in a diagonal path, they are able to shoot between one more wooden object to land in another Barrel Cannon that can pull them into an additional cannon. Like the Barrel Cannon before and the ones following it, this Barrel Cannon moves in a diagonal path, blasting them to the next cannon while shooting them through a wooden object. The final diagonally-moving barrel can shoot them past three consecutive wooden objects so they can enter another Barrel Cannon that travels vertically again. They can use this cannon to reach some more Barrel Cannons ahead, which have bananas and other collectibles between them, including the letter N. Eventually, they can reach the last vertically-moving Barrel Cannon in the area that can fire them through another wooden structure to reach a stationary Barrel Cannon. This cannon shoots the heroes forwards at a fast speed. The Kongs travel far ahead through the jungle all the way to a Blast Barrel that fires them to a large, bouncy flower on a solid platform. The flower safely bounces them onto the solid ground, where the Tutorial Pig and another checkpoint are located.
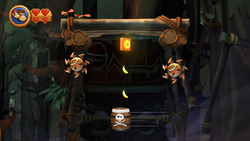
Stair-like platforms ahead of here lead to a DK Barrel. A Tiki Boing and some Skittlers run all around this area. The primates can reach a slightly lower platform after the DK Barrel with a few more Skittlers on it. Some Barrel Cannons can be viewed in the gap ahead. The stationary barrels can be used to progress over the large gap. The Barrel Cannons are automatically aimed to the cannon following it in this area, so the heroes only need to worry about shooting at the right time, as there are wooden obstacles all along the area that open and close. The Kongs must try to blast past the openings made by them when the two parts of the obstacles move apart. However, if they run into them as they close together, they lose a life and go back to the last checkpoint immediately.
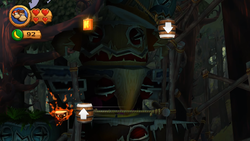
After the heroes shoot past the first three of these opening and closing obstacles, they reach a few Auto Fire Barrels that shoot them between the previous two obstacles and then into another Barrel Cannon. This cannon tilts at certain angles, changing its aim every second. The Kongs must blast out of the barrel as it aims above the wooden obstacle ahead to progress and grab the letter G. After they fall past the letter G, they land in a stationary barrel that aims them towards some Auto Fire Barrels. They must blast through these barrels as the pair of obstacles in their path open. Once they blast through Barrel Cannons away from these objects, they land in a cannon near a giant statue that takes up almost the whole screen. They must blast through its moving teeth to pass it. When they do so, they enter an Auto Fire Barrel that finally shoots them onto a solid platform with the level's Slot Machine Barrel on it.
Enemies[edit]
| Image | Name | Count |
|---|---|---|
| Flaming Tiki Buzz | 2 | |
| Orange Skittler | 7 | |
| Tiki Boing | 7 | |

|
Tiki Zing | 2 |
Items[edit]
| Image | Name | Count |
|---|---|---|
| Banana Coin | 8 | |
| DK Barrel | 2 | |

|
Heart | 1 |
K-O-N-G Letters[edit]
Puzzle Pieces[edit]
| Image | Number | Location |
|---|---|---|
|
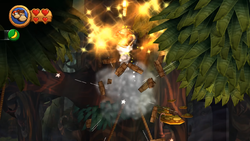
1 | The Kongs should jump towards a Banana Coin in the gap behind them at the beginning of the level to land in a hidden Barrel Cannon that shoots them to some Auto Fire Barrels. The barrels shoot them past many collectibles and also into the first Puzzle Piece. |
|
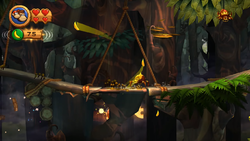
2 | A Barrel Cannon can be seen high in the air near the beginning of the level. The Kongs should bounce on a nearby Tiki Boing to reach it. The barrel can shoot them into the canopy, where a Puzzle Piece is present. |
|
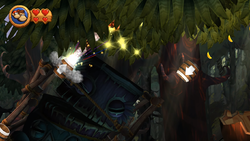
3 | When the primates shoot through the Barrel Cannons that move in a diagonal path shortly after the letter K, they should notice a Puzzle Piece hidden slightly behind the canopy. They can shoot to it to grab it. |
|
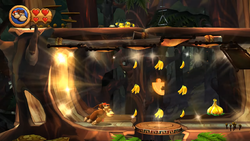
4 | After the primates finish jumping off of the first set of bouncy, red flowers, they should head left off the cliff to land on a hidden bouncy flower that can bounce them in an area with many bananas and a Puzzle Piece. |
|
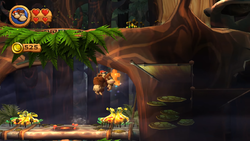
5 | The duo should pound on the round floor piece directly under the fourth Puzzle Piece to land in a hidden alcove. Two plants are in here; if they pound on the one to the right, it releases a Puzzle Piece. |
|
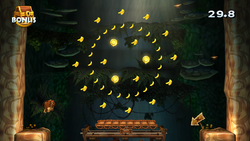
6 | Shortly after the second DK Barrel, Donkey and Diddy can see a round piece of ground on a large, solid platform. If they pound on it, they fall into a Bonus Level, where they must use a bouncy trampoline to grab three Banana Coins and ninety-nine bananas. If they collect everything here within thirty seconds, a Puzzle Piece appears. |
|
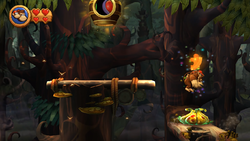
7 | The heroes should ignore the Slot Machine Barrel at the end of the level and drop down to a hidden platform following it to find a plant. If they pound on it, a Puzzle Piece is revealed. |
Names in other languages[edit]
| Language | Name | Meaning | Notes |
|---|---|---|---|
| Japanese | タルたいほうの Taru Taihō no Mori |
Barrel Cannon Forest | |
| French (NOA) | Singes-canons[?] | Cannon Monkeys | |
| German | Fetzige Fassschleuder[?] | Groovy Barrel Catapult | |
| Italian | Bosco perdifiato[?] | Breathless Woods | |
| Spanish | Cañones al Quinto Pino[?] | Far Away Cannons |
