Weighty Way: Difference between revisions
m (Text replacement - "dktable-brown" to "wikitable dk") |
m (Text replacement - "(\| *)Jap([RMCN\d]* *=)" to "$1Jpn$2") |
||
| (4 intermediate revisions by 4 users not shown) | |||
| Line 3: | Line 3: | ||
|image=[[File:WeightyWay.png|250px]] | |image=[[File:WeightyWay.png|250px]] | ||
|code=6-3 | |code=6-3 | ||
|world=[[Cliff]] | |world=[[Cliff (world)|Cliff]] | ||
|game=''[[Donkey Kong Country Returns]]'' (''[[Donkey Kong Country Returns 3D|3D]]'') | |game=''[[Donkey Kong Country Returns]]'' (''[[Donkey Kong Country Returns 3D|3D]]''/''[[Donkey Kong Country Returns HD|HD]]'') | ||
|before=[[Prehistoric Path|<<]] | |before=[[Prehistoric Path|<<]] | ||
|after=[[Boulder Roller|>>]] | |after=[[Boulder Roller|>>]] | ||
| Line 10: | Line 10: | ||
|track=Boulder Roller | |track=Boulder Roller | ||
}} | }} | ||
'''Weighty Way''' is the fortieth level in ''[[Donkey Kong Country Returns]]'' and | '''Weighty Way''' is the fortieth level in ''[[Donkey Kong Country Returns]]'' and its [[Donkey Kong Country Returns 3D|Nintendo 3DS]] and [[Donkey Kong Country Returns HD|Nintendo Switch]] ports, as well as the third level in the [[Cliff (world)|Cliff]] world. | ||
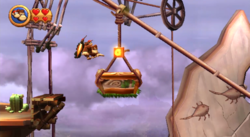
This level takes place high in the mountains, where [[Donkey Kong|Donkey]] and [[Diddy Kong]] must rely on weights to progress. Most of these weights have another weight attached to them by a rope, similar to the [[Scale Lift]]s from ''[[Super Mario Bros.]]'', so if the [[Kong]]s stand on one side of the weight, causing it to move down a bit, the other moves up. Sometimes the weights have giant rocks or enemies on them, so the primates have to destroy them first if they want to use the weights to help themselves reach a high area. However, if the Kongs stand on one side of the weights too long, it may break, causing them to fall and lose an [[Extra Life Balloon]]. Another common obstacle in this level is [[Blast Barrel]]s, which blast the Kongs higher up the mountains. Enemies in this level include [[Tiki Buzz]]es, [[Flaming Tiki Buzz]]es, and [[Skellirex]]es. | This level takes place high in the mountains, where [[Donkey Kong|Donkey]] and [[Diddy Kong]] must rely on weights to progress. Most of these weights have another weight attached to them by a rope, similar to the [[Scale Lift]]s from ''[[Super Mario Bros.]]'', so if the [[Kong]]s stand on one side of the weight, causing it to move down a bit, the other moves up. Sometimes the weights have giant rocks or enemies on them, so the primates have to destroy them first if they want to use the weights to help themselves reach a high area. However, if the Kongs stand on one side of the weights too long, it may break, causing them to fall and lose an [[Extra Life Balloon]]. Another common obstacle in this level is [[Blast Barrel]]s, which blast the Kongs higher up the mountains. Enemies in this level include [[Tiki Buzz]]es, [[Flaming Tiki Buzz]]es, and [[Skellirex]]es. | ||
| Line 17: | Line 17: | ||
The music of this stage is curiously titled "Boulder Roller" in the music gallery of the Extras menu, despite not playing in the [[Boulder Roller|later level of the same name]]. It plays in [[Precarious Plateau]] instead. | The music of this stage is curiously titled "Boulder Roller" in the music gallery of the Extras menu, despite not playing in the [[Boulder Roller|later level of the same name]]. It plays in [[Precarious Plateau]] instead. | ||
==Overview== | ==Overview== | ||
The level begins under a giant dinosaur skull next to a cactus, which holds a [[Puzzle Piece (Donkey Kong Country Returns)|Puzzle Piece]]. After a bridge with the first [[DK Barrel]] reaching over a large gap are some weights. The first set of weights have a Tiki Buzz between them, and the Kongs must make the weight on the right move up by standing on the weight to the left to be able to reach the next pair of weights. A Skellirex on the weight on the right is weighing it down, making it harder to reach the green, grassy turf hanging off of the ceiling nearby. If they defeat the foe, they can weigh down the left side to let the right side lift them to the turf, which has the letter K of the [[KONG Letters|K-O-N-G Letters]] on it. Under the turf are some delicate platforms surrounding a single Tiki Buzz that fall with any of the Kongs' mass put on them. There is an additional set of weights after this that hold a Skellirex that weighs down the weight on the right. They can defeat this and then bounce on the Tiki Buzz between the two weights to land on the left weight. When this is weighed down, the right side moves up and helps the Kongs reach a fragile platform that they can use to reach a solid platform placed after a Tiki Buzz. Ahead of a few blue plants growing here is a Barrel Cannon that shoots the primates farther up the mountain with the aid of some other Barrel Cannons. The last barrel blasts them onto solid ground in front of a cactus, where the [[Professor Chops|Tutorial Pig]] and the first checkpoint wait. | The level begins under a giant dinosaur skull next to a cactus, which holds a [[Puzzle Piece (Donkey Kong Country Returns)|Puzzle Piece]]. After a bridge with the first [[DK Barrel]] reaching over a large gap are some weights. The first set of weights have a Tiki Buzz between them, and the Kongs must make the weight on the right move up by standing on the weight to the left to be able to reach the next pair of weights. A Skellirex on the weight on the right is weighing it down, making it harder to reach the green, grassy turf hanging off of the ceiling nearby. If they defeat the foe, they can weigh down the left side to let the right side lift them to the turf, which has the letter K of the [[KONG Letters|K-O-N-G Letters]] on it. Under the turf are some delicate platforms surrounding a single Tiki Buzz that fall with any of the Kongs' mass put on them. There is an additional set of weights after this that hold a Skellirex that weighs down the weight on the right. They can defeat this and then bounce on the Tiki Buzz between the two weights to land on the left weight. When this is weighed down, the right side moves up and helps the Kongs reach a fragile platform that they can use to reach a solid platform placed after a Tiki Buzz. Ahead of a few blue plants growing here is a Barrel Cannon that shoots the primates farther up the mountain with the aid of some other Barrel Cannons. The last barrel blasts them onto solid ground in front of a cactus, where the [[Professor Chops|Tutorial Pig]] and the first checkpoint wait. | ||
| Line 124: | Line 125: | ||
==Names in other languages== | ==Names in other languages== | ||
{{foreign names | {{foreign names | ||
| | |Jpn={{ruby|上|あ}}げ{{hover|下|さ}}げゆかの{{ruby|谷|たに}} | ||
| | |JpnR=Agesage Yuka no Tani | ||
| | |JpnM=Valley of Rising and Falling Floors | ||
|Spa=Pesos Pesados | |Spa=Pesos Pesados | ||
|SpaM=Heavy Weights | |SpaM=Heavy Weights | ||
Latest revision as of 14:46, January 7, 2025
| Level | |
|---|---|
| Weighty Way | |
| |
| Level code | 6-3 |
| World | Cliff |
| Game | Donkey Kong Country Returns (3D/HD) |
| Music track | Boulder Roller |
| << Directory of levels >> ** | |
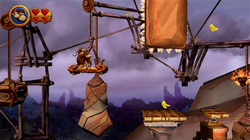
Weighty Way is the fortieth level in Donkey Kong Country Returns and its Nintendo 3DS and Nintendo Switch ports, as well as the third level in the Cliff world.
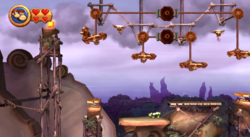
This level takes place high in the mountains, where Donkey and Diddy Kong must rely on weights to progress. Most of these weights have another weight attached to them by a rope, similar to the Scale Lifts from Super Mario Bros., so if the Kongs stand on one side of the weight, causing it to move down a bit, the other moves up. Sometimes the weights have giant rocks or enemies on them, so the primates have to destroy them first if they want to use the weights to help themselves reach a high area. However, if the Kongs stand on one side of the weights too long, it may break, causing them to fall and lose an Extra Life Balloon. Another common obstacle in this level is Blast Barrels, which blast the Kongs higher up the mountains. Enemies in this level include Tiki Buzzes, Flaming Tiki Buzzes, and Skellirexes.
In the Time Attack mode of the game, a time of 1:28:00 is needed to get a gold medal, a time of 2:00:00 for silver, and a time of 2:50:00 for bronze.
The music of this stage is curiously titled "Boulder Roller" in the music gallery of the Extras menu, despite not playing in the later level of the same name. It plays in Precarious Plateau instead.
Overview[edit]
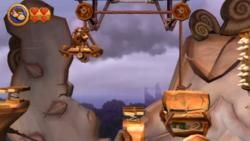
The level begins under a giant dinosaur skull next to a cactus, which holds a Puzzle Piece. After a bridge with the first DK Barrel reaching over a large gap are some weights. The first set of weights have a Tiki Buzz between them, and the Kongs must make the weight on the right move up by standing on the weight to the left to be able to reach the next pair of weights. A Skellirex on the weight on the right is weighing it down, making it harder to reach the green, grassy turf hanging off of the ceiling nearby. If they defeat the foe, they can weigh down the left side to let the right side lift them to the turf, which has the letter K of the K-O-N-G Letters on it. Under the turf are some delicate platforms surrounding a single Tiki Buzz that fall with any of the Kongs' mass put on them. There is an additional set of weights after this that hold a Skellirex that weighs down the weight on the right. They can defeat this and then bounce on the Tiki Buzz between the two weights to land on the left weight. When this is weighed down, the right side moves up and helps the Kongs reach a fragile platform that they can use to reach a solid platform placed after a Tiki Buzz. Ahead of a few blue plants growing here is a Barrel Cannon that shoots the primates farther up the mountain with the aid of some other Barrel Cannons. The last barrel blasts them onto solid ground in front of a cactus, where the Tutorial Pig and the first checkpoint wait.
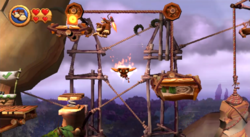
A spring platform near here bounces the Kongs to the left side of a pair of weights, which have a Flaming Tiki Buzz between them. They can weigh down the left side to make the right platform rise, allowing the heroes to reach another weight platform that pulls up a giant boulder in the background. The Kongs must lower it to reach a brittle platform under a wall of spikes, but if they stand on it too long, the giant rock may break and cause them to fall into the large abyss below. The brittle platform can only hold their weight for a few seconds, so they must quickly hop to the spring next to it that helps them bounce over a Flaming Tiki Buzz and land on another weight that pulls up a boulder in the background when stood on. If they remain on the platform too long, the rock breaks and drops the said platform, which is followed by two more brittle platforms under a spiky wall.
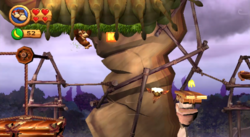
After them is another spring that can be used to bounce over a Flaming Tiki Buzz and onto the left side of a set of weights. They can weigh it down to make the platform to the right rise, enabling them to reach two small, fragile platforms with Tiki Buzzes flying around them. These platforms fall when landed on. Another weight is after them that can be lowered to make a platform with climbable turf on it move towards the heroes. They can grab onto the turf and ride along it as it automatically forces them to the right near more grassy turf that hangs off of a rocky ceiling. If they climb across this banana-covered obstacle, they can access a Barrel Cannon that shoots them farther up the mountain with the aid of other Barrel Cannons. Eventually, they are fired to a solid area of land with the Tutorial Pig and the second checkpoint.
Following a nearby Flaming Tiki Buzz is a platform connected to a slanted bar. When stood on, it slides down the long bar, taking the heroes past some Banana Bunches and to a spring. Next to the spring is a solid, wooden platform with a Skellirex, a cactus, and the second DK Barrel in the level on it. Breaking the cactus open reveals a Barrel Cannon that shoots the Kongs into the background, where there are two sets of weights above the wooden platform that they land on. Around this platform is a stone area with a cactus and a Skellirex and then another with a spring. The spring can bounce them to a high platform with another cactus on it. If the cactus is broken open, a Barrel Cannon appears. It is too high for the primates to reach, so they must rely on the nearby weights to reach it. Using a Tiki Buzz and the first set of weights, which appear to be much smaller than the second set, the Kongs can reach the left end of the area, where the letter N can be seen on a tall, thin platform.
The weight next to the letter makes the weight at the other end of the area near the Barrel Cannon rise when it is stood on. Once they make the platform rise enough, they can climb back over to the right side of the area and reach the Barrel Cannon found earlier with the help of the weight that is now higher. The Barrel Cannon shoots them onto a solid platform in the foreground, which a blue plant thrives on. Ahead of the plant is a platform attached to a giant boulder in the background. Any weight on the platform causes it to lower, while making the rock rise at the same time. The primates must jump off of this platform and land on a solid rock surface under a spiky wall before it lowers too much and falls. On this solid platform is a cactus, while ahead of it is a Barrel Cannon that, with other Barrel Cannons, shoots the primates higher up the mountain to the Tutorial Pig and the third checkpoint.
As the Kongs approach the end of the level, they can find a bridge leading to a dead end. On the bridge are bananas and a Banana Coin. To the right of the checkpoint is a spring that can bounce them onto another set of weights. They must make the lower weight to the right rise, but a giant stone block weighs it down. Between the two weights that are connected is a spring that can help them bounce back up to the left weight after they destroy the rock on the opposite one. When the stone is gone, they can make it rise and let them reach the top of a spiky platform. Following it is another weight that is lifted high into the air by a giant boulder found in the background connected to it by a rope. When they stand on it, it lowers and enables them to access an area under another spiky wall. If they remain on it too long, it can fall. Ahead of this weight is a solid area of land with a spring on the end of it.
There is a platform with grassy turf on it above here that the Kongs can grab onto by using the spring. With their weight on the platform, it slides to the right while being held up by a giant boulder and leads them above a Barrel Cannon in an abyss. As they wait in the cannon, the weight moves to the left back into its original position. When it is near this position, the Kongs can shoot out of the cannon and into a nearby Blast Barrel that can then blast them above the weight. If they manage to get on top of it, they can find the third DK Barrel and make it move to the right, where there is a small, solid platform with a Skellirex, a cactus, and bananas on it. Another pair of weights is after this, and a Barrel Cannon is under the weight on the right, which is placed next to another Barrel Cannon. The heroes can shoot onto the platform with the first Barrel Cannon and then jump to the second to shoot farther up the mountain. Here, they land on a flat section of the cliff, where there is a Skellirex, a cactus, and some blue plants. A platform with climbable turf on the end of it is nearby with the letter G on it. If they Kongs grab onto the turf or stand on the object, it begins to slide down the long bar that it is connected to, pulling them towards many bananas. When it reaches the end of the bar, the primates can find a Barrel Cannon under them that they can enter to be shot to a solid area of land with the Slot Machine Barrel.
Enemies[edit]
| Image | Name | Count |
|---|---|---|
| Flaming Tiki Buzz | 4 | |

|
Skellirex | 6 |
| Tiki Buzz | 10 |
Items[edit]
| Image | Name | Count |
|---|---|---|
| Banana Coin | 7 | |
| DK Barrel | 3 | |

|
Heart | 1 |
K-O-N-G Letters[edit]
Puzzle Pieces[edit]
| Image | Number | Location |
|---|---|---|
|
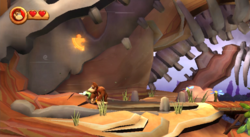
1 | The first Puzzle Piece can be found if the Kongs break open the cactus behind them at the beginning of the level. |
|
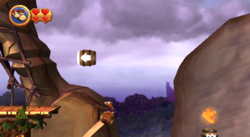
2 | Before the Kongs get into the first Barrel Cannon, they should roll-jump off the cliff and into a hidden Barrel Cannon to find the second Puzzle Piece. |
|
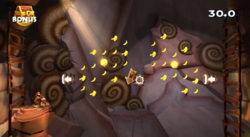
3 | Shortly after the letter O, the Kongs can find a hidden entrance to a bonus room just before the part in the level where they have to use a weight to move a platform with grassy turf on it towards them. In the bonus round, they must shoot back and forth between two Barrel Cannons, trying to collect two Banana Coins and eighty bananas. At the same time, they must avoid a Blast Barrel moving in the center of the area that can blast them out of the bonus stage. If everything is collected within thirty seconds, a Puzzle Piece appears. |
|
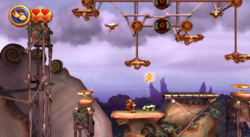
4 | After the Kongs are blasted into the background near the letter N, they should head to the left of where they land to find a cactus. Pounding it reveals a Puzzle Piece. |
|
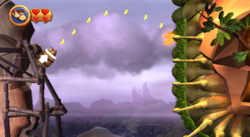
5 | To get the fifth and final Puzzle Piece, the Kongs must get onto the platform that holds the letter G and ride down the area with it. When the platform stops moving, a Barrel Cannon can be viewed nearby in the air. If they jump into it, they are shot to the Puzzle Piece next to a wall of turf. |
Names in other languages[edit]
| Language | Name | Meaning | Notes |
|---|---|---|---|
| Japanese | Agesage Yuka no Tani |
Valley of Rising and Falling Floors | |
| French (NOA) | Dance des Balances[?] | Dance of the Scales | |
| German | In der Schwebe[?] | In Floatation | |
| Italian | Punta inbilico[?] | Poised Point | |
| Spanish | Pesos Pesados[?] | Heavy Weights |
