Melty Molten Galaxy: Difference between revisions
mNo edit summary |
m (Text replacement - "(\| *)Jap([RMCN\d]* *=)" to "$1Jpn$2") |
||
| (374 intermediate revisions by more than 100 users not shown) | |||
| Line 1: | Line 1: | ||
[[ | {{Distinguish|Melty Monster Galaxy}} | ||
The '''Melty Molten Galaxy''' is a galaxy in ''[[Super Mario Galaxy]]''. It | {{course infobox | ||
|image=[[File:Melty Molten Galaxy.png|250px]] | |||
|area=[[Garden (Super Mario Galaxy)|Garden]] | |||
|stars={{icon|SMG-Mission}}{{icon|SMG-Mission}}{{icon|SMG-Mission}}{{icon|SMG-CometD}}{{icon|SMG-CometP}}{{icon|SMG-MissionS}} | |||
|unlock=Get 52 stars | |||
|missions=[[The Sinking Lava Spire]]<br>[[Through the Meteor Storm]]<br>[[Fiery Dino Piranha]]<br>[[Lava Spire Daredevil Run]]<br>[[Red-Hot Purple Coins]]<br>[[Burning Tide]] | |||
|comets=[[Daredevil Comet]]<br>[[Purple Comet]] | |||
|boss=[[Dino Piranha]] | |||
|icon=The [[#Lava Planet, Lava Spire|Lava Spire]] on the [[#Starting Planet|Starting Planet]] and the [[#Lava Tide Planet|Lava Tide Planet]] | |||
}} | |||
The '''Melty Molten Galaxy''' is a [[galaxy]] in ''[[Super Mario Galaxy]]'', and the last major galaxy to be unlocked in a dome. It is quite a large galaxy, made completely of lava and rock. It is situated between two stars, a red one and a light purple one, with large streams of plasma pouring from the former to the latter. There are many [[Launch Star]]s here, allowing Mario to traverse the massive planet. There are also some small planetoids around it. This is the only galaxy that has [[Star Chip]]s in all three missions and the comet mission. This is one of the two galaxies to feature the theme for the Speedy and Daredevil Comets in a non-comet mission, the other being the [[Dusty Dune Galaxy]]. | |||
==Planets | This galaxy's music is in the key of D {{wp|Phrygian mode|Phrygian}}, which is typically used to produce a melancholic or dark sound in compositions. | ||
=== | ==Planets/areas== | ||
{{conjecture|subsections=yes}} | |||
===Starting Planet=== | |||
[[File:SMG Melty Molten Starting.png|left|200px|thumb|Mario flying around the planet.]] | |||
{{multiple image | |||
|align=right | |||
|direction=horizontal | |||
|width=200 | |||
|image1=SMG Melty Molten Starting Planet.png | |||
|caption1=Mario lands on the {{conjectural|Starting Planet|planet}}. | |||
|image2=SMG Melty Molten Sinking Platforms.png | |||
|caption2=The sinking metal platforms. | |||
}} | |||
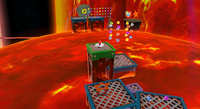
This area is a large disk of lava connected to the main planet. It contains a small volcano with two large platforms on either side of it. Both have various obstacles and enemies. Small steel platforms make a path between the two platforms. The volcano has a switch inside that makes the lava rise and release [[Star Bit]]s. In the [[The Sinking Lava Spire|first mission]], only the platforms leading to the side of the plateau on the second platform with the collapsible wall nearby will be present. In the [[Through the Meteor Storm|second mission]], all of the steel platforms are absent, since Mario has to light some torches, and [[Meteor|meteors]] bombard the planet. In the [[Fiery Dino Piranha|third mission]], the meteors have vanished, and the steel platforms leading to an indent in the plateau are present. In the [[Red-Hot Purple Coins|Purple Comet mission]], both sets of steel platforms are present. | |||
{{br}} | |||
The | ====Volcano==== | ||
[[File:SMG Melty Molten Volcano.png|thumb|left|Mario as he blasts off from the volcano]] | |||
[[File:SMG Inside Volcano.png|thumb|200px|Mario inside the volcano]] | |||
The Volcano is a volcanic area found in the Melty Molten Galaxy. There is a [[Launch Star]] above it, but if [[Mario]] drops into the volcano, there is a [[ground-pound switch]] on a rock floor at the bottom, which causes [[Star Bit]]s to appear. However, the volcano will erupt ten seconds after Mario activates the switch, so he will have to use a [[Sling Star]] at the bottom to get out. In the [[Purple Coin]] mission ([[Melty Molten Galaxy#Red Hot Purple Coins|Red Hot Purple Coins]]), there are purple coins down the sides of and inside of the Volcano Area and the lava will not rise. One coin in this mission is placed on top of a small lava ring inside the volcano, requiring a health slice to reach it, unless the player uses a good timed [[spin]] or a [[Long Jump]]. | |||
{{br}} | |||
===Small Glass and Lava Planets=== | |||
[[File:SMG Melty Molten Glass and Lava Planets.png|200px|thumb|Mario Crossing the {{conjectural|Small Glass and Lava Planets|planets}}]] | |||
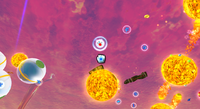
These are a collection of six small lava planets and three small glass planets, though Mario only visits this region after he leaves the Starting Planet in the [[The Sinking Lava Spire|first mission]]. Mario must navigate his way through these planets via [[Pull Star]]s avoiding solar arcs that will knock him off the Pull Star path and take him into their gravity fields causing Mario to bounce across the lava surface. In the Daredevil Run, Mario needs to wait for these arcs to pass or he will be hit and lose a life. | |||
{{br}} | |||
===Hardening Lava Planets=== | |||
[[File:SMG Melty Molten Saucer.png|200px|thumb|left|The {{conjectural|Hardening Lava Planets|planets}}.]] | |||
[[File:SMG Melty Molten Spinning Hardening Lava Planet.png|200px|thumb|The {{conjectural|Hardening Lava Planets|planets}}.]] | |||
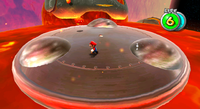
These are two hardening planets made of magma and cooled lava on their surfaces that [[Mario]] can walk on. They are home to several [[Li'l Cinder]]s. One spins and the other does not. Beside them lies a crashed [[Topman]] [[UFO]] that serves as a starting platform; another one, tipped over and scorched, is seen later, but not used as a platform. These planets have their own gravity despite being embedded in the main planet's surface, and they are visited in the first and third missions, where Mario visits the static one in the former and both in the latter. These UFOs are a reference to an earlier version of the game, where [[Topmaniac]] was originally planned to be fought in this galaxy, but the idea was eventually scrapped.<ref>Game Developer's Conference 2007 Super Mario Galaxy Trailer [https://m.youtube.com/watch?v=GJx9DSJFvTU]</ref> | |||
{{br}} | |||
=== | ===Lava Spire=== | ||
The | [[File:SMG Sinking Lava Spire.png|200px|thumb|Mario flies to the Lava Spire]] | ||
[[File:SMG Lava Spire Crystals.png|200px|thumb|left|The Lava Spire collapses]] | |||
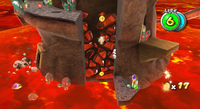
The Lava Spire is a large rock formation surrounded by other large rock formations that are intertwined. The spire is also home to many [[Li'l Cinder]]s. On top of the spire, a [[Power Star]] is incased in a large ice crystal that Mario must get to. When Mario steps on the spire, the spire begins to sink, so he must run up the spire or be engulfed by the lava. There is a shortcut at the beginning of the spire that leads Mario halfway up and gets him a [[1-Up Mushroom]]. Mario only visits this planet in the first mission after his departure from the static Hardening Lava Nodule. | |||
{{br}} | |||
===Thwomp Planet=== | |||
[[File:SMG Thwomp Planet.png|200px|thumb|left|The {{conjectural|Thwomp Planet|planet}}.]] | |||
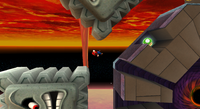
This planet is only visited in the second mission, being a large stone octagon that is covered by three [[Thwomp]]s on the second, fourth, and fifth faces, with a 1-Up Mushroom under the third Thwomp. The planet's core is a hollow cavity haunted by a [[black hole]] that Mario must avoid as he runs around the planet to a [[Launch Star]] leading to the Cooled Lava Area. The third face has a gap that Mario must jump over. However, he must also avoid the meteor that falls in, lest he gets knocked back with the risk of falling into the black hole. The sixth and seventh faces have bumps that Mario must climb over and more meteors that he must avoid, and after that is a Launch Star. If Mario attempts a [[Long Jump]] at the first face to get to the seventh, he will fall into the gap where the eighth face should be and get eaten by the black hole at the core. | |||
{{br}} | |||
===Cooled Lava Area=== | |||
[[File:SMG Melty Molten Cooled Lava Area.png|200px|thumb|left|Mario collecting Star Chips in the {{conjectural|Cooled Lava Area|area}}]] | |||
This is a small network of cooled lava platforms that is home to several [[Lava Bubble]]s. Mario must find five [[Star Chip|Yellow Star Chips]] to continue, and he only visits this planet in the second mission, in which it is constantly bombarded by meteors. | |||
{{br}} | |||
===U Tower Planet=== | |||
[[File:SMG U Tower Planet.png|200px|thumb|The {{conjectural|U Tower Planet|planet}}.]] | |||
This planet is a large U-shaped planet of cooled magma with stone built onto it to make it like a tower from a castle. The inside of the planet is made out of hot magma. On one side of the planet, there is a [[Launch Star]] that leads to the Lava Ball Rolling Planet, although a cage that [[Mario]] lands on after his departure from the Cooled Lava Area blocks it off from access. On the other side of the planet, there is a double-sided [[Bill Blaster]] that will try to stop Mario from continuing, although the [[Bullet Bill]]s it launches can be used to destroy the aforementioned cage, allowing him to continue. | |||
{{br}} | |||
===Lava Ball Rolling Planet=== | |||
{{rewrite-expand|What does touching the blue vertical bars do?|section=y}} | |||
[[File:SMG Melty Molten Lava Ball Rolling Area.png|200px|thumb|Mario in the {{conjectural|Lava Ball Rolling Area|area}}.]] | |||
This planet is made up of many lava panels, four stone panels, and a humongous tunnel of lava. The tunnel has many holes in it that Mario can fall through to his death. Mario must roll on the [[Star Ball|Rolling Ball]] to the finish line so he could receive the Power Star. There is a shortcut Mario can take to avoid the moving lava platforms: he can jump to the stone platform with a [[1-Up Mushroom]]. Jumping on this platform will cause the ball to slow down, so the player must roll the ball near the back edge of the platform, build up momentum, and jump. It saves the time of going over the moving lava platforms. | |||
{{br}} | |||
===Disk Planet=== | |||
[[File:SMG Melty Molten Disk Planet.png|200px|thumb|Mario in the {{conjectural|Disk Planet|planet}}.]] | |||
This is a small disk with a spherical lava core, being exclusive to the third mission. It has several platforms that rotate around the core that [[Mario]] must ride and collect five yellow [[Star Chip]]s to continue to the Steel Platform Planet. | |||
{{br}} | |||
===Steel Platform Planet=== | |||
[[File:Lava Planet Steel Platform Area.png|200px|thumb|left|The {{conjectural|Steel Platform Area|area}}]] | |||
This is a small area with many steel platforms and sling stars, exclusive to the mission [[Fiery Dino Piranha]]. Mario must use the [[Sling Star]]s to avoid falling into the lava and dodge the [[Lava Geyser]]s. At the end of this area, there is [[Lumalee]] that Mario could decide to buy either a [[1-Up Mushroom]] or a [[Life Mushroom]] for the battle against [[Dino Piranha]], who has taken on a fiery form. | |||
{{br}} | |||
===Fiery Dino Piranha Planet=== | |||
[[File:SMG Melty Molten Fiery Dino Piranha Planet.png|200px|thumb|left|Mario confronting the fiery Dino Piranha on its planet.]] | |||
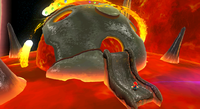
This planet is the home to the fiery [[Dino Piranha]], and is a copy of the Dino Geo Planet from the [[Good Egg Galaxy]]. Mario only visits this planet in the third mission, and first arrives on the planet as he lands on the Dino Piranha egg and cracks it, which makes a slight crack on the egg. After Mario spins the ball at the end of the tail, the Dino Piranha breaks out of his egg and tries to attack Mario. Mario is rewarded with a Power Star after he defeats Dino Piranha. | |||
{{br}} | |||
===Lava Sea Planet=== | |||
[[File:SMG Melty Molten Lava Tide Planet.png|200px|thumb|Mario in the {{conjectural|Lava Sea Planet|area}}.]] | |||
This is a small rock planet with a sea of lava around it, created by feeding a [[Hungry Luma]] 80 [[Star Bit]]s. The lava has a tide that reveals a network of paths when low, which Mario can advance through, but the lava covers up the path when it is a high tide. The grey parts of the planet will not be covered up, including where Mario lands. Mario must scuttle across the planet, avoiding high tides and Burn Bits to retrieve five [[Silver Star]]s and get the Power Star for the secret mission [[Burning Tide]]. This Hungry Luma is absent in the [[Lava Spire Daredevil Run|Daredevil Comet mission]], and even if Mario fed him beforehand, the planet will not appear in the Daredevil Comet mission either. | |||
{{br}} | |||
==Enemies== | |||
<gallery> | |||
BurnBit.png|[[Li'l Cinder]]s | |||
SMG Steam Jet.png|[[Fire geyser]]s | |||
SMG Asset Model Lava Geyser.png|[[Lava Geyser]]s | |||
SMG Screenshot Fireball.png|[[Fireball (obstacle)|Fireballs]] | |||
SMG Asset Model Boulder.png|[[Boulder|Ruby Rock]]s | |||
SMG Asset Model Meteor.png|[[Meteor]]s | |||
SMG Thwomp Artwork.png|[[Thwomp]]s | |||
SMG Asset Model Lava Bubble.png|[[Lava Bubble]]s | |||
SMG Bullet Bill.png|[[Bullet Bill]]s | |||
SMG Fire Bar screenshot.png|[[Fire Bar]]s | |||
Firey Dino Piranha.png|[[Dino Piranha]] (boss) | |||
</gallery> | |||
==Missions== | ==Missions== | ||
== | {{SMG missions table|sortable=yes | ||
|mission1={{sort|Sinking Lava Spire, The|[[The Sinking Lava Spire]]}} | |||
|image1=[[File:SMG Sinking Lava Spire.png|200px]] | |||
== | |summary1=This mission's objective is to climb the Lava Spire before it sinks. | ||
|mission2=[[Through the Meteor Storm]] | |||
|image2=[[File:SMG Melty Molten Lava Ball Rolling Area.png|200px]] | |||
|summary2=This mission's objective is to traverse the basic area in a meteor shower and then roll a [[Star Ball|Rolling Ball]] over lava platforms. | |||
|mission3=[[Fiery Dino Piranha]] | |||
|image3=[[File:SMG Melty Molten Fiery Dino Piranha Planet.png|200px]] | |||
|summary3=This mission's objective is to defeat the fiery version of [[Dino Piranha]]. | |||
|mission4=[[Lava Spire Daredevil Run]] | |||
|image4=[[File:Lava Spire Daredevil Run.png|200px]] | |||
|summary4=This mission's objective is to go through the first mission with only one health section due to the effects of the [[Prankster Comet#Daredevil Comet|Daredevil Comet]]. | |||
|mission5=[[Red-Hot Purple Coins]] | |||
|image5=[[File:Red-Hot Purple Coins.png|200px]] | |||
|summary5=This mission's objective is to collect all 100 [[Purple Coin]]s. | |||
|mission6=[[Burning Tide]] | |||
|image6=[[File:SMG Melty Molten Lava Tide Planet.png|200px]] | |||
|summary6=This mission's objective is to feed a [[Hungry Luma]] and collect the five [[Silver Star]]s. | |||
}} | |||
== | ==Gallery== | ||
<gallery> | |||
SMG Asset Sprite Preview (Melty Molten Galaxy).png|Galaxy preview banner | |||
SMG 120 Staff roll 7.png|Staff Roll image | |||
SMG 120 Staff roll 15.png|Staff Roll image | |||
SMG Concept Art 1.png| Concept art of elements featured in [[Battlerock Galaxy|Battlerock]] and Melty Molten Galaxy | |||
</gallery> | |||
=== | ==Names in other languages== | ||
{{foreign names | |||
|Jpn=ヘルプロミネンスギャラクシー | |||
|JpnR=Heru Purominensu Gyarakushī | |||
|JpnM=Hell Prominence Galaxy | |||
|SpaA=Galaxia del Paseo Infernal | |||
|SpaAM=Infernal Stroll Galaxy | |||
|SpaE=Galaxia Paseo Infernal | |||
|SpaEM=Infernal Stroll Galaxy | |||
|Ger=Feuereruptionen | |||
|GerM=Fire Eruptions | |||
|FreE=Gerbes infernales | |||
|FreEM=Infernal sheaves | |||
|FreA=Éruptions Infernales | |||
|FreAM=Infernal Eruptions | |||
|Ita=Galassia Passo Falso | |||
|ItaM=Misstep Galaxy | |||
|Kor=헬 프로미넌스 갤럭시 | |||
|KorR=Hel Peuromineonseu Gaelleoksi | |||
|KorM=Hell Prominence Galaxy | |||
|Chi=地狱喷射熔岩银河 | |||
|ChiR=Dìyù pēnshè róngyán yínhé | |||
|ChiM=Hell Erupting Lava Galaxy | |||
}} | |||
== | ==Trivia== | ||
*This is the only galaxy to feature the [[Star Ball|Rolling Ball]] but not have the word "Rolling" in its name, due to the Rolling Ball being a minor part of the galaxy, rather than the central focus. | |||
*Due to a mistake, the low-resolution model for the fiery Dino Piranha's planet still uses [[tcrf:Super Mario Galaxy/Unused Models#DinoPackunBattlePlanetLow|the design]] it had in the E3 build of ''Super Mario Galaxy''. This outdated model can be seen from the starting planet.<ref>Alex SMG (December 29, 2018). [https://www.youtube.com/watch?v=DJMR87XbSAc Melty Molten Galaxy Planet Oddity]. ''YouTube''. Retrieved October 19, 2024.</ref> | |||
== | ==References== | ||
<references/> | |||
{{ | {{SMG}} | ||
{{ | {{SMG missions}} | ||
[[Category:Galaxies]] | |||
[[Category:Volcanic areas]] | |||
[[Category: | [[Category:Super Mario Galaxy locations]] | ||
[[Category: | [[de:Feuereruptionen-Galaxie]] | ||
[[Category: | |||
[[ | |||
Latest revision as of 11:41, January 7, 2025
- Not to be confused with Melty Monster Galaxy.
| Melty Molten Galaxy | |
|---|---|
| |
| Area | Garden |
| How to unlock | Get 52 stars |
| Boss(es) | Dino Piranha |
| Comet(s) | Daredevil Comet Purple Comet |
| Mission(s) | The Sinking Lava Spire Through the Meteor Storm Fiery Dino Piranha Lava Spire Daredevil Run Red-Hot Purple Coins Burning Tide |
| Stars | |
| Galaxy icon | The Lava Spire on the Starting Planet and the Lava Tide Planet |
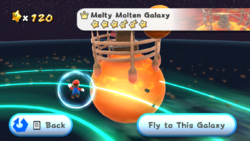
The Melty Molten Galaxy is a galaxy in Super Mario Galaxy, and the last major galaxy to be unlocked in a dome. It is quite a large galaxy, made completely of lava and rock. It is situated between two stars, a red one and a light purple one, with large streams of plasma pouring from the former to the latter. There are many Launch Stars here, allowing Mario to traverse the massive planet. There are also some small planetoids around it. This is the only galaxy that has Star Chips in all three missions and the comet mission. This is one of the two galaxies to feature the theme for the Speedy and Daredevil Comets in a non-comet mission, the other being the Dusty Dune Galaxy.
This galaxy's music is in the key of D Phrygian, which is typically used to produce a melancholic or dark sound in compositions.
Planets/areas[edit]
The titles of the following subsections are conjectural unless otherwise noted; an official name for each section's subject has not been found, so it has been given a fitting title by the editors. If an acceptable name is found for a given section, then that section should be changed to the new title.
Starting Planet[edit]
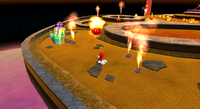
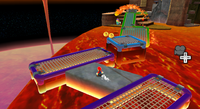
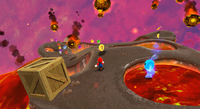
This area is a large disk of lava connected to the main planet. It contains a small volcano with two large platforms on either side of it. Both have various obstacles and enemies. Small steel platforms make a path between the two platforms. The volcano has a switch inside that makes the lava rise and release Star Bits. In the first mission, only the platforms leading to the side of the plateau on the second platform with the collapsible wall nearby will be present. In the second mission, all of the steel platforms are absent, since Mario has to light some torches, and meteors bombard the planet. In the third mission, the meteors have vanished, and the steel platforms leading to an indent in the plateau are present. In the Purple Comet mission, both sets of steel platforms are present.
Volcano[edit]
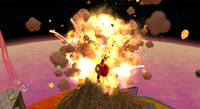
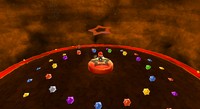
The Volcano is a volcanic area found in the Melty Molten Galaxy. There is a Launch Star above it, but if Mario drops into the volcano, there is a ground-pound switch on a rock floor at the bottom, which causes Star Bits to appear. However, the volcano will erupt ten seconds after Mario activates the switch, so he will have to use a Sling Star at the bottom to get out. In the Purple Coin mission (Red Hot Purple Coins), there are purple coins down the sides of and inside of the Volcano Area and the lava will not rise. One coin in this mission is placed on top of a small lava ring inside the volcano, requiring a health slice to reach it, unless the player uses a good timed spin or a Long Jump.
Small Glass and Lava Planets[edit]
These are a collection of six small lava planets and three small glass planets, though Mario only visits this region after he leaves the Starting Planet in the first mission. Mario must navigate his way through these planets via Pull Stars avoiding solar arcs that will knock him off the Pull Star path and take him into their gravity fields causing Mario to bounce across the lava surface. In the Daredevil Run, Mario needs to wait for these arcs to pass or he will be hit and lose a life.
Hardening Lava Planets[edit]
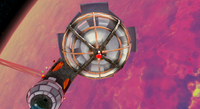
These are two hardening planets made of magma and cooled lava on their surfaces that Mario can walk on. They are home to several Li'l Cinders. One spins and the other does not. Beside them lies a crashed Topman UFO that serves as a starting platform; another one, tipped over and scorched, is seen later, but not used as a platform. These planets have their own gravity despite being embedded in the main planet's surface, and they are visited in the first and third missions, where Mario visits the static one in the former and both in the latter. These UFOs are a reference to an earlier version of the game, where Topmaniac was originally planned to be fought in this galaxy, but the idea was eventually scrapped.[1]
Lava Spire[edit]
The Lava Spire is a large rock formation surrounded by other large rock formations that are intertwined. The spire is also home to many Li'l Cinders. On top of the spire, a Power Star is incased in a large ice crystal that Mario must get to. When Mario steps on the spire, the spire begins to sink, so he must run up the spire or be engulfed by the lava. There is a shortcut at the beginning of the spire that leads Mario halfway up and gets him a 1-Up Mushroom. Mario only visits this planet in the first mission after his departure from the static Hardening Lava Nodule.
Thwomp Planet[edit]
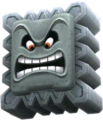
This planet is only visited in the second mission, being a large stone octagon that is covered by three Thwomps on the second, fourth, and fifth faces, with a 1-Up Mushroom under the third Thwomp. The planet's core is a hollow cavity haunted by a black hole that Mario must avoid as he runs around the planet to a Launch Star leading to the Cooled Lava Area. The third face has a gap that Mario must jump over. However, he must also avoid the meteor that falls in, lest he gets knocked back with the risk of falling into the black hole. The sixth and seventh faces have bumps that Mario must climb over and more meteors that he must avoid, and after that is a Launch Star. If Mario attempts a Long Jump at the first face to get to the seventh, he will fall into the gap where the eighth face should be and get eaten by the black hole at the core.
Cooled Lava Area[edit]
This is a small network of cooled lava platforms that is home to several Lava Bubbles. Mario must find five Yellow Star Chips to continue, and he only visits this planet in the second mission, in which it is constantly bombarded by meteors.
U Tower Planet[edit]
This planet is a large U-shaped planet of cooled magma with stone built onto it to make it like a tower from a castle. The inside of the planet is made out of hot magma. On one side of the planet, there is a Launch Star that leads to the Lava Ball Rolling Planet, although a cage that Mario lands on after his departure from the Cooled Lava Area blocks it off from access. On the other side of the planet, there is a double-sided Bill Blaster that will try to stop Mario from continuing, although the Bullet Bills it launches can be used to destroy the aforementioned cage, allowing him to continue.
Lava Ball Rolling Planet[edit]
It has been requested that this section be rewritten and expanded to include more information. Reason: What does touching the blue vertical bars do?
This planet is made up of many lava panels, four stone panels, and a humongous tunnel of lava. The tunnel has many holes in it that Mario can fall through to his death. Mario must roll on the Rolling Ball to the finish line so he could receive the Power Star. There is a shortcut Mario can take to avoid the moving lava platforms: he can jump to the stone platform with a 1-Up Mushroom. Jumping on this platform will cause the ball to slow down, so the player must roll the ball near the back edge of the platform, build up momentum, and jump. It saves the time of going over the moving lava platforms.
Disk Planet[edit]
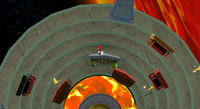
This is a small disk with a spherical lava core, being exclusive to the third mission. It has several platforms that rotate around the core that Mario must ride and collect five yellow Star Chips to continue to the Steel Platform Planet.
Steel Platform Planet[edit]
This is a small area with many steel platforms and sling stars, exclusive to the mission Fiery Dino Piranha. Mario must use the Sling Stars to avoid falling into the lava and dodge the Lava Geysers. At the end of this area, there is Lumalee that Mario could decide to buy either a 1-Up Mushroom or a Life Mushroom for the battle against Dino Piranha, who has taken on a fiery form.
Fiery Dino Piranha Planet[edit]
This planet is the home to the fiery Dino Piranha, and is a copy of the Dino Geo Planet from the Good Egg Galaxy. Mario only visits this planet in the third mission, and first arrives on the planet as he lands on the Dino Piranha egg and cracks it, which makes a slight crack on the egg. After Mario spins the ball at the end of the tail, the Dino Piranha breaks out of his egg and tries to attack Mario. Mario is rewarded with a Power Star after he defeats Dino Piranha.
Lava Sea Planet[edit]
This is a small rock planet with a sea of lava around it, created by feeding a Hungry Luma 80 Star Bits. The lava has a tide that reveals a network of paths when low, which Mario can advance through, but the lava covers up the path when it is a high tide. The grey parts of the planet will not be covered up, including where Mario lands. Mario must scuttle across the planet, avoiding high tides and Burn Bits to retrieve five Silver Stars and get the Power Star for the secret mission Burning Tide. This Hungry Luma is absent in the Daredevil Comet mission, and even if Mario fed him beforehand, the planet will not appear in the Daredevil Comet mission either.
Enemies[edit]
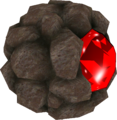
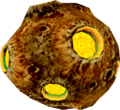
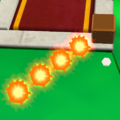
Dino Piranha (boss)
Missions[edit]
| Mission | Image | Summary
|
|---|---|---|
| The Sinking Lava Spire | 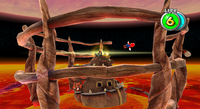 |
This mission's objective is to climb the Lava Spire before it sinks. |
| Through the Meteor Storm | 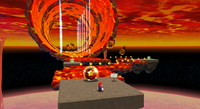 |
This mission's objective is to traverse the basic area in a meteor shower and then roll a Rolling Ball over lava platforms. |
| Fiery Dino Piranha | 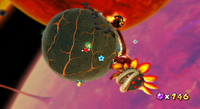 |
This mission's objective is to defeat the fiery version of Dino Piranha. |
| Lava Spire Daredevil Run | 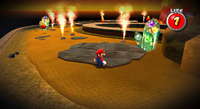 |
This mission's objective is to go through the first mission with only one health section due to the effects of the Daredevil Comet. |
| Red-Hot Purple Coins | 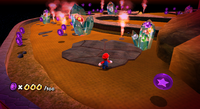 |
This mission's objective is to collect all 100 Purple Coins. |
| Burning Tide | 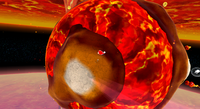 |
This mission's objective is to feed a Hungry Luma and collect the five Silver Stars. |
Gallery[edit]
Concept art of elements featured in Battlerock and Melty Molten Galaxy
Names in other languages[edit]
| Language | Name | Meaning | Notes |
|---|---|---|---|
| Japanese | ヘルプロミネンスギャラクシー[?] Heru Purominensu Gyarakushī |
Hell Prominence Galaxy | |
| Chinese | 地狱喷射熔岩银河[?] Dìyù pēnshè róngyán yínhé |
Hell Erupting Lava Galaxy | |
| French (NOA) | Éruptions Infernales[?] | Infernal Eruptions | |
| French (NOE) | Gerbes infernales[?] | Infernal sheaves | |
| German | Feuereruptionen[?] | Fire Eruptions | |
| Italian | Galassia Passo Falso[?] | Misstep Galaxy | |
| Korean | 헬 프로미넌스 갤럭시[?] Hel Peuromineonseu Gaelleoksi |
Hell Prominence Galaxy | |
| Spanish (NOA) | Galaxia del Paseo Infernal[?] | Infernal Stroll Galaxy | |
| Spanish (NOE) | Galaxia Paseo Infernal[?] | Infernal Stroll Galaxy |
Trivia[edit]
- This is the only galaxy to feature the Rolling Ball but not have the word "Rolling" in its name, due to the Rolling Ball being a minor part of the galaxy, rather than the central focus.
- Due to a mistake, the low-resolution model for the fiery Dino Piranha's planet still uses the design it had in the E3 build of Super Mario Galaxy. This outdated model can be seen from the starting planet.[2]
References[edit]
- ^ Game Developer's Conference 2007 Super Mario Galaxy Trailer [1]
- ^ Alex SMG (December 29, 2018). Melty Molten Galaxy Planet Oddity. YouTube. Retrieved October 19, 2024.

