Treacherous Track: Difference between revisions
mNo edit summary |
m (Text replacement - "(\| *)Jap([RMCN\d]* *=)" to "$1Jpn$2") |
||
| (25 intermediate revisions by 12 users not shown) | |||
| Line 1: | Line 1: | ||
{{level | {{level infobox | ||
|title=Treacherous Track | |title=Treacherous Track | ||
|image=[[File:TreacherousTrack.png|250px]] | |image=[[File:TreacherousTrack.png|250px]] | ||
|code=7 - K | |code=7-K | ||
|world=[[Factory (Donkey Kong Country Returns)|Factory]] | |world=[[Factory (Donkey Kong Country Returns)|Factory]] | ||
|game=''[[Donkey Kong Country Returns]]'' (''[[Donkey Kong Country Returns 3D|3D]]'') | |game=''[[Donkey Kong Country Returns]]'' (''[[Donkey Kong Country Returns 3D|3D]]''/''[[Donkey Kong Country Returns HD|HD]]'') | ||
|before=[[Handy Hazards|<<]] | |before=[[Handy Hazards|<<]] | ||
|after= | |after= | ||
}} | }} | ||
'''Treacherous Track''' is the fifty-fifth level in ''[[Donkey Kong Country Returns]]'' and | '''Treacherous Track''' is the fifty-fifth level in ''[[Donkey Kong Country Returns]]'' and its [[Donkey Kong Country Returns 3D|Nintendo 3DS]] and [[Donkey Kong Country Returns HD|Nintendo Switch]] ports, as well as the ninth and final level in the [[Factory (Donkey Kong Country Returns)|Factory]] world. It is also the seventh Key Temple, unlocked by buying a [[Map Key]] from [[Cranky Kong's Shop]], completing [[Handy Hazards]], and collecting all of the [[KONG Letters|K-O-N-G Letters]] in the Factory world. | ||
This | This temple features a gear that moves along a grooved path. [[Donkey Kong]] and [[Diddy Kong]] must guide along with the gear and turn all the red pendants to yellow in order to reveal a missing piece of the track. As the Kongs goes by with the rotating gear, platforms will pop out from the wall, some of which require the gear to be used to keep the Kongs safe. If Donkey Kong or Diddy Kong do not open a missing part of the track in time, the gear will fall off, and the level cannot be completed without that key item. Common enemies in this level include [[Tiki Goon]]s, [[Tiki Buzz]]es, and [[Pyrobot]]s. | ||
In the [[Donkey Kong Country Returns#Time Attack|Time Attack]] mode of the game, a time of 1:29:00 is needed to get a gold medal, a time of 1:35:00 for silver, and a time of 1:50:00 for bronze. | In the [[Donkey Kong Country Returns#Time Attack|Time Attack]] mode of the game, a time of 1:29:00 is needed to get a gold medal, a time of 1:35:00 for silver, and a time of 1:50:00 for bronze. | ||
==Overview== | ==Overview== | ||
The Kongs begin the level heading into a barrel that launches them on a platform that is connected to gears. As the gear moves, the first pendant is right after the platform moves, with the missing part of the track replaced instantly. Next comes a platform that pops out from the background with a Tiki Goon and a Pyrobot, along with a trail of | The Kongs begin the level heading into a barrel that launches them on a platform that is connected to gears. As the gear moves, the first pendant is right after the platform moves, with the missing part of the track replaced instantly. Next comes a platform that pops out from the background with a [[Tiki Goon]] and a [[Pyrobot]], along with a trail of [[banana]]s and the second pendant at the end. After Donkey Kong and Diddy Kong touch the pendant, they need to hop back onto the gear and avoid the [[Tiki Buzz]] that hovers over the second missing track location. The Kongs then need to hop over a platform with a vase on it, and then duck low as the gear passes under a spiked-coated platform base. After that, Donkey Kong and Diddy Kong need to fire out of another barrel to reach the third pendant and reach the gear while avoiding the Tiki Goon next to the pendant, along with the Pyrobot on the upper platform further down. Next, the Kongs need to climb up the three collapsible platform - each separated with Tiki Buzzes - in order to reach the fourth pendant to activate the fourth missing piece of the track. | ||
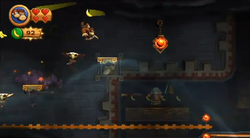
[[File:DKCR Treacherous Track 2.png|thumb|250px|left|The Kongs head towards a pendant]] | |||
The Kongs then need to drop down onto the platform holding a Pyrobot, and then wait for the gear to pass through the platform to hop back on it. Immediately after, Donkey Kong and Diddy Kong need to duck as they pass under another spiky-based platform, and then rush over the next platform onto a low-leveled platform carrying a Tiki Goon. There, they need to rush and bounce high off the tire to hit the fifth pendant before the gear reaches it. Back on the gear platform, the Kongs need to rush ahead once again after they pass another tall platform with the Tiki Buzz far out. Before the gear platform reaches a high-leveled platform, they need to drop down onto the two low collapsible platform and then back onto the platform leading into the next platform that has a Pyrobot on it. Once Donkey Kong and Diddy Kong accomplish that platform, they need to bounce high off the tire to reach the tall platform ahead, and then touch the sixth pendant between two collapsible platforms and a Tiki Buzz hovering over it. | |||
Using the last collapsible platform, the Kongs need to get over the tall platform ahead then hop back down to the gear platform and duck under a spiky-based platform. Next, the Kongs need to get over the three low-leveled collapsible platforms before the gear platform so that they can touch the seventh pendant while making it back onto the moving platform. Donkey Kong and Diddy Kong now need to leap over the platform with a vase and the two Tiki Buzzes hovering over the seventh missing track location to keep up with the gear platform to be able to duck under the next spiky-based platform. Afterwards, the Kongs need to pass the platform with the Pyrobot to the collapsible platform and over the three [[Tiki Zing]]s to get to the tall platform. They need to wait for the gear platform to come and then drop between the two platforms to the eighth pendant and over the next platform to the gear platform once again. | |||
Next, Donkey Kong and Diddy Kong need to bounce hard off the two Tiki Buzzes to get over the two spiky platforms, respectively, to get back safely onto the gear platform and duck under another spiky-based platform. Now the Kongs need to hop onto the collapsible platform and get over to the ninth pendant over a collapsible platform that has spikes below but with two Tiki Buzzes for leverage. Donkey Kong and Diddy Kong need to hop off the next collapsible platform onto a Tiki Buzz hovering over a spiky platform to reach the tenth pendant. Immediately afterwards they need to jump up two collapsible platforms to the eleventh pendant. After that, the Kongs need to bounce off the Tiki Buzz hovering over a spiky platform to a collapsible platform with the twelfth and final pendant to activate the last missing part of the track. They need to wait for the gear platform to reach the spot and hop on it to activate the pendant, then hop onto the Tiki Buzz over a spiky platform ahead to get back onto the platform. The Kongs now need to duck under another spiky-based platform and then let the gear reach the end. After that, Donkey Kong and Diddy Kong can collect the seventh [[Rare Orb]]. | |||
==Enemies== | |||
{| class="wikitable dk" | |||
!Image | |||
!Name | |||
!Count | |||
|- | |||
|align="center"|[[File:PyrobotR.png|x50px]] | |||
|align="center"|[[Pyrobot]] | |||
|5 | |||
|- | |||
|align="center"|[[File:TikiBuzz.png|x50px]] | |||
|align="center"|[[Tiki Buzz]] | |||
|17 | |||
|- | |||
|align="center"|[[File:TikiGoon.png|x50px]] | |||
|align="center"|[[Tiki Goon]] | |||
|5 | |||
|} | |||
== | ==Items== | ||
{|class="wikitable dk" width=15% | |||
|- | |||
!Image | |||
!Name | |||
!Count | |||
|- | |||
|align="center"|[[File:BananacoinDKCR.png|x50px]] | |||
|align="center"|[[Banana Coin]] | |||
|5 | |||
|- | |||
|align="center"|[[File:DKBarrelDKCR.png|x50px]] | |||
|align="center"|[[DK Barrel]] | |||
|1 | |||
|} | |||
===Puzzle Pieces=== | ===Puzzle Pieces=== | ||
[[File: | {|class="wikitable dk" width=70% | ||
|- | |||
!Image | |||
!Number | |||
!Location | |||
|- | |||
|align="center"|[[File:DKCR Treacherous Track Puzzle Piece 1.png|250px]] | |||
|align="center"|1 | |||
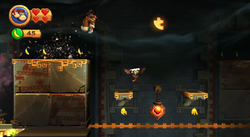
|The first [[Puzzle Piece (Donkey Kong Country series)|Puzzle Piece]] is found under the platform that is hovering above the third missing track part. Once the player switches the red pendant to yellow, they need to stay on the gear platform to grab it. | |||
|- | |||
|align="center"|[[File:DKCR Treacherous Track Puzzle Piece 2.png|250px]] | |||
|align="center"|2 | |||
|The second Puzzle Piece is on a weak platform far under the fifth missing part of the track. Player needs to hop off the gear platform and land on the platform to grab the piece. They then need to make their way over the other two weak platforms in order to reach the gear platform as it goes by. | |||
|- | |||
|align="center"|[[File:DKCR Treacherous Track Puzzle Piece 3.png|250px]] | |||
|align="center"|3 | |||
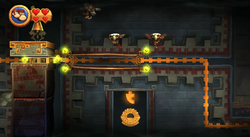
|The third Puzzle Piece is hovering high above the sixth pendant. The player needs to have the Kongs hop of the tall platform before it and bounce off of a Tiki Buzz in order to reach it. | |||
|- | |||
|align="center"|[[File:DKCR Treacherous Track Puzzle Piece 4.png|250px]] | |||
|align="center"|4 | |||
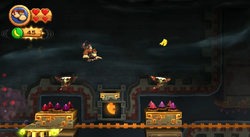
|The fourth Puzzle Piece is found above a tire below the seventh missing track part. The player needs to hop off of the gear platform onto the tire. After grabbing the Puzzle Piece, they need to bounce back onto the gear platform via tire. | |||
|- | |||
|align="center"|[[File:DKCR Treacherous Track Puzzle Piece 5.png|250px]] | |||
|align="center"|5 | |||
|The fifth and final Puzzle Piece is after the eighth missing part of the track, behind a open hole. The player needs to have the Kongs jump over a spiky platform to cause both it and the Puzzle Piece to be pushed out. DK then needs to hop back onto the gear platform just as it reaches the Puzzle Piece. | |||
|} | |||
==Names in other languages== | ==Names in other languages== | ||
{{ | {{foreign names | ||
| | |Jpn=スイッチングラビリンス | ||
| | |JpnR=Suicchingu Rabirinsu | ||
| | |JpnM=Switching Labyrinth | ||
|Spa=Trayecto Traicionero | |Spa=Trayecto Traicionero | ||
|SpaM=Treacherous Track | |SpaM=Treacherous Track | ||
| | |FreA=Lumières Ferroviaires | ||
| | |FreAM=Ferrovial Lights | ||
|Ger=Tückische Schienen | |Ger=Tückische Schienen | ||
|GerM=Treacherous Rails}} | |GerM=Treacherous Rails | ||
|Ita=Cunicolo buiopesto | |||
|ItaM=Dark Pitch Tunnel | |||
}} | |||
==Trivia== | ==Trivia== | ||
*This level is very similar to [[Trick Track Trek]], with both taking place along a platform on a track and both set up in a factory area. It is also similar to [[Tanked Up Trouble]], as both of the levels require touching objects to keep the platform moving. | |||
*This level is very similar to [[Trick Track Trek]], with both taking place along a platform on a track and both set up in a factory area. It | |||
{{DKCR}} | {{DKCR}} | ||
[[Category: | [[Category:Secret levels]] | ||
[[Category: | [[Category:Temples]] | ||
[[Category:Donkey Kong | [[Category:Donkey Kong Country Returns levels]] | ||
Latest revision as of 16:08, January 7, 2025
| Level | |
|---|---|
| Treacherous Track | |
| |
| Level code | 7-K |
| World | Factory |
| Game | Donkey Kong Country Returns (3D/HD) |
| << Directory of levels >> | |
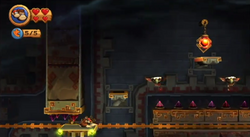
Treacherous Track is the fifty-fifth level in Donkey Kong Country Returns and its Nintendo 3DS and Nintendo Switch ports, as well as the ninth and final level in the Factory world. It is also the seventh Key Temple, unlocked by buying a Map Key from Cranky Kong's Shop, completing Handy Hazards, and collecting all of the K-O-N-G Letters in the Factory world.
This temple features a gear that moves along a grooved path. Donkey Kong and Diddy Kong must guide along with the gear and turn all the red pendants to yellow in order to reveal a missing piece of the track. As the Kongs goes by with the rotating gear, platforms will pop out from the wall, some of which require the gear to be used to keep the Kongs safe. If Donkey Kong or Diddy Kong do not open a missing part of the track in time, the gear will fall off, and the level cannot be completed without that key item. Common enemies in this level include Tiki Goons, Tiki Buzzes, and Pyrobots.
In the Time Attack mode of the game, a time of 1:29:00 is needed to get a gold medal, a time of 1:35:00 for silver, and a time of 1:50:00 for bronze.
Overview[edit]
The Kongs begin the level heading into a barrel that launches them on a platform that is connected to gears. As the gear moves, the first pendant is right after the platform moves, with the missing part of the track replaced instantly. Next comes a platform that pops out from the background with a Tiki Goon and a Pyrobot, along with a trail of bananas and the second pendant at the end. After Donkey Kong and Diddy Kong touch the pendant, they need to hop back onto the gear and avoid the Tiki Buzz that hovers over the second missing track location. The Kongs then need to hop over a platform with a vase on it, and then duck low as the gear passes under a spiked-coated platform base. After that, Donkey Kong and Diddy Kong need to fire out of another barrel to reach the third pendant and reach the gear while avoiding the Tiki Goon next to the pendant, along with the Pyrobot on the upper platform further down. Next, the Kongs need to climb up the three collapsible platform - each separated with Tiki Buzzes - in order to reach the fourth pendant to activate the fourth missing piece of the track.
The Kongs then need to drop down onto the platform holding a Pyrobot, and then wait for the gear to pass through the platform to hop back on it. Immediately after, Donkey Kong and Diddy Kong need to duck as they pass under another spiky-based platform, and then rush over the next platform onto a low-leveled platform carrying a Tiki Goon. There, they need to rush and bounce high off the tire to hit the fifth pendant before the gear reaches it. Back on the gear platform, the Kongs need to rush ahead once again after they pass another tall platform with the Tiki Buzz far out. Before the gear platform reaches a high-leveled platform, they need to drop down onto the two low collapsible platform and then back onto the platform leading into the next platform that has a Pyrobot on it. Once Donkey Kong and Diddy Kong accomplish that platform, they need to bounce high off the tire to reach the tall platform ahead, and then touch the sixth pendant between two collapsible platforms and a Tiki Buzz hovering over it.
Using the last collapsible platform, the Kongs need to get over the tall platform ahead then hop back down to the gear platform and duck under a spiky-based platform. Next, the Kongs need to get over the three low-leveled collapsible platforms before the gear platform so that they can touch the seventh pendant while making it back onto the moving platform. Donkey Kong and Diddy Kong now need to leap over the platform with a vase and the two Tiki Buzzes hovering over the seventh missing track location to keep up with the gear platform to be able to duck under the next spiky-based platform. Afterwards, the Kongs need to pass the platform with the Pyrobot to the collapsible platform and over the three Tiki Zings to get to the tall platform. They need to wait for the gear platform to come and then drop between the two platforms to the eighth pendant and over the next platform to the gear platform once again.
Next, Donkey Kong and Diddy Kong need to bounce hard off the two Tiki Buzzes to get over the two spiky platforms, respectively, to get back safely onto the gear platform and duck under another spiky-based platform. Now the Kongs need to hop onto the collapsible platform and get over to the ninth pendant over a collapsible platform that has spikes below but with two Tiki Buzzes for leverage. Donkey Kong and Diddy Kong need to hop off the next collapsible platform onto a Tiki Buzz hovering over a spiky platform to reach the tenth pendant. Immediately afterwards they need to jump up two collapsible platforms to the eleventh pendant. After that, the Kongs need to bounce off the Tiki Buzz hovering over a spiky platform to a collapsible platform with the twelfth and final pendant to activate the last missing part of the track. They need to wait for the gear platform to reach the spot and hop on it to activate the pendant, then hop onto the Tiki Buzz over a spiky platform ahead to get back onto the platform. The Kongs now need to duck under another spiky-based platform and then let the gear reach the end. After that, Donkey Kong and Diddy Kong can collect the seventh Rare Orb.
Enemies[edit]
| Image | Name | Count |
|---|---|---|
| Pyrobot | 5 | |

|
Tiki Buzz | 17 |
| Tiki Goon | 5 |
Items[edit]
| Image | Name | Count |
|---|---|---|
| Banana Coin | 5 | |
| DK Barrel | 1 |
Puzzle Pieces[edit]
| Image | Number | Location |
|---|---|---|
|
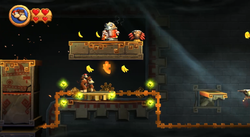
1 | The first Puzzle Piece is found under the platform that is hovering above the third missing track part. Once the player switches the red pendant to yellow, they need to stay on the gear platform to grab it. |
|
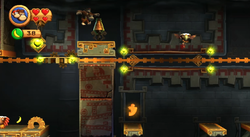
2 | The second Puzzle Piece is on a weak platform far under the fifth missing part of the track. Player needs to hop off the gear platform and land on the platform to grab the piece. They then need to make their way over the other two weak platforms in order to reach the gear platform as it goes by. |
|
3 | The third Puzzle Piece is hovering high above the sixth pendant. The player needs to have the Kongs hop of the tall platform before it and bounce off of a Tiki Buzz in order to reach it. |
|
4 | The fourth Puzzle Piece is found above a tire below the seventh missing track part. The player needs to hop off of the gear platform onto the tire. After grabbing the Puzzle Piece, they need to bounce back onto the gear platform via tire. |
|
5 | The fifth and final Puzzle Piece is after the eighth missing part of the track, behind a open hole. The player needs to have the Kongs jump over a spiky platform to cause both it and the Puzzle Piece to be pushed out. DK then needs to hop back onto the gear platform just as it reaches the Puzzle Piece. |
Names in other languages[edit]
| Language | Name | Meaning | Notes |
|---|---|---|---|
| Japanese | スイッチングラビリンス[?] Suicchingu Rabirinsu |
Switching Labyrinth | |
| French (NOA) | Lumières Ferroviaires[?] | Ferrovial Lights | |
| German | Tückische Schienen[?] | Treacherous Rails | |
| Italian | Cunicolo buiopesto[?] | Dark Pitch Tunnel | |
| Spanish | Trayecto Traicionero[?] | Treacherous Track |
Trivia[edit]
- This level is very similar to Trick Track Trek, with both taking place along a platform on a track and both set up in a factory area. It is also similar to Tanked Up Trouble, as both of the levels require touching objects to keep the platform moving.
