New Super Mario Bros. U: Difference between revisions
m (Text replacement - "([Cc])olor-link" to "$1olor link") |
|||
| Line 1: | Line 1: | ||
{{ | {{italic title}} | ||
{{ | {{about|the 2012 Wii U game|the Nintendo Switch port of this game|[[New Super Mario Bros. U Deluxe]]|the [[microgame]] from [[WarioWare: Get It Together!]]|[[New Super Mario Bros. U (microgame)]]}} | ||
| | {{game infobox | ||
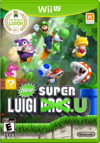
|image=[[File:NSMBU boxcover.png|250px]]<br> | |image=[[File:NSMBU boxcover.png|250px]]<br>North American box cover | ||
|developer=[[Nintendo Entertainment Analysis and Development|Nintendo EAD]] | |developer=[[Nintendo Entertainment Analysis and Development|Nintendo EAD]] | ||
|publisher=Nintendo | |publisher=[[Nintendo]] | ||
| | |release={{flag list|USA|November 18, 2012<ref>{{cite|deadlink=y|archive=web.archive.org/web/20120916233646/http://www.nintendo.com/games/detail/hf_6AALqLd22OOdNFfAmJVGEfQ7pTpke|title=''New Super Mario Bros. U'' – Game Info|publisher=Nintendo of America|language=en-us|accessdate=July 26, 2024}}</ref>|Europe|November 30, 2012|Australia|November 30, 2012<ref>[https://www.nintendo.com.au/index.php?action=news Nintendo.com.au]</ref>{{dead link}}|Japan|December 8, 2012}} | ||
|genre=Platformer | |languages={{languages|en_us=y|en_gb=y|es_es=y|es_latam=y|fr_fr=y|fr_ca=y|de=y|it=y|nl=y|ru=y|pt_pt=y|jp=y}} | ||
|modes=Single-player<br>Multiplayer | |genre=[[Genre#Platform|Platformer]] | ||
|ratings={{ratings|esrb=e|cero=A|pegi=3}} | |modes=Single-player<br>Multiplayer | ||
|ratings={{ratings|esrb=e|cero=A|pegi=3|usk=0|acb=g|classind=L|fpb=pg}} | |||
|platforms=[[Wii U]] | |platforms=[[Wii U]] | ||
| | |format={{format|wiiu=1|wiiudl=1}} | ||
|input={{input|wiiu=1|wiiusideways=1}} | |input={{input|wiiu=1|wiiusideways=1|wiiupro=1}} | ||
|serials={{flag list|Japan|WUP-P-ARPJ|USA|WUP-P-ARPE|Europe|WUP-P-ARPP}} | |||
}} | }} | ||
'''''New Super Mario Bros. U''''' is | '''''New Super Mario Bros. U''''' is a 2012 side-scrolling {{wp|2.5D}} [[Genre#Platform|platforming]] game, and a launch title for the [[Wii U]]. It is the sixteenth entry in the [[Super Mario (series)|''Super Mario'' series]]<ref name=encyclopedia>{{cite|author=Sakai, Kazuya (Ambit), kikai, Akinori Sao, Junko Fukuda, Kunio Takayama, and Ko Nakahara (Shogakukan), editors|title=『[[Super Mario Bros. Encyclopedia|スーパーマリオブラザーズ百科: 任天堂公式ガイドブック]]』|language=ja|location=Tokyo|publisher=Shogakukan|date=2015|page=11–13|isbn=978-4-09-106569-8}}</ref><ref>{{cite|author=[[Nintendo|Nintendo Co., Ltd]]|title=HISTORY → Series → ''Super Mario''|url=www.nintendo.com/jp/character/mario/en/history/index.html|publisher=Mario Portal|accessdate=6 Nov. 2024|archive=web.archive.org/web/20241003115239/https://www.nintendo.com/jp/character/mario/en/history/index.html}}</ref> and the fourth ''New Super Mario Bros.'' game. As a sequel to ''[[New Super Mario Bros. Wii]]'', the game is a follow-up to ''[[New Super Mario Bros. 2]]''. It is the first ''Super Mario'' series game to be released as a launch title for a home console since ''[[Super Mario 64]]''. An expansion pack for this game was later released in mid-2013, titled ''[[New Super Luigi U]]''. | ||
Based upon the ''[[New Super Mario Bros. Mii]]'' tech demo shown at {{wp|E3 2011}}, the game uses new, more detailed background styles and models and introduces the Flying Squirrel power-up, acquired by [[Mario]] and his friends from an item called the [[Super Acorn]], as well as utilizing the [[Wii U#Wii U GamePad|Wii U GamePad]] in [[Boost Mode]]. | |||
The game was originally purchasable at the [[Nintendo eShop#Wii U|Nintendo eShop]], requiring 2301.7 MB (about 2.25 GB) to be downloaded, but with the retail release of ''[[New Super Mario Bros. U + New Super Luigi U]]'', it is no longer possible to purchase ''New Super Mario Bros. U'' as a standalone game in regions outside of Japan. | |||
[[Reissue#Ports|A port]] titled ''[[New Super Mario Bros. U Deluxe]]'' was released for the [[Nintendo Switch]] in January 2019, and once again contains both ''New Super Mario Bros. U'' and ''New Super Luigi U''. | |||
==Story== | ==Story== | ||
[[Mario]], [[Luigi]], [[Blue Toad | [[File:NSMBU Intro 1.png|thumb|left|upright=1.4|The Mario Bros. and Toads about to be hit by the [[Mecha Hand]].]] | ||
[[Mario]], [[Luigi]], [[Yellow Toad and Blue Toad|Yellow Toad, and Blue Toad]] are with [[Princess Peach]] in [[Peach's Castle]] dining together. [[Bowser]] and the [[Koopalings]] suddenly arrive in their [[Airship]]s, with the former sporting a [[Mecha Hand]] that smashes and launches the brothers and the Toads away from the castle. Mario and his friends crash into the [[Acorn Tree]], launching [[Super Acorn]]s through the area. They then tumble out of the tree, passing by a [[Bubble Baby Yoshi]] and [[Balloon Baby Yoshi]], and they then look into the horizon to see Bowser beginning a siege on Princess Peach's Castle, setting the Mario Bros. and the Toads to go on a new adventure and to save Princess Peach. | |||
As the game progresses, the view occasionally shifts to Peach's Castle, showing the flags being replaced by Bowser's flags (after [[Tilted Tunnel]]), and the castle being surrounded by a thin tornado-like cloud that is made thicker by [[Kamek|Magikoopa]]'s magic (after [[Stoneslide Tower]]), entirely obscuring the castle (after [[Giant Skewer Tower]] or [[Freezing-Rain Tower]]). Mario, Luigi, Yellow Toad, and Blue Toad also encounter Bowser's forces, including the Koopalings, [[Boom Boom]], Magikoopa, and [[Bowser Jr.]], who occasionally attacks the heroes with his father's airship. All of them are defeated, and Bowser Jr. causes the airship to crash after making the mechanical hand punch through it. After reaching Peach's Castle and defeating Bowser, the group moves onward, but Bowser Jr. appears and urges Magikoopa to spread his magic across the area. After heading to the castle exterior, Mario and the others see Peach in a tower. Before they can save her, she is locked inside the tower and Bowser appears, now at a giant size, alongside Bowser Jr. Eventually, Bowser is defeated and Bowser Jr., embarrassed, flees. The character that defeated Bowser gets to Peach and bows down to her, and is then kissed by her, to their shock and delight, as the clouds surrounding the castle disappear, restoring it to its former state. | |||
Outside the castle, the Koopalings and Bowser Jr. are fleeing on the airship as Bowser, who has returned to his normal size, recovers. Noticing the escaping airship, he climbs up onto one of the castle towers and leaps onto the ship, but his weight causes it to plummet into a hill nearby; they then fly away hanging onto Bowser Jr.'s [[Junior Clown Car]] while Mario and Blue Toad watch. They then turn back to the others, who are celebrating their victory, with Mario delivering a final victory pose. | |||
==Gameplay== | |||
===Overview=== | |||
[[File:NSMBU Flying Squirrel Gameplay.png|left|thumb|upright=1.1|Mario in his [[Flying Squirrel Mario|Flying Squirrel]] suit, in [[Acorn Plains Way|the first level of Acorn Plains]].]] | |||
''New Super Mario Bros. U'' is a platform game which plays very similarly to that of past ''[[New Super Mario Bros. (disambiguation)|New Super Mario Bros.]]'' games, especially ''[[New Super Mario Bros. Wii]]'', with the return of the 4-player multiplayer functioning identically to the [[Wii]] game, while most of the elements and design found in the game make heavy reference to ''[[Super Mario World]]''. Many other gameplay elements from the Wii game, such as the [[Super Guide]], [[Enemy Course]]s, and the bubble function, also return. In certain modes, players can play as their [[Mii]]s, including the first player, who can also choose whoever to play as. Power-ups, like the [[Fire Flower]], [[Ice Flower]], [[Penguin Suit]], [[Propeller Mushroom]], and the [[Mini Mushroom]] return. The game also features a new power-up, the [[Super Acorn]], which gives Mario and co. a [[Flying Squirrel Mario|Flying Squirrel form]], which lets them glide and grab onto walls. | |||
''New Super Mario Bros. U'' features two main controller options: single-player using the [[Wii U#Wii U GamePad|Wii U GamePad]], and single-player or multiplayer using [[Wii#Wii Remote|Wii Remotes]] and/or [[Wii U#Wii U Pro Controller|Wii U Pro Controllers]]; the player can switch controllers at any point between the GamePad and a Wii Remote or Pro Controller by pausing the game, either in a level or on the world map, and selecting the "Change Controller" option. The game supports up to five simultaneous players, with up to four being able to play as the characters with a Wii Remote or Wii U Pro Controller, and are able to drop in and out at any point while in a stage by pressing {{button|wiiu|Plus}} on the GamePad and selecting a character, or on the map by pausing and selecting "Number of Players". Another player is able to use the Wii U GamePad in what is known as [[Boost Mode]]. In Boost Mode, the GamePad player can assist the other players by placing blocks for them to stand on and stunning enemies. Boost Mode can be used at any point when playing with one of the other controllers; when playing with just the GamePad, it supports {{wp|Off-TV Play}}. | |||
After clearing Layer-Cake Desert-1, an enemy called [[Nabbit]] appears and steals an item from a [[Toad House]] connecting that level, heading back to Acorn Plains-1. When the player enters a stage with Nabbit, the objective is to race him to the goal, trying to catch him before he can get away. If the player succeeds in catching Nabbit, they are rewarded with a [[P-Acorn]]. Replacing the Toad saving in ''New Super Mario Bros. Wii'', Nabbit only appears in one stage in the first seven worlds. | |||
The first update to the game added [[Miiverse]] support. With Miiverse functionality enabled, players can read each others' posts on the world map by viewing the map; when not viewing the map a Miiverse post is indicated by a red balloon, generally near a stage, and can be hidden by pressing {{button|wiiu|A}}; when on the World Map while using Boost Mode, the GamePad player can scroll across the map on the GamePad screen and view Miiverse posts. At certain times throughout gameplay, such as when the player dies several times or reaches the end of a course in a specific way (collecting all the Star Coins, clearing in a certain amount of time, clearing without taking damage, etc.), they are given a prompt to post a message to Miiverse. Players can also see Miiverse posts after they die in a stage. Miiverse settings can be changed at any point on the world map by selecting the pencil and envelope icon on the bottom right of the pause menu. | |||
The sound is in stereo, with no support for 5.1 surround. | |||
===Controls=== | |||
[[File:NSMBU Boost Mode 3.png|thumb|upright=1.4|Perspective of gameplay, featuring four players controlling the characters with Wii Remotes while a fifth player uses the GamePad in Boost Mode.]] | |||
Like ''New Super Mario Bros. Wii'', the Wii Remote is the primary controller for the game, allowing players to shake the controller to perform a [[Spin Jump]], dismount [[Yoshi]], and pick up objects. However, players can also play the game normally with the Wii U GamePad (single-player only) or the Wii U Pro Controller (after the 1.3.0 update). In the case of the Wii U Pro Controller, actions that require motion control on the Wii Remote and Wii U GamePad are replaced with button pressing, as the Wii U Pro Controller lacks motion controls. | |||
Unlike ''New Super Mario Bros. Wii'', this game lacks [[Wii#Nunchuk|Nunchuk]] support. | |||
====Stages==== | |||
{|class="wikitable"style="width:60%;text-align:center" | |||
!width=40%|Action(s) | |||
!Wii U GamePad | |||
!Wii U Pro Controller | |||
!Wii Remote | |||
|- | |||
|Move, swim (Baby Yoshi) | |||
|colspan="2"|{{button|wii|CCStickL}} / {{button|wiiu|Pad}} | |||
|{{button|wii|Pad}} | |||
|- | |||
|Jump, swim, glide (hold), wall jump, Flutter Jump (Yoshi; hold), double/triple jump (press right upon landing) | |||
|colspan="2"|Option 1: {{button|wiiu|B}} / {{button|wiiu|A}}<br>Option 2: {{button|wiiu|X}} / {{button|wiiu|A}} | |||
|{{button|wii|2}} | |||
|- | |||
|Run, carry objects (hold); shoot fireballs/iceballs, extend tongue (Yoshi) | |||
|colspan="2"|Option 1: {{button|wiiu|Y}} / {{button|wiiu|X}}<br>Option 2: {{button|wiiu|Y}} / {{button|wiiu|B}} | |||
|{{button|wii|1}} | |||
|- | |||
|Ground Pound (normal, simultaneous*) | |||
|colspan="2"|Jump + {{button|wii|CCStickL}} (down) / {{button|wiiu|Paddown}} | |||
|{{button|wii|2}} + {{button|wii|Paddown}} | |||
|- | |||
|Crouch, slide (on slopes) | |||
|colspan="2"|{{button|wii|CCStickL}} (down) / {{button|wiiu|Paddown}} | |||
|{{button|wii|Paddown}} | |||
|- | |||
|Climb (on fences, ladders, poles) | |||
|colspan="2"|{{button|wii|CCStickL}} (up) / {{button|wiiu|Padup}} | |||
|{{button|wii|Padup}} | |||
|- | |||
|Bubble* | |||
|N/A | |||
|{{button|wiiu|Minus}} | |||
|{{button|wii|A}} | |||
|- | |||
|Enter door/[[Warp Pipe]] | |||
|colspan="2"|Door: {{button|wii|CCStickL}} (up) / {{button|wiiu|padup}}<br>Pipe: {{button|wii|CCStickL}} / {{button|wiiu|pad}} (in direction of entrance) | |||
|Door: {{button|wii|padup}}<br>Pipe: {{button|wii|pad}} (in direction of entrance) | |||
|- | |||
|Spin Jump, Baby Yoshi abilities, dismount Yoshi, Flying Squirrel jump, spin underwater (Baby Yoshi) | |||
|{{button|wiiu|GamePad}} (shake) / {{button|wiiu|L}} / {{button|wiiu|R}} / {{button|wiiu|ZL}} / {{button|wiiu|ZR}} | |||
|{{button|wiiu|L}} / {{button|wiiu|R}} | |||
|{{button|wii|Wiimote}} (shake) | |||
|- | |||
|Grab other players*/frozen enemies | |||
|Run + {{button|wiiu|GamePad}} (shake) / {{button|wiiu|L}} / {{button|wiiu|R}} / {{button|wiiu|ZL}} / {{button|wiiu|ZR}}<br>(release run button to throw) | |||
|Run + {{button|wiiu|L}} / {{button|wiiu|R}}<br>(release run button to throw) | |||
|{{button|wii|1}} + {{button|wii|Wiimote}} (shake)<br>(release {{button|wii|1}} to throw) | |||
|- | |||
|Tilt [[Tilt Lift]]s | |||
|Tilt GamePad | |||
|Alternate between pressing {{button|wiiu|ZL}} and {{button|wiiu|ZR}} | |||
|Tilt Wii Remote | |||
|- | |||
|Pause | |||
|colspan="3"|{{button|wiiu|Plus}} | |||
|- | |||
|Boost Mode* | |||
|{{button|wiiu|touchscreen}} | |||
|colspan="2"|N/A | |||
|} | |||
<small><nowiki>*</nowiki> Multiplayer only.</small> | |||
====Map/menus==== | |||
{|class="wikitable"style="width:60%;text-align:center" | |||
!width=40%|Action(s) | |||
!width=30%|Wii U GamePad/Pro Controller | |||
!Wii Remote | |||
|- | |||
|Move, select option | |||
|{{button|wii|CCStickL}} / {{button|wiiu|pad}} | |||
|{{button|wii|pad}} | |||
|- | |||
|Open inventory | |||
|{{button|wiiu|B}} | |||
|{{button|wii|1}} | |||
|- | |||
|View map | |||
|{{button|wiiu|L}} | |||
|{{button|wii|A}} | |||
|- | |||
|Pause | |||
|colspan="2"|{{button|wiiu|Plus}} | |||
|- | |||
|Zoom in/out (map view) | |||
|colspan="2"|{{button|wiiu|Plus}} / {{button|wiiu|Minus}} | |||
|- | |||
|Confirm, hide/show Miiverse posts (map view) | |||
|{{button|wiiu|A}} | |||
|{{button|wii|2}} | |||
|- | |||
|Back | |||
|{{button|wiiu|B}} | |||
|{{button|wii|1}} | |||
|} | |||
===Inventory=== | |||
[[File:NSMBU Inventory.png|left|thumb|400px|The inventory.]] | |||
The world map inventory, seen in ''[[Super Mario Bros. 3]]'' and ''[[New Super Mario Bros. Wii]]'', returns in ''New Super Mario Bros. U'', allowing players to store items that can be used before entering a level. Unlike the other inventories, this is limited to ten items only. If more items come in, the player will have to discard items from the inventory until they have ten. Players can gain items into their inventory by playing [[Toad House|Red Toad House]] minigames, collecting items on the world map itself, completing an [[Enemy Course]], catching [[Nabbit]], or finishing a level with the final two digits of the time matching. | |||
== | ===Extra modes=== | ||
[[File: | [[File:Time Attack Trial NSMBU.png|thumb|upright=1.4|Small Mario playing through a Time Attack stage in Challenge Mode.]] | ||
In addition to the main adventure, ''New Super Mario Bros. U'' features three additional bonus modes to play. The first of these is [[Challenge Mode (New Super Mario Bros. U)|Challenge Mode]], in which players must complete a given objective on a given stage, some within a specific time limit. In most cases, after the player completes a challenge, they are ranked with a medal depending on how well they did. There are five types of challenges: Time Attack, Coin Collection, 1-Up Rally, Special, and Boost Mode. | |||
Another mode is [[Boost Rush|Boost Rush Mode]], where players have to reach the end of two or three selected stages in the lowest possible time, similar to the [[Coin Rush]] mode featured in ''[[New Super Mario Bros. 2]]''. Unlike Coin Rush, the stages scroll automatically, meaning the player has to keep up with the stage, which speeds up every time they collect coins. | |||
[[ | [[Coin Battle]] from ''New Super Mario Bros. Wii'' is also available. However, in this version of the mode, players can be grouped into teams against each other or play free-for-all, rather than just the latter. The Wii U GamePad can also be used for [[Coin Edit]], in which the GamePad is used to customize the coin placement in the [[Coin Courses|Coin Battle-exclusive courses]]. | ||
Unlike in the main game, player 1 can choose any character in these modes. | |||
==== | ==Worlds== | ||
{{NSMBU map}} | |||
Unlike the previous ''New Super Mario Bros.'' titles, where worlds are separated like in ''[[Super Mario Bros. 3]]'', ''New Super Mario Bros. U'' has a contiguous world map, similar to ''[[Super Mario World]]''. Like ''New Super Mario Bros. Wii'', the worlds include [[Toad House]]s and [[Enemy Course]]s, though only red and green Toad Houses return. Also returning are [[Tower]]s, [[Castle]]s, and [[Ghost House]]-related levels. Likely as a result of the redesigned world map, [[Warp Cannon]]s are not present, with [[Goal Pole (secret)|secret exits]] that unlocked Warp Cannons in previous titles now unlocking hidden levels. Completing them unlocks a shortcut to a later world, similar in vein to the [[Star World]] levels from ''Super Mario World''. There are [[Pipe Cannon]]s that send the player characters back to previously-cleared worlds, replacing the world selection option from previous ''New Super Mario Bros.'' games. The music changes instruments throughout the world map similar to [[Yoshi's Island (location)|Yoshi's Island]]. | |||
This is the first 2D ''Super Mario'' game to use completely unique names for each of its levels, and the second after ''Super Mario World'' to name its greater areas in-game. Both games use food and beverages as the theme for their world names. | |||
{{br}} | {{br}} | ||
<center> | |||
{|width=80% class="wikitable"style="text-align:center" | |||
!colspan="6"align="center"style="background:red;color:white"|<big>Worlds</big> | |||
|- | |||
!colspan=2 width=25% style="background:#DAF7A6"|{{Color link|black|Acorn Plains}} | |||
!colspan=2 width=25% style="background:LemonChiffon"|{{Color link|Black|Layer-Cake Desert}} | |||
!colspan=2 width=25% style="background:skyblue"|{{Color link|Black|Sparkling Waters}} | |||
|- | |||
|colspan=2|[[File:NSMBU Acorn Plains Map.png|250px]] | |||
|colspan="2"|[[File:Layer Cake Desert.png|250px]] | |||
|colspan="2"|[[File:NSMBU Sparkling Waters World Map Screenshot.png|250px]] | |||
|- | |||
|colspan=2 align=center|A grassy world with plenty of shrubs, slanted mountains, and the [[Acorn Tree]]. This world resembles many other first worlds in the ''Super Mario'' series. | |||
|colspan=2 align=center|A desert dotted with melting ice creams, giant cakes, and a sea of sand with [[Stone-Eye|Moai-like statues]]. | |||
|colspan=2 align=center|A chain of tropical islands and sea stacks, similar to [[World 4 (New Super Mario Bros. Wii)|World 4]] from ''[[New Super Mario Bros. Wii]]''. This world can be entirely skipped for Frosted Glacier. | |||
|-bgcolor=#FF7733 | |||
!width=2%|# | |||
!width="5%"|Level | |||
!width=2%|# | |||
!width="5%"|Level | |||
!width=2%|# | |||
!width="5%"|Level | |||
|- | |||
|1 | |||
|[[Acorn Plains Way]] (Grass) | |||
|1 | |||
|[[Stone-Eye Zone]] (Desert) | |||
|1 | |||
|[[Waterspout Beach]] (Beach) | |||
|- | |||
|2 | |||
|[[Tilted Tunnel]] (Underground) | |||
|2 | |||
|[[Perilous Pokey Cave]] (Desert/Underground) | |||
|2 | |||
|[[Tropical Refresher]] (Underwater) | |||
|- | |||
|[[File:NSMBW Tower Icon.png|x18px|Tower|link=Tower]] | |||
|[[Crushing-Cogs Tower]] (Tower) | |||
|3 | |||
|[[Fire Snake Cavern]] (Desert/Underground) | |||
|[[File:NSMBW Tower Icon.png|x18px|Tower|link=Tower]] | |||
|[[Giant Skewer Tower]] (Tower) | |||
|- | |||
|3 | |||
|[[Yoshi Hill]] (Grass) | |||
|[[File:NSMBW Tower Icon.png|x18px|Tower|link=Tower]] | |||
|[[Stoneslide Tower]] (Tower/Desert) | |||
|[[File:Ghost Icon.png|x18px|Ghost House|link=Ghost House]] | |||
|[[Haunted Shipwreck]] (Shipwreck) | |||
|- | |||
|4 | |||
|[[Mushroom Heights]] (Sky) | |||
|4 | |||
|[[Spike's Spouting Sands]] (Desert) | |||
|3 | |||
|[[Above the Cheep Cheep Seas]] (Beach/Sky) | |||
|- | |||
|5 | |||
|[[Rise of the Piranha Plants]] (Grass) | |||
|5 | |||
|[[Dry Desert Mushrooms]] (Desert/Sky) | |||
|4 | |||
|[[Urchin Shoals]] (Beach) | |||
|- | |||
|[[File:Castle Icon.png|x18px|Castle|link=Castle]] | |||
|[[Lemmy's Swingback Castle]] (Castle) | |||
|6 | |||
|[[Blooming Lakitus]] (Desert) | |||
|5 | |||
|[[Dragoneel's Undersea Grotto]] (Underwater) | |||
|- | |||
|[[File:NSMBU Blooper Icon.png|x25px|Secret|link=]] | |||
|[[Blooper's Secret Lair]] (Underwater/Underground) | |||
|[[File:Castle Icon.png|x18px|Castle|link=Castle]] | |||
|[[Morton's Compactor Castle]] (Castle) | |||
|[[File:Castle Icon.png|x18px|Castle|link=Castle]] | |||
|[[Larry's Torpedo Castle]] (Castle/Water) | |||
|- | |||
|colspan="2"| | |||
|[[File:NSMBU Ice Block Icon.png|x20px|Secret|link=]] | |||
|[[Piranha Plants on Ice]] (Snow) | |||
|[[File:NSMBU Leaf Icon.png|x20px|Secret|link=]] | |||
|[[Skyward Stalk]] (Sky) | |||
|- | |||
!colspan=2 width=25% style="background:powderblue"|{{Color link|Black|Frosted Glacier}} | |||
!colspan=2 width=25% style="background:darkseagreen"|{{Color link|Black|Soda Jungle}} | |||
!colspan=2 width=25% style="background:beige"|{{Color link|Black|Rock-Candy Mines}} | |||
|- | |||
|colspan="2"|[[File:NSMBU Frosted Glacier Map.png|250px]] | |||
|colspan="2"|[[File:NSMBU Soda Jungle Main Map.png|250px]]<br><div class="contentbox mw-collapsible mw-collapsed"data-expandtext="Show sub-area"data-collapsetext="Hide sub-area">[[File:NSMBU Soda Jungle Haunted.png|250px]]</div> | |||
|colspan="2"|[[File:NSMBU Rock-Candy Mines World Map Screenshot.png|250px]] | |||
|- | |||
|colspan=2 align=center|A snowy mountain set at night, filled with stars and constellations. This world can be entirely skipped for Sparkling Waters. | |||
|colspan=2 align=center|A rainforest flooded by purple [[Poison (obstacle)|poison]], based on the [[Forest of Illusion]] from ''[[Super Mario World]]'' and [[World 4 (New Super Mario Bros.)|World 4]] from ''[[New Super Mario Bros.]]'' | |||
|colspan=2 align=center|A rocky region with tall, holey mountains. Several red and blue switches similar to [[! Switch]]es appear in this world, and pressing them activates [[Stretch Block]]s with their corresponding color. | |||
|-bgcolor=#FF7733 | |||
!width=2%|# | |||
!width="5%"|Level | |||
!width=2%|# | |||
!width="5%"|Level | |||
!width=2%|# | |||
!width="5%"|Level | |||
|- | |||
|1 | |||
|[[Spinning-Star Sky]] (Snow) | |||
|[[File:NSMBW Airship Sprite.png|x18px|Airship|link=Airship]] | |||
|[[The Mighty Cannonship]] (Airship) | |||
|1 | |||
|[[Fuzzy Clifftop]] (Mountain) | |||
|- | |||
|2 | |||
|[[Cooligan Fields]] (Snow) | |||
|1 | |||
|[[Jungle of the Giants]] (Jungle) | |||
|2 | |||
|[[Porcupuffer Falls]] (Mountain/Water) | |||
|- | |||
|[[File:NSMBW Tower Icon.png|x18px|Tower|link=Tower]] | |||
|[[Freezing-Rain Tower]] (Tower/Snow) | |||
|2 | |||
|[[Bridge over Poisoned Waters]] (Jungle) | |||
|[[File:NSMBW Tower Icon.png|x18px|Tower|link=Tower]] | |||
|[[Grinding-Stone Tower]] (Tower/Mountain) | |||
|- | |||
|3 | |||
|[[Prickly Goombas!]] (Snow) | |||
|3 | |||
|[[Bramball Woods]] (Darkness Jungle) | |||
|3 | |||
|[[Waddlewing's Nest]] (Mountain) | |||
|- | |||
|4 | |||
|[[Scaling the Mountainside]] (Snow) | |||
|[[File:NSMBW Tower Icon.png|x18px|Tower|link=Tower]] | |||
|[[Snake Block Tower]] (Tower) | |||
|4 | |||
|[[Light Blocks, Dark Tower]] (Underground) | |||
|- | |||
|5 | |||
|[[Icicle Caverns]] (Snow/Underground) | |||
|[[File:Ghost Icon.png|x18px|Ghost House|link=Ghost House]] | |||
|[[Which-Way Labyrinth]] (Ghost house) | |||
|5 | |||
|[[Walking Piranha Plants!]] (Mountain) | |||
|- | |||
|[[File:Ghost Icon.png|x18px|Ghost House|link=Ghost House]] | |||
|[[Swaying Ghost House]] (Ghost House) | |||
|4 | |||
|[[Painted Swampland]] (Haunted forest/Painting) | |||
|6 | |||
|[[Thrilling Spine Coaster]] (Underground) | |||
|- | |||
|[[File:Castle Icon.png|x18px|Castle|link=Castle]] | |||
|[[Wendy's Shifting Castle]] (Castle/Snow) | |||
|5 | |||
|[[Deepsea Ruins]] (Underwater/Underground) | |||
|[[File:NSMBW Tower Icon.png|x18px|Tower|link=Tower]]2 | |||
|[[Screwtop Tower]] (Tower/Mountain) | |||
|- | |||
|[[File:NSMBU Fliprus Icon.png|x22px|Secret|link=]] | |||
|[[Fliprus Lake]] (Snow) | |||
|6 | |||
|[[Seesaw Bridge]] (Jungle) | |||
|7 | |||
|[[Shifting-Floor Cave]] (Underground) | |||
|- | |||
|rowspan=3 colspan=2| | |||
|7 | |||
|[[Wiggler Stampede]] (Jungle) | |||
|[[File:Castle Icon.png|x18px|Castle|link=Castle]] | |||
|[[Roy's Conveyor Castle]] (Castle) | |||
|- | |||
|[[File:Castle Icon.png|x18px|Castle|link=Castle]] | |||
|[[Iggy's Volcanic Castle]] (Castle) | |||
|colspan="2"rowspan="2"| | |||
|- | |||
|[[File:NSMBU Parabeetle Icon.png|x22px|Secret|link=]] | |||
|[[Flight of the Para-Beetles]] (Sky) | |||
|- | |||
!colspan=2 width=25% style="background:lightsalmon"|{{Color link|black|Meringue Clouds}} | |||
!colspan=2 width=25% style="background:pink"|{{Color link|black|Peach's Castle (world)|Peach's Castle}} | |||
!colspan=2 width="100%"style="background:#feff82"|{{Color link|Black|Superstar Road}} | |||
|- | |||
|colspan="2"|[[File:Meringue Clouds.png|250px]] | |||
|colspan="2"|[[File:NSMBU Peach's Castle World Map.png|250px]] | |||
|colspan=2|[[File:NSMBU Superstar Road World Map Screenshot.png|250px]] | |||
|- | |||
|colspan=2 align=center|A world above the clouds. Two levels take place at sunset, and this world's [[Castle]] takes place near the tornado surrounding the next world, as marked by different cloud coloration. | |||
|colspan=2 align=center|Peach's domain, initially in its welcoming usual state but slowly transformed into a lava-based area by Bowser. This world must be completed to beat the game. | |||
|colspan=2 align=center|A secret world unlocked after beating Bowser's final battle. Its levels must be unlocked with the Star Coins collected from all the levels of the previous worlds. | |||
|- | |||
!style="background:#FF7733"width=2%|# | |||
!style="background:#FF7733"width="5%"|Level | |||
!style="background:#FF7733"width=2%|# | |||
!style="background:#FF7733"width="5%"|Level | |||
!style="background:#FF7733"width=2%|# | |||
!style="background:#FF7733"width="5%"|Level | |||
|- | |||
|1 | |||
|[[Land of Flying Blocks]] (Sky) | |||
|1 | |||
|[[Meteor Moat]] (Volcano/Castle exterior) | |||
|1 | |||
|[[Spine-Tingling Spine Coaster]] (Grass) | |||
|- | |||
|2 | |||
|[[Seesaw Shrooms (level)|Seesaw Shrooms]] (Sky) | |||
|2 | |||
|[[Magma-River Cruise]] (Volcano/Castle exterior) | |||
|2 | |||
|[[Run for It]] (Desert/Sky) | |||
|- | |||
|3 | |||
|[[Switchback Hill]] (Sky) | |||
|3 | |||
|[[Rising Tides of Lava]] (Volcano/Underground) | |||
|3 | |||
|[[Swim for Your Life!]] (Underwater/Underground) | |||
|- | |||
|[[File:NSMBW Tower Icon.png|x18px|Tower|link=Tower]] | |||
|[[Slide Lift Tower]] (Tower) | |||
|4 | |||
|[[Firefall Cliffs]] (Volcano/Castle exterior) | |||
|4 | |||
|[[Hammerswing Caverns]] (Snow/Underground) | |||
|- | |||
|[[File:Ghost Icon.png|x18px|Ghost House|link=Ghost House]] | |||
|[[Spinning Spirit House]] (Ghost House) | |||
|[[File:Princess Peach Castle Sprite.png|18px]] | |||
|[[Red-Hot Elevator Ride]] (Castle) | |||
|5 | |||
|[[Spinning Platforms of Doom]] (Haunted forest/Painting) | |||
|- | |||
|4 | |||
|[[Bouncy Cloud Boomerangs]] (Sky) | |||
|[[File:Princess Peach Castle Sprite.png|18px]]2 | |||
|[[The Final Battle (New Super Mario Bros. U)|The Final Battle]] (Castle) | |||
|6 | |||
|[[Fire Bar Cliffs]] (Mountain) | |||
|- | |||
|5 | |||
|[[A Quick Dip in the Sky]] (Sky) | |||
|rowspan=4 colspan=2| | |||
|7 | |||
|[[Lakitu! Lakitu! Lakitu!]] (Sky) | |||
|- | |||
|6 | |||
|[[Snaking above Mist Valley]] (Sky) | |||
|8 | |||
|[[Pendulum Castle]] (Fortress) | |||
|- | |||
|[[File:Castle Icon.png|x18px|Castle|link=Castle]] | |||
|[[Ludwig's Clockwork Castle]] (Castle/Sky) | |||
|9 | |||
|[[Follow That Shell!]] (Sky) | |||
|- | |||
|[[File:NSMBW Airship Sprite.png|x18px|Airship|link=Airship]] | |||
|[[Boarding the Airship]] (Airship) | |||
|colspan=2| | |||
|} | |||
</center> | |||
===Other areas=== | |||
<center> | |||
{|width=55% class="wikitable"style="text-align:center" | |||
!width=50% style="background:#E9BFFF"|{{Color link|Black|Secret Island}} | |||
!width=50% colspan=2 style="background:lavender"|{{Color link|Black|Coin Courses}} | |||
|- | |||
|[[File:NSMBU Secret Island World Map.png|250px]] | |||
|colspan="2"|[[File:NSMBU Coin Courses Level Select.png|250px]] | |||
|- | |||
|align=center rowspan=10|A small island between Acorn Plains and Sparkling Waters that houses a [[Toad House|Purple Toad House]], where the player can check several records. It is unlocked alongside Superstar Road. | |||
|colspan=2 align=center|A multiplayer-exclusive world found in [[Coin Battle]], similar to [[World Coin]] from ''[[New Super Mario Bros. Wii]]''. | |||
|- | |||
!style="background:#FF7733"|# | |||
!style="background:#FF7733"|Difficulty | |||
|- | |||
|{{world link|coin|1|World Coin-1 (New Super Mario Bros. U)}} (Grass) | |||
|★ | |||
|- | |||
|{{world link|coin|2|World Coin-2 (New Super Mario Bros. U)}} (Cosmic) | |||
|★ | |||
|- | |||
|{{world link|coin|3|World Coin-3 (New Super Mario Bros. U)}} (Beach) | |||
|★★ | |||
|- | |||
|{{world link|coin|4|World Coin-4 (New Super Mario Bros. U)}} (Sky) | |||
|★★★ | |||
|- | |||
|{{world link|coin|5|World Coin-5 (New Super Mario Bros. U)}} (Underwater) | |||
|★★★ | |||
|- | |||
|{{world link|coin|6|World Coin-6}} (Ghost House) | |||
|★★★★ | |||
|- | |||
|{{world link|coin|7|World Coin-7}} (Cosmic/Snow) | |||
|★★★★★ | |||
|- | |||
|{{world link|coin|8|World Coin-8}} (Sky) | |||
|★★★★★ | |||
|- | |||
|} | |||
</center> | |||
== | ==Characters== | ||
===Playable | ===Playable characters=== | ||
{|class="wikitable"style="width:100%;text-align:center" | |||
|-style="color:white;background:red" | |||
!width=12%|Name | |||
!Description | |||
|- | |||
|style="background:white"|[[File:NSMBU Mario Jumping Artwork.png|100x100px]]<br>[[Mario]] | |||
|align=left|The game's protagonist and the only playable character in single-player. Mario is flung from [[Peach's Castle]] by [[Bowser]]'s [[Mecha Hand]] during his siege. Like prior ''New Super Mario Bros.'' titles, Mario has some moves that originated from the 3D games, including the [[Triple Jump]] and [[Wall Jump]]. | |||
|- | |||
|style="background:white"|[[File:NSMBU Luigi Jumping Artwork.png|100x100px]]<br>[[Luigi]] | |||
|align=left|Mario's younger twin brother. He is flung from Peach's Castle with Mario and is available to play as during multiplayer. Luigi has the same physiques and moves as Mario. In single-player, losing five lives gives Mario the option of striking the [[Super Guide Block]], which allows Luigi to finish the level for him. | |||
|- | |||
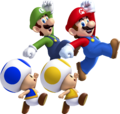
|style="background:white"|[[File:NSMBU Artwork Yellow Toad and Blue Toad.png|100x100px]]<br>[[Yellow Toad and Blue Toad]] | |||
|align=left|These Toads were tossed from the castle with Mario and Luigi. They have all the same moves and physiques, and are only available to play as in multiplayer. | |||
|- | |||
|style="background:white"|[[File:NSMBU Three Miis Artwork.png|100x100px]]<br>[[Mii]]s | |||
|align=left|Miis are only available to be played as in [[Challenge Mode (New Super Mario Bros. U)|Challenge Mode]], [[Boost Rush]], and [[Coin Battle]]. In the multiplayer modes, all four players can control a Mii and it corresponds with a specific color: Player 1's Mii wears red like Mario; Player 2 wears green like Luigi; Player 3 wears yellow like [[Wario]]; and Player 4 wears an original blue outfit. Some non-playable Miis appear in the background of normal levels during [[Boost Mode]]. | |||
|} | |||
=== | ===Yoshis=== | ||
''New Super Mario Bros. U'' features [[Baby Yoshi]]s, having been absent from the ''Super Mario'' series since their debut in ''[[Super Mario World]]''. The game features three differently-colored Baby Yoshis, each one with a special ability. They differ from the adult Yoshi in terms of gameplay. Being babies, they cannot be ridden, so characters must carry them throughout the levels. Baby Yoshis instantly eat almost any enemy that is in front of them. Unlike ''Super Mario World'', Baby Yoshis cannot mature into adults after eating enemies, instead remaining infants. Two types of Baby Yoshis found on the world map can be taken into any course, with the exception of [[fortress|towers]], [[airship]]s, and [[castle]]s. | |||
{|class="wikitable"style="width:100%;text-align:center" | |||
|-style="color:white;background:red" | |||
!width=12%|Name | |||
!Description | |||
!width=15%|Locations | |||
|- | |||
|style="background:white"|[[File:Yoshi FS.png|100x100px]]<br>[[Yoshi]] | |||
|align=left|A dinosaur-like creature with a long tongue that can be ridden. Yoshi has a meter that tracks how many [[Fruit (Yoshi food)|fruits]] he eats. Eating five makes him lay an egg containing an item. Unlike Baby Balloon Yoshis and Baby Bubble Yoshis, Yoshi cannot be taken to other levels, instead waving goodbye to the player character once they reach the [[Goal Pole]]. In multiplayer, the number of Yoshis that appear in a level equals the number of player characters. | |||
|[[Yoshi Hill]], [[Perilous Pokey Cave]], [[Above the Cheep Cheep Seas]], [[Prickly Goombas!]], [[Fuzzy Clifftop]], [[Seesaw Shrooms (level)|Seesaw Shrooms]] | |||
|- | |||
|style="background:white"|[[File:NSMBU Balloon Baby Yoshi Artwork.png|100x100px]]<br>[[Balloon Baby Yoshi]]s | |||
|align=left|Magenta Baby Yoshis that expand like balloons and gently float in the air. Up to four player characters can grab onto one Balloon Baby Yoshi, by grabbing their legs. This slows the player down though. | |||
|[[Acorn Plains]], [[Sparkling Waters]] | |||
|- | |||
|style="background:white"|[[File:NSMBU Bubble Baby Yoshi Artwork.png|100x100px]]<br>[[Bubble Baby Yoshi]]s | |||
|align=left|Blue Baby Yoshis that blow bubbles from their mouths. Enemies caught in these bubbles will turn into three [[coin]]s, a power-up, or a [[1-Up Mushroom]]. These bubbles can also be used as small platforms. | |||
|[[Frosted Glacier]], [[Rock-Candy Mines]] | |||
|- | |||
|style="background:white"|[[File:GlowbabyyoshiNSMBU.png|100x100px]]<br>[[Glowing Baby Yoshi]]s | |||
|align=left|Yellow Baby Yoshis that light up dark areas and can stun enemies with their light attack. Unlike the other two Baby Yoshis, Glowing Baby Yoshis are not found on the world map and are found only in levels. Instead of following the characters throughout the courses, they give an [[extra life]] when reach the end of the levels that they appear in. | |||
|[[Fire Snake Cavern]], [[Which-Way Labyrinth]] | |||
|} | |||
=== | ===Non-playable characters=== | ||
{|class="wikitable"style="width:100%;text-align:center" | |||
|-style="color:white;background:red" | |||
!width=12%|Name | |||
!Description | |||
!width=15%|Locations | |||
|- | |||
|style="background:white"|[[File:PeachtoadsNSMBU.png|100x100px]]<br>[[Princess Peach]] | |||
|align=left|The ruler of the [[Mushroom Kingdom]]. Her [[Peach's Castle|castle]] is sieged by [[Bowser]] while she is having tea with Mario, Luigi, Yellow Toad, and Blue Toad. The game follows their quest to return to Peach's Castle to save her. | |||
|[[The Final Battle (New Super Mario Bros. U)|The Final Battle]] | |||
|- | |||
|style="background:white"|[[File:NSMBU Red Toad Render.png|100x100px]]<br>[[Toad (species)|Toads]] | |||
|align=left|Toads appear throughout the game in Toad Houses, at the end of the level when the player catches Nabbit, and past the end-of-level castles to give Mario a power-up if they complete a stage with the last two digits of the [[Time Limit]] being the same. | |||
|[[Toad House]]s, All levels | |||
|- | |||
|style="background:white"|[[File:NabbitNSMBU.png|100x100px]]<br>[[Nabbit]] | |||
|align=left|A mysterious [[rabbit]]-like creature that steals items from the map and must be caught to retrieve them. | |||
|[[Acorn Plains Way]], [[Blooming Lakitus]], [[Urchin Shoals]], [[Prickly Goombas!]], [[Jungle of the Giants]], [[Walking Piranha Plants!]], [[Seesaw Shrooms (level)|Seesaw Shrooms]] | |||
|} | |||
==Enemies and obstacles== | |||
===Enemies=== | ===Enemies=== | ||
[[ | The enemies listed in this table match those in the companion [[Prima Games]] guidebook,<ref>{{cite|author=Stratton, Steve|title=''New Super Mario Bros. U: PRIMA Official Game Guide''|location=Roseville|publisher=[[Prima Games]]|date=2012|page=28–35|isbn=978-0-307-89690-2}}</ref> the ''[[Super Mario Bros. Encyclopedia]]'',<ref name=sakai>{{cite|author=Sakai, Kazuya (Ambit), kikai, Akinori Sao, Junko Fukuda, Kunio Takayama, and Ko Nakahara (Shogakukan), editors|title="New Super Mario Bros. U" in『[[Super Mario Bros. Encyclopedia|スーパーマリオブラザーズ百科: 任天堂公式ガイドブック]]』|language=ja|location=Tokyo|publisher=[[Shogakukan]]|date=2015|page=204–19|isbn=4-091065-69-4}}</ref> and Mario Portal Game Archive.<ref>{{cite|author=[[Nintendo|Nintendo Co., Ltd.]]|title=New Super Mario Bros. U|url=nintendo.com/jp/character/mario/en/history/new_smb_u/index.html|publisher=Mario Portal Game Archive|date=2022|accessdate=28 Aug. 2024}}</ref> The default order they are listed derives from their occurrence in-game with adjustments to ensure enemies are listed next to their immediate relatives. The blue Dragoneel is only recognized in the guidebook<ref>Stratton, p. 90.</ref> and is unmentioned in the other two sources, but it is listed here in recognition of its mechanical and physiological distinctiveness from the red one. | ||
{|class="wikitable sortable"style="width:100%;text-align:center" | |||
|-style="color:white;background:red" | |||
!rowspan=2 width=10%|Name | |||
!class="unsortable"rowspan=2|Description | |||
!class="unsortable"colspan=2 |Levels | |||
!rowspan=2|Pts. | |||
!rowspan=2|Exc. | |||
!rowspan=2|New | |||
|-style="color:white;background:red" | |||
!width=8%|First | |||
!width=8%|Last | |||
|- | |||
|data-sort-value=Gooa style="background:white"|[[File:NSMBU Goomba Alternate Artwork.png|100x100px]]<br>[[Goomba]] | |||
|align=left|Squat mushroom creatures that walk along the ground. Goombas are weak to all attacks and walk of the edge of platforms. Some of the ones in Skyward Stalk are fastened to balloons and drift down. They are the most common enemies in the game. | |||
|data-sort-value=11|[[Acorn Plains Way]] | |||
|data-sort-value=99|[[Follow That Shell!]] | |||
|200 | |||
|— | |||
|— | |||
|- | |||
|data-sort-value=Parg style="background:white"|[[File:ParagoombaNSMBU.png|100x100px]]<br>[[Paragoomba]] | |||
|align=left|Winged Goombas that hop along the ground. Stomping one causes it to lose its wings, turning it into a normal Goomba. | |||
|colspan=2 data-sort-value=72|[[Seesaw Shrooms (level)|Seesaw Shrooms]] | |||
|200 | |||
|{{icon|NSMBU-exc}} | |||
|— | |||
|- | |||
|data-sort-value=Hef style="background:white"|[[File:NSMBU Hefty Goomba.jpg|100x100px]]<br>[[Hefty Goomba]] | |||
|align=left|A large Goomba that is the middling size of a Goomba, being smaller than a Big Goomba but bigger than a regular Goomba. This enemy splits into two Goombas when jumped on. | |||
|colspan=2 data-sort-value=52|[[Jungle of the Giants]] | |||
|200 | |||
|— | |||
|— | |||
|- | |||
|data-sort-value=BigG style="background:white"|[[File:NSMBU Big Goomba.jpg|100x100px]]<br>[[Mega Goomba|Big Goomba]] | |||
|align=left|Large variants of Goombas. They split into two Hefty Goombas once stomped on. | |||
|colspan=2 data-sort-value=52|[[Jungle of the Giants]] | |||
|200 | |||
|{{icon|NSMBU-exc}} | |||
|— | |||
|- | |||
|data-sort-value=Min style="background:white"|[[File:NSMBU Screenshot Mini Goomba.png|100x100px]]<br>[[Mini Goomba]] | |||
|align=left|Small Goombas that weigh the player character down until he either attacks or walks for a few seconds. | |||
|data-sort-value=74|[[Slide Lift Tower]] | |||
|data-sort-value=82|[[Magma-River Cruise]] | |||
|200 | |||
|— | |||
|— | |||
|- | |||
|data-sort-value=Pri style="background:white"|[[File:NSMBU Screenshot Prickly Goomba.png|100x100px]]<br>[[Prickly Goomba]] | |||
|align=left|A Goomba that hides inside a spiked chestnut shell until it is hit with a [[fireball]], which is when it turns into a regular Goomba. | |||
|colspan=2 data-sort-value=44|[[Prickly Goombas!]] | |||
|200 | |||
|— | |||
|— | |||
|- | |||
|data-sort-value=Goor style="background:white"|[[File:NSMBU Asset Model Goombrat.png|100x100px]]<br>[[Goombrat]] | |||
|align=left|A [[Goomba]] that resembles a {{wp|persimmon}} and turns at ledges. | |||
|colspan=2 data-sort-value=15|[[Mushroom Heights]] | |||
|200 | |||
|— | |||
|{{icon|new}} | |||
|- | |||
|data-sort-value=Wad style="background:white"|[[File:NSMBU Waddlewing Walking Artwork.png|100x100px]]<br>[[Waddlewing]] | |||
|align=left|Orange flying-squirrel enemies that glide through stages. | |||
|data-sort-value=11|[[Acorn Plains Way]] | |||
|data-sort-value=71|[[Land of Flying Blocks]] | |||
|200 | |||
|— | |||
|{{icon|new}} | |||
|- | |||
|data-sort-value=KooTG style="background:white"|[[File:KoopaTroopaNSMBU.png|100x100px]]<br>[[Koopa Troopa]] (Green) | |||
|align=left|Turtle enemies that go into their shells when attacked, then can be picked up or thrown. Green Koopa Troopas walk off ledges. | |||
|data-sort-value=11|[[Acorn Plains Way]] | |||
|data-sort-value=99|[[Follow That Shell!]] | |||
|200 | |||
|— | |||
|— | |||
|- | |||
|data-sort-value=KooTR style="background:white"|[[File:KoopatroopaNSMBU.png|100x100px]]<br>Koopa Troopa (Red) | |||
|align=left|Red Koopa Troopas turn around when they reach the edge of platforms. | |||
|data-sort-value=12|[[Tilted Tunnel]] | |||
|data-sort-value=99|[[Follow That Shell!]] | |||
|200 | |||
|— | |||
|— | |||
|- | |||
|data-sort-value=KooPG style="background:white"|[[File:ParatroopaNSMBU.png|100x100px]]<br>[[Koopa Paratroopa]] (Green) | |||
|align=left|Winged Koopa Troopas that jump in high arcs. | |||
|data-sort-value=21|[[Stone-Eye Zone]] | |||
|data-sort-value=92|[[Run for It]] | |||
|200 | |||
|— | |||
|— | |||
|- | |||
|data-sort-value=KooPR style="background:white"|[[File:KoopaParatroopa NSMBU.png|100x100px]]<br>Koopa Paratroopa (Red) | |||
|align=left|The red-shelled Koopa Paratroopas fly up-and-down or back-and-forth in the air. | |||
|data-sort-value=21|[[Stone-Eye Zone]] | |||
|data-sort-value=94|[[Hammerswing Caverns]] | |||
|200 | |||
|— | |||
|— | |||
|- | |||
|data-sort-value=BigKG style="background:white"|[[File:NSMBU Screenshot Big Koopa Troopa (Green).png|100x100px]]<br>[[Big Koopa Troopa]] (Green) | |||
|align=left|Large variants of Koopa Troopas that walk off ledges. Their shells are too large to be held. | |||
|colspan=2 data-sort-value=52|[[Jungle of the Giants]] | |||
|200 | |||
|{{icon|NSMBU-exc}} | |||
|— | |||
|- | |||
|data-sort-value=BigKR style="background:white"|[[File:NSMBU Big Koopa.png|100x100px]]<br>Big Koopa Troopa (Red) | |||
|align=left|Like the normal-sized ones, the red-shelled Big Koopa Troopas turn around when the reach the end of a platform. | |||
|colspan=2 data-sort-value=52|[[Jungle of the Giants]] | |||
|200 | |||
|— | |||
|— | |||
|- | |||
|data-sort-value=Dry style="background:white"|[[File:MP8 DryBones.png|100x100px]]<br>[[Dry Bones]] | |||
|align=left|Skeleton Koopa Troopas that collapse when attacked, but later rebuild themselves. | |||
|data-sort-value=13|[[Crushing-Cogs Tower]] | |||
|data-sort-value=79|[[Ludwig's Clockwork Castle]] | |||
|200 | |||
|— | |||
|— | |||
|- | |||
|data-sort-value=BigD style="background:white"|[[File:NSMBU Asset Model Dry Bones.png|100x100px]]<br>[[Mega Dry Bones|Big Dry Bones]] | |||
|align=left|Large variants of Dry Bones that appear in castle levels. | |||
|data-sort-value=24|[[Stoneslide Tower]] | |||
|data-sort-value=79|[[Ludwig's Clockwork Castle]] | |||
|200 | |||
|— | |||
|— | |||
|- | |||
|data-sort-value=Buz style="background:white"|[[File:NSMBU Buzzy Beetle Artwork.png|100x100px]]<br>[[Buzzy Beetle]] | |||
|align=left|Shelled enemies that can be kicked or thrown after being jumped on, and can walk on ceilings. | |||
|data-sort-value=12|[[Tilted Tunnel]] | |||
|data-sort-value=96|[[Fire Bar Cliffs]] | |||
|200 | |||
|— | |||
|— | |||
|- | |||
|data-sort-value=BigBu style="background:white"|[[File:NSMBU Buzzy Beetle Render.png|100x100px]]<br>[[Big Buzzy Beetle]] | |||
|align=left|Bigger variants of Buzzy Beetles. | |||
|colspan=2 data-sort-value=83|[[Rising Tides of Lava]] | |||
|200 | |||
|{{icon|NSMBU-exc}} | |||
|— | |||
|- | |||
|data-sort-value=SpikT style="background:white"|[[File:NSMBU Asset Model Spike Top.png|100x100px]]<br>[[Spike Top]] | |||
|align=left|Buzzy Beetle variants that have spikes on their shells, preventing them from being jumped on. | |||
|data-sort-value=24|[[Stoneslide Tower]] | |||
|data-sort-value=83|[[Rising Tides of Lava]] | |||
|200 | |||
|— | |||
|— | |||
|- | |||
|data-sort-value=Par- style="background:white"|[[File:NSMBU Asset Model Para-Beetle.png|100x100px]]<br>[[Para-Beetle]] | |||
|align=left|Para-Beetles are winged Buzzy Beetles. However, the player character can hop on their back for a ride, unlike with other winged foes. | |||
|colspan=2 data-sort-value=59.3|[[Flight of the Para-Beetles]] | |||
|data-sort-value=2000|{{icon|cross}} | |||
|— | |||
|— | |||
|- | |||
|data-sort-value=Hea style="background:white"|[[File:NSMBU Asset Model Heavy Para-Beetle.png|100x100px]]<br>[[Heavy Para-Beetle]] | |||
|align=left|A Para-Beetle that descends when used as a platform. | |||
|colspan=2 data-sort-value=59.3|[[Flight of the Para-Beetles]] | |||
|data-sort-value=2000|{{icon|cross}} | |||
|— | |||
|— | |||
|- | |||
|data-sort-value=Bon style="background:white"|[[File:NSMBU Bony Beetle Artwork.png|100x100px]]<br>[[Bony Beetle]] | |||
|align=left|Skeleton variants of Buzzy Beetles that walk around and suddenly stop to stick out their spikes. | |||
|data-sort-value=63|[[Grinding-Stone Tower]] | |||
|data-sort-value=98|[[Pendulum Castle]] | |||
|200 | |||
|— | |||
|— | |||
|- | |||
|data-sort-value=Ham style="background:white"|[[File:NSMBU Hammer Bro Artwork.png|100x100px]]<br>[[Hammer Bro]] | |||
|align=left|Enemies that throw hammers and jump. | |||
|colspan=2 data-sort-value=16|[[Rise of the Piranha Plants]] | |||
|1000 | |||
|— | |||
|— | |||
|- | |||
|data-sort-value=FirB style="background:white"|[[File:NSMBU Fire Bro Artwork.png|100x100px]]<br>[[Fire Bro]] | |||
|align=left|Hammer Bros that throw fireballs. | |||
|data-sort-value=23|[[Fire Snake Cavern]] | |||
|data-sort-value=79|[[Ludwig's Clockwork Castle]] | |||
|1000 | |||
|— | |||
|— | |||
|- | |||
|data-sort-value=Boom style="background:white"|[[File:NSMBU Boomerang Bro Artwork.png|100x100px]]<br>[[Boomerang Bro]] | |||
|align=left|Hammer Bros that use boomerangs, which return to them after being thrown. | |||
|colspan=2 data-sort-value=76|[[Bouncy Cloud Boomerangs]] | |||
|1000 | |||
|— | |||
|— | |||
|- | |||
|data-sort-value=IceB style="background:white"|[[File:NSMBU Ice Bro Artwork.png|100x100px]]<br>[[Ice Bro]] | |||
|align=left|An enemy that throws [[Ice Ball|ice ball]]s at the ground, which can freeze the player and even other enemies. | |||
|colspan=2 data-sort-value=46|[[Icicle Caverns]] | |||
|1000 | |||
|— | |||
|— | |||
|- | |||
|data-sort-value=Sle style="background:white"|[[File:NSMBU Sledge Bro Screenshot.png|100x100px]]<br>[[Sledge Bro]] | |||
|align=left|Hammer Bro variants that stun the player character after they jump. | |||
|colspan=2 data-sort-value=79|[[Ludwig's Clockwork Castle]] | |||
|1000 | |||
|— | |||
|— | |||
|- | |||
|data-sort-value=Sum style="background:white"|[[File:NSMBU Sumo Bro Artwork.png|100x100px]]<br>[[Sumo Bro]] | |||
|align=left|Giant Koopas that stomp the ground and create electric waves in two directions. | |||
|colspan=2 data-sort-value=68|[[Screwtop Tower]] | |||
|200 | |||
|— | |||
|— | |||
|- | |||
|data-sort-value=Lak style="background:white"|[[File:NSMBU Lakitu Artwork.png|100x100px]]<br>[[Lakitu]] | |||
|align=left|Enemies that throw Spiny Eggs. If the player character defeats a Lakitu, he can ride on its cloud until it disappears. | |||
|data-sort-value=27|[[Blooming Lakitus]] | |||
|data-sort-value=97|[[Lakitu! Lakitu! Lakitu!]] | |||
|1000 | |||
|— | |||
|— | |||
|- | |||
|data-sort-value=Spin style="background:white"|[[File:NSMBU Asset Model Spiny.png|100x100px]]<br>[[Spiny]] | |||
|align=left|Enemies that hatch from Spiny Eggs and cannot be jumped on. | |||
|data-sort-value=72|[[Seesaw Shrooms (level)|Seesaw Shrooms]] | |||
|data-sort-value=97|[[Lakitu! Lakitu! Lakitu!]] | |||
|200 | |||
|— | |||
|— | |||
|- | |||
|data-sort-value=SpinE style="background:white"|[[File:NSMBU Screenshot Spiny Egg.png|100x100px]]<br>[[Spiny Egg]] | |||
|align=left|The furled form of Spinies dropped by Lakitus. Direct contact damages the player character. Spiny Eggs turn into Spinies when they make contact with the ground. | |||
|data-sort-value=72|[[Seesaw Shrooms (level)|Seesaw Shrooms]] | |||
|data-sort-value=97|[[Lakitu! Lakitu! Lakitu!]] | |||
|200 | |||
|— | |||
|— | |||
|- | |||
|data-sort-value=Spik style="background:white"|[[File:NSMBU Spike Render.png|100x100px]]<br>[[Spike]] | |||
|align=left|Green turtles which pull spiked balls out of their mouths and throw them directly downwards from the ledges on which they stand | |||
|colspan=2 data-sort-value=25|[[Spike's Spouting Sands]] | |||
|200 | |||
|— | |||
|— | |||
|- | |||
|data-sort-value=Sto style="background:white"|[[File:NSMBU Asset Model Stone Spike.png|100x100px]]<br>[[Stone Spike]] | |||
|align=left|A Spike that throws stone rocks downwards. | |||
|colspan=2 data-sort-value=26|[[Dry Desert Mushrooms]] | |||
|200 | |||
|— | |||
|— | |||
|- | |||
|data-sort-value=PirL style="background:white"|[[File:NSMBU Piranha Plant Cropped Artwork.png|100x100px]]<br>[[Piranha Plant]] | |||
|align=left|Plants that move in and out of Warp Pipes and some grounded. | |||
|data-sort-value=11|[[Acorn Plains Way]] | |||
|data-sort-value=95|[[Spinning Platforms of Doom]] | |||
|200 | |||
|— | |||
|— | |||
|- | |||
|data-sort-value=PirO style="background:white"|[[File:NSMBUD Piranha Pod model.png|100x100px]]<br>[[Piranha Pod]] | |||
|align=left|A projectile thrown by a [[Lakitu]] that turns into a [[Piranha Plant]]. | |||
|colspan=2 data-sort-value=27|[[Blooming Lakitus]] | |||
|200 | |||
|— | |||
|{{icon|new}} | |||
|- | |||
|data-sort-value=BigP style="background:white"|[[File:GroundedPiranhaPlantNSMBU.png|100x100px]]<br>[[Big Piranha Plant]] | |||
|align=left|Large variants of Piranha Plants. | |||
|data-sort-value=15|[[Mushroom Heights]] | |||
|data-sort-value=77|[[A Quick Dip in the Sky]] | |||
|200 | |||
|— | |||
|— | |||
|- | |||
|data-sort-value=FirP style="background:white"|[[File:FirepiranhaNSMBU.png|100x100px]]<br>[[Fire Piranha Plant]] | |||
|align=left|Piranha Plants that aim at the player character and shoot fireballs. | |||
|data-sort-value=14|[[Yoshi Hill]] | |||
|data-sort-value=44|[[Prickly Goombas!]] | |||
|200 | |||
|— | |||
|— | |||
|- | |||
|data-sort-value=IceP style="background:white"|[[File:Ice PiranhaNSMBU.png|100x100px]]<br>[[Frost Piranha|Ice Piranha Plant]] | |||
|align=left|A Piranha Plant that can shoot ice balls from its mouth, like Fire Piranha Plants. | |||
|colspan=2 data-sort-value=61|[[Fuzzy Clifftop]] | |||
|200 | |||
|— | |||
|— | |||
|- | |||
|data-sort-value=Riv style="background:white"|[[File:NSMBU River Piranha Plant Render.png|100x100px]]<br>[[River Piranha Plant]] | |||
|align=left|A stationary Piranha Plant that blows a green spiked ball up and down, similar to a [[Ptooie]]. | |||
|data-sort-value=49|[[Fliprus Lake]] | |||
|data-sort-value=59|[[Seesaw Bridge]] | |||
|200 | |||
|— | |||
|— | |||
|- | |||
|data-sort-value=Sta style="background:white"|[[File:NSMBU Screenshot Stalking Piranha Plant.png|100x100px]]<br>[[Stalking Piranha Plant]] | |||
|align=left|A Piranha Plant that walks around and stretches up and down on a regular basis. | |||
|data-sort-value=54|[[Bramball Woods]] | |||
|data-sort-value=66|[[Walking Piranha Plants!]] | |||
|200 | |||
|— | |||
|— | |||
|- | |||
|data-sort-value=Mun style="background:white"|[[File:NSMBU Muncher Artwork.png|100x100px]]<br>[[Muncher]] | |||
|align=left|An invincible black plant. | |||
|data-sort-value=41|[[Spinning-Star Sky]] | |||
|data-sort-value=67|[[Thrilling Spine Coaster]] | |||
|data-sort-value=2000|{{icon|cross}} | |||
|— | |||
|— | |||
|- | |||
|data-sort-value=Mon style="background:white"|[[File:MontymoleNSMBU.png|100x100px]]<br>[[Monty Mole]] | |||
|align=left|A mole that pops out of mountains and the ground and gives chase. | |||
|data-sort-value=14|[[Yoshi Hill]] | |||
|data-sort-value=82|[[Magma-River Cruise]] | |||
|200 | |||
|— | |||
|— | |||
|- | |||
|data-sort-value=Roc style="background:white"|[[File:NSMBU Asset Model Rocky Wrench.png|100x100px]]<br>[[Rocky Wrench]] | |||
|align=left|Monty Moles that pop out of its hole in an airship throw wrenches. | |||
|colspan=2 data-sort-value=79.1|[[Boarding the Airship]] | |||
|200 | |||
|{{icon|NSMBU-exc}} | |||
|— | |||
|- | |||
|data-sort-value=Lav style="background:white"|[[File:NSMBW Asset Model Lava Bubble.png|100x100px]]<br>[[Lava Bubble]] | |||
|align=left|Fireballs that jump out of lava. | |||
|data-sort-value=17|[[Lemmy's Swingback Castle]] | |||
|data-sort-value=86|[[The Final Battle (New Super Mario Bros. U)|The Final Battle]] | |||
|200 | |||
|— | |||
|— | |||
|- | |||
|data-sort-value=Pok style="background:white"|[[File:NSMBU Pokey Artwork.png|100x100px]]<br>[[Pokey]] | |||
|align=left|Living cacti that appear in desert levels and move slowly. | |||
|colspan=2 data-sort-value=22|[[Perilous Pokey Cave]] | |||
|200 | |||
|— | |||
|— | |||
|- | |||
|data-sort-value=BigP style="background:white"|[[File:NSMBU Screenshot Big Pokey.png|100x100px]]<br>[[Big Pokey]] | |||
|align=left|Large variants of Pokeys. | |||
|colspan=2 data-sort-value=28|[[Morton's Compactor Castle]] | |||
|None | |||
|— | |||
|— | |||
|- | |||
|data-sort-value=Swo style="background:white"|[[File:NSMBU Asset Model Swoop.png|100x100px]]<br>[[Swoop]] | |||
|align=left|Bats that hang onto the ceiling, then swoop towards the player character. | |||
|data-sort-value=22|[[Perilous Pokey Cave]] | |||
|data-sort-value=69|[[Shifting-Floor Cave]] | |||
|200 | |||
|{{icon|NSMBU-exc}} | |||
|— | |||
|- | |||
|data-sort-value=FirS style="background:white"|[[File:NSMBU Asset Model Fire Snake.png|100x100px]]<br>[[Fire Snake]] | |||
|align=left|Flames that jump in a high arc. | |||
|colspan=2 data-sort-value=23|[[Fire Snake Cavern]] | |||
|200 | |||
|— | |||
|— | |||
|- | |||
|data-sort-value=Grr style="background:white"|[[File:NSMBU Grrrol Artwork.png|100x100px]]<br>[[Grrrol]] | |||
|align=left|Round, Thwomp-like enemies that roll on the ground. | |||
|data-sort-value=24|[[Stoneslide Tower]] | |||
|data-sort-value=63|[[Grinding-Stone Tower]] | |||
|200 | |||
|— | |||
|{{icon|new}} | |||
|- | |||
|data-sort-value=Meg style="background:white"|[[File:Dai Goro model.png|100x100px]]<br>[[Mega Grrrol]] | |||
|align=left|A bigger Grrrol with the same behavior. | |||
|colspan=2 data-sort-value=63|[[Grinding-Stone Tower]] | |||
|200 | |||
|— | |||
|{{icon|new}} | |||
|- | |||
|data-sort-value=Huc style="background:white"|[[File:NSMBU Huckit Crab Artwork.png|100x100px]]<br>[[Huckit Crab]] | |||
|align=left|A crab that throws rocks on loop. These can be jumped on and used as a temporary platform. | |||
|colspan=2 data-sort-value=31|[[Waterspout Beach]] | |||
|200 | |||
|— | |||
|— | |||
|- | |||
|data-sort-value=Chee style="background:white"|[[File:CheepCheepNSMBU.png|100x100px]]<br>[[Cheep Cheep]] | |||
|align=left|Fish that are found swimming aimlessly in underwater levels. | |||
|data-sort-value=31|[[Waterspout Beach]] | |||
|data-sort-value=93|[[Swim for Your Life!]] | |||
|200 | |||
|— | |||
|— | |||
|- | |||
|data-sort-value=BigC style="background:white"|[[File:NSMBU Asset Model Big Cheep Cheep.png|100x100px]]<br>[[Big Cheep Cheep]] | |||
|align=left|Large variants of Cheep Cheeps that are found in underwater levels. | |||
|colspan=2 data-sort-value=32|[[Tropical Refresher]] | |||
|200 | |||
|— | |||
|— | |||
|- | |||
|data-sort-value=Eep style="background:white"|[[File:NSMBU Eep Cheep Artwork.png|100x100px]]<br>[[Eep Cheep]] | |||
|align=left|A Cheep Cheep that lives in a school with other Eep Cheeps and swims away when the player comes near it. | |||
|colspan=2 data-sort-value=37|[[Dragoneel's Undersea Grotto]] | |||
|200 | |||
|— | |||
|— | |||
|- | |||
|data-sort-value=SpinC style="background:white"|[[File:NSMBU Spiny Cheep Artwork.png|100x100px]]<br>[[Spiny Cheep Cheep]] | |||
|align=left|Fast-swimming fish that chase the player character. | |||
|data-sort-value=32|[[Tropical Refresher]] | |||
|data-sort-value=93|[[Swim for Your Life!]] | |||
|200 | |||
|— | |||
|— | |||
|- | |||
|data-sort-value=Cheo style="background:white"|[[File:NSMBU Asset Model Cheep Chomp.png|100x100px]]<br>[[Cheep Chomp]] | |||
|align=left|Large fish that attempt to eat the player character. | |||
|colspan=2 data-sort-value=93|[[Swim for Your Life!]] | |||
|200 | |||
|— | |||
|— | |||
|- | |||
|data-sort-value=Por style="background:white"|[[File:NSMBU Porcupuffer Artwork.png|100x100px]]<br>[[Porcupuffer]] | |||
|align=left|Fish that jump out of the water and follow the player character. | |||
|colspan=2 data-sort-value=62|[[Porcupuffer Falls]] | |||
|200 | |||
|— | |||
|— | |||
|- | |||
|data-sort-value=Fis style="background:white"|[[File:FishboneNSMBU.png|100x100px]]<br>[[Fish Bone]] | |||
|align=left|Skeletal fish that charge towards the player character. | |||
|data-sort-value=34|[[Haunted Shipwreck]] | |||
|data-sort-value=58|[[Deepsea Ruins]] | |||
|200 | |||
|— | |||
|— | |||
|- | |||
|data-sort-value=Cla style="background:white"|[[File:NSMBU Asset Model Clampy.png|100x100px]]<br>[[Clampy]] | |||
|align=left|Clams that open and close their mouths. | |||
|colspan=2 data-sort-value=31|[[Waterspout Beach]] | |||
|data-sort-value=2000|{{icon|cross}} | |||
|{{icon|NSMBU-exc}} | |||
|— | |||
|- | |||
|data-sort-value=Urc style="background:white"|[[File:NSMBU Urchin Artwork.png|100x100px]]<br>[[Urchin]] | |||
|align=left|Stationary enemies that appear in underwater levels. | |||
|data-sort-value=32|[[Tropical Refresher]] | |||
|data-sort-value=93|[[Swim for Your Life!]] | |||
|200 | |||
|— | |||
|— | |||
|- | |||
|data-sort-value=BigU style="background:white"|[[File:NSMBU Asset Model Big Urchin.png|100x100px]]<br>[[Big Urchin]] | |||
|align=left|A gigantic Urchin that can be defeated only with a Star. | |||
|data-sort-value=32|[[Tropical Refresher]] | |||
|data-sort-value=36|[[Urchin Shoals]] | |||
|200 | |||
|— | |||
|— | |||
|- | |||
|data-sort-value=DraR style="background:white"|[[File:NSMBUDX Dragoneel model.png|100x100px]]<br>[[Dragoneel]] (Red) | |||
|align=left|A long eel that attacks the player character by chasing them. | |||
|colspan=2 data-sort-value=37|[[Dragoneel's Undersea Grotto]] | |||
|200 | |||
|— | |||
|{{icon|new}} | |||
|- | |||
|data-sort-value=DraB style="background:white"|[[File:NSMBUDX twin Dragoneel model.png|100x100px]]<br>Dragoneel (Blue) | |||
|align=left| Shorter Dragoneels that move slower, but make sharper turns. | |||
|colspan=2 data-sort-value=37|[[Dragoneel's Undersea Grotto]] | |||
|200 | |||
|— | |||
|{{icon|new}} | |||
|- | |||
|data-sort-value=Blo style="background:white"|[[File:NSMBU Asset Model Blooper.png|100x100px]]<br>[[Blooper]] | |||
|align=left|Squids that move in an erratic pattern and follow the player character. | |||
|data-sort-value=18|[[Blooper's Secret Lair]] | |||
|data-sort-value=32|[[Tropical Refresher]] | |||
|200 | |||
|— | |||
|— | |||
|- | |||
|data-sort-value=BloN style="background:white"|[[File:BloopernannyNSMBU.png|100x100px]]<br>[[Blooper Nanny]] | |||
|align=left|Bloopers that have [[Blooper Baby|Blooper Babies]] swimming in a trail behind them. | |||
|colspan=2 data-sort-value=18|[[Blooper's Secret Lair]] | |||
|200 | |||
|{{icon|NSMBU-exc}} | |||
|— | |||
|- | |||
|data-sort-value=Bul style="background:white"|[[File:NSMBU Asset Model Bullet Bill.png|100x100px]]<br>[[Bullet Bill]] | |||
|align=left|Bullets that fly straight forward and are shot from Bill Blasters and Bill Blaster Turrets. | |||
|data-sort-value=45|[[Scaling the Mountainside]] | |||
|data-sort-value=73|[[Switchback Hill]] | |||
|200 | |||
|— | |||
|— | |||
|- | |||
|data-sort-value=Mis style="background:white"|[[File:NSMBU Asset Model Bull's-Eye Bill.png|100x100px]]<br>[[Bull's-Eye Bill|Missile Bill]] | |||
|align=left|Bullet Bills that target the player character. | |||
|colspan=2 data-sort-value=69.1|[[Roy's Conveyor Castle]] | |||
|200 | |||
|— | |||
|— | |||
|- | |||
|data-sort-value=Ban style="background:white"|[[File:BanzaibillNSMBU.png|100x100px]]<br>[[Bomber Bill|Banzai Bill]] | |||
|align=left|Large Bullet Bills that fly straight forward. | |||
|colspan=2 data-sort-value=45|[[Scaling the Mountainside]] | |||
|200 | |||
|— | |||
|— | |||
|- | |||
|data-sort-value=Kin style="background:white"|[[File:NSMBU Asset Model King Bill.png|100x100px]]<br>[[King Bill]] | |||
|align=left|A nearly invincible enemy that charges forward, taking up most of the screen. | |||
|colspan=2 data-sort-value=59.3|[[Flight of the Para-Beetles]] | |||
|200 | |||
|— | |||
|— | |||
|- | |||
|data-sort-value=Tor style="background:white"|[[File:NSMBU Asset Model Torpedo Ted.png|100x100px]]<br>[[Torpedo Ted]] | |||
|align=left|A slow-moving torpedo that flies in one direction. | |||
|data-sort-value=38|[[Larry's Torpedo Castle]] | |||
|data-sort-value=51|[[The Mighty Cannonship]] | |||
|200 | |||
|— | |||
|— | |||
|- | |||
|data-sort-value=Tar style="background:white"|[[File:NSMBU Asset Model Targeting Ted.png|100x100px]]<br>[[Targeting Ted]] | |||
|align=left|Red Torpedo Teds that home into their target, much like Bull's-Eye Bills. | |||
|colspan=2 data-sort-value=51|[[The Mighty Cannonship]] | |||
|200 | |||
|— | |||
|{{icon|new}} | |||
|- | |||
|data-sort-value=Coo style="background:white"|[[File:CooliganNSMBU.png|100x100px]]<br>[[Cooligan]] | |||
|align=left|An enemy that slides on ice and slows down when hit. | |||
|colspan=2 data-sort-value=42|[[Cooligan Fields]] | |||
|200 | |||
|— | |||
|— | |||
|- | |||
|data-sort-value=Fli style="background:white"|[[File:FliprusModelNSMBU.png|100x100px]]<br>[[Fliprus]] | |||
|align=left|A walrus-like creature that throws snowballs that can be jumped on. | |||
|colspan=2 data-sort-value=49|[[Fliprus Lake]] | |||
|200 | |||
|— | |||
|{{icon|new}} | |||
|- | |||
|data-sort-value=Thwo style="background:white"|[[File:NSMBU Thwomp Artwork.png|100x100px]]<br>[[Thwomp]] | |||
|align=left|Grimacing stones that fall when the player character gets close. The spikes that surround their bodies cause damage on contact. | |||
|colspan=2 data-sort-value=48|[[Wendy's Shifting Castle]] | |||
|200 | |||
|— | |||
|— | |||
|- | |||
|data-sort-value=BigT style="background:white"|[[File:NSMBU Asset Model Big Thwomp.png|100x100px]]<br>[[Big Thwomp]] | |||
|align=left|Large Thwomps that can break through stone tiles. | |||
|colspan=2 data-sort-value=48|[[Wendy's Shifting Castle]] | |||
|200 | |||
|— | |||
|— | |||
|- | |||
|data-sort-value=Thwi style="background:white"|[[File:NSMBU Thwimp Model.png|100x100px]]<br>[[Thwimp]] | |||
|align=left|A tiny Thwomp that hops around. | |||
|colspan=2 data-sort-value=48|[[Wendy's Shifting Castle]] | |||
|200 | |||
|{{icon|NSMBU-exc}} | |||
|— | |||
|- | |||
|data-sort-value=Meck style="background:white"|[[File:NSMBU Asset Model Mechakoopa.png|100x100px]]<br>[[Mechakoopa]] | |||
|align=left|A mechanical Koopa. After stomping onw, the player character can pick it up and use it as a projectile. | |||
|colspan=2 data-sort-value=51|[[The Mighty Cannonship]] | |||
|200 | |||
|— | |||
|— | |||
|- | |||
|data-sort-value=Mec style="background:white"|[[File:NSMBU Asset Model Mecha Cheep.png|100x100px]]<br>[[Mecha Cheep]] | |||
|align=left|Robotic Cheep Cheeps that are immune to fireballs. | |||
|colspan=2 data-sort-value=51|[[The Mighty Cannonship]] | |||
|200 | |||
|{{icon|NSMBU-exc}} | |||
|{{icon|new}} | |||
|- | |||
|data-sort-value=Bra style="background:white"|[[File:NSMBU Bramball Artwork.png|100x100px]]<br>[[Bramball]] | |||
|align=left|An enemy that moves around in a set pattern and is mostly covered in spikes, with the head being the only safe part to jump on. It can be forced to move if jumped into from below. | |||
|colspan=2 data-sort-value=54|[[Bramball Woods]] | |||
|200 | |||
|— | |||
|— | |||
|- | |||
|data-sort-value=Amp style="background:white"|[[File:Amp NSMBU model.png|100x100px]]<br>[[Amp]] | |||
|align=left|Electric balls that shock the player character upon contact. | |||
|data-sort-value=55|[[Snake Block Tower]] | |||
|data-sort-value=79|[[Ludwig's Clockwork Castle]] | |||
|200 | |||
|{{icon|NSMBU-exc}} | |||
|— | |||
|- | |||
|data-sort-value=BigA style="background:white"|[[File:NSMBU Big Amp Close-up Screenshot.png|100x100px]]<br>[[Big Amp]] | |||
|align=left|Larger variants of Amps. | |||
|colspan=2 data-sort-value=55|[[Snake Block Tower]] | |||
|200 | |||
|{{icon|NSMBU-exc}} | |||
|— | |||
|- | |||
|data-sort-value=Boo style="background:white"|[[File:BooNSMBU.png|100x100px]]<br>[[Boo]] | |||
|align=left|Ghosts that follow the player character when their back is turned, but hide their face when they look at them. [[Boo Buddies|Groups of Boos]] occur floating in circles in some levels. | |||
|data-sort-value=34|[[Haunted Shipwreck]] | |||
|data-sort-value=75|[[Spinning Spirit House]] | |||
|200 | |||
|— | |||
|— | |||
|- | |||
|data-sort-value=BigB style="background:white"|[[File:BooNSMBU sprite.png|100x100px]]<br>[[Big Boo]] | |||
|align=left|Bigger variants of Boos that have the same behavior. | |||
|data-sort-value=47|[[Swaying Ghost House]] | |||
|data-sort-value=75|[[Spinning Spirit House]] | |||
|200 | |||
|— | |||
|— | |||
|- | |||
|data-sort-value=Bro style="background:white"|[[File:BroozerNSMBU.png|100x100px]]<br>[[Broozer]] | |||
|align=left|A walking, boxing Boo. Can break [[Hard Block|Stone Block]]s and other blocks that are normally indestructible. the player character can defeat one by jumping on it three times, or hitting them with a fireball. | |||
|data-sort-value=56|[[Which-Way Labyrinth]] | |||
|data-sort-value=75|[[Spinning Spirit House]] | |||
|200 | |||
|— | |||
|— | |||
|- | |||
|data-sort-value=Sca style="background:white"|[[File:NSMBU Asset Model Scaredy Rat.png|100x100px]]<br>[[Scaredy Rat]] | |||
|align=left|An enemy that walks around in a group. When one of the rats is jumped on, the rest panic and run around. | |||
|colspan=2 data-sort-value=56|[[Which-Way Labyrinth]] | |||
|200 | |||
|{{icon|NSMBU-exc}} | |||
|— | |||
|- | |||
|data-sort-value=Bul style="background:white"|[[File:BulberNSMBU.png|100x100px]]<br>[[Bulber]] | |||
|align=left|An enemy that illuminates a dark area and swims in a set pattern. | |||
|colspan=2 data-sort-value=58|[[Deepsea Ruins]] | |||
|200 | |||
|{{icon|NSMBU-exc}} | |||
|— | |||
|- | |||
|data-sort-value=Jel style="background:white"|[[File:NSMBU Screenshot Jellybeam.png|100x100px]]<br>[[Jellybeam]] | |||
|align=left|An enemy that illuminates a dark cave. | |||
|colspan=2 data-sort-value=58|[[Deepsea Ruins]] | |||
|200 | |||
|{{icon|NSMBU-exc}} | |||
|— | |||
|- | |||
|data-sort-value=Wig style="background:white"|[[File:NSMBU Screenshot Wiggler.png|100x100px]]<br>[[Wiggler]] | |||
|align=left|Caterpillars that move faster after being jumped on. | |||
|data-sort-value=59|[[Seesaw Bridge]] | |||
|data-sort-value=59.1|[[Wiggler Stampede]] | |||
|200 | |||
|— | |||
|— | |||
|- | |||
|data-sort-value=BigW style="background:white"|[[File:NSMBU Screenshot Big Wiggler.png|100x100px]]<br>[[Mega Wiggler|Big Wiggler]] | |||
|align=left|Large variants of Wigglers. | |||
|colspan=2 data-sort-value=59.1|[[Wiggler Stampede]] | |||
|data-sort-value=2000|{{icon|cross}} | |||
|— | |||
|— | |||
|- | |||
|data-sort-value=Maga style="background:white"|[[File:NSMBU Magmaargh Render.png|100x100px]]<br>[[Magmaargh]] | |||
|align=left|Lava monsters that attacks by moving towards the player character in a wave-like movement. | |||
|colspan=2 data-sort-value=59.2|[[Iggy's Volcanic Castle]] | |||
|data-sort-value=2000|{{icon|cross}} | |||
|— | |||
|— | |||
|- | |||
|data-sort-value=Magw style="background:white"|[[File:MagmawNSMBU.png|100x100px]]<br>[[Magmaw]] | |||
|align=left|Lava monsters that lunges at the player character and dips back into the lava. | |||
|colspan=2 data-sort-value=82|[[Magma-River Cruise]] | |||
|data-sort-value=2000|{{icon|cross}} | |||
|— | |||
|— | |||
|- | |||
|data-sort-value=Fla style="background:white"|[[File:NSMBU Screenshot Flame Chomp.png|100x100px]]<br>[[Flame Chomp]] | |||
|align=left|Black spheres that spit fireballs at the player character. They explode after they're out of fireballs. | |||
|colspan=2 data-sort-value=83|[[Rising Tides of Lava]] | |||
|200 | |||
|— | |||
|— | |||
|- | |||
|data-sort-value=Fuz style="background:white"|[[File:NSMBU Fuzzy Artwork.png|100x100px]]<br>[[Fuzzy]] | |||
|align=left|Enemies that travel along tracks and hurt the player character on contact. | |||
|data-sort-value=61|[[Fuzzy Clifftop]] | |||
|data-sort-value=77|[[A Quick Dip in the Sky]] | |||
|200 | |||
|— | |||
|— | |||
|- | |||
|data-sort-value=BigF style="background:white"|[[File:MegaFuzzyNSMBU.png|100x100px]]<br>[[Big Fuzzy]] | |||
|align=left|Large variants of Fuzzies. | |||
|colspan=2 data-sort-value=91|[[Spine-Tingling Spine Coaster]] | |||
|200 | |||
|— | |||
|— | |||
|- | |||
|data-sort-value=Cha style="background:white"|[[File:NSMBU Screenshot Chain Chomp.png|100x100px]]<br>[[Chain Chomp]] | |||
|align=left|Enemies tied to posts that lunge at the player character. If the player character ground pounds their post, they are set free. | |||
|colspan=2 data-sort-value=64|[[Waddlewing's Nest]] | |||
|200 | |||
|— | |||
|— | |||
|- | |||
|data-sort-value=Bob style="background:white"|[[File:BobombNSMBU.png|100x100px]]<br>[[Bob-omb]] | |||
|align=left|Bombs that ignite if they are jumped on or have a fireball thrown at them, then explode shortly after. | |||
|data-sort-value=65|[[Light Blocks, Dark Tower]] | |||
|data-sort-value=86|[[The Final Battle (New Super Mario Bros. U)|The Final Battle]] | |||
|200 | |||
|— | |||
|— | |||
|- | |||
|data-sort-value=Parb style="background:white"|[[File:ParabombNSMBU.png|100x100px]]<br>[[Parabomb]] | |||
|align=left|Parachuting Bob-ombs that are sometimes shot out of cannons. | |||
|colspan=2 data-sort-value=85|[[Red-Hot Elevator Ride]] | |||
|200 | |||
|— | |||
|— | |||
|- | |||
|data-sort-value=Foo style="background:white"|[[File:FooNSMBU.png|100x100px]]<br>[[Foo]] | |||
|align=left|An enemy that creates fog in order to obscure the player's view. | |||
|colspan=2 data-sort-value=78|[[Snaking above Mist Valley]] | |||
|200 | |||
|— | |||
|— | |||
|} | |||
===Obstacles=== | |||
{|class="wikitable"style="width:100%;text-align:center" | |||
|-style="color:white;background:red" | |||
!rowspan=2 width=10%|Name | |||
!rowspan=2|Description | |||
!colspan=2|Levels | |||
|-style="color:white;background:red" | |||
!width=8%|First | |||
!width=8%|Last | |||
|- | |||
|style="background:white"|[[File:NSMBU Screenshot Ash.png|100x100px]]<br>[[Poison fog|Ash]] | |||
|align=left|Ash enshrouds the left of the screen in Magma-River Cruise. Contact makes the player character lose a [[extra life|life]] | |||
|colspan=2|[[Magma-River Cruise]] | |||
|- | |||
|style="background:white"|[[File:NSMBU Asset Model Banzai Bill Cannon.png|100x100px]]<br>[[Banzai Bill Cannon]] | |||
|align=left|Bill Blasters that shoot Banzai Bills. | |||
|colspan=2|[[Scaling the Mountainside]] | |||
|- | |||
|style="background:white"|[[File:NSMBU Asset Model Bill Blaster.png|100x100px]]<br>[[Bill Blaster]] | |||
|align=left|Cannons that shoot Bullet Bills. | |||
|[[Scaling the Mountainside]] | |||
|[[Switchback Hill]] | |||
|- | |||
|style="background:white"|[[File:Multi Bill Blaster NSMBU Sprite.png|100x100px]]<br>[[Bill Blaster Turret]] | |||
|align=left|Stacks of Bill Blasters that rotate and shoot Bullet Bills. | |||
|colspan=2|[[Switchback Hill]] | |||
|- | |||
|style="background:white"|[[File:NSMBU Asset Model Bowser Stunner.png|100x100px]]<br>[[Bowser Stunner]] | |||
|align=left|An electric statue that resembles [[Bowser]]'s head and carries electrical currents. | |||
|colspan=2|[[Red-Hot Elevator Ride]] | |||
|- | |||
|style="background:white"|[[File:NSMBU Screenshot Bowser's Flame.png|100x100px]]<br>[[Bowser's Flame]] | |||
|align=left|Fireballs spewed by Bowser. The appear traveling on-screen in the narrow hallway leading to the Koopa King, before he is within frame. | |||
|colspan=2|[[The Final Battle (New Super Mario Bros. U)|The Final Battle]] | |||
|- | |||
|style="background:white"|[[File:NSMBUDX Meteor.png|100x100px]]<br>Bowser's Flame (big) | |||
|align=left|Balls of fire that fall slowly and break upon hitting either the ground or a block. The player character can reduce their size if they toss [[Ice Ball|ice balls]] at them. | |||
|[[Meteor Moat]] | |||
|[[The Final Battle (New Super Mario Bros. U)|The Final Battle]] | |||
|- | |||
|style="background:white"|[[File:NSMBU Screenshot Burner.jpg|100x100px]]<br>[[Burner]] | |||
|align=left|Constant streams of fire that rotate and are found on airships. | |||
|[[Larry's Torpedo Castle]] | |||
|[[Boarding the Airship]] | |||
|- | |||
|style="background:white"|[[File:NSMBU Screenshot Cannon.png|100x100px]]<br>[[Cannon]] | |||
|align=left|Cannons that shoot [[cannonball]]s. | |||
|colspan=2|[[The Mighty Cannonship]] | |||
|- | |||
|style="background:white"|[[File:NSMBU Screenshot Current.png|100x100px]]<br>[[Current]] | |||
|align=left|Downward currents that pull the player character into an [[pit|abyss]], costing them a life. | |||
|colspan=2|[[Tropical Refresher]] | |||
|- | |||
|style="background:white"|[[File:NSMBUDX Fire Bar.png|100x100px]]<br>[[Fire Bar]] | |||
|align=left|A series of fireballs that rotate infinitely, either clockwise or counterclockwise. | |||
|[[Screwtop Tower]] | |||
|[[Slide Lift Tower]] | |||
|- | |||
|style="background:white"|[[File:GhostQuestionBlock.png|100x100px]]<br>[[Ghost Block]] | |||
|align=left|A ? Block that floats and charges at the player character, breaking if it hits a floor or a platform. | |||
|[[Haunted Shipwreck]] | |||
|[[Spinning Spirit House]] | |||
|- | |||
|style="background:white"|[[File:NSMBU Giant Cannon.jpg|100x100px]]<br>[[Giant cannon]] | |||
|align=left|Horizontal, pipe-sized cannons shoot [[giant cannonball]]s. | |||
|colspan=2|[[The Mighty Cannonship]] | |||
|- | |||
|style="background:white"|[[File:NSMBU Huge Fire Bar.png|100x100px]]<br>[[Huge Fire Bar]] | |||
|align=left|A larger version of the Fire Bar. | |||
|[[Slide Lift Tower]] | |||
|[[Fire Bar Cliffs]] | |||
|- | |||
|style="background:white"|[[File:NSMBU Huge Icicle.jpg|100x100px]]<br>[[Huge Icicle]] | |||
|align=left|Large icicles that fall and act as platforms. | |||
|colspan=2|[[Icicle Caverns]] | |||
|- | |||
|style="background:white"|[[File:NSMBU 9-4 Coin 2.jpg|100x100px]]<br>[[Ice]] | |||
|align=left|Icy terrain that reduces Mario's traction. Ice make it difficult to make precise jumps and avoid oncoming hazards. | |||
|[[Cooligan Fields]] | |||
|[[Hammerswing Caverns]] | |||
|- | |||
|style="background:white"|[[File:NsmbuIcicle.png|100x100px]]<br>[[Icicle]] | |||
|align=left|Icicles that fall when the player character gets close underneath. | |||
|[[Freezing-Rain Tower]] | |||
|[[Wendy's Shifting Castle]] | |||
|- | |||
|style="background:white"|[[File:NSMBU Rising Tides of Lava Screenshot.jpg|100x100px]]<br>[[Lava]] | |||
|align=left|Pools of molten rock that cause the player character to instantly lose a life upon contact. In [[Rising Tides of Lava]], the lava [[Lava tide|rises and falls like the tide]]. | |||
|[[Lemmy's Swingback Castle]] | |||
|[[The Final Battle (New Super Mario Bros. U)|The Final Battle]] | |||
|- | |||
|style="background:white"|[[File:NSMBUDX Lava Geyser.png|100x100px]]<br>[[Lava Geyser]] | |||
|align=left|Pillar of lava that rises up from pools. | |||
|colspan=2|[[Meteor Moat]] | |||
|- | |||
|style="background:white"|[[File:NSMBU Iggy's Volcanic Castle Screenshot.jpg|100x100px]]<br>[[Lava swell]] | |||
|align=left|Lava that moves up in waves. | |||
|colspan=2|[[Iggy's Volcanic Castle]] | |||
|- | |||
|style="background:white"|[[File:NSMBU Mecha Hand.png|100x100px]]<br>[[Mecha Hand]] | |||
|align=left|A large mechanical hand modeled after Bowser's own hand that attempts to crush the player characters while they are on board. Bowser Jr. also uses the Mecha Hand in The Mighty Cannonship after the player character defeats him here. | |||
|colspan=2|[[Boarding the Airship]] | |||
|- | |||
|style="background:white"|[[File:NSMBU Morton's Compactor Castle Screenshot.jpg|100x100px]]<br>Moving rock | |||
|align=left|Stones that move in set patterns and come in various sizes. They can either help or hinder the player character. | |||
|colspan=2|[[Morton's Compactor Castle]] | |||
|- | |||
|style="background:white"|[[File:NSMBU Screenshot Moving Torch.png|100x100px]]<br>[[Burner|Moving torch]] | |||
|align=left|Cannon-like Burners that pivot back and forth. | |||
|colspan=2|[[Boarding the Airship]] | |||
|- | |||
|style="background:white"|[[File:NSMBU Wiggler Stampede Screenshot.jpg|100x100px]]<br>[[Poison (obstacle)|Poison Bog]] | |||
|align=left|A liquid hazard that causes the player character to instantly lose a life. | |||
|[[Bridge over Poisoned Waters]] | |||
|[[Spinning Platforms of Doom]] | |||
|- | |||
|style="background:white"|[[File:NSMBU E3 Perilous Pokey Cave.png|100x100px]]<br>[[Quicksand]] | |||
|align=left|Sand that sinks the player character. | |||
|[[Stone-Eye Zone]] | |||
|[[Blooming Lakitus]] | |||
|- | |||
|style="background:white"|[[File:NSMBU Screenshot Skewer.png|100x100px]]<br>[[Skewer]] | |||
|align=left|Spiked columns that extend out of walls and retract at regular intervals. Both vertical and horizontal Skewers appear. | |||
|colspan=2|[[Giant Skewer Tower]] | |||
|- | |||
|style="background:white"|[[File:FireFleeingMario.png|100x100px]]<br>[[Spike Trap|Spikes]] | |||
|align=left|Beds of spikes appear in two Special Challenges. Touching them knocks out the player character. | |||
|[[Fire, Bro!]] | |||
|[[Seriously! Fire, Bro!]] | |||
|- | |||
|style="background:white"|[[File:NSMBU Screenshot Spinner.jpg|100x100px]]<br>[[Spinner]] | |||
|align=left|A large, undefeatable spiked ball on a chain. Some of the ones in Pendulum Castle are large. | |||
|[[Snake Block Tower]] | |||
|[[Pendulum Castle]] | |||
|- | |||
|style="background:white"|[[File:NSMBU Red Torpedo Base Screenshot.png|100x100px]]<br>[[Torpedo Base]] | |||
|align=left|Red torpedo tubes that fire Targeting Teds. | |||
|colspan=2|[[The Mighty Cannonship]] | |||
|- | |||
|style="background:white"|[[File:NSMBU Torpedo Base Model.png|100x100px]]<br>[[Torpedo tube]] | |||
|align=left|An indestructible box that releases Torpedo Teds. | |||
|[[Larry's Torpedo Castle]] | |||
|[[The Mighty Cannonship]] | |||
|} | |||
===Bosses=== | ===Bosses=== | ||
{|class="wikitable"style="width:100%;text-align:center" | |||
|-style="color:white;background:red" | |||
!rowspan=2 width=10%|Name | |||
!rowspan=2|Description | |||
!colspan=2|Levels | |||
|-style="color:white;background:red" | |||
!width=8%|First | |||
!width=8%|Last | |||
|- | |||
!colspan=4 style="background:#FF7733"|Tower bosses | |||
|- | |||
|style="background:white"|[[File:Boom Boom NSMBU Model.png|100x100px]]<br>[[Boom Boom]] | |||
|align=left|The most recurring tower boss. He does not change in the first battle, especially on Crushing-Cogs Tower in [[Acorn Plains]]. However, following his first defeat, the [[Kamek|Magikoopa]] gives him special abilities. In Stoneslide Tower from [[Layer-Cake Desert]], Magikoopa will grant him the ability to spin jump. In Giant Skewer Tower from [[Sparkling Waters]] and Freezing-Rain Tower from [[Frosted Glacier]], the Magikoopa will grant him the ability to jump, similar to ''[[Super Mario Bros. 3]]''. In Snake Block Tower from [[Soda Jungle]], Magikoopa will make him larger. In Grinding-Stone Tower from [[Rock-Candy Mines]], Magikoopa will transform his arms into wings, similar to ''Super Mario Bros. 3''. | |||
|[[Crushing-Cogs Tower]] | |||
|[[Grinding-Stone Tower]] | |||
|- | |||
|style="background:white"|[[File:NSMBU Boss Sumo Bro Artwork.png|100x100px]]<br>[[Boss Sumo Bro]] | |||
|align=left|Boss Sumo Bro was a regular [[Sumo Bro]] until the Magikoopa made him grow in size. He is normally immune to attacks from the top due to the spike on his head, but he will jump between platforms which the player can hit from the bottom. Knocking him off a platform makes him vulnerable to jump attacks. He is fought on [[Screwtop Tower]]. | |||
|colspan=2|[[Screwtop Tower]] | |||
|- | |||
|style="background:white"|[[File:NSMBW Kamek Artwork.png|100x100px]]<br>[[Kamek|Magikoopa]] | |||
|align=left|Magikoopa is fought on Slide Lift Tower and teleports most of the time when Mario gets too close. However, when he stops to attack Mario, he is left vulnerable to Mario's jumping. He also casts spells on Boom Boom, Boss Sumo Bro, and Bowser granting them extra power before their battles, such as causing them to grow in size. | |||
|colspan=2|[[Slide Lift Tower]] | |||
|- | |||
!colspan=4 style="background:#FF7733"|The Koopalings | |||
|- | |||
|style="background:white"|[[File:Lemmy Koopa NSMBU.png|100x100px]]<br>[[Lemmy]] | |||
|align=left|Lemmy Koopa is fought on Lemmy's Swingback Castle in [[Acorn Plains]] and attempts to throw [[bomb]]s at Mario. | |||
|colspan=2|[[Lemmy's Swingback Castle]] | |||
|- | |||
|style="background:white"|[[File:MortonNSMBU.png|100x100px]]<br>[[Morton]] | |||
|align=left|Morton Koopa Jr. is fought on Morton's Compactor Castle in [[Layer-Cake Desert]] and uses a large hammer that is apparently filled with magic to knock [[Big Pokey]] segments in the player character's way after shaking the ground by stomping on it. He can knock Pokey segments straight at the player or knock them in high arcs. | |||
|colspan=2|[[Morton's Compactor Castle]] | |||
|- | |||
|style="background:white"|[[File:NSMBU Larry Koopa Artwork.png|100x100px]]<br>[[Larry]] | |||
|align=left|Larry Koopa is fought on Larry's Torpedo Castle in [[Sparkling Waters]] and blasts fireballs and use water blasts from the pool below the arena. When Larry is spinning in his shell, the [[Water Geyser]]s give his shell a boost upwards, making it a bit tricky to avoid. After two stomps, Larry begins to cast two fireballs in quick succession. | |||
|colspan=2|[[Larry's Torpedo Castle]] | |||
|- | |||
|style="background:white"|[[File:NSMBU Wendy Koopa Artwork.png|100x100px]]<br>[[Wendy]] | |||
|align=left|Wendy O. Koopa is fought on Wendy's Shifting Castle in [[Frosted Glacier]] and skates around the arena, shooting out two energy rings that ricochet off of walls and can knock down the [[Icicle]]s at the ceiling of the airship. She also spin jumps from walls. After she is jumped on twice, she will shoot out three rings instead. | |||
|colspan=2|[[Wendy's Shifting Castle]] | |||
|- | |||
|style="background:white"|[[File:NSMBU Iggy Artwork.png|100x100px]]<br>[[Iggy]] | |||
|align=left|Iggy Koopa is fought on Iggy's Volcanic Castle in [[Soda Jungle]] and uses the four warp pipes to run around the room and on the ceiling to make it trickier for the player to stomp on him as he uses his Magic Wand to shoot three fireballs, with some being his usual green flame, and the other being red skeleton orbs that generate [[Magmaargh]]s when they land into the lava below. When Iggy is stomped on, he will dash around the room in his shell using the pipes on the walls, which will switch him to the other side of the room. Unlike the other Koopalings where they spin in their shells and change directions at the edges or walls of the room, Iggy can actually change directions anywhere around the room during his duration in his shell. | |||
|colspan=2|[[Iggy's Volcanic Castle]] | |||
|- | |||
|style="background:white"|[[File:NSMBU Roy Artwork.png|100x100px]]<br>[[Roy]] | |||
|align=left|Roy Koopa is fought on Roy's Conveyor Castle in [[Rock-Candy Mines]] and shoots [[Bullet Bill]]s with his cannon and jump between platforms that move around during the fight. Occasionally, he shoots [[Bull's-Eye Bill|Missile Bills]]. He can also jump high in the air and ground pound the floor or platform, which makes him fire Bullet Bills on both sides of his blaster. The ground pound can also make the floating platforms appear after he comes out of his shell. | |||
|colspan=2|[[Roy's Conveyor Castle]] | |||
|- | |||
|style="background:white"|[[File:LudwigNSMBU.png|100x100px]]<br>[[Ludwig]] | |||
|align=left|Ludwig von Koopa is fought on Ludwig's Clockwork Castle in [[Meringue Clouds]] and levitates in the air while making two clones of himself, and all three Ludwigs will blast fireballs at Mario before dropping onto the ground. If one of the clones is jumped on, it will simply disappear. There are four ways to find out which is the real one. The one that is the real one fires three fireballs, while the clones fire two. The clones keep their eyes half-open, and tend to assume the real Ludwig's pre-battle idle pose while not levitating. The real Ludwig will also drop to the ground last, after the clones, as well as laugh while dropping. Finally, Mario always looks at the real Ludwig if he can see him directly, just as he does with the other bosses. When the fight starts off, after shooting their fireballs, the clones disappear before landing. After the first stomp, the clones do not disappear. After the second stomp, not only do all three Ludwigs shoot faster, but swap positions, though the real Ludwig still shoots three fireballs. | |||
|colspan=2|[[Ludwig's Clockwork Castle]] | |||
|- | |||
!colspan=4 style="background:#FF7733"|Other bosses | |||
|- | |||
|style="background:white"|[[File:Bowserjr NSMBU.png|100x100px]]<br>[[Bowser Jr.]] | |||
|align=left|Bowser Jr. is fought on [[airship]]s. In Soda Jungle's The Mighty Cannonship, Bowser Jr. uses his [[Junior Clown Car]] as a submarine underwater, in which the player must guide the Targeting Teds that Bowser Jr. shoots into his submarine. With every hit, he summons three Torpedo Teds from the left and right or from the ceiling and the floor. In Meringue Clouds' [[Boarding the Airship]], Bowser Jr.'s boss battle involves him in his Clown Car equipped with boxing gloves, which he uses to destroy the blocks the player is standing on. Bowser Jr. periodically throws Bob-ombs, which the player can use against him. However, in [[Peach's Castle (world)|Peach's Castle]]'s The Final Battle, he cannot be defeated. | |||
|[[The Mighty Cannonship]] | |||
|[[The Final Battle (New Super Mario Bros. U)|The Final Battle]] | |||
|- | |||
|style="background:white"|[[File:BowserNSMBU.png|100x100px]]<br>[[Bowser]] | |||
|align=left|Bowser is fought in The Final Battle in Peach's Castle. The first part of his battle is similar to ''[[Super Mario Bros.]]'', where the player has to get to the other side and press the switch; alternatively, shooting several fireballs also works. This causes the axe to fall and make the bridge collapse, making Bowser fall. The gate then opens and Mario moves on. When Mario reaches the top of the castle, Peach is being held up in the tower. After this, Bowser Jr. shows up in his Junior Clown Car, and Bowser hops on top of the castle while he is huge. Bowser Jr. also fights the player. In order to defeat them, the player must jump on Bowser Jr., causing him to fall out of his Junior Clown Car. This allows the player to jump in and hover over Bowser to harm him. Like the Koopalings, he curls into his shell and spins around when hit. He is defeated after being hit three times by the Clown Car. | |||
|colspan=2|[[The Final Battle (New Super Mario Bros. U)|The Final Battle]] | |||
|} | |||
==Items and objects== | |||
===Items=== | ===Items=== | ||
[[File: | These are collectibles, pickups, and health-restoring objects. | ||
{|class="wikitable" style="width:100%;text-align:center" | |||
|-style="color:white;background:red" | |||
!width=12%|Name | |||
!Description | |||
|- | |||
|style="background:white"|[[File:NSMBU Coin Artwork.png|100x100px]]<br>[[Coin]]s | |||
|align=left|Collecting 100 of these gives the player an extra life. | |||
|- | |||
|style="background:white"|[[File:NSMBU Asset Sprite Hidden Coin.png|100x100px]]<br>[[Hidden Coin]]s | |||
|align=left|An outline of a coin that becomes a coin if Mario goes through it. These coins are very common in [[Coin Battle]]. | |||
|- | |||
|style="background:white"|[[File:NSMBU Red Coin Render.png|100x100px]]<br>[[Red Coin]]s | |||
|align=left|Collecting all eight Red Coins that appear after passing through a Red Ring gives a Super Mushroom, Fire Flower, or 1-Up Mushroom, depending on what power-up the player is currently using. | |||
|- | |||
|style="background:white"|[[File:NSMBU Asset Model Blue Coin.png|100x100px]]<br>[[Blue Coin]]s | |||
|align=left|These coins are just like normal coins, but they appear by hitting a [[P Switch]]. | |||
|- | |||
|style="background:white"|[[File:Green CoinNSMBU.png|100x100px]]<br>[[Green Coin]]s | |||
|align=left|Collecting all five groups of Green Coins that appear after passing through a Green Ring gives a Super Mushroom, Fire Flower, or 1-Up Mushroom, depending on what power-up the player is currently using. | |||
|- | |||
|style="background:white"|[[File:NSMBU Starcoin Artwork.png|100x100px]]<br>[[Star Coin]]s | |||
|align=left|Three of these are located in every course in hard-to-reach or hidden areas. | |||
|- | |||
|style="background:white"|[[File:NSMBU 1-Up Mushroom.png|100x100px]]<br>[[1-Up Mushroom]]s | |||
|align=left|Gives the player an [[extra life]]. | |||
|- | |||
|style="background:white"|[[File:NSMBU Asset Model 3-Up Moon.png|100x100px]]<br>[[3-Up Moon]]s | |||
|align=left|Gives the player three [[extra life|extra lives]]. Only appears in [[Boost Mode]]. | |||
|- | |||
|style="background:white"|[[File:NSMBU Green Shell Artwork.png|100x100px]]<br>[[Koopa Shell]]s | |||
|align=left|[[Koopa Troopa]]s temporarily retreat into their shells when stomped, which can then be kicked, picked up, or thrown. They bounce off of opposing walls and can damage the player character character on the rebound, but they can be stopped with a well-timed jump or fireballs. The [[Giant Green Shell|giant shells]] of [[Big Koopa Troopa]]s can also be sent sliding by jumping on them, but are too large to hold. | |||
|- | |||
|style="background:white"|[[File:NSMBU Screenshot Buzzy Shell.png|100x100px]]<br>[[Buzzy Shell]]s | |||
|align=left|These work like Koopa Shells, but they are impervious to fire. Fireballs cannot stop them. | |||
|- | |||
|style="background:white"|[[File:NSMBU Asset Model Barrel.png|100x100px]]<br>[[Barrel]]s | |||
|align=left|An item that the player can pick up and throw at enemies to defeat them and at coins to collect them. [[Broozer]]s can also throw them. Another player who touches a barrel while it rolls will take damage. | |||
|- | |||
|style="background:white"|[[File:NSMBW POW Block Artwork.png|100x100px]]<br>[[POW Block]]s | |||
|align=left|A block that causes a large tremor on the ground when thrown. | |||
|- | |||
|style="background:white"|[[File:NSMBU Screenshot Ice Block.png|100x100px]]<br>[[Ice block (Ice Mario)|Ice blocks]] | |||
|align=left|A block that is created by an enemy that was frozen with an [[Ice Ball|ice ball]]. This block can be picked up and thrown like a barrel. | |||
|- | |||
|style="background:white"|[[File:NSMBU Asset Model Springboard.png|100x100px]]<br>[[Trampoline]]s | |||
|align=left|A spring that lets the player jump high into the air. It can be picked up and carried around. | |||
|- | |||
|style="background:white"|[[File:NSMBU Green Yoshi Egg Artwork.png|100x100px]]<br>[[Yoshi's Egg]]s | |||
|align=left|An egg that Yoshi comes out of or produces after eating five fruits, which contain power-ups. They come in two different colors: green releases the adult [[Yoshi]]. | |||
|- | |||
|style="background:white"|[[File:NSMBU Yellow Yoshi Egg Artwork.png|100x100px]]<br>[[Yoshi's Egg|Glowing Baby Yoshi's Egg]]s | |||
|align=left|This yellow eggs releases a [[Glowing Baby Yoshi]]. | |||
|- | |||
|style="background:white"|[[File:NSMBU Asset Model Fruit.png|100x100px]]<br>[[Fruit (Yoshi food)|Fruit]]s | |||
|align=left|A fruit that Yoshi eats. When Yoshi eats five fruits, he makes an egg that contains an item. | |||
|- | |||
|style="background:white"|[[File:NSMBU Purple Star Artwork.png|100x100px]]<br>[[Boost Star]]s | |||
|align=left|A star that appears during [[Boost Mode]]. | |||
|} | |||
===Power-ups=== | |||
{|width=100% cellspacing=0 border=1 cellpadding=3 style="border-collapse:collapse;background:#f5f5f5" | |||
|-style="background:red;color:white;" | |||
!width=12% rowspan=3|Power-up | |||
!width=24% colspan=3|Form | |||
!rowspan=3|Description | |||
|- | |||
!width=12% style="background:red"rowspan=2|{{icon|NSMBU-Mario}} | |||
!width=6% style="background:red"|{{icon|NSMBU-Luigi}} | |||
!width=6% style="background:red"|{{icon|NSMBU-ToadY}} | |||
|- | |||
!style="background:red"|{{icon|NSMBU-ToadB}} | |||
!style="background:red"|{{icon|NSMBU-Mii}} | |||
|- | |||
|align=center style="background:white"rowspan=2|N/A | |||
|align=center style="background:white"rowspan=2|[[File:NSMBUSmallMario.png|110x110px]]<br>[[Small Mario]] | |||
|align=center style="background:white"|[[File:NSMBU Screenshot Small Luigi.png|50x50px]]<br><small>[[Small Mario|Small<br>Luigi]]</small> | |||
|align=center style="background:white"|[[File:NSMBU Screenshot Small Yellow Toad.png|50x50px]]<br><small>[[Small Mario|Small Yellow Toad]]</small> | |||
|rowspan=2|The player character's weakest form. They start each life in their Small form. If they are touched by an enemy or obstacle, they lose one life. | |||
|- | |||
|align=center style="background:white"|[[File:NSMBU Screenshot Small Blue Toad.png|50x50px]]<br><small>[[Small Mario|Small Blue Toad]]</small> | |||
|align=center style="background:white"|[[File:NSMBU Screenshot Small Mii.png|50x50px]]<br><small>[[Small Mario|Small<br>Mii]]</small> | |||
|- | |||
|align=center style="background:white"rowspan=2|[[File:NSMBU Mushroom Artwork.png|100x100px]]<br>[[Super Mushroom]] | |||
|align=center style="background:white"rowspan=2|[[File:NSMBU Mario Jumping Artwork.png|110x110px]]<br>[[Super Mario (form)|Super Mario]] | |||
|align=center style="background:white"|[[File:NSMBU Luigi Jumping Artwork.png|50x50px]]<br><small>[[Super Mario (form)|Super<br>Luigi]]</small> | |||
|align=center style="background:white"|[[File:NSMBUYellowToad.png|50x50px]]<br><small>[[Super Mario (form)|Super Yellow Toad]]</small> | |||
|rowspan=2|Turns [[Mario]] into [[Super Mario (form)|Super Mario]]. | |||
|- | |||
|align=center style="background:white"|[[File:NSMBUBlueToad.png|50x50px]]<br><small>[[Super Mario (form)|Super Blue Toad]]</small> | |||
|align=center style="background:white"|[[File:NSMBU Screenshot Super Mii.jpg|50x50px]]<br><small>[[Super Mario (form)|Super<br>Mii]]</small> | |||
|- | |||
|align=center style="background:white"rowspan=2|[[File:NSMBU Super Acorn Artwork.png|100x100px]]<br>[[Super Acorn]] | |||
|align=center style="background:white"rowspan=2|[[File:NSMBU Flying Squirrel Mario Artwork.png|110x110px]]<br>[[Flying Squirrel Mario]] | |||
|align=center style="background:white"|[[File:FlyingSquirrelLuigiNSMBU.png|50x50px]]<br><small>[[Flying Squirrel Mario|Flying Squirrel Luigi]]</small> | |||
|align=center style="background:white"|[[File:NSMBU Flying Squirrel Yellow Toad Artwork.png|50x50px]]<br><small>[[Flying Squirrel Mario|Flying Squirrel Yellow Toad]]</small> | |||
|rowspan=2|Turns Mario into [[Flying Squirrel Mario]]. | |||
|- | |||
|align=center style="background:white"|[[File:NSMBU Flying Squirrel Blue Toad Sprite.png|50x50px]]<br><small>[[Flying Squirrel Mario|Flying Squirrel Blue Toad]]</small> | |||
|align=center style="background:white"|[[File:NSMBU Screenshot Flying Squirrel Mii.jpg|50x50px]]<br><small>[[Flying Squirrel Mario|Flying Squirrel Mii]]</small> | |||
|- | |||
|align=center style="background:white"rowspan=2|[[File:NSMBU Fire Flower Artwork.png|100x100px]]<br>[[Fire Flower]] | |||
|align=center style="background:white"rowspan=2|[[File:Fire Mario.png|110x110px]]<br>[[Fire Mario]] | |||
|align=center style="background:white"|[[File:NSMBU Screenshot Fire Luigi.png|50x50px]]<br><small>[[Fire Mario|Fire<br>Luigi]]</small> | |||
|align=center style="background:white"|[[File:NSMBU Screenshot Fire Yellow Toad.png|50x50px]]<br><small>[[Fire Mario|Fire Yellow Toad]]</small> | |||
|rowspan=2|Turns Mario into [[Fire Mario]]. | |||
|- | |||
|align=center style="background:white"|[[File:NSMBU Screenshot Fire Blue Toad.png|50x50px]]<br><small>[[Fire Mario|Fire Blue<br>Toad]]</small> | |||
|align=center style="background:white"|[[File:NSMBU Screenshot Fire Mii.jpg|50x50px]]<br><small>[[Fire Mario|Fire<br>Mii]]</small> | |||
|- | |||
|align=center style="background:white"rowspan=2|[[File:NSMBU Ice Flower Artwork.png|100x100px]]<br>[[Ice Flower]] | |||
|align=center style="background:white"rowspan=2|[[File:NSMBW Ice Mario Artwork.png|110x110px]]<br>[[Ice Mario]] | |||
|align=center style="background:white"|[[File:NSMBU Screenshot Ice Luigi.png|50x50px]]<br><small>[[Ice Mario|Ice<br>Luigi]]</small> | |||
|align=center style="background:white"|[[File:IceYellowToadNSMBU.png|50x50px]]<br><small>[[Ice Mario|Ice Yellow<br>Toad]]</small> | |||
|rowspan=2|Turns Mario into [[Ice Mario]]. Mario can shoot ice balls to freeze most enemies. | |||
|- | |||
|align=center style="background:white"|[[File:NSMBU Screenshot Ice Blue Toad.png|50x50px]]<br><small>[[Ice Mario|Ice Blue<br>Toad]]</small> | |||
|align=center style="background:white"|[[File:NSMBU Screenshot Ice Mii.png|50x50px]]<br><small>[[Ice Mario|Ice<br>Mii]]</small> | |||
|- | |||
|align=center style="background:white"rowspan=2|[[File:NSMBU Mini Mushroom Artwork.png|100x100px]]<br>[[Mini Mushroom]] | |||
|align=center style="background:white"rowspan=2|[[File:NSMBUMiniMario.png|110x110px]]<br>[[Mini Mario]] | |||
|align=center style="background:white"|[[File:NSMBU Screenshot Mini Luigi.png|50x50px]]<br><small>[[Mini Mario|Mini<br>Luigi]]</small> | |||
|align=center style="background:white"|[[File:NSMBU Screenshot Mini Yellow Toad.png|50x50px]]<br><small>[[Mini Mario|Mini Yellow Toad]]</small> | |||
|rowspan=2|Turns Mario into [[Mini Mario]]. | |||
|- | |||
|align=center style="background:white"|[[File:NSMBU Screenshot Mini Blue Toad.png|50x50px]]<br><small>[[Mini Mario|Mini Blue<br>Toad]]</small> | |||
|align=center style="background:white"|[[File:NSMBU Screenshot Mini Mii.png|50x50px]]<br><small>[[Mini Mario|Mini<br>Mii]]</small> | |||
|- | |||
|align=center style="background:white"rowspan=2|[[File:NSMBW Propeller Mushroom Artwork.png|100x100px]]<br>[[Propeller Mushroom]] | |||
|align=center style="background:white"rowspan=2|[[File:NSMBW Propeller Mario.png|110x110px]]<br>[[Propeller Mario]] | |||
|align=center style="background:white"|[[File:NSMBU Screenshot Propeller Luigi.png|50x50px]]<br><small>[[Propeller Mario|Propeller<br>Luigi]]</small> | |||
|align=center style="background:white"|[[File:NSMBU Screenshot Propeller Yellow Toad.png|50x50px]]<br><small>[[Propeller Mario|Propeller Yellow Toad]]</small> | |||
|rowspan=2|Turns Mario into [[Propeller Mario]] and gives him some short flight. | |||
|- | |||
|align=center style="background:white"|[[File:NSMBU Screenshot Propeller Blue Toad.png|50x50px]]<br><small>[[Propeller Mario|Propeller Blue Toad]]</small> | |||
|align=center style="background:white"|[[File:NSMBU Screenshot Propeller Mii.png|50x50px]]<br><small>[[Propeller Mario|Propeller<br>Mii]]</small> | |||
|- | |||
|align=center style="background:white"rowspan=2|[[File:Penguinsuit.png|100x100px]]<br>[[Penguin Suit]] | |||
|align=center style="background:white"rowspan=2|[[File:MKT Artwork PenguinMario.png|110x110px]]<br>[[Penguin Mario]] | |||
|align=center style="background:white"|[[File:NSLU Penguin Luigi Render.png|50x50px]]<br><small>[[Penguin Mario|Penguin<br>Luigi]]</small> | |||
|align=center style="background:white"|[[File:NSMBU Screenshot Penguin Yellow Toad.png|50x50px]]<br><small>[[Penguin Mario|Penguin Yellow Toad]]</small> | |||
|rowspan=2|Turns Mario into [[Penguin Mario]]. Mario can shoot ice balls and slide on his belly, along with having an improved swimming ability. | |||
|- | |||
|align=center style="background:white"|[[File:NSMBU Screenshot Penguin Blue Toad.png|50x50px]]<br><small>[[Penguin Mario|Penguin Blue Toad]]</small> | |||
|align=center style="background:white"|[[File:NSMBU Screenshot Penguin Mii.png|50x50px]]<br><small>[[Penguin Mario|Penguin<br>Mii]]</small> | |||
|- | |||
|align=center style="background:white"rowspan=2|[[File:NSMBU Super Star Artwork.png|100x100px]]<br>[[Super Star]] | |||
|align=center style="background:white"rowspan=2|[[File:NSMBWii Invincible Mario Artwork.png|110x110px]]<br>[[Invincible Mario]] | |||
|align=center style="background:white"|[[File:NSMBU Screenshot Invincible Luigi.png|50x50px]]<br><small>[[Invincible Mario|Invincible<br>Luigi]]</small> | |||
|align=center style="background:white"|[[File:NSMBU Screenshot Invincible Yellow Toad.png|50x50px]]<br><small>[[Invincible Mario|Invincible Yellow Toad]]</small> | |||
|rowspan=2|Turns Mario into [[Invincible Mario]]. | |||
|- | |||
|align=center style="background:white"|[[File:NSMBU Screenshot Invincible Blue Toad.png|50x50px]]<br><small>[[Invincible Mario|Invincible Blue Toad]]</small> | |||
|align=center style="background:white"|[[File:NSMBU Screenshot Invincible Mii.png|50x50px]]<br><small>[[Invincible Mario|Invincible<br>Mii]]</small> | |||
|- | |||
|align=center style="background:white"rowspan=2|[[File:NSLU P-Acorn Icon.png|100x100px]]<br>[[P-Acorn]] | |||
|align=center style="background:white"rowspan=2|[[File:NSMBU Power Squirrel Mario Render.png|110x110px]]<br>[[Power Squirrel Mario]] | |||
|align=center style="background:white"|[[File:NSLU P-Acorn Luigi Render.png|50x50px]]<br><small>[[Power Squirrel Mario|Power Squirrel Luigi]]</small> | |||
|align=center style="background:white"|[[File:NSMBU Screenshot Power Squirrel Yellow Toad.png|50x50px]]<br><small>[[Power Squirrel Mario|Power Squirrel Yellow Toad]]</small> | |||
|rowspan=2|Turns Mario into [[Power Squirrel Mario]]. | |||
|- | |||
|align=center style="background:white"|[[File:NSMBU Screenshot Power Squirrel Blue Toad.png|50x50px]]<br><small>[[Power Squirrel Mario|Power Squirrel Blue Toad]]</small> | |||
|align=center style="background:white"|[[File:NSMBU Screenshot Power Squirrel Mii.png|50x50px]]<br><small>[[Power Squirrel Mario|Power Squirrel Mii]]</small> | |||
|} | |||
===Objects=== | |||
Objects are interactable elements of the environment that cannot be picked up or collected by [[Mario]]. For objects that primarily function as obstructions or hazards, see [[#Obstacles|above]]. | |||
{|class="wikitable"style="width:100%;text-align:center" | |||
|-style="color:white;background:red" | |||
!width=12%|Name | |||
!Description | |||
|- | |||
!colspan=3 style="background:#FF7733"|Blocks and containers | |||
|- | |||
|style="background:white"|[[File:Question Block NSMB.png|100x100px]]<br>[[? Block]] | |||
|align=left|Contains a [[coin]] or item when hit. Some ? Block are [[Coin Block|10-Coin Blocks]] that release up to ten coins when struck in rapid succession. Other are [[Hidden Block|invisible]] and also become visible when struck. Emptying any ? Block turns it into an [[Empty Block]] that can be stood on like a platform. | |||
|- | |||
|style="background:white"|[[File:3UP MoonBlockNSMBU.png|100x100px]]<br>[[3-Up Moon Block]] | |||
|align=left|A very rare block that contains a [[3-Up Moon]]. | |||
|- | |||
|style="background:white"|[[File:NSMBU Ground Big Brick Block.png|100x100px]]<br>[[Mega Block|Big Block]] | |||
|align=left|A large Brick Block that mostly have the same properties normal-sized Brick Block. However, some Big Blocks are Coin Blocks. When these ones are emptied, the Big Block falls apart and leaves five coins behind on the ground. | |||
|- | |||
|style="background:white"|[[File:NSMBU Screenshot Block (Rail).png|100x100px]]<br>[[Block]] ([[Track|railed]]) | |||
|align=left|? Blocks and Bricks that travel along tracks. | |||
|- | |||
|style="background:white"|[[File:NSMBU Red Boost Block Artwork.png|100x100px]]<br>[[Boost Block]] | |||
|align=left|Blocks that appear when touching the screen on the Wii U GamePad. | |||
|- | |||
|style="background:white"|[[File:NSMBW Brick Block Artwork.png|100x100px]]<br>[[Brick Block]] | |||
|align=left|Breaks or contains coins when hit. Like ? Blocks, there are Brick Blocks that are 10-Coin Blocks. The player character cannot break Brick Blocks in their Small or Mini forms. | |||
|- | |||
|style="background:white"|[[File:NSMBU Screenshot Cracked Block.png|100x100px]]<br>[[Cracked block]]<ref>Stratton, p. 187</ref> | |||
|align=left|These blocks make up the floor in the battle against [[Bowser Jr.]] A block will fall away if struck by Bowser Jr. twice, but reappear after a brief period of time. | |||
|- | |||
|style="background:white"|[[File:NsmbuCrate.png|100x100px]]<br>[[Crate]] | |||
|align=left|A wooden box Mario can break via a [[Ground Pound]]. Sometimes contains coins or power-ups. | |||
|- | |||
|style="background:white"|[[File:NSMBU Asset Model Donut Block.png|100x100px]]<br>[[Donut Block]] | |||
|align=left|A platform that falls under weight if Mario stays there for too long. As Mini Mario, he is too light to make it fall; as such, it becomes safer. | |||
|- | |||
|style="background:white"|[[File:NSMBU-FlyingBlock.png|100x100px]]<br>[[Flying ? Block]] | |||
|align=left|A type of ? Block that flies in a rhythmic pattern to the music of a stage. Once hit, it becomes an Empty Block. | |||
|- | |||
|style="background:white"|[[File:NSMBU Screenshot Magical Platform (A).png|100x100px]]<br>[[Magical platform]]<ref>Stratton, p. 175</ref> (A) | |||
|align=left|These blocks appear during the battle with the [[Kamek|Magikoopa]]. When his [[spell]]s strike these blocks, they turn into Donut Blocks. | |||
|- | |||
|style="background:white"|[[File:NSMBU Screenshot Magical Platform (B).png|100x100px]]<br>Magical platform (B) | |||
|align=left|Some of these airborne magical platforms contain enemies. The slam downward on the Magikoopa's command, damaging the player character if they are in their path. The platforms that contain enemies release them when they collide with the ground, freeing them onto the field. | |||
|- | |||
|style="background:white"|[[File:NSMBU Ground Big Question Block.png|100x100px]]<br>[[Mega ? Block]] | |||
|align=left|Giant ? Blocks. It functions like the smaller ones and becomes a big Empty Block when emptied. | |||
|- | |||
|style="background:white"|[[File:JumpBlockNSMBU.png|100x100px]]<br>[[Note Block]] | |||
|align=left|A block that makes Mario jump higher when he jumps or steps on it. | |||
|- | |||
|style="background:white"|[[File:NSMBU Roulette Block Sprite.gif|100x100px]]<br>[[Roulette Block]] | |||
|align=left|A block with various items scrolling on it. Mario can hit it and release the power-up shown. | |||
|- | |||
|style="background:white"|[[File:NSMBU Screenshot Snake Block.jpg|100x100px]]<br>[[Snake Block]] | |||
|align=left|Green blocks that move like a snake once Mario steps on it. | |||
|- | |||
|style="background:white"|[[File:NSMBU Screenshot Giant Snake Block.jpg|100x100px]]<br>Snake Block (big) | |||
|align=left|A large type of Snake Block. | |||
|- | |||
|style="background:white"|[[File:NsmbuHardBlock.png|100x100px]]<br>[[Hard Block|Stone block]] | |||
|align=left|Block that can only be destroyed by [[Bob-omb]] explosions or some large/spiky enemies like [[Grrrol]]s or [[Big Thwomp]]s. | |||
|- | |||
|style="background:white"|[[File:NSMBU Screenshot Stretch Block.jpg|100x100px]]<br>[[Stretch Block]] | |||
|align=left|A block made up of five segments that stretches to act as a bridge in certain levels. | |||
|- | |||
|style="background:white"|[[File:HintblockNSMBU.png|100x100px]]<br>[[Super Guide Block]] | |||
|align=left|Appears after Mario loses five lives in a row in one stage. When this block is hit, Luigi clears the stage for Mario. | |||
|- | |||
|style="background:white"|[[File:NSMBU Asset Model Treasure Chest.png|100x100px]]<br>[[Treasure chest]] | |||
|align=left|Chests award the player character a [[Super Star]] that goes into their inventory. In [[Enemy Course]]s, Nabbit steals the Star if the character does not grab it in time. | |||
|- | |||
!colspan=3 style="background:#FF7733"|Trigger objects | |||
|- | |||
|style="background:white"|[[File:NSMBU Screenshot ! Switch.png|100x100px]]<br>[[! Switch]] | |||
|align=left|Activating the switch enables the axe to destroy the bridge, causing Bowser to fall. | |||
|- | |||
|style="background:white"|[[File:NSMBU Asset Model Question Switch.png|100x100px]]<br>[[? Switch]] | |||
|align=left|Changes or adds things to an area, such as platforms, for a limited time. | |||
|- | |||
|style="background:white"|[[File:NSMBU Goal Ring Render.png|100x100px]]<br>[[Goal ring (New Super Mario Bros. U)|Goal ring]] | |||
|align=left|The [[goal]]s in [[Challenge Mode]], appearing in place of Goal Poles. | |||
|- | |||
|style="background:white"|[[File:Green RingNSMBU.png|100x100px]]<br>[[Green Ring]] | |||
|align=left|Makes fifteen Green Coins appear. If the player collects all five groups of green coins before they disappear, they receive either a power-up, which varies in between levels, or a [[1-Up Mushroom]], depending on the player's current size. | |||
|- | |||
|style="background:white"|[[File:NSMBU Asset Model P Switch.png|100x100px]]<br>[[P Switch]] | |||
|align=left|Not only turns bricks into coins or vice versa, but also reveals Blue Coins. | |||
|- | |||
|style="background:white"|[[File:NSMBU Asset Model Red Ring.png|100x100px]]<br>[[Red Ring]] | |||
|align=left|Makes eight Red Coins appear. If the player collects all eight coins before they disappear, they receive either a power-up, which varies in between levels, or a 1-Up Mushroom, depending on the player's current size. | |||
|- | |||
!colspan=3 style="background:#FF7733"|Pipes | |||
|- | |||
|style="background:white"|[[File:NSMBU Warp Pipe Render.png|100x100px]]<br>[[Warp Pipe|Giant pipe]] | |||
|align=left|[[Big Piranha Plant]]s sit in giant pipes. None of these ones are Warp Pipes. | |||
|- | |||
|style="background:white"|[[File:NsmbuCurrent.png|100x100px]]<br>[[Jet Pipe]] | |||
|align=left|These underwater pipes expel strong currents that push the player character. | |||
|- | |||
|style="background:white"|[[File:NSMBU Green Warp Pipe Artwork.png|100x100px]]<br>[[Warp Pipe|Pipe]] | |||
|align=left|Pipes going through the ground that transport the player to new areas. In {{world link|coin|2|World Coin-2 (New Super Mario Bros. U)}} and {{world link|coin|7|World Coin-7}}, a golden Warp Pipe leading to the next area appears when players have collected enough coins in an area. | |||
|- | |||
|style="background:white"|[[File:NSMBU Screenshot Pipe Cannon.png|100x100px]]<br>[[Pipe Cannon]] | |||
|align=left|Pipes that launch players to another location or a platform that they are unable to reach. | |||
|- | |||
|style="background:white"|[[File:MiniWarpPipeNSMBU.png|100x100px]]<br>[[Small pipe]] | |||
|align=left|Mini variants of warp pipes that can be accessed with a [[Mini Mushroom]]. | |||
|- | |||
!colspan=3 style="background:#FF7733"|Climbable objects | |||
|- | |||
|style="background:white"|[[File:NSMBU Asset Model Vine Block.png|100x100px]]<br>[[Vine|Beanstalk]] | |||
|align=left|Used to reach [[Coin Heaven]]s or other secret places. They emerge from Vine Blocks, which resemble Invisible Blocks or Brick Blocks. | |||
|- | |||
|style="background:white"|[[File:NSMBU Screenshot Hanging Chain.jpg|100x100px]]<br>[[Chain (object)|Hanging chain]] | |||
|align=left|Chains that the player character can swing back and forth on like {{wp|rope swing}}s. | |||
|- | |||
|style="background:white"|[[File:NSMBU Screenshot Hanging Vine.png|100x100px]]<br>[[Swinging vine|Hanging vine]] | |||
|align=left|Hanging vines found in [[Spinning Platforms of Doom]]. They function like rope swings. | |||
|- | |||
|style="background:white"|[[File:NsmbuChainLink.png|100x100px]]<br>[[Moving Fence]] | |||
|align=left|Chain-link fences that shift through the air. A [[Chain-Link|stationary one]] appears in [[Fire Bar Cliffs]]. | |||
|- | |||
|style="background:white"|[[File:NSMBU Screenshot Pole.jpg|100x100px]]<br>[[Pole]] | |||
|align=left|Striped poles that the player can climb up and slide down after jumping onto them. | |||
|- | |||
|style="background:white"|[[File:NSMBU Asset Sprite Rocky Wall.png|100x100px]]<br>[[Rocky wall]] | |||
|align=left|Rocky walls can be climbed like rope ladders but with more horizontal breath. They are found in mountainous levels. Movement is restricted at the top of these walls, where the player character can only sidestep. | |||
|- | |||
|style="background:white"|[[File:NSMBU Screenshot Rope Ladder.jpg|100x100px]]<br>[[Ladder|Rope ladder]] | |||
|align=left|A climbable object used to get on top of platforms. | |||
|- | |||
!colspan=3 style="background:#FF7733"|Platforms | |||
|- | |||
|style="background:white"|[[File:NsmbuArrowLift.png|100x100px]]<br>[[Arrow lift (New Super Mario Bros. series)|Arrow lift]] | |||
|align=left|Lifts that appear turn from blue to red when activated, causing them will move in the opposite direction from where they are pointing while idle. | |||
|- | |||
|style="background:white"|[[File:NsmbuBeanPlatformCurled.png|100x100px]]<br>[[Bean Platform]] | |||
|align=left|Large beans serving as platforms that periodically coil and uncoil. | |||
|- | |||
|style="background:white"|[[File:NSMBU Screenshot Bridge.png|100x100px]]<br>[[Bone Bridge]] | |||
|align=left|A floor made up of skeleton bones. When Bowser Jr. slams down on a bridge with his Junior Clown Car, it causes brief ripples that can stun the player and enemies. | |||
|- | |||
|style="background:white"|[[File:NSMBU Screenshot Bouncy Cloud.png|100x100px]]<br>[[Bouncy Cloud]] | |||
|align=left|Cloud platforms that makes the player and enemies bounces very high. | |||
|- | |||
|style="background:white"|[[File:NSMBU Screenshot Clockwork Block.png|100x100px]]<br>[[Clockwork Block]]<ref>{{cite|author=Roberts, Rachel, Cardner Clark, editors|title="New Super Mario Bros. U" in ''[[Super Mario Bros. Encyclopedia|Super Mario Bros. Encyclopedia: The Official Guide to the First 30 Years]]''|format=First English Edition|location=Milwaukie|publisher=[[Dark Horse Comics|Dark Horse Books]]|date=2018|page=215|isbn=978-1-50670-897-3}}</ref> | |||
|align=left|A platform with gears that moves left and right. | |||
|- | |||
|style="background:white"|[[File:NsmbuCloudLift.png|100x100px]]<br>[[Cloud Lift]] | |||
|align=left|Long platforms that move to the right when initially landed on. | |||
|- | |||
|style="background:white"|[[File:NSMBU Asset Model Cog (Medium).png|100x100px]]<br>[[Cog (obstacle)|Cog]] | |||
|align=left|Gear-like platforms that the player must go under to pass. If they remain under one, they will be squished and lose a life. | |||
|- | |||
|style="background:white"|[[File:NSMBU Asset Sprite Conveyor Belt.png|100x100px]]<br>[[Conveyor Belt]] | |||
|align=left|Moving platforms that carry the player and, sometimes, Iron Blocks and enemies. | |||
|- | |||
|style="background:white"|[[File:NSMBU Screenshot Cross Lift.jpg|100x100px]]<br>[[Cross Lift]] | |||
|align=left|A lift that not only expands and contracts horizontally, but also conversely expands and contracts vertically. | |||
|- | |||
|style="background:white"|[[File:NSMBU Screenshot Flatbed Ferry.jpg|100x100px]]<br>[[Lift|Flatbed Ferry]] | |||
|align=left|Lifts that travel along tracks. Some tracks are self-connected or lead to a rounded end that sends the Flatbed Ferry back the way it came. Others lack an obstruction at the end, causing the lift to fall. | |||
|- | |||
|style="background:white"|[[File:NSMBU Asset Model Floating Crate.png|100x100px]]<br>[[Crate|Floating crate]] | |||
|align=left|These large wooden crates float in water and sink when stood on. The float back into place once jumped off of. | |||
|- | |||
|style="background:white"|[[File:NsmbuFloor.png|100x100px]]<br>[[Floor (Mario Bros.)|Floor]] | |||
|align=left|Platforms that the player can bump from below to stun enemies. | |||
|- | |||
|style="background:white"|[[File:NSMBU Screenshot Ice Chunk.png|100x100px]]<br>[[Ice Chunk]] | |||
|align=left|A giant variant of an Ice Block that serves as a platform. It functions similarly to Iron Blocks, which can also crush the player. | |||
|- | |||
|style="background:white"|[[File:NSMBU Asset Model Ice Platform.png|100x100px]]<br>[[Ice platform]] | |||
|align=left|Columnar lifts made of ice. Some move back and forth or up and down. | |||
|- | |||
|style="background:white"|[[File:NsmbuIronCrate.png|100x100px]]<br>[[Iron Block]] | |||
|align=left|An iron box that drops on Conveyor Belts. They are indestructible and causes the player to lose a life if crushed. | |||
|- | |||
|style="background:white"|[[File:NsmbuLeafPlatform.png|100x100px]]<br>[[Leaf Platform]] | |||
|align=left|Leaves that serve as platforms appearing on giant beanstalks. When they first sprout, they appear to be green, only to turn red and brown then slowly float down after some time has passed. | |||
|- | |||
|style="background:white"|[[File:NSMBU Asset Model Lift.png|100x100px]]<br>[[Lift]] | |||
|align=left|Wooden platforms that are suspended above ground. Many of them move in set paths and are of varied lengths. | |||
|- | |||
|style="background:white"|[[File:NSMBU Asset Model Light-Up Lift.png|100x100px]]<br>[[Light-Up-Lift|Light Block]] | |||
|align=left|A block-like platform that shines light in dark areas. | |||
|- | |||
|style="background:white"|[[File:NSMBU Mole to Goal Screenshot.png|100x100px]]<br>[[Limited Lift]] | |||
|align=left|A lift that the player can travel with a limited capacity of at least five enemies. It stops once the counter reaches 0. | |||
|- | |||
|style="background:white"|[[File:NSMBU Screenshot Limited Lift (Remote-Control).png|100x100px]]<br>[[Limited Lift (Remote-Control)]]<ref>Stratton, p. 199</ref> | |||
|align=left|[[Girder]]-like Limited Lifts that begin to rise once a player character is on top of it. The player can tilt the lift, but stops if the counter on it reaches 0. | |||
|- | |||
|style="background:white"|[[File:NSMBU Screenshot Bolt Lift.jpg|100x100px]]<br>[[Bolt Lift|Nut]] | |||
|align=left|A set of nuts that are screwed onto a very long bolt that function as lifts. The player must continually jump to avoid falling. | |||
|- | |||
|style="background:white"|[[File:NSMBU Screenshot Paddle Platform.jpg|100x100px]]<br>[[Paddle Platform]] | |||
|align=left|A paddle wheel-like platforms made of 4 smaller platforms that moves in a wheel on tracks. | |||
|- | |||
|style="background:white"|[[File:NSMBU Screenshot Palm Tree.jpg|100x100px]]<br>[[Tree|Palm tree]] | |||
|align=left|Trees of varying heights that serve as platforms. | |||
|- | |||
|style="background:white"|[[File:NSMBU Screenshot Pendulum Platform.jpg|100x100px]]<br>[[Pendulum Platform]] | |||
|align=left|Chained platforms that sway from side to side indefinitely. | |||
|- | |||
|style="background:white"|[[File:NSMBU Screenshot Remote-Control Platform.png|100x100px]]<br>[[Remote-Control Platform]] | |||
|align=left|A lift that the player can tilt and move on tracks by tilting the Wii U GamePad or the Wii Remote or by alternating between pressing {{button|wiiu|zl}} and {{button|wiiu|zr}}. It reacts only when a player is standing on it. | |||
|- | |||
|style="background:white"|[[File:NSMBU Screenshot Rocking Platform.jpg|100x100px]]<br>[[Rocking Platform]]<ref>Roberts and Clark, p. 216</ref> | |||
|align=left|Wooden platforms in the air that tilt back and forth on their own. | |||
|- | |||
|style="background:white"|[[File:NsmbuRollingLog.png|100x100px]]<br>[[Rolling log]] | |||
|align=left|Cylindrical wooden platforms that, when stood on, roll over. The player must run along them or jump carefully to avoid falling off until they reach their destination on a set path. | |||
|- | |||
|style="background:white"|[[File:NsmbuSandGeyser.png|100x100px]]<br>[[Sand Geyser]] | |||
|align=left|Pillars of sand that rises up from pits at regular intervals, and can be used as platforms. | |||
|- | |||
|style="background:white"|[[File:NsmbuScaleLift.png|100x100px]]<br>[[Scale Lift]] | |||
|align=left|Scale-like platforms that causes the one platform to rise if the player lands on the parallel one. It will fall off if they stand on it for too long. | |||
|- | |||
|style="background:white"|[[File:NSMBU Screenshot Screwtop Lift.jpg|100x100px]]<br>[[Screwtop Lift]] | |||
|align=left|A lift with a [[Screwtop]] that the player can move in a set direction by spinning. | |||
|- | |||
|style="background:white"|[[File:NSMBU Screenshot Screwtop Platform.jpg|100x100px]]<br>[[Screwtop Platform]] | |||
|align=left|A platform with a Screwtop that the player can move in a set direction by spinning. | |||
|- | |||
|style="background:white"|[[File:NSMBU Screenshot Screwtop Shroom.jpg|100x100px]]<br>[[Screwtop Shroom]] | |||
|align=left|A Mushroom Platform that only appears in [[Rising Tides of Lava]]. When the Screwtop on it is spun on, it lowers another lift's height. | |||
|- | |||
|style="background:white"|[[File:NSMBU Screenshot Seesaw Log Bridge.jpg|100x100px]]<br>[[Seesaw Log Bridge]] | |||
|align=left|Solid wooden platforms that teeter to one side when a player or element stands on the opposite side. | |||
|- | |||
|style="background:white"|[[File:NSMBU Asset Model Seesaw Shroom.png|100x100px]]<br>[[Seesaw Shroom]] | |||
|align=left|A mushroom platform that acts as a seesaw. | |||
|- | |||
|style="background:white"|[[File:DontTouchAnything.png|100x100px]]<br>[[Slide Lift]] | |||
|align=left|Lifts that are aligned either horizontally or vertically and move in a rectangular fashion either clockwise or counterclockwise. | |||
|- | |||
|style="background:white"|[[File:NSMBU Asset Model Spine Coaster.png|100x100px]]<br>[[Spine Coaster]] | |||
|align=left|Rideable creatures made of bone used to aid Mario and company to pass through pits and pits. | |||
|- | |||
|style="background:white"|[[File:NSMBU Asset Model Star Lift.png|100x100px]]<br>[[Star Lift]] | |||
|align=left|Star-shaped platforms that spin depending on which side of them is weighed down by the player. | |||
|- | |||
|style="background:white"|[[File:NsmbuStretchShroom.png|100x100px]]<br>[[Stretch Shroom]] | |||
|align=left|Mushroom Platforms that contract and extend at constant intervals, pulling anything and anyone on the ends of the platforms to the center when they contract. | |||
|- | |||
|style="background:white"|[[File:NsmbuStoneEye.png|100x100px]]<br>[[Stone-Eye]] | |||
|align=left|Giant gray stone heads that either move in different patterns, or stay completely stationary. Stone-Eyes are sentient, indicated by their eyes that constantly stare at the player. | |||
|- | |||
|style="background:white"|[[File:NSMBU Hammerswing Caverns Screenshot.jpg|100x100px]]<br>[[Hammer Pendulum|Swinging Hammer]] | |||
|align=left|Hammer-like platforms that swing back and forth in a 180° arc. | |||
|- | |||
|style="background:white"|[[File:NSMBU Screenshot Unstable Mushroom.png|100x100px]]<br>[[Tilting mushroom]] | |||
|align=left|Mushroom Platforms that tilt back and forth on their own. | |||
|- | |||
|style="background:white"|[[File:NsmbuTurningFloor.png|100x100px]]<br>[[Turning Floor]] | |||
|align=left|Continually moving objects that turn clockwise or counterclockwise, moving anything on them. | |||
|- | |||
|style="background:white"|[[File:NsmbuWaterBall.png|100x100px]]<br>[[Water Ball]] | |||
|align=left|A huge mass of water that floats in the air. Acts as if Mario and co. are in water. | |||
|- | |||
|style="background:white"|[[File:NSMBU Water Geyser Artwork.png|100x100px]]<br>[[Water Geyser]] | |||
|align=left|Pillars of water that rise from below and serve as platforms. | |||
|- | |||
|style="background:white"|[[File:Wobble Rock NSMBU.png|100x100px]]<br>[[Wobble Rock]] | |||
|align=left|Rock platforms that wobble from left to right when the player stands near one of its edges. | |||
|- | |||
!colspan=3 style="background:#FF7733"|Other objects | |||
|- | |||
|style="background:white"|[[File:NSMBU Screenshot Boss Cannon.jpg|100x100px]]<br>[[Cannon|Boss cannon]] | |||
|align=left|Cannons found at the end of enemy [[castle]]s. Boss cannons launch the player character to one of a nearby [[airship]] to battle one of the [[Koopalings]]. | |||
|- | |||
|style="background:white"|[[File:NSMBU Screenshot Checkpoint Flag.jpg|100x100px]]<br>[[Checkpoint Flag]] | |||
|align=left|A flag that acts like a checkpoint. It has Bowser's insignia, but if a player touches it, it is replaced by whichever character's symbol turned it. If that character is in their Small form, they transform into their Super form. | |||
|- | |||
|style="background:white"|[[File:NSMBU Asset Model Door.png|100x100px]]<br>[[Warp Door|Door]] | |||
|align=left|Doors bring the player character to another area. In [[Ghost House]]s, doors are sometimes involved in puzzles. One-way boss doors occur at the end of every [[tower|fortress]] that bring the player character to a boss battle. | |||
|- | |||
|style="background:white"|[[File:NSMBU Screenshot False Wall.jpg|100x100px]]<br>[[False wall]]<ref>Stratton, p. 6, 10, 43, 45, 51, 65, 67, 70, 81, 83, 84, 92, 98, 99, 103, 104, 108, 110, 111, 117, 131, 136, 146, 151, 152, 157, 172, 175–77, 179, 192, 214, 217, 219</ref> | |||
|align=left|Hidden alcoves found throughout many levels. False walls often conceal blocks, pipes, or Star Coins. | |||
|- | |||
|style="background:white"|[[File:NsmbuFlower.png|100x100px]]<br>[[Flower (environmental object)|Flower]] | |||
|align=left|A common background object that releases a coin when spun next to. | |||
|- | |||
|style="background:white"|[[File:FlagpoleNSMBU.png|100x100px]]<br>[[Goal Pole]] | |||
|align=left|Flagpoles found at the end of every level. Touching one completes the level. | |||
|- | |||
|style="background:white"|[[File:NSMBU Flagpole.png|100x100px]]<br>[[Goal Pole (secret)]] | |||
|align=left|Flagpoles with red flags, found at the end of some levels. Touching one completes the level and leads to [[secret exit]]s. | |||
|- | |||
|style="background:white"|[[File:NSMBU Screenshot Mist.jpg|100x100px]]<br>[[Cloud (cover)|Mist]] | |||
|align=left|Dense haze that obscures the player's view and conceals objects. They can temporarily be blown away through various means, such as [[Spin Jump]]ing. Enemies sometimes are concealed in mist. | |||
|- | |||
|style="background:white"|[[File:DoorNSMBU.png|100x100px]]<br>[[Trick door]]<ref>Stratton, p. 10, 84</ref> | |||
|align=left|Some of the doors found in Ghost Houses are illusions crafted by [[Boo]]s. Attempting to open one makes it disappear and releases a coin. | |||
|} | |||
==Reception== | |||
''New Super Mario Bros. U'' has received generally positive reviews. The game currently maintains an 84 average on Metacritic<ref>{{cite|url=www.metacritic.com/game/wii-u/new-super-mario-bros-u|title=New Super Mario Bros. U|publisher=Metacritic|accessdate=May 13, 2024|language=en}}</ref> and had an 84.48% on GameRankings.<ref>{{cite|deadlink=y|archive=web.archive.org/web/20191209013358/http://www.gamerankings.com/wii-u/632934-new-super-mario-bros-u/index.html|title=New Super Mario Bros. U for Wii U|publisher=GameRankings|accessdate=May 13, 2024|language=en}}</ref> GameXplain gave the single-player and multi-player modes 4 stars out of 5,<ref>{{cite|url=www.youtube.com/watch?v=LqF2T1AkIek|title=New Super Mario Bros. U - Video Review (Wii U) [HD]|publisher=YouTube|author=GameXplain|language=en|date=November 15, 2012|accessdate=May 13, 2024}}</ref> IGN gave it a score of 9.1 out of 10,<ref>{{cite|url=www.ign.com/articles/2012/11/15/new-super-mario-bros-u-review|title=New Super Mario Bros. U Review|publisher=IGN|accessdate=May 13, 2024|author=George, Richard|date=November 15, 2012|language=en}}</ref> EGM<ref>{{cite|deadlink=y|archive=web.archive.org/web/20121116100744/http://www.egmnow.com/articles/reviews/egm-review-new-super-mario-bros-u|author=Carsillo, Ray|accessdate=May 13, 2024|title=EGM Review: New Super Mario Bros. U|publisher=EGMNOW|language=en|date=November 15, 2012}}</ref> gave a score of 9/10, Joystiq gave it 4.5 stars out of 5,<ref>{{cite|deadlink=y|archive=web.archive.org/web/20121118053042/http://www.joystiq.com/2012/11/15/new-super-mario-bros-u-review|title=New Super Mario Bros. U review: A return to form|publisher=Joystiq|accessdate=May 13, 2024|date=November 15, 2012|language=en|author=Mitchell, Richard}}</ref> Polygon<ref>{{cite|url=www.polygon.com/2012/11/15/3647880/new-super-mario-bros-u-review|publisher=Polygon|date=November 15, 2012|language=en|title=New Super Mario Bros. U review: new tricks|author=Kollar, Phillip|accessdate=May 13, 2024}}</ref> and Destructoid<ref>{{cite|deadlink=y|archive=web.archive.org/web/20121117144425/http://www.destructoid.com/review-new-super-mario-bros-u-238434.phtml|title=Review: New Super Mario Bros. U|publisher=Destructoid|accessdate=May 13, 2024|language=en|author=Sterling, Jim|date=November 15, 2012}}</ref> gave the same score of 8.5/10, VentureBeat<ref>{{cite|url=venturebeat.com/2012/11/15/new-super-mario-bros-u-is-far-from-new-review/2|title=New Super Mario Bros. U is far from new (review)|publisher=VentureBeat|date=November 15, 2012|accessdate=May 13, 2024|language=en|author=McLaughlin, Rus}}</ref> gave it a score of 83/100 (83%), Games Radar gave it 4 stars out of 5,<ref>{{cite|url=www.gamesradar.com/new-super-mario-bros-u-review|language=en|publisher=Gamesradar|title=New Super Mario Bros U review|author=Gilbert, Henry|date=November 15, 2012|accessdate=May 13, 2024}}</ref> and Gamespot gave a score of 8.5.<ref>{{cite|url=www.youtube.com/watch?v=tux1HawsuNw|title=GameSpot Reviews - New Super Mario Bros. U|author=GameSpot|publisher=YouTube|date=November 17, 2012|accessdate=May 13, 2024|language=en}}</ref> | |||
The game has been praised for its balanced gameplay and challenge mode, with IGN's Rich George describing it as "the best thing to come to Mario's world since 3D", while criticizing it as not pushing the [[Wii U]]'s visuals and audio potential. He also stated, "though it doesn't necessarily redefine Nintendo's iconic hero, it still manages to capture the sense of carefree adventure that many of us felt as kids." He also criticized the game's "weak graphics and audio, plus the return of the irritating chaotic, bouncy multiplayer mode." He praised the progressing difficulty in the game and the additional difficulty of Challenge Mode. | |||
{|class="wikitable reviews" | |||
!colspan="4"style="font-size:120%;text-align:center;background-color:silver"|Reviews | |||
|-style="background-color:#E6E6E6;" | |||
|Reviewer, Publication | |||
|Score | |||
|Comment | |||
|- | |||
|Jim Sterling, [https://www.destructoid.com/review-new-super-mario-bros-u-238434.phtml Destructoid] | |||
|8.5/10 | |||
|align="left"|"''New Super Mario Bros. U is a great little platformer that kicks off the Wii U launch with a bang. Players know exactly what they're getting with this one -- an entertaining and incomplex bit of gaming that provides challenge and smirks in equal measure. While certainly a "safe" game to launch with, it is by no means unremarkable, and the only people who would fail to have fun are those with a fundamental aversion to Mario or platformers in general. Literally everybody else would find it incredibly difficult to dislike this one ... even if some of those latter stages will make them temporarily despise it. Because nobody likes lava levels. Nobody.''" | |||
|- | |||
|Christian Donlan, [https://www.eurogamer.net/articles/2012-11-15-new-super-mario-bros-u-review Eurogamer] | |||
|9/10 | |||
|align="left"|"''Is the plumber's Wii U debut as good as his recent 3D outings? Not quite, but for the New Super Mario Bros. series, it's a real step forward in detailing, imagination and character. There's always been a keen Mario brain working away inside these 2D design exercises. Now, it feels like there's a proper soul to go along with it.''" | |||
|- | |||
|Richard George, [https://www.ign.com/articles/2012/11/15/new-super-mario-bros-u-review IGN] | |||
|9.1/10 | |||
|align="left"|"''It's difficult to find freshness or brilliance in a 2D landscape. Mario's world is now three decades old. That would seem to suggest new territory is scarce, and in some ways the formulaic New Mario series had come to reinforce that fear. But New Super Mario Bros. U demonstrates there's not just life left in this type of game, but that it can be modern and nostalgic at the same time. Nintendo's approach here strikes a great balance in all areas, ranging from its difficulty to design to enemies and bosses. And for everything the basic Story Mode does right – and that's a considerable amount – the Challenge Mode will be remembered as a key moment in the life of the New Mario series, where Nintendo realized it didn’t have to sacrifice the core gamer’s experience at the expense of a more casual audience. This is how Mario can and will appeal to everyone.''" | |||
|- | |||
!colspan="4"style="background-color:silver;font-size:120%;text-align:center;"|Aggregators | |||
|-style="background-color:#E6E6E6;" | |||
|colspan=2|Compiler | |||
|colspan=2|Platform / Score | |||
|- | |||
|colspan=2|Metacritic | |||
|colspan=2 style="background-color:LimeGreen"|[https://www.metacritic.com/game/wii-u/new-super-mario-bros-u 84] | |||
|- | |||
|colspan=2|GameRankings | |||
|colspan=2|[https://www.gamerankings.com/wii-u/632934-new-super-mario-bros-u/index.html 84.48%] | |||
|} | |||
{{br}} | |||
===Sales=== | |||
As of March 31, 2014, ''New Super Mario Bros. U'' is the 3rd best-selling game for the Wii U, having sold about 4.16 million copies worldwide. As of September 30, 2021, it had sold 5.82 million copies worldwide.<ref>{{cite|date=May 10, 2022|url=www.nintendo.co.jp/ir/finance/software/wiiu.html|title=Top Selling Title Sales Unites|publisher=Nintendo|accessdate=May 13, 2024|archive=web.archive.org/web/20170802044950/https://www.nintendo.co.jp/ir/finance/software/wiiu.html|language=Japanese}}</ref> | |||
==Updates== | |||
<div id=fh3 class=mw-headline>1.1.0</div> | |||
'''Release date:''' November 18, 2012 | |||
Released at launch, the first update adds the game's Miiverse functionality. | |||
<div id=fh3 class=mw-headline>1.2.0</div> | |||
'''Release date:''' March 15, 2013<ref>{{cite|author=Bonds, Curtis|date=March 15, 2013|url=www.nintendoworldreport.com/news/33579/update-v120-released-for-new-super-mario-bros-u|title=v.1.2.0 Released for ''New Super Mario Bros. U''|publisher=Nintendo World Report|accessdate=November 28, 2014|language=en}}</ref> | |||
The second update causes any Miiverse posts made in-game to be posted to a separate "Game Posts" community rather than the standard community. | |||
<div id=fh3 class=mw-headline>1.3.0</div> | |||
'''Release date:''' June 20, 2013<ref>{{cite|url=mynintendonews.com/2013/06/20/new-super-mario-bros-u-update-allows-wii-u-pro-controller-use|author=Colette|title=''New Super Mario Bros. U'' Update Allows Wii U Pro Controller Use]|publisher=My Nintendo News|date=June 20, 2013|accessdate=May 13, 2024}}</ref> | |||
The third game update adds the ability for the game to receive the ''New Super Luigi U'' downloadable content and puts a prompt in-game to go to the Nintendo eShop to download it. The update also adds support for the Wii U Pro Controller. | |||
==''New Super Luigi U''== | |||
[[File:NSLU NA Box Art.png|thumb|100px|''New Super Luigi U'' retail box art.]] | |||
{{main|New Super Luigi U}} | |||
In July 2013, as part of the [[Year of Luigi]] celebration, a large-scale expansion pack titled ''[[New Super Luigi U]]'' was released as downloadable content for ''New Super Mario Bros. U'' on the [[Nintendo eShop]], and was later released as a standalone title at retail. The pack contains 82 new courses in place of the original ones, featuring Luigi as the main character in the place of Mario, who does not appear at all within the game. | |||
The game features the same multiplayer, with the option of playing as Yellow Toad, Blue Toad, or Nabbit (who cannot power-up like the other characters, but is impervious to enemy damage). The game features similar physics to that of Luigi's style of gameplay in ''[[Super Mario Bros.: The Lost Levels]]'', in that the characters run faster and jump higher, but stop slower. The levels have also been designed to be more challenging, with each one being shorter and featuring a 100 second time limit. | |||
The Mario & Luigi Deluxe Set Wii U bundle released in November 2013 includes with it both games put onto one disc, titled ''[[New Super Mario Bros. U + New Super Luigi U]]''. In addition to being a compilation of both games, this release includes several bonus videos. | |||
=== | With the discontinuation of digital purchases for Wii U in March 2023, it is no longer possible to buy ''New Super Luigi U'' as DLC for ''New Super Mario Bros. U'', though it can still be downloaded by those who purchased it when it was available. | ||
==Development== | |||
As stated above, ''New Super Mario Bros. U'' was based upon the ''New Super Mario Bros. Mii'' Wii U experience demo shown off at E3 2011.<ref>{{cite|url=www.nintendolife.com/news/2012/04/mario_wii_u_based_on_new_super_mario_bros_mii|title=Mario Wii U "Based On" New Super Mario Bros. Mii|author=Newton, James|publisher=Nintendo Life|accessdate=May 13, 2024|date=April 17, 2012}}</ref> A translation of a Spanish online magazine revealed that the new title was in development and would be revealed at {{wp|E3 2012}},<ref>{{cite|url=www.nintendolife.com/news/2012/04/miyamoto_to_show_wii_u_mario_at_e3|title=Miyamoto To Show Wii U Mario at E3|publisher=Nintendo Life|date=April 16, 2012|author=Newton, James|accessdate=May 13, 2024}}</ref> with the game fully revealed to be ''New Super Mario Bros. U'' during the E3 trailer.<ref>{{cite|url=www.youtube.com/watch?v=K4pJnV5OxPI|title=Wii U - ''New Super Mario Bros. U'' E3 Trailer|date=June 5, 2012|publisher=YouTube|accessdate=May 13, 2024|author=Nintendo of America}}</ref> | |||
''New Super Mario Bros. U'' began development soon after the completion of ''New Super Mario Bros. Wii'', using pre-existing elements from the Wii game, as development equipment for the Wii U did not exist at the time.<ref name="Iwata NSMBU 1">{{cite|url=iwataasks.nintendo.com/interviews/wiiu/nsmbu/0/0/|title=Iwata Asks : ''New Super Mario Bros. U'' : "What Should Be New?"|accessdate=May 13, 2024|publisher=Nintendo}}</ref> The game's singular, interconnected world map was inspired by the one seen in ''Super Mario World''; Masataka Takemoto desired to take the map from that game and use the Wii U in order to recreate and expand upon the concept.<ref name="Iwata NSMBU 3">{{cite|url=iwataasks.nintendo.com/interviews/wiiu/nsmbu/0/3|title=Iwata Asks : ''New Super Mario Bros. U'' : One Map|accessdate=May 13, 2024|publisher=Nintendo}}</ref> The map being seamless also had a role in Miiverse integration, as with the setup of the map it was possible to display comments across each of the levels.<ref name="Iwata NSMBU 4">{{cite|url=iwataasks.nintendo.com/interviews/wiiu/nsmbu/0/4|title=Iwata Asks : ''New Super Mario Bros. U'' : Reading the Posts in your Hands|accessdate=May 13, 2024|publisher=Nintendo}}</ref> The concept of drop-in play with one player on the Gamepad placing blocks was brought up early in development. When the Wii U Gamepad was brought up during development, the team began to conceptualize ways to use it, talking specifically about the drop-in play. Wanting to make a feature with "controls that you can understand right away with no explanation," the concept of using the GamePad to place blocks the other players can jump on went through.<ref name="Iwata NSMBU 1"/> | |||
Challenge Mode was based upon the idea of setting a self-challenge in the previous games, as well as the challenge site for ''New Super Mario Bros. Wii''. Because of ideas like this, the developers decided to put the Challenge Mode into the game from the beginning. The challenges were created with all types of skill levels in mind.<ref name="Iwata NSMBU 2">{{cite|url=iwataasks.nintendo.com/interviews/wiiu/nsmbu/0/1|title=Iwata Asks : ''New Super Mario Bros. U'' : "Mottainai (What a Waste)!"|publisher=Nintendo|accessdate=May 13, 2024}}</ref> | |||
Boost Rush Mode was based on the Free-for-All Mode featured in ''New Super Mario Bros. Wii'', in that they wanted a similar mode for playing the main game stages in short bursts. The developers tried connecting courses together and playing them through, but found it uneventful; they then added the concept of collecting coins resulting in the screen scrolling faster, and found it to fit a ''Super Mario''-style of gameplay.<ref name="Iwata NSMBU 3"/> | |||
==Pre-release and unused content== | |||
[[File:NSMBU Prerelease Miis Screenshot.png|thumb|upright=0.85|Four Miis in Acorn Plains-1.]] | |||
{{main|List of New Super Mario Bros. U pre-release and unused content}} | |||
Miis were originally going to be playable in the game's Story Mode. In the final game, Mii playability is restricted to the bonus modes. Additionally, Boost Mode was also originally titled "Assist Play". The Acorn Plains map as seen in the E3 showcase for the game is also very different from the version seen in final game. | |||
{{br}} | |||
==Gallery== | ==Gallery== | ||
{{ | {{main-gallery}} | ||
<gallery> | |||
NSMBU Four Characters Jumping Artwork.png|[[Mario]], [[Luigi]], [[Yellow Toad and Blue Toad|Yellow Toad]], and [[Yellow Toad and Blue Toad|Blue Toad]] | |||
NSMBU Mario and Yoshi Jumping Artwork.png|Mario riding [[Yoshi]] | |||
NSMBU Glowing Baby Yoshi with Mario Artwork.png|Mario carrying a [[Glowing Baby Yoshi]] | |||
NSMBU Waddlewing and Super Acorn Artwork.png|A [[Waddlewing]] holding a [[Super Acorn]] | |||
NSMBU group art.jpg|Group art | |||
</gallery> | |||
==Media== | |||
{{main-media}} | |||
{{media table | |||
|file1=Overworld Theme New Super Mario Bros U.oga | |||
|title1=Overworld Theme | |||
|length1=0:30 | |||
|file2=New Super Mario Bros U Athletic Theme.oga | |||
|title2=Athletic Theme | |||
|length2=0:30 | |||
|file3=NSMBU Snow Theme.oga | |||
|title3=Snow Theme | |||
|length3=0:30 | |||
|file4=NSMBU Title Theme.oga | |||
|title4=Title Theme | |||
|length4=0:30 | |||
}} | |||
==Glitches== | |||
{{main|List of New Super Mario Bros. U / New Super Luigi U glitches}} | |||
By entering a Warp Pipe or door in any stage exactly when the timer hits zero, the player does not die, and they can explore the level indefinitely. | |||
==Staff== | |||
{{main|List of New Super Mario Bros. U staff}} | |||
''New Super Mario Bros. U'' was produced by [[Takashi Tezuka]] and Hiroyuki Kimura, with Masataka Takemoto as the director and Tsutomu Kaneshige and Shinichi Ikeamtsu as the general coordinators. [[Satoru Iwata]] was the executive producer, with the general producer being [[Shigeru Miyamoto]]. Masanobu Sato was the lead designer, and Shiro Mouri was the programming director. The music was composed by Shiho Fujii and Mahito Yokota, with [[Koji Kondo]] as sound adviser. | |||
==References to other games== | |||
*''[[Mario Bros. (game)|Mario Bros.]]'': [[World Coin-2 (New Super Mario Bros. U)|Coin Courses-2]] is based on the levels in this game with similar platforms and [[Koopa Troopa]]s acting like as [[Shellcreeper]]s. | |||
*''[[Super Mario Bros.]]'': The second level is an underground level with a secret path over the ceiling passing over the exit [[Warp Pipe]], leading to a [[Goal Pole (secret)|secret exit]]. In the final battle with [[Bowser]], when Mario hits the switch, it causes an [[axe]] to fall and break the bridge. Sprites from this game are used in the game menus. | |||
*''[[Super Mario Bros. 2]]'': A portion of the title screen theme references the start of this game's "[[Ground Theme (Super Mario Bros. 2)|Ground Theme]]". | |||
*''[[Super Mario Bros. 3]]'': [[Boom Boom]] is fought as the mid-boss of each world. The [[Super Acorn]] is comparable to the [[Super Leaf]], as it has a [[P-Acorn|P-variation]]. The [[Koopalings]], which originated from this game, have [[airship]]s once again. Airship levels, and the castle rooms before entering a Koopaling's airship, both use a remastered version of the airship theme from ''Super Mario Bros. 3''. [[P Flying Squirrel Mario]]'s flying sound effect is similar to the [[P-Meter]] sound. | |||
*''[[Super Mario World]]'': The world map is connected again and a ghost ship, similar to the [[Sunken Ghost Ship]] level, appears in this game. The Warp Pipes have a similar structure to the ones in ''Super Mario World''. [[Sumo Bro]]s, [[Torpedo Ted]]s, [[Thwimp]]s, and [[Bony Beetle]]s reappear as enemies. Most of the worlds are named after food again. Some of the world's features are similar to those found in [[Dinosaur Land]] (e.g. Acorn Plains having jagged mountains or Soda Jungle being one-third based on the [[Forest of Illusion]]). ''Super Mario World'' has the exact same number of exits that this game has: 96. | |||
*''[[Super Mario World 2: Yoshi's Island]]'': The name of the [[Challenge Mode (New Super Mario Bros. U)|Challenge]] "[[Spin Jump, Get Dizzy]]" is a reference to that of a level from this game, [[Touch Fuzzy, Get Dizzy]]. Bubble Baby Yoshi's abilities maybe a reference to how Yoshi can shoot bubbles in this game including how the player can bounce off the bubbles. [[Kamek]] uses his magic to enhance Boom Boom's attacks, just as he did with this game's bosses. He also grows Bowser to a large size, similar to the final fight with [[Baby Bowser]]. | |||
*''[[New Super Mario Bros.]]'': [[Cloud Lift]]s are redesigned to better resemble their ''New Super Mario Bros.'' counterparts and compress when stood on, just like in this game. The background of [[Dry Desert Mushrooms]] is based on the background of [[World 2-6 (New Super Mario Bros.)|World 2-6]]. | |||
*''[[Mario Kart Wii]]'': The [[Red Shell]] and [[Green Shell]] use their artworks from this game, but the Green Shell's artwork is mirrored. | |||
*''[[New Super Mario Bros. Wii]]'': The title is the sequel to this game. Many graphical, audial, and technical assets were reused from this game. Kamek growing Bowser with magic could also be a reference to this game's final fight, where similar events transpired. The main gimmicks in [[World 1 (New Super Mario Bros. Wii)|Princess Peach’s Kingdom]]'s [[World 1-Tower (New Super Mario Bros. Wii)|tower]] and [[World 1-Castle (New Super Mario Bros. Wii)|castle]] levels, [[Pendulum Platform]]s and [[Cog (obstacle)|cogs]] respectively, are switched in order of appearance between [[Acorn Plains]]' [[Crushing-Cogs Tower]] and [[Lemmy's Swingback Castle]]. | |||
*''[[Super Mario Galaxy 2]]'': Balloon Baby Yoshi and Glowing Baby Yoshi's abilities are similar to those of [[Blimp Yoshi]] and [[Bulb Yoshi]], respectively. [[Magmaargh]]s and [[Magmaw]]s return from this game. | |||
*''[[Super Mario 3D Land]]'': Boom Boom's voices are reused, as well as the motion patterns of some of the enemies. | |||
*''[[Mario Kart 7]]'': The [[Mii]]s reuse their voice clips from this game. | |||
*''[[New Super Mario Bros. 2]]'': The title is a follow-up to this installment. The [[Note Block]] sounds are reused. The Goal Pole also produces the flag containing the emblem of the topmost character, also seen in this game. | |||
*''[[Paper Mario: Sticker Star]]'': The [[Ghost House]] doors use the design from [[The Enigmansion]] in this game rather than the one from ''New Super Mario Bros. Wii''. The [[Bony Beetle]]'s design is reused. Also, Bowser Jr. uses the same glass dome in his clown copter as in this game. | |||
==References in later games== | |||
*''[[Mario Kart Arcade GP DX]]'': Various background mountains from [[Acorn Plains]] are visible in the [[Bowser Jr. Cup]]'s courses, [[Aerial Road]] and [[Sky Arena]]. | |||
*''[[Mario Kart 8]]'': [[Mecha Cheep]]s reappear in the underwater sections of [[Water Park]]. The Koopalings' weight class order (from lightweight to heavyweight) in this game mirrors the order they are hanging onto Bowser's tail in ''New Super Mario Bros. U''{{'}}s ending cutscene: [[Lemmy]] is the lightest, [[Larry]] and [[Wendy]] are tied for the second-lightest, [[Iggy]] and [[Ludwig]] are middleweights, [[Roy]] is the second-heaviest, and [[Morton]] is the heaviest. | |||
*''[[Mario Golf: World Tour]]'': [[Layer-Cake Desert]], [[Sparkling Waters]], and [[Rock-Candy Mines]] appear as downloadable courses in this game. Some pieces of Mii gear are based upon both [[Nabbit]] and the [[Boss Sumo Bro]], both of which originate from this game. Nabbit returns as a downloadable playable character. | |||
*''[[Super Smash Bros. for Wii U]]'': A stage based on ''New Super Mario Bros. U'', [[Mushroom Kingdom U]], appears in this game. | |||
*''[[Mario Party 10]]'': A few of the minigames take place in areas that resemble some of the worlds in ''New Super Mario Bros. U'', such as [[Cheep Cheep Leap]] taking place in Sparkling Waters and [[Fruit Scoot Scurry]] taking place in Layer-Cake Desert. | |||
*''[[Super Mario Maker]]''/''[[Super Mario Maker for Nintendo 3DS]]'': The fourth game style in these games is based on ''New Super Mario Bros. U''. | |||
*''[[Mario Tennis: Ultra Smash]]'': The [[Junior Clown Car]] is equipped with the boxing gloves from ''New Super Mario Bros. U''. | |||
*''[[Super Mario Run]]'': The graphics, as well as most of the music, are based on ''New Super Mario Bros. U''. | |||
*''[[Mario Party: Star Rush]]'': The underwater theme from ''New Super Mario Bros. Wii'' appears as a song from ''New Super Mario Bros. U'' in the Rhythm Recital mode for this game. | |||
*''[[Super Smash Bros. Ultimate]]'': The stage [[Mushroom Kingdom U]] from ''Super Smash Bros. for Wii U'' returns as a stage in this game. The Koopalings, Nabbit, Boo, Hammer Bro, Banzai Bill, Thwomp, Bob-omb, Flying Squirrel Toad, Super Mushroom, Fire Flower, and Super Star appear as spirits, using their artwork from ''New Super Mario Bros. U''. | |||
* ''[[Super Mario Maker 2]]'': Like the previous ''Super Mario Maker'' games, the fourth style in this game is based on ''New Super Mario Bros. U''. | |||
*''[[WarioWare: Get It Together!]]'': This game features a [[New Super Mario Bros. U (microgame)|microgame]] based on ''New Super Mario Bros. U''. | |||
*''[[Mario & Luigi: Brothership]]'': The magic blocks from [[Kamek]]'s battle appear as part of an attack by the [[Magikoopa]] enemies. | |||
==Names in other languages== | |||
{{foreign names | |||
|Jap={{ruby|New|ニュー}} スーパーマリオブラザーズ U<ref name=sakai/> | |||
|JapR=Nyū Sūpā Mario Burazāzu Yū | |||
|JapM=New Super Mario Bros. U | |||
|Kor=뉴 슈퍼 마리오브라더스 U | |||
|KorR=Nyu Syupeo Mariobeuradeoseu Yu | |||
|KorM=New Super Mario Bros. U; as named in ''[[New Super Mario Bros. U Deluxe]]'' | |||
|ChiS=New 超级马力欧兄弟 U<ref name="SMM2">''Super Mario Maker 2'' in-game name</ref> | |||
|ChiSR=New Chāojí Mǎlì'ōu Xiōngdì U | |||
|ChiSM=New Super Mario Bros. U | |||
|ChiT=New 超級瑪利歐兄弟U<ref name="SMM2"/> | |||
|ChiTR=New Chāojí Mǎlì'ōu Xiōngdì U | |||
|ChiTM=New Super Mario Bros. U | |||
}} | |||
==Trivia== | ==Trivia== | ||
*If the Miis are selected as P1, they will be colored like [[Mario]]. If P2, they will be colored like [[Luigi]]. If P3, they will be colored like [[Wario]]. If P4, they will wear blue shirts and dark blue overalls, similar to Luigi's light blue alternate costume from the ''[[Super Smash Bros. (series)|Super Smash Bros.]]'' series. This could be a reference to the player 4 in some of the Wii U [[Virtual Console#Wii U|Virtual Console]] ports of the [[Game Boy Advance]] iteration of ''[[Mario Bros. (game)|Mario Bros.]]'' | |||
*If the Miis are selected as P1, they will be colored like [[Mario]]. If P2, they will be colored like [[Luigi]]. If P3, they will be colored like [[Wario]]. If P4, they will | *When the Mario Bros., Toads, or Miis are not moving, they stop and stare at the screen until the player starts moving them again. | ||
*When the | *Sometimes, on the title screen, Luigi almost trips over instead of jumping and ground-pounding the ground. | ||
*In this game, ''[[New Super Luigi U]]'', and [[New Super Mario Bros. U Deluxe|their Nintendo Switch port]], [[Yellow Toad (New Super Mario Bros. series)|Yellow Toad]] and [[Blue Toad (character)|Blue Toad]]'s in-game voices are swapped compared to ''[[New Super Mario Bros. Wii]]''. However, their voices in the menus and character selection screen are still the same as the previous game. In ''[[Super Mario Maker 2]]''{{'}}s ''New Super Mario Bros. U''-style, [[Toad]]'s voices are a combination of both of them. | |||
*Bowser transforming Peach's castle into a stronghold of his in this game is similar to the climax of ''[[Super Mario Bros.: Peach-hime Kyūshutsu Dai Sakusen!]]'' | |||
*[ | |||
==References== | ==References== | ||
<references/> | <references/> | ||
{{ | |||
==External links== | |||
{{NIWA|NWiki=1|StrategyWiki=1|MiiWiki=1}} | |||
{{TCRF}} | |||
*[https://www.nintendo.com/jp/character/mario/en/history/new_smb_u/index.html Mario Portal Game Archive (EN)] | |||
*[https://www.nintendo.com/jp/character/mario/history/new_smb_u/index.html Mario Portal Game Archive (JP)] | |||
*[https://www.nintendo.co.jp/wiiu/arpj/index.html Japanese website] | |||
*[https://web.archive.org/web/20130620090224/http://newsupermariobrosu.nintendo.com/characters/#/new-enemies American website] | |||
*[https://www.nintendo.co.uk//Games/Wii-U/New-Super-Mario-Bros-U-593118.html European website] | |||
*[https://www.youtube.com/user/NewMarioUEN Official YouTube channel] | |||
{{NSMBU}} | |||
{{Super Mario games}} | |||
{{Wii U}} | {{Wii U}} | ||
[[de:New Super Mario Bros. U]] | |||
[[ | [[it:New Super Mario Bros. U]] | ||
[[Category: | [[Category:New Super Mario Bros. U|*]] | ||
[[Category:Games]] | [[Category:Games]] | ||
[[Category:Platforming | [[Category:Wii U games]] | ||
[[Category:Platforming games]] | |||
[[Category:2012 games]] | [[Category:2012 games]] | ||
[[Category: | [[Category:Games with Nintendo Network]] | ||
Latest revision as of 17:39, December 31, 2024
- This article is about the 2012 Wii U game. For the Nintendo Switch port of this game, see New Super Mario Bros. U Deluxe. For the microgame from WarioWare: Get It Together!, see New Super Mario Bros. U (microgame).
| New Super Mario Bros. U | |||||||||||||||
|---|---|---|---|---|---|---|---|---|---|---|---|---|---|---|---|
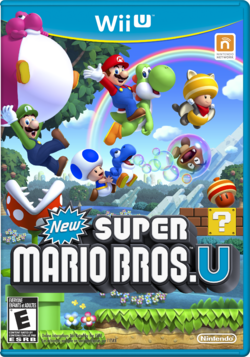 North American box cover For alternate box art, see the game's gallery. | |||||||||||||||
| Developer | Nintendo EAD | ||||||||||||||
| Publisher | Nintendo | ||||||||||||||
| Platform(s) | Wii U | ||||||||||||||
| Release date | |||||||||||||||
| Language(s) | English (United Kingdom) English (United States) French (France) French (Canada) German Spanish (Spain) Spanish (Latin America) Italian Dutch Portuguese (Portugal) Russian Japanese | ||||||||||||||
| Genre | Platformer | ||||||||||||||
| Rating(s) |
| ||||||||||||||
| Mode(s) | Single-player Multiplayer | ||||||||||||||
| Format | Wii U: | ||||||||||||||
| Input | Wii U: | ||||||||||||||
| Serial code(s) | |||||||||||||||
New Super Mario Bros. U is a 2012 side-scrolling 2.5D platforming game, and a launch title for the Wii U. It is the sixteenth entry in the Super Mario series[3][4] and the fourth New Super Mario Bros. game. As a sequel to New Super Mario Bros. Wii, the game is a follow-up to New Super Mario Bros. 2. It is the first Super Mario series game to be released as a launch title for a home console since Super Mario 64. An expansion pack for this game was later released in mid-2013, titled New Super Luigi U.
Based upon the New Super Mario Bros. Mii tech demo shown at E3 2011, the game uses new, more detailed background styles and models and introduces the Flying Squirrel power-up, acquired by Mario and his friends from an item called the Super Acorn, as well as utilizing the Wii U GamePad in Boost Mode.
The game was originally purchasable at the Nintendo eShop, requiring 2301.7 MB (about 2.25 GB) to be downloaded, but with the retail release of New Super Mario Bros. U + New Super Luigi U, it is no longer possible to purchase New Super Mario Bros. U as a standalone game in regions outside of Japan.
A port titled New Super Mario Bros. U Deluxe was released for the Nintendo Switch in January 2019, and once again contains both New Super Mario Bros. U and New Super Luigi U.
Story[edit]
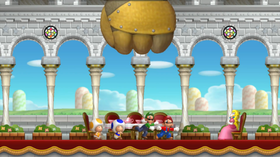
Mario, Luigi, Yellow Toad, and Blue Toad are with Princess Peach in Peach's Castle dining together. Bowser and the Koopalings suddenly arrive in their Airships, with the former sporting a Mecha Hand that smashes and launches the brothers and the Toads away from the castle. Mario and his friends crash into the Acorn Tree, launching Super Acorns through the area. They then tumble out of the tree, passing by a Bubble Baby Yoshi and Balloon Baby Yoshi, and they then look into the horizon to see Bowser beginning a siege on Princess Peach's Castle, setting the Mario Bros. and the Toads to go on a new adventure and to save Princess Peach.
As the game progresses, the view occasionally shifts to Peach's Castle, showing the flags being replaced by Bowser's flags (after Tilted Tunnel), and the castle being surrounded by a thin tornado-like cloud that is made thicker by Magikoopa's magic (after Stoneslide Tower), entirely obscuring the castle (after Giant Skewer Tower or Freezing-Rain Tower). Mario, Luigi, Yellow Toad, and Blue Toad also encounter Bowser's forces, including the Koopalings, Boom Boom, Magikoopa, and Bowser Jr., who occasionally attacks the heroes with his father's airship. All of them are defeated, and Bowser Jr. causes the airship to crash after making the mechanical hand punch through it. After reaching Peach's Castle and defeating Bowser, the group moves onward, but Bowser Jr. appears and urges Magikoopa to spread his magic across the area. After heading to the castle exterior, Mario and the others see Peach in a tower. Before they can save her, she is locked inside the tower and Bowser appears, now at a giant size, alongside Bowser Jr. Eventually, Bowser is defeated and Bowser Jr., embarrassed, flees. The character that defeated Bowser gets to Peach and bows down to her, and is then kissed by her, to their shock and delight, as the clouds surrounding the castle disappear, restoring it to its former state.
Outside the castle, the Koopalings and Bowser Jr. are fleeing on the airship as Bowser, who has returned to his normal size, recovers. Noticing the escaping airship, he climbs up onto one of the castle towers and leaps onto the ship, but his weight causes it to plummet into a hill nearby; they then fly away hanging onto Bowser Jr.'s Junior Clown Car while Mario and Blue Toad watch. They then turn back to the others, who are celebrating their victory, with Mario delivering a final victory pose.
Gameplay[edit]
Overview[edit]
New Super Mario Bros. U is a platform game which plays very similarly to that of past New Super Mario Bros. games, especially New Super Mario Bros. Wii, with the return of the 4-player multiplayer functioning identically to the Wii game, while most of the elements and design found in the game make heavy reference to Super Mario World. Many other gameplay elements from the Wii game, such as the Super Guide, Enemy Courses, and the bubble function, also return. In certain modes, players can play as their Miis, including the first player, who can also choose whoever to play as. Power-ups, like the Fire Flower, Ice Flower, Penguin Suit, Propeller Mushroom, and the Mini Mushroom return. The game also features a new power-up, the Super Acorn, which gives Mario and co. a Flying Squirrel form, which lets them glide and grab onto walls.
New Super Mario Bros. U features two main controller options: single-player using the Wii U GamePad, and single-player or multiplayer using Wii Remotes and/or Wii U Pro Controllers; the player can switch controllers at any point between the GamePad and a Wii Remote or Pro Controller by pausing the game, either in a level or on the world map, and selecting the "Change Controller" option. The game supports up to five simultaneous players, with up to four being able to play as the characters with a Wii Remote or Wii U Pro Controller, and are able to drop in and out at any point while in a stage by pressing ![]() on the GamePad and selecting a character, or on the map by pausing and selecting "Number of Players". Another player is able to use the Wii U GamePad in what is known as Boost Mode. In Boost Mode, the GamePad player can assist the other players by placing blocks for them to stand on and stunning enemies. Boost Mode can be used at any point when playing with one of the other controllers; when playing with just the GamePad, it supports Off-TV Play.
on the GamePad and selecting a character, or on the map by pausing and selecting "Number of Players". Another player is able to use the Wii U GamePad in what is known as Boost Mode. In Boost Mode, the GamePad player can assist the other players by placing blocks for them to stand on and stunning enemies. Boost Mode can be used at any point when playing with one of the other controllers; when playing with just the GamePad, it supports Off-TV Play.
After clearing Layer-Cake Desert-1, an enemy called Nabbit appears and steals an item from a Toad House connecting that level, heading back to Acorn Plains-1. When the player enters a stage with Nabbit, the objective is to race him to the goal, trying to catch him before he can get away. If the player succeeds in catching Nabbit, they are rewarded with a P-Acorn. Replacing the Toad saving in New Super Mario Bros. Wii, Nabbit only appears in one stage in the first seven worlds.
The first update to the game added Miiverse support. With Miiverse functionality enabled, players can read each others' posts on the world map by viewing the map; when not viewing the map a Miiverse post is indicated by a red balloon, generally near a stage, and can be hidden by pressing ![]() ; when on the World Map while using Boost Mode, the GamePad player can scroll across the map on the GamePad screen and view Miiverse posts. At certain times throughout gameplay, such as when the player dies several times or reaches the end of a course in a specific way (collecting all the Star Coins, clearing in a certain amount of time, clearing without taking damage, etc.), they are given a prompt to post a message to Miiverse. Players can also see Miiverse posts after they die in a stage. Miiverse settings can be changed at any point on the world map by selecting the pencil and envelope icon on the bottom right of the pause menu.
; when on the World Map while using Boost Mode, the GamePad player can scroll across the map on the GamePad screen and view Miiverse posts. At certain times throughout gameplay, such as when the player dies several times or reaches the end of a course in a specific way (collecting all the Star Coins, clearing in a certain amount of time, clearing without taking damage, etc.), they are given a prompt to post a message to Miiverse. Players can also see Miiverse posts after they die in a stage. Miiverse settings can be changed at any point on the world map by selecting the pencil and envelope icon on the bottom right of the pause menu.
The sound is in stereo, with no support for 5.1 surround.
Controls[edit]
Like New Super Mario Bros. Wii, the Wii Remote is the primary controller for the game, allowing players to shake the controller to perform a Spin Jump, dismount Yoshi, and pick up objects. However, players can also play the game normally with the Wii U GamePad (single-player only) or the Wii U Pro Controller (after the 1.3.0 update). In the case of the Wii U Pro Controller, actions that require motion control on the Wii Remote and Wii U GamePad are replaced with button pressing, as the Wii U Pro Controller lacks motion controls.
Unlike New Super Mario Bros. Wii, this game lacks Nunchuk support.
Stages[edit]
| Action(s) | Wii U GamePad | Wii U Pro Controller | Wii Remote |
|---|---|---|---|
| Move, swim (Baby Yoshi) | |||
| Jump, swim, glide (hold), wall jump, Flutter Jump (Yoshi; hold), double/triple jump (press right upon landing) | Option 1: Option 2: |
||
| Run, carry objects (hold); shoot fireballs/iceballs, extend tongue (Yoshi) | Option 1: Option 2: |
||
| Ground Pound (normal, simultaneous*) | Jump + |
||
| Crouch, slide (on slopes) | |||
| Climb (on fences, ladders, poles) | |||
| Bubble* | N/A | ||
| Enter door/Warp Pipe | Door: Pipe: |
Door: Pipe: | |
| Spin Jump, Baby Yoshi abilities, dismount Yoshi, Flying Squirrel jump, spin underwater (Baby Yoshi) | |||
| Grab other players*/frozen enemies | Run + (release run button to throw) |
Run + (release run button to throw) |
(release |
| Tilt Tilt Lifts | Tilt GamePad | Alternate between pressing |
Tilt Wii Remote |
| Pause | |||
| Boost Mode* | N/A | ||
* Multiplayer only.
[edit]
| Action(s) | Wii U GamePad/Pro Controller | Wii Remote |
|---|---|---|
| Move, select option | ||
| Open inventory | ||
| View map | ||
| Pause | ||
| Zoom in/out (map view) | ||
| Confirm, hide/show Miiverse posts (map view) | ||
| Back | ||
Inventory[edit]
The world map inventory, seen in Super Mario Bros. 3 and New Super Mario Bros. Wii, returns in New Super Mario Bros. U, allowing players to store items that can be used before entering a level. Unlike the other inventories, this is limited to ten items only. If more items come in, the player will have to discard items from the inventory until they have ten. Players can gain items into their inventory by playing Red Toad House minigames, collecting items on the world map itself, completing an Enemy Course, catching Nabbit, or finishing a level with the final two digits of the time matching.
Extra modes[edit]
In addition to the main adventure, New Super Mario Bros. U features three additional bonus modes to play. The first of these is Challenge Mode, in which players must complete a given objective on a given stage, some within a specific time limit. In most cases, after the player completes a challenge, they are ranked with a medal depending on how well they did. There are five types of challenges: Time Attack, Coin Collection, 1-Up Rally, Special, and Boost Mode.
Another mode is Boost Rush Mode, where players have to reach the end of two or three selected stages in the lowest possible time, similar to the Coin Rush mode featured in New Super Mario Bros. 2. Unlike Coin Rush, the stages scroll automatically, meaning the player has to keep up with the stage, which speeds up every time they collect coins.
Coin Battle from New Super Mario Bros. Wii is also available. However, in this version of the mode, players can be grouped into teams against each other or play free-for-all, rather than just the latter. The Wii U GamePad can also be used for Coin Edit, in which the GamePad is used to customize the coin placement in the Coin Battle-exclusive courses.
Unlike in the main game, player 1 can choose any character in these modes.
Worlds[edit]
Unlike the previous New Super Mario Bros. titles, where worlds are separated like in Super Mario Bros. 3, New Super Mario Bros. U has a contiguous world map, similar to Super Mario World. Like New Super Mario Bros. Wii, the worlds include Toad Houses and Enemy Courses, though only red and green Toad Houses return. Also returning are Towers, Castles, and Ghost House-related levels. Likely as a result of the redesigned world map, Warp Cannons are not present, with secret exits that unlocked Warp Cannons in previous titles now unlocking hidden levels. Completing them unlocks a shortcut to a later world, similar in vein to the Star World levels from Super Mario World. There are Pipe Cannons that send the player characters back to previously-cleared worlds, replacing the world selection option from previous New Super Mario Bros. games. The music changes instruments throughout the world map similar to Yoshi's Island.
This is the first 2D Super Mario game to use completely unique names for each of its levels, and the second after Super Mario World to name its greater areas in-game. Both games use food and beverages as the theme for their world names.
| Worlds | |||||
|---|---|---|---|---|---|
| Acorn Plains | Layer-Cake Desert | Sparkling Waters | |||
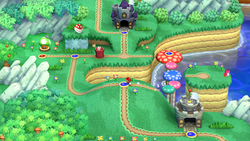
|
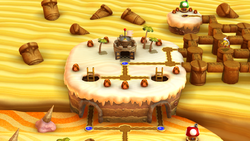
|
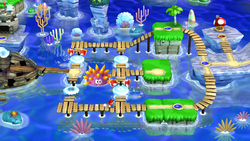
| |||
| A grassy world with plenty of shrubs, slanted mountains, and the Acorn Tree. This world resembles many other first worlds in the Super Mario series. | A desert dotted with melting ice creams, giant cakes, and a sea of sand with Moai-like statues. | A chain of tropical islands and sea stacks, similar to World 4 from New Super Mario Bros. Wii. This world can be entirely skipped for Frosted Glacier. | |||
| # | Level | # | Level | # | Level |
| 1 | Acorn Plains Way (Grass) | 1 | Stone-Eye Zone (Desert) | 1 | Waterspout Beach (Beach) |
| 2 | Tilted Tunnel (Underground) | 2 | Perilous Pokey Cave (Desert/Underground) | 2 | Tropical Refresher (Underwater) |
| Crushing-Cogs Tower (Tower) | 3 | Fire Snake Cavern (Desert/Underground) | Giant Skewer Tower (Tower) | ||
| 3 | Yoshi Hill (Grass) | Stoneslide Tower (Tower/Desert) | Haunted Shipwreck (Shipwreck) | ||
| 4 | Mushroom Heights (Sky) | 4 | Spike's Spouting Sands (Desert) | 3 | Above the Cheep Cheep Seas (Beach/Sky) |
| 5 | Rise of the Piranha Plants (Grass) | 5 | Dry Desert Mushrooms (Desert/Sky) | 4 | Urchin Shoals (Beach) |
| Lemmy's Swingback Castle (Castle) | 6 | Blooming Lakitus (Desert) | 5 | Dragoneel's Undersea Grotto (Underwater) | |
| Blooper's Secret Lair (Underwater/Underground) | Morton's Compactor Castle (Castle) | Larry's Torpedo Castle (Castle/Water) | |||
| Piranha Plants on Ice (Snow) | Skyward Stalk (Sky) | ||||
| Frosted Glacier | Soda Jungle | Rock-Candy Mines | |||
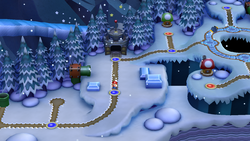
|
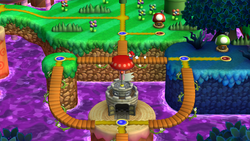 |
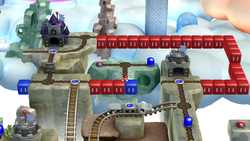
| |||
| A snowy mountain set at night, filled with stars and constellations. This world can be entirely skipped for Sparkling Waters. | A rainforest flooded by purple poison, based on the Forest of Illusion from Super Mario World and World 4 from New Super Mario Bros. | A rocky region with tall, holey mountains. Several red and blue switches similar to ! Switches appear in this world, and pressing them activates Stretch Blocks with their corresponding color. | |||
| # | Level | # | Level | # | Level |
| 1 | Spinning-Star Sky (Snow) | The Mighty Cannonship (Airship) | 1 | Fuzzy Clifftop (Mountain) | |
| 2 | Cooligan Fields (Snow) | 1 | Jungle of the Giants (Jungle) | 2 | Porcupuffer Falls (Mountain/Water) |
| Freezing-Rain Tower (Tower/Snow) | 2 | Bridge over Poisoned Waters (Jungle) | Grinding-Stone Tower (Tower/Mountain) | ||
| 3 | Prickly Goombas! (Snow) | 3 | Bramball Woods (Darkness Jungle) | 3 | Waddlewing's Nest (Mountain) |
| 4 | Scaling the Mountainside (Snow) | Snake Block Tower (Tower) | 4 | Light Blocks, Dark Tower (Underground) | |
| 5 | Icicle Caverns (Snow/Underground) | Which-Way Labyrinth (Ghost house) | 5 | Walking Piranha Plants! (Mountain) | |
| Swaying Ghost House (Ghost House) | 4 | Painted Swampland (Haunted forest/Painting) | 6 | Thrilling Spine Coaster (Underground) | |
| Wendy's Shifting Castle (Castle/Snow) | 5 | Deepsea Ruins (Underwater/Underground) | Screwtop Tower (Tower/Mountain) | ||
| Fliprus Lake (Snow) | 6 | Seesaw Bridge (Jungle) | 7 | Shifting-Floor Cave (Underground) | |
| 7 | Wiggler Stampede (Jungle) | Roy's Conveyor Castle (Castle) | |||
| Iggy's Volcanic Castle (Castle) | |||||
| Flight of the Para-Beetles (Sky) | |||||
| Meringue Clouds | Peach's Castle | Superstar Road | |||
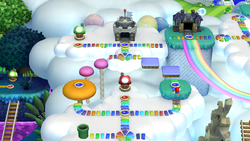
|
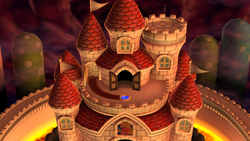
|
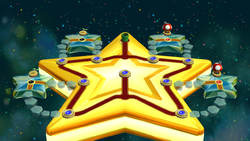
| |||
| A world above the clouds. Two levels take place at sunset, and this world's Castle takes place near the tornado surrounding the next world, as marked by different cloud coloration. | Peach's domain, initially in its welcoming usual state but slowly transformed into a lava-based area by Bowser. This world must be completed to beat the game. | A secret world unlocked after beating Bowser's final battle. Its levels must be unlocked with the Star Coins collected from all the levels of the previous worlds. | |||
| # | Level | # | Level | # | Level |
| 1 | Land of Flying Blocks (Sky) | 1 | Meteor Moat (Volcano/Castle exterior) | 1 | Spine-Tingling Spine Coaster (Grass) |
| 2 | Seesaw Shrooms (Sky) | 2 | Magma-River Cruise (Volcano/Castle exterior) | 2 | Run for It (Desert/Sky) |
| 3 | Switchback Hill (Sky) | 3 | Rising Tides of Lava (Volcano/Underground) | 3 | Swim for Your Life! (Underwater/Underground) |
| Slide Lift Tower (Tower) | 4 | Firefall Cliffs (Volcano/Castle exterior) | 4 | Hammerswing Caverns (Snow/Underground) | |
| Spinning Spirit House (Ghost House) | Red-Hot Elevator Ride (Castle) | 5 | Spinning Platforms of Doom (Haunted forest/Painting) | ||
| 4 | Bouncy Cloud Boomerangs (Sky) | The Final Battle (Castle) | 6 | Fire Bar Cliffs (Mountain) | |
| 5 | A Quick Dip in the Sky (Sky) | 7 | Lakitu! Lakitu! Lakitu! (Sky) | ||
| 6 | Snaking above Mist Valley (Sky) | 8 | Pendulum Castle (Fortress) | ||
| Ludwig's Clockwork Castle (Castle/Sky) | 9 | Follow That Shell! (Sky) | |||
| Boarding the Airship (Airship) | |||||
Other areas[edit]
| Secret Island | Coin Courses | |
|---|---|---|
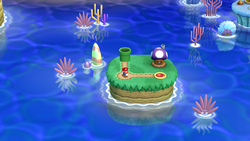
|
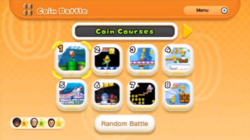
| |
| A small island between Acorn Plains and Sparkling Waters that houses a Purple Toad House, where the player can check several records. It is unlocked alongside Superstar Road. | A multiplayer-exclusive world found in Coin Battle, similar to World Coin from New Super Mario Bros. Wii. | |
| # | Difficulty | |
| World |
★ | |
| World |
★ | |
| World |
★★ | |
| World |
★★★ | |
| World |
★★★ | |
| World |
★★★★ | |
| World |
★★★★★ | |
| World |
★★★★★ | |
Characters[edit]
Playable characters[edit]
| Name | Description |
|---|---|
 Mario |
The game's protagonist and the only playable character in single-player. Mario is flung from Peach's Castle by Bowser's Mecha Hand during his siege. Like prior New Super Mario Bros. titles, Mario has some moves that originated from the 3D games, including the Triple Jump and Wall Jump. |
 Luigi |
Mario's younger twin brother. He is flung from Peach's Castle with Mario and is available to play as during multiplayer. Luigi has the same physiques and moves as Mario. In single-player, losing five lives gives Mario the option of striking the Super Guide Block, which allows Luigi to finish the level for him. |
 Yellow Toad and Blue Toad |
These Toads were tossed from the castle with Mario and Luigi. They have all the same moves and physiques, and are only available to play as in multiplayer. |
Miis |
Miis are only available to be played as in Challenge Mode, Boost Rush, and Coin Battle. In the multiplayer modes, all four players can control a Mii and it corresponds with a specific color: Player 1's Mii wears red like Mario; Player 2 wears green like Luigi; Player 3 wears yellow like Wario; and Player 4 wears an original blue outfit. Some non-playable Miis appear in the background of normal levels during Boost Mode. |
Yoshis[edit]
New Super Mario Bros. U features Baby Yoshis, having been absent from the Super Mario series since their debut in Super Mario World. The game features three differently-colored Baby Yoshis, each one with a special ability. They differ from the adult Yoshi in terms of gameplay. Being babies, they cannot be ridden, so characters must carry them throughout the levels. Baby Yoshis instantly eat almost any enemy that is in front of them. Unlike Super Mario World, Baby Yoshis cannot mature into adults after eating enemies, instead remaining infants. Two types of Baby Yoshis found on the world map can be taken into any course, with the exception of towers, airships, and castles.
| Name | Description | Locations |
|---|---|---|
 Yoshi |
A dinosaur-like creature with a long tongue that can be ridden. Yoshi has a meter that tracks how many fruits he eats. Eating five makes him lay an egg containing an item. Unlike Baby Balloon Yoshis and Baby Bubble Yoshis, Yoshi cannot be taken to other levels, instead waving goodbye to the player character once they reach the Goal Pole. In multiplayer, the number of Yoshis that appear in a level equals the number of player characters. | Yoshi Hill, Perilous Pokey Cave, Above the Cheep Cheep Seas, Prickly Goombas!, Fuzzy Clifftop, Seesaw Shrooms |
 Balloon Baby Yoshis |
Magenta Baby Yoshis that expand like balloons and gently float in the air. Up to four player characters can grab onto one Balloon Baby Yoshi, by grabbing their legs. This slows the player down though. | Acorn Plains, Sparkling Waters |
 Bubble Baby Yoshis |
Blue Baby Yoshis that blow bubbles from their mouths. Enemies caught in these bubbles will turn into three coins, a power-up, or a 1-Up Mushroom. These bubbles can also be used as small platforms. | Frosted Glacier, Rock-Candy Mines |
 Glowing Baby Yoshis |
Yellow Baby Yoshis that light up dark areas and can stun enemies with their light attack. Unlike the other two Baby Yoshis, Glowing Baby Yoshis are not found on the world map and are found only in levels. Instead of following the characters throughout the courses, they give an extra life when reach the end of the levels that they appear in. | Fire Snake Cavern, Which-Way Labyrinth |
Non-playable characters[edit]
| Name | Description | Locations |
|---|---|---|
 Princess Peach |
The ruler of the Mushroom Kingdom. Her castle is sieged by Bowser while she is having tea with Mario, Luigi, Yellow Toad, and Blue Toad. The game follows their quest to return to Peach's Castle to save her. | The Final Battle |
 Toads |
Toads appear throughout the game in Toad Houses, at the end of the level when the player catches Nabbit, and past the end-of-level castles to give Mario a power-up if they complete a stage with the last two digits of the Time Limit being the same. | Toad Houses, All levels |
 Nabbit |
A mysterious rabbit-like creature that steals items from the map and must be caught to retrieve them. | Acorn Plains Way, Blooming Lakitus, Urchin Shoals, Prickly Goombas!, Jungle of the Giants, Walking Piranha Plants!, Seesaw Shrooms |
Enemies and obstacles[edit]
Enemies[edit]
The enemies listed in this table match those in the companion Prima Games guidebook,[5] the Super Mario Bros. Encyclopedia,[6] and Mario Portal Game Archive.[7] The default order they are listed derives from their occurrence in-game with adjustments to ensure enemies are listed next to their immediate relatives. The blue Dragoneel is only recognized in the guidebook[8] and is unmentioned in the other two sources, but it is listed here in recognition of its mechanical and physiological distinctiveness from the red one.
| Name | Description | Levels | Pts. | Exc. | New | |
|---|---|---|---|---|---|---|
| First | Last | |||||
 Goomba |
Squat mushroom creatures that walk along the ground. Goombas are weak to all attacks and walk of the edge of platforms. Some of the ones in Skyward Stalk are fastened to balloons and drift down. They are the most common enemies in the game. | Acorn Plains Way | Follow That Shell! | 200 | — | — |
 Paragoomba |
Winged Goombas that hop along the ground. Stomping one causes it to lose its wings, turning it into a normal Goomba. | Seesaw Shrooms | 200 | — | ||
 Hefty Goomba |
A large Goomba that is the middling size of a Goomba, being smaller than a Big Goomba but bigger than a regular Goomba. This enemy splits into two Goombas when jumped on. | Jungle of the Giants | 200 | — | — | |
 Big Goomba |
Large variants of Goombas. They split into two Hefty Goombas once stomped on. | Jungle of the Giants | 200 | — | ||
 Mini Goomba |
Small Goombas that weigh the player character down until he either attacks or walks for a few seconds. | Slide Lift Tower | Magma-River Cruise | 200 | — | — |
 Prickly Goomba |
A Goomba that hides inside a spiked chestnut shell until it is hit with a fireball, which is when it turns into a regular Goomba. | Prickly Goombas! | 200 | — | — | |
 Goombrat |
A Goomba that resembles a persimmon and turns at ledges. | Mushroom Heights | 200 | — | ||
 Waddlewing |
Orange flying-squirrel enemies that glide through stages. | Acorn Plains Way | Land of Flying Blocks | 200 | — | |
 Koopa Troopa (Green) |
Turtle enemies that go into their shells when attacked, then can be picked up or thrown. Green Koopa Troopas walk off ledges. | Acorn Plains Way | Follow That Shell! | 200 | — | — |
 Koopa Troopa (Red) |
Red Koopa Troopas turn around when they reach the edge of platforms. | Tilted Tunnel | Follow That Shell! | 200 | — | — |
 Koopa Paratroopa (Green) |
Winged Koopa Troopas that jump in high arcs. | Stone-Eye Zone | Run for It | 200 | — | — |
 Koopa Paratroopa (Red) |
The red-shelled Koopa Paratroopas fly up-and-down or back-and-forth in the air. | Stone-Eye Zone | Hammerswing Caverns | 200 | — | — |
 Big Koopa Troopa (Green) |
Large variants of Koopa Troopas that walk off ledges. Their shells are too large to be held. | Jungle of the Giants | 200 | — | ||
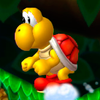 Big Koopa Troopa (Red) |
Like the normal-sized ones, the red-shelled Big Koopa Troopas turn around when the reach the end of a platform. | Jungle of the Giants | 200 | — | — | |
 Dry Bones |
Skeleton Koopa Troopas that collapse when attacked, but later rebuild themselves. | Crushing-Cogs Tower | Ludwig's Clockwork Castle | 200 | — | — |
 Big Dry Bones |
Large variants of Dry Bones that appear in castle levels. | Stoneslide Tower | Ludwig's Clockwork Castle | 200 | — | — |
 Buzzy Beetle |
Shelled enemies that can be kicked or thrown after being jumped on, and can walk on ceilings. | Tilted Tunnel | Fire Bar Cliffs | 200 | — | — |
 Big Buzzy Beetle |
Bigger variants of Buzzy Beetles. | Rising Tides of Lava | 200 | — | ||
 Spike Top |
Buzzy Beetle variants that have spikes on their shells, preventing them from being jumped on. | Stoneslide Tower | Rising Tides of Lava | 200 | — | — |
 Para-Beetle |
Para-Beetles are winged Buzzy Beetles. However, the player character can hop on their back for a ride, unlike with other winged foes. | Flight of the Para-Beetles | — | — | ||
 Heavy Para-Beetle |
A Para-Beetle that descends when used as a platform. | Flight of the Para-Beetles | — | — | ||
 Bony Beetle |
Skeleton variants of Buzzy Beetles that walk around and suddenly stop to stick out their spikes. | Grinding-Stone Tower | Pendulum Castle | 200 | — | — |
 Hammer Bro |
Enemies that throw hammers and jump. | Rise of the Piranha Plants | 1000 | — | — | |
 Fire Bro |
Hammer Bros that throw fireballs. | Fire Snake Cavern | Ludwig's Clockwork Castle | 1000 | — | — |
 Boomerang Bro |
Hammer Bros that use boomerangs, which return to them after being thrown. | Bouncy Cloud Boomerangs | 1000 | — | — | |
 Ice Bro |
An enemy that throws ice balls at the ground, which can freeze the player and even other enemies. | Icicle Caverns | 1000 | — | — | |
 Sledge Bro |
Hammer Bro variants that stun the player character after they jump. | Ludwig's Clockwork Castle | 1000 | — | — | |
 Sumo Bro |
Giant Koopas that stomp the ground and create electric waves in two directions. | Screwtop Tower | 200 | — | — | |
 Lakitu |
Enemies that throw Spiny Eggs. If the player character defeats a Lakitu, he can ride on its cloud until it disappears. | Blooming Lakitus | Lakitu! Lakitu! Lakitu! | 1000 | — | — |
 Spiny |
Enemies that hatch from Spiny Eggs and cannot be jumped on. | Seesaw Shrooms | Lakitu! Lakitu! Lakitu! | 200 | — | — |
 Spiny Egg |
The furled form of Spinies dropped by Lakitus. Direct contact damages the player character. Spiny Eggs turn into Spinies when they make contact with the ground. | Seesaw Shrooms | Lakitu! Lakitu! Lakitu! | 200 | — | — |
 Spike |
Green turtles which pull spiked balls out of their mouths and throw them directly downwards from the ledges on which they stand | Spike's Spouting Sands | 200 | — | — | |
 Stone Spike |
A Spike that throws stone rocks downwards. | Dry Desert Mushrooms | 200 | — | — | |
 Piranha Plant |
Plants that move in and out of Warp Pipes and some grounded. | Acorn Plains Way | Spinning Platforms of Doom | 200 | — | — |
 Piranha Pod |
A projectile thrown by a Lakitu that turns into a Piranha Plant. | Blooming Lakitus | 200 | — | ||
 Big Piranha Plant |
Large variants of Piranha Plants. | Mushroom Heights | A Quick Dip in the Sky | 200 | — | — |
 Fire Piranha Plant |
Piranha Plants that aim at the player character and shoot fireballs. | Yoshi Hill | Prickly Goombas! | 200 | — | — |
 Ice Piranha Plant |
A Piranha Plant that can shoot ice balls from its mouth, like Fire Piranha Plants. | Fuzzy Clifftop | 200 | — | — | |
 River Piranha Plant |
A stationary Piranha Plant that blows a green spiked ball up and down, similar to a Ptooie. | Fliprus Lake | Seesaw Bridge | 200 | — | — |
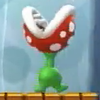 Stalking Piranha Plant |
A Piranha Plant that walks around and stretches up and down on a regular basis. | Bramball Woods | Walking Piranha Plants! | 200 | — | — |
Muncher |
An invincible black plant. | Spinning-Star Sky | Thrilling Spine Coaster | — | — | |
 Monty Mole |
A mole that pops out of mountains and the ground and gives chase. | Yoshi Hill | Magma-River Cruise | 200 | — | — |
 Rocky Wrench |
Monty Moles that pop out of its hole in an airship throw wrenches. | Boarding the Airship | 200 | — | ||
 Lava Bubble |
Fireballs that jump out of lava. | Lemmy's Swingback Castle | The Final Battle | 200 | — | — |
Pokey |
Living cacti that appear in desert levels and move slowly. | Perilous Pokey Cave | 200 | — | — | |
 Big Pokey |
Large variants of Pokeys. | Morton's Compactor Castle | None | — | — | |
 Swoop |
Bats that hang onto the ceiling, then swoop towards the player character. | Perilous Pokey Cave | Shifting-Floor Cave | 200 | — | |
 Fire Snake |
Flames that jump in a high arc. | Fire Snake Cavern | 200 | — | — | |
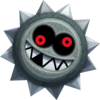 Grrrol |
Round, Thwomp-like enemies that roll on the ground. | Stoneslide Tower | Grinding-Stone Tower | 200 | — | |
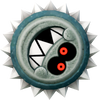 Mega Grrrol |
A bigger Grrrol with the same behavior. | Grinding-Stone Tower | 200 | — | ||
Huckit Crab |
A crab that throws rocks on loop. These can be jumped on and used as a temporary platform. | Waterspout Beach | 200 | — | — | |
 Cheep Cheep |
Fish that are found swimming aimlessly in underwater levels. | Waterspout Beach | Swim for Your Life! | 200 | — | — |
 Big Cheep Cheep |
Large variants of Cheep Cheeps that are found in underwater levels. | Tropical Refresher | 200 | — | — | |
 Eep Cheep |
A Cheep Cheep that lives in a school with other Eep Cheeps and swims away when the player comes near it. | Dragoneel's Undersea Grotto | 200 | — | — | |
 Spiny Cheep Cheep |
Fast-swimming fish that chase the player character. | Tropical Refresher | Swim for Your Life! | 200 | — | — |
 Cheep Chomp |
Large fish that attempt to eat the player character. | Swim for Your Life! | 200 | — | — | |
 Porcupuffer |
Fish that jump out of the water and follow the player character. | Porcupuffer Falls | 200 | — | — | |
 Fish Bone |
Skeletal fish that charge towards the player character. | Haunted Shipwreck | Deepsea Ruins | 200 | — | — |
 Clampy |
Clams that open and close their mouths. | Waterspout Beach | — | |||
 Urchin |
Stationary enemies that appear in underwater levels. | Tropical Refresher | Swim for Your Life! | 200 | — | — |
 Big Urchin |
A gigantic Urchin that can be defeated only with a Star. | Tropical Refresher | Urchin Shoals | 200 | — | — |
Dragoneel (Red) |
A long eel that attacks the player character by chasing them. | Dragoneel's Undersea Grotto | 200 | — | ||
 Dragoneel (Blue) |
Shorter Dragoneels that move slower, but make sharper turns. | Dragoneel's Undersea Grotto | 200 | — | ||
 Blooper |
Squids that move in an erratic pattern and follow the player character. | Blooper's Secret Lair | Tropical Refresher | 200 | — | — |
 Blooper Nanny |
Bloopers that have Blooper Babies swimming in a trail behind them. | Blooper's Secret Lair | 200 | — | ||
 Bullet Bill |
Bullets that fly straight forward and are shot from Bill Blasters and Bill Blaster Turrets. | Scaling the Mountainside | Switchback Hill | 200 | — | — |
 Missile Bill |
Bullet Bills that target the player character. | Roy's Conveyor Castle | 200 | — | — | |
 Banzai Bill |
Large Bullet Bills that fly straight forward. | Scaling the Mountainside | 200 | — | — | |
 King Bill |
A nearly invincible enemy that charges forward, taking up most of the screen. | Flight of the Para-Beetles | 200 | — | — | |
 Torpedo Ted |
A slow-moving torpedo that flies in one direction. | Larry's Torpedo Castle | The Mighty Cannonship | 200 | — | — |
 Targeting Ted |
Red Torpedo Teds that home into their target, much like Bull's-Eye Bills. | The Mighty Cannonship | 200 | — | ||
 Cooligan |
An enemy that slides on ice and slows down when hit. | Cooligan Fields | 200 | — | — | |
 Fliprus |
A walrus-like creature that throws snowballs that can be jumped on. | Fliprus Lake | 200 | — | ||
 Thwomp |
Grimacing stones that fall when the player character gets close. The spikes that surround their bodies cause damage on contact. | Wendy's Shifting Castle | 200 | — | — | |
 Big Thwomp |
Large Thwomps that can break through stone tiles. | Wendy's Shifting Castle | 200 | — | — | |
 Thwimp |
A tiny Thwomp that hops around. | Wendy's Shifting Castle | 200 | — | ||
 Mechakoopa |
A mechanical Koopa. After stomping onw, the player character can pick it up and use it as a projectile. | The Mighty Cannonship | 200 | — | — | |
 Mecha Cheep |
Robotic Cheep Cheeps that are immune to fireballs. | The Mighty Cannonship | 200 | |||
 Bramball |
An enemy that moves around in a set pattern and is mostly covered in spikes, with the head being the only safe part to jump on. It can be forced to move if jumped into from below. | Bramball Woods | 200 | — | — | |
 Amp |
Electric balls that shock the player character upon contact. | Snake Block Tower | Ludwig's Clockwork Castle | 200 | — | |
 Big Amp |
Larger variants of Amps. | Snake Block Tower | 200 | — | ||
 Boo |
Ghosts that follow the player character when their back is turned, but hide their face when they look at them. Groups of Boos occur floating in circles in some levels. | Haunted Shipwreck | Spinning Spirit House | 200 | — | — |
Big Boo |
Bigger variants of Boos that have the same behavior. | Swaying Ghost House | Spinning Spirit House | 200 | — | — |
 Broozer |
A walking, boxing Boo. Can break Stone Blocks and other blocks that are normally indestructible. the player character can defeat one by jumping on it three times, or hitting them with a fireball. | Which-Way Labyrinth | Spinning Spirit House | 200 | — | — |
 Scaredy Rat |
An enemy that walks around in a group. When one of the rats is jumped on, the rest panic and run around. | Which-Way Labyrinth | 200 | — | ||
 Bulber |
An enemy that illuminates a dark area and swims in a set pattern. | Deepsea Ruins | 200 | — | ||
 Jellybeam |
An enemy that illuminates a dark cave. | Deepsea Ruins | 200 | — | ||
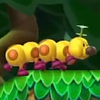 Wiggler |
Caterpillars that move faster after being jumped on. | Seesaw Bridge | Wiggler Stampede | 200 | — | — |
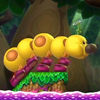 Big Wiggler |
Large variants of Wigglers. | Wiggler Stampede | — | — | ||
 Magmaargh |
Lava monsters that attacks by moving towards the player character in a wave-like movement. | Iggy's Volcanic Castle | — | — | ||
 Magmaw |
Lava monsters that lunges at the player character and dips back into the lava. | Magma-River Cruise | — | — | ||
 Flame Chomp |
Black spheres that spit fireballs at the player character. They explode after they're out of fireballs. | Rising Tides of Lava | 200 | — | — | |
 Fuzzy |
Enemies that travel along tracks and hurt the player character on contact. | Fuzzy Clifftop | A Quick Dip in the Sky | 200 | — | — |
 Big Fuzzy |
Large variants of Fuzzies. | Spine-Tingling Spine Coaster | 200 | — | — | |
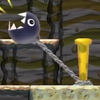 Chain Chomp |
Enemies tied to posts that lunge at the player character. If the player character ground pounds their post, they are set free. | Waddlewing's Nest | 200 | — | — | |
 Bob-omb |
Bombs that ignite if they are jumped on or have a fireball thrown at them, then explode shortly after. | Light Blocks, Dark Tower | The Final Battle | 200 | — | — |
 Parabomb |
Parachuting Bob-ombs that are sometimes shot out of cannons. | Red-Hot Elevator Ride | 200 | — | — | |
 Foo |
An enemy that creates fog in order to obscure the player's view. | Snaking above Mist Valley | 200 | — | — | |
Obstacles[edit]
| Name | Description | Levels | |
|---|---|---|---|
| First | Last | ||
 Ash |
Ash enshrouds the left of the screen in Magma-River Cruise. Contact makes the player character lose a life | Magma-River Cruise | |
 Banzai Bill Cannon |
Bill Blasters that shoot Banzai Bills. | Scaling the Mountainside | |
 Bill Blaster |
Cannons that shoot Bullet Bills. | Scaling the Mountainside | Switchback Hill |
Bill Blaster Turret |
Stacks of Bill Blasters that rotate and shoot Bullet Bills. | Switchback Hill | |
 Bowser Stunner |
An electric statue that resembles Bowser's head and carries electrical currents. | Red-Hot Elevator Ride | |
 Bowser's Flame |
Fireballs spewed by Bowser. The appear traveling on-screen in the narrow hallway leading to the Koopa King, before he is within frame. | The Final Battle | |
 Bowser's Flame (big) |
Balls of fire that fall slowly and break upon hitting either the ground or a block. The player character can reduce their size if they toss ice balls at them. | Meteor Moat | The Final Battle |
 Burner |
Constant streams of fire that rotate and are found on airships. | Larry's Torpedo Castle | Boarding the Airship |
 Cannon |
Cannons that shoot cannonballs. | The Mighty Cannonship | |
 Current |
Downward currents that pull the player character into an abyss, costing them a life. | Tropical Refresher | |
 Fire Bar |
A series of fireballs that rotate infinitely, either clockwise or counterclockwise. | Screwtop Tower | Slide Lift Tower |
 Ghost Block |
A ? Block that floats and charges at the player character, breaking if it hits a floor or a platform. | Haunted Shipwreck | Spinning Spirit House |
 Giant cannon |
Horizontal, pipe-sized cannons shoot giant cannonballs. | The Mighty Cannonship | |
 Huge Fire Bar |
A larger version of the Fire Bar. | Slide Lift Tower | Fire Bar Cliffs |
 Huge Icicle |
Large icicles that fall and act as platforms. | Icicle Caverns | |
 Ice |
Icy terrain that reduces Mario's traction. Ice make it difficult to make precise jumps and avoid oncoming hazards. | Cooligan Fields | Hammerswing Caverns |
 Icicle |
Icicles that fall when the player character gets close underneath. | Freezing-Rain Tower | Wendy's Shifting Castle |
 Lava |
Pools of molten rock that cause the player character to instantly lose a life upon contact. In Rising Tides of Lava, the lava rises and falls like the tide. | Lemmy's Swingback Castle | The Final Battle |
 Lava Geyser |
Pillar of lava that rises up from pools. | Meteor Moat | |
 Lava swell |
Lava that moves up in waves. | Iggy's Volcanic Castle | |
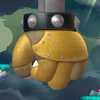 Mecha Hand |
A large mechanical hand modeled after Bowser's own hand that attempts to crush the player characters while they are on board. Bowser Jr. also uses the Mecha Hand in The Mighty Cannonship after the player character defeats him here. | Boarding the Airship | |
 Moving rock |
Stones that move in set patterns and come in various sizes. They can either help or hinder the player character. | Morton's Compactor Castle | |
 Moving torch |
Cannon-like Burners that pivot back and forth. | Boarding the Airship | |
 Poison Bog |
A liquid hazard that causes the player character to instantly lose a life. | Bridge over Poisoned Waters | Spinning Platforms of Doom |
 Quicksand |
Sand that sinks the player character. | Stone-Eye Zone | Blooming Lakitus |
 Skewer |
Spiked columns that extend out of walls and retract at regular intervals. Both vertical and horizontal Skewers appear. | Giant Skewer Tower | |
 Spikes |
Beds of spikes appear in two Special Challenges. Touching them knocks out the player character. | Fire, Bro! | Seriously! Fire, Bro! |
 Spinner |
A large, undefeatable spiked ball on a chain. Some of the ones in Pendulum Castle are large. | Snake Block Tower | Pendulum Castle |
 Torpedo Base |
Red torpedo tubes that fire Targeting Teds. | The Mighty Cannonship | |
 Torpedo tube |
An indestructible box that releases Torpedo Teds. | Larry's Torpedo Castle | The Mighty Cannonship |
Bosses[edit]
| Name | Description | Levels | |
|---|---|---|---|
| First | Last | ||
| Tower bosses | |||
 Boom Boom |
The most recurring tower boss. He does not change in the first battle, especially on Crushing-Cogs Tower in Acorn Plains. However, following his first defeat, the Magikoopa gives him special abilities. In Stoneslide Tower from Layer-Cake Desert, Magikoopa will grant him the ability to spin jump. In Giant Skewer Tower from Sparkling Waters and Freezing-Rain Tower from Frosted Glacier, the Magikoopa will grant him the ability to jump, similar to Super Mario Bros. 3. In Snake Block Tower from Soda Jungle, Magikoopa will make him larger. In Grinding-Stone Tower from Rock-Candy Mines, Magikoopa will transform his arms into wings, similar to Super Mario Bros. 3. | Crushing-Cogs Tower | Grinding-Stone Tower |
 Boss Sumo Bro |
Boss Sumo Bro was a regular Sumo Bro until the Magikoopa made him grow in size. He is normally immune to attacks from the top due to the spike on his head, but he will jump between platforms which the player can hit from the bottom. Knocking him off a platform makes him vulnerable to jump attacks. He is fought on Screwtop Tower. | Screwtop Tower | |
 Magikoopa |
Magikoopa is fought on Slide Lift Tower and teleports most of the time when Mario gets too close. However, when he stops to attack Mario, he is left vulnerable to Mario's jumping. He also casts spells on Boom Boom, Boss Sumo Bro, and Bowser granting them extra power before their battles, such as causing them to grow in size. | Slide Lift Tower | |
| The Koopalings | |||
 Lemmy |
Lemmy Koopa is fought on Lemmy's Swingback Castle in Acorn Plains and attempts to throw bombs at Mario. | Lemmy's Swingback Castle | |
 Morton |
Morton Koopa Jr. is fought on Morton's Compactor Castle in Layer-Cake Desert and uses a large hammer that is apparently filled with magic to knock Big Pokey segments in the player character's way after shaking the ground by stomping on it. He can knock Pokey segments straight at the player or knock them in high arcs. | Morton's Compactor Castle | |
 Larry |
Larry Koopa is fought on Larry's Torpedo Castle in Sparkling Waters and blasts fireballs and use water blasts from the pool below the arena. When Larry is spinning in his shell, the Water Geysers give his shell a boost upwards, making it a bit tricky to avoid. After two stomps, Larry begins to cast two fireballs in quick succession. | Larry's Torpedo Castle | |
 Wendy |
Wendy O. Koopa is fought on Wendy's Shifting Castle in Frosted Glacier and skates around the arena, shooting out two energy rings that ricochet off of walls and can knock down the Icicles at the ceiling of the airship. She also spin jumps from walls. After she is jumped on twice, she will shoot out three rings instead. | Wendy's Shifting Castle | |
 Iggy |
Iggy Koopa is fought on Iggy's Volcanic Castle in Soda Jungle and uses the four warp pipes to run around the room and on the ceiling to make it trickier for the player to stomp on him as he uses his Magic Wand to shoot three fireballs, with some being his usual green flame, and the other being red skeleton orbs that generate Magmaarghs when they land into the lava below. When Iggy is stomped on, he will dash around the room in his shell using the pipes on the walls, which will switch him to the other side of the room. Unlike the other Koopalings where they spin in their shells and change directions at the edges or walls of the room, Iggy can actually change directions anywhere around the room during his duration in his shell. | Iggy's Volcanic Castle | |
 Roy |
Roy Koopa is fought on Roy's Conveyor Castle in Rock-Candy Mines and shoots Bullet Bills with his cannon and jump between platforms that move around during the fight. Occasionally, he shoots Missile Bills. He can also jump high in the air and ground pound the floor or platform, which makes him fire Bullet Bills on both sides of his blaster. The ground pound can also make the floating platforms appear after he comes out of his shell. | Roy's Conveyor Castle | |
 Ludwig |
Ludwig von Koopa is fought on Ludwig's Clockwork Castle in Meringue Clouds and levitates in the air while making two clones of himself, and all three Ludwigs will blast fireballs at Mario before dropping onto the ground. If one of the clones is jumped on, it will simply disappear. There are four ways to find out which is the real one. The one that is the real one fires three fireballs, while the clones fire two. The clones keep their eyes half-open, and tend to assume the real Ludwig's pre-battle idle pose while not levitating. The real Ludwig will also drop to the ground last, after the clones, as well as laugh while dropping. Finally, Mario always looks at the real Ludwig if he can see him directly, just as he does with the other bosses. When the fight starts off, after shooting their fireballs, the clones disappear before landing. After the first stomp, the clones do not disappear. After the second stomp, not only do all three Ludwigs shoot faster, but swap positions, though the real Ludwig still shoots three fireballs. | Ludwig's Clockwork Castle | |
| Other bosses | |||
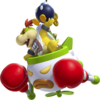 Bowser Jr. |
Bowser Jr. is fought on airships. In Soda Jungle's The Mighty Cannonship, Bowser Jr. uses his Junior Clown Car as a submarine underwater, in which the player must guide the Targeting Teds that Bowser Jr. shoots into his submarine. With every hit, he summons three Torpedo Teds from the left and right or from the ceiling and the floor. In Meringue Clouds' Boarding the Airship, Bowser Jr.'s boss battle involves him in his Clown Car equipped with boxing gloves, which he uses to destroy the blocks the player is standing on. Bowser Jr. periodically throws Bob-ombs, which the player can use against him. However, in Peach's Castle's The Final Battle, he cannot be defeated. | The Mighty Cannonship | The Final Battle |
 Bowser |
Bowser is fought in The Final Battle in Peach's Castle. The first part of his battle is similar to Super Mario Bros., where the player has to get to the other side and press the switch; alternatively, shooting several fireballs also works. This causes the axe to fall and make the bridge collapse, making Bowser fall. The gate then opens and Mario moves on. When Mario reaches the top of the castle, Peach is being held up in the tower. After this, Bowser Jr. shows up in his Junior Clown Car, and Bowser hops on top of the castle while he is huge. Bowser Jr. also fights the player. In order to defeat them, the player must jump on Bowser Jr., causing him to fall out of his Junior Clown Car. This allows the player to jump in and hover over Bowser to harm him. Like the Koopalings, he curls into his shell and spins around when hit. He is defeated after being hit three times by the Clown Car. | The Final Battle | |
Items and objects[edit]
Items[edit]
These are collectibles, pickups, and health-restoring objects.
| Name | Description |
|---|---|
 Coins |
Collecting 100 of these gives the player an extra life. |
Hidden Coins |
An outline of a coin that becomes a coin if Mario goes through it. These coins are very common in Coin Battle. |
 Red Coins |
Collecting all eight Red Coins that appear after passing through a Red Ring gives a Super Mushroom, Fire Flower, or 1-Up Mushroom, depending on what power-up the player is currently using. |
 Blue Coins |
These coins are just like normal coins, but they appear by hitting a P Switch. |
 Green Coins |
Collecting all five groups of Green Coins that appear after passing through a Green Ring gives a Super Mushroom, Fire Flower, or 1-Up Mushroom, depending on what power-up the player is currently using. |
 Star Coins |
Three of these are located in every course in hard-to-reach or hidden areas. |
 1-Up Mushrooms |
Gives the player an extra life. |
 3-Up Moons |
Gives the player three extra lives. Only appears in Boost Mode. |
 Koopa Shells |
Koopa Troopas temporarily retreat into their shells when stomped, which can then be kicked, picked up, or thrown. They bounce off of opposing walls and can damage the player character character on the rebound, but they can be stopped with a well-timed jump or fireballs. The giant shells of Big Koopa Troopas can also be sent sliding by jumping on them, but are too large to hold. |
 Buzzy Shells |
These work like Koopa Shells, but they are impervious to fire. Fireballs cannot stop them. |
 Barrels |
An item that the player can pick up and throw at enemies to defeat them and at coins to collect them. Broozers can also throw them. Another player who touches a barrel while it rolls will take damage. |
 POW Blocks |
A block that causes a large tremor on the ground when thrown. |
 Ice blocks |
A block that is created by an enemy that was frozen with an ice ball. This block can be picked up and thrown like a barrel. |
 Trampolines |
A spring that lets the player jump high into the air. It can be picked up and carried around. |
 Yoshi's Eggs |
An egg that Yoshi comes out of or produces after eating five fruits, which contain power-ups. They come in two different colors: green releases the adult Yoshi. |
 Glowing Baby Yoshi's Eggs |
This yellow eggs releases a Glowing Baby Yoshi. |
 Fruits |
A fruit that Yoshi eats. When Yoshi eats five fruits, he makes an egg that contains an item. |
 Boost Stars |
A star that appears during Boost Mode. |
Power-ups[edit]
Objects[edit]
Objects are interactable elements of the environment that cannot be picked up or collected by Mario. For objects that primarily function as obstructions or hazards, see above.
| Name | Description | |
|---|---|---|
| Blocks and containers | ||
 ? Block |
Contains a coin or item when hit. Some ? Block are 10-Coin Blocks that release up to ten coins when struck in rapid succession. Other are invisible and also become visible when struck. Emptying any ? Block turns it into an Empty Block that can be stood on like a platform. | |
 3-Up Moon Block |
A very rare block that contains a 3-Up Moon. | |
 Big Block |
A large Brick Block that mostly have the same properties normal-sized Brick Block. However, some Big Blocks are Coin Blocks. When these ones are emptied, the Big Block falls apart and leaves five coins behind on the ground. | |
 Block (railed) |
? Blocks and Bricks that travel along tracks. | |
 Boost Block |
Blocks that appear when touching the screen on the Wii U GamePad. | |
 Brick Block |
Breaks or contains coins when hit. Like ? Blocks, there are Brick Blocks that are 10-Coin Blocks. The player character cannot break Brick Blocks in their Small or Mini forms. | |
 Cracked block[9] |
These blocks make up the floor in the battle against Bowser Jr. A block will fall away if struck by Bowser Jr. twice, but reappear after a brief period of time. | |
 Crate |
A wooden box Mario can break via a Ground Pound. Sometimes contains coins or power-ups. | |
 Donut Block |
A platform that falls under weight if Mario stays there for too long. As Mini Mario, he is too light to make it fall; as such, it becomes safer. | |
 Flying ? Block |
A type of ? Block that flies in a rhythmic pattern to the music of a stage. Once hit, it becomes an Empty Block. | |
 Magical platform[10] (A) |
These blocks appear during the battle with the Magikoopa. When his spells strike these blocks, they turn into Donut Blocks. | |
 Magical platform (B) |
Some of these airborne magical platforms contain enemies. The slam downward on the Magikoopa's command, damaging the player character if they are in their path. The platforms that contain enemies release them when they collide with the ground, freeing them onto the field. | |
 Mega ? Block |
Giant ? Blocks. It functions like the smaller ones and becomes a big Empty Block when emptied. | |
 Note Block |
A block that makes Mario jump higher when he jumps or steps on it. | |
Roulette Block |
A block with various items scrolling on it. Mario can hit it and release the power-up shown. | |
 Snake Block |
Green blocks that move like a snake once Mario steps on it. | |
 Snake Block (big) |
A large type of Snake Block. | |
 Stone block |
Block that can only be destroyed by Bob-omb explosions or some large/spiky enemies like Grrrols or Big Thwomps. | |
 Stretch Block |
A block made up of five segments that stretches to act as a bridge in certain levels. | |
 Super Guide Block |
Appears after Mario loses five lives in a row in one stage. When this block is hit, Luigi clears the stage for Mario. | |
 Treasure chest |
Chests award the player character a Super Star that goes into their inventory. In Enemy Courses, Nabbit steals the Star if the character does not grab it in time. | |
| Trigger objects | ||
 ! Switch |
Activating the switch enables the axe to destroy the bridge, causing Bowser to fall. | |
 ? Switch |
Changes or adds things to an area, such as platforms, for a limited time. | |
 Goal ring |
The goals in Challenge Mode, appearing in place of Goal Poles. | |
 Green Ring |
Makes fifteen Green Coins appear. If the player collects all five groups of green coins before they disappear, they receive either a power-up, which varies in between levels, or a 1-Up Mushroom, depending on the player's current size. | |
 P Switch |
Not only turns bricks into coins or vice versa, but also reveals Blue Coins. | |
 Red Ring |
Makes eight Red Coins appear. If the player collects all eight coins before they disappear, they receive either a power-up, which varies in between levels, or a 1-Up Mushroom, depending on the player's current size. | |
| Pipes | ||
 Giant pipe |
Big Piranha Plants sit in giant pipes. None of these ones are Warp Pipes. | |
 Jet Pipe |
These underwater pipes expel strong currents that push the player character. | |
Pipe |
Pipes going through the ground that transport the player to new areas. In World | |
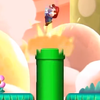 Pipe Cannon |
Pipes that launch players to another location or a platform that they are unable to reach. | |
 Small pipe |
Mini variants of warp pipes that can be accessed with a Mini Mushroom. | |
| Climbable objects | ||
Beanstalk |
Used to reach Coin Heavens or other secret places. They emerge from Vine Blocks, which resemble Invisible Blocks or Brick Blocks. | |
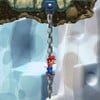 Hanging chain |
Chains that the player character can swing back and forth on like rope swings. | |
 Hanging vine |
Hanging vines found in Spinning Platforms of Doom. They function like rope swings. | |
 Moving Fence |
Chain-link fences that shift through the air. A stationary one appears in Fire Bar Cliffs. | |
 Pole |
Striped poles that the player can climb up and slide down after jumping onto them. | |
Rocky wall |
Rocky walls can be climbed like rope ladders but with more horizontal breath. They are found in mountainous levels. Movement is restricted at the top of these walls, where the player character can only sidestep. | |
 Rope ladder |
A climbable object used to get on top of platforms. | |
| Platforms | ||
Arrow lift |
Lifts that appear turn from blue to red when activated, causing them will move in the opposite direction from where they are pointing while idle. | |
 Bean Platform |
Large beans serving as platforms that periodically coil and uncoil. | |
 Bone Bridge |
A floor made up of skeleton bones. When Bowser Jr. slams down on a bridge with his Junior Clown Car, it causes brief ripples that can stun the player and enemies. | |
 Bouncy Cloud |
Cloud platforms that makes the player and enemies bounces very high. | |
 Clockwork Block[11] |
A platform with gears that moves left and right. | |
Cloud Lift |
Long platforms that move to the right when initially landed on. | |
 Cog |
Gear-like platforms that the player must go under to pass. If they remain under one, they will be squished and lose a life. | |
Conveyor Belt |
Moving platforms that carry the player and, sometimes, Iron Blocks and enemies. | |
 Cross Lift |
A lift that not only expands and contracts horizontally, but also conversely expands and contracts vertically. | |
 Flatbed Ferry |
Lifts that travel along tracks. Some tracks are self-connected or lead to a rounded end that sends the Flatbed Ferry back the way it came. Others lack an obstruction at the end, causing the lift to fall. | |
 Floating crate |
These large wooden crates float in water and sink when stood on. The float back into place once jumped off of. | |
Floor |
Platforms that the player can bump from below to stun enemies. | |
 Ice Chunk |
A giant variant of an Ice Block that serves as a platform. It functions similarly to Iron Blocks, which can also crush the player. | |
Ice platform |
Columnar lifts made of ice. Some move back and forth or up and down. | |
 Iron Block |
An iron box that drops on Conveyor Belts. They are indestructible and causes the player to lose a life if crushed. | |
 Leaf Platform |
Leaves that serve as platforms appearing on giant beanstalks. When they first sprout, they appear to be green, only to turn red and brown then slowly float down after some time has passed. | |
Lift |
Wooden platforms that are suspended above ground. Many of them move in set paths and are of varied lengths. | |
 Light Block |
A block-like platform that shines light in dark areas. | |
 Limited Lift |
A lift that the player can travel with a limited capacity of at least five enemies. It stops once the counter reaches 0. | |
 Limited Lift (Remote-Control)[12] |
Girder-like Limited Lifts that begin to rise once a player character is on top of it. The player can tilt the lift, but stops if the counter on it reaches 0. | |
 Nut |
A set of nuts that are screwed onto a very long bolt that function as lifts. The player must continually jump to avoid falling. | |
 Paddle Platform |
A paddle wheel-like platforms made of 4 smaller platforms that moves in a wheel on tracks. | |
 Palm tree |
Trees of varying heights that serve as platforms. | |
 Pendulum Platform |
Chained platforms that sway from side to side indefinitely. | |
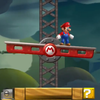 Remote-Control Platform |
A lift that the player can tilt and move on tracks by tilting the Wii U GamePad or the Wii Remote or by alternating between pressing | |
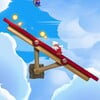 Rocking Platform[13] |
Wooden platforms in the air that tilt back and forth on their own. | |
 Rolling log |
Cylindrical wooden platforms that, when stood on, roll over. The player must run along them or jump carefully to avoid falling off until they reach their destination on a set path. | |
 Sand Geyser |
Pillars of sand that rises up from pits at regular intervals, and can be used as platforms. | |
 Scale Lift |
Scale-like platforms that causes the one platform to rise if the player lands on the parallel one. It will fall off if they stand on it for too long. | |
 Screwtop Lift |
A lift with a Screwtop that the player can move in a set direction by spinning. | |
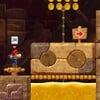 Screwtop Platform |
A platform with a Screwtop that the player can move in a set direction by spinning. | |
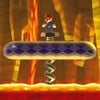 Screwtop Shroom |
A Mushroom Platform that only appears in Rising Tides of Lava. When the Screwtop on it is spun on, it lowers another lift's height. | |
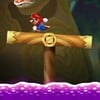 Seesaw Log Bridge |
Solid wooden platforms that teeter to one side when a player or element stands on the opposite side. | |
Seesaw Shroom |
A mushroom platform that acts as a seesaw. | |
 Slide Lift |
Lifts that are aligned either horizontally or vertically and move in a rectangular fashion either clockwise or counterclockwise. | |
 Spine Coaster |
Rideable creatures made of bone used to aid Mario and company to pass through pits and pits. | |
 Star Lift |
Star-shaped platforms that spin depending on which side of them is weighed down by the player. | |
 Stretch Shroom |
Mushroom Platforms that contract and extend at constant intervals, pulling anything and anyone on the ends of the platforms to the center when they contract. | |
 Stone-Eye |
Giant gray stone heads that either move in different patterns, or stay completely stationary. Stone-Eyes are sentient, indicated by their eyes that constantly stare at the player. | |
 Swinging Hammer |
Hammer-like platforms that swing back and forth in a 180° arc. | |
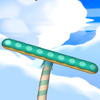 Tilting mushroom |
Mushroom Platforms that tilt back and forth on their own. | |
 Turning Floor |
Continually moving objects that turn clockwise or counterclockwise, moving anything on them. | |
 Water Ball |
A huge mass of water that floats in the air. Acts as if Mario and co. are in water. | |
 Water Geyser |
Pillars of water that rise from below and serve as platforms. | |
 Wobble Rock |
Rock platforms that wobble from left to right when the player stands near one of its edges. | |
| Other objects | ||
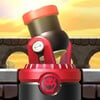 Boss cannon |
Cannons found at the end of enemy castles. Boss cannons launch the player character to one of a nearby airship to battle one of the Koopalings. | |
 Checkpoint Flag |
A flag that acts like a checkpoint. It has Bowser's insignia, but if a player touches it, it is replaced by whichever character's symbol turned it. If that character is in their Small form, they transform into their Super form. | |
 Door |
Doors bring the player character to another area. In Ghost Houses, doors are sometimes involved in puzzles. One-way boss doors occur at the end of every fortress that bring the player character to a boss battle. | |
 False wall[14] |
Hidden alcoves found throughout many levels. False walls often conceal blocks, pipes, or Star Coins. | |
 Flower |
A common background object that releases a coin when spun next to. | |
Goal Pole |
Flagpoles found at the end of every level. Touching one completes the level. | |
Goal Pole (secret) |
Flagpoles with red flags, found at the end of some levels. Touching one completes the level and leads to secret exits. | |
 Mist |
Dense haze that obscures the player's view and conceals objects. They can temporarily be blown away through various means, such as Spin Jumping. Enemies sometimes are concealed in mist. | |
 Trick door[15] |
Some of the doors found in Ghost Houses are illusions crafted by Boos. Attempting to open one makes it disappear and releases a coin. | |
Reception[edit]
New Super Mario Bros. U has received generally positive reviews. The game currently maintains an 84 average on Metacritic[16] and had an 84.48% on GameRankings.[17] GameXplain gave the single-player and multi-player modes 4 stars out of 5,[18] IGN gave it a score of 9.1 out of 10,[19] EGM[20] gave a score of 9/10, Joystiq gave it 4.5 stars out of 5,[21] Polygon[22] and Destructoid[23] gave the same score of 8.5/10, VentureBeat[24] gave it a score of 83/100 (83%), Games Radar gave it 4 stars out of 5,[25] and Gamespot gave a score of 8.5.[26]
The game has been praised for its balanced gameplay and challenge mode, with IGN's Rich George describing it as "the best thing to come to Mario's world since 3D", while criticizing it as not pushing the Wii U's visuals and audio potential. He also stated, "though it doesn't necessarily redefine Nintendo's iconic hero, it still manages to capture the sense of carefree adventure that many of us felt as kids." He also criticized the game's "weak graphics and audio, plus the return of the irritating chaotic, bouncy multiplayer mode." He praised the progressing difficulty in the game and the additional difficulty of Challenge Mode.
| Reviews | |||
|---|---|---|---|
| Reviewer, Publication | Score | Comment | |
| Jim Sterling, Destructoid | 8.5/10 | "New Super Mario Bros. U is a great little platformer that kicks off the Wii U launch with a bang. Players know exactly what they're getting with this one -- an entertaining and incomplex bit of gaming that provides challenge and smirks in equal measure. While certainly a "safe" game to launch with, it is by no means unremarkable, and the only people who would fail to have fun are those with a fundamental aversion to Mario or platformers in general. Literally everybody else would find it incredibly difficult to dislike this one ... even if some of those latter stages will make them temporarily despise it. Because nobody likes lava levels. Nobody." | |
| Christian Donlan, Eurogamer | 9/10 | "Is the plumber's Wii U debut as good as his recent 3D outings? Not quite, but for the New Super Mario Bros. series, it's a real step forward in detailing, imagination and character. There's always been a keen Mario brain working away inside these 2D design exercises. Now, it feels like there's a proper soul to go along with it." | |
| Richard George, IGN | 9.1/10 | "It's difficult to find freshness or brilliance in a 2D landscape. Mario's world is now three decades old. That would seem to suggest new territory is scarce, and in some ways the formulaic New Mario series had come to reinforce that fear. But New Super Mario Bros. U demonstrates there's not just life left in this type of game, but that it can be modern and nostalgic at the same time. Nintendo's approach here strikes a great balance in all areas, ranging from its difficulty to design to enemies and bosses. And for everything the basic Story Mode does right – and that's a considerable amount – the Challenge Mode will be remembered as a key moment in the life of the New Mario series, where Nintendo realized it didn’t have to sacrifice the core gamer’s experience at the expense of a more casual audience. This is how Mario can and will appeal to everyone." | |
| Aggregators | |||
| Compiler | Platform / Score | ||
| Metacritic | 84 | ||
| GameRankings | 84.48% | ||
Sales[edit]
As of March 31, 2014, New Super Mario Bros. U is the 3rd best-selling game for the Wii U, having sold about 4.16 million copies worldwide. As of September 30, 2021, it had sold 5.82 million copies worldwide.[27]
Updates[edit]
Release date: November 18, 2012
Released at launch, the first update adds the game's Miiverse functionality.
Release date: March 15, 2013[28]
The second update causes any Miiverse posts made in-game to be posted to a separate "Game Posts" community rather than the standard community.
Release date: June 20, 2013[29]
The third game update adds the ability for the game to receive the New Super Luigi U downloadable content and puts a prompt in-game to go to the Nintendo eShop to download it. The update also adds support for the Wii U Pro Controller.
New Super Luigi U[edit]
- Main article: New Super Luigi U
In July 2013, as part of the Year of Luigi celebration, a large-scale expansion pack titled New Super Luigi U was released as downloadable content for New Super Mario Bros. U on the Nintendo eShop, and was later released as a standalone title at retail. The pack contains 82 new courses in place of the original ones, featuring Luigi as the main character in the place of Mario, who does not appear at all within the game.
The game features the same multiplayer, with the option of playing as Yellow Toad, Blue Toad, or Nabbit (who cannot power-up like the other characters, but is impervious to enemy damage). The game features similar physics to that of Luigi's style of gameplay in Super Mario Bros.: The Lost Levels, in that the characters run faster and jump higher, but stop slower. The levels have also been designed to be more challenging, with each one being shorter and featuring a 100 second time limit.
The Mario & Luigi Deluxe Set Wii U bundle released in November 2013 includes with it both games put onto one disc, titled New Super Mario Bros. U + New Super Luigi U. In addition to being a compilation of both games, this release includes several bonus videos.
With the discontinuation of digital purchases for Wii U in March 2023, it is no longer possible to buy New Super Luigi U as DLC for New Super Mario Bros. U, though it can still be downloaded by those who purchased it when it was available.
Development[edit]
As stated above, New Super Mario Bros. U was based upon the New Super Mario Bros. Mii Wii U experience demo shown off at E3 2011.[30] A translation of a Spanish online magazine revealed that the new title was in development and would be revealed at E3 2012,[31] with the game fully revealed to be New Super Mario Bros. U during the E3 trailer.[32]
New Super Mario Bros. U began development soon after the completion of New Super Mario Bros. Wii, using pre-existing elements from the Wii game, as development equipment for the Wii U did not exist at the time.[33] The game's singular, interconnected world map was inspired by the one seen in Super Mario World; Masataka Takemoto desired to take the map from that game and use the Wii U in order to recreate and expand upon the concept.[34] The map being seamless also had a role in Miiverse integration, as with the setup of the map it was possible to display comments across each of the levels.[35] The concept of drop-in play with one player on the Gamepad placing blocks was brought up early in development. When the Wii U Gamepad was brought up during development, the team began to conceptualize ways to use it, talking specifically about the drop-in play. Wanting to make a feature with "controls that you can understand right away with no explanation," the concept of using the GamePad to place blocks the other players can jump on went through.[33]
Challenge Mode was based upon the idea of setting a self-challenge in the previous games, as well as the challenge site for New Super Mario Bros. Wii. Because of ideas like this, the developers decided to put the Challenge Mode into the game from the beginning. The challenges were created with all types of skill levels in mind.[36]
Boost Rush Mode was based on the Free-for-All Mode featured in New Super Mario Bros. Wii, in that they wanted a similar mode for playing the main game stages in short bursts. The developers tried connecting courses together and playing them through, but found it uneventful; they then added the concept of collecting coins resulting in the screen scrolling faster, and found it to fit a Super Mario-style of gameplay.[34]
Pre-release and unused content[edit]
Miis were originally going to be playable in the game's Story Mode. In the final game, Mii playability is restricted to the bonus modes. Additionally, Boost Mode was also originally titled "Assist Play". The Acorn Plains map as seen in the E3 showcase for the game is also very different from the version seen in final game.
Gallery[edit]
- For this subject's image gallery, see Gallery:New Super Mario Bros. U.
Mario, Luigi, Yellow Toad, and Blue Toad
Mario riding Yoshi
Mario carrying a Glowing Baby Yoshi
A Waddlewing holding a Super Acorn
Media[edit]
- For a complete list of media for this subject, see List of New Super Mario Bros. U media.
| File info 0:30 |
| File info 0:30 |
| File info 0:30 |
| File info 0:30 |
Glitches[edit]
By entering a Warp Pipe or door in any stage exactly when the timer hits zero, the player does not die, and they can explore the level indefinitely.
Staff[edit]
- Main article: List of New Super Mario Bros. U staff
New Super Mario Bros. U was produced by Takashi Tezuka and Hiroyuki Kimura, with Masataka Takemoto as the director and Tsutomu Kaneshige and Shinichi Ikeamtsu as the general coordinators. Satoru Iwata was the executive producer, with the general producer being Shigeru Miyamoto. Masanobu Sato was the lead designer, and Shiro Mouri was the programming director. The music was composed by Shiho Fujii and Mahito Yokota, with Koji Kondo as sound adviser.
References to other games[edit]
- Mario Bros.: Coin Courses-2 is based on the levels in this game with similar platforms and Koopa Troopas acting like as Shellcreepers.
- Super Mario Bros.: The second level is an underground level with a secret path over the ceiling passing over the exit Warp Pipe, leading to a secret exit. In the final battle with Bowser, when Mario hits the switch, it causes an axe to fall and break the bridge. Sprites from this game are used in the game menus.
- Super Mario Bros. 2: A portion of the title screen theme references the start of this game's "Ground Theme".
- Super Mario Bros. 3: Boom Boom is fought as the mid-boss of each world. The Super Acorn is comparable to the Super Leaf, as it has a P-variation. The Koopalings, which originated from this game, have airships once again. Airship levels, and the castle rooms before entering a Koopaling's airship, both use a remastered version of the airship theme from Super Mario Bros. 3. P Flying Squirrel Mario's flying sound effect is similar to the P-Meter sound.
- Super Mario World: The world map is connected again and a ghost ship, similar to the Sunken Ghost Ship level, appears in this game. The Warp Pipes have a similar structure to the ones in Super Mario World. Sumo Bros, Torpedo Teds, Thwimps, and Bony Beetles reappear as enemies. Most of the worlds are named after food again. Some of the world's features are similar to those found in Dinosaur Land (e.g. Acorn Plains having jagged mountains or Soda Jungle being one-third based on the Forest of Illusion). Super Mario World has the exact same number of exits that this game has: 96.
- Super Mario World 2: Yoshi's Island: The name of the Challenge "Spin Jump, Get Dizzy" is a reference to that of a level from this game, Touch Fuzzy, Get Dizzy. Bubble Baby Yoshi's abilities maybe a reference to how Yoshi can shoot bubbles in this game including how the player can bounce off the bubbles. Kamek uses his magic to enhance Boom Boom's attacks, just as he did with this game's bosses. He also grows Bowser to a large size, similar to the final fight with Baby Bowser.
- New Super Mario Bros.: Cloud Lifts are redesigned to better resemble their New Super Mario Bros. counterparts and compress when stood on, just like in this game. The background of Dry Desert Mushrooms is based on the background of World 2-6.
- Mario Kart Wii: The Red Shell and Green Shell use their artworks from this game, but the Green Shell's artwork is mirrored.
- New Super Mario Bros. Wii: The title is the sequel to this game. Many graphical, audial, and technical assets were reused from this game. Kamek growing Bowser with magic could also be a reference to this game's final fight, where similar events transpired. The main gimmicks in Princess Peach’s Kingdom's tower and castle levels, Pendulum Platforms and cogs respectively, are switched in order of appearance between Acorn Plains' Crushing-Cogs Tower and Lemmy's Swingback Castle.
- Super Mario Galaxy 2: Balloon Baby Yoshi and Glowing Baby Yoshi's abilities are similar to those of Blimp Yoshi and Bulb Yoshi, respectively. Magmaarghs and Magmaws return from this game.
- Super Mario 3D Land: Boom Boom's voices are reused, as well as the motion patterns of some of the enemies.
- Mario Kart 7: The Miis reuse their voice clips from this game.
- New Super Mario Bros. 2: The title is a follow-up to this installment. The Note Block sounds are reused. The Goal Pole also produces the flag containing the emblem of the topmost character, also seen in this game.
- Paper Mario: Sticker Star: The Ghost House doors use the design from The Enigmansion in this game rather than the one from New Super Mario Bros. Wii. The Bony Beetle's design is reused. Also, Bowser Jr. uses the same glass dome in his clown copter as in this game.
References in later games[edit]
- Mario Kart Arcade GP DX: Various background mountains from Acorn Plains are visible in the Bowser Jr. Cup's courses, Aerial Road and Sky Arena.
- Mario Kart 8: Mecha Cheeps reappear in the underwater sections of Water Park. The Koopalings' weight class order (from lightweight to heavyweight) in this game mirrors the order they are hanging onto Bowser's tail in New Super Mario Bros. U's ending cutscene: Lemmy is the lightest, Larry and Wendy are tied for the second-lightest, Iggy and Ludwig are middleweights, Roy is the second-heaviest, and Morton is the heaviest.
- Mario Golf: World Tour: Layer-Cake Desert, Sparkling Waters, and Rock-Candy Mines appear as downloadable courses in this game. Some pieces of Mii gear are based upon both Nabbit and the Boss Sumo Bro, both of which originate from this game. Nabbit returns as a downloadable playable character.
- Super Smash Bros. for Wii U: A stage based on New Super Mario Bros. U, Mushroom Kingdom U, appears in this game.
- Mario Party 10: A few of the minigames take place in areas that resemble some of the worlds in New Super Mario Bros. U, such as Cheep Cheep Leap taking place in Sparkling Waters and Fruit Scoot Scurry taking place in Layer-Cake Desert.
- Super Mario Maker/Super Mario Maker for Nintendo 3DS: The fourth game style in these games is based on New Super Mario Bros. U.
- Mario Tennis: Ultra Smash: The Junior Clown Car is equipped with the boxing gloves from New Super Mario Bros. U.
- Super Mario Run: The graphics, as well as most of the music, are based on New Super Mario Bros. U.
- Mario Party: Star Rush: The underwater theme from New Super Mario Bros. Wii appears as a song from New Super Mario Bros. U in the Rhythm Recital mode for this game.
- Super Smash Bros. Ultimate: The stage Mushroom Kingdom U from Super Smash Bros. for Wii U returns as a stage in this game. The Koopalings, Nabbit, Boo, Hammer Bro, Banzai Bill, Thwomp, Bob-omb, Flying Squirrel Toad, Super Mushroom, Fire Flower, and Super Star appear as spirits, using their artwork from New Super Mario Bros. U.
- Super Mario Maker 2: Like the previous Super Mario Maker games, the fourth style in this game is based on New Super Mario Bros. U.
- WarioWare: Get It Together!: This game features a microgame based on New Super Mario Bros. U.
- Mario & Luigi: Brothership: The magic blocks from Kamek's battle appear as part of an attack by the Magikoopa enemies.
Names in other languages[edit]
| Language | Name | Meaning | Notes |
|---|---|---|---|
| Japanese | Nyū Sūpā Mario Burazāzu Yū |
New Super Mario Bros. U | |
| Chinese (simplified) | New 超级马力欧兄弟 U[37] New Chāojí Mǎlì'ōu Xiōngdì U |
New Super Mario Bros. U | |
| Chinese (traditional) | New 超級瑪利歐兄弟U[37] New Chāojí Mǎlì'ōu Xiōngdì U |
New Super Mario Bros. U | |
| Korean | 뉴 슈퍼 마리오브라더스 U[?] Nyu Syupeo Mariobeuradeoseu Yu |
New Super Mario Bros. U; as named in New Super Mario Bros. U Deluxe |
Trivia[edit]
- If the Miis are selected as P1, they will be colored like Mario. If P2, they will be colored like Luigi. If P3, they will be colored like Wario. If P4, they will wear blue shirts and dark blue overalls, similar to Luigi's light blue alternate costume from the Super Smash Bros. series. This could be a reference to the player 4 in some of the Wii U Virtual Console ports of the Game Boy Advance iteration of Mario Bros.
- When the Mario Bros., Toads, or Miis are not moving, they stop and stare at the screen until the player starts moving them again.
- Sometimes, on the title screen, Luigi almost trips over instead of jumping and ground-pounding the ground.
- In this game, New Super Luigi U, and their Nintendo Switch port, Yellow Toad and Blue Toad's in-game voices are swapped compared to New Super Mario Bros. Wii. However, their voices in the menus and character selection screen are still the same as the previous game. In Super Mario Maker 2's New Super Mario Bros. U-style, Toad's voices are a combination of both of them.
- Bowser transforming Peach's castle into a stronghold of his in this game is similar to the climax of Super Mario Bros.: Peach-hime Kyūshutsu Dai Sakusen!
References[edit]
- ^ New Super Mario Bros. U – Game Info. Nintendo of America (American English). Archived September 16, 2012, 23:36:46 UTC from the original via Wayback Machine. Retrieved July 26, 2024.
- ^ Nintendo.com.au
- ^ Sakai, Kazuya (Ambit), kikai, Akinori Sao, Junko Fukuda, Kunio Takayama, and Ko Nakahara (Shogakukan), editors (2015). 『スーパーマリオブラザーズ百科: 任天堂公式ガイドブック』. Tokyo: Shogakukan (Japanese). ISBN 978-4-09-106569-8. Page 11–13.
- ^ Nintendo Co., Ltd. HISTORY → Series → Super Mario. Mario Portal. Retrieved 6 Nov. 2024. (Archived October 3, 2024, 11:52:39 UTC via Wayback Machine.)
- ^ Stratton, Steve (2012). New Super Mario Bros. U: PRIMA Official Game Guide. Roseville: Prima Games. ISBN 978-0-307-89690-2. Page 28–35.
- ^ a b Sakai, Kazuya (Ambit), kikai, Akinori Sao, Junko Fukuda, Kunio Takayama, and Ko Nakahara (Shogakukan), editors (2015). "New Super Mario Bros. U" in『スーパーマリオブラザーズ百科: 任天堂公式ガイドブック』. Tokyo: Shogakukan (Japanese). ISBN 4-091065-69-4. Page 204–19.
- ^ Nintendo Co., Ltd. (2022). New Super Mario Bros. U. Mario Portal Game Archive. Retrieved 28 Aug. 2024.
- ^ Stratton, p. 90.
- ^ Stratton, p. 187
- ^ Stratton, p. 175
- ^ Roberts, Rachel, Cardner Clark, editors (2018). "New Super Mario Bros. U" in Super Mario Bros. Encyclopedia: The Official Guide to the First 30 Years (First English Edition). Milwaukie: Dark Horse Books. ISBN 978-1-50670-897-3. Page 215.
- ^ Stratton, p. 199
- ^ Roberts and Clark, p. 216
- ^ Stratton, p. 6, 10, 43, 45, 51, 65, 67, 70, 81, 83, 84, 92, 98, 99, 103, 104, 108, 110, 111, 117, 131, 136, 146, 151, 152, 157, 172, 175–77, 179, 192, 214, 217, 219
- ^ Stratton, p. 10, 84
- ^ New Super Mario Bros. U. Metacritic (English). Retrieved May 13, 2024.
- ^ New Super Mario Bros. U for Wii U. GameRankings (English). Archived December 9, 2019, 01:33:58 UTC from the original via Wayback Machine. Retrieved May 13, 2024.
- ^ GameXplain (November 15, 2012). New Super Mario Bros. U - Video Review (Wii U) [HD]. YouTube (English). Retrieved May 13, 2024.
- ^ George, Richard (November 15, 2012). New Super Mario Bros. U Review. IGN (English). Retrieved May 13, 2024.
- ^ Carsillo, Ray (November 15, 2012). EGM Review: New Super Mario Bros. U. EGMNOW (English). Archived November 16, 2012, 10:07:44 UTC from the original via Wayback Machine. Retrieved May 13, 2024.
- ^ Mitchell, Richard (November 15, 2012). New Super Mario Bros. U review: A return to form. Joystiq (English). Archived November 18, 2012, 05:30:42 UTC from the original via Wayback Machine. Retrieved May 13, 2024.
- ^ Kollar, Phillip (November 15, 2012). New Super Mario Bros. U review: new tricks. Polygon (English). Retrieved May 13, 2024.
- ^ Sterling, Jim (November 15, 2012). Review: New Super Mario Bros. U. Destructoid (English). Archived November 17, 2012, 14:44:25 UTC from the original via Wayback Machine. Retrieved May 13, 2024.
- ^ McLaughlin, Rus (November 15, 2012). New Super Mario Bros. U is far from new (review). VentureBeat (English). Retrieved May 13, 2024.
- ^ Gilbert, Henry (November 15, 2012). New Super Mario Bros U review. Gamesradar (English). Retrieved May 13, 2024.
- ^ GameSpot (November 17, 2012). GameSpot Reviews - New Super Mario Bros. U. YouTube (English). Retrieved May 13, 2024.
- ^ May 10, 2022. Top Selling Title Sales Unites. Nintendo (Japanese). Retrieved May 13, 2024. (Archived August 2, 2017, 04:49:50 UTC via Wayback Machine.)
- ^ Bonds, Curtis (March 15, 2013). v.1.2.0 Released for New Super Mario Bros. U. Nintendo World Report (English). Retrieved November 28, 2014.
- ^ Colette (June 20, 2013). New Super Mario Bros. U Update Allows Wii U Pro Controller Use]. My Nintendo News. Retrieved May 13, 2024.
- ^ Newton, James (April 17, 2012). Mario Wii U "Based On" New Super Mario Bros. Mii. Nintendo Life. Retrieved May 13, 2024.
- ^ Newton, James (April 16, 2012). Miyamoto To Show Wii U Mario at E3. Nintendo Life. Retrieved May 13, 2024.
- ^ Nintendo of America (June 5, 2012). Wii U - New Super Mario Bros. U E3 Trailer. YouTube. Retrieved May 13, 2024.
- ^ a b Iwata Asks : New Super Mario Bros. U : "What Should Be New?". Nintendo. Retrieved May 13, 2024.
- ^ a b Iwata Asks : New Super Mario Bros. U : One Map. Nintendo. Retrieved May 13, 2024.
- ^ Iwata Asks : New Super Mario Bros. U : Reading the Posts in your Hands. Nintendo. Retrieved May 13, 2024.
- ^ Iwata Asks : New Super Mario Bros. U : "Mottainai (What a Waste)!". Nintendo. Retrieved May 13, 2024.
- ^ a b Super Mario Maker 2 in-game name
External links[edit]
- Mario Portal Game Archive (EN)
- Mario Portal Game Archive (JP)
- Japanese website
- American website
- European website
- Official YouTube channel
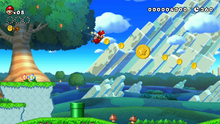
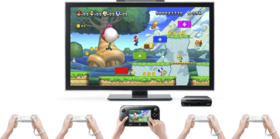
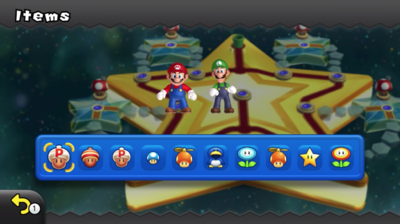
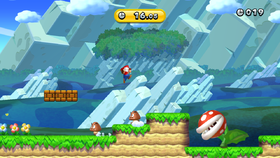
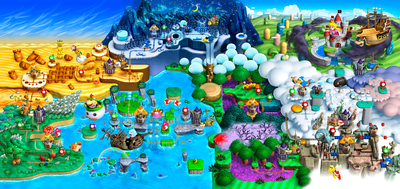
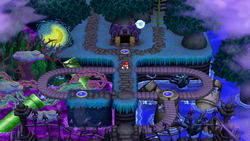


![Artwork of Fire Mario in New Super Mario Bros. (also used in New Super Mario Bros. Wii and Super Mario 3D Land)[1][2]](https://mario.wiki.gallery/images/thumb/8/8a/Fire_Mario.png/110px-Fire_Mario.png)


