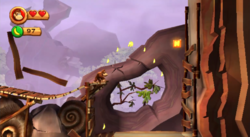
Crumble Canyon: Difference between revisions
Master R.O.B (talk | contribs) mNo edit summary |
m (Text replacement - "(\| *)Jap([RMCN\d]* *=)" to "$1Jpn$2") |
||
| (55 intermediate revisions by 29 users not shown) | |||
| Line 1: | Line 1: | ||
{{level | {{level infobox | ||
|title=Crumble Canyon | |title=Crumble Canyon | ||
|image=[[File: | |image=[[File:DKCR Crumble Canyon 1.png|250px]] | ||
|code=6 - 6 | |code=6-6 | ||
|game=''[[Donkey Kong Country Returns]] | |world=[[Cliff (world)|Cliff]] | ||
| | |game=''[[Donkey Kong Country Returns]]'' (''[[Donkey Kong Country Returns 3D|3D]]''/''[[Donkey Kong Country Returns HD|HD]]'') | ||
| | |before=[[Boulder Roller|<<]] | ||
|before_alt=[[Precarious Plateau|**]] | |||
|after=[[Tippy Shippy|>>]] | |after=[[Tippy Shippy|>>]] | ||
|track=Clifftop Concert | |||
}} | }} | ||
'''Crumble Canyon''' is the forty-third level in the [[ | '''Crumble Canyon''' is the forty-third level in the game, ''[[Donkey Kong Country Returns]]'' and its [[Donkey Kong Country Returns 3D|Nintendo 3DS]] and [[Donkey Kong Country Returns HD|Nintendo Switch]] ports, as well as the sixth level in the [[Cliff (world)|Cliff]] world. | ||
Many crumbling stone platforms are found in this cliff-themed level. Some of these platforms must be avoided by [[Donkey Kong|Donkey]] and [[Diddy Kong]] because they can make them fall, while others can be used to help the [[Kong]]s cross gaps. Tilting, wooden platforms and slanted pathways are also present in Crumble Canyon. Near the end of the level, the primates discover a | Many crumbling stone platforms are found in this cliff-themed level. Some of these platforms must be avoided by [[Donkey Kong|Donkey]] and [[Diddy Kong]] because they can make them fall, while others can be used to help the [[Kong]]s cross gaps. Tilting, wooden platforms and slanted pathways are also present in Crumble Canyon. Near the end of the level, the primates discover a [[Giga Goro Ball]] that rolls after them. They must move quickly ahead of it to avoid being crushed. Sometimes, though, they may need to slow down and wait for the Giga Goro Ball, as it alters parts of the Kongs' surroundings to let them progress. Other enemies in this level include [[Skullyrex]]es, [[Skellirex]]es, and [[Tiki Buzz]]es. In addition, this is the last level of the Cliff with stormy weather. | ||
In the [[Donkey Kong Country Returns#Time Attack|Time Attack]] mode of the game, a time of 1:33:00 is needed to get a gold medal, a time of 1:49:00 for silver, and a time of 2:26:00 for bronze. | In the [[Donkey Kong Country Returns#Time Attack|Time Attack]] mode of the game, a time of 1:33:00 is needed to get a gold medal, a time of 1:49:00 for silver, and a time of 2:26:00 for bronze. | ||
==Overview== | ==Overview== | ||
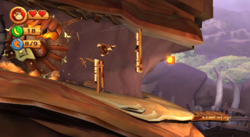
[[File: | [[File:DKCR Crumble Canyon 2.png|thumb|left|250px|The Kongs ride on a tipping platform.]] | ||
The level begins with a straight pathway towards a [[Barrel Cannon]]. As the Kongs travel to the barrel, coming across many Skullyrexes, | The level begins with a straight pathway towards a [[Barrel Cannon]]. As the Kongs travel to the barrel, coming across many Skullyrexes, Skellirexes, and Tiki Buzzes on the way, pieces of the ground break off and fall. A normal [[barrel]] is also located near the Barrel Cannon next to a platform that permanently tilts down when the Kongs stand on it. When they reach the cannon, they are shot to a section of land with a cactus containing an item and a large piece of rock that falls when stood on. As this large stone falls, it tilts over a large abyss that the primates cannot cross easily without the object. The rock platform sends them down to another platform that falls when they stand on it, and it is followed by three similar platforms. The four platforms must be used to help the Kongs easily cross wide abysses, as they pull them over the gaps as they fall. The last of these platforms takes them to a slanted pathway with the letter K of the [[K-O-N-G Letters]] at the bottom of it. | ||
After the letter are two wooden platforms that the heroes can tilt left and right by putting their weight on certain sides of them. A solid platform with the first [[DK Barrel]] is present near this, with four thin platforms following it that are surrounded by Tiki Buzzes and are too weak to hold the Kongs for more then a few seconds. After a tilting, wooden platform with a | After the letter are two wooden platforms that the heroes can tilt left and right by putting their weight on certain sides of them. A solid platform with the first [[DK Barrel]] is present near this, with four thin platforms following it that are surrounded by Tiki Buzzes and are too weak to hold the Kongs for more then a few seconds. After a tilting, wooden platform with a Skellirex are four more of these crumbling platforms that help the primates reach a bigger platform. This platform breaks with their weight as well, but instead of falling straight down into the abyss below, it tilts to the side first, where the Kongs can find another platform. Like many of the previous platforms, this one crumbles with the Kongs' weight, and then falls straight down into the gap. It is followed by two similar platforms and another tilting, wooden platform that the heroes can tilt to help themselves reach a higher, more solid area with the [[Professor Chops|Tutorial Pig]] and the checkpoint. Around the checkpoint are Skullyrexes and the second DK Barrel in the level. | ||
If they Kongs continue from here, they must travel downwards to a Barrel Cannon in a lower area. Crumbling platforms can help them safely reach this barrel without falling into an abyss, although some of them are covered in | If they Kongs continue from here, they must travel downwards to a Barrel Cannon in a lower area. Crumbling platforms can help them safely reach this barrel without falling into an abyss, although some of them are covered in Skellirexes. When the primates enter the Barrel Cannon, it blasts them into the foreground onto a slanted platform. They can slide down it to reach a lone barrel next to a bridge stretching over a wide gap covered in Skullyrexes. After the bridge are a few strange, blue plants that give items when blown on and a Barrel Cannon. The cannon shoots the Kongs into the background onto another slanted pathway. As they slide, they hit into rib bones that fall off into the abyss below. Another slanted platform just like this is ahead, followed by a smaller, more flat platform that tumbles when landed on. A Skellirex is on it. They should quickly jump off of this falling platform and head towards a platform that is slanted in an upward position. They can climb up it to reach another Barrel Cannon that blasts them onto a fragile platform in the foreground that crumbles when landed on. They must get off of this platform fast so they do not fall, and then jump to a nearby platform. This platform is very long and steep. The Kongs must slide down the angled pathway on it, coming across many [[banana]]s on the way. At the end of the area is a Barrel Cannon that can shoot the Kongs back into the background, where there is a another bridge covered in Skullyrexes and a single Skellirex after a cactus. On the other side of this wooden bridge are a few strange, blue plants that reveal items when blown on and another checkpoint, where the Tutorial Pig waits. | ||
[[File: | [[File:DKCR Crumble Canyon 3.png|thumb|250px|The primates try to avoid the Giga Goro Ball.]] | ||
Following the checkpoint is a | Following the checkpoint is a Giga Goro Ball that becomes angry when the Kongs jump on it. When they fall into the lower area of land ahead of it, a wall of wooden boards in their way breaks away, allowing them to progress. As they advance, the ball chases them, making a long piece of land tilt downwards. This leads them to a dead end. However, when the ball rolls down the slanted piece of ground, the piece of ground that the Kongs are standing on begins to tilt to the side, letting them travel under the previous platform. Next to a [[Banana Coin]] at the end of this pathway is a dead end. They can escape the area when the ball rolls down a makes another piece of land break and tilt to the side. This piece falls onto a more solid area of ground that the heroes can slide down to avoid the ball that is pursuing them. On the way down the slide are two small gaps, the last one with a Tiki Buzz and some bananas around it. On the other side of both gaps is a small, wooden wall of boards that can get in the Kongs' way and a Skellirex next to a trail of bananas. The trail leads to another gap that must be jumped over to access a curvy bridge. At the end of the bridge is a gap that the Kongs must go in to reach a lower area. | ||
Here, there is a wooden set of boards that they must break through to progress. They must wait for the ball to fall next to them to break it. When it is broken, they can access a lower area that is very similar to the previous. The Kongs must wait for the ball | Here, there is a wooden set of boards that they must break through to progress. They must wait for the ball to fall next to them to break it. When it is broken, they can access a lower area that is very similar to the previous. The Kongs must wait for the ball to land next to them as they stand on the wooden boards placed in this area. When they fall through the boards, they end up in a near-identical area with another wooden board that they must use the ball to break through. When they break through the wood, they end up in a tunnel area with some dinosaur bones in it. On the way through the tunnel, the Kongs travel along some wooden boards connected to the wall to avoid sticky tar. After they cross the first pit of tar, they come up to a wooden wall that stands in their way. They can jump over it and then reach another wooden board that leads them over tar. Several more wooden walls are after this that the primates must maneuver around, until they get to the outside of the tunnel, where the letter G is located. Ahead is a gap with tar inside of it. They should dodge the tar and head onto a set of fragile platforms that crumble with their weight. At this point, the ball falls into the gap and sinks into the tar. When the Kongs reach the end of the crumbling platforms, they reach a more solid one with the [[Slot Machine Barrel]] above it. | ||
== | ==Enemies== | ||
===[[K-O-N-G Letters]]=== | {|class="wikitable dk" | ||
!Image | |||
!Name | |||
!Count | |||
|- | |||
|align="center"|[[File:DKCR_Skellirex_Screenshot.png|50px]] | |||
|align="center"|[[Skellirex]] | |||
|9 | |||
|- | |||
|align="center"|[[File:Skullyrex.png|50px]] | |||
|align="center"|[[Skullyrex]] | |||
|8 | |||
|- | |||
|align="center"|[[File:TikiBuzz.png|50px]] | |||
|align="center"|[[Tiki Buzz]] | |||
|5 | |||
|- | |||
|align="center"|[[File:Giga Goro Ball.png|50px]] | |||
|align="center"|[[Giga Goro Ball]] | |||
|1 | |||
|} | |||
==Items== | |||
{|class="wikitable dk"width=15% | |||
|- | |||
!Image | |||
!Name | |||
!Count | |||
|- | |||
|align="center"|[[File:BananacoinDKCR.png|x50px]] | |||
|align="center"|[[Banana Coin]] | |||
|11 | |||
|- | |||
|align="center"|[[File:BarrelDKCR.png|x50px]] | |||
|align="center"|[[Barrel]] | |||
|2 | |||
|- | |||
|align="center"|[[File:DKBarrelDKCR.png|x50px]] | |||
|align="center"|[[DK Barrel]] | |||
|2 | |||
|- | |||
|align="center"|[[File:BalloonDKCR.png|x50px]] | |||
|align="center"|[[Red Balloon]] | |||
|1 | |||
|} | |||
===[[KONG Letters|K-O-N-G Letters]]=== | |||
{|class="wikitable dk"width=70% | |||
|- | |||
!Image | |||
!Letter | |||
!Location | |||
|- | |||
|align="center"|[[File:DKCR Crumble Canyon K Letter.png|250px]] | |||
|align="center"|K | |||
|The K letter is located after a group of four tipping platforms. When the final platform drops them onto a slanted pathway, the letter can be seen at the edge of the platform. | |||
|- | |||
|align="center"|[[File:DKCR Crumble Canyon O Letter.png|250px]] | |||
|align="center"|O | |||
|On the third fragile platform before the first checkpoint is the letter O. | |||
|- | |||
|align="center"|[[File:DKCR Crumble Canyon N Letter.png|250px]] | |||
|align="center"|N | |||
|When the Kongs are being chased by the Giga Goro Ball, they travel across a wooden bridge. The N letter can be collected by roll-jumping off the end of the bridge above the gap that leads into the tunnel area. | |||
|- | |||
|align="center"|[[File:DKCR Crumble Canyon G Letter.png|250px]] | |||
|align="center"|G | |||
|At the end of the tunnel area just before the Giga Goro Ball stops chasing the Kongs is the letter G in front of a wooden wall. | |||
|} | |||
===Puzzle Pieces=== | ===Puzzle Pieces=== | ||
[[File: | {|class="wikitable dk"width=70% | ||
|- | |||
!Image | |||
!Number | |||
!Location | |||
|- | |||
|align="center"|[[File:DKCR Crumble Canyon Puzzle Piece 1.png|250px]] | |||
|align="center"|1 | |||
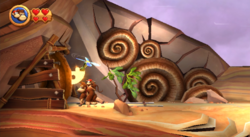
|At the start, the Kongs should turn back and blow on a blue plant hidden behind a wooden wall. It reveals a Puzzle Piece when this is done. | |||
|- | |||
|align="center"|[[File:DKCR Crumble Canyon Puzzle Piece 2.png|250px]] | |||
|align="center"|2 | |||
|After getting launched by the first [[Barrel Cannon]], the Kongs should go back and destroy a [[Item Container#Donkey Kong Country Returns / 3D|cactus]] to find the second Puzzle Piece. | |||
|- | |||
|align="center"|[[File:DKCR Crumble Canyon Puzzle Piece 3.png|250px]] | |||
|align="center"|3 | |||
|Soon after the first [[DK Barrel]], the Puzzle Piece can be found behind some boards above a teetering platform with a Skellirex on it. | |||
|- | |||
|align="center"|[[File:DKCR Crumble Canyon Bonus Room.png|250px]] | |||
|align="center"|4 | |||
|When the Kongs are launched to the foreground by the Barrel Cannon after the first checkpoint, they need go to the left up a rocky hill to reach a hidden Barrel Cannon that shoots them into a hole in a rock located in the background. Inside the hole is a [[Bonus Level]], where Donkey Kong and Diddy Kong must collect 44 bananas and four Banana Coins above a moving trampoline. If they collect everything within thirty seconds, they earn a Puzzle Piece. | |||
|- | |||
|align="center"|[[File:DKCR Crumble Canyon Puzzle Piece 5.png|250px]] | |||
|align="center"|5 | |||
|While the primates are running away from the big, round boulder, they should see a giant dinosaur skull. They need jump into the mouth part of the skull to collect the hidden Puzzle Piece. | |||
|- | |||
|align="center"|[[File:DKCR Crumble Canyon Puzzle Piece 6.png|250px]] | |||
|align="center"|6 | |||
|Near the fifth Puzzle Piece is a little blue plant. When one of the Kongs blow on it, a Puzzle Piece comes out. | |||
|- | |||
|align="center"|[[File:DKCR Crumble Canyon Puzzle Piece 7.png|250px]] | |||
|align="center"|7 | |||
|Shortly after the letter N in the tunnel area, the Kongs can see some boards, and behind them is a Puzzle Piece. They can only reach the item if they jump off from the wooden boards below it. | |||
|- | |||
|align="center"|[[File:DKCR Crumble Canyon Puzzle Piece 8.png|250px]] | |||
|align="center"|8 | |||
|Immediately before the letter G, the eighth Puzzle Piece can be found between two wooden walls. | |||
|- | |||
|align="center"|[[File:DKCR Crumble Canyon Puzzle Piece 9.png|250px]] | |||
|align="center"|9 | |||
|In the final area, where the Slot Machine Barrel is located, the Kongs should fall down into the tar, where the ninth and final Puzzle Piece can be found under the platform supporting the Slot Machine Barrel. | |||
|} | |||
==Names in | ==Names in other languages== | ||
{{ | {{foreign names| | ||
| | |Jpn=クランブルマウンテン | ||
| | |JpnR=Kuranburu Maunten | ||
| | |JpnM=Crumble Mountain | ||
|Spa=Cañón Caído | |Spa=Cañón Caído | ||
|SpaM=Fallen Canyon | |SpaM=Fallen Canyon | ||
| | |FreA=Canyon Chaotique | ||
| | |FreAM=Chaotic Canyon | ||
|Ger=Bröselschlucht | |||
|GerM=Crumble Canyon | |||
|Ita=Abisso cascaterra | |||
|ItaM=Falling Ground Abyss | |||
}} | |||
{{DKCR}} | {{DKCR}} | ||
[[Category:Mountains]] | [[Category:Mountains]] | ||
[[Category:Donkey Kong Country Returns levels]] | |||
Latest revision as of 13:05, January 7, 2025
| Level | |
|---|---|
| Crumble Canyon | |
| |
| Level code | 6-6 |
| World | Cliff |
| Game | Donkey Kong Country Returns (3D/HD) |
| Music track | Clifftop Concert |
| ** << Directory of levels >> | |
Crumble Canyon is the forty-third level in the game, Donkey Kong Country Returns and its Nintendo 3DS and Nintendo Switch ports, as well as the sixth level in the Cliff world.
Many crumbling stone platforms are found in this cliff-themed level. Some of these platforms must be avoided by Donkey and Diddy Kong because they can make them fall, while others can be used to help the Kongs cross gaps. Tilting, wooden platforms and slanted pathways are also present in Crumble Canyon. Near the end of the level, the primates discover a Giga Goro Ball that rolls after them. They must move quickly ahead of it to avoid being crushed. Sometimes, though, they may need to slow down and wait for the Giga Goro Ball, as it alters parts of the Kongs' surroundings to let them progress. Other enemies in this level include Skullyrexes, Skellirexes, and Tiki Buzzes. In addition, this is the last level of the Cliff with stormy weather.
In the Time Attack mode of the game, a time of 1:33:00 is needed to get a gold medal, a time of 1:49:00 for silver, and a time of 2:26:00 for bronze.
Overview[edit]
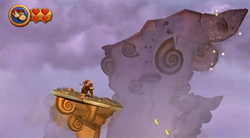
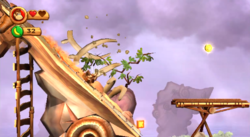
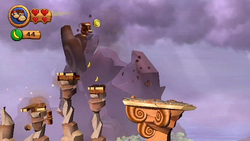
The level begins with a straight pathway towards a Barrel Cannon. As the Kongs travel to the barrel, coming across many Skullyrexes, Skellirexes, and Tiki Buzzes on the way, pieces of the ground break off and fall. A normal barrel is also located near the Barrel Cannon next to a platform that permanently tilts down when the Kongs stand on it. When they reach the cannon, they are shot to a section of land with a cactus containing an item and a large piece of rock that falls when stood on. As this large stone falls, it tilts over a large abyss that the primates cannot cross easily without the object. The rock platform sends them down to another platform that falls when they stand on it, and it is followed by three similar platforms. The four platforms must be used to help the Kongs easily cross wide abysses, as they pull them over the gaps as they fall. The last of these platforms takes them to a slanted pathway with the letter K of the K-O-N-G Letters at the bottom of it.
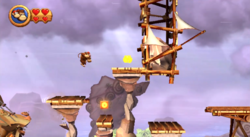
After the letter are two wooden platforms that the heroes can tilt left and right by putting their weight on certain sides of them. A solid platform with the first DK Barrel is present near this, with four thin platforms following it that are surrounded by Tiki Buzzes and are too weak to hold the Kongs for more then a few seconds. After a tilting, wooden platform with a Skellirex are four more of these crumbling platforms that help the primates reach a bigger platform. This platform breaks with their weight as well, but instead of falling straight down into the abyss below, it tilts to the side first, where the Kongs can find another platform. Like many of the previous platforms, this one crumbles with the Kongs' weight, and then falls straight down into the gap. It is followed by two similar platforms and another tilting, wooden platform that the heroes can tilt to help themselves reach a higher, more solid area with the Tutorial Pig and the checkpoint. Around the checkpoint are Skullyrexes and the second DK Barrel in the level.
If they Kongs continue from here, they must travel downwards to a Barrel Cannon in a lower area. Crumbling platforms can help them safely reach this barrel without falling into an abyss, although some of them are covered in Skellirexes. When the primates enter the Barrel Cannon, it blasts them into the foreground onto a slanted platform. They can slide down it to reach a lone barrel next to a bridge stretching over a wide gap covered in Skullyrexes. After the bridge are a few strange, blue plants that give items when blown on and a Barrel Cannon. The cannon shoots the Kongs into the background onto another slanted pathway. As they slide, they hit into rib bones that fall off into the abyss below. Another slanted platform just like this is ahead, followed by a smaller, more flat platform that tumbles when landed on. A Skellirex is on it. They should quickly jump off of this falling platform and head towards a platform that is slanted in an upward position. They can climb up it to reach another Barrel Cannon that blasts them onto a fragile platform in the foreground that crumbles when landed on. They must get off of this platform fast so they do not fall, and then jump to a nearby platform. This platform is very long and steep. The Kongs must slide down the angled pathway on it, coming across many bananas on the way. At the end of the area is a Barrel Cannon that can shoot the Kongs back into the background, where there is a another bridge covered in Skullyrexes and a single Skellirex after a cactus. On the other side of this wooden bridge are a few strange, blue plants that reveal items when blown on and another checkpoint, where the Tutorial Pig waits.
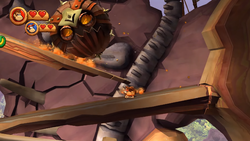
Following the checkpoint is a Giga Goro Ball that becomes angry when the Kongs jump on it. When they fall into the lower area of land ahead of it, a wall of wooden boards in their way breaks away, allowing them to progress. As they advance, the ball chases them, making a long piece of land tilt downwards. This leads them to a dead end. However, when the ball rolls down the slanted piece of ground, the piece of ground that the Kongs are standing on begins to tilt to the side, letting them travel under the previous platform. Next to a Banana Coin at the end of this pathway is a dead end. They can escape the area when the ball rolls down a makes another piece of land break and tilt to the side. This piece falls onto a more solid area of ground that the heroes can slide down to avoid the ball that is pursuing them. On the way down the slide are two small gaps, the last one with a Tiki Buzz and some bananas around it. On the other side of both gaps is a small, wooden wall of boards that can get in the Kongs' way and a Skellirex next to a trail of bananas. The trail leads to another gap that must be jumped over to access a curvy bridge. At the end of the bridge is a gap that the Kongs must go in to reach a lower area.
Here, there is a wooden set of boards that they must break through to progress. They must wait for the ball to fall next to them to break it. When it is broken, they can access a lower area that is very similar to the previous. The Kongs must wait for the ball to land next to them as they stand on the wooden boards placed in this area. When they fall through the boards, they end up in a near-identical area with another wooden board that they must use the ball to break through. When they break through the wood, they end up in a tunnel area with some dinosaur bones in it. On the way through the tunnel, the Kongs travel along some wooden boards connected to the wall to avoid sticky tar. After they cross the first pit of tar, they come up to a wooden wall that stands in their way. They can jump over it and then reach another wooden board that leads them over tar. Several more wooden walls are after this that the primates must maneuver around, until they get to the outside of the tunnel, where the letter G is located. Ahead is a gap with tar inside of it. They should dodge the tar and head onto a set of fragile platforms that crumble with their weight. At this point, the ball falls into the gap and sinks into the tar. When the Kongs reach the end of the crumbling platforms, they reach a more solid one with the Slot Machine Barrel above it.
Enemies[edit]
| Image | Name | Count |
|---|---|---|

|
Skellirex | 9 |
| Skullyrex | 8 | |
| Tiki Buzz | 5 | |

|
Giga Goro Ball | 1 |
Items[edit]
| Image | Name | Count |
|---|---|---|
| Banana Coin | 11 | |
| Barrel | 2 | |
| DK Barrel | 2 | |
| Red Balloon | 1 |
K-O-N-G Letters[edit]
Puzzle Pieces[edit]
| Image | Number | Location |
|---|---|---|
|
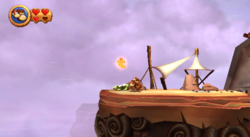
1 | At the start, the Kongs should turn back and blow on a blue plant hidden behind a wooden wall. It reveals a Puzzle Piece when this is done. |
|
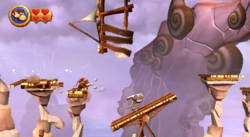
2 | After getting launched by the first Barrel Cannon, the Kongs should go back and destroy a cactus to find the second Puzzle Piece. |
|
3 | Soon after the first DK Barrel, the Puzzle Piece can be found behind some boards above a teetering platform with a Skellirex on it. |
|
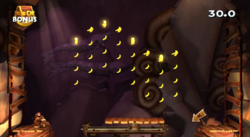
4 | When the Kongs are launched to the foreground by the Barrel Cannon after the first checkpoint, they need go to the left up a rocky hill to reach a hidden Barrel Cannon that shoots them into a hole in a rock located in the background. Inside the hole is a Bonus Level, where Donkey Kong and Diddy Kong must collect 44 bananas and four Banana Coins above a moving trampoline. If they collect everything within thirty seconds, they earn a Puzzle Piece. |
|
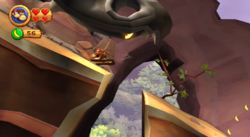
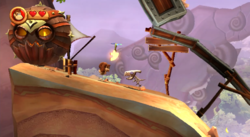
5 | While the primates are running away from the big, round boulder, they should see a giant dinosaur skull. They need jump into the mouth part of the skull to collect the hidden Puzzle Piece. |
|
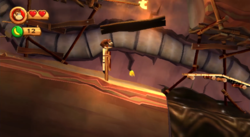
6 | Near the fifth Puzzle Piece is a little blue plant. When one of the Kongs blow on it, a Puzzle Piece comes out. |
|
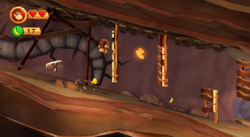
7 | Shortly after the letter N in the tunnel area, the Kongs can see some boards, and behind them is a Puzzle Piece. They can only reach the item if they jump off from the wooden boards below it. |
|
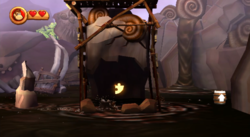
8 | Immediately before the letter G, the eighth Puzzle Piece can be found between two wooden walls. |
|
9 | In the final area, where the Slot Machine Barrel is located, the Kongs should fall down into the tar, where the ninth and final Puzzle Piece can be found under the platform supporting the Slot Machine Barrel. |
Names in other languages[edit]
| Language | Name | Meaning | Notes |
|---|---|---|---|
| Japanese | クランブルマウンテン[?] Kuranburu Maunten |
Crumble Mountain | |
| French (NOA) | Canyon Chaotique[?] | Chaotic Canyon | |
| German | Bröselschlucht[?] | Crumble Canyon | |
| Italian | Abisso cascaterra[?] | Falling Ground Abyss | |
| Spanish | Cañón Caído[?] | Fallen Canyon |
