Treasure (Wario franchise): Difference between revisions
| (74 intermediate revisions by 28 users not shown) | |||
| Line 1: | Line 1: | ||
{{italic title|Treasure (''Wario'' franchise)}} | |||
''' | '''Treasure''' in the [[Wario (franchise)|''Wario'' franchise]] refers to valuable objects that can be collected by the player. In most games, [[Wario]] discovers or steals the treasures from various places. | ||
==History== | |||
===''Wario'' franchise=== | |||
====''Wario Land: Super Mario Land 3''==== | |||
In ''[[Wario Land: Super Mario Land 3]]'', Wario hears rumors of immense riches held by the [[Black Sugar Gang|Brown Sugar Pirates]] on [[Kitchen Island]]. After arriving on the island, he single-handedly defeats [[Captain Syrup]] and her pirates, escaping with their riches. Additionally, there are fifteen collectible treasures hidden throughout the game, with Wario receiving a different type of house from the [[Genie (Wario Land: Super Mario Land 3)|Genie]] depending on the value of the treasures he offers the Genie at the end of the game. The total value of all of the treasures is 90,000 coins, meaning that to achieve the best ending, the player must collect 9,999 coins in addition to all fifteen treasures. | |||
If the player [[Game Over|loses all their lives]], they will lose one of the treasures they have already obtained, forcing them to collect it again from the stage it was previously found in. If the player has no treasures, they will instead lose half of their total [[coin]]s. | |||
=== | {|class="wikitable" | ||
[[ | !colspan="2" |Treasure | ||
[[ | !Value | ||
!Location | |||
|- | |||
!A | |||
|align=center|[[File:WLSML3 Treasure A.png]] | |||
|9000 Coins | |||
|[[Course No.03]] | |||
|- | |||
!B | |||
|align=center|[[File:WLSML3 Treasure B.png]] | |||
|6000 Coins | |||
|[[Course No.09]] | |||
|- | |||
!C | |||
|align=center|[[File:WLSML3 Treasure C.png]] | |||
|2000 Coins | |||
|[[Course No.11]] | |||
|- | |||
!D | |||
|align=center|[[File:WLSML3 Treasure D.png]] | |||
|7000 Coins | |||
|[[Course No.16]] | |||
|- | |||
!E | |||
|align=center|[[File:WLSML3 Treasure E.png]] | |||
|5000 Coins | |||
|[[Course No.17]] | |||
|- | |||
!F | |||
|align=center|[[File:WLSML3 Treasure F.png]] | |||
|9000 Coins | |||
|[[Course No.18]] | |||
|- | |||
!G | |||
|align=center|[[File:WLSML3 Treasure G.png]] | |||
|5000 Coins | |||
|[[Course No.20]] | |||
|- | |||
!H | |||
|align=center|[[File:WLSML3 Treasure H.png]] | |||
|8000 Coins | |||
|[[Course No.24]] | |||
|- | |||
!I | |||
|align=center|[[File:WLSML3 Treasure I.png]] | |||
|7000 Coins | |||
|[[Course No.26]] | |||
|- | |||
!J | |||
|align=center|[[File:WLSML3 Treasure J.png]] | |||
|3000 Coins | |||
|[[Course No.29]] | |||
|- | |||
!K | |||
|align=center|[[File:WLSML3 Treasure K.png]] | |||
|4000 Coins | |||
|[[Course No.30]] | |||
|- | |||
!L | |||
|align=center|[[File:WLSML3 Treasure L.png]] | |||
|8000 Coins | |||
|[[Course No.31]] | |||
|- | |||
!M | |||
|align=center|[[File:WLSML3 Treasure M.png]] | |||
|4000 Coins | |||
|[[Course No.34]] | |||
|- | |||
!N | |||
|align=center|[[File:WLSML3 Treasure N.png]] | |||
|7000 Coins | |||
|[[Course No.37]] | |||
|- | |||
!O | |||
|align=center|[[File:WLSML3 Treasure O.png]] | |||
|6000 Coins | |||
|[[Course No.39]] | |||
|- | |||
|} | |||
====''Virtual Boy Wario Land''==== | |||
[[File:Awazon2ol2-1-.png|right|thumb|The ten collectible treasures placed around the vault located inside the Aldegara Waterfall.]] | |||
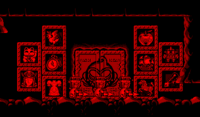
In ''[[Virtual Boy Wario Land]]'', there are ten collectible treasures that serve the purpose of opening a vault found in the [[Awazon river basin]] that contains immense amounts of treasure. Wario first encounters the treasures after he notices three [[Mask-Guy]]s carrying treasure chests from a distance. He decides to follow them until they arrive at a set of large, sliding doors that open for them, with the ten treasures placed in alcoves around the entrance. After they deposit their treasure, Wario manages to overpower them, hoping to take the contents of the vault for himself. However, the treasures that powered the sliding door fly out of their alcoves, and the floor collapses from beneath Wario's feet, sending him deep underground. | |||
The ten collectible treasures are later found throughout the game's stages, with one appearing in every stage not marked with a skull on the world map. Getting a Game Over will cause a bat to steal one of the player's treasures, forcing them to find it once again, similarly to what happens in ''Super Mario Land 3: Wario Land''. Collecting all of them will allow Wario to open the vault at the beginning of the game after defeating [[Demon Head]], revealing it to hold a multitude of riches, including a magic carpet and a bottle, the former of which he rides on to get home. In a second playthrough on a file, the bottle is revealed to contain Demon Head, who rows Wario back home on the carpet if the player completes the game in over 2 hours. | |||
=== | {|class="wikitable" | ||
! Treasure | |||
! Location | |||
|- | |||
|align=center|[[File:VBWario Lvl1Treasure.png]] | |||
|[[Stage 1 (Virtual Boy Wario Land)|Stage 1]] | |||
|- | |||
|align=center|[[File:VBWario Lvl2Treasure.png]] | |||
|[[Stage 2 (Virtual Boy Wario Land)|Stage 2]] | |||
|- | |||
|align=center|[[File:VBWario Lvl3Treasure.png]] | |||
|[[Stage 3 (Virtual Boy Wario Land)|Stage 3]] | |||
|- | |||
|align=center|[[File:VBWario Lvl5Treasure.png]] | |||
|[[Stage 5 (Virtual Boy Wario Land)|Stage 5]] | |||
|- | |||
|align=center|[[File:VBWario Lvl6Treasure.png]] | |||
|[[Stage 6 (Virtual Boy Wario Land)|Stage 6]] | |||
|- | |||
|align=center|[[File:VBWario Lvl7Treasure.png]] | |||
|[[Stage 7 (Virtual Boy Wario Land)|Stage 7]] | |||
|- | |||
|align=center|[[File:VBWario Lvl9Treasure.png]] | |||
|[[Stage 9 (Virtual Boy Wario Land)|Stage 9]] | |||
|- | |||
|align=center|[[File:VBWario Lvl10Treasure.png]] | |||
|[[Stage 10 (Virtual Boy Wario Land)|Stage 10]] | |||
|- | |||
|align=center|[[File:VBWario Lvl11Treasure.png]] | |||
|[[Stage 11 (Virtual Boy Wario Land)|Stage 11]] | |||
|- | |||
|align=center|[[File:VBWario Lvl13Treasure.png]] | |||
|[[Stage 13 (Virtual Boy Wario Land)|Stage 13]] | |||
|} | |||
===''[[ | ====''Wario Land II''==== | ||
In '' | [[File:WL2 Treasure.png|frame|The 50 treasures]] | ||
[[File:WL2 S PicPanel.png|frame|left|The treasure map]] | |||
In ''[[Wario Land II]]'', the [[Black Sugar Gang]] infiltrates his castle while he is asleep, stealing his treasure in the process. After he wakes up, Wario pursues the pirates to get his riches back, which he eventually does after defeating the pirate crew. | |||
Additionally, 50 hidden treasures can be obtained throughout the 50 levels of the game, by playing a mini-game called Matching Game. A treasure map can also be unlocked by playing and winning a Number Matching Game at the end of every level. Together, they give access to both the secret [[Steal the Syrup's treasure!!|Time Attack]] mode and the mini-game [[Flagman D-D]] to the player. | |||
===''[[Wario: Master of Disguise | ====''Wario Land 3''==== | ||
{{main|Wario Land 3#Treasures}} | |||
In ''[[Wario Land 3]]'', [[Rudy|a hidden figure]] informs Wario that he could keep all the treasure of the [[music box (world)|music box world]] if he is freed. There are a total of 100 treasures in the world to collect, but not all are necessary to complete the game, with only 48 of them being required. After finding five [[Music Box|music box]]es and going to [[The Temple]], Wario frees the figure, who rather than keeping his end of the bargain, intends to eliminate him and continue his world conquest in both the music box world and the outer one. After defeating the hidden figure and freeing the villagers, the old man among them allows Wario to keep all the collected treasure out of gratitude. | |||
====''Wario Land 4''==== | |||
[[File:WL4-Newspaper.png|thumb|right|A newspaper article about the legendary treasure in ''Wario Land 4'']] | |||
Treasures return in ''[[Wario Land 4]]''. During the credits, various treasures fly out of the treasure sack and are shown to the player. For each treasure, an image of a corresponding scene displays in the sky. There are also treasures obtained from bosses, under the name of '''legendary treasure''' (or '''Great Treasure'''{{ref needed}}). Wario first hears about the treasure when he reads a newspaper article, and he sets off towards an [[Golden Pyramid|ancient pyramid]] pyramid in his [[Wario Car]] in the middle of the night in the hope of having the treasure all to himself. When speeding through the city, he almost runs over a [[Kuro Neko|black cat]]. The newspaper article flies into her face, and she seems to read it with a curious interest. At the Golden Pyramid, the black cat guides Wario to the main room. Here, there are [[Wario Land 4#Passages and levels|five passages]]. The four main ones ([[Emerald Passage]], [[Ruby Passage]], [[Topaz Passage]], and [[Sapphire Passage]]) each have a [[Wario Land 4#Bosses|boss]] that guards a legendary treasure and three [[treasure chest]]s. The boss [[Spoiled Rotten]] guards no treasure. [[Cractus]] defends the Crown, [[Cuckoo Condor]] guards the Earrings, [[Aerodent]] wears the Necklace, and [[Catbat]] protects the Bracelets. When each of these bosses is defeated, the treasure chests and the legendary treasure are collected and stored into the Golden Pyramid on the main map. | |||
[[File:GoldenDivaWL4.png|frame|The [[Golden Diva]] wears all of the legendary treasure.]] | |||
[[File:WL4-Ending Treasure.png|thumb|left|Wario recovers the treasure after the final battle.]] | |||
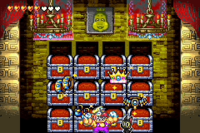
When all five bosses have been defeated, the Golden Pyramid will become accessible. This is the stronghold of the [[Golden Diva]], the game's final boss and the evil ruler of the pyramid. The Golden Diva wears all of the ancient jewelry that was taken from the four bosses. There is also a wall that holds up to twelve treasure chests, three from each boss. If the Golden Diva is defeated, in a final wave of fury she will begin to destroy the internal structure of the pyramid, causing it to begin crumbling to the ground. Panicking, Wario gathers up the treasure, puts it into a sack, and makes an escape with the black cat leading the way out. When they reach a safe distance, they watch the pyramid crumble to the ground. The four legendary treasures that the Golden Diva was wearing fly out of the sack and return to the black cat, who transforms into [[Princess Shokora]], the true ruler of the pyramid, whose appearance depends on the amount of treasure he ends with. The princess kisses Wario thank you and farewell. Four angels surround her, and they lift her into heaven. After sitting there for a short while trying to make sense of it all, Wario grabs what remains of the treasure, throws it into the back of his Wario Car, and drives across the desert back home. | |||
{|class="wikitable" | |||
|+ Treasures | |||
|- | |||
! colspan="2" | Treasure | |||
|- | |||
|align=center|[[File:WL4-Gold Treasure1.png]] | |||
|Small Tree | |||
|- | |||
|align=center|[[File:WL4-Gold Treasure2.png]] | |||
|Apple | |||
|- | |||
|align=center|[[File:WL4-Gold Treasure3.png]] | |||
|Fish | |||
|- | |||
|align=center|[[File:WL4-Gold Treasure4.png]] | |||
|Candle Holder | |||
|- | |||
|align=center|[[File:WL4-Gold Treasure5.png]] | |||
|Lamp | |||
|- | |||
|align=center|[[File:WL4-Gold Treasure6.png]] | |||
|Crescent Moon Bed | |||
|- | |||
|align=center|[[File:WL4-Gold Treasure7.png]] | |||
|Toy Bear | |||
|- | |||
|align=center|[[File:WL4-Gold Treasure8.png]] | |||
|Lollipop | |||
|- | |||
|align=center|[[File:WL4-Gold Treasure9.png]] | |||
|[[Game Boy Advance]] | |||
|- | |||
|align=center|[[File:WL4-Gold Treasure10.png]] | |||
|Toy Robot | |||
|- | |||
|align=center|[[File:WL4-Gold Treasure11.png]] | |||
|Toy Rocket | |||
|- | |||
|align=center|[[File:WL4-Gold Treasure12.png]] | |||
|Rocking Horse | |||
|} | |||
{|class="wikitable" | |||
|+ Legendary treasure | |||
|- | |||
! colspan="2" | Legendary treasure | |||
! Boss | |||
|- | |||
|align=center|[[File:WL4-The Crown.png]] | |||
|The Crown | |||
|[[Cractus]] | |||
|- | |||
|align=center|[[File:WL4-The Earrings.png]] | |||
|The Earrings | |||
|[[Cuckoo Condor]] | |||
|- | |||
|align=center|[[File:WL4-The Necklace.png]] | |||
|The Necklace | |||
|[[Aerodent]] | |||
|- | |||
|align=center|[[File:WL4-The Bracelets.png]] | |||
|The Bracelets | |||
|[[Catbat]] | |||
|} | |||
====''Wario World''==== | |||
In ''[[Wario World]]'', the [[Black Jewel]] transforms Wario's treasures into monsters. Wario must get his treasure back. Each of the game's eight levels has eight treasures to collect, for a total of 64 in the game. To find a Treasure, Wario must find and activate a [[treasure button]]. The buttons are color-coded and when one is activated, its corresponding [[treasure chest]] appears on a colored platform somewhere else in the level. Wario can then open the chest and collect one of his missing treasures. | |||
If Wario comes across a treasure chest platform before activating the platform's button, he will be unable to receive the treasure. For this reason, backtracking is sometimes necessary. | |||
====''Wario: Master of Disguise''==== | |||
In ''[[Wario: Master of Disguise]]'', along with helpful items such as maps to the current location, [[Guise Gem]]s and keys to important doors, [[treasure chest]]s also contain treasures that boost Wario's money tally for the current level. The player will have to complete one of several mini-games in order to obtain the treasure, which get harder on later levels. Once Wario obtained a treasure, he can view it, its value, and a description of it in his Treasure Log on the main menu. | |||
Starting in the third level, [[Treasure Pest]] enemies appear and randomly replace one of these treasures in every level; Wario will have to retry the level later in order to get the treasure. Also, on return trips, Wario can re-open chests that contained Guise or Mastery Gems in order to get a new treasure. | Starting in the third level, [[Treasure Pest]] enemies appear and randomly replace one of these treasures in every level; Wario will have to retry the level later in order to get the treasure. Also, on return trips, Wario can re-open chests that contained Guise or Mastery Gems in order to get a new treasure. | ||
==List of Wario's | ====''Wario Land: Shake It!''==== | ||
{{ | {{main|List of treasures in Wario Land: Shake It!}} | ||
Treasures return in ''[[Wario Land: Shake It!]]'', with three treasures appearing in every non-boss level for a total of 99 treasures. They are found inside [[treasure chest]]s. They can be viewed in the Treasure List option in the game's main menu, where each of them has its own description. They are required for 100% completion, and turn Wario's room gold when all are collected. | |||
===''Super Mario-kun''=== | |||
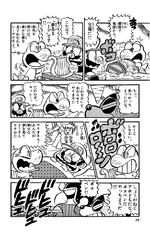
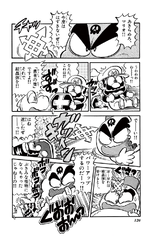
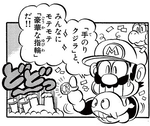
During the ''Wario Land: Super Mario Land 3'' arc in ''[[Super Mario-kun]]'', [[Mario]], [[Yoshi]] and Wario are instructed to retrieve not only the golden statue of Peach from the Brown Sugar Gang pirates, but also the other treasures stolen by the pirates during their raid in [[Chirako no Shima]]. The trio was given a list of the treasures, which includes a description of their magical properties that the heroes use against the foes they meet. The treasures are not used for the end game price, being Wario's Castle: left penniless and alone (with the statue warping Mario, Yoshi and [[Luigi]] away), all Wario gets is a doghouse from the Genie as an April Fools' joke. | |||
{|class="wikitable" | |||
!Treasure | |||
!Image | |||
!Properties | |||
!Chapter(s) | |||
|- | |||
!Treasure B<br>{{ruby|夢|ゆめ}}{{ruby|見|み}}る ハープ<br><small>(''Dreaming Harp'')</small> | |||
|[[File:Dreaming Harp SMKun.png|150px]] | |||
|Whoever hears its sound falls asleep and has beautiful and relaxing dreams. | |||
|[[Super Mario-kun Volume 11#Stage 3|Volume 11, Stage 3]] | |||
|- | |||
!Treasure C<br>ミスリルの{{ruby|王|おう}}{{ruby|冠|かん}}<br><small>(''Mythril Crown'')</small> | |||
|[[File:Mythril Crown SMKun.png|150px]] | |||
|Grants three wishes. | |||
|[[Super Mario-kun Volume 11#Stage 8|Volume 11, Stages 8]] and [[Super Mario-kun Volume 11#Stage 9|9]] | |||
|- | |||
!Treasure D<br>{{ruby|勇|ゆう}}{{ruby|者|しゃ}}の{{ruby|盾|たて}}<br><small>(''Hero's Shield'')</small> | |||
|[[File:Hero's Shield SMKun.png|150px]] | |||
|Can deflect any projectile. | |||
|[[Super Mario-kun Volume 11#Stage 11|Volume 11, Stage 11]] and [[Super Mario-kun Volume 12#Stage 6|Volume 12, Stage 6]] | |||
|- | |||
!Treasure F | |||
|[[File:Kong Magic Lamp SMKun.png|150px]] | |||
|When rubbed, [[Donkey Kong]] is summoned. | |||
|[[Super Mario-kun Volume 11#Stage 12|Volume 11, Stage 12]] | |||
|- | |||
!Treasure G<br>カプリ{{ruby|海|かい}}の{{ruby|萬|しん}}{{ruby|珠|じゅ}}<br><small>(''Caribbean Sea Pearl'')</small> | |||
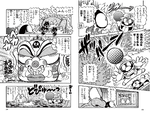
|[[File:Caribbean Sea Pearl SMKun.png|150px]] | |||
|Summons an infinite fresh water stream. | |||
|[[Super Mario-kun Volume 12#Stage 1|Volume 12, Stages 1]] and [[Super Mario-kun Volume 12#Stage 6|6]] | |||
|- | |||
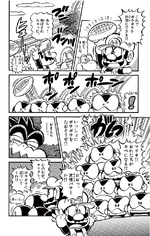
!Treasure K<br>{{ruby|友|ゆう}}{{ruby|情|じょう}}のボール<br><small>(''Friendship Ball'')</small> | |||
|[[File:Friendship Ball SMKun.png|150px]] | |||
|The user can kick or toss the ball and the people hit by it become friends with him.<br>There are other balls with different effects, including saddening, angering, and making the target fall in love with the user. | |||
|[[Super Mario-kun Volume 12#Stage 4|Volume 12, Stage 4]] | |||
|- | |||
!Treasures A and E | |||
| rowspan=2 |[[File:Dancing Mask SMKun.png|150px]] | |||
|Unknown | |||
| rowspan=3 |[[Super Mario-kun Volume 12#Stage 6|Volume 12, Stage 6]] | |||
|- | |||
!Treasure L<br>おどる{{ruby|仮|か}}{{ruby|面|めん}}<br><small>(''Dancing Mask'')</small> | |||
|The wearer dances until exhaustion. | |||
|- | |||
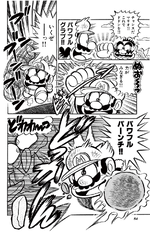
!Treasure M<br>パワフルグラブ<br><small>(''Powerful Glove'')</small> | |||
|[[File:Powerful Glove SMKun.png|150px]] | |||
|The wearer throws powerful punches. | |||
|- | |||
!Treasure N<br>{{ruby|手|て}}のりクジラ<br><small>(''Hand-held Whale'')</small> | |||
| rowspan=2 |[[File:Luxurious Ring and Hand-held Whale SMKun.png|150px]] | |||
|Can squirt a powerful water jet. | |||
| rowspan=2 |[[Super Mario-kun Volume 12#Stage 8|Volume 12, Stage 8]] | |||
|- | |||
!Treasure O<br>{{ruby|豪|ごう}}{{ruby|華|か}}な{{ruby|指|ゆび}}{{ruby|輪|わ}}<br><small>(''Luxurious Ring'')</small> | |||
|Whoever gazes upon it immediately likes the wearer. | |||
|} | |||
==List of Wario' | ==Lists of treasures== | ||
*[[List of treasures in Wario World|List of treasures in ''Wario World'']] | |||
*[[List of treasures in Wario: Master of Disguise|List of treasures in ''Wario: Master of Disguise'']] | |||
*[[List of treasures in Wario Land: Shake It!|List of treasures in ''Wario Land: Shake It!'']] | |||
{{WL}} | {{WL}} | ||
{{ | {{Wario World}} | ||
[[Category: Artifacts]] | [[Category:Artifacts]] | ||
[[Category: | [[Category:Treasures|*]] | ||
[[Category:Wario collectibles]] | |||
[[Category:Wario Land: Super Mario Land 3 items]] | |||
[[Category:Wario | |||
[[Category:Wario Land: Super Mario Land 3]] | |||
[[Category:Wario Land II]] | [[Category:Wario Land II]] | ||
[[Category:Wario Land 3]] | [[Category:Wario Land 3 items]] | ||
[[Category:Wario Land 4]] | [[Category:Wario Land 4 items]] | ||
[[Category:Wario World]] | |||
Latest revision as of 18:27, December 24, 2024
Treasure in the Wario franchise refers to valuable objects that can be collected by the player. In most games, Wario discovers or steals the treasures from various places.
History[edit]
Wario franchise[edit]
Wario Land: Super Mario Land 3[edit]
In Wario Land: Super Mario Land 3, Wario hears rumors of immense riches held by the Brown Sugar Pirates on Kitchen Island. After arriving on the island, he single-handedly defeats Captain Syrup and her pirates, escaping with their riches. Additionally, there are fifteen collectible treasures hidden throughout the game, with Wario receiving a different type of house from the Genie depending on the value of the treasures he offers the Genie at the end of the game. The total value of all of the treasures is 90,000 coins, meaning that to achieve the best ending, the player must collect 9,999 coins in addition to all fifteen treasures.
If the player loses all their lives, they will lose one of the treasures they have already obtained, forcing them to collect it again from the stage it was previously found in. If the player has no treasures, they will instead lose half of their total coins.
| Treasure | Value | Location | |
|---|---|---|---|
| A | 9000 Coins | Course No.03 | |
| B | 6000 Coins | Course No.09 | |
| C | 2000 Coins | Course No.11 | |
| D | 7000 Coins | Course No.16 | |
| E | 5000 Coins | Course No.17 | |
| F | 9000 Coins | Course No.18 | |
| G | 5000 Coins | Course No.20 | |
| H | 8000 Coins | Course No.24 | |
| I | 7000 Coins | Course No.26 | |
| J | 3000 Coins | Course No.29 | |
| K | 4000 Coins | Course No.30 | |
| L | 8000 Coins | Course No.31 | |
| M | 4000 Coins | Course No.34 | |
| N | 7000 Coins | Course No.37 | |
| O | 6000 Coins | Course No.39 | |
Virtual Boy Wario Land[edit]
In Virtual Boy Wario Land, there are ten collectible treasures that serve the purpose of opening a vault found in the Awazon river basin that contains immense amounts of treasure. Wario first encounters the treasures after he notices three Mask-Guys carrying treasure chests from a distance. He decides to follow them until they arrive at a set of large, sliding doors that open for them, with the ten treasures placed in alcoves around the entrance. After they deposit their treasure, Wario manages to overpower them, hoping to take the contents of the vault for himself. However, the treasures that powered the sliding door fly out of their alcoves, and the floor collapses from beneath Wario's feet, sending him deep underground.
The ten collectible treasures are later found throughout the game's stages, with one appearing in every stage not marked with a skull on the world map. Getting a Game Over will cause a bat to steal one of the player's treasures, forcing them to find it once again, similarly to what happens in Super Mario Land 3: Wario Land. Collecting all of them will allow Wario to open the vault at the beginning of the game after defeating Demon Head, revealing it to hold a multitude of riches, including a magic carpet and a bottle, the former of which he rides on to get home. In a second playthrough on a file, the bottle is revealed to contain Demon Head, who rows Wario back home on the carpet if the player completes the game in over 2 hours.
| Treasure | Location |
|---|---|
| Stage 1 | |
| Stage 2 | |
| Stage 3 | |
| Stage 5 | |
| Stage 6 | |
| Stage 7 | |
| Stage 9 | |
| Stage 10 | |
| Stage 11 | |
| Stage 13 |
Wario Land II[edit]
In Wario Land II, the Black Sugar Gang infiltrates his castle while he is asleep, stealing his treasure in the process. After he wakes up, Wario pursues the pirates to get his riches back, which he eventually does after defeating the pirate crew.
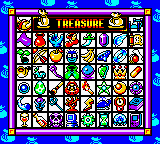
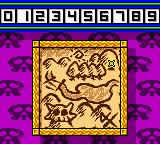
Additionally, 50 hidden treasures can be obtained throughout the 50 levels of the game, by playing a mini-game called Matching Game. A treasure map can also be unlocked by playing and winning a Number Matching Game at the end of every level. Together, they give access to both the secret Time Attack mode and the mini-game Flagman D-D to the player.
Wario Land 3[edit]
- Main article: Wario Land 3 § Treasures
In Wario Land 3, a hidden figure informs Wario that he could keep all the treasure of the music box world if he is freed. There are a total of 100 treasures in the world to collect, but not all are necessary to complete the game, with only 48 of them being required. After finding five music boxes and going to The Temple, Wario frees the figure, who rather than keeping his end of the bargain, intends to eliminate him and continue his world conquest in both the music box world and the outer one. After defeating the hidden figure and freeing the villagers, the old man among them allows Wario to keep all the collected treasure out of gratitude.
Wario Land 4[edit]
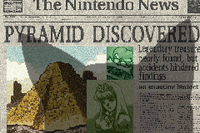
Treasures return in Wario Land 4. During the credits, various treasures fly out of the treasure sack and are shown to the player. For each treasure, an image of a corresponding scene displays in the sky. There are also treasures obtained from bosses, under the name of legendary treasure (or Great Treasure[citation needed]). Wario first hears about the treasure when he reads a newspaper article, and he sets off towards an ancient pyramid pyramid in his Wario Car in the middle of the night in the hope of having the treasure all to himself. When speeding through the city, he almost runs over a black cat. The newspaper article flies into her face, and she seems to read it with a curious interest. At the Golden Pyramid, the black cat guides Wario to the main room. Here, there are five passages. The four main ones (Emerald Passage, Ruby Passage, Topaz Passage, and Sapphire Passage) each have a boss that guards a legendary treasure and three treasure chests. The boss Spoiled Rotten guards no treasure. Cractus defends the Crown, Cuckoo Condor guards the Earrings, Aerodent wears the Necklace, and Catbat protects the Bracelets. When each of these bosses is defeated, the treasure chests and the legendary treasure are collected and stored into the Golden Pyramid on the main map.

When all five bosses have been defeated, the Golden Pyramid will become accessible. This is the stronghold of the Golden Diva, the game's final boss and the evil ruler of the pyramid. The Golden Diva wears all of the ancient jewelry that was taken from the four bosses. There is also a wall that holds up to twelve treasure chests, three from each boss. If the Golden Diva is defeated, in a final wave of fury she will begin to destroy the internal structure of the pyramid, causing it to begin crumbling to the ground. Panicking, Wario gathers up the treasure, puts it into a sack, and makes an escape with the black cat leading the way out. When they reach a safe distance, they watch the pyramid crumble to the ground. The four legendary treasures that the Golden Diva was wearing fly out of the sack and return to the black cat, who transforms into Princess Shokora, the true ruler of the pyramid, whose appearance depends on the amount of treasure he ends with. The princess kisses Wario thank you and farewell. Four angels surround her, and they lift her into heaven. After sitting there for a short while trying to make sense of it all, Wario grabs what remains of the treasure, throws it into the back of his Wario Car, and drives across the desert back home.
| Treasure | |
|---|---|
| Small Tree | |
| Apple | |
| Fish | |
| Candle Holder | |
| Lamp | |
| Crescent Moon Bed | |
| Toy Bear | |
| Lollipop | |
| Game Boy Advance | |
| Toy Robot | |
| Toy Rocket | |
| Rocking Horse | |
| Legendary treasure | Boss | |
|---|---|---|
| The Crown | Cractus | |
| The Earrings | Cuckoo Condor | |
| The Necklace | Aerodent | |
| The Bracelets | Catbat | |
Wario World[edit]
In Wario World, the Black Jewel transforms Wario's treasures into monsters. Wario must get his treasure back. Each of the game's eight levels has eight treasures to collect, for a total of 64 in the game. To find a Treasure, Wario must find and activate a treasure button. The buttons are color-coded and when one is activated, its corresponding treasure chest appears on a colored platform somewhere else in the level. Wario can then open the chest and collect one of his missing treasures.
If Wario comes across a treasure chest platform before activating the platform's button, he will be unable to receive the treasure. For this reason, backtracking is sometimes necessary.
Wario: Master of Disguise[edit]
In Wario: Master of Disguise, along with helpful items such as maps to the current location, Guise Gems and keys to important doors, treasure chests also contain treasures that boost Wario's money tally for the current level. The player will have to complete one of several mini-games in order to obtain the treasure, which get harder on later levels. Once Wario obtained a treasure, he can view it, its value, and a description of it in his Treasure Log on the main menu.
Starting in the third level, Treasure Pest enemies appear and randomly replace one of these treasures in every level; Wario will have to retry the level later in order to get the treasure. Also, on return trips, Wario can re-open chests that contained Guise or Mastery Gems in order to get a new treasure.
Wario Land: Shake It![edit]
- Main article: List of treasures in Wario Land: Shake It!
Treasures return in Wario Land: Shake It!, with three treasures appearing in every non-boss level for a total of 99 treasures. They are found inside treasure chests. They can be viewed in the Treasure List option in the game's main menu, where each of them has its own description. They are required for 100% completion, and turn Wario's room gold when all are collected.
Super Mario-kun[edit]
During the Wario Land: Super Mario Land 3 arc in Super Mario-kun, Mario, Yoshi and Wario are instructed to retrieve not only the golden statue of Peach from the Brown Sugar Gang pirates, but also the other treasures stolen by the pirates during their raid in Chirako no Shima. The trio was given a list of the treasures, which includes a description of their magical properties that the heroes use against the foes they meet. The treasures are not used for the end game price, being Wario's Castle: left penniless and alone (with the statue warping Mario, Yoshi and Luigi away), all Wario gets is a doghouse from the Genie as an April Fools' joke.
| Treasure | Image | Properties | Chapter(s) |
|---|---|---|---|
| Treasure B (Dreaming Harp) |
|
Whoever hears its sound falls asleep and has beautiful and relaxing dreams. | Volume 11, Stage 3 |
| Treasure C ミスリルの (Mythril Crown) |

|
Grants three wishes. | Volume 11, Stages 8 and 9 |
| Treasure D (Hero's Shield) |
|
Can deflect any projectile. | Volume 11, Stage 11 and Volume 12, Stage 6 |
| Treasure F | 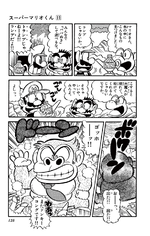
|
When rubbed, Donkey Kong is summoned. | Volume 11, Stage 12 |
| Treasure G カプリ (Caribbean Sea Pearl) |
|
Summons an infinite fresh water stream. | Volume 12, Stages 1 and 6 |
| Treasure K (Friendship Ball) |
|
The user can kick or toss the ball and the people hit by it become friends with him. There are other balls with different effects, including saddening, angering, and making the target fall in love with the user. |
Volume 12, Stage 4 |
| Treasures A and E | 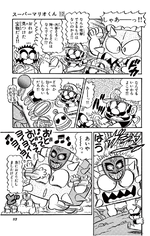
|
Unknown | Volume 12, Stage 6 |
| Treasure L おどる (Dancing Mask) |
The wearer dances until exhaustion. | ||
| Treasure M パワフルグラブ (Powerful Glove) |
|
The wearer throws powerful punches. | |
| Treasure N (Hand-held Whale) |
|
Can squirt a powerful water jet. | Volume 12, Stage 8 |
| Treasure O (Luxurious Ring) |
Whoever gazes upon it immediately likes the wearer. |
Lists of treasures[edit]
- List of treasures in Wario World
- List of treasures in Wario: Master of Disguise
- List of treasures in Wario Land: Shake It!
| Wario Land: Super Mario Land 3 | |||
|---|---|---|---|
| Characters | Wario • Brown Sugar Pirates • Mario | ||
| Bosses | Spiked Koopa • Minotaur • Penguin • Devil's Head • Bobo • Ghost • Captain Syrup • Genie | ||
| Worlds | Rice Beach • Mt. Teapot • Sherbet Land • Stove Canyon • SS Tea Cup • Parsley Woods • Syrup Castle | ||
| Power-ups | Bull Pot • Dragon Pot • Garlic Pot • Jet Pot • Star | ||
| Collectibles | ? Block • 1 Gold Coin • 10 Gold Coin • 100 Coin • 3-Up Heart • Heart • Key • Treasure | ||
| Enemies and obstacles | Batto Shuruken • Bee Fly • Big • Bō • Bucket Head • Chicken Duck • D.D. • Demon Bat • Dropper • Floater • Gaugau • Goboten • Guragura • Harisu • Helmut • Knight • Konotako • Kōmori Missile • Lance • Maizō • Mine • Muncher • Paidan • Pecan • Penkoon • Pikkarikun • Pinwheel • Piranha Plant • Pirate Goom • Pouncer • Skewer • Sparky • Spiked ball • Togemaru • Ukiwani • Wanderin' Goom • Watch • White puff • Yadorā • Yarikuri Obake | ||
| Miscellaneous | Gallery • Glitches • Media • Pre-release and unused content • Staff | ||
