Crazy Cart: Difference between revisions
mNo edit summary |
m (Text replacement - "(\| *)Jap([RMCN\d]* *=)" to "$1Jpn$2") |
||
| (68 intermediate revisions by 40 users not shown) | |||
| Line 1: | Line 1: | ||
{{level | {{level infobox | ||
|title=Crazy Cart | |title=Crazy Cart | ||
|image=[[File: | |image=[[File:DKCR Crazy Cart 2.png|260px]] | ||
|code=1 - 6 | |code=1-6 | ||
|game=''[[Donkey Kong Country Returns]] | |world=[[Jungle (Donkey Kong Country Returns)|Jungle]] | ||
| | |game=''[[Donkey Kong Country Returns]]'' (''[[Donkey Kong Country Returns 3D|3D]]''/''[[Donkey Kong Country Returns HD|HD]]'') | ||
|before=[[Canopy Cannons|<<]] | |before=[[Canopy Cannons|<<]] | ||
|after=[[ | |before_alt=[[Sunset Shore|**]] | ||
|after=[[Mugly's Mound|>>]] | |||
}} | }} | ||
'''Crazy Cart''' is the sixth level in ''[[Donkey Kong Country Returns]]'', as well as the sixth level in the [[Jungle (Donkey Kong Country Returns)|Jungle]] world. | '''Crazy Cart''' is the sixth level in ''[[Donkey Kong Country Returns]]'' and its [[Donkey Kong Country Returns 3D|Nintendo 3DS]] and [[Donkey Kong Country Returns HD|Nintendo Switch]] ports, as well as the sixth level in the [[Jungle (Donkey Kong Country Returns)|Jungle]] world. This level's musical theme is a remix of [[Mine Cart Madness]] from ''[[Donkey Kong Country]]''. This is the first [[Mine Cart|minecart]] level in the game, and it takes place in an underground mine shaft and in the jungle. | ||
This is the first [[Cart|minecart]] level in the game, and it takes place in an underground mine shaft and in the jungle | |||
In the [[Donkey Kong Country Returns#Time Attack|Time Attack]] mode of the game, a time of 1:46:00 is needed to get a gold medal, a time of 1:58:00 for silver, and a time of 2:21:00 for bronze. | In the [[Donkey Kong Country Returns#Time Attack|Time Attack]] mode of the game, a time of 1:46:00 is needed to get a gold medal, a time of 1:58:00 for silver, and a time of 2:21:00 for bronze. | ||
==Overview== | ==Overview== | ||
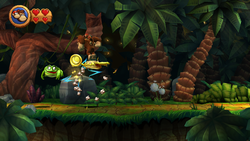
[[File: | [[File:DKCR Crazy Cart 1.png|thumb|250px|left|The beginning of the level]] | ||
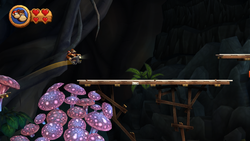
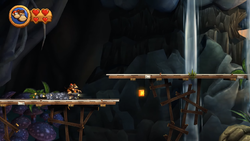
The level starts out with a pathway through the jungle leading to three | The level starts out with a pathway through the jungle leading to three [[Frogoon]]s and a raised piece of land with a [[DK Barrel]] on it. Nearby are some plants that give items when blown or pounded on, as well as a large switch. If this is pounded into the ground, many platforms begin to fall from the sky. The stone walls supporting the platforms build together like a puzzle, making the platforms completely solid. The Kongs can climb up these to reach a high ledge with the entrance to a mine area on it. Inside the mines, the Kongs can find a room that is almost empty, with only a single lamp in it. If they pound on the wooden boards on the ground, they can access a lower area, where they roll down a hill and reach a [[Barrel Cannon]]. The cannon shoots them into a minecart, which begins to move as soon as it is entered. | ||
[[File:DKCR Crazy Cart 3.png|thumb|250px|Donkey Kong makes a long jump]] | |||
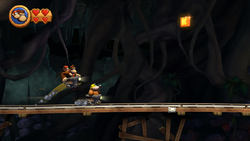
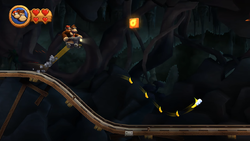
The carts leads the | The carts leads the Kongs to some [[banana]]s, and later, three [[Mole Miner]]s in separate minecarts. The last Mole Miner has the letter K just above its head. After passing a small gap, the Kongs come up to a Mole Miner that rides into another gap in which they must cross. A third abyss is just ahead, and another Mole Miner rides right into it. A [[Banana Coin]] is right above this gap, and some bananas and [[Banana|Banana Bunch]]es are farther ahead around a [[Tiki Buzz]]. After another Tiki Buzz and a Banana Coin is a Mole Miner. Slightly ahead of it is a second track that the Kongs can jump up to. This rail takes them down a small hill, with has the letter O just above it. Farther ahead are some flying bananas. After the Kongs ride under some brambles, they come up to a rather small gap and travel closer to the foreground. The camera is closer to the Kongs, making it harder to see what is ahead. Bananas, Banana Bunches, and other collectibles are in this area, and the camera scrolls away from the heroes just as they pass the [[Professor Chops|Tutorial Pig]] with the checkpoint. | ||
[[File:DKCR Crazy Cart 4.png|thumb|250px|left|Donkey Kong goes downhill, towards an upcoming jump]] | |||
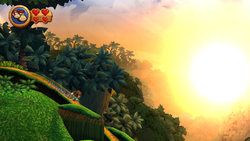
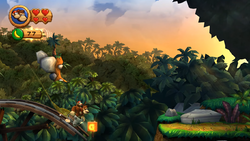
Some enemies are ahead of this point, including a Tiki | Some enemies are ahead of this point, including a [[Flaming Tiki Buzz]] and a Mole Miner. The Kongs soon come up to an area where a separate track is raised above the normal one. While the higher rails are harder to reach, they lead to an [[Extra Life Balloon]]. Flaming Tiki Buzzes and regular Tiki Buzzes are placed between the gaps in this area. Eventually, the Kongs ride down a long hill and come up to a track placed just above the one they are on. At the end of this track is the letter N. The new track leads outside of the mines, where the Kongs ride high above the jungle canopy. Flaming Tiki Buzzes stand in the way of the Kongs as they travel outside, as well as a few mole enemies. Soon after this, the Kongs encounter some moving Flaming Tiki Buzzes and a few gaps, one of which that has three Banana Bunches above it. More gaps and some small sections of the track are farther ahead if this, along with some Tiki Buzzes. At the end of the rails is the letter G. The Kongs must jump off of the track to reach a pathway in the jungle that they can ride down. The pathway takes them down to a large hill with a ramp on the end of it. The ramp sends the Kongs on a new track if they jump high enough; if not, they land on the jungle floor where they can run into a wall and lose a life instantly if they do not jump back on the track above them fast enough. After a small gap, the Kongs reach a bumpy area of the track. They fall out of the minecart when they hit these bumps, causing them to land near the [[Slot Machine Barrel]]. | ||
{{br}} | |||
==Enemies== | |||
{|class="wikitable dk" width=25% | |||
|- | |||
!Image | |||
!Name | |||
!Amount | |||
|- | |||
|align="center"|[[File:Flaming_Tiki_Buzz_DKCR.png|x50px]] | |||
|align="center"|[[Flaming Tiki Buzz]] | |||
|8 | |||
|- | |||
|align="center"|[[File:Frogoon_screenshot.png|x50px]] | |||
|align="center"|[[Frogoon]] | |||
|3 | |||
|- | |||
|align="center"|[[File:Mole MinerDKCR.png|x50px]] | |||
|align="center"|[[Mole Miner]] | |||
|9 | |||
|- | |||
|align="center"|[[File:TikiBuzz.png|x50px]] | |||
|align="center"|[[Tiki Buzz]] | |||
|13 | |||
|} | |||
== | ==Items== | ||
{|class="wikitable dk" width=25% | |||
|- | |||
!Image | |||
!Name | |||
!Amount | |||
|- | |||
|align="center"|[[File:BananacoinDKCR.png|x50px]] | |||
|align="center"|[[Banana Coin]] | |||
|11 | |||
|- | |||
|align="center"|[[File:DKBarrelDKCR.png|x50px]] | |||
|align="center"|[[DK Barrel]] | |||
|1 | |||
|- | |||
|align="center"|[[File:BalloonDKCR.png|x50px]] | |||
|align="center"|[[Extra Life Balloon]] | |||
|2 | |||
|} | |||
===K-O-N-G Letters=== | ===K-O-N-G Letters=== | ||
{|class="wikitable dk" width=70% | |||
|- | |||
!Image | |||
!Letter | |||
!Location | |||
|- | |||
|align="center"|[[File:DKCR Crazy Cart Letter K.png|250px]] | |||
|align="center"|K | |||
|When the Kongs approach three moles in minecarts, they should perform a high jump on the third mole to reach the letter K that is high in the air. | |||
|- | |||
|align="center"|[[File:DKCR Crazy Cart Letter O.png|250px]] | |||
|align="center"|O | |||
|Right after the third Puzzle Piece, the Kongs come towards a small hill. Before they begin to ride down it, they should jump up to grab the letter O. | |||
|- | |||
|align="center"|[[File:DKCR Crazy Cart Letter N.png|250px]] | |||
|align="center"|N | |||
|Shortly before exiting the mines, they Kongs can find the letter N at the end of the track. They can grab it and then immediately jump onto the track above to collect it safely. | |||
|- | |||
|align="center"|[[File:DKCR Crazy Cart Letter G.png|250px]] | |||
|align="center"|G | |||
|Just before the Kongs enter the deeper parts of the jungle where there is no track, the Kongs should jump at the end of the rails to grab the letter G. | |||
|} | |||
===Puzzle Pieces=== | ===Puzzle Pieces=== | ||
[[File: | {|class="wikitable dk" width=70% | ||
|- | |||
!Image | |||
!Number | |||
!Location | |||
|- | |||
|align="center"|[[File:DKCR Crazy Cart Puzzle Piece 1.png|250px]] | |||
|align="center"|1 | |||
|At the beginning of the level, the Kongs should head backwards into a hidden alcove to find a [[Puzzle Piece (Donkey Kong Country Returns)|Puzzle Piece]]. | |||
|- | |||
|align="center"|[[File:DKCR Bonus Room 6.png|250px]] | |||
|align="center"|2 | |||
|After the Kongs finish pounding on a large switch in the jungle, platforms appear. They jump from them and go into the canopy to the left, which has a hidden area with a doorway leading to a [[Bonus Level]]. Donkey Kong and Diddy Kong have 30 seconds to collect 47 bananas, two Banana Coins, and a [[Red Balloon]] while moving along two large moving platforms; there is also a small, stationary platform. After collecting every item, the second Puzzle Piece appears. | |||
|- | |||
|align="center"|[[File:DKCR Crazy Cart Puzzle Piece 3.png|250px]] | |||
|align="center"|3 | |||
|After the Kongs pass some flying Tiki foes, they come up to a mole in a minecart. They should jump over it, without landing on the track above them, to grab the third Puzzle Piece at the edge of the rails. | |||
|- | |||
|align="center"|[[File:DKCR Crazy Cart Puzzle Piece 4.png|250px]] | |||
|align="center"|4 | |||
|Immediately after the letter O, the Kongs can find the fourth Puzzle Piece just before a small gap. They can jump a little earlier than usual to grab it and get over the gap safely. | |||
|- | |||
|align="center"|[[File:DKCR Crazy Cart Puzzle Piece 5.png|250px]] | |||
|align="center"|5 | |||
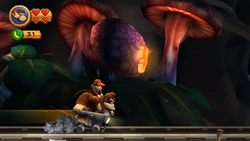
|Shortly after the thorn plants, the camera zooms into the Kongs. After some bananas, the Kongs must quickly jump to reach the fifth and final Puzzle Piece. | |||
|} | |||
==Gallery== | |||
<gallery> | |||
Crazy Cart DKCR DK Barrel.png|The DK Barrel of Crazy Cart | |||
Crazy Cart DKCR platforms.png|The Kongs jumping from some platforms | |||
Crazy Cart DKCR Mole Miner.png|The Kongs approach a Mole Miner | |||
Crazy Cart DKCR Flaming Tiki Buzzes.png|The Kongs jump through some Flaming Tiki Buzzes | |||
</gallery> | |||
==Names in | ==Names in other languages== | ||
{{ | {{foreign names | ||
|Jpn=トロッコで大ジャンプ! | |||
|JpnR=Torokko de Dai Janpu! | |||
|JpnM=Big Jump with the Cart! | |||
|Spa=Vagoneta Veloz | |Spa=Vagoneta Veloz | ||
|SpaM=Fast Wagon | |SpaM=Fast Wagon | ||
|Ita=Binario | |Ita=Binario equatoriale | ||
|ItaM=Equatorial Rail}} | |ItaM=Equatorial Rail | ||
|Fre=Rails Aïe Aïe | |||
|FreM=Ouch Ouch Rails | |||
|Ger=Lustiger Loren-Limbo | |||
|GerM=Funny Cart-Limbo | |||
|Kor=트램카로 크게 점프! | |||
|KorR=Teuraemka'ro keuge Jeompeu! | |||
|KorM=Great Jump with the Cart! | |||
|Chi=乘矿车大跳跃! | |||
|ChiR=Chéng Kuàngchē Dà Tiàoyuè! | |||
|ChiM=Big Jump with the Cart! | |||
}} | |||
{{DKCR}} | {{DKCR}} | ||
[[Category: | [[Category:Jungles]] | ||
[[Category: | [[Category:Mines]] | ||
[[Category:Donkey Kong Country Returns]] | [[Category:Donkey Kong Country Returns levels]] | ||
[[ | [[it:Binario equatoriale]] | ||
Latest revision as of 14:01, January 7, 2025
| Level | |
|---|---|
| Crazy Cart | |
| |
| Level code | 1-6 |
| World | Jungle |
| Game | Donkey Kong Country Returns (3D/HD) |
| ** << Directory of levels >> | |
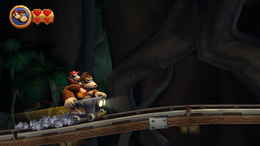
Crazy Cart is the sixth level in Donkey Kong Country Returns and its Nintendo 3DS and Nintendo Switch ports, as well as the sixth level in the Jungle world. This level's musical theme is a remix of Mine Cart Madness from Donkey Kong Country. This is the first minecart level in the game, and it takes place in an underground mine shaft and in the jungle.
In the Time Attack mode of the game, a time of 1:46:00 is needed to get a gold medal, a time of 1:58:00 for silver, and a time of 2:21:00 for bronze.
Overview[edit]
The level starts out with a pathway through the jungle leading to three Frogoons and a raised piece of land with a DK Barrel on it. Nearby are some plants that give items when blown or pounded on, as well as a large switch. If this is pounded into the ground, many platforms begin to fall from the sky. The stone walls supporting the platforms build together like a puzzle, making the platforms completely solid. The Kongs can climb up these to reach a high ledge with the entrance to a mine area on it. Inside the mines, the Kongs can find a room that is almost empty, with only a single lamp in it. If they pound on the wooden boards on the ground, they can access a lower area, where they roll down a hill and reach a Barrel Cannon. The cannon shoots them into a minecart, which begins to move as soon as it is entered.
The carts leads the Kongs to some bananas, and later, three Mole Miners in separate minecarts. The last Mole Miner has the letter K just above its head. After passing a small gap, the Kongs come up to a Mole Miner that rides into another gap in which they must cross. A third abyss is just ahead, and another Mole Miner rides right into it. A Banana Coin is right above this gap, and some bananas and Banana Bunches are farther ahead around a Tiki Buzz. After another Tiki Buzz and a Banana Coin is a Mole Miner. Slightly ahead of it is a second track that the Kongs can jump up to. This rail takes them down a small hill, with has the letter O just above it. Farther ahead are some flying bananas. After the Kongs ride under some brambles, they come up to a rather small gap and travel closer to the foreground. The camera is closer to the Kongs, making it harder to see what is ahead. Bananas, Banana Bunches, and other collectibles are in this area, and the camera scrolls away from the heroes just as they pass the Tutorial Pig with the checkpoint.
Some enemies are ahead of this point, including a Flaming Tiki Buzz and a Mole Miner. The Kongs soon come up to an area where a separate track is raised above the normal one. While the higher rails are harder to reach, they lead to an Extra Life Balloon. Flaming Tiki Buzzes and regular Tiki Buzzes are placed between the gaps in this area. Eventually, the Kongs ride down a long hill and come up to a track placed just above the one they are on. At the end of this track is the letter N. The new track leads outside of the mines, where the Kongs ride high above the jungle canopy. Flaming Tiki Buzzes stand in the way of the Kongs as they travel outside, as well as a few mole enemies. Soon after this, the Kongs encounter some moving Flaming Tiki Buzzes and a few gaps, one of which that has three Banana Bunches above it. More gaps and some small sections of the track are farther ahead if this, along with some Tiki Buzzes. At the end of the rails is the letter G. The Kongs must jump off of the track to reach a pathway in the jungle that they can ride down. The pathway takes them down to a large hill with a ramp on the end of it. The ramp sends the Kongs on a new track if they jump high enough; if not, they land on the jungle floor where they can run into a wall and lose a life instantly if they do not jump back on the track above them fast enough. After a small gap, the Kongs reach a bumpy area of the track. They fall out of the minecart when they hit these bumps, causing them to land near the Slot Machine Barrel.
Enemies[edit]
| Image | Name | Amount |
|---|---|---|

|
Flaming Tiki Buzz | 8 |

|
Frogoon | 3 |

|
Mole Miner | 9 |

|
Tiki Buzz | 13 |
Items[edit]
| Image | Name | Amount |
|---|---|---|
| Banana Coin | 11 | |
| DK Barrel | 1 | |
| Extra Life Balloon | 2 |
K-O-N-G Letters[edit]
Puzzle Pieces[edit]
| Image | Number | Location |
|---|---|---|
|
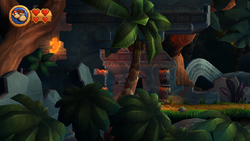
1 | At the beginning of the level, the Kongs should head backwards into a hidden alcove to find a Puzzle Piece. |
|
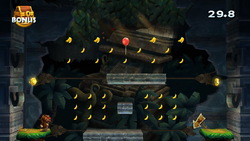
2 | After the Kongs finish pounding on a large switch in the jungle, platforms appear. They jump from them and go into the canopy to the left, which has a hidden area with a doorway leading to a Bonus Level. Donkey Kong and Diddy Kong have 30 seconds to collect 47 bananas, two Banana Coins, and a Red Balloon while moving along two large moving platforms; there is also a small, stationary platform. After collecting every item, the second Puzzle Piece appears. |
|
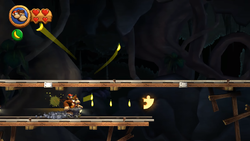
3 | After the Kongs pass some flying Tiki foes, they come up to a mole in a minecart. They should jump over it, without landing on the track above them, to grab the third Puzzle Piece at the edge of the rails. |
|
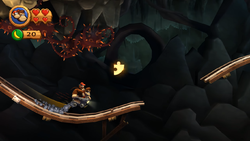
4 | Immediately after the letter O, the Kongs can find the fourth Puzzle Piece just before a small gap. They can jump a little earlier than usual to grab it and get over the gap safely. |
|
5 | Shortly after the thorn plants, the camera zooms into the Kongs. After some bananas, the Kongs must quickly jump to reach the fifth and final Puzzle Piece. |
Gallery[edit]
Names in other languages[edit]
| Language | Name | Meaning | Notes |
|---|---|---|---|
| Japanese | トロッコで大ジャンプ![?] Torokko de Dai Janpu! |
Big Jump with the Cart! | |
| Chinese | 乘矿车大跳跃![?] Chéng Kuàngchē Dà Tiàoyuè! |
Big Jump with the Cart! | |
| French | Rails Aïe Aïe[?] | Ouch Ouch Rails | |
| German | Lustiger Loren-Limbo[?] | Funny Cart-Limbo | |
| Italian | Binario equatoriale[?] | Equatorial Rail | |
| Korean | 트램카로 크게 점프![?] Teuraemka'ro keuge Jeompeu! |
Great Jump with the Cart! | |
| Spanish | Vagoneta Veloz[?] | Fast Wagon |
