The 'Shroom:Issue 216/Strategy Wing
Director's Notes
Written by: Hooded Pitohui (talk)
Hello, all you readers of The 'Shroom! Have you taken a gander at the Moon lately? I keep finding myself drawn to Luna these days. Whether making an appearance in the late afternoon skies or shining beautifully at night, our wonderful Moon has been brightening my days and lifting my spirits. Why, just the other night, the rising Moon took on this lustrous copper color that made it look like a freshly-minted coin just above the horizon. If you find yourself feeling a little unsteady amidst the turbulence surrounding you, or you too are hissing because the nuisance of DST has thrown off your sleep, maybe take a moment to search the skies for the Moon, take a deep breath, and admire the beauty of our cosmic companion.
Then, knowing Luna is keeping a vigilant watch over you, you can dive into a jam-packed edition of Strategy Wing! All of our regular sections await you. Roserade (talk) dips into the unique Awards Randomizer Killing Game (emphasis mine) for Killing the Killing Game Roles this month, while Pokémon Academy follows up last month's wind chime with a bell and Four Steps for a 3D World revisits its roots. By the way, I discovered a fun fact just days before this issue released. With this issue, Pokémon Academy is three years old, Four Steps is two years old, and Octet is one year old. It seems I have a penchant for starting sections in March, I suppose!
Enough about my own work, though! We have some brand-new announcements, and, oh boy, they're exciting ones. First off, Sparks (talk) has brought us a bonus edition of Just Shapes & Beats: The Groovy Guide covering the game's lost chapter. I won't spoil anything, but you indie RPG fans out there may just get a kick out of one of the tracks featured in this edition... That isn't all from Sparks, though! Strap on your life vest and climb aboard Shipshape Island, because Captain Sparks is taking us on a boss-fighting tour of Concordia in the Brothership Boss Battle Guide.
In addition, we have a sequel to one of our older sections. You may remember So You Want to Conquer Japan? from 2021. Well, our resident warlord Shoey (talk) has returned, and, displaced in time and space, he has found himself in China during the decline of the Han Dynasty, just a bit before the later struggle for domination between the states of Cao Wei, Shu Han, and Eastern Wu. With such a fractured polity, he'll have his work cut out for him to carve out his own territory and re-unify China under his rule, and you can follow his efforts in So You Want to Romance the Three Kingdoms?. Despite the name, there's not a dating sim component, but we do have a lot of eligible men to choose between in this first edition...
That's all I have in the way of announcements, so bask under the moonlight, enjoy what our writers have put together for you, cast a vote and write in a Poochy's Pick, and if you're feeling inspired at the end of it all, you can always send in your application to join the team!
Section of the Month
I'm ringing out every bell in Strategy Wing to express my thanks to all of you for making the Chimecho-focused Pokémon Academy February's section of the month. Coming up behind the oddly rare Generation III Pokémon, there was a lot of enthusiasm for Roserade's (talk) thorough analysis of the management-heavy Latuschels role from AKGO. For those of you who enjoyed Why Are You So Shaped?, I'm still keeping an eye out for your applications with your analyses of Mario enemy designs!
| STRATEGY WING SECTION OF THE MONTH | ||||
|---|---|---|---|---|
| Place | Section | Votes | % | Writer |
| 1st | Pitohui's Pokémon Academy | 6 | 35.29% | Hooded Pitohui (talk) |
| 2nd | Killing the Killing Game Roles | 4 | 23.53% | Roserade (talk) |
| 2nd | Why Are You So Shaped? | 4 | 23.53% | Hooded Pitohui (talk) |
| 3rd | Just Shapes & Beats: The Groovy Guide | 3 | 17.65% | Sparks (talk) |
Brothership Boss Battle Guide
Greetings everybody! It's me Sparks, your local pony and Mario & Luigi: Brothership enthusiast, with a brand-new section - Brothership Boss Battle Guide! Every month, I will discuss a boss in the game, telling about their stats, abilities, and how to defeat them. I will go through them as they are encountered in the story, but I will include optional battles in the spots I think they'd fit the best in.
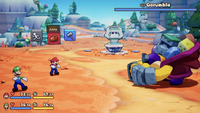
For March 2025, we will analyze the first main boss of the game - the big strong troublemaker that is Gorumbla! After finding Billdit and Maykit, Mario and Luigi receive news that Rumbla Island is under attack by Gorumbla and his gang of Guardarms! The brothers must put a stop to Gorumbla's antics.
Let's take a look at his stats so we know what we're dealing with.
Gorumbla's stats
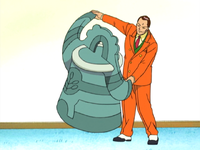
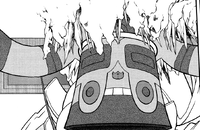
| Image | Level | Location | HP | POW | DEF | SPD | Type | EXP | Coins | Item(s) |
|---|---|---|---|---|---|---|---|---|---|---|

|
7 | Rumbla Island | 480 | 26 | 5 | 8 | Normal | 200 | 130 | Super Mushroom |
| Notes | This enemy uses his arms as shields and takes reduced damage if attacked from the direction the arms are held in. | |||||||||
Gorumbla's abilities
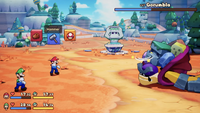
At the start of the battle, Gorumbla uses his arms to protect his head, much like Guardarms do. If he is protecting the front of his face, hammer attacks will deal much less damage than usual. If the boss guards the top of his head, then jump attacks are ineffective. If struck with the correct attack, Gorumbla will move to his other guarding stance. While guarding, he can perform two attacks, and both are avoided by jumping:
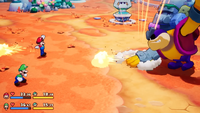
- Gorumbla can slide towards Mario or Luigi, similarly to how a Guardarm does. He can be counterattacked if his head is stomped on, but the proper timing is needed. Landing on his back deals no damage as he guards the blow.
- Gorumbla also slams his hands down on the ground multiple times, sending out waves towards the Bros. The waves can only be avoided, and the speed and when Gorumbla slams the ground varies. Sometimes he sends out multiple shockwaves in quick succession, but other times he delays his attacks.
After enough damage is dealt, Gorumbla fully stands up and takes less damage from all attacks, but he no longer guards. In this state he has two attacks:
- Gorumbla jumps near a brother and swings his arms twice before headbutting them. This attack is avoided by jumping. The swipes can only be dodged, and the headbutt is not immediately after the second swing. If timed right, a counterattack can be done by landing on Gorumbla's head during the headbutt.
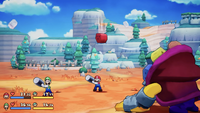
- The boss flings several rocks upward, and then they fall one by one. Hammers are used to defend against this attack. Colorless rocks fall around the brothers, but never on top of them. Red and green rocks are what need to be countered. Red ones fall on Mario, and green ones are for Luigi. Before a colored rock falls, Gorumbla looks above a character, indicating where a rock will fall. Countering a rock will send it at Gorumbla, dealing some damage back at him. After multiple rocks, the attack ends.
After the rock attack is finished, a yellow rock falls on a statue in the background. This gives Luigi inspiration for a Luigi Logic!
- In this Luigi Logic, Luigi jumps onto the background statue and swings back before sending himself and the rock towards Gorumbla. However, the big guy catches both of them with one hand before throwing them at Mario. Mario must hit the rock at the right time by pressing
. This will stop it in place, and Luigi jumps off it before preparing to swing at it as well. After pressing
, both brothers will hit the rock back at Gorumbla, dizzying him and incapacitating him for a few turns. While dizzy, he will take higher damage than usual from attacks. Basically, attacks performed become critical hits.
After recovering, Gorumbla will go back to protecting himself, restarting the cycle. If the Luigi Logic is failed, Gorumbla still fully stands up.
Tips and tricks
Everyone has their own playstyles and strategies, so this part is more of a recommendation. Try to get the best gear for Mario and Luigi (So-So Boots, So-So Hammer, and So-So Wear) and have whatever you want for gloves/accessories. Because Gorumbla is level 7, try to match or surpass his level. I fought a lot of enemies when I first played, so I was level 9 when I reached the boss. Nothing wrong with being too safe!
Be sure to use the correct attacks when Gorumbla guards himself. If he is protecting his face, jump on him. When he has his hands on the top of his head, use hammer attacks. You can use whatever attack you want when he stands up and is dizzy. You don't have Bros. Attacks yet, so just get EXCELLENTS on your main attacks.
Try to counter Gorumbla's attacks whenever you can! The only one that cannot be countered is his wave attack. It never hurts to deal more damage to the boss. If you're low in HP, simply use Mushrooms/Nuts to heal. BP isn't an issue here, so don't worry about that.
The timing for the Luigi Logic is later than you'd expect. I have seen multiple people miss the timing because they swung too early. Keep a close eye on Luigi and the rock and you'll be fine.
When Gorumbla is dizzy, go all out! Take the time to deal massive damage to him. Use the attack you feel more comfortable getting EXCELLENTS with.
This is an easy boss because it's the first one in the game.
With this information, you'll take down Gorumbla in no time! Not much to say about this guy, but when we get to the later bosses that's when I'll go into more detail. Thank you for reading and tune in next time where I'll look at Gobblick! Bye-bye!
Four Steps for a 3D World
Written by: Hooded Pitohui (talk)
Hello, all you readers of The 'Shroom, and welcome back to Four Steps for a 3D World, a section in which we look at levels from a selection of 3D Super Mario titles through the lens of a design philosophy Koichi Hayashida discussed in an interview.
In brief, 3D Mario game levels in certain titles are designed around an introduction that lets a player learn a mechanic in a safe environment, further development that builds on what the player is learning and introduces more complicated aspects of a mechanic, a twist that adds some kind of significant wrinkle or challenge to force players to consider the mechanic from a new angle, and a conclusion which gives players one final satisfying chance to show they've mastered the mechanic. We look at 3D Mario levels and see if they conform to this model while trying to get some insight on how a good level is constructed.
Based on feedback, it seems that covering Red Coin-centric missions in this section isn't what readers want, and that's fair enough. We've gone all over the map with this section now, covering plenty of games that were made well before Hayashida was a game director and before the interview where he spoke on the four-step model. This month, I thought we'd go back to the one game that we know was developed with this model firmly in place - Super Mario 3D World.
Now, as with most Mario games, 3D World prioritizes gameplay over spectacle, but that doesn't mean it shies away from having levels built on visual appeal entirely. A prime example here is World 2's Shadow-Play Alley. Did this focus on spectacle override the four steps we're accustomed to, or was it built atop them?
In the end, for all its focus on spectacle and visual appeal, Shadow-Play Alley still kept the core level design philosophy of Super Mario 3D World intact. A few bits felt disconnected from the rest of the level, the emphasis on Potted Piranha Plants was odd and went nowhere, and the Conclusion section is tucked away, but the four steps still stand. Back in issue 200, we talked about when it's okay to ditch or loosen the four steps for the sake of aesthetics or level concept, and we've talked about the role of spectacle. While those give us cases of spectacle being prioritized over the four steps or feeling disconnected while still being within them, here we see an example of where spectacle and these steps are interwoven. This level uses its big "wow" moment to create its Twist section, and it's all that much more memorable for it.
With four rows of Blurkers, three Green Star silhouettes, all of this in World 2, and one amusing wooden cutout, this has been Four Steps for a 3D World. See you next month!
Just Shapes & Beats: The Groovy Guide
Played by Sparks on the Nintendo Switch
Welcome back to Just Shapes & Beats: The Groovy Guide! What?
That's right - we're not actually finished with this game! In July 2021, just three years after the release of this game, a new chapter was added to the story mode, titled The Lost Chapter. It was originally cut during development, but it's now here and fully playable! I'm sorry to those who expected me to start my Mega Man 3 walkthrough; you'll have to wait until April to read part one.
Now, let's dive in!
The Lost Chapter
So we beat the boss and restored everything to normal. Afterwards, he suddenly reformed and threw a massive party for everyone right? True! However, there was a chapter excluded from the main story. By rewinding back in time, we can now experience it! This takes place between the tutorial and paradise worlds.
After clearing "Long Live The New Fresh", the three Tree Triangles all formed together to create paradise… or so you thought. In actuality, a spider jumped towards the Triangles during their formation and separated them! Only one of them managed to escape. We need to find the other two Triangles and reunite them. How hard can that be?
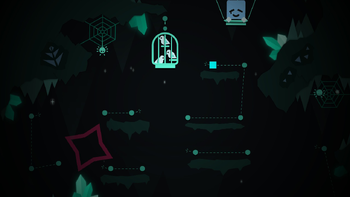
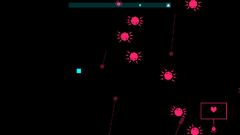
We're at the "Long Live The New Fresh" stage, where the boss has been sealed away. A new path opens, leading the way upward. This is an underground cavern with pink crystals and stars we must navigate through to move forward. After jumping across several gaps and some climbing, we reach a bird cage containing, well, birds. They're trapped inside it, so they must be freed! The path to it is blocked because of a spider web, but thankfully a stage is nearby, so maybe the small triangle can get rid of it! This stage has the song "Airborne Robots".
Airborne Robots, by F-777
This stage contains three checkpoints, so there are four parts.
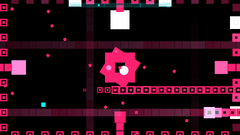
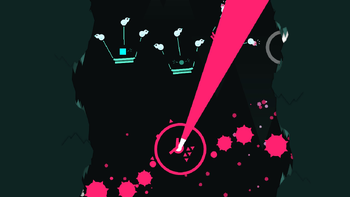
The first section has lines of squares that leave behind temporary trails while flying in from the right side of the screen. There are also shorter, smaller ones with increased speed. The edges of the screen then get covered in squares while squares fly by, shooting out small projectiles towards the center. Afterwards, a large, rotating square appears in the center, shooting out small squares in all directions, as well as one normal-sized square in each of the four directions. Lines of squares then start flying in from all sides of the screen.
When the second part starts, everything disappears before big squares zoom by the bottom, top, bottom and middle sections in that order. The top and bottom edges get covered in squares, while tiny squares continuously block the center area, so try to stay away from there. Additionally, horizontal lasers strike and more lines of squares zoom by. It's not as bad as it sounds!
The third part has two squares on opposite sides, taking turns firing small projectiles in front of them at various angles. Oh, and there are more square lines too. At the end of this section, squares cover most of the screen, with the ones in the opening shooting small squares to the music.
When the final section starts, everything disappears once again and now square lines cover the top and bottom of the screen while small trails fly across the center and the top and bottom, with those ones shooting out tiny projectiles in the opposite direction. Then, the walls close in on the center while more projectiles are fired. You must dash very quickly and precisely to avoid all of this! Afterwards, the previous pattern repeats before squares cover the screen in the same way they did at the end of the third section, with more squares fired before the song ends. That is super difficult to put into words!
The small triangle we obtain clears out the spider web, allowing us to knock down that birdcage and free the birds! One of them adds a line to a dot, enabling us to jump across a gap we couldn't before! After more jumping and climbing (while avoiding more crystals as well as stars which appear and disappear), we encounter a friend, or in this case a soon-to-be friend - the sad square! He's trapped in a spider web, so we must play the nearby stage to free him - with this stage featuring "Interlaced", a song made specifically for this game!
Interlaced, by MDK
This song has two checkpoints, making for three sections.
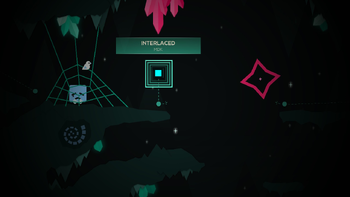
The first part has these "walls" that drop down before moving in the direction of the rough side, leaving behind lines of various heights that disappear after a second. Some of these walls start at a far edge; then they move, bombs appear in front of them, and explode the bombs explode to send out tiny projectiles. After a few walls go by, thin ones begin to fly across the screen at a fast pace, signaled by the bright triangle pattern the lines form. At the end of this part, several slow-moving walls make their way towards the left side while lines appear at various heights, but no lines appear in the center, so try to stay in the middle of the screen. The walls then start at the left and repeat the pattern. Try to dash through two walls at a time to avoid more precise moves.
In the second part, walls emerge from the center of the screen, although some start at the left and right sides. This leaves two open spaces for the players where lines appear in the center-ish area of each side, so be sure to react quickly whenever you see danger. All of the hazards then disappear, and another wall falls down on the far right side of the screen, this time "pushing" itself towards the left while sending out walls to the right. Every two beats, lines appear throughout the screen, with less of them appearing to the right of the main wall. Once the big wall exits the screen, two more walls appear and cover everything but a large chunk of the top left corner. They send out walls that slow down as they progress, so be careful! After a few walls, the pink uncovers two areas behind the walls (except for the bottom right corner, where there are lasers) and they get pushed backwards. Afterwards the conditions flip; the old walls disappear but new ones arrive and move towards the top left side! These are very tight spaces, so precision is key.
The third section starts when the moving walls reach the top left corner. In a series of rapid-fire moves, walls appear in various places and travel across the screen, and lasers take up most of the screen when walls aren't seen! It goes by really quickly, so I won't waste your time on so many details. The last segment is almost identical to the beginning of the stage, so it should be easy.
With the small triangle now obtained, it destroys the web and frees the sad square! He jumps for joy, but is unaware that he is shaking the ground and accidentally causes a cluster of crystals to fall, destroying the ground we're on. Fortunately, he has quick reactions and saves us (giving us a hug afterwards! Awwww)! Together, we explore more of the cavern and come across a wide gap. Encouraged a by a bird, the sad square jumps with us in hand, landing on an unsteady platform with crystals growing underneath. The impact from the landing causes cracks to appear, but nothing else happens. Phew! The terrain going forward becomes more difficult to navigate, so only we can move forward. We come across an area where one of the Tree Triangles is, also entangled in a spider web. To free it, we must get another small triangle from the stage close to it - "Last Tile 海底撈月". Yes that's part of the title and. I copy/pasted the foreign text. Is it Chinese or Japanese?
Last Tile 海底撈月, by Kommisar
This stage has two checkpoints, meaning there are three parts.
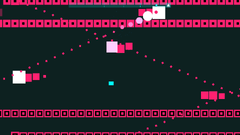
In the first section, pistons fill the top and bottom edges of the screen and stay. Circles appear in the middle section and get "popped" by spikes, releasing hexagon projectiles in many directions. There will then be two sets of pistons (each one consisting of two each) moving from the left to the right of the screen, pausing along the way.
The second part has more circles that get popped, but they appear all throughout the middle area, so finding the safe spots and dashing through the projectiles is the way to go. There will then be two more sets of pistons; this time, however, the first set emerges from the right instead of the left. While they move, vertical lasers strike at specific points. After both sets of pistons have passed, the screen clears up before hexagons rain from the top of the screen and more pistons fall. With them comes a wheel of pistons, stopping in the center.
The final section is super chaotic, but I'll do my best! The edges get covered in pink, forming an octagon shape in the center. The wheel of pistons sends out circles in eight directions one-by-one, moving clockwise starting with the top. After all circles are sent out, eight spikes appear and shoot out at the circles in the same order and rhythm, popping them and releasing hexagon projectiles with each circle. Lasers then expand from the center and the piston wheel splits up into eight separate pistons. The edges move closer to the center, forcing the players to the center of the screen as a result. The eight pistons then move to the opposite side before the edges retract, and the eight pistons now "orbit" around the screen. Four spikes then get launched to the center, one at a time and diagonally. The impacts send out hexagon projectiles and the piston wheel returns, with the separate pistons disappearing now. Eight circles appear close to the wheel. What follows is basically the beginning of this section, but now there are rotating lasers involved! These lasers change direction midway through, making for some very difficult and precise reactions. At the end, the lasers stop and move around. The piston wheel also splits into two, each one having their own lasers. The two then merge and everything disappears. It's over!
This small triangle destroys the web, releasing the Tree Triangle! It flies out of the cavern and reunites with the other free one. Now to find the last one! We climb some more and break another bird cage. The birds trapped inside provide a flying platform for the sad square, allowing for him to escape with us! After jumping across more gaps, we break yet another cage, but it falls on that unsteady crystal platform from before. The impact frees the birds but breaks the platform, causing the crystals to fall and land on the "Long Live The New Fresh" stage, opening it up and freeing the boss! He roars with anger and uses his two arms to climb upward.
Pursuit
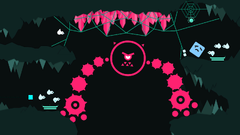
The birds provide a transportation method for us as well, but unfortunately the boss has reached our location and gives pursuit while awesome music plays. This section is similar to that Volcano section (where we went upward and dodged obstacles + that corrupted flower), but we only have three platforms instead of six positions. The boss attacks by firing lasers at the platforms and slamming into the walls, causing rocks to fall. Both attacks have warnings and getting hit results in breaking apart, but that really doesn't matter because the game will immediately pick right back up at where you are. About midway through the chase, the boss sends out many arms at the platforms, also with warnings. This entire section lasts for about a minute and a half.
We all escape and reach the surface, but the boss catches up to us too! He once again roars with anger, but this time the tables will turn. He is in an inconvenient spot, because a spider cuts a web above him, making crystals fall and burying the boss. Only one of his arms sticks out, which would later cause an issue in the story…
Anyways, with him out of the way, we can safely continue our search for the last Tree Triangle. Conveniently, it's right here! The Triangle is trying to break through a rock wall to reach the others, so we must assist it, oddly enough with a small triangle. As you'd expect, we have to clear another song. This one is "Born Survivor".
Born Survivor, by Shirobon
This song has two checkpoints, making for three parts total.
The first section has these awesome-to-look-at circle groups appearing close to the edges of the screen, which wavy square lines fly towards. One of these circles release the wavy square lines instead of capturing them. There will then be lasers that send quick squares towards the circles, while wavy squares fly around the edges of the screen, so try to stay closer to the center. The next segment has more squares flying past the center of the screen while circles around the diagonals release many square projectiles in many directions. This pattern repeats four times, with the circles moving around the screen after each pattern.
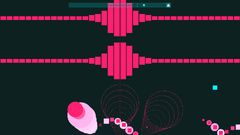
When the second section starts, one circle groups moves directly in the center of the screen before exploding, creating a line horizontally dividing the screen. This line looks like one of those audio graphs with colors (I forgot the name of them…) and moves with the music, so try not to be near it. The top half of the screen gets "attacked" with circle groups and squares before the same thing happens to the bottom, so dash upwards at the right time! Horizontal lasers then strike both halves of the screen, sending out squares that explode when they reach the other side. This part is pretty easy actually.
The last part is another crazy one: the line disappears and circles move across the screen horizontally before disappearing. The top half of the screen then becomes uninhabitable because of another line that splits in two. At the same time, the bottom has circle groups that send out squares in many directions. Afterwards, lasers strike the screen at various angles, sending out squares that create more squares that travel in the opposite direction of the impacts. Two lines also appear at the top and bottom sections before disappearing. The center becomes dangerous because of circles and squares while more lines appear at the bottom and top, this time with wavy squares close to them. These lines disappear and the pattern repeats, this time with the obstacles starting on the opposite side. This time, however, the lines merge into one before imploding. The song then ends. Whew! That's hard to follow, isn't it?
After getting through all of that, the small triangle we obtained destroys the rock wall, allowing for the final Tree Triangle to join the others. They then spin and combine, but instead of forming a tree, they form a black hole instead! Everyone hangs on for dear life but a spider detaches from its web and gets sucked in. A path then forms to the black hole, meaning we have to stop it. As we head towards it, we lose our grip and get sucked in as well! Oh boy.
Spider Dance, remixed by Shirobon (original by Toby Fox)
Boss stage and, by the way, yes, this is a remix of an Undertale song! More specifically, it's the battle against Muffet.
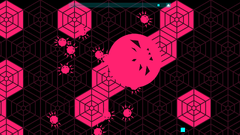
At the beginning of the stage, spiders crawl upwards from the bottom of the screen before a lot of them emerge from the center, traveling across lines of web. The pattern repeats, although this time spiders descend from the top as well. After the second "spider attack", webs fill the screen, but they are harmless… that is, until they glow! Webs "strike" at various locations of the screen to the music. They all vanish before smaller webs do the same, albeit at a faster pace. Afterwards, a giant spider swings in the center of the screen while more spiders descend. The large spider also spins at one point, sending out many spiders in various directions. It then disappears (and laughs like Muffet does!) before columns of webs appear and disappear.
The screen then starts autoscrolling to the right while the boss spider gives pursuit. As it does so, more spiders arrive from the left and, eventually, from the top and bottom. While all of this happening, more webs appear and disappear. The big spider then exits the screen while many spiders appear and travel along lines of web. A spider holding a sign with a moving heart appears on the bottom right corner before disappearing, making for another Undertale reference. Spiders then ascend and descend while more appear on lines of web.
The boss spider then returns, appearing in the center before bouncing around the screen, sending out spiders as it does so. The screen moves to the left and right, making for harder concentration. Once again, webs appear and disappear at various places as well. When the song ends, the large spider explodes, sending out many spiders. We did it!
The black hole is now calmed down, and the Tree Triangles become the big tree, creating the paradise world. So now you know the full story of Just Shapes & Beats! After the title of the game appears, the screens fades to black, and a shooting star flies across the screen. What could that mean?
Killing the Killing Game Roles
Welcome back, readers, to another edition of Killing the Killing Game Roles, the section where we analyze various player roles from past Mario Boards Killing Games in hope of answering the question, what makes for a good role? By analyzing what's come before, we can discover some tricks and tips that could even help you design your own roles!
For full transparency with you, readers: right now, I'm moving through a nightmarish finals season, and I need a bit of an easy write-up this month. So I'm going to be rolling back a soft restriction I had on myself and look at a role from an unconventional game: Awards Randomizer Killing Game. ARKG roles started out very simple before getting gradually more complex... specifically as a result of the role we're looking at today. I'll explain later. For now, know that this'll likely be a much shorter section than last month.
This role also doesn't have an official name, so for the sake of having a title to refer back to, I'm going to make something up based on the theming the player applied to it. You can send any feedback to my P.O. box.
ARKG - The Proposal Wizard
- +You have the ability to force an election for (almost) anything once per day phase, with binding results.
- +You have unlimited oxygen and will be able to breathe under any circumstances.
- -You must do one random act of kindness for another player each night. Failure to do so will result in instant death.
Yep, you're reading that right. That's the entire transcript of the original role. Meaty, I know.
To those uninitiated, I should explain how ARKG roles worked. Before the game began, the general forum populace were encouraged to submit ideas for role attributes to a form. Some traits were beneficial, denoted by a +, while other traits were hindrances, denoted by a -. Then, when the game began, these attributes were randomly pulled from the pool for each player. Everyone received two positive attributes and one negative attribute. In this instance, Fun With Despair (talk) ended up receiving the set you see above. He ported over his Killing Game 8 character, Alexander Wexlyn, and leaned into the wizarding persona the character once adopted. From there, the Proposal Wizard (name pending) was born.
So, alright, we've got our short checklist of mismatched traits. How do these traits actually work out in practice, though?
General Overview
This is where we'd read off the rolecard directly and determine what we can interpret from its language. For this role, I'll approach the overview a little bit differently, because what was submitted to the form needed to be reinterpreted via the host.
To start with, we have the role's most notable ability by a wide margin. In "forcing an election", the role came to be flavored around proposals. At any point during the Day Phase, the Proposal Wizard is able to put forward a formal proposal that every other player could then vote in. If the proposal received a majority "yes" vote, its rule would pass and become a permanent fixture of the game. If the proposal received a majority "no", it would be passed over with no consequence. The "(almost) anything" part is really for the purposes of the host; it gives them a veto in the instance that the proposal would just utterly break the game. Basically: through player agreement, the Proposal Wizard can essentially change the game however you see fit. We'll discuss the particulars of this power and what FWD did with it under ability application.
The unlimited oxygen part is much more straightforward, don't have too much to analyze there. What qualifies as a "random act of kindness" for the negative role trait is a bit subjective, but this can be assumed to mean an unasked favor of some sort. Giving somebody a gift or assisting them if they're ko'd would easily satisfy this piece.
Ability Application
Let's just breeze past the oxygen aspect again. The application is obvious: remaining in precarious situations or spaces longer than you should. Hanging out and exploring the bottom of a lake is a quick example. This aspect mostly has benefits for environmental exploration and kill attempts. Environmentally, to the effect that lore/general investigations can happen in unorthodox places. What if that bottom of the lake houses a sunken treasure that can be uncovered to learn more about the map's past? Kill attempts, the effect that the Proposal Wizard can easily camp out somewhere and wait for the correct moment to strike. What if the bottom of the lake is a perfect spot to await somebody passing along the lake's surface, thus leading to a sick underwater kill attempt? Despite its simplicity, it's a pretty potent ability.
But then there's the proposals. Good lord, the proposals. Here's the thing: any player having the ability to fundamentally change the nature of the entire game, once per day phase, is the kind of absurdist scenario that can only occur in a game as inherently "shitpost"-y as Randomizer. The possibilities for this power are almost literally endless. It's entirely player dependent on which angle to approach this from, as well. There are macro decisions and micro decisions to be made, and either one is just as valid and potent.
Let's look through the list of proposals FWD passed to see examples of the areas of coverage they had.
- Day 1: At the start of each night, each player has a new, randomly selected ability added to their role. This is a proposal that impacted the entire structure of the game, and every player within it. Suddenly, our simplistic three-part roles from the beginning of the game were no more. By the end of the game, everyone had an additional five role aspects to their name, each one randomly selected from both positive and negative trait pools. Was it also a bit headache-inducing from a host perspective to manage several players with eight random role attributes by the end of the game? No comment.
- Day 2: The EEE OOO Room will be replaced by another randomly generated room. This is a proposal that impacted the game writing for the betterment of everyone, including the host. Required context: the EEE OOO Room was a randomly-pulled room that caused nothing but timelining headaches for every single player alive to witness it, and the host that had to coordinate timelines correctly. This proposal passing was nothing but a blessing, for everyone participating.
- Day 3: My bedroom moves to my office, replacing Satoru's old room. This is a proposal that impacted literally just Wexlyn. This was passed almost certainly because of its relative insignificance and everyone's appreciation of Wexlyn.
- Day 4: On the next night, no role powers will be able to be used offensively, only in self defense. Attempting to kill or incapacitate someone with a role power in any way besides self-defense will result in the immediate death of the user as well. This is a proposal that impacted the entire playerbase specifically moving into the following Endgame. Essentially, it ensured that an escape ending was the only way through the finale, unless someone was willing to attempt an entirely role-less kill run.
As you can see, a variety of effects emerged from the Proposal Wizard: two that impacted everyone for the entire remainder of the game; one that only impacted Wexlyn directly; one that only impacted the events of the Endgame phase. These are far from the only things that could've happened, though. The sky's the limit, is what I'm trying to illustrate.
Environmental Functionality
Not so much to report in this category. In terms of environmental interaction, little of the Proposal Wizard's kit requires specific map design to thrive. If you're aware that there's going to be a "can breathe anywhere" role and want to stick some lore somewhere otherwise inaccessible, that can be something to keep in mind. Otherwise, this role works in isolation, regardless of the map you design for it.
Drawbacks & Balances
Regarding balancing factors for the role, there isn't so much baked into the role text itself that acts as a limiter. It is true that the Proposal Wizard needs to do the random act of kindness once per night, but that's hardly a challenge to integrate into a night submission. For the proposals themselves, there is the host's veto, which means that the Proposal Wizard can't do literally anything they want.
However, there is one implicit balancing aspect of the role that I think makes it the most interesting it can be. These proposals are democratic, meaning that whatever the Proposal Wizard puts forward needs to be appealing enough for other players to agree to it. This creates a fascinating game of psychology: how do you ensure that what you're proposing can benefit you and potentially your allies, while also coming across as worthy enough for everyone else to vote yes on it? When considering the playerbase as a whole, this role requires an exact hand to utilize correctly. The Proposal Wizard has to propose the right ideas at the right time to get them passed. FWD performed this exceptionally over the course of ARKG.
Player Responsibility
The player's responsibility with this role is primarily what I said above: determining what the best way to impact the game would be, and then determining how to persuade everyone else into voting yes on it. I would argue that a mind more familiar with the KG format and its workings would be better suited for this role. Giving this power to someone who's never played KG before might result in weaker applications overall, or more instances of denial from the host. Beyond this critical consideration, there isn't so much the Proposal Wizard needs to keep track of, beyond their pseudo-Forbidden Action.
Host Responsibility
The host's responsibility for the Proposal Wizard is simple: make sure it doesn't get too stupidly busted. The host has the right to veto any proposal the player puts forward, so it's on their shoulders to ensure that whatever gets proposed won't royally mess up the rest of the game to follow. Like with the player who receives it, hosting this role is likely best suited for a host with familiarity in KG. Otherwise, it might be too easy to let a proposal pass that would result in disastrous results overall. If the host is willing to permit some fuckery in their format and relinquish some game design power to their playerbase, this role can work out for the better.
Overall Thoughts
If it wasn't apparent before, I love the Proposal Wizard. I think its engagement with the game format as a whole is remarkably inventive and fresh, and the power of the proposals cannot be understated. But within this consideration, a question emerges: should a host ever put a role like this into their game? Is it worthwhile to have a role so potent that it can completely demolish any plans you had for your game? Can it ever work in a format that isn't inherently random and jokey? My answer is: I have no idea! I can't in earnest ever advise anyone to add a spiritual successor to the Proposal Wizard to their KG... but I would be interested to see it in practice. Consider my stance like dangling a sweet treat over a cliff. If anyone wants to plunge for it, I'm excited to see the fall.
That’s all for this month. Tune in next month for more Killing Game goodness!
Pitohui's Pokémon Academy
Written by: Hooded Pitohui (talk)
It seems warm weather is on the verge of sweeping in, hm? Perhaps a few among you tend gardens in the spring, and are preparing even now to sow seeds and nurture your crop. If so, I suspect you may share my appreciation for rain. If only there were some mechanism by which precipitation could be guaranteed, how much easier that would make the work of a gardener! We are not the first to consider such a mechanism. For centuries, the Pokémon Bronzong has been revered as a bringer of rains, so in honor of our antecedents, we shall make Bronzong the object of our attention for this month's class.
Before we get underway, though, for those of you just joining us, you can find our course policies and aims in the first box below and a refresher on frequently-used terms in the second box. By all means, skip them if you're already familiar with what we do here!
First, a Smogon University course, this course is not. No, this academy's lessons are designed to get trainers of any stripe thinking about how they can raise their Pokémon, and, as a result, aren't designed to keep up with the widely-accepted metagame for the series. In some cases, the way I've raised my Pokémon may even flies in the face of conventional wisdom. If you're looking for top-tier strategies, do check out Smogon, but if you merely want to get a little deeper into raising Pokémon while still doing things your own way, feel free to use this section as a reference.
Since we all know the importance of citing our sources, I also need to credit the design of some of the tables used in these lectures to Crocodile Dippy, author of the Pocket Handbook which can be found in early editions of Strategy Wing. Additionally, I'd like to give nod to the Bulbagarden Archives, the source of many images in this section.Base Stats: Base stats are the values associated with a particular Pokémon species, and are the same across every individual Pokémon of a given species. You have no influence on them. You can think of them as traits tied to a species. A chimp isn't ever going to be able to get as good as digging as a mole will be, and, likewise, an Abra is never going to have the defensive prowess a Shuckle has.
Individual Values (IVs): Individual values, as their name implies, are associated with individual Pokémon. They range from 0 to 31 in each stat, with 31 being considered a "perfect" IV and higher numbers corresponding to different stats. Magikarp A and Magikarp B will have the same base stats, but they may very well have different IVs. To stick with the animal analogy, one mole may be born with larger claws than another mole, and that first mole is probably going to have an easier time digging through dirt than the latter. Individual values are set in stone, strictly speaking, but you can use Hyper Training (from Generation VII onwards) to functionally get a perfect IV in a stat.
Effort Values (EVs): Effort values are the one thing you can easily change. A Pokémon can earn, primarily through battling, but also through means like the use of certain items or mechanics like Super Training, up to a total of 510 effort values, with up to 252 in any given stat. To finish off the animal analogy, no matter what kind of claws a mole is born with, moles who have more experience digging are probably going to be better at digging than moles which have never dug.
Nature: A Pokémon's nature is, more or a less, a stat modifier with a name meant to make it sound like a Pokémon has some personality. Natures will raise one stat by ten percent and lower another stat by ten percent. Some natures raise and lower the same stat, canceling out the effect and leaving stats unchanged. Natures can be functionally changed with the use of special mint items from Generation VIII onwards.
STAB: STAB stands for Same-Type Attack Bonus, and refers to the boosted power of moves that match the type of the move's user. To illustrate this, consider the case of a Lombre, a dual-type Pokémon which is both a Water-type and a Grass-type. Any Water-type moves Lombre uses will have their power boosted by 1.5x, and any Grass-type moves Lombre uses will, likewise, have their power boosted by 1.5x. (There are circumstances where this does not apply, and, while the 1.5x multiplier is typical, some games use other multipliers.)
Beginning as always with a treatment of Bronzong's base stats, we discover immediately that Bronzong is built defensively. While its offensive stats are not poor, its defense and special defense beat them out by a considerable margin. Interestingly, Bronzong has equal defense and special defense, a boon for our purposes of building a sturdy Pokémon. Unfortunately though, its HP is lacking, so we will need to invest in it to bolster it. Of Bronzong's offensive stats, its attack is slightly higher than its special attack, so we'll throw out the notion of using any special moves. Finally, its speed is... quite low, which suggests that we should consider putting Bronzong in a Trick Room environment. Fortunately, it can learn Trick Room itself.
Taking all of this into account, a picture emerges of a slow Pokémon operating in Trick Room, with strong defenses but few healing options or ways to stall out an opponent, and lacking the offenses to fight on its own. So let's mitigate that by pairing Bronzong with a partner. The exact partner is outside the scope of today's discussion, although a Pokémon with an answer to foes likely to carry Dark-type moves is worth considering. For this session, however, we'll simply leave it at knowing we're going to pair Bronzong with a slow but offensively-oriented partner in a Double Battle, and that it will lead off the team so it can set up Trick Room early.
With our plan established, we can focus entirely on Bronzong's defensive stats, shoring up its HP with maximal EV investment. For the rest of its EVs, we'll split them among defense and special defense, investing more (somewhere around the 160-200 range, higher than lower) into physical defense for reasons we will address when we discuss moves. As for a Nature, since we're using Trick Room, we want a speed-lowering Nature (and speed should be as close to a zero IV as we can reasonably get). Since we aren't investing as many EVs into special defense, we'll choose Sassy to shore it up.

|
Name: | Bronzong | Base HP: | 67 | |
| Category: | Bronze Bell | Base Attack: | 89 | ||
| Type: | Steel | Psychic | Base Defense: | 116 | |
| Abilities: | Levitate | Base Special Attack: | 79 | ||
| Heatproof | Base Special Defense: | 116 | |||
| Heavy Metal | Base Speed: | 33 | |||
Bronzong has three possible abilities, one of which we can immediately eliminate. Heavy Metal only serves to double Bronzong's weight, which benefits it only if it is using the move Heavy Slam. While Heavy Slam can be powerful in the right circumstances, it partially depends on the Pokémon used by the opponent and a boosted Heavy Slam simply isn't as useful as the benefits from Bronzong's other abilities.
Moving on then, Bronzong has a choice between Heatproof, which reduces the damage taken by Fire-type attacks by 50%, and Levitate, which makes Bronzong immune to Ground-type moves. Back before Generation VI removed Steel's resistances to Dark and Ghost, this made using supereffective moves against Bronzong a bit of a gamble. Its only weaknesses were Fire and Ground, and depending on its ability, one of those types would be less effective or completely ineffective. That bit of reminiscing aside, the clear winner here is Levitate, because immunity is better than mere resistance. Plus, Ground is a common offensive type, so immunity to it is a great boon. As such, we'll raise Bronzong with Levitate.
Moving on to a moveset, we've already established that Bronzong will run Trick Room, so we'll slot it in immediately. Since it will be leading the team into battle and has the defenses to spare a turn setting up a hazard, we'll also give it Stealth Rock so that the opponent will need to be more cautious in switching out from the top of the battle.
While defenses are our focus, it's wise to equip Bronzong with a STAB move just in case the opportunity to assist its partner by playing a more offensive role arises. When it comes to Psychic-type moves, Bronzong has only one physical option, and that is Zen Headbutt. With a base power of 80 and a 10% chance of causing the opponent to flinch, Zen Headbutt isn't too bad, especially on a Trick Room Bronzong which can take advantage of that flinch chance, but it also has an accuracy of 90%. That's a considerable drop for no real increase in power, so let's look at Steel-type moves instead.
We've already eliminated Heavy Slam for being dependent on the opponent to some extent, and we can likewise eliminate Hard Press because its power varies with the opponent's HP. That's too inconsistent for our purposes. That leaves Gyro Ball, which also depends on the opponent to some degree but is much more consistent than Heavy Slam because Bronzong is so slow, and Iron Head. Looking at Iron Head, it has 80 base power and a 30% chance to cause the opponent to flinch... with an accuracy of 100%. ...well, that's just Zen Headbutt but better! Needless to say, Iron Head is our STAB move of choice here. You could potentially use Gyro Ball as an alternative, and it may be more powerful in some cases, but the flinch chance and consistency of Iron Head more than balance that out.
| Iron Head | 
|
The user slams the target with its steel-hard head. This may also make the target flinch. |
| Body Press | 
|
The user attacks by slamming its body into the target. The higher the user's Defense stat, the greater the damage this move deals. |
| Stealth Rock | The user lays a trap of levitating stones around the opposing team. The trap damages opposing Pokémon that switch into battle. | |
| Trick Room | The user creates a bizarre area in which slower Pokémon get to move first for five turns. |
For a final move, we could consider Zen Headbutt, but I don't consider a second STAB move to be that beneficial to Bronzong in its role as a partnered team lead. If it can effectively wield a common offensive type to free up a moveslot so its partner can have greater coverage, though, that would be useful. Earthquake is a possibility to consider here since it'll hit both opponents on the other side of the field, but it will require a Flying-type or a Pokémon with Levitate or Earth Eater or some similar ability as Bronzong's partner. Additionally, since Bronzong already has Levitate, I would think Earthquake would work better on its partner.
Fighting is another common offensive type, though, and Bronzong has access to the Fighting-type move Body Press, which runs off the defense of the user rather than the attack of the user. With its high base defense and our EV investment into defense (this is why we invested more into it than special defense), this suits Bronzong quite well. Of course, if you'd rather keep Bronzong focused on a more defensive role, it could set up a Reflect or Light Screen to bolster the team's defense or special defense, instead.
There may be other options you could explore for a fourth slot, but that should get you started with one offensive option and defensive alternatives. With that, we arrive at the end of our session. I shall spare you any demanding assignments this time. All I ask is that you do some light reading on bronze bells for your own enjoyment. Who knows, perhaps even a niche subject will contain something which excites you! For now, class is dismissed, so go off and dream of a rainy day.
So You Want to Romance the Three Kingdoms?
Hello and welcome to a brand-new Strategy Wing section by resident random obscure game guy, me, Shoey! This section, So You Want to Romance the Three Kingdoms?, is, sadly, not about an obscure romance game about making out with princes and princesses. Instead, it is about the classic SNES Koei strategy game Romance of the Three Kingdoms IV: Wall of Fire.
For those of you who remember my old series So You Want to Conquer Japan?, that one was about Nobunaga's Ambition, a strategy game that is similar to the Romance of the Three Kingdoms series. While that one took place during Nobunaga's failed attempts to unify Japan, the Romance of the Three Kingdoms series takes place during the Three Kingdoms period of Chinese history, where the states of Cao Wei, Shu Han, and Eastern Wu vied to unify China under their domination. Although, funnily enough, none of those states would actually unify China! Instead, it was the Jin Dynasty led by Sima Yan, who, after overthrowing the already-basically-overthrown Cao family, unified China under his own dynasty! But don't worry, he gets his when his lunkhead son became emperor and everything went tits up! But that's a story for another day and I don't think there's going to be a video game about that part of China!
Now, technically most of the scenarios in this game actually take place before the three kingdoms solidified and when there were a lot more people involved. But enough about Chinese history (for now). Romance of the Three Kingdoms is a strategy game a lot like Nobunaga's Ambition, except this one is way more complicated! So we're going to spend the first couple months of this section just going over some of the important basics of this game. This month, we're going to focus entirely on breaking down the pros and cons of the various cities we can control!
Picking the Right City to Start Your Campaign
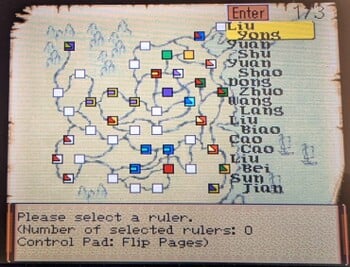
The game has six different scenarios we can play, each one taking place at different periods of the Romance of the Three Kingdoms. Spoiler alert: most of these scenarios are just Cao Cao and his family kicking ass and taking cities! But we're going to be playing scenario 1, Dong Zhou Triumphs in Luoyang, because this one has the most rulers and the most even distribution of conquered cities (i.e., nobody has a huge advantage like in scenario 6's Clash of Wei, Wu, and Shu, where Emperor Cao Rui emperor of Cao Wei controls like 2/3rds of the map). In scenario 1, the greatest number of cities any one ruler controls is three and there are eighteen different rulers.
This scenario starts in December of 189. Dong Zhou following the death of Emperor Ling and at the request of He Jin, had ridden into China's capital Luoyang and had just slaughtered the treacherous eunuchs. Shortly after that, he deposed and killed that little wiener Liu Bian (also known as Emperor Shao literally young emperor) and placed Shao's younger brother, Emperor Xian of Han, onto the throne as a puppet.
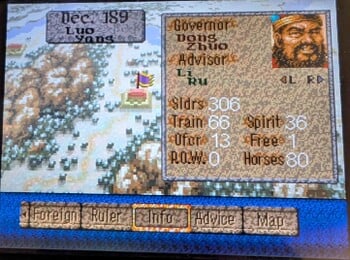
So, with a little background out of the way, it's time to pick our city to rule. And this is important, because I want to make it clear the cities are not balanced like they were in Nobunaga's Ambition, where the starting troop differences were somewhat slight and could be overcome with a quick draft. No, in this game, some rulers are in significantly better positions than others! For example, in this game, much like in real life, Dong Zhou is in easily the strongest position of all the rulers. Not only does Dong Zhou control three cities with twenty-three officers and a starting army of over 500,000 soldiers split between those cities, but one of those cities is the capital, Luoyang, which has by far the most people of any city which in turn means that Dong Zhou can hold the biggest drafts and build his army the quickest.
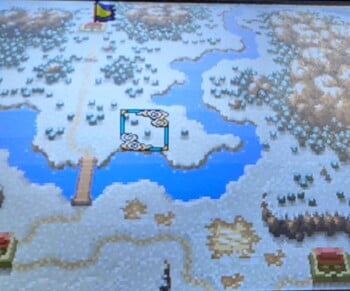
I'd say Dong Zhou in scenario 1 is the easy mode. Not only does he have the best army and the best city, but if you look at the map, you can see he (purple and yellow squares) only has two neighbors that are actually occupied cities with the rest being unoccupied cities. That's important because it means there's very few people who can immediately threaten his territory! So you'd think it would be a no-brainer to play as Dong Zhou, right? Well, here's the thing. I don't boil people in oil, don't have soldiers sever limbs from captured opponents at parties, and I have a very strict "no emperor killing" policy, so Dong Zhou is out. Plus it's not like having control of Emperor Xian does anything in this game, in fact I'm pretty sure the Emperor isn't in this game at all! That's how of little importance the Emperor was during this time period! Also, in reality I just don't want that big of an advantage because it makes the game no effort.
With that said, somebody like Liu Yan of Cheng Du (white and red squares) is also out even though he has control of three cities and all his neighbors are unoccupied cities. He'd be perfect for a beginner playthrough and if you were just going to play this as a casual thing, I'd recommend him or Dong Zhou. But this ain't casual baby! This is Strategy Wing, so we're going to look elsewhere!
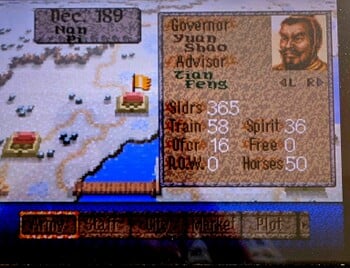
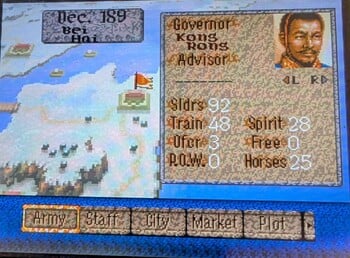
So, let's talk about the two best single-city rulers, Yuan Shao of Nan Pi (orange square) and Cao Cao of Chen Liu (purple square). If you're going to go with a single-city ruler, these two are the best choices. Yuan Shao, legendary badass general he is, starts with 365,000 soldiers and 15 officers. Not only that, but he also has weak neighbors like Gongsun Zan of Bei Ping (blue and red), who starts with only three officers and 120,000 soldiers; Liu Bei of Ping Yang (green square), who only has 100,000 soldiers and four officers; and finally Kong Rong of Bei Hai, who starts with 92,000 soldiers and only two officers!
That means that Yuan Shao can pretty much immediately create an empire without sacrificing much, and that's important because the more territory you control, the more soldiers you can get, the more money and rice you get via harvest and taxes, and the more officers you'll have control of. So that's it, right? We should go with Yuan Shao. I mean, how could we not with all these pluses? Well, here's the thing. In 195, Yuan Shao had the opportunity to take in Emperor Xian, thus putting what was left of imperial authority under in his control, but he stupidly passed on the chance because he felt if he took the emperor in he'd have to listen to the emperor on key issues. What a moron! And I just can't support that level of lunkhead, so he's out!
That leaves Cao Cao, who is a little worse than Yuan Shao at this point, starting with 220,000 soldiers and ten officers. Cao Cao makes up for it by having better stats than most officers and he starts with some pretty badass generals, including the one-eyed super general Xiahou Dun. Cao Cao to me is that medium-difficulty ruler in this scenario. He starts off strong, but he's not so strong that he allows you to braindead play the game. But unfortunately, in 209 Cao Cao would suffer a humiliating defeat at the Battle of the Red Cliffs when Huang Gai faked surrender and used fire ships to burn Cao Cao's fleet, and I just can't be associated with that level of incompetency!
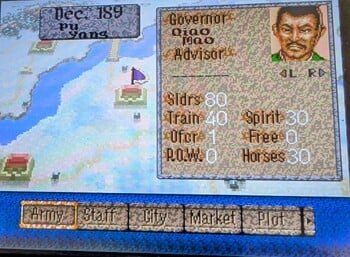
Now let's talk about the rulers you don't want to be! There are six rulers that I think really put you in a bad spot! The first is Han Fu of Ye (red and yellow square), because not only does he border that madman Dong Zhou, but he also borders Cao Cao! That means you're bordering two of the stronger rulers in the game! And he only starts with 114,000 soldiers and three officers and, if you look at their stats, none of them have above 80 power, meaning they aren't going to be very good at leading troops anyways! Next up, avoid Kong Zhou of Qiao (blue and light blue square) and Qiao Mao of Pu Yang (purple and gold square). These might be the worst cities in the entire game, only starting with one officer and 100,000 troops from Kong Zhou and 80,000 troops for Qiao Mao. That means you're going to be basically doing nothing unless you get lucky with recruiting on visiting officers.
Let me explain why that's so bad. Every officer can do one move a turn (as long as it's something that officer can do stat-wise) so having only one officer means that, like, if you decide to train the troops, you won't be able to recruit any officers that visit your city because you'll be too busy training soldiers. It also means that, in war, you will only be able to make one singular unit of 100,000 soldiers instead of dividing your army into different parts. Stay away from Kong Zhou and Qiao Mao!
Finally, you're going to be in a bad spot if you decide to play as Liu Bei, Kong Rong, or Gongsun Zan, because they border Yuan Shao who, as we said, has 360,000 troops to start with and he's not afraid to use them! That means there's a really good chance that, before you even get the chance to start playing the game, Yuan Shao will invade and he's going to use his superior numbers and better officers to crush you! So yeah, stay away from those cities that border Yuan Shao unless you really want a tougher experience.
So with all that said, what is the best city if you want much of a challenge? Well, looking at the map, Yuan Shu of Wan presents an interesting challenge. On one hand, much like Han Fu, his territory borders Dong Zhou's, but the good news is he only borders Dong Zhou and not Cao Cao. Plus, Yuan Shu starts with five officers and 249,000 soldiers, so you're in a healthy spot with enough numbers you can ward off invasions from Dong Zhou while you build, but you're not in a such a good spot that you can conquer territory immediately.
In a similar vein, we've got Sun Jian of Chang Sha (solid red) who is in an interesting spot. Sun Jian is connected to two unoccupied cities, which is great! But he's also connected to the Liu Biao empire, which is bad because joint attacks exist in this game. If one of the cities invades you, the other one can provide support. Sun Jian starts with a very solid 147,000 soldiers and nine officers, and not only that, but the city of Chang Sha has over 300,000 citizens, which means that you can draft 55,000 soldiers every draft. So despite the threat of joint attacks, you can instantly gather the numbers of raw troops that will prevent invasions. Also, Sun Jian has one final trick up his sleeve. In January 190 (the second month of the scenario), his son, the legendary general Sun Ce, comes of age, instantly giving you one of the most powerful generals in the game! Sun Ce, my beloved!
Next up, we've got Wang Lang (purple and yellow) of Hui Ti, who I think is interesting because he's at the very bottom of the map with only one neighbor. He only starts with three officers and 78,000 troops but because of his isolation, there's only one real threat, so it's pretty easy to build up a stable army.
His direct and only neighbor Yan Baibu of Wu (green and yellow square), I'm not as big of a fan of. While he has more soldiers than Wang Lang (85,000), he only has two officers and he has another neighbor, Liu Yong, who controls two territories. But this isn't as big a deal as it sounds, because neither territory has a lot of soldiers to start with. So, have a single draft and you'll be able to ward off an aggression.
Finally, we have Ma Teng of Xi Liang (yellow inside purple square) all the way at the top left of the map. Now this might one of the most interesting cities. Not only does Ma Teng start with 180,000 troops and four officers, but isolated in the mountains he has plenty of unoccupied cities that can provide a buffer between him and his closest neighbors Dong Zhou and Liu Yan, since in order for either to encroach on his territory they have to divide their army and officers to take the unoccupied cities. Not only that, but, Ma Teng has the ability to quickly expand his domain! Since to his south is an unoccupied city with that isn't directly connected to either Dong Zhou or Liu Yan's territories. So with no opposition between him and the first unoccupied city, you can quickly conquer that city and set up shop there. Then you can use Xi Liang to bolster your forces in your new city! Ma Teng probably has the most interesting location set up in this scenario!
With all this information, it's time to answer the question "who the fuck are we playing as???" Well, remember how I said we shouldn't pick a city next to Yuan Shao? Here's the thing… We're picking somebody next to Yuan Shao, for the man who I will make the next ruler of China is Kong Rong of Bei Hai. Now, in his time, Kong Rong was a minor official of the Han Dynasty who got himself and his family executed because he would not quit being an asshole to Cao Cao. Now, you'd think that would violate my "no lunkhead" policy.
But here's the thing! While, yes, Kong Rong was a lunkhead and, yes, Kong Rong does have a terrible city with a number of disadvantages, you people aren't considering how funny I think the name Kong Rong is! So with our ruler picked, join me next month as we start looking at more mechanics of Romance of the Three Kingdoms IV: Wall of Fire!
An Octet Gazette
Written by: Museful Traveler (talk)
Welcome back to An Octet Gazette, readers of The 'Shroom! It's time for the final job-focused edition of this section, so let's get right into it with no further ado.
Runes Imbued With Elemental Powers
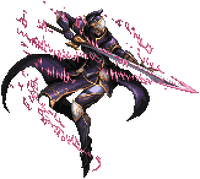
Coming up first, we have the Runelord job, bringing with it swords and axes.
The Runelord job is perhaps the most purpose-built job in the first title. Offering balanced stat increases across the board, its strength doesn't lie in leaning in one direction or another like the other secret jobs. No, rather, the Runelord job offers a unique mechanic through which it can imbue weapons-based attacks with elemental magic, creating attacks which hit once with a weapon and again with an element. This can be a boon for whittling down an enemy's shield points, as even a basic unboosted attack can whittle down two points at a time. So built around this sole purpose is the class that six of its eight skills are devoted to applying runes, and its seventh also interfaces with the rune system. It's unique even among the secret jobs, and a favorite of many players - but we'll discuss that shortly.
Those who seek mastery over magical runes must venture to West Everhold Pass, find the Shrine of the Runeblade, and defeat Balogar to receive his knowledge. Once obtained, the job offers the following skills in exchange for the usual JP costs.
I'm not going to cover the six elemental rune skills in any detail because that would be fairly pointless. They do exactly what it says above, adding an elemental follow-up attack to any weapon-based skill used by the caster. However, take special note of that last bit. The elemental runes only apply to the caster. This has two ramifications, one being that the Runelord is less effective on physically-focused travelers, and two being that the job needs a special means to spread its runes around the party.
Enter Transfer Rune, a skill which causes self-targeting skills to apply to the rest of the party. This is primarily designed for the elemental runes, with the idea being that a Runelord first casts Transfer Rune, and then casts one of the elemental runes to apply that elemental effect to everyone else. It's an interesting mechanic, if a simple one. The downsides are that it takes two actions to set up runes and that the total SP cost comes out to 40 for a single rune.
There is, however, an upshot. Because of this system, Transfer Rune can spread non-rune self-targeting skills, allowing for some powerful combinations. Transfer Rune plus the Merchant job's Sidestep is perhaps the canonical example of an Octopath combination, rendering 3/4th of the party able to completely avoid a physical attack. Transfer Rune opens up a fair number of combinations for the Runelord job, making this apparently purpose-built job fairly versatile.
Finally, the job offers the elemental equivalent of Winnehild's Battle Cry, although it only targets a single foe.
That's the Runelord job, built for one purpose but with an approach which opens up some of the most powerful combinations in the game. The Runelord job has a rough equivalent in the second game, but just how did they take a job built around a singular role and change it up?
Conjuring Up A Broader Role
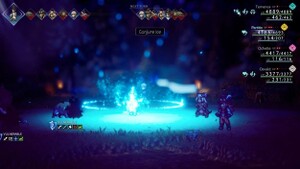
Octopath II answers the first game's Runelord with the Conjurer job. The stat increases offered by the Conjurer job hew closer to the Starseer, but as we'll see from its skills, the role it plays makes it more like the Runelord.
To actually obtain this job, however, one must complete a sidequest which opens up after completing the final chapter of Hikari's story. The sidequest is a straightforward one, tasking the party with winning five battles across the five floors of the Tower of Trials, with the final fight being a boss battle against the Priestess Hinoekagura. It's the secret job obtained the most similarly to the first game, in the aspect of being won by defeating a tucked-away boss in the lategame.
Once the job is obtained, the following skills are available, locked behind only the usual JP requirements:
Right off the bat, this job brings back the runes of the Runelord, but there are a few key differences. Not only has the number of runes been reduced, with light and darkness dropped, but Transfer Rune has been eliminated, simplifying the process of applying these runes to the rest of the party. Perhaps because of this, the unboosted duration of each rune's effects have been decreased and the SP cost of the runes has increased, but when the combined cost of the runes and Transfer Rune are taken into account, the cost has actually been halved.
The loss of Transfer Rune does come with the disadvantage of disallowing the kinds of combinations Runelord had access to (though there are so many combinations and synergies in the game it's hardly a loss), but on the flipside, the job can be more easily wielded by any traveler since their own elemental attack never factors into the power of the runes.
With three rune-based abilities eliminated and less of a focus on mastery of all the elements, how did the Conjurer fill its remaining four skill slots? Well, seemingly by trying to creep into a secondary role as a specialized healer. Oddly enough, it takes its divine skill, BP Boost, right from the Starseer job, and Prayer for Rain is the SP equivalent of the Starseer's Ethereal Healing. Dance of Immunity does parallel the kind of buffs offered by the Starseer, but it's doing something unique in protecting from status conditions rather than debuffs.
Then there is a wholly original and fairly interesting skill in the form of Rite of the Sun, a hail Mary play of sorts that can refresh the entire party at the expense of rendering the user useless for a number of turns. It's neat, though I can't say I ever encountered a situation where I would call it useful.
Overall, the job tried to diversify itself compared to the Runelord, incorporating some aspects of the Starseer job and a couple ideas of its own to become this odd dual-use runse-setter and niche healer. I don't think it works as well as Runelord, though. Runelord's heavy focus on one role was to its advantage, allowing it to properly specialize, whereas this job gets the most mileage out of its runes and the healing elements feel... tacked on. If Runelord had been completely restricted to one role, Conjurer may have been an upgrade (or at least comparably more interesting), but Transfer Rune gave it plenty of versatility already, versatility which Conjurer tries to make up for in other ways while not quite hitting the mark.
All in all, while the Conjurer job has its uses, it seems like a downgrade from Runelord, simpler but more restricted and more uncertain of its own purpose.
Support Skills
| Name | Effect |
|---|---|
| Stat Swap | The base physical and elemental attack of the equipping traveler are swapped |
| Sp Recovery | Recover 1% of damage received as SP |
| Dauntless | Negative status conditions afflicting the equipping traveler will provide physical and elemental attack buffs |
| Elemental Edge | Gain a buff to elemental attack and elemental defense |
Now, for the last time, let's look at the Support Skills of these two jobs. Runelord's set... all make some degree of sense, honestly. While not the most useful since the Runelord's main role is augmenting the rest of the party with runes, Stat Swap allowing a traveler to tap into either physical or elemental attack works well for a job that, well, combines physical weapon strikes with elemental follow-up attacks. SP Recovery is a solid ability (if one with a low regeneration rate) considering the Runelord will always be burning through SP to set up and transfer runes.
Dauntless and Elemental Edge both function to ensure that the additional elemental strikes offered by the runes will be maximally powerful. Dauntless isn't that useful, though. Considering a traveler afflicted by Sleep or Unconsciousness can't act, a traveler afflicted by blindness is likely to miss an attack, and a traveler afflicted by Confusion will attack their allies, it's at best useless and at worst harmful to the party in most conditions. Only Poison, Silence, and Terror cause its effect to benefit the equipping traveler.
| Name | Effect |
|---|---|
| Purification | Halves the time which stat debuffs persist on the equipping traveler |
| SP Saver | Halves the SP cost for the equipping traveler's skills |
| Divine Wrath | Afflict a status condition, stats debuff, or elemental damage to a foe who knocks out the equipping traveler |
| BP Regeneration | Gain a 25% chance to recover spent BP |
The Conjurer's Support Skills, on the other hand... mostly don't mesh with the job specifically as far as I can tell? I suppose one could make an argument that Purification and BP Regeneration mesh with the healing emphasis, but even that seems a stretch. Nonetheless, most of these are useful in the general sense. SP Saver is one of the best Support Skills out there, allowing a magic user to go much further in battle without needing their SP topped off, and BP Regeneration, while luck-based, could result in a nice occasional bonus.
Purification could be useful, I suppose, but if a stats debuff is a problem, there are so many other ways to dispel it that it feels more efficient to simply get rid of it than to wait out even a halved duration. Divine Wrath... yeah, that one is just too based in random chance, and it's not that wise to let a traveler get KO'd if it can be helped.
With that said, we have covered every job available in the mainline Octopath duology. Next month, we start a whirlwind tour of the travelers themselves that'll cover the Path Actions, Latent Powers, and unique abilities of each traveler pair in the two games. See you then!
| The 'Shroom: Issue 216 | |
|---|---|
| Staff sections | Staff Notes • The 'Shroom Spotlight • Poochy's Picks • Poll Chairperson Address • Credits |
| Features | Fake News • Fun Stuff • Palette Swap • Pipe Plaza • Critic Corner • Strategy Wing |


