The 'Shroom:Issue 215/Strategy Wing
Director's Notes
Written by: Hooded Pitohui (talk)
Can you feel it, readers of The 'Shroom? It hangs in the air all around us this month and grows most pungent right around this time... That's right, it's the scent of looming post-Valentine's candy sales! Get your wallets open and scoop up whatever treats you desire!
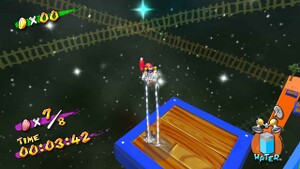
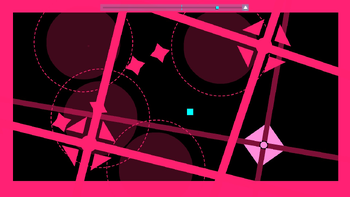
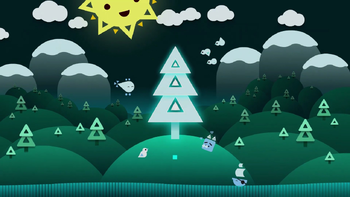
Speaking of treats, let's turn our attention to this month's edition of Strategy Wing. First up, Sparks' (talk) guide to Just Shapes & Beats wraps up this month, bringing to an end our Sub-Director's quest to gather the Tree Triangles. What final challenges will this game hold? You'll need to read on to find out, although I would wager that they'll involve shapes. I know this will be a shocker, but I might even guess they'll involve some beats, too.
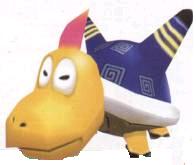
In other news, we also have a one-off section this month covering how the shapes used in the design of Mario enemies influence the behaviors of players. Consider Why Are You So Shaped? my invitation to those of you sitting on the fence when it comes to joining the Strategy Wing team! Once you read it, I'll leave it to one of you to take its premise and continue the section. We'll be eagerly awaiting your application, so don't hesitate in telling me why you think Galoombas are rounder than Goombas, or what's up with the prominently-domed backs of Galaxy's Mechakoopas.
Aside from that, we have our full slate of regular sections for your reading pleasure! Go forth and enjoy!
Section of the Month
It truly is the year of the snake, judging by last month's look at Arbok putting Pokémon Academy in first place! Thank you very much for all the support. Thanks go out to Waluigi Time (talk) for suggesting a well-received Four Steps looking at the secret level within the "Secret of the Dirty Lake", as well. I'd also like to give congratulations to Roserade (talk) for taking a joint third with a debut section reflecting on the Ultimate Neocowboy role. I appreciate all of you readers showing support for our writers both new and old! Keep it up!
| STRATEGY WING SECTION OF THE MONTH | ||||
|---|---|---|---|---|
| Place | Section | Votes | % | Writer |
| 1st | Pitohui's Pokémon Academy | 9 | 45.00% | Hooded Pitohui (talk) |
| 2nd | Four Steps for a 3D World | 5 | 25.00% | Hooded Pitohui (talk) |
| 3rd | Killing the Killing Game Roles | 3 | 15.00% | Roserade (talk) |
| 3rd | Just Shapes & Beats: The Groovy Guide | 3 | 15.00% | Sparks (talk) |
Four Steps for a 3D World
Written by: Hooded Pitohui (talk)
Hello, all you readers of The 'Shroom, and welcome to an experimental edition of Four Steps for a 3D World. As you may have noticed, I have ditched the usual intro for this month, and that's because we won't be referring back to our usual four steps this month (worry not - they shall return!). While covering the secret level in "The Secret of the Dirty Lake" last month, I started thinking about covering Red Coin missions in this section. With Super Mario 64 stages and Sunshine overworld stages, I thought I could analyze whether or not coin placement creates challenge and incentivizes exploration, and within Sunshine secret levels, I figured I could see whether or not the Red Coins built upon the lessons and mechanics introduced in the original version of the level.
Since we had tackled a secret level last month, it only felt right to finish it out by looking at its Red Coins, so let's return to the Cliff Spring Cave and pound the Red Switch Plate!
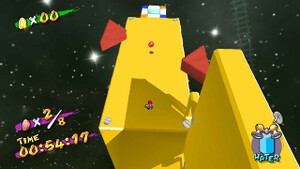
The level's first Red Coin starts off with a decent showing. While not in the most exciting place it could have been, putting in in the middle of these flipping platforms works well enough. In the original version of this level, after all, players were focused entirely on getting to solid ground, only jumping back and forth between panels in service of that goal. Asking players to quickly and actively target something floating in the midst of these platforms, then, is a decent-if-underwhelming way of building on built-up familiarity with these flipping platforms that suffices for the first coin of the level.
The decent start comes to a screeching halt, however, with the second coin, which is just... given to players? It's just sitting there on the spinning star, and grabbing it involves no challenge at all. To rub salt into the wound, there's even a freebie 1-Up Mushroom there from the original mission still given here too.
Personally, I would move this forward a little bit, putting it high up along the upcoming wall, just out of reach of a normal jump. Players could then use the wall jumping skills they learned in the initial version of the level to grab it, employing the Hover Nozzle to help them land back on the rotating cube or to cross the gap, if necessary. It wouldn't be much, but it'd be better than this freely-given coin.
Disappointment follows disappointment as the third coin appears right in the middle of these two sweeping triangles. The easiest path through them in the normal version of the level is also right down the middle, meaning this coin is basically also freely-given, expecting absolutely nothing new from players. Maybe the idea of placing it there is that it keeps players from cheesing the triangles with the Hover Nozzle? I'm not sure it works well, if so.
Admittedly, there isn't much room in this level for rearranging these, but I might make an attempt to improve this coin by putting it directly above one of the triangle spawning points. Would it be utterly trivial to obtain with the Hover Nozzle? Yes, it would, but at least it would be different, and perhaps some players would hop off one of the triangles as it appears.
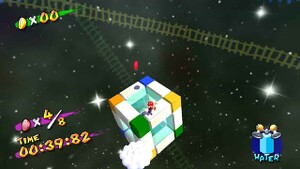
The next two coins are built around the exact same challenge, so we'll cover them together. Both of these coins are floating in the air in the path of the rotating cube elevator, tasking players with standing in the right places on the cube to grab them without slipping off. This is certainly an improvement, actually presenting players with a new challenge that uses knowledge they developed in the regular version of the level. These are (spoilers) probably the best Red Coins in the level, actually.
Now, admittedly, as with the second coin, there is a 1-Up on the ride up that is obtained in the same way as these coins, but I'm willing to forgive it because... these aren't just sitting there. Getting the 1-Up actually felt like it required taking a risk, and thus it almost feels like practice for grabbing these coins. Contrast this to the 1-Up and Red Coin on the spinning star, which have no associated challenge whatsoever.
The only problem here is that both of these coins use the exact same challenge. There are some clouds around the cube's route, and one of these Red Coins could be moved to a cloud for just a smidge more variety.
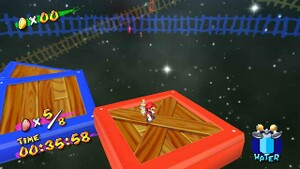
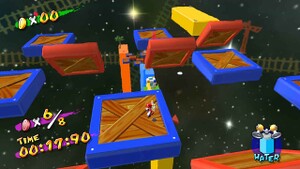
The final three coins are all similar. Not only that, they're also similar to the first coin in the level! On one hand, I understand that the size of this level leaves the developers without many other places to put these, but on the other hand, when half of the Red Coins in the level revolve around the same challenge, the mission starts to feel like filler. To the credit of these coins, coins six and eight (especially six) do try to distinguish themselves by floating at the edge of the field of platforms, making it a little more important that players plan their route to ensure they have a way to hover back to a platform. They're the most challenging coins to nab in this level (not that they have a high bar to clear). Even so, it's a bit disappointing that all three of these coins run together like this and re-use the challenge presented by the level's first coin.
Once all eight coins have been collected, the Shine Sprite spawns... a few steps in front of the original, a fitting capstone to a secret stage which was just too small to host a proper Red Coin challenge that could iterate on its concepts. This is far and away the most disappointing mission we've seen in this section to date. You can tell the developers were struggling to find space for all eight Red Coins, and there simply wasn't enough here for them to give each Red Coin its own challenge. Maybe they could have tucked something on that little safety platform under the first cube? For a timed, linear mission like this, it would be annoying if you missed it and had to double back for it, though, so perhaps it's better they didn't.
If there's any lesson to be had here, it's that you should probably scale the number of collectibles you put in an area to the size of that area! Next time I go hunting for Red Coins, hopefully I won't find so much disappointment...
We'll see what next month holds. For now, with just four unique "challenges" behind the Red Coins in this level, three Red Coins clustered over the flipping platforms at the end of the level, two 1-Up Mushrooms, and one hope for a better level next month, this has been 4 Steps for a 3D World!
Just Shapes & Beats: The Groovy Guide
Played by Sparks on the Nintendo Switch
Welcome back everybody to Just Shapes & Beats: The Groovy Guide! In last month's issue, we obtained two of the three Tree Triangles and fought against a corrupted flower as well as our square friend! Now we must infiltrate the tower and stop the mastermind behind this disaster.
Tower
We're at the base of the tower, and it's locked tight because of three gates. We must play through three songs to obtain triangles to unlock them. Our choices are "Try This", "Vindicate Me" and "Into the Zone". Let's start with "Try This". That's an interesting title!
Try This, by Pegboard Nerds
This song has one checkpoint, making for two sections total.
The stage starts off with a cool James Bond aesthetic, like the scope of gun is locked on to the characters. It moves left and right before expanding out, revealing a factory setting with alarm lights on. There are also these "spotlights" that move around and attack to the music. After a few seconds, the stage starts autoscrolling to the right. This section is a hallway that has spotlights throughout, and at one part the autoscrolling stops and a mechanism appears and fires lasers in four directions before disappearing. We must then maneuver past spotlights and the terrain to reach to a large room containing a crystal. Unfortunately for us, we're not doing a heist, and the crystal disappears into the ground.
The second part is basically a barrage of spotlights, lasers and shuriken. Four spotlights stick around for the rest of the song, and more laser mechanisms appear on the edges of the screen. As for the shuriken, they fly in from the sides. Try to stay around the center area of the stage so you have time to react to everything.
The triangle we obtain here breaks the wall behind one of the levers needed to unlock the gates. Our square friend jumps up and down to cause a broken-off piece of the ceiling to fall on the lever, activating it. That's one down, so two more to go! Up next is "Vindicate Me".
Vindicate Me, by Big Giant Circles
This song has three checkpoints, meaning there are four parts total.
The stage starts off with these pistons magically appearing at the bottom of the screen (without warning too, so if you take damage, it's not your fault), so immediately rush to the top. After some time, a wall of squares covers the ceiling and these pillars "roll" in from the right side. The pistons knock them at the ceiling to the beat, so pay attention here! There's a safe spot at the top right side - if you hide out there, you won't have to move! In other words, you'll be safe, at least for this section.
The second section involves autoscrolling to the right, where these pistons can be found striking in four directions before retracting, rotating and striking again. These form grids of pink that must be avoided. At the end of this part, a big laser divides the screen horizontally, forming pistons in the center and causing pillars on both paths to appear. The screens stops as well. After getting through this, the pistons disappear.
The third part has more autoscrolling, but the obstacles have changed; they are now wheels of pistons! There are tight spaces to fit in, but from observing them at a distance, you'll be able to figure them out. Eventually the screen will stop, the wheels vanish and walls of pistons form. Pillars roll down from the top and slam into the center before disappearing, revealing a two-sided piston that subsequently attacks with the wall pillars. Then, everything vanishes and pistons appear on the floor, launching two pillars into the air. Next, the ceiling becomes pistons as well. Both sides strike and the last section begins.
This final part has more piston wheels, although now the floor and ceiling are both dangerous. Calmly navigate through and survive until the end.
The triangle obtained from this stage destroys another wall protecting a level. This time, however, our helicopter buddy uses the square to activate it. Just one more to go!
Into the Zone, by Shirobon
This song has two checkpoints, so that means there are three sections total.
The first part of the stage has wavy square lines flying in from the right side of the screen. Also, pillars appear along the ground and ceiling, but never both at the same time. Then, pillars slide in from the left and right sides of the screen, and the walls close in while a cool "portal effect" is displayed in the background. Trust me when I say all of this happens very quickly!
Throughout the entirety of the second section, the walls are closer to the center and have an awesome "laser grid" effect. More wavy square lines appear, this time rising and falling vertically while bombs explode at the edges. Afterwards, lasers strike at the center area vertically before the entire sequence repeats. Halfway through, pillars move along the top and bottom while more bombs appear and detonate, so stay really close to the center! There's even a moment where pillars get really close, so watch out!
The final part removes the walls, but now the floor and ceiling are closer to the middle of the screen, both looking great with a vintage 1980s vaporwave aesthetic! More pillars appear from the left and right sides, this time in four groups. The first group appears from the right, the second from the left, and the last two pillar groups from both sides at once. Quick movements will get you through to the end!
Once again, a triangle obtained destroys yet another wall guarding a switch. The boat ally activates it, opening up the last gate protecting the tower. We now have access to a stage titled "FINAL BOSS"! Just when we're about to enter, our friends offer one last heartfelt moment with us: a hug from the big square, a spray of water from the boat, and a high-five from the helicopter! Now, let's put an end to this, shall we?
Final Boss, by Nitro Fun
Yep! The final boss song is literally titled "Final Boss".
Right when the song starts, we see corrupted flowers take up the right and left sides of the screen. Some of them flash before jumping to the center, sending out a lot of tiny projectiles before landing. The screen then autoscrolls upwards, which means that we are climbing the tower. After avoiding more flowers, the speed starts increasing to the point that dashing is necessary to stay ahead of the now-present "danger trail" at the bottom of the screen. Thankfully, the corrupted flowers stop attacking, but now spike balls descend from the top, forcing us to dodge them as we rise. Eventually, lasers get added in. Afterwards, the obstacles cease and the autoscrolling becomes even faster. The walls also close in, and we must keep up with them as they move side to side. Soon, lasers strike the center, and the autoscrolling stops.
All of a sudden, the boss appears with his crown on (which also holds the final Tree Triangle), but corrupted flowers take it off of him. He then attacks with lasers in many directions for one second before the fight truly begins. The boss then moves around the screen, stops to shoot in three directions (as well as a bunch of projectiles around him), then repeats. He aims in several directions and one must always watch carefully and plan where he will aim next. Then, corrupted flowers fill the sides as the boss continues attacking. He then disappears before six flower jump out at the top.
In a surprise attack, the boss then jumps from below and starts chasing us, turning and shooting all the while. It will eventually get faster, so just keep on dashing upwards while dodging the attacks! Eventually, the boss will lose control and explode, ending the fight.
We did it! With him gone, we can retrieve the final Tree Triangle and take his crown for ourselves! The triangle becomes purified and - - oh no. Turns out the boss isn't truly defeated. He knocks us away and regains the Triangle for himself.
But then… yikes! He gets stabbed by it and becomes corrupted himself. Lots of centipede-like creatures appear and spikes fill up the entire screen. We have no choice but to put an end to this corruption - once and for all!
Annihilate (Original Mix), by Destroid
When the song starts, the boss appears at the top-center of the screen, crying down damaging tears at set intervals, so try to avoid staying beneath him. The edges also become spiky and should not be touched. Not long into the stage, explosions occur at the right and left sides, releasing many spiky projectiles the opposite direction. Spiky projectiles then appear from the edges and fill the screen, so be on guard! Then, centipedes "hatch" from the spikes and move towards the opposite side of the screen. Thankfully, the hatching spots flash to indicate danger. Later on, two centipedes hatch at once, and several centipedes rush across in various directions. The music intensifies and the boss glows, moving towards the center of the screen. And then… "YOU HAVE BEEN DESTROYED'"
He transforms and fires a massive laser horizontally! Afterwards, the boss fires lots of spiky projectiles all around him and occasionally shoots out more lasers. This next section is basically a huge attack barrage by the boss and I can't type out every single detail because I'd wear myself out, so just watch out for spikes, lasers, more spikes… you name it!
He then returns to his original position, refilling the edges with spikes and unleashing more spiky projectiles while centipedes rum amok. He eventually stops attacking himself and lets more centipedes attack for him. Stay away from the edges and stay calm. At the very end, spikes fill the screen, leaving room to escape the boss's deadly maw. We… lost.
No. NO. It's NOT over! We can't let this guy win! We may have been broken from the fight, but with the power of rewinding, we have reformed and are ready to properly defeat - - CRASH! Nope. Never mind. No matter what we do, the boss will smash us to pieces. There's no way to get around it.
Oh boy, what to do… our friends arrive to try to give us support and fix us up, but it's no use. Our square friend in particular becomes devastated from our loss, and all hope is gone.
*Blink blink!*
Well, not exactly. You know those brand new triangle ears the square buddy has? Turns out they can be used as automated external defibrillators (AEDs) to bring us right back up! We are now super powerful!
Till It's Over, by Tristan
With our newfound strength, we can take on and defeat this corrupted being for good. The shapes all shoot automatically and fire strong lasers to fight back and deplete the boss's health. We're invincible, so dodging isn't a priority here. The boss is fought in three phases:
- Phase 1: he shoots out spiky projectiles and has spikes around the edges of the screen. Attacking him will destroy the spikes.
- Phase 2: He surrounds himself with a spiky ring barrier and moves side to side, shooting out for spiky projectiles.
- Phase 3: Almost defeated and barely hanging on, the boss uses the last of his strength to move side to side, occasionally slamming down to the ground, creating rising waves from the impact.
After losing all of his health, he's done for!
Ending
The corrupted boss fades away into nothingness, and the final Tree Triangle is obtained for real this time! Combining their might, they rebuild the paradise and destroy any and all corruption remaining. The sun comes out of hiding and everyone lives happily ever after!
Just before the credits start, it turns out that the bad guy wasn't truly defeated. But don't worry - he's not evil anymore. He's now a DJ at a rave party! WOOOOOOOO!
Makes you wanna dance, right?
Why Are You So Shaped?
Written by: Hooded Pitohui (talk)
Quickly! Here comes a new enemy! Take a look at the image below and decide whether you're going to attack this new enemy with a hammer or whether you're going to attack with a jump. Think fast, though! You have ten seconds to decide!
Have you made your decision yet?
Well, if you chose to jump, unfortunately, you're taking damage. Against this enemy, it's better to use the hammer. The question is, how are you meant to arrive at that conclusion? After all, unless you happened to recognize the enemy I presented as a Spikely from Mario & Luigi: Brothership, you have nothing to go on beside a silhouette. As presented here, you don't know how it moves, what details adorn it, what color it is, what its name is, or anything else about it. All you know is the shapes which make up its body.
Maybe – and bear with me here – that's all you need to know.
Shape in Mario Designs
I imagine many of you out there correctly chose the hammer, including those of you who weren't able to identify the specific enemy attached to this silhouette. Why is that? What guides our decisions when we first encounter a Mario enemy or object, whether in an RPG, a platformer, or some other game?
The answer is, strictly speaking, "a lot". Sound effects, movement, and the context of the space all affect how we choose to interact with an enemy or object that is new to us. All of these add up to form our impression of an enemy or object and to shape our response, yes, but Mario games aren't typically designed as slow, cerebral affairs asking players to stop and observe what's around them. You want Mario and Luigi speedily bounding through levels, not stopping every few seconds because a player needs to take in the details of a new enemy!
How, then, do you make it possible for a player to make these decisions in a snap? How do you convey, through only a quick glance at an enemy, that it shouldn't be jumped on?
You do it by paying attention to an enemy's shapes and shape language. By carefully choosing what shapes are prominent in an enemy's design, you can efficiently provide important warnings or hints to players, allowing them to quickly make an educated guess as to how they should interact with it.
We've already seen this in action. I imagine that, when you all saw that silhouette above, most of you zeroed in on those pointed cones on the top. Those cones convey sharpness, especially with their fine-tipped ends, and anyone who has stepped on a push-pin can intuitively understand that you don't want your feet coming down on anything sharp! These pointed cones are an effective, wordless warning to avoid jumping on Spikelies, and the rounded body serves to make them that much more prominent by giving them a smooth surface to jut out from and contrast against.
Spinies
We see this "rounded structure with prominent pointed cones" often in the Mario series. Take a look at the humble Spiny above, the poster child of enemies with spikes that will hurt anyone who dares to jump on them. With a rounded shell and prominent cones in the spikes, the Spiny checks all of our boxes! The tail and eyes make it cute while the white lip of the shell gives the separation of shell and body visual definition, yes, but they're ornamentation. Reduce a Spiny to a silhouette, and those details wholly or mostly disappear, leaving just that rounded shell with pointed conic spikes on top, showing you what shapes serve to communicate the Spiny's role in gameplay versus which shapes are there for decoration.
Pokeys
You can even see Nintendo adjusting a design to either discard or refine this exact language by looking at the Pokey, another prominent Mario enemy impervious to jumps! In their first venture into the third dimension (Super Mario 64), Pokeys have three spike-like protrusions on the top of their head. It's not quite the "rounded shape with conic projections" we've seen so far, though, looking more akin to a crown of some kind. While it does an adequate job of conveying that Pokeys shouldn't be stomped, it can be a bit difficult to make out from a distance, nicely demonstrating why it helps to have a rounded component to give the spikes something against which they can contrast.
In Super Mario Sunshine, meanwhile, Pokeys could be jumped on, so any conic shapes on top of a Pokey's head were eliminated. Here, Pokeys have flattened, almost cupped petals of a flower atop their heads, practically inviting a stomp by looking like they're meant to be a receptacle for something.
By the time of New Super Mario Bros. Wii, where Pokeys are again unstompable, Pokeys not only return to having pointed shapes on their head, but refine it and double down on it. Here, they settle on that shape we discussed above, with proper rounded heads and some very prominent conic spikes atop it, firmly warning against coming down on top of it.
Electrokoopas
As one final, more subtle example, let's take Electrokoopas from Super Mario Sunshine. These enemies are a bit more complex than the others we have looked at so far, because there are times in which they can be jumped on and times in which they can't. So long as they are in their electric shell, jumping on them isn't an option!
Now, in-game, you'll be given an additional signal not to jump on them in the form of crackling electricity sparking around their shells. Even so, for a first-time player rushing through Pinna Park, it's possible to miss this detail. That's a likely reason we see these enemies using the same shape language as Spinies, sporting two cone-like shapes rising from their rounded shells. Even if you know nothing else about them, those sharp points should make you second-guess jumping on them! Electrokoopas also serve to demonstrate that this shape language need not always be translated into spikes and spines. Here, these projections are turned into electrical terminals befitting these sparking turtles!
When they fling away their shells, by contrast, Electrokoopas show off their flat, oval-esque bodies. Almost looking pancake-like, even before you factor in the prominent pink boxers, their bodies invite you to, well, pancake 'em! By being low to the ground and so rounded and non-threatening, the Electrokoopa body invites you to step on it and see what happens, handily signaling that this is the vulnerable state of the Electrokoopa even before you factor in any other details.
More Mysteries Await!
As you can see, gameplay considerations appear to be a major determinant of what shapes appear in the designs of Mario enemies! The particular shapes and formula I discussed today are far from the only examples worth taking a closer look at, though! Take this question you might like to ponder. Why are Goombas button-shaped, with their rounded, dome-like heads, but squat "cheeks"? What different considerations might have gone into Galoombas, which are far more rounded than Goombas, but still not perfectly so?
To answer these questions and more, I turn the floor over to you, readers of The 'Shroom! This is your invitation to pick up this concept and run with it. I want to hear your thoughts on why Mario enemies look the way they do, either in shape or in the details which ornament them. Cover just a single enemy per edition, if you'd like! As our friend the Electrokoopa shows, there can be plenty to say even about a singular enemy.
Get to thinking about the designs of Mario enemies and send in an application, and I'll see you here in Strategy Wing real soon!
Killing the Killing Game Roles
Welcome back, readers, to another edition of Killing the Killing Game Roles, the section where we analyze various player roles from past Mario Boards Killing Games in hope of answering the question, what makes for a good role? By analyzing what's come before, we can discover some tricks and tips that could even help you design your own roles!
Today, we'll be moving ourselves into the realm of Awards Killing Game Odyssey, a game with some of the most complex and inventive roles seen on the Mario Boards thus far, befitting a game of its spectacle. AKGO is a game I'll likely be returning to a lot - its roles are a wealth of phenomenal ideas and a variety of executions. With that said, there are some that could use particular criticism, which will be one of our focuses today. Hold onto your hats as we set sail on the S.S. Circinus and uncover one of the most complex roles seen in the early half of the game.
AKGO - Latuschels, the World Adventurer
Additional Information
0 Shells
- Camera: Your Shellkah Slate possesses a camera feature. You may, during the night, take photos of up to two objects. The next day, you may use the slate's sensors to attempt to locate one of these objects by taking the slate through various rooms and seeing where it beeps. While doing this, you will have no time for chitchat, and cannot make any other investigative posts or share testimony. The time it takes will vary, depending on the item and the difficulty you face locating it.
- You can store up to 20 photos in the camera. Already inside the slate is a picture of the seashell that it needs to run its other functions, so you can choose to ascertain the location of seashells for you to grab the next night instead.
2 Shells
- Lumicendiary: Once per night, your slate can produce a construct of light resembling a bomb. Place the construct anywhere you wish, and press this rune again to blow it up. The construct is more akin to a flashbang than to a true explosive. It does not cause damage, but it does temporarily blind those who witness the explosion.
- Ferromanipulation: Press this rune, and you will be able to effortlessly lift, from a distance, any metallic object within your line of sight that you could normally lift. This casts a visible ray uniting your slate and the object being lifted.
4 Shells
- Anchoring: Point your slate at a non-living object and cast this rune, and the object will become completely unmovable for the remainder of the night. You can use this rune only once per night.
- Shellonis: Anywhere in which there is a body of water deep and large enough for an average person to wade up to their ankles, you may point your slate at the water and press this rune. A pillar made of crushed and grounded seashells, compacted and, thus, not usable as fuel, will rise up. Up to two pillars may be made at once, and the pillars cannot be broken. They will crumble on their own at the end of the day which comes after they are raised.
Upon-Death Information
- A warning flashes on the screen of Koyanskaya's slate, stating that without the spirit of its host, it cannot access most of its functions, and has absorbed the remainder of Koyanskaya's shells to sustain itself until its inevitable shutdown, at a rate of 1 per phase. Koyanskaya had a total of 10 shells upon her death, so the slate will permanently shut off in 10 phases. Only the magic detection and pin functions may be used, and the Camera may be used, but without Koyanskaya's spirit, now costs 1 shell to take a photo and 1 shell to activate the radar.
Card 1 - Info
- NAME: KOYANSKAYA
- VESSEL: CIRCINUS
- ROOM: STARBOARD-9
You've been exploring the world since you could walk! Well... maybe it wasn't that early, but you've been exploring for quite some time! In all of your journeys, there's one item that's not only intrigued you, but has mystified you. The mysterious tablet you possess, the Shellkah Slate, has great power, and also strange properties. With an expert on magical artifacts aboard this vessel, perhaps, just perhaps, you may finally have the opportunity to find out more about your Shellkah Slate. Though, it's also possible you might use it to your advantage on this cruise, as well, provided it doesn't run out of power...
Card 2 - Role
- Your Shellkah Slate, powered by a special kind of seashell, has a variety of runes inscribed on it. By pressing one of these runes, you can tap into the slate's powers, activating one of a variety of effects. The full list of powers is below, and some of them require more shells to use. You can choose up to five rooms you visit to actively search for these special shells in, but these rooms will appear to have been disturbed the next day. Other players can find these shells as well, but only you know of their true purpose.
- Your slate passively detects magic, or so you believe, based on what you've ascertained about it, and at night, it beeps more loudly the closer you are to a site where magic has recently been used. This radar will automatically turn on when you activate any other rune, beeping quite loudly at the start and remaining active for the rest of the night.
Card 3 - Role cont.
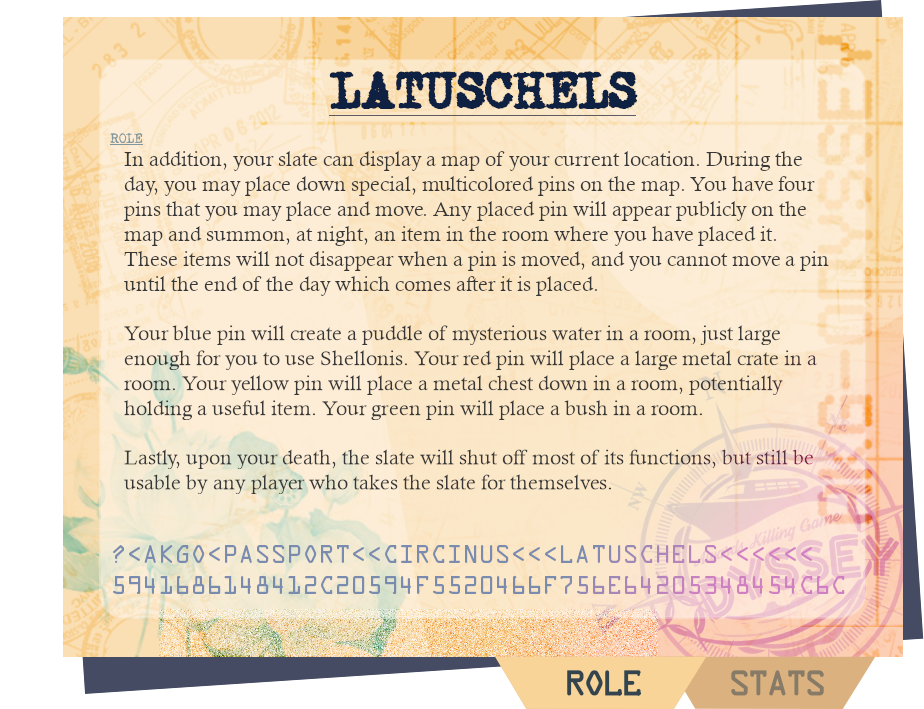
- In addition, your slate can display a map of your current location. During the day, you may place down special, multicolored pins on the map. You have four pins that you may place and move. Any placed pin will appear publicly on the map and summon, at night, an item in the room where you have placed it. These items will not disappear when a pin is moved, and you cannot move a pin until the end of the day which comes after it is placed.
- Your blue pin will create a puddle of mysterious water in a room, just large enough for you to use Shellonis. Your red pin will place a large metal crate in a room. Your yellow pin will place a metal chest down in a room, potentially holding a useful item. Your green pin will place a bush in a room.
- Lastly, upon your death, the slate will shut off most of its functions, but still be usable by any player who takes the slate for themselves.
Card 4 - Stats
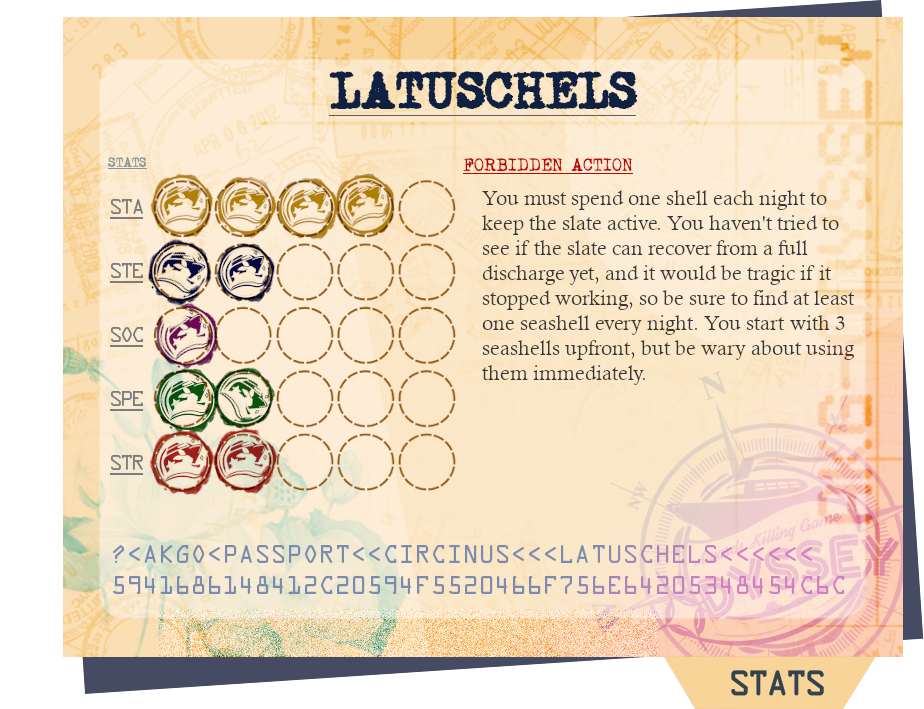
- STAMINA: 4/5
- STEALTH: 2/5
- SOCIAL: 1/5
- SPEED: 2/5
- STRENGTH: 2/5
[FORBIDDEN ACTION]
You must spend one shell each night to keep the slate active. You haven't tried to see if the slate can recover from a full discharge yet, and it would be tragic if it stopped working, so be sure to find at least one seashell every night. You start with 3 seashells upfront, but be wary about using them immediately.
Additional Information
0 Shells
- Camera: Your Shellkah Slate possesses a camera feature. You may, during the night, take photos of up to two objects. The next day, you may use the slate's sensors to attempt to locate one of these objects by taking the slate through various rooms and seeing where it beeps. While doing this, you will have no time for chitchat, and cannot make any other investigative posts or share testimony. The time it takes will vary, depending on the item and the difficulty you face locating it.
- You can store up to 20 photos in the camera. Already inside the slate is a picture of the seashell that it needs to run its other functions, so you can choose to ascertain the location of seashells for you to grab the next night instead.
2 Shells
- Lumicendiary: Once per night, your slate can produce a construct of light resembling a bomb. Place the construct anywhere you wish, and press this rune again to blow it up. The construct is more akin to a flashbang than to a true explosive. It does not cause damage, but it does temporarily blind those who witness the explosion.
- Ferromanipulation: Press this rune, and you will be able to effortlessly lift, from a distance, any metallic object within your line of sight that you could normally lift. This casts a visible ray uniting your slate and the object being lifted.
4 Shells
- Anchoring: Point your slate at a non-living object and cast this rune, and the object will become completely unmovable for the remainder of the night. You can use this rune only once per night.
- Shellonis: Anywhere in which there is a body of water deep and large enough for an average person to wade up to their ankles, you may point your slate at the water and press this rune. A pillar made of crushed and grounded seashells, compacted and, thus, not usable as fuel, will rise up. Up to two pillars may be made at once, and the pillars cannot be broken. They will crumble on their own at the end of the day which comes after they are raised.
Upon-Death Information
- A warning flashes on the screen of Koyanskaya's slate, stating that without the spirit of its host, it cannot access most of its functions, and has absorbed the remainder of Koyanskaya's shells to sustain itself until its inevitable shutdown, at a rate of 1 per phase. Koyanskaya had a total of 10 shells upon her death, so the slate will permanently shut off in 10 phases. Only the magic detection and pin functions may be used, and the Camera may be used, but without Koyanskaya's spirit, now costs 1 shell to take a photo and 1 shell to activate the radar.
Wew, hope you enjoyed your light novel reading! Latuschels, or how I'll refer to them, the World Adventurer, was carried by Koyanskaya, the roleplay portrayed by Hearts. Although the foxy woman didn't last too long in the game proper, her presence was regularly felt after her death, be it through the persistence of the Skellkah Slate or Koyanskaya's reappearance as a spirit. In any case, she still passed relatively early in the game, which leads to the question: what potential could the role have achieved if it had lasted any longer in AKGO?
General Overview
The World Adventurer's Shellkah Slate is pretty blatantly riffed off of the Sheikah Slate from The Legend of Zelda: Breath of the Wild, an in-game object that allows Link to utilize a whole host of separate abilities. Because of this origin, the World Adventurer can be described as a versatility role, with a wide degree of uses for the Shellkah Slate. However, the role intends to keep these uses in-check by utilizing a resource system. For this kind of role, I'd coin the term "versatile gimmick role". A versatile gimmick role has a wide host of applications for the player, but requires meeting a certain mechanical criteria to activate. A few other examples seen in MBKG's would include a chimerist that requires you to steal the "essence" of another player's role to create new combinations, or a spellcaster that requires you to create glyphs that enact the magic. In this instance, the Shellkah Slate runs on shells, an expendable resource discoverable on the map; collecting these shells is mandatory if the player wants to utilize every power on display. How does this work out in tangible practice? ...We'll get to that.
Ability Application
To start off, let's go one-by-one through the role abilities and discuss their applications, based on simply what is written on the card. What versatility do these abilities have, and are these abilities clear enough in their aims for the role as a whole?
Firstly, we have the primary function of the Shellkah Slate: activating runes on the device to cause effects during the night. The Shellkah Slate has enough detailed functions that it requires a secondary list of abilities, completely unattached to the role card! While this specificity and variety is mostly to the role's benefit, it's still worth noting that fully understanding the effects of this role requires a lot of perusal and internalized ideas of how to use it - which'll be covered more extensively when we get to player responsibility. I'll shift our attention to the list of functions, before returning back to the role card proper.
Primary Shellkah Slate Powers
The Camera function is, at face value, a versatile and useful tool, but its functionality might be a little too situational to be readily utilized. The role specifies that you can take two photos at night, and then search for the item of interest in the photo during the day. What this means is that the World Adventurer can't take a picture of interest during the day, nor can they utilize the camera's searching feature to discover an object of interest during their night actions. Although the photo of the seashells can be used to discover seashells, which is a night action, so perhaps there's more leniency in the Camera application than the text lets on? In the way the role is described, it feels as though the Camera's main use is for marking important items in case another player takes or steals them for themselves. The Fortuna Shards, an important stealable object seen in AKGO, would be a good target for the Camera. Otherwise, you might have to hope that the object you're looking for incidentally ended up in the background of a photo you took, since you can't account for what all will be important during the day when writing your night actions.
Lumicendiary is a one-time use during the night, and essentially allows the World Adventurer to flashbang a set area, blinding anyway to what's occurring. The Lumicendiary bomb is outfitted like the bombs from Breath of the Wild, and can be activated remotely, so this adds a variety of use cases, such as waiting for a signal to activate your trap. The one element I would be curious about is sound. Does the detonation set off its own deafening noise, or is the effect of Lumicendiary only visual? This might change my willingness to utilize it in trap-building situations. Lumicendiary would also be good for escaping or succeeding in confrontations.
Ferromanipulation does not have the same one-time use limitations as Lumicendiary, but its use is much more apparent to offset this. Once again ala Breath of the Wild, there will be a visual indication of the World Adventurer manipulating the object through the air, in the form of a light beam. What's most significant about this power is the specification of a metal object the player would be able to typically wield. This certainly limits its functionality - no lifting an entire cruise ship out of the water - but not enough to inhibit both the offensive and defensive capabilities of Ferromanipulation. Use it to set up a kill involving dropping a spear, or rip a gun out of someone's hand before they can shoot you.
Anchoring is another once-per-night power that has a little less functionality than Ferromanipulation, I would argue. Anchoring's main leg-up on Ferromanipulation is the fact that it works on any non-living object, regardless of if the object's metal or not. This also does not have an explicit size restriction, which, depending on how lenient your host is, might make for some absolutely metal applications later on in the game. The drawback to Anchoring is that you cannot move the object alongside anyone else attempting to. This means that using it defensively might be a bad call - why freeze a weapon in midair when you can steal the weapon into your hand with Ferromanipulation? Mostly, I see Anchoring as an important tool in situations where a large confrontation is occurring, and the World Adventurer ensures that an enemy's plans are entirely thwarted. Just think of a world in which AKGO's big bad DeMorge shows up in the finale with his airship, but the World Adventurer freezes his airship so it can't attack the players...
Last ability from the extra list! So many of these!! Shellonis is easily the most situational of the abilities, requiring access to deep enough water and an environment in which you'd need to actually make the pillars. I suppose they could be used defensively in a pinch, but I think the World Adventurer would mostly want these as a traversal tool, a way to reach higher spaces than perhaps intended for them to reach under normal circumstances. It's an environmental use through-and-through, so its use factors are reliant on how the player coordinates their plans with the map.
Remaining Role Attributes
To receive shells for the Slate, the World Adventurer needs to specify up to five rooms to search for shells in. It's unclear from the role how many shells the player can expect to receive each night, or if certain rooms will have more successful hunts than others. I'd argue the greatest concern here is that other players can find these shells - but this is a matter I'll be explaining more thoroughly in the host responsibility portion.
The Shellkah Slate has the passive ability to detect when magic is being used in a room, which is kind of finnicky in the context of Killing Game. There are tons of role powers with varying effects, and a player might wonder what exactly counts as magic being cast or utilized. AKGO intentionally had a more elaborate magic system to it, but I'm still uncertain right now how many role powers were explicitly magic based, and which ones would be caught by this sensor. Might be useful in cases such as a Fortuna Shard theft, where determining whether magic was utilized or not would be crucial in solving the crime.
Then there's the map pins and their use on the map directly, which sure is another Lot of Stuff for this role to have access to. Easily the coolest part of the map pins is that they directly interacted with the interactive map Lakituthequick (talk) built for AKGO. In terms of a visual trick, it's a very neat one. Still, I wonder the necessity of including four other role elements in addition to the mountain of aspects the World Adventurer is already juggling. These pins are of pretty varying uses, too. The most applicable one is immediately the blue pin, which spawns water that'll synergize with Shellonis. Red pin and blue pin have their chances of being helpful environmental items. I have absolutely no idea what good spawning a bush with the green pin would do for the World Adventurer.
Lastly, there's the fact that the Shellkah Slate continues to have limited functionality after the World Adventurer's death. It's a cool way to keep a role item in play, but I pity the host that has to continue monitoring how this thing works in another player's hands.
Environmental Functionality
Given how extensive the writing up above was, I'm going to keep this part brief. Thankfully, there isn't too much to consider environmentally when it comes to this role. The shells require your map to have different rooms to find them in, and if your map doesn't have rooms, um... might need to reconsider your entire game structure. Nearly every function of the Shellkah Slate is applicable to a wide array of environments and rooms, and doesn't demand something specific of the game map. Even the Shellonis pillar requirement of ankle-deep water has the workaround of the blue pin, meaning you don't need a specific spot where there's conveniently water for them to use. I suppose a bigger map would be better if the game host intends on the hunt for shells to be a real hunt?
Drawbacks & Balances
Next, let's move on to considering some of the checks and balances applied to this role, especially as we look at the ever-present Forbidden Action, to determine how balanced of a gameplay experience it provides.
In terms of the resource aspect of the role, my honest assessment is... I'm not sure how much of a limitation the shells actually are for the Slate. I mean, you can search up to five rooms a night for them, so the World Adventurer could pretty simply encounter more shells in-between Shellkah Slate uses. The language of the Forbidden Action also isn't too clear, admittedly. It states "You must spend one shell each night to keep the slate active," but... does this just refer to the Slate shutting down, or is this actually the Forbidden Action that kills the player? My suggestion for clarity would be to add the clause that the Shellkah Slate shutting down is actually the Forbidden Action. This would add an extra level of risk to the role besides just collecting shells; perhaps if the Slate takes enough damage, that could also cause it to shut down, so you've gotta keep the Slate safe alongside keeping it charged.
There's also the Slate's beeping mechanism, which is activated for the night whenever the World Adventurer utilizes a rune. I guess this demands the user to be a little more considerate of when they're utilizing a rune? Honestly, it feels like mostly an annoyance that can be written off as the Slate going off because of some other magic source, and it doesn't do much in terms of broadcasting the role that seeing a pillar burst out of the water or an object freezing in midair wouldn't already do.
As it stands, besides the occasional one-time use distinction for the Shellkah Slate runes, I'm not sure what else really limits the World Adventurer. If Koyanskaya dying with ten shells on Night 2 is any indication, this role doesn't seem to have many practical safeguards on it to stop its momentum from building up quickly. I mean, the abilities attached to the Slate aren't so powerful to make this freedom overly worrying, but it is still worth referencing.
Player Responsibility
This portion identifies how much commitment a player needs to the overall game or their role to see strong returns from their role. In the case of the World Adventurer, I'd say their workload isn't too heavy, at least relative to the amount of text they initially have to read. The World Adventurer will have the responsibility of utilizing their role in both Day and Night phases, but presumably most of these are going to be one-time use instances. There's also the matter of shell resourcing - but given what I outlined above regarding the seeming ease of finding shells, this wouldn't be too worrying of an element. As long as a player can keep abreast on which abilities they have available to them when, and includes a few asides in their night actions to grab up more shells, they'll be just fine.
Host Responsibility
This, in my opinion, is where the World Adventurer fully falls apart in execution. In terms of upkeeping the shell resource system for this role, there is a lot hosts have to consider:
- Where can shells be found on the map? Are these locations set from the beginning of the game, or are they flexible depending on where the World Adventurer submits to explore?
- How many shells does each location produce? Are these amounts set or flexible?
- How do you determine when another player finds shells? Should they be passably discoverable, or should they be found only if that player is thoroughly investigating a space?
- What does it mean for the shell economy when another player finds them? Are they removed from the economy outright, or would the World Adventurer find more shells there if they investigated the room later on?
As a host of AKG3 with its flimsy-at-best coin system, resource management in Killing Game is much more complex than it looks on the surface. A host needs to have a detailed plan of the how, the when, and the why. Without it, they'll be flopping around a little, shrugging and going "sure, give them the resource here," and then they've got a role building momentum further than they ever anticipated or intended. And of course, none of this resource-on-the-map talk is regarding how the host needs to also keep track of how many shells the World Adventurer has collected overall, and how many they're spending with each Shellkah Slate rune; nor is it regarding how the host needs to keep track of environmental aspects introduced with the pin-on-the-map system.
As much as Koyanskaya was a great roleplay and Hearts is a great Killing Game player, it's kind of an act of grace that the World Adventurer died on Night 2. I can't imagine the logistical headache this role would've become by Night 6 or 7. If you're looking to have a role focusing on completion of a gimmick to execute abilities, I recommend either steering clear of resource management altogether, or if you're including it, refine it as much as possible before Night 1 begins.
Overall Thoughts
I've spent a long time ragging on this role, but I believe the concepts at its core are more than workable as a Killing Game role. Because of this, I'm going to offer my own outline of how I believe the World Adventurer role could function in a way that would become healthier for the hosting experience overall.
- For this example, I'm going to suggest that those Fortuna Shards I mentioned before are a more prevalent source in the game. There are multiple of them on the game map, and they are discoverable, to varying rewards for the player who finds them.
- The World Adventurer's Slate starts out with just two or so functionalities, each likely activatable once per night.
- Every time a Fortuna Shard is discovered and claimed by a player - any player - a new ability unlocks on the Slate. Alternatively, a few unlocks could instead be boosting the number of times an ability can be used during the night.
- Repeat this process as long as the role is functional.
I believe this fixes many of the problems in the initial role concept and its execution of a resource system, instead incentivizing plot-relevant item discovery. Having the unlock criteria being any player finding the Fortuna Shard could create another interesting dynamic for the World Adventurer - if someone has claimed a Shard but hasn't publicly said so, the World Adventurer would have extra insights on the course of the game. Plus, a World Adventurer hunting down a bunch of powerful artifacts? Seems fitting of their title.
As a final wrap-up, when hosting Killing Game and building a large role concept, make sure you're considering how manageable your mechanics feel before you start up the action. Run through hypotheticals, ask yourself if this is a role you want to be accommodating by Night 8, not just Night 1. With that perspective, you'll eventually find that middlepoint of hostable and expansive.
That’s all for this month. Tune in next month for more Killing Game goodness!
Pitohui's Pokémon Academy
Written by: Hooded Pitohui (talk)
Hello and welcome back, class. I trust you all prepared detailed documentation on the movesets you designed for Arbok, yes? Your assignment from the conclusion of our last session together does... ring a bell, yes? Don't be shy now. Feel free to chime in at any time. Lest my hinting at the topic of today's session take a toll on you, allow me to cut to the chase straightaway in saying that, this month, I thought we might discuss raising the oft-overlooked Chimecho.
Before we get underway, though, for those of you just joining us, you can find our course policies and aims in the first box below and a refresher on frequently-used terms in the second box. By all means, skip them if you're already familiar with what we do here!
First, a Smogon University course, this course is not. No, this academy's lessons are designed to get trainers of any stripe thinking about how they can raise their Pokémon, and, as a result, aren't designed to keep up with the widely-accepted metagame for the series. In some cases, the way I've raised my Pokémon may even flies in the face of conventional wisdom. If you're looking for top-tier strategies, do check out Smogon, but if you merely want to get a little deeper into raising Pokémon while still doing things your own way, feel free to use this section as a reference.
Since we all know the importance of citing our sources, I also need to credit the design of some of the tables used in these lectures to Crocodile Dippy, author of the Pocket Handbook which can be found in early editions of Strategy Wing. Additionally, I'd like to give nod to the Bulbagarden Archives, the source of many images in this section.Base Stats: Base stats are the values associated with a particular Pokémon species, and are the same across every individual Pokémon of a given species. You have no influence on them. You can think of them as traits tied to a species. A chimp isn't ever going to be able to get as good as digging as a mole will be, and, likewise, an Abra is never going to have the defensive prowess a Shuckle has.
Individual Values (IVs): Individual values, as their name implies, are associated with individual Pokémon. They range from 0 to 31 in each stat, with 31 being considered a "perfect" IV and higher numbers corresponding to different stats. Magikarp A and Magikarp B will have the same base stats, but they may very well have different IVs. To stick with the animal analogy, one mole may be born with larger claws than another mole, and that first mole is probably going to have an easier time digging through dirt than the latter. Individual values are set in stone, strictly speaking, but you can use Hyper Training (from Generation VII onwards) to functionally get a perfect IV in a stat.
Effort Values (EVs): Effort values are the one thing you can easily change. A Pokémon can earn, primarily through battling, but also through means like the use of certain items or mechanics like Super Training, up to a total of 510 effort values, with up to 252 in any given stat. To finish off the animal analogy, no matter what kind of claws a mole is born with, moles who have more experience digging are probably going to be better at digging than moles which have never dug.
Nature: A Pokémon's nature is, more or a less, a stat modifier with a name meant to make it sound like a Pokémon has some personality. Natures will raise one stat by ten percent and lower another stat by ten percent. Some natures raise and lower the same stat, canceling out the effect and leaving stats unchanged. Natures can be functionally changed with the use of special mint items from Generation VIII onwards.
STAB: STAB stands for Same-Type Attack Bonus, and refers to the boosted power of moves that match the type of the move's user. To illustrate this, consider the case of a Lombre, a dual-type Pokémon which is both a Water-type and a Grass-type. Any Water-type moves Lombre uses will have their power boosted by 1.5x, and any Grass-type moves Lombre uses will, likewise, have their power boosted by 1.5x. (There are circumstances where this does not apply, and, while the 1.5x multiplier is typical, some games use other multipliers.)
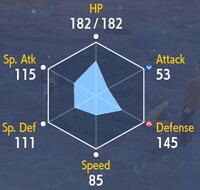
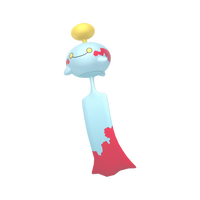
Chimecho has numerous useful supportive moves at its disposal. Because it possesses such adaptability, deciding the particular role you envision Chimecho playing is essential to whittling down the options at its disposal. That said, conventional wisdom holds that, despite the range of options available to Chimecho, poor stats prevent it from effectively fulfilling any of its potential roles. Now, we have never allowed poor stats to become an impediment to our work, and we will not begin now, but we must nevertheless begin by getting a clear picture of Chimecho's base stats.
Upon examination, Chimecho proves to be a mixed bag, with strong special defense and special attack, acceptable defense, middling HP and speed, and poor attack. Its speed is prohibitively low for making the most of Chimecho's special attack stat, so we can eliminate a purely offensive approach. A special stats-focused approach may be viable, especially with access to defensive moves such as Cosmic Power and self-healing in the form of Recover. Though due to the setup work required, Chimecho's middling speed remains a concern, leaving open the possibility Chimecho might set up then get KO'd before it can heal.
Another option we might consider is turning Chimecho into a support teammate, focusing on the healing options available to it. With Wish, Recover, Heal Bell, Heal Pulse, and Healing Wish available to it, Chimecho can mend the wounds and cure the status conditions of more powerful teammates to force a weakened foe to reckon with a major threat again. Chimecho's speed still hampers this approach, but this approach is interesting and has less competition for Chimecho as a niche, so we will explore it further.
For that reason, we'll invest mostly in Chimecho's bulk. We can discard its low attack entirely, treating it as our dump stat. Conversely, since a healer can only do their work if they can take one or two hits, we'll invest EVs into Chimecho's weaker defensive stats to bolster them, and opt for a Bold nature so defense gets a boost at the expense of attack.
|
Name: | Chimecho | Base HP: | 75 | |
| Category: | Wind Chime | Base Attack: | 50 | ||
| Type: | Psychic | Base Defense: | 80 | ||
| Abilities: | Levitate | Base Special Attack: | 95 | ||
| Base Special Defense: | 90 | ||||
| Base Speed: | 65 | ||||
We needn't touch on abilities this month, as we have only one option. Levitate will serve us decently well, at least, giving Chimecho one immunity (Ground-types) and protecting it from a number of entry hazards (Spikes, Sticky Web, etc.).
We've already decided we will focus on Chimecho's healing capabilities, but even limiting ourselves to the five healing moves I discussed above, we have more potential moves than slots for them! Consider this a practical demonstration of how important it is to narrow down Chimecho's role. For our purposes today, I'll say our focus is single battles, not double battles, so we can discard Heal Pulse. We want Chimecho to heal its teammates, not itself, so we can discard Recover as well. Heal Bell concerns status conditions, so we'll set it aside for a moment so we can make a decision between the two HP-restoration options.
Now, of the two, Wish is more flexible and Healing Wish is more specialized. Wish can restore Chimecho's health or a teammate's health, but it does require more turns to execute, and, by the time Chimecho switches out to make way for a receiving teammate, Chimecho will likely be so depleted that it will be KO'd immediately upon returning to the field. Healing Wish, on the other hand, sacrifices Chimecho, causing it to faint in exchange for the Pokémon which takes its place being fully healed and cured of status conditions.
Since, in either scenario, it is likely Chimecho will only make it onto the field once, I lean towards Healing Wish. Another factor to consider is the amount of HP each move will restore. Wish heals the recipient for half of Chimecho's health, so any Pokémon with more HP than Chimecho (a not insignificant number) will be healed for less than 50% of its HP. Healing Wish will always restore the recipient to their maximum HP. This consideration strengthens my inclination towards Healing Wish, so, that is what we will put at the core of Chimecho's moveset!
Our goal is to make it possible for Chimecho to enter battle and efficiently sacrifice itself in order to heal another Pokémon, so next we should look for the move which will best support that goal. Best fitting our criteria is Yawn. Successfully using Yawn does require Chimecho take one hit, but we invested in its bulk for exactly that reason. Once Yawn succeeds, the opponent has two unenviable options. They may either try to block Chimecho from firing off Healing Wish, but fall asleep in the process, leaving their Pokémon open to attack, or they will switch out, giving Chimecho a free turn to use Healing Wish.
Alternatively, they could use moves like U-turn or Volt Switch to switch out and attack Chimecho, so be wary of that possibility. Unless they're equipped with a switch-out move or have another niche counter, though, most opponents will switch out, giving Chimecho a prime opportunity to fulfill its mission and make its Healing Wish.
| Dazzling Gleam | The user damages opposing Pokémon by emitting a powerful flash. | |
| Yawn | The user lets loose a huge yawn that lulls the target into falling asleep on the next turn. | |
| Heal Bell | The user makes a soothing bell chime to cure the status conditions of all its fellow party Pokémon and allies. | |
| Healing Wish | The user faints. In return, the Pokémon taking its place will have its HP restored and status conditions cured. |
Now, Healing Wish does cure status conditions, but only on one Pokémon. For that reason, as a third, opportunistic move, I suggest Heal Bell. In the case multiple Pokémon in your team are afflicted by status conditions, Heal Bell can cure them all at once. Admittedly, it won't be often that Chimecho uses this, and you should not let it distract you from Chimecho's primary role, but you can use this opportunistically. If you anticipate your opponent might react oddly to Chimecho appearing, such as by, for example, trying to take its appearance as an opportunity to set up an entry hazard, you just might be able to get Heal Bell off before you move into Healing Wish. It will be rare, it will be a gamble when you use it, and I recommend being conservative with it so that you don't end up losing the opportunity to use Healing Wish, but at least you will have the capability.
The astute regular attendees among you may be asking "don't we usually incorporate at least one offensive STAB move?". Indeed we do, and, for our fourth move, we shall choose a suitable offensive move for Chimecho, but it will not be a STAB move. It's important we have at least one offensive move so that Chimecho is not rendered completely helpless by Taunt. On the same breath, however, Psychic is not ideal for a singular offensive move, because Psychic-type moves are completely ineffective against Dark-types, so encountering a Dark-type and getting hit with Taunt would still leave Chimecho helpless. For that reason, we'll use the Fairy-type Dazzling Gleam, sacrificing some power (which is no great loss on a defensively-oriented Pokémon) in order to prevent Chimecho from being completely stonewalled. Fairy is a better choice than any other type available for our purposes. Ghost, Normal, or Electric all have another type which is immune to them, running into the same problem Psychic did. Fairy is also resisted by fewer types than Grass or Ice, and the only special Dark move (Dark being equal to Fairy in number of types which resist it) available to Chimecho has a base power of merely 55.
Alternative Options/Considerations
So that wraps up our discussion, no? We have four moves, two which serve Chimecho's primary role, one which we reserve for opportunistic use, and one offensive move to prevent foes from shutting Chimecho down completely. Well, true though that may be, it's worth noting a few other possibilities for raising a Chimecho.
Firstly, as established, Chimecho is held back by its low speed. You may, then, be tempted to ask about Trick Room. At 65 base speed, Chimecho's speed is... on the lower end of middling, meaning Trick Room is viable, but not necessarily great to pair with Chimecho. You can make use of Chimecho in a Trick Room team, but do not be surprised if some foes outspeed it in those conditions. If you do pursue this route, be sure you aim for a zero speed IV, and consider swapping the Bold nature out for a Relaxed nature.
Because Heal Bell is used opportunistically here, there are a range of moves which may be equally or even more effective than it. You might consider replacing it with Taunt so Chimecho can shut down the strategies of its opponents, Reflect or Light Screen so the healed Pokémon which takes Chimecho's place gets a defensive boost, or Psychic so you do have access to a STAB move. If you choose to put Chimecho on a Trick Room team, replacing Heal Bell with Trick Room is also potentially viable. If you're feeling inclined to some trickery, you could even consider Wrap to prevent an opponent from switching out to guarantee they fall asleep from Yawn.
If you're considering using Chimecho in a double battle team, you might consider Recover for self-healing and Heal Pulse for healing allies, with Thunder Wave/Taunt/Heal bell as supportive moves and Psychic as an offensive option. With a partner at its side to assist it, Chimecho can get more use out of Recover to extend its longevity, and since Chimecho will have an ally to handle Dark-types, it can make do with having only a Psychic-type offensive option.
Or, for the bold among you, you may circle back to the idea we discussed near the top of our session, using moves like Cosmic Power and Calm Mind, in conjunction with Chimecho's high special attack and Recover/Wish, to turn Chimecho into a specially-focused fighter.
As you can tell by now, the roles which this unassuming windchime can fill are wider than you may have expected! Chimecho is a Pokémon whose stats leave it beneath notice, which also makes coming up with a niche for it and deciding how you would raise it to fill that role a good exercise. For our next session, I hope to see you all documenting a multitude of approaches to raising Chimecho, so you best get on your work quickly! Consider that assignment and Chimecho's ringing your dismissal bell, and I will see you next month!
An Octet Gazette
Written by: Museful Traveler (talk)
Welcome back to An Octet Gazette, readers of The 'Shroom! Would you believe that we're in the penultimate job-focused issue of this section? Come April, and we'll be starting a blitz through Latent Powers, Path Actions, and characters, and then we'll have just a few sections of miscellany. For the moment, though, we still have jobs to discuss, and this month, we'll be looking at the secret jobs in each game most oriented around offering buffs!
Blessings Written in the Celestial Dome
You thought that look into the future in the introduction was the only prediction going on here, eh? Well, think again! This month, we're looking at the Starseer job!
Now, in terms of flavor, the Starseer job may be oriented around prognostication and readings of fate, but mechanically, I would describe the job as a "super-buffer". We already had the Dancer job filling the niche of granting buffs and augmentations to party members, but the Starseer cranks up the power of those buffs. Where most of the Dancer job's offerings concern stat boosts, starseers roll all their stat boosts into one skill, freeing up the other skill slots for a wider range of more varied buffs.
To learn the secrets of the sky, however, requires defeating the god Steorra in the Shrine of the Starseer. Those compelled to know the ways of the fates must journey to Western Whispermill Flats. Once obtained, the job offers the following skills in exchange for the usual JP costs.
As you can see, six of the eight skills here revolve around granting some kind of boon to the user's teammates, with one even able to pull double duty as an enemy debuff. You're better served just looking at the table above than having me recapitulate what each individual skill does down here. Just take note of Starsong, which offers the same effect as a combined Lion Dance, Mole Dance, and Panther Dance from the Dancer job and throws in an evasion buff as an extra. This doesn't render dancers completely outclassed. Starsong doesn't offer the elemental attack boost of the Peacock Strut, collectively using the three dances costs less SP than Starsong, and, most importantly, dancers still have access to useful skills like Sealticge's Seduction.
On account of folding its stat buffs into one skill, the Starseer job gets to toss out far more interesting buffs like a counterattack, passive HP regeneration, and additional BP accumulation. Some of these buffs have rare edge cases or additional conditions that may not be immediately clear, but, for my money, the two to focus in on are BP Boost and Moon's Reflection. BP Boost only increases BP received when a traveler would normally recover BP. It may sound obvious, but I've seen some confusion around it stemming from the wording of the skill's description. If you've used a boosted attack in the previous turn, as always, you'll recover no BP even with the buff active. Moon's Reflection is a stacking buff, meaning it will last until triggered or dispelled, and multiple "copies" of the buff can be stacked on top of each other, with each triggering event reducing the stack by one copy. For all the buffs here which last a certain number of turns, boosting will extend their duration, and for Moon's Reflection, boosting will add n + 1 copies to the stack for every n level of boost.
Outside of all those buffing abilities, the job offers two offensive skills. Shooting Stars makes up for the relative lack of offensive skills by offering three elements at once, and Steorra's Prophecy... exists. It has some synergy with BP Boost, maybe, but it's not that remarkable.
That's the Starseer, then, the pinnacle of buffing... in a game where stat buffs fall off in importance in the lategame. Broadly speaking, Starseer appears to be the least popular of the secret jobs, and the typical reason given is that its buffs simply aren't all that useful. Stat buffs become less important than synergies, Divination's boost to damage output is too small to notice amidst typical lategame setups, Celestial Intervention is somewhat situational, and BP Boost tends to be less efficient than popping an Energizing Pomegranate.
With Starseer not getting a warm reception in the first game, let's peer into the future and see how its loose counterpart changed things up.
Breaking the Bindings of Fate
I can't say with certainty whether or not this was an intentional design choice, but it strikes me that Octopath II's secret jobs can be broadly read as examples of mortals seizing the powers of the gods. What need is there for the arts of the Archmagus when an inventor can create tools capable of great feats? What need is there for a divine Warmaster if weapons equivalent in power can be reforged and wielded by mortal hands?
Intentionally or not, the third secret job we have continues with this theme. Where in Orsterra the starseers sought only to see the future, in Solistia, those who hold the Arcanist job manipulate the future, using their knowledge of the arcane to alter what is and what will be. Like the Starseer, the Arcanist job offers various unique buffs, but the job focuses less exclusively on buffing, and a number of its buffs emphasize alteration, changing something which is already there or how something works.
Before getting into skills, though, it's necessary to discuss how the job is even obtained.
Unlike the secret jobs we've discussed previously, the Arcanist is not tied to a formal sidequest. Instead, the job is uncovered through exploration alone, tucked away on an island. Reaching this island requires unlocking the game's sailing mechanic, which occurs in the process of completing special quests tied to Partitio. Once they are able to sail the seas, the party can reach The Lost Isle, and after discovering the secret of the island's labyrinth, they can speak to the Arcanist Descendant to obtain the job. There's a little more detail to all of that, but I'm giving you as few spoilers as possible so you can experience this for yourself!
Once the job is obtained, the following skills are available, locked behind only the usual JP requirements:
A few of these skills roughly correspond to Starseer job skills. Hex can be seen as a different take on Celestial Intervention, both indirectly weakening enemies, but where Celestial Intervention works by preventing buffs, Hex extends debuffs. It requires a little more set-up and work on the party's part to apply the debuffs in the first place, but in turn grants the party a bit more control and has more strategic potential. Worthy of note here is that Hex can be upgraded to a higher-tier form through Alephan's Wisdom.
Reflective Barrier is a straightforward upgrade to Moon's Reflection, eliminating the need to tank an attack. It negates all damage and reflects it back, rather than launching a counterattack after taking damage. It has switched from a focus on physical attacks to elemental attacks.
Rounding out the counterparts, Shooting Stars has been decomposited into Malice and Blessing. In exchange for losing an element and getting split over two slots, these offensive skills gained secondary effects, restoring HP or SP, with the restoration scaling with damage dealt. Both of these spells can be upgraded with Alephan's Wisdom. One might make an argument that Malice replaces Ethereal Healing in its HP restoration role, and if so, like Hex, it makes for a more active and deliberate form of a Starseer buff.
Beyond these are the four "seal" skills, which are the core of the job, each an alteration of some existing condition or the usual rules. Seal of Inversion and Seal of Eternity demonstrate this most directly, changing a debuff into a buff or making a buff last until dispelled, and Seal of Diffusion accomplishes this in a more subtle manner, altering the reach of self-targeting skills. As an aside, the difference between Seal of Diffusion and Sealticge's Seduction may not be immediately clear. The former only affects self-targeting skills, while the latter affects skills in which a single target is chosen.
Seal of Immortality, then, works by altering the usual rules around taking damage, applying a buff which leaves a traveler at 1 HP if an attack would otherwise deplete their health entirely.
Through these skills, the Arcanist becomes something similar to, but not quite one-to-one with, the Starseer. An emphasis on buffs can be seen in both, but the Arcanist is less passive, incorporates an emphasis on alteration, and offers more opportunity for strategizing by offering more direct control over its effects.
Support Skills
| Name | Effect |
|---|---|
| Hard Worker | Earn more JP from battles |
| Boost-Start | Begin the battle with an extra BP |
| BP Eater | Increases the damage done by boosted offensive skills |
| Divine Aura | Gain a 25% chance to avoid damage from an attack |
Starseer may have ended up with the short end of the stick when it comes to its skills, but when it comes to Support Skills, the job fares better. Boost-Start is a great passive ability, whether for quickly dispatching standard enemies or for getting a quicker start to a strategy against a boss. Divine Aura, while luck-based, is rather powerful, occasionally negating all damage from an attack. Divine Aura meshes well with the job's focus on buffs, as well, with its effect feeling on par with the buffs granted by the job's skills. In addition, the job can offer another unique passive buff in the form of BP Eater. Considering how crucial it is to throw BP behind offensive thrusts, BP Eater is far from situational, consistently and constantly providing damage boosts.
To round out the set of four here, Hard Worker offers a JP boost, which... works better in the sequel, where it's on the Dancer job class. While I can see the rationale of reaching the lategame and being rewarded with a way to more quickly unlock all the skills and Support Skills of the jobs you have accumulated, it works better to have access to it earlier on, allowing you to experiment with different arrangements of jobs prior to most of the game wrapping up.
| Name | Effect |
|---|---|
| SP Recovery | 1% of damage received is repaid as SP |
| Lasting Memory | Status effects, buffs, and the like do not disappear when the equipping character is knocked out |
| Price of Power | Doubles the SP cost of magical skills, but increases their strength |
| Of Equal Might | The physical attack and elemental attack of the equipping character are made equal, both rising to the higher value of the two (excluding the effects of equipment). |
Looking at the Arcanist's Support Skills, there's one which clearly meshes with the focus of the job. Lasting Memory works in tandem with the Arcanist's buffing abilities, and especially with Seal of Eternity, allowing buffs which have been extended indefinitely to persist even through a traveler's death. SP Recovery arguably ties to Blessing, providing another means of SP restoration, though it's not the most useful of passive bonuses.
Price of Power strays further from the Arcanist's role, and seems like a downgrade from BP Eater, being more restricted in its application and coming with a greater cost. OF Equal Might is a strange one, and I don't have much to say on it, but there are some use cases for it. Overall, the Arcanist has a bit of a hodgepodge when it comes to Support Skills, but at least Lasting Memory pairs well with the rest of the job.
Next month, the final set of jobs awaits, so come back in March to look at the Runelord and the Conjurer!
| The 'Shroom: Issue 215 | |
|---|---|
| Staff sections | Staff Notes • The 'Shroom Spotlight • Poochy's Picks • Poll Chairperson Election • Credits |
| Features | Fake News • Fun Stuff • Palette Swap • Pipe Plaza • Critic Corner • Strategy Wing |


