The 'Shroom:Issue 213/Strategy Wing
Director's Notes
Written by: Hooded Pitohui (talk)
Hello, all you readers of The 'Shroom, and welcome to the final edition of Strategy Wing in 2024! That's right, it's finally December, and, in fact, by the time you read this, we will be a week and some change away from the end of the year. 2024 was a mixed bag in my books. On one hand, it was a travel-heavy year for me, and I saw some great sights, but on the other hand, there were a few areas in which I didn't make the progress I had hoped to make and a few projects I would have liked to do more with. It wasn't a bad year by any means, though, and I'll take that as a win.
You don't want to hear my ramblings about my year, though! Let's talk about Strategy Wing this year, because 2024 was a great year for this team. Not only did we see three great sections run through to completion with Shoey's (talk) File City Files and The Anatomy of a Pikmin alongside Waluigi Time's (talk) Shine Get, but we also had Sparks (talk) and MightyMario (talk) join the team! Add on a new section and a few editions of Koops, Your Emblem is on Fire, and we've had a productive year here.
We'll keep that momentum going into next year, as well! I won't spoil any surprises, but keep an eye out for what's coming in January, and if you've got a game you'd like to cover in some capacity, head on over to the sign-up page and whip up an example edition of the section you have in mind. Walkthroughs, level breakdowns, tips and tricks, a look at an enemy or an allied unit - we come at games from all kinds of angles in Strategy Wing! We'd be thrilled to have you join us whether you're bringing back a classic or have a new section in mind!
Speaking of new sections, we have one debuting this month! Sparks has given Dr. Wily a chance to rest and has let the Blue Bomber take a vacation, but in the meantime, he's taking us through a fast-moving world of geometry and catchy tunes in Just Shapes & Beats: The Groovy Guide. Check it out and get some tips on dodging lasers, snakes, and more.
Fittingly for the end of the year, as one section begins, another draws to a close. Now that Bowser has been defeated, there's but one last Shine Sprite to collect in Shine Get, so be sure to join Waluigi Time on one last adventure trapezing through 2D with F.L.U.D.D.. Thanks for all the good times, Waluigi Time, and may those Shine Sprites ever keep you in their glow!
That's everything I have to say up here, so take a gander at the SOTM results and get to seeing what the team has for you this month. Happy holidays, everyone! See you in 2025!
Section of the Month
A shout of congratulations goes to Waluigi Time (talk) for his coverage of the final battle of Super Mario 63 in Shine Get (and the level leading up to it, as well as the escape sequence after it). He may really need it shouted, too, seeing as it took him up to space! He certainly condensed a large level and a dramatic final boss into an amusing, light read! Thank you all so much for the support you show our writers with your votes. Keep it up into the new year, and we'll keep on producing new looks at your favorite (and not-so-favorite) games!
| STRATEGY WING SECTION OF THE MONTH | ||||
|---|---|---|---|---|
| Place | Section | Votes | % | Writer |
| 1st | Shine Get | 10 | 55.56% | Waluigi Time (talk) |
| 2nd | Pitohui's Pokémon Academy | 6 | 33.33% | Hooded Pitohui (talk) |
| 3rd | Four Steps for a 3D World | 2 | 11.11% | Hooded Pitohui (talk) |
Four Steps for a 3D World
Written by: Hooded Pitohui (talk)
Hello, all you readers of The 'Shroom, and welcome back to Four Steps for a 3D World, a section in which we look at levels from a selection of 3D Super Mario titles through the lens of a design philosophy Koichi Hayashida discussed in an interview.
In brief, 3D Mario game levels in certain titles are designed around an introduction that lets a player learn a mechanic in a safe environment, further development that builds on what the player is learning and introduces more complicated aspects of a mechanic, a twist that adds some kind of significant wrinkle or challenge to force players to consider the mechanic from a new angle, and a conclusion which gives players one final satisfying chance to show they've mastered the mechanic. We look at 3D Mario levels and see if they conform to this model while trying to get some insight on how a good level is constructed.
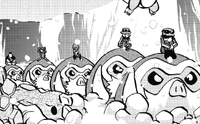
It's the holiday season, so to match the chill in the air and the twinkling lights, I thought we'd blast off into the cold depths of starry space and look at the Freezeflame Galaxy from Super Mario Galaxy. More specifically, to avoid the heat, we'll be looking at the galaxy's first mission, The Frozen Peak of Baron Brr, which takes place entirely in its icy half.
Now, Super Mario Galaxy was not a game Hayashida directed, unlike its numbered sequel. While certainly not as linear as the 3D World and 3D Land pair, it's a step up in linearity from 64 and Sunshine to be certain. Does that mean the four steps we've become so familiar with are already taking shape in its level structure, or is something different happening here? Put on your parkas and brave the Baron's peak, and we'll find out!
Before proceeding through the level, I want to break down a few of the things this introductory area does in detail, because it introduces quite a bit at once, and does so fairly elegantly. The sinking and tilting platforms guide the player directly to the first ? Coin, which unveils the Ice Flower, which isn't much to speak of in and of itself, only serving to make the power-up a clear point of interest. From there, the platforms guide players to the Ice Flower, but also put them on-track to encounter Li'l Brrs over small platforms, where they're likely to knock the Li'l Brrs into the water with a spin and see them immediately rise back up, quickly establishing that players need to lure them over solid ground and attack them there.
That lesson learned, players then collect the Ice Flower, which is smartly placed right over a water fountain and a small puddle of water, meaning that players will immediately learn that the Ice Flower allows them to walk atop water, allowing them to explore the big lake around them. From there, three paths are immediately within notice, and what's interesting is that the path to progress is the least attractive of the three. Going forward will take the player towards progressing through the level, but to the right is a Sling Star which players likely spotted while en route to the Ice Flower, and Sling Stars usually lead to progress or goodies, making it likely to attract the attention of players who will find it leads to a slide with some mushrooms. To the left is a giant ? Coin floating over the lake which can lure players in that direction. When collected, it spawns a bunch of coins. Whether players take the slide or go to collect the coins, both of these routes run down the timer on the power-up, making it likely the power-up will run out, both teaching players that they have a limited time with the Ice Flower and giving them a feel for the amount of time they have.
Incidentally, the left path also has an alternative route to progressing just a bit past the ? Coin. While the main route of progress has players triple jump up fountains, this path only requires wall-jumping up an alcove, making it an easier alternative for players who haven't mastered the triple jump and reminding them of a mechanic they'll use again later in the mission. It's a very well-designed area, Freezy Peak's base!
Looking at this mission as a whole, I'd say it doesn't fully fit our typical four steps, but that's not necessarily a bad thing. I do feel like the Development section is a little lackluster, myself, and maybe the mission would be a bit improved for having a proper Twist section to add a little spark of excitement before the boss battle, but the mission shines in its Introduction portion. It's a mixed bag where some things are done quite well and other things feel like they could have been done better, but it's a decent mission that sets up, like, three of Freezeflame's other missions handily.
That's all for this month! With four Bomps on the way up, three Goombas at the mountain's base, two Li'l Brrs with Baron Brr, and one wish of happy holidays to all of you readers, this has been Four Steps for a 3D World!
Just Shapes & Beats: The Groovy Guide
Played by Sparks on the Nintendo Switch
Ahhh… it's the end of 2024, in my opinion one of my favorite years. After happily playing through the entirety of Mario & Luigi: Brothership, it's time I got back to making walkthroughs!
After the Mega Man 2 walkthrough I put up a poll on the Mario Boards to get feedback for what game I should do next. In a decision between Mega Man 3, Cuphead, Just Shapes & Beats, Undertale and some other game, JS&B won out in the end by one vote! After this walkthrough is finished, I will start the one for Mega Man 3. Think of this as a short break for Wily to recover… although he didn't get hurt.
Now… about Just Shapes & Beats! It's a musical bullet-heck game that has players controlling colorful shapes while avoiding a barrage of pinkness to amazing music. I've played Geometry Dash back then (not the most recent 2.2 update however) and it's kinda like it, except it his game is much more fun and has better tracks. Ever since August 2, 2019, I have been playing this game and managed to get S ranks on all songs, both normal and hardcore. Yeah, you can say I'm an expert.
This walkthrough will cover the entire story mode of the game, played on normal difficulty. Without further ado, let's get started!
Tutorial
First song
We start out as a square, alone in the darkness. But then, a triangle appears on the right side of the screen. When we move over to it, the screen resets, but music starts playing. Pink spiky projectiles are slowly launched from the right side of the screen. Additionally, another triangle appears on the right. For this song, we must constantly obtain these triangles to move on. For each triangle obtained, the music gets more intense, and more obstacles get added, like lasers, bombs and expanding circles. Eventually, we get to a screen where walls block our way. They look impossible to get past, but birds show us that we can dash to zip on by! Dashing gives you a short burst of speed and makes you temporarily invincible too. Using this new ability, we get past a few more unremarkable screens until the pink starts closing in. It then retracts before the several obstacles fill the screen. Don't worry, it's much easier than I make it sound. After dodging for about 20 seconds, we finally clear the stage, obtaining another triangle.
After getting through this stage, we get sent to the map, where a triangle creates a path we must follow. The path leads to three songs that crust be cleared: "Chronos", "Milky Ways" and "Logic Gatekeeper". They can be cleared in any order. Let's start with Chronos!
Chronos, by Danimal Cannon and Zef
Now, these songs don't have collectible triangles - we just have to dodge. There are also checkpoints in these songs! Also, we have three lives; losing all 3 of our HP will cause us to break and force us to retry that section. If we lose all of our lives, we must try the entire song again. Chronos has five checkpoints, so I'll go over these by "sections" if you will. That means Chronos has six sections.
The first section is super short and easy. Projectiles are fired from the right side of the screen, and two triangles fire projectiles before zooming to the left.
The second section has more projectiles, but also horizontal lasers. I recommend going low into the bottom of the screen, as they mostly occupy the top. Near the end of this section is a huge bomb that releases a ton of projectiles everywhere. It's really difficult to dodge this attack, so go to the left side and dash at the right time!
The third section has lots of lasers, both horizontal and vertical. Still easy!
The fourth section has less lasers, but now there are expanding circles. Near the end of this section are more projectiles.
The start of the fifth section has several bombs that release projectiles, but they are all easy to avoid. Afterwards, "large lasers" Will strike the screen to the music. In the middle of this section, circles expand and more bombs explode.
The final section has more large lasers, but also a few projectiles.
These stages are super hard to describe in such a short time. I'm just giving out the general Information here! With the triangle obtained in this stage, it helps to open the path to the boss. We still need two more though, so let's move on to Milky Ways!
Milky Ways, by Bossfight
This stage has two checkpoints.
In the first section, squares appear in various places to the music. Their sizes range from small to large. Then, a wall of bombs explode on the right side of the screen, where lines of squares zoom to the left while large square continue appearing. The same thing happens on the left side not long afterward.
The second section has more squares appearing and a few lines of squares from the right before circles pop up in rapid succession, accompanied by bombs. A series of circles then fill the screen before larger circles appear. Try to get in the small openings the circles make!
The final section is a repeat of the first section, with lines of squares from the right and large squares appearing, except there are more large squares.
Only one more stage to go! Logic Gatekeeper.
Logic Gatekeeper, by Danimal Cannon and Zef
This stage has three checkpoints, so there are four sections.
The first section is super short and easy, with just expanding circles and triangles that Fire projection, like in Chronos. Near the end, saws move along the top and bottom of the screen, so stay away from those!
The second second is honestly bad. There are these lines that pop up and zoom to the left without warning. My advice is to stay at the top of the screen and avoid any incoming projectiles. The lines will then be replaced by lasers.
The third section marks the return of the "large lasers", also from Chronos. They mostly strike the middle of the screen, so stay at the top and bottom, but watch out for incoming lasers! Some circles appear as well.
The final section has more large circles and some bombs. Honestly pretty easy.
Alrighty! Now the boss stage has opened up!
Long Live the New Fresh, by Danimal Cannon
In boss stages, you have double the HP, but there are no checkpoints. In other words, we must get through the entire stage in one go, but we have more health to compensate.
At the beginning of the stage, we have a circle with triangle horns firing spiky projectiles to the music. It is accompanied by bombs from the right side of the screen. The circle will then grow from energy being drawn to it, which must be avoided. After enough energy…
The boss gets a face and grows arms! It then pounds the ground, making waves and sending out small projectiles. Just before it does so, dash to the top of the screen to avoid this sudden crazy attack. It will then stay in the center, where circles appear around it and lasers strike. The boss then fires its arm to the left, sending out a large wave and several projectiles in the opposite direction. It then starts spinning in the center with only one arm.
While the boss is spinning, more arms are launched out, all of which are telegraphed by their bright light. After a several seconds, the boss grows its second arm back and the attacks continue. One arm is launched directly to the boss, making it angry and having four arms at once! I recommend hiding out in a corner because this is much more difficult to avoid.
Afterwards, it attacks like it did so at the beginning of the battle, just a circle shooting out spiky projectiles and rotating. Then, the face of the boss enlarges and fires lasers left and right, descending to the bottom from the top. It then shoots out an arm to the left and spins around before firing a large laser from the top right, curving to the top left. It then descends and shoots lasers at a faster speed and causes an impact when the boss lands on the ground. It then fires a smaller laser from the bottom right to the top left. This entire sequence of attacks is then repeated before the arms of the boss turn on it and punch him, defeating him and ending the fight!
So we defeated the boss! We then see three large triangles stack up and transform the screen…
Paradise
Overworld
…into a paradise! Trees, water, a happy sun… hooray! We explore this world and encounter a large blue square with a teary eye. It takes us down a slide to an island, where we see a happy flower await us. Finally, after wandering through a cave, we find a sleeping flower that lunges at a triangle, causing it to bleed. Something is wrong here…
Suddenly, it transforms into that boss we fought earlier! It chases us down and corrupts this paradise, causing chaos as well. It then detaches the large triangle tree from the ground and now we have to stop it.
New Game, by Nitro Fun
At the start of this song, the boss watches the spinning tree shoot out lasers and small projectiles from the center of the screen. Not long after, it will shove the tree into the ground and punch it several times, shooting out more lasers.
After burying the now corrupted tree, it will create these tower pieces as the screen scrolls upwards. This part is difficult because we have to constantly dash upwards while avoiding lasers and the spikes from below. After some time, the tree splits up into three triangles, two of which shoot out many small triangles and float off-screen. Then, the boss arrives and eats the smaller triangles from the one remaining triangle. As a result, he becomes more powerful now!
In crazy quick maneuvers, he fills up the center of the screen, causes spikes to rain down and rolls around the dies before making an impact in the center before he PAC-MANs to the left before repeating the cycle. After the second time, he eats another triangle and powers up even more (accompanied by the Super Mushroom sound effect)! In this final section, the boss becomes a cannon and spins around, shooting out trails of spiky projectiles. After three spins, smaller squares revolve around the boss, adding more obstacles. After three more spins, he powers up even more before inhaling everything, including the players. This cannot be avoided, and afterwards he shoots us off the screen, ending the song.
Island
We land on an island, where we see the devastation caused. Our square friend drifts away on a tree, and we cannot escape the island. All is not lost, however! A level drifts in from the left side of the screen.
The Art of War, by Chipzel
This stage has two checkpoints, for a total of three sections.
The first section has many small, slow projectiles falling from the top of the screen. Some faster squares fall too. Carefully navigate through them and avoid them.
The second section has these "walls" of circles that split up the screen, as well as rings of circles forming from the bottom of the screen (where water is now present).
The final section of the song has rings that shoot out many projections all around them. There are then rings that roll by the top and bottom of the screen. I you have to dash through the rings one at a time. Because water inhabits the bottom, the top path is better because it has more space. Lastly, circles fill the screen in a cool pattern, but it is easy to avoid.
Completing the stage has provided a bridge to escape! We must now jump past corrupted flowers at the right time. Timing is key! We then wind up on another island where three parts of a ship are encased in boxes. To free them, we must clear the three songs here: "Termination Shock", "Sevcon", and "Cascade". I'll start with Cascade.
Cascade, by Kubbi
This stage has four checkpoints, making for a total of five sections.
The first part has lines of squares curving downwards from the top of the screen, with some small projectiles falling too. Soon, slower lines of squares emerge from the bottom.
The second section has lines of squares appearing from the center of the screen, curving as they move. Projectiles fly in from the right of the screen later on, so staying at the left is preferable.
The third part has more lines of squares from the center, but some of them are very fast, so be careful! Near the end, squares will descend from the top, getting bigger and faster as the music intensifies.
The fourth section is the longest one in this song. Large lasers will strike the screen, sending out lots of squares away from them. Squares also arrive from the top and bottom of the screen by themselves too. One moment here has an unpredictable attack from an explosion, so don't feel bad if you get hit by it.
The last part of the song is a barrage of squares and projectiles from the center of the screen. The best way to avoid it all is by hiding out in a corner. Now for Sevcon!
Sevcon, by Big Giant Circles
This stage has big giant circles in it, funnily enough! It also has only one checkpoint, making for two sections overall.
The first section has a circle in the center shooting out slow circles. Eventually, circles will be drawn into the main circle, where more are sent out upon collision.
The second (and longest) section starts out with a large rotating wall of circles that moves around. Then, the main circle gets a large ring of circles and moves around while different ones are shot out everywhere as projectiles. This is honestly quite difficult to describe; I'd recommend watching along using a Let's Play of the game to see it for yourself. Finally, the main circle fires out slow circles around it before disappearing, ending the song. Only one more to go!
Termination Shock, by Sabrepulse
This song is noted to be the toughest stage in the Island world, as it is very long and difficult for the early game. It has four checkpoints, making for five sections.
The first part of the song has these two circles in the center of the screen, expanding at specific times to the music. Eventually, they shoot out lots of small projectiles around them before disappearing, starting the next section.
The second section has these pillars that form on the top and bottom of the screen before zooming to the left. The left and right sides also get pillars, so stay away from those. Soon, projectiles are shot from the left and right, so be careful.
The third (and longest) section has these spiky pillars that appear and subsequently rush off in the direction the spikes face. They can only go left and right, so try to stay in the center. As you'd expect, more projectiles are fired later on. The spiky pillars will also gain the ability to move downwards too.
The fourth section is a barrage of pillars and projectiles from the right side, before switching to the left, right and left again. You must constantly move up and down while dodging the projectiles.
The fifth and final section is the same as the second one, so no need to explain that again.
Pirate Ship!
With the boxes destroyed, we can fix the boat! He helps us get off this island and to travel to the left while awesome Pirate dubstep music plays. It's not a clear path however, as corrupted flowers and spikes block the way. We must rush past and jump to our goal. If you take damage, you'll just be knocked back a little, so no worries!
We arrive at the base of a volcano, but the boss appears and puts one of three corrupted triangles in it, corrupting the volcano as well! We now must traverse the volcano and reach the top! A wall blocks our progress however, and we must defeat a boss to proceed past!
Barracuda, by Noisestorm
The boss fight here is a triangle with an eye on it. It sends out "triangle snakes" that slither across the screen in curved motions. The triangle itself then grows and sends out lines from its three sides as well as more snakes. To easily avoid the lines, we must get to one of the corners of the triangle to get out of range. The boss then turns upside-down, so we have to move to another corner.
The large triangle exits off-screen to the bottom before rising up as a huge pyramid, sending out lines of squares from below too. Once it reaches its maximum height, the pyramid rushes to the right side and constantly sends out lines everywhere but the top, so we must stay high up. The triangle shows up growing circles at our range, so we have to navigate. Snakes also rise up from the bottom after a few circles. After more circles, the boss moves to the left and repeats. Afterwards, the boss zooms off to the bottom.
In this final part, the boss appears at the edges of the screen and shoots out lines to its sides and circles in front of it several times. After some time, four snakes slither in from the four sides before the boss continues attacking. In one final attack, the triangle appears in the center and explodes, sending out lots of snakes across the three sides of it. After the explosion, small triangles rain down from the top for the remainder of the song.
Now, the wall is destroyed and we can officially enter the volcano! But that'll be for next time. Whew! Describing all of that was exhausting. Some things are easier to show than to explain, y'know?
That marks the end of this section. Merry Christmas, Happy Holidays and Happy New Year everyone!
Pitohui's Pokémon Academy
Written by: Hooded Pitohui (talk)
Right then, are we all prepared? With the holidays only days away, I thought we might engage in a little holiday reminiscence, reflecting on days gone by. Ah, but, to be clear, I don't mean twenty years ago or even thirty. No, I'm thinking we turn our minds back much further than that, not by decades, not even by centuries. No, for our lesson this month, we're reaching back in time across millennia, to a time when glaciers stretched across lands which are now temperate. In these frigid days, great herds of Mamoswine roamed the wilds, and today, we'll get a taste of their might by raising one ourselves.
Before we get into the lesson, for those of you just joining us, you can find our course policies and aims in the first box below and a refresher on frequently-used terms in the second box. By all means, skip them if you're already familiar with what we do here!
First, a Smogon University course, this course is not. No, this academy's lessons are designed to get trainers of any stripe thinking about how they can raise their Pokémon, and, as a result, aren't designed to keep up with the widely-accepted metagame for the series. In some cases, the way I've raised my Pokémon may even flies in the face of conventional wisdom. If you're looking for top-tier strategies, do check out Smogon, but if you merely want to get a little deeper into raising Pokémon while still doing things your own way, feel free to use this section as a reference.
Since we all know the importance of citing our sources, I also need to credit the design of some of the tables used in these lectures to Crocodile Dippy, author of the Pocket Handbook which can be found in early editions of Strategy Wing. Additionally, I'd like to give nod to the Bulbagarden Archives, the source of many images in this section.Base Stats: Base stats are the values associated with a particular Pokémon species, and are the same across every individual Pokémon of a given species. You have no influence on them. You can think of them as traits tied to a species. A chimp isn't ever going to be able to get as good as digging as a mole will be, and, likewise, an Abra is never going to have the defensive prowess a Shuckle has.
Individual Values (IVs): Individual values, as their name implies, are associated with individual Pokémon. They range from 0 to 31 in each stat, with 31 being considered a "perfect" IV and higher numbers corresponding to different stats. Magikarp A and Magikarp B will have the same base stats, but they may very well have different IVs. To stick with the animal analogy, one mole may be born with larger claws than another mole, and that first mole is probably going to have an easier time digging through dirt than the latter. Individual values are set in stone, strictly speaking, but you can use Hyper Training (from Generation VII onwards) to functionally get a perfect IV in a stat.
Effort Values (EVs): Effort values are the one thing you can easily change. A Pokémon can earn, primarily through battling, but also through means like the use of certain items or mechanics like Super Training, up to a total of 510 effort values, with up to 252 in any given stat. To finish off the animal analogy, no matter what kind of claws a mole is born with, moles who have more experience digging are probably going to be better at digging than moles which have never dug.
Nature: A Pokémon's nature is, more or a less, a stat modifier with a name meant to make it sound like a Pokémon has some personality. Natures will raise one stat by ten percent and lower another stat by ten percent. Some natures raise and lower the same stat, canceling out the effect and leaving stats unchanged. Natures can be functionally changed with the use of special mint items from Generation VIII onwards.
STAB: STAB stands for Same-Type Attack Bonus, and refers to the boosted power of moves that match the type of the move's user. To illustrate this, consider the case of a Lombre, a dual-type Pokémon which is both a Water-type and a Grass-type. Any Water-type moves Lombre uses will have their power boosted by 1.5x, and any Grass-type moves Lombre uses will, likewise, have their power boosted by 1.5x. (There are circumstances where this does not apply, and, while the 1.5x multiplier is typical, some games use other multipliers.)
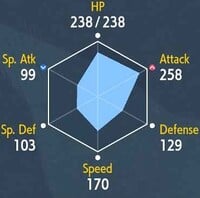
Jumping right into Mamoswine's base stats, it should be immediately apparent that we're going to want to emphasize attack. HP being Mamoswine's second-highest stat makes a bulky attacker a potential option, but we mustn't rush to that conclusion without first examining its defenses, and they are... mixed. Special defense is quite weak, while defense is decent. Perhaps we focus Mamoswine on physical stats, then? Well, we could, but it's worth noting that its speed is equal to its defense, which raises the question - do we forget about speed and try to make Mamoswine an imposing physical attacker and defender, or do we discard defense and boost speed so Mamoswine can (ideally) KO opponents before they can attack it?
That high base HP may suggest the former approach is better, but for fuller tiebreaker, I suggest looking at Mamoswine's weaknesses and resistances. In a situation like this, if a Pokémon is weak to many common types, it's probably better to emphasize speed, and if it has a number of resistances, that makes the defensive approach more viable. In Mamoswine's case, it has one resistance (Poison) and one immunity (Electric), which isn't great. An immunity is always appreciated, but that's still a low total. On the flipside, Mamoswine has five weaknesses. Now, it can counter three of those weaknesses with its STAB moves, but that's still a wide range of weaknesses to exploit. In light of that, Mamoswine doesn't seem well-suited for playing defense.
Taking all of that together, what we'll do is emphasize attack and speed, investing 252 EVs into each and handing the remaining 6 out to HP to capitalize on its strength there.

|
Name: | Mamoswine | Base HP: | 110 | |
| Category: | Twin Tusk | Base Attack: | 130 | ||
| Type: | Ice | Ground | Base Defense: | 80 | |
| Abilities: | Snow Cloak | Base Special Attack: | 70 | ||
| Oblivious | Base Special Defense: | 60 | |||
| Thick Fat | Base Speed: | 80 | |||
Before we move on from stats altogether, we must pick a Nature. Here, our dump stat is clearly special attack, which we have no reason to use at all. We've established we're emphasizing offensive stats over defensive stats, so we want either Jolly to boost speed or Adamant to raise attack. We get a considerably larger increase here from attack (recall that Natures are percentage-based), and since our biggest priority is allowing Mamoswine to hit as hard as possible, we will choose Adamant.
With all stat-related matters addressed, we move on to choosing an Ability. Mamoswine's Hidden Ability far and away outshines its others. Thick Fat is the gold standard for Mamoswine, effectively granting it an additional resistance (to Ice-type moves) and mitigating its Fire-type weakness. Snow Cloak may be acceptable if you're having difficulties obtaining Thick Fat ifyou intend to use Mamoswine on a snow/hail team, but I'd more broadly recommend Oblivious if you must go with one of Mamoswine's default abilities. At least with Oblivious it will be guarded from Intimidate potentially taking a bite out of its attack.
Turning our discussion to building a moveset, we'll begin as always by selecting STAB moves for Mamoswine. Now, if you browse through Mamoswine's level-up moves and TM moves, you'll notice that it has no physical Ice-type moves with a power above 65. You may think this an issue for us, and you think correctly. That's too weak for our purposes. Avalanche does receive a power boost if Mamoswine has already been damaged during the turn, but to use it would defeat all of our investment in speed. No, for an Ice-type STAB move, we need to turn to Mamoswine's Egg Moves. Understanding Egg Move inheritance is left as an exercise for you, students, but if you need a primer to get you started, you may consult these introductory notes. More specifically, of Mamoswine's Egg Moves, we need to obtain Icicle Crash from an Alolan Sandslash or a Beartic, giving us a relatively (90% accuracy) reliable 85 base power physical Ice-type move.
Luckily, our search for a Ground-type STAB move is less convoluted. Here, we turn to that ever-classic ol' reliable, Earthquake.
| Icicle Crash | 
|
The user attacks by crashing large icicles onto the target. This may also make the target flinch. |
| Earthquake | 
|
The user sets off an earthquake that strikes every Pokémon around it. |
| Ice Shard | 
|
The user flash-freezes chunks of ice and hurls them at the target. This move always goes first. |
| Rock Slide | 
|
Large boulders are hurled at opposing Pokémon to inflict damage. This may also make the opposing Pokémon flinch. |
Now, for moves three and four, we have more flexibility, so let's consider what we want out of Mamoswine. We want it to strike hard, which we've covered with our STAB moves, and we want it to strike fast. Looking at its learnset, there's a move that can assist us with that second goal. Ice Shard is a physical Ice-type move, which suits Mamoswine well, but more importantly, it is what's called a "priority move". That means that, regardless of any differences in speed, Mamoswine will act before its opponent when it uses this move (in the vast majority of cases - if they also use a priority move, or a move with higher priority than Ice Shard, this does not apply). While the move isn't powerful, that it generally guarantees Mamoswine will strike first and that Mamoswine gets STAB from it make it highly useful all the same.
For a fourth move... Honestly, there is a range of moves you can choose from. None of Mamoswine's remaining moves are great counters for the two weaknesses not already countered by its STAB moves. Trailblaze can give Mamoswine an option for dealing with Water-types while raising its speed, which certainly aligns with our goals, so it isn't a poor choice, but it is on the weaker side. If you plan to lead with Mamoswine, you may choose Stealth Rock so it can set up an entry hazard early. Mamoswine has a few Dark-type moves it can learn, but the Dark-type doesn't expand its offensive options that much, so if you want it to have one, I suggest the utility of Knock Off over a more powerful move like Throat Chop. Snowscape is possible if you're at a loss and have a plan for a Snow team, though it doesn't really align with Mamoswine hitting hard and fast. Personally, I've elected to go with Rock Slide, since it's a reasonably powerful physical move and Rock covers some pretty common types, but you should experiment with Mamoswine's fourth move and see what works in your own judgement.
Now, I'd say experimenting with a fourth move for Mamoswine is a light enough homework assignment you all can complete before we reconvene in January, don't you agree? I know, I know, nobody likes assignments over the holidays, but you have plenty of options, and it is but only one move, so perhaps don't think too ill of me. If you will refrain from premature grumbling... a little birdie has informed me there may be someone offering Mamoswine rides around campus this evening before we all depart for the holidays. Perhaps you would like a taste of riding atop this ancient creature? Just don't spread the word too widely - the dean did not sanction this.
I trust I shall see you one more time before the day ends, but if you choose to depart early, may you have a joyful new year!
Shine Get
Written by: Waluigi Time (talk)
Hello there, 'Shroom readers, and welcome to the final edition of Shine Get! Last time, Bowser was defeated and the apocalypse was canceled, Kamek helped save the day but still hates Mario because status quo is king, Peach was rescued, Mario got to eat cake, and Luigi was stuck in a room somewhere. This time, I'm going to collect the final Shine Sprite and Star Coin in the game and wrap things up!
With 63 Shine Sprites collected, the cannon in the Castle Grounds finally opens up. You can aim to the left and shoot onto the roof of Peach's Castle, which creaks a lot when you walk on it. She might want to have that looked at. There's a Sling Star above the peak of the main tower, and launching out of it will get you several 1-Up Mushrooms and the Wing Cap. Use the Wing Cap to fly all the way to the right side of the screen, and you'll enter a secret course that the game doesn't actually call a secret course! This is technically still classified as the Castle Grounds. When you enter it, it's called The Edge of the Mushroom Kingdom, but it gets a completely different name when completed as a course that I'll be using here because I want to.
The Secret of the Shine Sprites
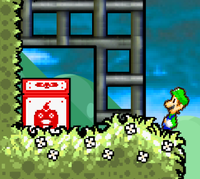
Things start out with some pretty simple platforming. Early on, there's a Rocket Nozzle inside of a cage, and a lot of arrows pointing up. You can probably guess that the first objective is getting an Invisibility Cap to get inside. However, the platforms to the right are made of cages as well, along with some breakable crates. You have to avoid breaking too many of those, otherwise you won't have enough solid ground left when you're invisible. At the end of this segment, there's an Invisibility Cap as well as the Turbo Nozzle. The Turbo Nozzle is a very double-edged sword here that I don't recommend using unless you have to! Otherwise, you'll probably end up flying into the abyss or crashing into the side of a breakable block. This is a pretty tricky segment, but thankfully they get it out of the way early.
After several attempts and a game over, I got back to the Rocket Nozzle and now I can do what I always wanted to do and listen to arrows. There's two paths here, though. You can continue up and to the left, or go right across some precarious looking Bumpties. You might be meant to use the Turbo Nozzle for that one, but Rocket feels safer and works just fine. At the end, there's a Wing Cap, and you're actually going to want this! It's an easy flight back to the fork in the road, then keep going to the left. The final Star Coin in the game is here in between two 1-Ups, and it's pretty hard to miss (at least visually, we are dealing with the Wing Cap after all!). This unlocks the final special prize, which I'll be checking out a little later! Hopefully I don't keep you in too much suspense, or you can just scroll down, I guess. It's also possible to do this with just the Rocket Nozzle and a good spin jump, but pretty tricky. Continuing to the left, there's a cloud with the Hover Nozzle, making it easy to go up and to the next screen.
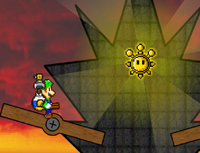
I had a weird visual bug where Luigi briefly turned into an inverted, transparent version of Mario when I went to the next screen, but unfortunately I wasn't fast enough on the screenshot button. The big focus of this last area is what appears to be a partially destroyed fortress, and infiltrating it is probably the trickiest part here. There's several pendulums to deal with, an elevator that spins in a loop in such a way that it's very inconvenient to work with, and as you get closer, chasing Bullet Bills! Inside the fortress, things get easier. It has a bit of a labyrinth feel but it's linear. You're constantly under assault from Bullet Bills in the homing and non-homing variety and fire geysers, but there's also lots of coins and a health refill heart so it's not too bad. At the end, there's a seesaw platform over some constantly active fire geysers, and one last platforming segments with Bumpties and spinning platforms trying to get in your way. The final Shine Sprite of the game is just past those, so one last time for good measure... Shine get!
Now that everything's collected, there's a couple more pieces of business to take care of. First of all, the prize for collecting every Star Coin! The final door in the Level Designer room leads to the "Mush-Room", a room filled with a ton of 1-Up Mushrooms and breakable boxes filled with coins to get even more 1-Ups! By the time I collected everything, I had over 50 lives. But here's the problem... At this point in the game, this prize is mostly worthless! The last Star Coin is about halfway through in a level that you need to have completed every other Shine Sprite in the game to unlock, so the only thing you'd need these 1-Ups for is if you were really bad at the second half of that level. Granted, it's hard to make a prize for 100% completion (in this case, almost 100% completion) that feels worthwhile because you've already engaged with the rest of the content and don't have anything to use it for anymore. It might also be possible that 1-Ups in the main game carried over to the Level Designer, but I'm not sure. If that was the case, it's salvageable in concept.
Now, one last thing. I've read that once you get 100% completion you get a secret ending if you fight Bowser again, so give me a moment to go find out if that's true and report back. I guess that's something I can use those 50 lives for, huh? Thankfully, this will be quicker now because the pipe is still here, letting me skip all the way past the robot Bowser battle. (Unfortunately, you still can't bring Luigi.)
Hi, I'm back! Turns out the "secret" ending is that it just says "The End" with no question mark now, and Mario says "Hey, you're very good! See you next time!" instead of "Thank you so much for playing my game!". Kind of overhyped if you ask me, but at least it's not just someone spreading misinformation on the internet! I have to wonder though... What happened to Bowser? Last time we saw him he was falling off a tower in space, down to a castle that was about to be completely destroyed. Is he dead? No one says anything about his fate or seems to care! I guess we'll never know.
So, that's Super Mario 63 in its near entirety, except for the Level Designer, which I really can't say anything about! It's been a lot of fun replaying this game and getting to bring it into The 'Shroom. It's a fangame with quite the legacy that still continues to this day. As a matter of fact, a team of fans are currently working on a sequel with Runouw's approval called Super Mario 127, which looks pretty cool. Anyway, thank you for coming on this journey with me!
An Octet Gazette
Written by: Museful Traveler (talk)
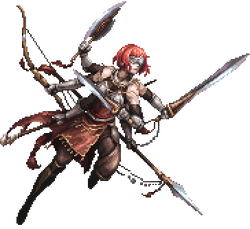
Welcome back to An Octet Gazette, readers of The 'Shroom! After last month's intermission, we're finally at the point where we can delve into our first pair of secret jobs, the Warmaster from the first game and the Armsmaster from the second. Now, I've mentioned in passing that the secret jobs between the two games don't clearly match up one-to-one, but these two are an exception. These are clear counterparts, so let's see how they stack up to one another!
Hit Hard and Hit With Everything
Starting off with weapons, we have a treat, because the Warmaster is able to wield all six weapon types.
The idea behind the Warmaster is unambiguous. It's the premier physical class of the game, emphasizing most strongly physical attack and physical defense and providing access to every weapon type. It's built around the central idea of hitting as hard as possible with any weapon, and almost all of its skills have a notably high base power, putting them a league above a standard attack with the corresponding weapons type.
To obtain the job, however, the goddess Winnehild must be defeated in the Shrine of the Warbringer in North Riverford Traverse. Once she is defeated and the job is equipped, it offers the following skills to those willing and able to spend the JP to unlock them:
I'm not going to get too deep into the weeds of most of these attacks. In five out of eight cases here, I could boil any commentary down to "this hits really hard with its respective weapon". There isn't a lot to the Warmaster beyond that! It's a "what you see is what you get" job class. If you really want to get into number crunching, check out the skills' pages on the Octopath Traveler Wiki, as they have the detailed damage calculations for each move.
That said, let's look at the few exceptions. On the surface, it might seem like Guardian Liondog provides the best bang for your buck here, offering multiple hits where the other skills only offer one and with the only tradeoff being that it randomly targets foes. It's more balanced than it seems on the surface, though. Where the rest of the job's skills have high base power, Guardian Liondog has fairly low base power, and not every hit of the move is guaranteed to land. Whereas the rest of the Warmaster arsenal focuses on dealing big damage, this skill is more useful for chipping away at Shield Points
Nightmare Chimera is mechanically unique. Upon using it, a traveler can select a weapon from the inventory, using it for the move but sacrificing it in the process. The selected weapon does receive a considerable power boost in the damage calculations, so the utility is easy to see. That said... you can easily search around and see folks hesitant about using the skill because they don't want to give up any equipment they've collected. I get it.
Winnehild's War Cry is fairly straightforward. Spend extra SP (and BP), and get six strikes in succession in return. The one thing to note is that the strikes always occur in the same order. It'll always use the sword first, then the polearm, then the dagger, then the axe, then the bow, and finally the staff. Just keep that in mind for the purposes of breaking shields!
There you have it! That's the Warmaster, a powerful, straightforward job. Now, let's see if its Octopath II equivalent changes it up in any way, or if it's so straightforward it didn't need much changing.
Divine Tools Forged by Mortal Hands
This part will seem a bit silly this month, but we've got to establish the weapons the secret jobs in each game can wield separately. So, what does the Armsmaster have available?
Oh, look, it's everything. Again. I did say these two were direct counterparts.
Moving on to an actual difference, this job is not obtained by battling a hidden boss. No, rather, unlocking this job and its full potential is a reward for an elaborate sidequest. In the lategame town of Gravell, you can save a blacksmith from a debt collector, who will then grant you the job. However, most of the job's skills are locked away and unusable initially. To unlock each skill, you must find Rusty Weapons hidden away in various parts of the world (one for each weapon type). Bringing them to the blacksmith, he will reforge them into divine weapons. Upon reforging each weapon, its corresponding skill will be unlocked for every traveler.
However, to make the skills usable, the traveler who has the Armsmaster job at a given moment must have the corresponding divine weapon equipped. In practice, this means you'll generally load out your Armsmaster with most or all of the divine weapons (which works out pretty well, considering separate legendary weapons can be given to the rest of the travelers).
It's less intimidating and long than I probably make it sound! Just going through the game normally, if you're an average seeker of sidequests and hidden areas, you'll probably encounter one or two of the rusty weapons before you even meet the blacksmith, and none of them are particularly tedious to seek out. Anyhow, now that we have all of that established, let's see what skills the Armsmaster has!
So beside the fact that this job obviously has the longest skill names in the series, what's most apparent here is that the Armsmaster follows the same broad structure as the Warmaster. Just like Warmaster, it offers six skills which correspond to the six weapons, one skill which uses all weapons, and one skill with a unique effect.
It's that last category that has received the biggest overhaul. The bane of RPG hoarders, Nightmare Chimera, has been removed in favor of Bulwark. Running off of physical defense isn't as mechanically unique as consuming a chosen weapon, but it does allow for a part of the Armsmaster job to shine that Warmaster only made passive use of. After all, Armsmaster provides just as large a boost to physical defense as to physical attack.
Sixfold Strike, the equivalent to Winnehild's Battle Cry, has been made less potent, but, in exchange, less costly. Its SP cost is reduced and no longer does it require max boost. In fact, rather than the job's ultimate skill, it's positioned as its base skill. Also worth noting is that the order of the strikes seems to have been changed. At least in my testing, it now goes sword, then dagger, then staff, then axe, then polearm, then bow.
The big difference between the Warmaster and Armsmaster, though, is the addition of secondary effects/conditions to the six skills corresponding to the six weapon types. You could argue that these secondary conditions make them less straightforward, but, I mean, it's still a basic "one attack for each weapon" structure, and personally I quite enjoyed the extra layer of strategy they offered. I won't cover their conditions in depth, because most of them are fairly self-explanatory outside of edge cases, but I will say I got a lot of use out of Lionheart's Axe and Hunter's Bow for big damage numbers and consecutive breaks, respectively.
This is a job that has evolved, becoming a little more complex, but also more interesting and strategic. I'd call it a straight-up upgrade in everything from unlock method to skills! Now, that all said, let's take a brief look at the Support Skills of both jobs.
Support Skills
| Name | Effect |
|---|---|
| Extra Experience | Earn more EXP from battle if a party member has this support skill equipped |
| Stalwart Defense | Increases physical defense by 50 points |
| Fortitude | Damage dealt increases as the equipping traveler's HP drops |
| Physical Prowess | Receive a boost to physical attack and defense during battle |
Two of these Support Skills make sense here. Stalwart Defense and Physical Prowess aren't the most exciting, merely further bolstering what the job already excels at, but the concept is clear. Fortitude... I question if it really makes that much sense on a defensively-strong (discounting elemental attacks) job class, which you wouldn't expect to lose HP easily, but I can at least understand it as a "last stand" deal. In that way, it meshes with the emphasis on big damage numbers.
In contrast, I can't really offer a good explanation for why this lategame job class has an EXP booster skill. I guess it could be useful for helping lagging party members catch up? But if they're lagging badly, they probably don't have a lot of JP to spare, and you need to spend a tidy sum to even unlock the support skill in the first place. It's just a bit odd and feels like a letdown at that point in the game.
| Name | Effect |
|---|---|
| Master of Offense | Increases the rate of critical hits on broken foes |
| Peak Performance | Increases the damage dealt at or above full HP |
| Invigorating Break | Restores some HP when breaking a foe |
| Arms Refinement | Fills the latent power gauge when striking a foe with a weapon or element they are weak to |
The Armsmaster Support Skills go in quite a different direction. No longer are any of these direct offense or defense buffs. Like the Armsmaster's six weapon skills, instead they each offer a boost in certain conditions. Master of Offense pairs nicely with skills like Sixfold Strike and Hunter's Bow that can quickly eat through an enemy's shields and break a foe. As do Arms Refinement and Invigorating Break, for that matter. Taking advantage of the full suite of weapons Armsmaster offers to target an enemy's weaknesses and to break 'em quickly seems to be the linking theme here, which is a nice twist that synergizes with the offensive focus without merely bolstering it.
The odd one out here is Peak Performance, which oddly enough feels like an inversion of Fortitude from the first game. It does make a smidge more sense for a defensive role, I'd say. Oh, and if you're curious about that "above full HP"... we'll get there,
But not this month nor next month! We've covered Warmaster and Armsmaster in full, so next month I shall return with another pair of secret jobs!
| The 'Shroom: Issue 213 | |
|---|---|
| Staff sections | Staff Notes • The 'Shroom Spotlight • Poochy's Picks • End-of-the-Year Awards • Director Election • Credits |
| Features | Fake News • Fun Stuff • Palette Swap • Pipe Plaza • Critic Corner • Strategy Wing |
