User:Mid188/Sandbox: Difference between revisions
(Blanked the page) Tags: Blanking Manual revert |
(3 pages for the Overhaul of lists.) Tag: Disambiguation links |
||
| Line 1: | Line 1: | ||
=List of treasure boxes in Super Mario RPG: Legend of the Seven Stars= | |||
==Mushroom Kingdom Region== | |||
There are a total of 11 treasure boxes to find in the Mushroom Kingdom Region: | |||
*[[Mushroom Way]] holds '''4 boxes''' | |||
*[[Mushroom Kingdom]] holds '''3 boxes''' | |||
*[[Bandit's Way]] holds '''4 boxes''' | |||
<br> | |||
{| style="text-align: center; width: 100%; margin: 0 auto; border: #ADD8E6; border-collapse: collapse;" border="1" cellpadding="4" cellspacing="1" | |||
|-style="background: #0000FF;font-size:14pt;color:white" | |||
!Item | |||
!Description | |||
!Image (SNES) | |||
!Image (Switch) | |||
|-style="background: #ADD8E6;font-size:120%;color:#202122" id="Mushroom Way" | |||
!colspan=4|[[Mushroom Way|{{color|#202122|Mushroom Way}}]] ­ ­ ­ ­|­ ­ ­ ­ 4 Treasures | |||
|- | |||
|[[File:SMRPGCoin.png]][[File:SMRPGCoin.png]][[File:SMRPGCoin.png]][[File:SMRPGCoin.png]][[File:SMRPGCoin.png]]<br>5 [[Coin]]s | |||
|In the first area, found near the first patrolling [[Koopa Paratroopa|Paratroopa]]. | |||
|[[File:Mushroom Way Treasure 1.png|240px]] | |||
|[[File:Mushroom Way Treasure 1 (Switch).png|300px]] | |||
|- | |||
|[[File:SMRPGCoin.png]][[File:SMRPGCoin.png]][[File:SMRPGCoin.png]][[File:SMRPGCoin.png]][[File:SMRPGCoin.png]][[File:SMRPGCoin.png]][[File:SMRPGCoin.png]][[File:SMRPGCoin.png]]<br>8 Coins | |||
|In the same area, found next to [[Toad]], being harassed by a [[Goomba]]. | |||
|[[File:Mushroom Way Treasure 2.png|240px]] | |||
|[[File:Mushroom Way Treasure 2 (Switch).png|300px]] | |||
|- | |||
|[[File:RPG Flower.png]]<br>[[Flower (Super Mario RPG)|Flower]] | |||
|In the second area with three rocky hills, found atop the left one. | |||
|[[File:Mushroom Way Treasure 3.png|240px]] | |||
|[[File:Mushroom Way Treasure 3 (Switch).png|300px]] | |||
|- | |||
|[[File:SMRPG Mushroom box.png]]<br>[[Mushroom]] | |||
|In the same area, found right of the right rocky hill (the one where Toad was held captive by a Paratroopa). This treasure respawns each time [[Mario]] enters the world map. | |||
|[[File:Mushroom Way Treasure 4.png|240px]] | |||
|[[File:Mushroom Way Treasure 4 (Switch).png|300px]] | |||
|- | |||
|-style="background: #ADD8E6;font-size:120%;color:#202122" id="Mushroom Kingdom" | |||
!colspan=4|[[Mushroom Kingdom|{{color|#202122|Mushroom Kingdom}}]] ­ ­ ­ ­|­ ­ ­ ­ 3 Treasures | |||
|- | |||
|[[File:SMRPG 10 Gold Coin.png]] [[File:RPG Flower.png]] [[File:SMRPG Mushroom box.png]]<br>[[10-Coin]], Flower, Mushroom | |||
|In the [[Peach's Castle#Super Mario RPG: Legend of the Seven Stars|castle's]] vault. Can be obtained twice: First time after given permission from the [[Chancellor]] and second time during [[Claymorton]]'s takeover of the [[Toad Town#Super Mario RPG: Legend of the Seven Stars|town]]. | |||
|[[File:Mushroom Kingdom Treasures.png|240px]] | |||
|[[File:Mushroom Kingdom Treasures (Switch).png|300px]] | |||
|- | |||
|-style="background: #ADD8E6;font-size:120%;color:#202122" id="Bandit's Way" | |||
!colspan=4|[[Bandit's Way|{{color|#202122|Bandit's Way}}]] ­ ­ ­ ­|­ ­ ­ ­ 4 Treasures | |||
|- | |||
|[[File:SMRPG Mushroom box.png]]<br>Mushroom | |||
|In the third area, after going right at the last crossroads, found at the end and guarded by a [[K-9]]. | |||
|[[File:Bandit's Way Treasure 1.png|240px]] | |||
|[[File:Bandit's Way Treasure 1 (Switch).png|300px]] | |||
|- | |||
|[[File:SMRPG Star box.png]]<br>[[Super Star|Star]] | |||
|In the fourth area with two rotating [[block (Super Mario RPG)|block]]s, found near the entrance. These two blocks are required to be used, so Mario can reach the treasure. | |||
|[[File:Bandit's Way Treasure 2.png|240px]] | |||
|[[File:Bandit's Way Treasure 2 (Switch).png|300px]] | |||
|- | |||
|[[File:RPG Flower.png]]<br>Flower | |||
|In the same area, found in the middle of the area. Like the previous one, rotating blocks are required to be used, so Mario can reach the treasure. | |||
|[[File:Bandit's Way Treasure 3.png|240px]] | |||
|[[File:Bandit's Way Treasure 3 (Switch).png|300px]] | |||
|- | |||
|[[File:SMRPG Mushroom box.png]]<br>Mushroom | |||
|In the last area, found near the entrance. | |||
|[[File:Bandit's Way Treasure 4.png|240px]] | |||
|[[File:Bandit's Way Treasure 4 (Switch).png|300px]] | |||
|} | |||
==Tadpole Pond Region== | |||
There are a total of 24 treasure boxes to find in the Tadpole Pond Region: | |||
*[[Kero Sewers]] holds '''5 boxes''' | |||
*[[Rose Way]] holds '''6 boxes''' | |||
*[[Rose Town]] holds '''5 boxes''' | |||
*[[Forest Maze]] holds '''5 boxes''' | |||
*[[Pipe Vault]] holds '''3 boxes''' | |||
<br> | |||
{| style="text-align: center; width: 100%; margin: 0 auto; border: #90EE90; border-collapse: collapse;" border="1" cellpadding="4" cellspacing="1" | |||
|-style="background: #008000;font-size:14pt;color:white" | |||
!Item | |||
!Description | |||
!Image (SNES) | |||
!Image (Switch) | |||
|-style="background: #90EE90;font-size:120%;color:#202122" id="Kero Sewers" | |||
!colspan=4|[[Kero Sewers|{{color|#202122|Kero Sewers}}]] ­ ­ ­ ­|­ ­ ­ ­ 5 Treasures | |||
|- | |||
|[[File:RPG Flower.png]]<br>Flower | |||
|After using the pipe at the end of the first room, Mario should use the one next to it. In this room, he should reach another one at the bottom and use it to enter a room with yellow stairs. Here, he should go forwards to reach a treasure in front of yellow stairs. | |||
|[[File:Kero Sewers Treasure 1.png|240px]] | |||
|[[File:Kero Sewers Treasure 1 (Switch).png|300px]] | |||
|- | |||
|[[File:Pandorite Sprite - Super Mario RPG.png]] [[File:RPG Pin.png]]<br>[[Huhwhat]] and [[Trueform Pin]] after its defeat (first time)<br>[[File:SMRPGCoin.png]][[File:SMRPGCoin.png]][[File:SMRPGCoin.png]][[File:SMRPGCoin.png]][[File:SMRPGCoin.png]]<br>5 Coins (second time) | |||
|In the same area, Mario should drop down to lowest level and go right to reach a treasure at the dead end. Jumping into this treasure triggers a battle with [[Huhwhat]] and Mario is awarded [[Trueform Pin]] after its defeat. After Mario leaves the room and comes back, this time the treasure contains five [[coin]]s. | |||
|[[File:Kero Sewers Treasure 2.png|240px]] | |||
|[[File:Kero Sewers Treasure 2 (Switch).png|300px]] | |||
|- | |||
|[[File:SMRPG Star box.png]]<br>Star | |||
|After Mario comes back onto the upper level of the room with yellow stairs, he should reach the top of them and enter a pipe there. Upon exiting said pipe, a treasure is seen to the right. | |||
|[[File:Kero Sewers Treasure 3.png|240px]] | |||
|[[File:Kero Sewers Treasure 3 (Switch).png|300px]] | |||
|- | |||
|[[File:SMRPG Mushroom box.png]]<br>Mushroom (lower chest)<br>[[File:RPG Flower.png]]<br>Flower (upper chest, first time)<br>[[File:RPG Bag.png]]<br>[[Cricket Jam]] (upper chest, second time) | |||
|After the water has been drained and Mario entered the previously unavailable pipe, two more treasures are seen. The lower one can be obtained normally, but the upper one has two methods of being accessed, each with its own reward (rewards are not mutually exclusive so both can be obtained without problem):<br>If the [[Boo]] trick is used (go into the corner between the arch and the wall and let Mario be attacked by a Boo. Then run from the battle and use the blinking Boo as a platform to reach the top.), then [[Flower (Super Mario RPG)|Flower]] is rewarded.<br>If the proper method is used (accessing Kero Sewers from [[Land's End]] via pipe), the [[Cricket Jam]] is rewarded. | |||
|[[File:Kero Sewers Treasures 4-5.png|240px]] | |||
|[[File:Kero Sewers Treasures 4-5 (Switch).png|300px]] | |||
|- | |||
|-style="background: #90EE90;font-size:120%;color:#202122" id="Rose Way" | |||
!colspan=4|[[Rose Way|{{color|#202122|Rose Way}}]] ­ ­ ­ ­|­ ­ ­ ­ 6 Treasures | |||
|- | |||
|[[File:Frog Coin.png]]<br>Frog Coin | |||
|After using the moving blocks in the first area, Mario should reach the exit on the left. In this area, two [[Shy Guy]]s are seen sitting on the moving blocks. Mario should defeat them, so he can use the moving blocks to reach a treasure high up in the air at the end of the area. | |||
|[[File:Rose Way Treasure 1.png|240px]] | |||
|[[File:Rose Way Treasure 1 (Switch).png|300px]] | |||
|- | |||
|[[File:SMRPGCoin.png]][[File:SMRPGCoin.png]][[File:SMRPGCoin.png]][[File:SMRPGCoin.png]][[File:SMRPGCoin.png]]<br>5 Coins | |||
|In the second-to-last area, found right at the entrance. The Shy Guy must be knocked off the chest before Mario can access the contents. This treasure respawns each time Mario enters the world map. | |||
|[[File:Rose Way Treasure 2.png|240px]] | |||
|[[File:Rose Way Treasure 2 (Switch).png|300px]] | |||
|- | |||
|[[File:SMRPGCoin.png]][[File:SMRPGCoin.png]][[File:SMRPGCoin.png]][[File:SMRPGCoin.png]][[File:SMRPGCoin.png]]<br>5 Coins | |||
|In the same area, found downwards from the previous one. The Shy Guy must be knocked off the chest before Mario can access the contents. This treasure respawns each time Mario enters the world map. | |||
|[[File:Rose Way Treasure 3.png|240px]] | |||
|[[File:Rose Way Treasure 3 (Switch).png|300px]] | |||
|- | |||
||[[File:SMRPG Mushroom box.png]]<br>Mushroom | |||
|In the same area, found right of the first one. The Shy Guy must be knocked off the chest before Mario can access the contents. This treasure respawns each time Mario enters the world map. | |||
|[[File:Rose Way Treasure 4.png|240px]] | |||
|[[File:Rose Way Treasure 4 (Switch).png|300px]] | |||
|- | |||
|[[File:SMRPGCoin.png]][[File:SMRPGCoin.png]][[File:SMRPGCoin.png]][[File:SMRPGCoin.png]][[File:SMRPGCoin.png]]<br>5 Coins (both chests) | |||
|In the same area, found near the exit. The Shy Guys must be knocked off the chests before Mario can access the contents. These treasures respawn each time Mario enters the world map. | |||
|[[File:Rose Way Treasures 5-6.png|240px]] | |||
|[[File:Rose Way Treasures 5-6 (Switch).png|300px]] | |||
|- | |||
|-style="background: #90EE90;font-size:120%;color:#202122" id="Rose Town" | |||
!colspan=4|[[Rose Town|{{color|#202122|Rose Town}}]] ­ ­ ­ ­|­ ­ ­ ­ 5 Treasures | |||
|- | |||
|[[File:RPG Flower.png]]<br>Flower | |||
|After using the chimney of the Item Shop, Mario lands on the top of the bookcase with treasure floating above it | |||
|[[File:Rose Town Treasure 1.png|240px]] | |||
|[[File:Rose Town Treasure 1 (Switch).png|300px]] | |||
|- | |||
|[[File:RPG Flower.png]]<br>Flower (both chests)<br>OR<br>[[File:SMRPGCoin.png]][[File:SMRPGCoin.png]][[File:SMRPGCoin.png]][[File:SMRPGCoin.png]][[File:SMRPGCoin.png]]<br>5 Coins (left chest)<br>[[File:SMRPGCoin.png]][[File:SMRPGCoin.png]][[File:SMRPGCoin.png]][[File:SMRPGCoin.png]][[File:SMRPGCoin.png]][[File:SMRPGCoin.png]][[File:SMRPGCoin.png]][[File:SMRPGCoin.png]]<br>8 Coins (right chest) | |||
|In the northeastern section of town is a house on a hill too high for Mario to reach. Mario must climb on top of the [[Toad (species)|Mushroom person]] nearby and jump from him to the hill. Going inside the house, two treasures are seen. Depending on when the treasures are collected, different contents are rewarded:<br>If Mario takes the contents before leaving the house, he gains two Flowers.<br>If Mario lowers the stairs, leaves the house, talks to the Mushroom person and comes back inside, the left one contains 5 coins and the right one contains 8 coins. | |||
|[[File:Rose Town Treasures 2-3.png|240px]] | |||
|[[File:Rose Town Treasures 2-3 (Switch).png|300px]] | |||
|- | |||
|[[File:SMRPG Lazy Shell box.png]]<br>[[Lazy Shell]] (both chests) | |||
|Only available after giving [[Gardener]] (available after talking to [[Rat Funk]] in [[Monstro Town]]) [[Seed (Super Mario RPG)|Seed]] (Found after defeating [[Smilax]] in [[Bean Valley]]) and [[Fertilizer]] (Given by [[Beezo]] in [[Nimbus Land]] after [[Valentina|Valentina's]] defeat) and climbing the newly grown [[Beanstalk (Super Mario RPG)|beanstalk]]. One treasure contains the [[Lazy Shell]] weapon, and the other one contains Lazy Shell armor. | |||
|[[File:Rose Town Treasures 4-5.png|240px]] | |||
|[[File:Rose Town Treasures 4-5 (Switch).png|300px]] | |||
|- | |||
|-style="background: #90EE90;font-size:120%;color:#202122" id="Forest Maze" | |||
!colspan=4|[[Forest Maze|{{color|#202122|Forest Maze}}]] ­ ­ ­ ­|­ ­ ­ ­ 5 Treasures | |||
|- | |||
|[[File:SMRPG Mushroom box.png]][[File:SMRPG Mushroom box.png]][[File:SMRPG Mushroom box.png]] [[File:RPG Flower.png]] [[File:Frog Coin.png]]<br>3 Mushrooms, Flower and Frog Coin(Steal Treasures->Go To Forest)<br>OR<br>[[File:RPG Flower.png]][[File:RPG Flower.png]][[File:RPG Flower.png]] [[File:SMRPG Mushroom box.png]] [[File:Frog Coin.png]]<br>3 Flowers, Mushroom and Frog Coin (Go To Forest->Steal Treasures) | |||
|After reaching the maze portion of the area, Mario should go left, left, straight and then right (from Mario's perspective) to reach a pipe. Entering said pipe reveals a secret treasure room with 5 chests. Depending on when Mario took the treasures out of the house in Rose Town, different contents are rewarded:<br>If Mario steals the treasures and then goes into the forest, the room contains 3 Mushrooms, Flower and a Frog Coin.<br>If Mario goes into the forest first and then steals the treasures, the room contains 3 Flowers, Mushroom and a Frog Coin. | |||
|[[File:SMRPG Forest Maze Treasure Room.png]] | |||
|[[File:SMRPG Forest Maze Treasure Room (Switch).png|300px]] | |||
|- | |||
|-style="background: #90EE90;font-size:120%;color:#202122" id="Pipe Vault" | |||
!colspan=4|[[Pipe Vault|{{color|#202122|Pipe Vault}}]] ­ ­ ­ ­|­ ­ ­ ­ 3 Treasures | |||
|- | |||
|[[File:RPG Flower.png]]<br>Flower | |||
|In the third area, Mario should down the first pipe in front of him. In the next area, Mario must reveal an invisible platform to get to the brick platform above by jumping at the spot before the brick platform begins. Once at the top, Mario should stand at the end of the brick platform and jump. | |||
|[[File:Pipe Vault Treasure 1.png|240px]] | |||
|[[File:Pipe Vault Treasure 1 (Switch).png|300px]] | |||
|- | |||
|[[File:RPG Flower.png]]<br>Flower | |||
|In the last area, after exiting the pipe, a block is seen. This block is required to reach a treasure high up in the air. | |||
|[[File:Pipe Vault Treasure 2.png|240px]] | |||
|[[File:Pipe Vault Treasure 2 (Switch).png|300px]] | |||
|- | |||
|[[File:SMRPG 10 Gold Coin.png]][[File:SMRPG 10 Gold Coin.png]]<br>2 10-Coins (SNES)<br>[[File:SMRPGCoin.png]][[File:SMRPGCoin.png]][[File:SMRPGCoin.png]][[File:SMRPGCoin.png]][[File:SMRPGCoin.png]][[File:SMRPGCoin.png]][[File:SMRPGCoin.png]][[File:SMRPGCoin.png]][[File:SMRPGCoin.png]][[File:SMRPGCoin.png]]<br>10 Coins (Switch) | |||
|In the same area, above 5 [[Nipper Plant]]s. A block is seen moving above them and is required to access the treasure. | |||
|[[File:Pipe Vault Treasure 3.png|240px]] | |||
|[[File:Pipe Vault Treasure 3 (Switch).png|300px]] | |||
|} | |||
==Moleville Region== | |||
There are a total of 11 treasure boxes to find in the Moleville Region: | |||
*[[Moleville]] holds '''4 boxes''' | |||
*[[Booster Pass]] holds '''3 boxes''' | |||
*[[Booster Tower]] holds '''4 boxes''' | |||
<br> | |||
{| style="text-align: center; width: 100%; margin: 0 auto; border: #FFA500; border-collapse: collapse;" border="1" cellpadding="4" cellspacing="1" | |||
|-style="background: #FF8C00;font-size:14pt;color:white" | |||
!Item | |||
!Description | |||
!Image (SNES) | |||
!Image (Switch) | |||
|-style="background: #FFA500;font-size:120%;color:#202122" id="Moleville" | |||
!colspan=4|[[Moleville|{{color|#202122|Moleville}}]] ­ ­ ­ ­|­ ­ ­ ­ 4 Treasures | |||
|- | |||
|[[File:SMRPG Star box.png]]<br>Star | |||
|In the upper part of the area with first cart tracks. This treasure respawns each time Mario enters the world map. | |||
|[[File:Coal Mines Treasure 1.png|240px]] | |||
|[[File:Moleville Treasure 1 (Switch).png|300px]] | |||
|- | |||
|[[File:SMRPGCoin.png]][[File:SMRPGCoin.png]][[File:SMRPGCoin.png]][[File:SMRPGCoin.png]][[File:SMRPGCoin.png]][[File:SMRPGCoin.png]][[File:SMRPGCoin.png]][[File:SMRPGCoin.png]][[File:SMRPGCoin.png]][[File:SMRPGCoin.png]][[File:SMRPGCoin.png]][[File:SMRPGCoin.png]][[File:SMRPGCoin.png]][[File:SMRPGCoin.png]][[File:SMRPGCoin.png]]<br>15 Coins | |||
|In the upper part of the area two rooms from the previous one. | |||
|[[File:Coal Mines Treasure 2.png|240px]] | |||
|[[File:Moleville Treasure 2 (Switch).png|300px]] | |||
|- | |||
|[[File:SMRPG Mushroom box.png]]<br>Mushroom | |||
|In the area with the [[Save Block]], found left of it. | |||
|[[File:Coal Mines Treasure 3.png|240px]] | |||
|[[File:Moleville Treasure 3 (Switch).png|300px]] | |||
|- | |||
|[[File:RPG Flower.png]]<br>Flower | |||
|In the same area, found high in the air near the exit. Mario must jump off two crates to reach it. | |||
|[[File:Coal Mines Treasure 4.png|240px]] | |||
|[[File:Moleville Treasure 4 (Switch).png|300px]] | |||
|- | |||
|-style="background: #FFA500;font-size:120%;color:#202122" id="Booster Pass" | |||
!colspan=4|[[Booster Pass|{{color|#202122|Booster Pass}}]] ­ ­ ­ ­|­ ­ ­ ­ 3 Treasures | |||
|- | |||
|[[File:Green Something Drink.png]] [[File:Frog Coin.png]] [[File:RPG Flower.png]]<br>[[Croaka Cola]], Frog Coin and Flower | |||
|Only available after pressing the button in [[Booster Tower]]. After pressing the button, Mario returns to the first area and find a new opening in the left part. Three treasures are found after entering the opening and reaching the end of the course. | |||
|[[File:Booster Pass Treasures.png|240px]] | |||
|[[File:Booster Pass Treasures (Switch).png|300px]] | |||
|- | |||
|-style="background: #FFA500;font-size:120%;color:#202122" id="Booster Tower" | |||
!colspan=4|[[Booster Tower|{{color|#202122|Booster Tower}}]] ­ ­ ­ ­|­ ­ ­ ­ 4 Treasures | |||
|- | |||
|[[File:SMRPG Hammer box.png]]<br>[[Masher]] | |||
|In the hallway with 4 circling [[Rob-omb]]s, Mario must enter the middle exit to find a treasure high in the air. To get it, he must jump down onto the see-saw and launch [[Bob-omb]] into the air. After Bob-omb falls back down, Mario is launched into the treasure. | |||
|[[File:Booster Tower Treasure 1.png|240px]] | |||
|[[File:Booster Tower Treasure 1 (Switch).png|300px]] | |||
|- | |||
|[[File:SMRPG Mushroom box.png]]<br>Mushroom | |||
|In the room with a [[Thwomp]] on the see-saw, found right of it. | |||
|[[File:Booster Tower Treasure 2.png|240px]] | |||
|[[File:Booster Tower Treasure 2 (Switch).png|300px]] | |||
|- | |||
|[[File:RPG Bag.png]]<br>[[Zoom Shoes]] | |||
|In the room accessed from the right exit of the invisible [[Lava Blubble]]s room. | |||
|[[File:Booster Tower Treasure 3.png|240px]] | |||
|[[File:Booster Tower Treasure 3 (Switch).png|300px]] | |||
|- | |||
|[[File:Frog Coin.png]]<br>Frog Coin | |||
|In the area just before Booster's room, Mario should jump to the orange platform in the southeast and continue jumping to the other ones until he finds a treasure. | |||
|[[File:Booster Tower Treasure 4.png|240px]] | |||
|[[File:Booster Tower Treasure 4 (Switch).png|300px]] | |||
|} | |||
==Star Hill Region== | |||
There are a total of 14 treasure boxes to find in the Star Hill Region: | |||
*[[Sea]] holds '''5 boxes''' | |||
*[[Sunken Ship]] holds '''9 boxes''' | |||
<br> | |||
{| style="text-align: center; width: 100%; margin: 0 auto; border: #FFC0CB; border-collapse: collapse;" border="1" cellpadding="4" cellspacing="1" | |||
|-style="background: #800080;font-size:14pt;color:white" | |||
!Item | |||
!Description | |||
!Image (SNES) | |||
!Image (Switch) | |||
|-style="background: #FFC0CB;font-size:120%;color:#202122" id="Sea" | |||
!colspan=4|[[Sea|{{color|#202122|Sea}}]] ­ ­ ­ ­|­ ­ ­ ­ 5 Treasures | |||
|- | |||
|[[File:SMRPG Star box.png]]<br>Star | |||
|In the third area (accessed from the lower exit), found near the exit. | |||
|[[File:Sea Treasure 1.png|240px]] | |||
|[[File:Sea Treasure 1 (Switch).png|300px]] | |||
|- | |||
|[[File:SMRPG Mushroom box.png]] [[File:RPG Flower.png]] [[File:Frog Coin.png]]<br>Mushroom, Flower, Frog Coin | |||
|At the end of the fourth area are two exits. Mario should go into the right one to reach a previously unavailable area. Here, three more treasures can be found. | |||
|[[File:Sea Treasures 2-4.png|240px]] | |||
|[[File:Sea Treasures 2-4 (Switch).png|300px]] | |||
|- | |||
|[[File:Yellow Mushroom.png]]<br>[[Ultra Mushroom#Super Mario RPG: Legend of the Seven Stars|Max Mushroom]] | |||
|In the fifth area, Mario should enter a whirlpool to sink underwater and then go through the opening on the right. Here, he should use the bubbles to reach an upper part of the fifth area and the treasure. | |||
|[[File:Sea Treasure 5.png|240px]] | |||
|[[File:Sea Treasure 5 (Switch).png|300px]] | |||
|- | |||
|-style="background: #FFC0CB;font-size:120%;color:#202122" id="Sunken Ship" | |||
!colspan=4|[[Sunken Ship|{{color|#202122|Sunken Ship}}]] ­ ­ ­ ­|­ ­ ­ ­ 9 Treasures | |||
|- | |||
|[[File:SMRPGCoin.png]][[File:SMRPGCoin.png]][[File:SMRPGCoin.png]][[File:SMRPGCoin.png]][[File:SMRPGCoin.png]][[File:SMRPGCoin.png]][[File:SMRPGCoin.png]][[File:SMRPGCoin.png]][[File:SMRPGCoin.png]][[File:SMRPGCoin.png]]<br>10 Coins | |||
|In the first room with [[Alley Rat]]s going up and down the stairs, found above the stack of 3 crates. | |||
|[[File:Sunken Ship Treasure 1.png|240px]] | |||
|[[File:Sunken Ship Treasure 1 (Switch).png|300px]] | |||
|- | |||
|[[File:SMRPG 10 Gold Coin.png]][[File:SMRPG 10 Gold Coin.png]][[File:SMRPG 10 Gold Coin.png]][[File:SMRPG 10 Gold Coin.png]][[File:SMRPG 10 Gold Coin.png]][[File:SMRPG 10 Gold Coin.png]][[File:SMRPG 10 Gold Coin.png]][[File:SMRPG 10 Gold Coin.png]][[File:SMRPG 10 Gold Coin.png]][[File:SMRPG 10 Gold Coin.png]]<br>10 10-Coins | |||
|In the room with [[List of shops in Super Mario RPG: Legend of the Seven Stars|Shaman's Shop]], found in the left part, guarded by the [[Dry Bones]]. | |||
|[[File:Sunken Ship Treasure 2.png|240px]] | |||
|[[File:Sunken Ship Treasure 2 (Switch).png|300px]] | |||
|- | |||
|[[File:SMRPG 10 Gold Coin.png]][[File:SMRPG 10 Gold Coin.png]][[File:SMRPG 10 Gold Coin.png]][[File:SMRPG 10 Gold Coin.png]][[File:SMRPG 10 Gold Coin.png]][[File:SMRPG 10 Gold Coin.png]][[File:SMRPG 10 Gold Coin.png]][[File:SMRPG 10 Gold Coin.png]][[File:SMRPG 10 Gold Coin.png]][[File:SMRPG 10 Gold Coin.png]]<br>10 10-Coins (both chests) | |||
|In the room after the second room with Alley Rats going up and down the stairs, Mario can see two treasures floating above a stack of crates. To reach them, he needs to make a running jump from the barrels in the northeastern corner. | |||
|[[File:Sunken Ship Treasures 3-4.png|240px]] | |||
|[[File:Sunken Ship Treasures 3-4 (Switch).png|300px]] | |||
|- | |||
|[[File:Frog Coin.png]]<br>Frog Coin | |||
|In the next area, there is a wall of crates. Behind said wall is a hidden opening. Going through said opening leads to a small room with a lone treasure. | |||
|[[File:Sunken Ship Treasure 5.png|240px]] | |||
|[[File:Sunken Ship Treasure 5 (Switch).png|300px]] | |||
|- | |||
|[[File:SMRPG Mushroom box.png]]<br>Mushroom (left chest)<br>[[File:Hidon Sprite - Super Mario RPG.png]] [[File:RPG Pin.png]]<br>[[Whuhoh]] and [[Safety Badge (Super Mario RPG)|Safety Badge]] after its defeat (right chest, first time)<br>[[File:SMRPG 10 Gold Coin.png]][[File:SMRPG 10 Gold Coin.png]][[File:SMRPG 10 Gold Coin.png]][[File:SMRPG 10 Gold Coin.png]][[File:SMRPG 10 Gold Coin.png]][[File:SMRPG 10 Gold Coin.png]][[File:SMRPG 10 Gold Coin.png]][[File:SMRPG 10 Gold Coin.png]][[File:SMRPG 10 Gold Coin.png]][[File:SMRPG 10 Gold Coin.png]]<br>10 10-Coins (right chest, second time) | |||
|In the next room, there are two treasures. The one on the right is a normal one containing a Mushroom, while the one on the right triggers a battle with [[Whuhoh]] and [[Safety Badge (Super Mario RPG)|Safety Badge]] is awarded after its defeat. If Mario leaves the room and then comes back, this chest will contain 10 [[10-Coin]]s. | |||
|[[File:Sunken Ship Treasures 6-7.png|240px]] | |||
|[[File:Sunken Ship Treasures 6-7 (Switch).png|300px]] | |||
|- | |||
|[[File:RPG Ring.png]]<br>[[Safety Ring (Super Mario RPG)|Safety Ring]] | |||
|In the room accessed via underwater opening in the room with [[Blooper]] and its babies. | |||
|[[File:Sunken Ship Treasure 8.png|240px]] | |||
|[[File:Sunken Ship Treasure 8 (Switch).png|300px]] | |||
|- | |||
|[[File:SMRPG Mushroom box.png]]<br>Mushroom | |||
|In the room where 4 [[Bandana Red]]s are encountered. | |||
|[[File:Sunken Ship Treasure 9.png|240px]] | |||
|[[File:Sunken Ship Treasure 9 (Switch).png|300px]] | |||
|} | |||
==Land's End Region== | |||
There are a total of 21 treasure boxes to find in the Land's End Region: | |||
*[[Land's End]] holds '''9 boxes''' | |||
*[[Bean Valley]] holds '''11 boxes''' | |||
*[[Grate Guy's Casino]] holds '''1 boxes''' | |||
<br> | |||
{| style="text-align: center; width: 100%; margin: 0 auto; border: #FF0000; border-collapse: collapse;" border="1" cellpadding="4" cellspacing="1" | |||
|-style="background: #8B0000;font-size:14pt;color:white" | |||
!Item | |||
!Description | |||
!Image (SNES) | |||
!Image (Switch) | |||
|-style="background: #FF0000;font-size:120%;color:#202122" id="Land's End" | |||
!colspan=4|[[Land's End|{{color|#202122|Land's End}}]] ­ ­ ­ ­|­ ­ ­ ­ 9 Treasures | |||
|- | |||
|[[File:Frog Coin.png]]<br>Frog Coin | |||
|In the second area, Mario should hop into the cannon and fire into the hole in the rocky hill. Jumping out of the hole, Mario should jump at the southwestern edge of the hole to reveal a platform. Going into the cannon and firing out once more, Mario lands on the platform. Then he should wait a few moments so he reaches a treasure in the air. | |||
|[[File:Land's End Treasure 1.png|240px]] | |||
|[[File:Land's End Treasure 1 (Switch).png|300px]] | |||
|- | |||
|[[File:Frog Coin.png]]<br>Frog Coin | |||
|At the Sky Bridge area, Mario should jump into the cave beneath it to enter the secret passage to Kero Sewers. After a while, a treasure high in the air is seen. To reach it, Mario must jump off the small wall of crates right of it. | |||
|[[File:Land's End Treasure 2.png|240px]] | |||
|[[File:Land's End Treasure 2 (Switch).png|300px]] | |||
|- | |||
|[[File:SMRPG Mushroom box.png]]<br>Mushroom | |||
|In the next underground area, found at the end near the trampoline. | |||
|[[File:Land's End Treasure 3.png|240px]] | |||
|[[File:Land's End Treasure 3 (Switch).png|300px]] | |||
|- | |||
|[[File:SMRPG Star box.png]]<br>Star | |||
|After going through the desert portion of the area, Mario reaches the underground with a Save Block. The treasure is found in the lower part of the room. | |||
|[[File:Land's End Treasure 4.png|240px]] | |||
|[[File:Land's End Treasure 4 (Switch).png|300px]] | |||
|- | |||
|[[File:SMRPG Star box.png]]<br>Star | |||
|After going through a room and then falling through a hole in the next one, Mario lands in the room with the [[Belome Temple]] entrance. In this room, there is a small wall made out of crates with a [[Shaman]] hiding behind it. Pay this Shaman 400 coins to make a treasure appear, containing a Star. Shaman then asks if he should go out to find another and disappears if agreed to. After Mario leaves the area and comes back, Shaman comes back and the treasure containing a Star now costs 800 coins. This can be done indefinitely, with a fixed price of 800 Coins. | |||
|[[File:Land's End Treasure 5.png|240px]] | |||
|[[File:Land's End Treasure 5 (Switch).png|300px]] | |||
|- | |||
|[[File:SMRPG 10 Gold Coin.png]][[File:SMRPG 10 Gold Coin.png]][[File:SMRPG 10 Gold Coin.png]][[File:SMRPG 10 Gold Coin.png]][[File:SMRPG 10 Gold Coin.png]]<br>5 10-Coins | |||
|In the second room, found at the start left of the Belome statue head. | |||
|[[File:Land's End Treasure 6.png|240px]] | |||
|[[File:Land's End Treasure 6 (Switch).png|300px]] | |||
|- | |||
|[[File:SMRPG Mushroom box.png]]<br>Mushroom<br>OR<br>[[File:RPG Cookie.png]]<br>[[Yoshi Cookie]]<br>OR<br>[[File:Frog Coin.png]]<br>Frog Coin<br>OR<br>[[File:SMRPG 10 Gold Coin.png]][[File:SMRPG 10 Gold Coin.png]][[File:SMRPG 10 Gold Coin.png]][[File:SMRPG 10 Gold Coin.png]][[File:SMRPG 10 Gold Coin.png]][[File:SMRPG 10 Gold Coin.png]][[File:SMRPG 10 Gold Coin.png]][[File:SMRPG 10 Gold Coin.png]][[File:SMRPG 10 Gold Coin.png]][[File:SMRPG 10 Gold Coin.png]]<br>10 10-Coins | |||
|Found in the room with a gate, contents depend on which order were the Belome statue head pressed in the previous room. Those include:<br>Mushroom (left, middle, right)<br>[[Yoshi Cookie]] (left, middle, right OR left, right, middle)<br>10 10-Coins (right, left, middle OR right, middle, left)<br>Frog Coin (right, left, middle) | |||
|[[File:Land's End Treasure 7.png|240px]] | |||
|[[File:Land's End Treasure 7 (Switch).png|300px]] | |||
|- | |||
|[[File:SMRPG 10 Gold Coin.png]][[File:SMRPG 10 Gold Coin.png]][[File:SMRPG 10 Gold Coin.png]][[File:SMRPG 10 Gold Coin.png]][[File:SMRPG 10 Gold Coin.png]][[File:SMRPG 10 Gold Coin.png]][[File:SMRPG 10 Gold Coin.png]][[File:SMRPG 10 Gold Coin.png]][[File:SMRPG 10 Gold Coin.png]][[File:SMRPG 10 Gold Coin.png]][[File:SMRPG 10 Gold Coin.png]][[File:SMRPG 10 Gold Coin.png]][[File:SMRPG 10 Gold Coin.png]][[File:SMRPG 10 Gold Coin.png]][[File:SMRPG 10 Gold Coin.png]]<br>15 10-Coins | |||
|In the next room, found at the entrance. | |||
|[[File:Land's End Treasure 8.png|240px]] | |||
|[[File:Land's End Treasure 8 (Switch).png|300px]] | |||
|- | |||
|[[File:Frog Coin.png]]<br>Frog Coin | |||
|In the same area, found at the end. | |||
|[[File:Land's End Treasure 9.png|240px]] | |||
|[[File:Land's End Treasure 9 (Switch).png|300px]] | |||
|- | |||
|-style="background: #FF0000;font-size:120%;color:#202122" id="Bean Valley" | |||
!colspan=4|[[Bean Valley|{{color|#202122|Bean Valley}}]] ­ ­ ­ ­|­ ­ ­ ­ 11 Treasures | |||
|- | |||
|[[File:RPG Flower.png]]<br>Flower | |||
|In the first area, after Mario reaches the end, he should go into the last remaining pipe, which takes him into an area with a lone treasure. | |||
|[[File:Bean Valley Treasure 1.png|240px]] | |||
|[[File:Bean Valley Treasure 1 (Switch).png|300px]] | |||
|- | |||
|[[File:Box Boy Sprite - Super Mario RPG.png]]<br>[[Pleaseno]]<br>OR<br>[[File:SMRPG Mushroom box.png]]<br>Mushroom<br>OR<br>[[File:RPG Flower.png]]<br>Flower<br>OR<br>[[File:Lucky Jewel.png]]<br>Rock Candy<br>OR<br>[[File:Frog Coin.png]]<br>Frog Coin | |||
|In the area with the five [[Chewy|Chewies]] growing from the pipes, Mario should defeat the one blocking the southernmost pipe, then enter it. In the passageway, Mario should circle around to reach the treasure. This treasure is a slot machine and reward depends on the symbols at the end:<br>If there is one Mushroom, one Flower and one Star, the battle with [[Pleaseno]] is triggered as a result.<br>If there are two Mushrooms and either a Flower or a Star, a Mushroom is rewarded.<br>If there are two Flowers and either a Mushroom or a Star, a Flower is rewarded.<br>If there are two Stars and either a Mushroom or a Flower, a [[Rock Candy (item)|Rock Candy]] is rewarded.<br>If there are 3 of any symbol, a Frog coin is rewarded. | |||
|[[File:Bean Valley Treasure 2.png|240px]] | |||
|[[File:Bean Valley Treasure 2 (Switch).png|300px]] | |||
|- | |||
|[[File:Box Boy Sprite - Super Mario RPG.png]]<br>Pleaseno | |||
|In the area with the five Chewies growing from the pipes, Mario should defeat the one blocking the central-west pipe, then enter it. A treasure is visible right away, but upon jumping into it, a battle with Pleaseno is triggered. | |||
|[[File:Bean Valley Treasure 3.png|240px]] | |||
|[[File:Bean Valley Treasure 3 (Switch).png|300px]] | |||
|- | |||
|[[File:Frog Coin.png]]<br>Frog Coin | |||
|In the same area, Mario should head to the top of the room, where pipe awaits him. This pipe takes him back outside, to an area with a lone treasure. | |||
|[[File:Bean Valley Treasure 4.png|240px]] | |||
|[[File:Bean Valley Treasure 4 (Switch).png|300px]] | |||
|- | |||
|[[File:Box Boy Sprite - Super Mario RPG.png]]<br>Pleaseno<br>OR<br>[[File:SMRPG Mushroom box.png]]<br>Mushroom<br>OR<br>[[File:RPG Flower.png]]<br>Flower<br>OR<br>[[File:Lucky Jewel.png]]<br>Rock Candy<br>OR<br>[[File:Frog Coin.png]]<br>Frog Coin | |||
|In the area with the five Chewies growing from the pipes, Mario should defeat the one blocking the central-east pipe, then enter it. A treasure is visible right away. This treasure is a slot machine and reward depends on the symbols at the end:<br>If there is one Mushroom, one Flower and one Star, the battle with Pleaseno is triggered as a result.<br>If there are two Mushrooms and either a Flower or a Star, a Mushroom is rewarded.<br>If there are two Flowers and either a Mushroom or a Star, a Flower is rewarded.<br>If there are two Stars and either a Mushroom or a Flower, a Rock Candy is rewarded.<br>If there are 3 of any symbol, a Frog coin is rewarded. | |||
|[[File:Bean Valley Treasure 5.png|240px]] | |||
|[[File:Bean Valley Treasure 5 (Switch).png|300px]] | |||
|- | |||
|[[File:Box Boy Sprite - Super Mario RPG.png]]<br>Pleaseno<br>OR<br>[[File:SMRPG Mushroom box.png]]<br>Mushroom<br>OR<br>[[File:RPG Flower.png]]<br>Flower<br>OR<br>[[File:Lucky Jewel.png]]<br>Rock Candy<br>OR<br>[[File:Frog Coin.png]]<br>Frog Coin | |||
|In the area with the five Chewies growing from the pipes, Mario should defeat the one blocking the northeastern pipe, then enter it. A treasure is visible right away. This treasure is a slot machine and reward reward depends on the symbols at the end:<br>If there is one Mushroom, one Flower and one Star, the battle with Pleaseno is triggered as a result.<br>If there are two Mushrooms and either a Flower or a Star, a Mushroom is rewarded.<br>If there are two Flowers and either a Mushroom or a Star, a Flower is rewarded.<br>If there are two Stars and either a Mushroom or a Flower, a Rock Candy is rewarded.<br>If there are 3 of any symbol, a Frog coin is rewarded. | |||
|[[File:Bean Valley Treasure 6.png|240px]] | |||
|[[File:Bean Valley Treasure 6 (Switch).png|300px]] | |||
|- | |||
|[[File:RPG Flower.png]]<br>Flower | |||
|SNES: In the second area of the beanstalk area, found between red and yellow ones on the left.<br>Switch: In the second area of the beanstalk area, found on the lowest cloud between red and yellow vines. | |||
|[[File:Bean Valley Treasure 7.png|240px]] | |||
|[[File:Bean Valley Treasure 7 (Switch).png|300px]] | |||
|- | |||
|[[File:Frog Coin.png]] [[File:RPG Bag.png]]<br>Frog Coin, [[Defense Scarf]] | |||
|In the fourth area of the beanstalk area (after using the upper yellow beanstalk in the second area), found behind a hole. | |||
|[[File:Bean Valley Treasures 8-9.png|240px]] | |||
|[[File:Bean Valley Treasures 8-9 (Switch).png|300px]] | |||
|- | |||
|[[File:RPG Flower.png]]<br>Flower (both chests) | |||
|After jumping into a hole in the previous area. Mario lands between the two treasures. | |||
|[[File:Bean Valley Treasures 10-11.png|240px]] | |||
|[[File:Bean Valley Treasures 10-11 (Switch).png|300px]] | |||
|- | |||
|-style="background: #FF0000;font-size:120%;color:#202122" id="Grate Guy's Casino" | |||
!colspan=4|[[Grate Guy's Casino|{{color|#202122|Grate Guy's Casino}}]] ­ ­ ­ ­|­ ­ ­ ­ 1 Treasure | |||
|- | |||
|[[File:Frog Coin.png]]<br>Frog Coin or Empty (SNES)<br>[[File:Red Mushroom.png]]/[[File:RedSyrup SMRPG.png]]/[[File:Green P Drink.png]]<br>Mushroom or Honey Syrup or Energizer or Empty (Switch) | |||
|Only treasure in the area, which acts as a slot machine. Any other combination other than three of any symbol results in failure.<br> It rewards a Frog Coin each time if there are 3 of any symbol at the end. (SNES)<br>It rewards Mushroom/Honey Syrup/Energizer if three Mushrooms/Flowers/Stars have been struck. (Switch) | |||
|[[File:Grate Guy's Casino.png|240px]] | |||
|[[File:Grate Guy's Casino (Switch).png|300px]] | |||
|} | |||
==Nimbus Land Region== | |||
There are a total of 13 treasure boxes to find in the Nimbus Land Region: | |||
*[[Nimbus Land]] holds '''5 boxes''' | |||
*[[Barrel Volcano]] holds '''8 boxes''' | |||
<br> | |||
{| style="text-align: center; width: 100%; margin: 0 auto; border: #FF0000; border-collapse: collapse;" border="1" cellpadding="4" cellspacing="1" | |||
|-style="background: #8B0000;font-size:14pt;color:white" | |||
!Item | |||
!Description | |||
!Image (SNES) | |||
!Image (Switch) | |||
|-style="background: #FF0000;font-size:120%;color:#202122" id="Nimbus Land" | |||
!colspan=4|[[Nimbus Land|{{color|#202122|Nimbus Land}}]] ­ ­ ­ ­|­ ­ ­ ­ 5 Treasures | |||
|- | |||
|[[File:RPG Flower.png]]<br>Flower | |||
|After Mario goes to the entrance of the castle, then to the left and through 2 hallways, the treasure is found at the end of the second one. | |||
|[[File:Nimbus Land Treasure 1.png|240px]] | |||
|[[File:Nimbus Land Treasure 1 (Switch).png|300px]] | |||
|- | |||
|[[File:SMRPG Mushroom box.png]]<br>Mushroom | |||
|In the crossroads room, Mario should go through the one with a door and through the following hallway. He then comes across a room with a lone statue and a treasure behind it. | |||
|[[File:Nimbus Land Treasure 2.png|240px]] | |||
|[[File:Nimbus Land Treasure 2 (Switch).png|300px]] | |||
|- | |||
|[[File:RPG Flower.png]]<br>Flower | |||
|In the grand hallway with the three doorways, found in the corner between a left doorway and a birdcage. | |||
|[[File:Nimbus Land Treasure 3.png|240px]] | |||
|[[File:Nimbus Land Treasure 3 (Switch).png|300px]] | |||
|- | |||
|[[File:RPG Flower.png]]<br>Flower | |||
|In the grand hallway with the three doorways, Mario should go through the left one and through the next room, to reach a dead end in the next one. Here, he can find another Treasure. | |||
|[[File:Nimbus Land Treasure 4.png|240px]] | |||
|[[File:Nimbus Land Treasure 4 (Switch).png|300px]] | |||
|- | |||
|[[File:SMRPG Star box.png]]<br>Star (first time)<br>[[File:RPG Flower.png]]<br>Flower (second time) | |||
|After confronting [[Valentina]] in the throne room and following her through three hallways, this treasure is found high in the air in the middle of the second hallway. To reach it, Mario must jump under it to make a block appear. During the "chase", this treasure contains a Star, but after Valentina has been defeated and Mario returns here, it will be filled up again, this time with a Flower. | |||
|[[File:Nimbus Land Treasure 5.png|240px]] | |||
|[[File:Nimbus Land Treasure 5 (Switch).png|300px]] | |||
|- | |||
|-style="background: #FF0000;font-size:120%;color:#202122" id="Barrel Volcano" | |||
!colspan=4|[[Barrel Volcano|{{color|#202122|Barrel Volcano}}]] ­ ­ ­ ­|­ ­ ­ ­ 8 Treasures | |||
|- | |||
|[[File:RPG Flower.png]]<br>Flower (both chests) | |||
|In the second area, there are small platforms in the lava, leading to an opening on the right. Going through this opening lead to two treasures. | |||
|[[File:Barrel Volcano Treasures 1-2.png|240px]] | |||
|[[File:Barrel Volcano Treasures 1-2 (Switch).png|300px]] | |||
|- | |||
|[[File:RPG Flower.png]]<br>Flower | |||
|In the fourth area, found right at the entrance. | |||
|[[File:Barrel Volcano Treasure 3.png|240px]] | |||
|[[File:Barrel Volcano Treasure 3 (Switch).png|300px]] | |||
|- | |||
|[[File:SMRPG 10 Gold Coin.png]][[File:SMRPG 10 Gold Coin.png]][[File:SMRPG 10 Gold Coin.png]][[File:SMRPG 10 Gold Coin.png]][[File:SMRPG 10 Gold Coin.png]][[File:SMRPG 10 Gold Coin.png]][[File:SMRPG 10 Gold Coin.png]][[File:SMRPG 10 Gold Coin.png]][[File:SMRPG 10 Gold Coin.png]][[File:SMRPG 10 Gold Coin.png]]<br>10 10-Coins | |||
|In the same area, found near the end. | |||
|[[File:Barrel Volcano Treasure 4.png|240px]] | |||
|[[File:Barrel Volcano Treasure 4 (Switch).png|300px]] | |||
|- | |||
|[[File:SMRPG Star box.png]]<br>Star | |||
|In the fifth area, found right at the entrance. | |||
|[[File:Barrel Volcano Treasure 5.png|240px]] | |||
|[[File:Barrel Volcano Treasure 5 (Switch).png|300px]] | |||
|- | |||
|[[File:RPG Flower.png]] [[File:Frog Coin.png]]<br>Flower, Frog Coin | |||
|In the room with the Save Block, one found floating above the steps and another left of the Save Block. | |||
|[[File:Barrel Volcano Treasures 6-7.png|240px]] | |||
|[[File:Barrel Volcano Treasures 6-7 (Switch).png|300px]] | |||
|- | |||
|[[File:SMRPG 10 Gold Coin.png]][[File:SMRPG 10 Gold Coin.png]][[File:SMRPG 10 Gold Coin.png]][[File:SMRPG 10 Gold Coin.png]][[File:SMRPG 10 Gold Coin.png]][[File:SMRPG 10 Gold Coin.png]][[File:SMRPG 10 Gold Coin.png]][[File:SMRPG 10 Gold Coin.png]][[File:SMRPG 10 Gold Coin.png]][[File:SMRPG 10 Gold Coin.png]]<br>10 10-Coins | |||
|In the room with [[Cinder Toad]]'s shop entrance, found left of the entrance to the shop. | |||
|[[File:Barrel Volcano Treasure 8.png|240px]] | |||
|[[File:Barrel Volcano Treasure 8 (Switch).png|300px]] | |||
|} | |||
==Bowser's Keep Region== | |||
There are a total of 35 treasure boxes to find in the Bowser's Keep Region: | |||
*[[Bowser's Keep]] holds '''27 boxes''' | |||
*[[Weapon World]] holds '''8 boxes''' | |||
<br> | |||
{| style="text-align: center; width: 100%; margin: 0 auto; border: #BDB76B; border-collapse: collapse;" border="1" cellpadding="4" cellspacing="1" | |||
|-style="background: #FFD700;font-size:14pt;color:black" | |||
!Item | |||
!Description | |||
!Image (SNES) | |||
!Image (Switch) | |||
|-style="background: #BDB76B;font-size:120%;color:#202122" id="Bowser's Keep" | |||
!colspan=4|[[Bowser's Keep|{{color|#202122|Bowser's Keep}}]] ­ ­ ­ ­|­ ­ ­ ­ 27 Treasures | |||
|- | |||
|[[File:SMRPG Mushroom box.png]]<br>Mushroom | |||
|In the fourth area (the one with most of the screen blacked out), found after going left from the bridge. | |||
|[[File:Bowser's Keep Treasure 1.png|240px]] | |||
|[[File:Bowser's Keep Treasure 1 (Switch).png|300px]] | |||
|- | |||
|[[File:SMRPG Mushroom box.png]] [[File:SMRPG 10 Gold Coin.png]][[File:SMRPG 10 Gold Coin.png]][[File:SMRPG 10 Gold Coin.png]][[File:SMRPG 10 Gold Coin.png]][[File:SMRPG 10 Gold Coin.png]][[File:SMRPG 10 Gold Coin.png]][[File:SMRPG 10 Gold Coin.png]][[File:SMRPG 10 Gold Coin.png]][[File:SMRPG 10 Gold Coin.png]][[File:SMRPG 10 Gold Coin.png]][[File:SMRPG 10 Gold Coin.png]][[File:SMRPG 10 Gold Coin.png]][[File:SMRPG 10 Gold Coin.png]][[File:SMRPG 10 Gold Coin.png]][[File:SMRPG 10 Gold Coin.png]]<br>Mushroom, 15 10-Coins | |||
|In fifth area is a detour found on the left. After going in, there is a small room with two treasures. | |||
|[[File:Bowser's Keep Treasures 26-27.png|240px]] | |||
|[[File:Bowser's Keep Treasures 2-3 (Switch).png|300px]] | |||
|- | |||
|[[File:SMRPG 10 Gold Coin.png]][[File:SMRPG 10 Gold Coin.png]][[File:SMRPG 10 Gold Coin.png]][[File:SMRPG 10 Gold Coin.png]][[File:SMRPG 10 Gold Coin.png]][[File:SMRPG 10 Gold Coin.png]][[File:SMRPG 10 Gold Coin.png]][[File:SMRPG 10 Gold Coin.png]][[File:SMRPG 10 Gold Coin.png]][[File:SMRPG 10 Gold Coin.png]][[File:SMRPG 10 Gold Coin.png]][[File:SMRPG 10 Gold Coin.png]][[File:SMRPG 10 Gold Coin.png]][[File:SMRPG 10 Gold Coin.png]][[File:SMRPG 10 Gold Coin.png]][[File:SMRPG 10 Gold Coin.png]][[File:SMRPG 10 Gold Coin.png]][[File:SMRPG 10 Gold Coin.png]][[File:SMRPG 10 Gold Coin.png]][[File:SMRPG 10 Gold Coin.png]][[File:SMRPG 10 Gold Coin.png]]<br>21 10-Coins | |||
|Only treasure in the [[The Trial Course#Puzzle courses|puzzle course]]s. As a part of the course, Mario is not able to get all 21 10-Coins and due to this, no coins are added to coin total. | |||
|[[File:Bowser's Keep Treasure 2.png|240px]] | |||
|[[File:Bowser's Keep Treasure 4 (Switch).png|300px]] | |||
|- | |||
|[[File:Green Something Drink.png]]<br>Croaka Cola | |||
|At the end of the huge stone platform in the [[The Trial Course#Action courses|action course]] featuring rising/falling platforms. | |||
|[[File:Bowser's Keep Treasure 3.png|240px]] | |||
|[[File:Bowser's Keep Treasure 5 (Switch).png|300px]] | |||
|- | |||
|[[File:Red Star Drink.png]]<br>[[Pick Me Up]] | |||
|Atop the first pillar in the action course featuring balancing on the ball. | |||
|[[File:Bowser's Keep Treasure 4.png|240px]] | |||
|[[File:Bowser's Keep Treasure 6 (Switch).png|300px]] | |||
|- | |||
|[[File:RPG Flower.png]]<br>Flower | |||
|Atop the second pillar in the action course featuring balancing on the ball. | |||
|[[File:Bowser's Keep Treasure 5.png|240px]] | |||
|[[File:Bowser's Keep Treasure 7 (Switch).png|300px]] | |||
|- | |||
|[[File:Lucky Jewel.png]]<br>Rock Candy | |||
|Atop the third right pillar in the action course featuring balancing on the ball. | |||
|[[File:Bowser's Keep Treasure 6.png|240px]] | |||
|[[File:Bowser's Keep Treasure 8 (Switch).png|300px]] | |||
|- | |||
|[[File:Yellow Mushroom.png]]<br>Max Mushroom | |||
|Atop the third left pillar in the action course featuring balancing on the ball. | |||
|[[File:Bowser's Keep Treasure 7.png|240px]] | |||
|[[File:Bowser's Keep Treasure 9 (Switch).png|300px]] | |||
|- | |||
|[[File:RPG Flower.png]]<br>Flower | |||
|Atop the last pillar in the action course featuring balancing on the ball. | |||
|[[File:Bowser's Keep Treasure 8.png|240px]] | |||
|[[File:Bowser's Keep Treasure 10 (Switch).png|300px]] | |||
|- | |||
|[[File:RPG Flower.png]]<br>Flower | |||
|First in the action course featuring two rotating platforms. | |||
|[[File:Bowser's Keep Treasure 9.png|240px]] | |||
|[[File:Bowser's Keep Treasure 11 (Switch).png|300px]] | |||
|- | |||
|[[File:Royal Syrup.PNG]]<br>[[Royal Syrup]] | |||
|Second in the action course featuring two rotating platforms. | |||
|[[File:Bowser's Keep Treasure 10.png|240px]] | |||
|[[File:Bowser's Keep Treasure 12 (Switch).png|300px]] | |||
|- | |||
|[[File:RPG Flower.png]]<br>Flower | |||
|Third in the action course featuring two rotating platforms. | |||
|[[File:Bowser's Keep Treasure 11.png|240px]] | |||
|[[File:Bowser's Keep Treasure 13 (Switch).png|300px]] | |||
|- | |||
|[[File:Red Bomb.png]]<br>[[Fire Bomb]] | |||
|Fourth in the action course featuring two rotating platforms. | |||
|[[File:Bowser's Keep Treasure 12.png|240px]] | |||
|[[File:Bowser's Keep Treasure 14 (Switch).png|300px]] | |||
|- | |||
|[[File:Red Star Drink.png]]<br>Pick Me Up | |||
|Fifth in the action course featuring two rotating platforms. | |||
|[[File:Bowser's Keep Treasure 13.png|240px]] | |||
|[[File:Bowser's Keep Treasure 15 (Switch).png|300px]] | |||
|- | |||
|[[File:Green Something Drink.png]]<br>Croaka Cola | |||
|Last in the action course featuring two rotating platforms. | |||
|[[File:Bowser's Keep Treasure 14.png|240px]] | |||
|[[File:Bowser's Keep Treasure 16 (Switch).png|300px]] | |||
|- | |||
|[[File:Green Bomb.png]]<br>[[Fright Bomb]] | |||
|First in the action course featuring invisible path. | |||
|[[File:Bowser's Keep Treasure 15.png|240px]] | |||
|[[File:Bowser's Keep Treasure 17 (Switch).png|300px]] | |||
|- | |||
|[[File:Blue Bomb.png]]<br>[[Ice Bomb]] | |||
|Second in the action course featuring invisible path. | |||
|[[File:Bowser's Keep Treasure 16.png|240px]] | |||
|[[File:Bowser's Keep Treasure 18 (Switch).png|300px]] | |||
|- | |||
|[[File:Royal Syrup.PNG]]<br>Royal Syrup | |||
|Third in the action course featuring invisible path. | |||
|[[File:Bowser's Keep Treasure 17.png|240px]] | |||
|[[File:Bowser's Keep Treasure 19 (Switch).png|300px]] | |||
|- | |||
|[[File:Lucky Jewel.png]]<br>Rock Candy | |||
|Last in the action course featuring invisible path. | |||
|[[File:Bowser's Keep Treasure 18.png|240px]] | |||
|[[File:Bowser's Keep Treasure 20 (Switch).png|300px]] | |||
|- | |||
|[[File:Yellow Mushroom.png]]<br>Max Mushroom | |||
|First in the action course featuring moving platforms. | |||
|[[File:Bowser's Keep Treasure 19.png|240px]] | |||
|[[File:Bowser's Keep Treasure 21 (Switch).png|300px]] | |||
|- | |||
|[[File:Red Essence.png]]<br>Red Essence | |||
|Second in the action course featuring moving platforms. | |||
|[[File:Bowser's Keep Treasure 20.png|240px]] | |||
|[[File:Bowser's Keep Treasure 22 (Switch).png|300px]] | |||
|- | |||
|[[File:RPG Flower.png]]<br>Flower | |||
|Third in the action course featuring moving platforms. | |||
|[[File:Bowser's Keep Treasure 21.png|240px]] | |||
|[[File:Bowser's Keep Treasure 23 (Switch).png|300px]] | |||
|- | |||
|[[File:Red Bomb.png]]<br>Fire Bomb | |||
|Last in the action course featuring moving platforms. | |||
|[[File:Bowser's Keep Treasure 22.png|240px]] | |||
|[[File:Bowser's Keep Treasure 24 (Switch).png|300px]] | |||
|- | |||
|[[File:Lucky Jewel.png]]<br>Rock Candy<br>OR<br>[[File:RPG Bag.png]]<br>[[Sonic Cymbals|Sonic Cymbal]]<br>OR<br>[[File:RPG Bag.png]]<br>[[Star Gun]]<br>OR<br>[[File:RPG Bag.png]]<br>[[Drill Claw]]<br>OR<br>[[File:RPG Bag.png]]<br>[[Super Slap]] | |||
|In the room after completing a course. This room repeats after the second and third courses. This room can be also repeated two more times after Mario leaves the keep and then comes back. Depending on which course was completed, the reward is different:<br>Action course ending with rotating platforms gives out [[Sonic Cymbals|Sonic Cymbal]].<br>Action course ending with [[Guerrilla]] throwing down [[barrel]]s gives out [[Super Slap]].<br>[[The Trial Course#Battle courses|Battle course]] ending with six Shamans gives out [[Star Gun]] ([[Drill Claw]] in the remake).<br>Battle course ending with a [[Comeon]] spawning [[Bahamutt]]s gives out Drill Claw (Star Gun in the remake).<br>Both puzzle courses give out Rock Candy. | |||
|[[File:Bowser's Keep Treasure 23.png|240px]] | |||
|[[File:Bowser's Keep Treasure 25 (Switch).png|300px]] | |||
|- | |||
|[[File:Lucky Jewel.png]]<br>Rock Candy<br>OR<br>[[File:RPG Bag.png]]<br>Sonic Cymbal<br>OR<br>[[File:RPG Bag.png]]<br>Star Gun<br>OR<br>[[File:RPG Bag.png]]<br>Drill Claw<br>OR<br>[[File:RPG Bag.png]]<br>Super Slap | |||
|In the room after completing a fourth/last course. Depending on which course was completed, the reward is different:<br>Action course ending with rotating platforms gives out Sonic Cymbal.<br>Action course ending with Guerrilla throwing down barrels gives out Super Slap.<br>Battle course ending with six Shamans gives out Star Gun (Drill Claw in the remake).<br>Battle course ending with a Comeon spawning Bahamutts gives out Drill Claw (Star Gun in the remake).<br>Both puzzle courses give out Rock Candy. | |||
|[[File:Bowser's Keep Treasure 24.png|240px]] | |||
|[[File:Bowser's Keep Treasure 26 (Switch).png|300px]] | |||
|- | |||
|'''∞'''[[File:SMRPGCoin.png]]<br>[[Magic treasure box|Infinite Coins]] | |||
|Created after a boss fight against [[Wizakoopa]]. | |||
|[[File:Bowser's Keep Treasure 25.png|240px]] | |||
|[[File:Bowser's Keep Treasure 27 (Switch).png|300px]] | |||
|- | |||
|-style="background: #BDB76B;font-size:120%;color:#202122" id="Weapon World" | |||
!colspan=4|[[Weapon World|{{color|#202122|Weapon World}}]] ­ ­ ­ ­|­ ­ ­ ­ 8 Treasures | |||
|- | |||
|[[File:SMRPG Ultra Hammer box.png]]<br>[[Ultra Hammer]] | |||
|In the area after the area with second Save Block, found left of the screws and the trampoline. | |||
|[[File:Gate Treasure 1.png|240px]] | |||
|[[File:Weapon World Treasure 1 (Switch).png|300px]] | |||
|- | |||
|[[File:SMRPG Mushroom box.png]]<br>Mushroom | |||
|In the first area with Conveyor Belts, the treasure is found atop the second one. | |||
|[[File:Gate Treasure 2.png|240px]] | |||
|[[File:Weapon World Treasure 2 (Switch).png|300px]] | |||
|- | |||
|[[File:RPG Flower.png]] [[File:SMRPG Mushroom box.png]]<br>Flower, Mushroom | |||
|In the same area, Mario must fall down the chasm. In this new area, Mario should continue forward to reach an area with two treasures. | |||
|[[File:Gate Treasures 3-4.png|240px]] | |||
|[[File:Weapon World Treasures 3-4 (Switch).png|300px]] | |||
|- | |||
|[[File:Royal Syrup.PNG]]<br>Royal Syrup | |||
|In the area with Conveyor Belt bridges, found in the middle of the area after two patrolling [[High Boo]]s. | |||
|[[File:Gate Treasure 5.png|240px]] | |||
|[[File:Weapon World Treasure 5 (Switch).png|300px]] | |||
|- | |||
|[[File:Yellow Mushroom.png]]<br>Max Mushroom | |||
|In the same area, after crossing the second Conveyor Belt bridge, Mario should go to the left to find a treasure behind an another Conveyor Belt. | |||
|[[File:Gate Treasure 6.png|240px]] | |||
|[[File:Weapon World Treasure 6 (Switch).png|300px]] | |||
|- | |||
|[[File:SMRPG Mushroom box.png]] [[File:RPG Flower.png]]<br>Mushroom, Flower | |||
|In the area after the area with 3 [[Ninja (enemy)|Ninja]]s and a respawning [[Machine Made]] of [[Speardovich]]. | |||
|[[File:Gate Treasures 7-8.png|240px]] | |||
|[[File:Weapon World Treasures 7-8 (Switch).png|300px]] | |||
|} | |||
=Hidden Treasure= | |||
{| style="text-align: center; width: 100%; margin: 0 auto; border: #ABC; border-collapse: collapse;" border="1" cellpadding="4" cellspacing="1" | |||
|-style="background: #ABC;font-size:14pt;color:white" | |||
!Location | |||
!Item | |||
!Description | |||
!Image (SNES) | |||
!Image (Switch) | |||
|- | |||
|[[Toad Town|Mushroom Kingdom]] | |||
|[[File:Frog Coin.png]]<br>[[Frog Coin]] | |||
|'''[[Missable content|In the original, this Hidden Treasure can only be opened the first time Mario enters the castle.]]''' When Mario sees [[Toad]], he should jump on his head. As Toad approaches the door, the player should jump up from him to the platform above the doorway. Jumping at the center of the platform reveals the Hidden Treasure. | |||
In [[Super Mario RPG (Nintendo Switch)|the remake]], the player can get the chest at any time by jumping on a mushroom person's head and jumping up to it. | |||
|[[File:HiddenChest01.png]] | |||
|[[File:MKHiddenTreasure.png|300px]] | |||
|- | |||
|[[Toad Town|Mushroom Kingdom]] | |||
|[[File:RPG Flower.png]]<br>[[Flower (Super Mario RPG)|Flower]] | |||
|In the shop's basement, Mario finds an elderly Mushroom person. When talking to her, she tells him to stand before her and order him to jump. By doing so, Mario reveals the Hidden Treasure.<br>Alternatively, the player can reveal the Hidden Treasure without talking to the Mushroom person by jumping at the spot three tiles southwest and one tile northwest from the bottom of the stairs. | |||
In [[Super Mario RPG (Nintendo Switch)|the remake]], after opening the chest, the player gets the [[Signal Ring]] from the elderly mushroom person. | |||
|[[File:HiddenChest02.png]] | |||
|[[File:HiddenTreasure02.jpg|300px]] | |||
|- | |||
|[[Toad Town|Mushroom Kingdom]] | |||
|[[File:RPG Flower.png]]<br>[[Flower (Super Mario RPG)|Flower]] | |||
|In the same room, Mario needs to stand on top of the elderly Mushroom person and wait until she approaches the eastern corner of the room. Jumping at the corner from the Mushroom person reveals the Hidden Treasure. | |||
|[[File:HiddenChest03.png]] | |||
|[[File:HiddenTreasure03.jpg|300px]] | |||
|- | |||
|[[Bandit's Way]] | |||
|[[File:Green Something Drink.png]]<br>[[Croaka Cola]] | |||
|In the second area of Bandit's Way, over the two plateaus, is a [[Spinning Flower]] next to a blue one. The player should ride the Spinning Flower and jump when Mario faces the blue flower. When launched, Mario hits the Hidden Treasure at the middle of the jump. | |||
|[[File:HiddenChest04.png]] | |||
|[[File:BanditsWaySwitch.jpg|300px]] | |||
|- | |||
|[[Rose Town]] | |||
|[[File:Frog Coin.png]]<br>[[Frog Coin]] | |||
|In the Rose Town shop, Mario should climb on top of the bookshelf behind the counter. Jumping at the northwestern end reveals the Hidden Treasure. | |||
|[[File:HiddenChest05.png]] | |||
|[[File:RoseTown1Switch.jpg|300px]] | |||
|- | |||
|[[Rose Town]] | |||
|[[File:Frog Coin.png]]<br>[[Frog Coin]] | |||
|In the northeastern section of town is a house on a hill too high for Mario to reach. The player could climb on top of the Mushroom person nearby and jump from him to the hill. Going inside the house, Mario should climb the stairs to the second floor. Jumping at the center of the bed reveals the Hidden Treasure. | |||
|[[File:HiddenChest06.png]] | |||
|[[File:RoseTown2Switch.jpg|300px]] | |||
|- | |||
|[[Forest Maze]] | |||
|[[File:Green Something Drink.png]]<br>[[Croaka Cola]] | |||
|At the forest's entrance, Mario should jump at the western corner to reveal the Hidden Treasure. | |||
|[[File:HiddenChest07.png]] | |||
|[[File:ForrestMaze1Switch.jpg|300px]] | |||
|- | |||
|[[Forest Maze]] | |||
|[[File:Frog Coin.png]]<br>[[Frog Coin]] | |||
|After working through the first cavern and out of the tree stump, Mario should walk to the bushes directly northwest of the stump and jump from that spot to reveal the Hidden Treasure. | |||
|[[File:HiddenChest08.png]] | |||
|[[File:ForestMaze2Switch.jpg|300px]] | |||
|- | |||
|[[Forest Maze]] | |||
|[[File:Green Something Drink.png]]<br>[[Croaka Cola]] | |||
|In the next area are seven tree stumps. Mario should enter the one farthest northwest. In the cavern, he should make his way to the northwest until he finds a sleeping [[Wiggler]]. After awakening the Wiggler, the player should go back into the cavern, and jumping in the northeast corner of the recessed area behind where the Wiggler was reveals the Hidden Treasure. | |||
|[[File:HiddenChest09.png]] | |||
|[[File:ForestMaze3Switch.jpg|300px]] | |||
|- | |||
|[[Forest Maze]] | |||
|[[File:RPG Flower.png]]<br>[[Flower (Super Mario RPG)|Flower]] | |||
|In the area with the seven tree stumps, Mario should enter the one farthest east (the one north of the southeastern entrance). In the cavern, Mario should head southwest from the springboard to a lit area. Jumping at the spot reveals the Hidden Treasure. | |||
|[[File:HiddenChest10.png]] | |||
|[[File:ForestMaze4Switch.jpg|300px]] | |||
|- | |||
|[[Forest Maze]] | |||
|Empty | |||
|In the area with the seven tree stumps, Mario should enter the west-central one. In the cavern, Mario should head north-northwest from the springboard to the first corner. Jumping at the spot reveals an empty Hidden Treasure, with the screen displaying, "You missed!" | |||
|[[File:HiddenChest11.png]] | |||
|[[File:ForestMaze5Switch.jpg|300px]] | |||
|- | |||
|[[Forest Maze]] | |||
|[[File:Red Essence.png]]<br>[[Red Essence]] | |||
|After working through the second cavern and out of the tree stump, Mario should head all the way to the other side of the area, near the entrance. Jumping at the eastern corner reveals another Hidden Treasure.<br>In the remake, the Hidden Treasure no longer here and is instead found in the southern corner of the last passageway, after navigating through the maze. | |||
|[[File:HiddenChest12.png]] | |||
|[[File:ForestMaze6Switch.jpg|300px]] | |||
|- | |||
|[[Pipe Vault]] | |||
|[[File:Frog Coin.png]]<br>[[Frog Coin]] | |||
|In the third area of the Pipe Vault, Mario should down the first pipe in front of him. In the next area, Mario must reveal an invisible platform to get to the brick platform above by jumping at the spot before the brick platform begins. Once at the top, Mario should stand at the second brick crease from the revealed platform to reveal the Hidden Treasure. | |||
|[[File:HiddenChest13.png]] | |||
|[[File:PipeVault1Switch.jpg|300px]] | |||
|- | |||
|[[Pipe Vault]] | |||
|[[File:Frog Coin.png]]<br>[[Frog Coin]] | |||
|In the same area, on the same brick platform, two brick creases from the visible Hidden Treasure, Mario should jump at the spot to reveal another Hidden Treasure. | |||
|[[File:HiddenChest14.png]] | |||
|[[File:PipeVault2Switch.jpg|300px]] | |||
|- | |||
|[[Yoshi's Island (location)|Yo'ster Isle]] | |||
|[[File:Frog Coin.png]]<br>[[Frog Coin]] | |||
|From the Warp Pipe, Mario should go behind the [[Save Block]] and jump at the spot northwest of it to reveal the Hidden Treasure. | |||
|[[File:HiddenChest15.png]] | |||
|[[File:Yo'sterIslandSwitch.jpg|300px]] | |||
|- | |||
|[[Booster Pass]] | |||
|[[File:RPG Flower.png]]<br>[[Flower (Super Mario RPG)|Flower]] | |||
|In the first area, from the southwestern entrance, Mario should head north and climb up and over the two rocky steps then over two more northwest until he finds a lone bush against the area's boundary. Jumping on top of the bush reveals the Hidden Treasure. | |||
|[[File:HiddenChest16.png]] | |||
|[[File:BoosterPass1Switch.jpg|300px]] | |||
|- | |||
|[[Booster Pass]] | |||
|[[File:Lucky Jewel.png]]<br>[[Rock Candy (item)|Rock Candy]] | |||
|In the same area, Mario should make his way to the rocky hill in the east and climb up the steps all the way to the highest ground, near the entrance to the next area. Jumping at the northern corner near this entrance reveals another Hidden Treasure. | |||
|[[File:HiddenChest17.png]] | |||
|[[File:BoosterPass2Switch.jpg|300px]] | |||
|- | |||
|[[Booster Tower]] | |||
|[[File:Frog Coin.png]]<br>[[Frog Coin]] | |||
|In the hallway with the [[Snifit]]s walking down the stairs, Mario should climb up to the highest ground and jump one tile west from the northern corner to reveal the Hidden Treasure. | |||
|[[File:HiddenChest18.png]] | |||
|[[File:BoosterTower1Switch.jpg|300px]] | |||
|- | |||
|[[Booster Tower]] | |||
|[[File:Frog Coin.png]]<br>[[Frog Coin]] | |||
|In the room where Mario is propelled up from the [[Thwomp]] on a see-saw below, the player would walk northwest along the lowest ground then jump at the westernmost corner to reveal the Hidden Treasure. | |||
|[[File:HiddenChest19.png]] | |||
|[[File:BoosterTower2Switch.jpg|300px]] | |||
|- | |||
|[[Booster Tower]] | |||
|[[File:RPG Bag.png]]<br>[[Goodie Bag]] | |||
|In the area just before Booster's room, Mario should jump to the orange platform in the southeast and continue jumping to the other ones until he finds a Hidden Treasure. Jumping from the Hidden Treasure reveals the Hidden Treasure. | |||
|[[File:HiddenChest20.png]] | |||
|[[File:BoosterTower3Switch.jpg|300px]] | |||
|- | |||
|[[Booster Tower]] | |||
|[[File:Red Mushroom.png]]<br>[[Mushroom]] | |||
|In the same area, Mario should jump in the southeastern corner near the low orange platform to reveal another Hidden Treasure. | |||
|[[File:HiddenChest21.png]] | |||
|[[File:BoosterTower4Switch.jpg|300px]] | |||
|- | |||
|[[Marrymore]] | |||
|[[File:Frog Coin.png]]<br>[[Frog Coin]] | |||
|In the hotel's regular room, Mario should jump on top of the bookcase in the western corner to reveal the Hidden Treasure. | |||
|[[File:HiddenChest22.png]] | |||
|[[File:MarrymoreSwitch.jpg|300px]] | |||
|- | |||
|[[Sunken Ship]] | |||
|[[File:Green Something Drink.png]]<br>[[Croaka Cola]] | |||
|In the room with the [[Greaper|doppelgänger of Mario]], either one should jump in the center lit area, almost against the eastern wall, to reveal a [[Johnny|J]] block which also reveals the Hidden Treasure on the opposite side. To reach the Hidden Treasure, Mario and the doppelgänger need to stand on top of each other, then jump to open it. | |||
|[[File:HiddenChest23.png]] | |||
|[[File:SunkenShipSwitch.jpg|300px]] | |||
|- | |||
|[[Land's End]] | |||
|[[File:Red Essence.png]]<br>[[Red Essence]] | |||
|In the first area, Mario should hop into the cannon and fire to the moving platform in front of it. Once on the platform, Mario should jump from the northern corner of the platform at its highest point to hit the Hidden Treasure in the middle of the jump. | |||
|[[File:HiddenChest24.png]] | |||
|[[File:LandsEnd1Switch.jpg|300px]] | |||
|- | |||
|[[Land's End]] | |||
|[[File:Green Something Drink.png]]<br>[[Croaka Cola]] | |||
|In the second area, Mario should hop into the cannon and fire into the hole in the rocky hill. Jumping out of the hole, Mario should jump at the southwestern edge of the hole to reveal a platform. Going into the cannon and firing out once more, Mario lands on the platform. Jumping to the highest ground on the rocky hill, Mario should jump at the western corner to reveal the Hidden Treasure. | |||
|[[File:HiddenChest25.png]] | |||
|[[File:LandsEnd2Switch.jpg|300px]] | |||
|- | |||
|[[Land's End]] | |||
|[[File:Frog Coin.png]]<br>[[Frog Coin]] | |||
|In the fourth area, with the Spinning Flowers, Mario should find two blue flowers at the area's boundary in the east. Jumping between the two flowers reveals the Hidden Treasure. | |||
|[[File:HiddenChest26.png]] | |||
|[[File:LandsEnd3Switch.jpg|300px]] | |||
|- | |||
|[[Land's End]] | |||
|[[File:Frog Coin.png]]<br>[[Frog Coin]] | |||
|At the Sky Bridge, Mario should jump into the cave beneath it to enter the secret passage to [[Kero Sewers]]. Avoiding the [[Geckit]]s and the [[Chow]] in the first area, Mario should then find a corner closest to the steps heading down. Jumping at the northern spot at the corner reveals the Hidden Treasure. | |||
|[[File:HiddenChest27.png]] | |||
|[[File:LandsEnd4Switch.jpg|300px]] | |||
|- | |||
|[[Belome Temple]] | |||
|[[File:Frog Coin.png]]<br>[[Frog Coin]] | |||
|After having the first part of Mario's fortune revealed, a gate opens, admitting him to a passageway with two visible treasure boxes. Jumping from the wall to the Hidden Treasure, Mario should jump again to reveal the Hidden Treasure. | |||
|[[File:HiddenChest28.png]] | |||
|[[File:BelomeTemple1Switch.jpg|300px]] | |||
|- | |||
|[[Belome Temple]] | |||
|[[File:Frog Coin.png]]<br>[[Frog Coin]] | |||
|In the same area, going down the stairs, Mario should jump in the recessed corner nearby to reveal another Hidden Treasure. | |||
|[[File:HiddenChest29.png]] | |||
|[[File:BelomeTemple2Switch.jpg|300px]] | |||
|- | |||
|[[Monstro Town]] | |||
|[[File:Frog Coin.png]]<br>[[Frog Coin]] | |||
|In the room leading to the exit, Mario should stand northwest between the flowering bush and the wall, then jump to reveal the Hidden Treasure. | |||
|[[File:HiddenChest30.png]] | |||
|[[File:MonstroTownSwitch.jpg|300px]] | |||
|- | |||
|[[Bean Valley]] | |||
|[[File:Frog Coin.png]]<br>[[Frog Coin]] | |||
|In the first area, Mario should go down the pipe in the east. Out of the pipe in the next area, Mario should make his way west all the way to a dead end and jump to reveal the Hidden Treasure. | |||
|[[File:HiddenChest31.png]] | |||
|[[File:BeanValley1Switch.jpg|300px]] | |||
|- | |||
|[[Bean Valley]] | |||
|[[File:Green Something Drink.png]]<br>[[Croaka Cola]] | |||
|In the area with the five [[Piranha Plant]]s growing from the pipes, Mario should defeat the one blocking the lower-right pipe, then enter it. In the passageway, Mario should circle around to the far side and jump near the dead end to reveal the Hidden Treasure. | |||
|[[File:HiddenChest32.png]] | |||
|[[File:BeanValley2Switch.jpg|300px]] | |||
|- | |||
|[[Bean Valley]] | |||
|[[File:Red Essence.png]]<br>[[Red Essence]] | |||
|In the area with the five [[Piranha Plant]]s growing from the pipes, Mario should defeat the one blocking the pipe on the far right, then enter it. In the passageway, Mario should head northeast to the corner near the yellow steps. Jumping near the corner reveals the Hidden Treasure. | |||
|[[File:HiddenChest33.png]] | |||
|[[File:BeanValley3Switch.jpg|300px]] | |||
|- | |||
|[[Nimbus Land]] | |||
|[[File:Frog Coin.png]]<br>[[Frog Coin]] | |||
|In the Item Shop, Mario should climb up the boxes behind the shopkeep and jump at the highest point to reveal the Hidden Treasure. | |||
|[[File:HiddenChest34.png]] | |||
|[[File:NimbusLandSwitch.jpg|300px]] | |||
|- | |||
|[[Nimbus Castle]] | |||
|[[File:Frog Coin.png]]<br>[[Frog Coin]] | |||
|This Hidden Treasure is only available after defeating [[Valentina]]. Inside the castle, in the grand hallway with the three doorways, Mario should find a bird in a cage near the northwestern corner of the room. Jumping at the corner reveals the Hidden Treasure. | |||
|[[File:HiddenChest35.png]] | |||
|[[File:NimbusCastle1Switch.jpg|300px]] | |||
|- | |||
|[[Nimbus Castle]] | |||
|[[File:Frog Coin.png]]<br>[[Frog Coin]] | |||
|In the same area, Mario should enter the middle doorway to the next room, and -- after defeating [[Birdo]] -- proceed to the next area and jump on the visible treasure box. Jumping from it reveals the Hidden Treasure. | |||
|[[File:HiddenChest36.png]] | |||
|[[File:NimbusCastle4Switch.jpg|300px]] | |||
|- | |||
|[[Nimbus Castle]] | |||
|[[File:Frog Coin.png]]<br>[[Frog Coin]] | |||
|Back into the grand hallway with the three doorways, Mario should enter the one on the left and continue until he finds a set of stairs in the second room. Just near the entrance to a room with a Save Block, Mario should jump against the wall to reveal the Hidden Treasure. | |||
|[[File:HiddenChest37.png]] | |||
|[[File:NimbusCastle3Switch.jpg|300px]] | |||
|- | |||
|[[Nimbus Castle]] | |||
|[[File:Frog Coin.png]]<br>[[Frog Coin]] | |||
|In the same area, at the bottom of the stairs, Mario should walk along the boundary of the hallway until he eventually walks on an invisible path. Mario should jump at the end of this invisible path to reveal another Hidden Treasure. | |||
|[[File:HiddenChest38.png]] | |||
|[[File:NimbusCastle2Switch.jpg|300px]] | |||
|- | |||
|[[Weapon World]] | |||
|[[File:Red Mushroom.png]]<br>[[Mushroom]] | |||
|The final Hidden Treasure is west of the second Save Block. Jumping at the western corner reveals it. | |||
|[[File:HiddenChest39.png]] | |||
|[[File:WeaponWorldSwitch.jpg|300px]] | |||
|} | |||
=List of blocks in Paper Mario= | |||
{{italic title|List of blocks in ''Paper Mario''}} | |||
{{about|the visible blocks from ''[[Paper Mario]]''|the hidden ones from same game|[[List of hidden blocks in Paper Mario|List of hidden blocks in ''Paper Mario'']]}} | |||
This is a list of block from ''[[Paper Mario]]''. There are 107 visible blocks in the game. There are two types of blocks: | |||
*[[? Block]]: Yellow/red blocks with white question mark on them. They contain mostly single coins or items, with occasional [[Badge#Paper Mario|Badge]]. | |||
*[[Coin Block]]: These blocks have same design as [[Brick Block]]s and contain 10 coins. | |||
[[Mario Bros.'_House#Paper Mario series|Mario's House]], [[Peach%27s_Castle#Paper_Mario|Princess Peach's Castle]], [[Star_Hill#Paper_Mario|Shooting Star Summit]], [[Koopa Village]], [[Dry Dry Outpost]], [[Windy Mill]], [[Yoshi's Village]], [[Shiver City]], [[Shiver Snowfield]], [[Starborn Valley]], [[Star Way]] and [[Star Haven]] are the only locations without any visible block. | |||
==Prologue: A Plea from the Stars== | |||
There are a total of 7 Blocks to find during the Prologue: | |||
*[[Goomba Village]] has '''2 Blocks''' - 1 ? and 1 Coin | |||
*[[Goomba Road]] has '''5 ? Blocks''' | |||
<br> | |||
{| style="text-align: center; width: 100%; margin: 0 auto; border: #ABC; border-collapse: collapse;" border="1" cellpadding="4" cellspacing="1" | |||
|-style="background: #ABC;font-size:14pt;color:white" | |||
!Item/s | |||
!Description | |||
!Image | |||
|- | |||
|-style="background: #ABC;font-size:120%;color:#202122" id="Goomba Village" | |||
!colspan=3|[[Goomba Village|{{color|#202122|Goomba Village}}]] ­ ­ ­ ­|­ ­ ­ ­ 2 Blocks (1 ?, 1 Coin) | |||
|- | |||
|[[File:PMCoin.png]][[File:PMCoin.png]][[File:PMCoin.png]][[File:PMCoin.png]][[File:PMCoin.png]][[File:PMCoin.png]][[File:PMCoin.png]][[File:PMCoin.png]][[File:PMCoin.png]][[File:PMCoin.png]]<br>10 [[Coin]]s | |||
|At [[Jr. Troopa|Jr. Troopa's]] playground, near the tree with [[Goombaria|Goombaria's]] [[Dolly]]. | |||
|{{anchor|Goomba Village}}[[File:Goomba Village Block 1.png|250px]] | |||
|- | |||
|[[File:PMCoin.png]]<br>Coin | |||
|Near the entrance to Jr. Troopa's playground. | |||
|[[File:Goomba Village Block 2.png|250px]] | |||
|- | |||
|-style="background: #ABC;font-size:120%;color:#202122" id="Goomba Road" | |||
!colspan=4|[[Goomba Road|{{color|#202122|Goomba Road}}]] ­ ­ ­ ­|­ ­ ­ ­ 5 ? Blocks | |||
|- | |||
|[[File:PMCoin.png]]<br>Coin (both blocks) | |||
|In the middle of the first scene. | |||
|{{anchor|Goomba Road}}[[File:Goomba Road Blocks 1-2.png|250px]] | |||
|- | |||
|[[File:Close Call Badge.png]]<br>[[Close Call (badge)|Close Call]] | |||
|In the red [[Badge#Paper_Mario|badge]] block on the second part of the path. | |||
|[[File:Goomba Road Block 3.png|250px]] | |||
|- | |||
|[[File:PaperMario Items SuperShroom.png]]<br>[[Super_Mushroom#Paper_Mario|Super Shroom]] | |||
|To the south of the opening after [[Goomba King's Fortress]], there is a brick which will reveal a ? Block after being hit. | |||
|[[File:Goomba Road Block 4.png|250px]] | |||
|- | |||
|[[File:PaperMario Items SleepySheep.png]]<br>[[Sleepy Sheep]] | |||
|Near the descending stairs between Goomba King's Fortress and [[Toad_Town#Paper_Mario|Toad Town]]. | |||
|[[File:Goomba Road Block 5.png|250px]] | |||
|} | |||
==Chapter 1: Storming Koopa Bros. Fortress== | |||
There are a total of 10 Blocks to find during Chapter 1: | |||
*[[Pleasant Path]] has '''6 Blocks''' - 5 ? and 1 Coin | |||
*[[Koopa Bros. Fortress]] has '''2 ? Blocks''' | |||
*[[Toad_Town#Paper_Mario|Toad Town]] has '''1 Coin Block''' | |||
*[[Toad Town Tunnels]] has '''1 Coin Block''' | |||
<br> | |||
{| style="text-align: center; width: 100%; margin: 0 auto; border: #EFCE18; border-collapse: collapse;" border="1" cellpadding="4" cellspacing="1" | |||
|-style="background: #EFCE18;font-size:14pt;color:white" | |||
!Item/s | |||
!Description | |||
!Image | |||
|- | |||
|-style="background: #EFCE18;font-size:120%;color:#202122" id="Pleasant Path" | |||
!colspan=3|[[Pleasant Path|{{color|#202122|Pleasant Path}}]] ­ ­ ­ ­|­ ­ ­ ­ 6 Blocks (5 ?, 1 Coin) | |||
|- | |||
|[[File:PMCoin.png]] [[File:Dizzy Attack Badge.png]]<br>Coin, [[Dizzy Attack]] | |||
|In the middle of the first scene. | |||
|{{anchor|Pleasant Path}}[[File:Pleasant Path Blocks 1-2.png|250px]] | |||
|- | |||
|[[File:PaperMario Items FrightJar.png]]<br>[[Fright Mask|Fright Jar]] | |||
|In the rightmost block at the first scene. | |||
|[[File:Pleasant Path Block 3.png|250px]] | |||
|- | |||
|[[File:PaperMario Items POWBlock.png]]<br>[[POW_Block#Paper_Mario_series|POW Block]] | |||
|At the start of the second scene. | |||
|[[File:Pleasant Path Block 4.png|250px]] | |||
|- | |||
|[[File:PMCoin.png]][[File:PMCoin.png]][[File:PMCoin.png]][[File:PMCoin.png]][[File:PMCoin.png]][[File:PMCoin.png]][[File:PMCoin.png]][[File:PMCoin.png]][[File:PMCoin.png]][[File:PMCoin.png]]<br>10 Coins | |||
|At the end of the second scene. | |||
|[[File:Pleasant Path Block 5.png|250px]] | |||
|- | |||
|[[File:Attack FX B Badge.png]]<br>[[Attack FX B (Paper Mario)|Attack FX B]] | |||
|Smashing the blocks near the entrance of [[Koopa Village]] in the order "left, right, middle" will reveal a red ? Badge block. | |||
|[[File:Pleasant Path Block 6.png|250px]] | |||
|- | |||
|-style="background: #EFCE18;font-size:120%;color:#202122" id="Koopa Bros. Fortress" | |||
!colspan=3|[[Koopa Bros. Fortress|{{color|#202122|Koopa Bros. Fortress}}]] ­ ­ ­ ­|­ ­ ­ ­ 2 ? Blocks | |||
|- | |||
|EMPTY/TRAP | |||
|Required to progress, found at the top of the room accessed by a second locked door. | |||
|{{anchor|Koopa Bros. Fortress}}[[File:Koopa Bros. Fortress Block 1.png|250px]] | |||
|- | |||
|[[File:PaperMario Items MapleSyrup.png]]<br>[[Maple Syrup]] | |||
|At the [[Bullet_Bill#Paper_Mario|Bullet Bill]] dodging scene, at the southwestern corner. | |||
|[[File:Koopa Bros. Fortress Block 2.png|250px]] | |||
|- | |||
|-style="background: #EFCE18;font-size:120%;color:#202122" id="Toad Town" | |||
!colspan=3|[[Toad_Town#Paper_Mario|{{color|#202122|Toad Town}}]] ­ ­ ­ ­|­ ­ ­ ­ 1 Coin Block | |||
|- | |||
|[[File:PMCoin.png]][[File:PMCoin.png]][[File:PMCoin.png]][[File:PMCoin.png]][[File:PMCoin.png]][[File:PMCoin.png]][[File:PMCoin.png]][[File:PMCoin.png]][[File:PMCoin.png]][[File:PMCoin.png]]<br>10 Coins | |||
|After gaining access to the rest of Toad Town, this block is found floating above wooden crates in the port. | |||
|{{anchor|Toad Town}}[[File:Toad Town Block.png|250px]] | |||
|- | |||
|-style="background: #EFCE18;font-size:120%;color:#202122" id="Toad Town Tunnels" | |||
!colspan=3|[[Toad Town Tunnels|{{color|#202122|Toad Town Tunnels}}]] ­ ­ ­ ­|­ ­ ­ ­ 1 Coin Block | |||
|- | |||
|[[File:PMCoin.png]][[File:PMCoin.png]][[File:PMCoin.png]][[File:PMCoin.png]][[File:PMCoin.png]][[File:PMCoin.png]][[File:PMCoin.png]][[File:PMCoin.png]][[File:PMCoin.png]][[File:PMCoin.png]]<br>10 Coins | |||
|Third brick block in the row of brick blocks found at the room right of the tunnels entrance. | |||
|{{anchor|Toad Town Tunnels}}[[File:Toad Town Tunnels Block 1.png|250px]] | |||
|} | |||
==Chapter 2: The Mystery of Dry Dry Ruins== | |||
There are a total of 36 Blocks to find during Chapter 2: | |||
*[[Mt. Rugged]] has '''4 ? Blocks''' | |||
*[[Dry_Dry_Desert#Paper_Mario|Dry Dry Desert]] has '''28 Blocks''' - 15 ? and 13 Coin | |||
*[[Dry_Dry_Ruins#Paper_Mario|Dry Dry Ruins]] has '''1 ? Block''' | |||
*[[Toad Town Tunnels]] has '''3 ? Blocks''' | |||
<br> | |||
{| style="text-align: center; width: 100%; margin: 0 auto; border: #FFC639; border-collapse: collapse;" border="1" cellpadding="4" cellspacing="1" | |||
|-style="background: #FFC639;font-size:14pt;color:white" | |||
!Item/s | |||
!Description | |||
!Image | |||
|- | |||
|-style="background: #FFC639;font-size:120%;color:#202122" id="Mt. Rugged" | |||
!colspan=3|[[Mt. Rugged|{{color|#202122|Mt. Rugged}}]] ­ ­ ­ ­|­ ­ ­ ­ 4 ? Blocks | |||
|- | |||
|[[File:PaperMario Items SleepySheep.png]]<br>Sleepy Sheep | |||
|At the southeastern corner of the second scene. | |||
|{{anchor|Mt. Rugged}}[[File:Mt. Rugged Block 1.png|250px]] | |||
|- | |||
|[[File:PaperMario Items Mushroom.png]]<br>[[Mushroom#Paper_Mario|Mushroom]] | |||
|Near the start of the scene to the north of the second scene, accessible after sliding the slope in the third scene. | |||
|[[File:Mt. Rugged Block 2.png|250px]] | |||
|- | |||
|[[File:PMCoin.png]]<br>Coin | |||
|After using the trampoline in the same scene, found on the left. | |||
|[[File:Mt. Rugged Block 3.png|250px]] | |||
|- | |||
|[[File:PaperMario Items HoneySyrup.png]]<br>[[Honey Syrup]] | |||
|After using the trampoline in the same scene, found after going to the right, guarded by a [[Cleft]]. | |||
|[[File:Mt. Rugged Block 4.png|250px]] | |||
|- | |||
|-style="background: #FFC639;font-size:120%;color:#202122" id="Dry Dry Desert" | |||
!colspan=3|[[Dry_Dry_Desert#Paper_Mario|{{color|#202122|Dry Dry Desert}}]] ­ ­ ­ ­|­ ­ ­ ­ 28 Blocks (15 ?, 13 Coin) | |||
|- | |||
|[[File:PaperMario Items FrightJar.png]] [[File:PMCoin.png]]<br>Fright Jar, Coin | |||
|In the scene three scenes north of the entrance. | |||
|{{anchor|Dry Dry Desert}}[[File:Dry Dry Desert Blocks 1-2.png|250px]] | |||
|- | |||
|[[File:PMCoin.png]][[File:PMCoin.png]][[File:PMCoin.png]][[File:PMCoin.png]][[File:PMCoin.png]][[File:PMCoin.png]][[File:PMCoin.png]][[File:PMCoin.png]][[File:PMCoin.png]][[File:PMCoin.png]]<br>10 Coins | |||
|In the scene six scenes east of the previous one, left of the tree. | |||
|[[File:Dry Dry Desert Block 3.png|250px]] | |||
|- | |||
|[[File:PMCoin.png]] 10x[[File:PMCoin.png]] [[File:PaperMario Items HoneySyrup.png]]<br>Coin, 10 Coins, Honey Syrup | |||
|In the scene two scenes west and one south of the previous one. | |||
|[[File:Dry Dry Desert Blocks 4-6.png|250px]] | |||
|- | |||
|[[File:PaperMario Items Mushroom.png]] [[File:PaperMario Items SuperShroom.png]] [[File:PaperMario Items UltraShroom.png]]<br>Mushroom, Super Shroom, [[Ultra Mushroom|Ultra Shroom]] | |||
|In the scene four scenes west and one south of the previous one. Here, Mario must hammer the empty ? block to make others appear. One hit spawns a block to the left with a [[Mushroom#Paper_Mario|Mushroom]], ten hits spawn a block to the right with a [[Super_Mushroom#Paper_Mario|Super Shroom]] and one hundred hits spawns a block in the midle with a [[Ultra Mushroom|Ultra Shroom]]. | |||
|[[File:Dry Dry Desert Blocks 7-9.png|250px]] | |||
|- | |||
|[[File:PMCoin.png]] [[File:PMCoin.png]] [[File:PaperMario Items FireFlower.png]] [[File:PMCoin.png]] [[File:PMCoin.png]]<br>Coin, Coin, [[Fire_Flower#Paper_Mario|Fire Flower]], Coin, Coin | |||
|In the scene two scenes east from the previous one. | |||
|[[File:Dry Dry Desert Blocks 10-14.png|250px]] | |||
|- | |||
|[[File:PMCoin.png]][[File:PMCoin.png]][[File:PMCoin.png]][[File:PMCoin.png]][[File:PMCoin.png]][[File:PMCoin.png]][[File:PMCoin.png]][[File:PMCoin.png]][[File:PMCoin.png]][[File:PMCoin.png]]<br>10 Coins (both blocks) | |||
|In the scene three scenes east from the previous one, two brick blocks closest to the northern exit. | |||
|[[File:Dry Dry Desert Blocks 15-16.png|250px]] | |||
|- | |||
|[[File:PMCoin.png]][[File:PMCoin.png]][[File:PMCoin.png]][[File:PMCoin.png]][[File:PMCoin.png]][[File:PMCoin.png]][[File:PMCoin.png]][[File:PMCoin.png]][[File:PMCoin.png]][[File:PMCoin.png]]<br>10 Coins | |||
|In the scene five scenes west and two south from the previous one, the middle brick block. | |||
|[[File:Dry Dry Desert Block 17.png|250px]] | |||
|- | |||
|[[File:PMCoin.png]]<br>Coin | |||
|In the scene three scenes east from the previous one. | |||
|[[File:Dry Dry Desert Block 18.png|250px]] | |||
|- | |||
|[[File:PMCoin.png]]<br>Coin | |||
|In the scene three scenes east from the previous one. | |||
|[[File:Dry Dry Desert Block 19.png|250px]] | |||
|- | |||
|[[File:PMCoin.png]][[File:PMCoin.png]][[File:PMCoin.png]][[File:PMCoin.png]][[File:PMCoin.png]][[File:PMCoin.png]][[File:PMCoin.png]][[File:PMCoin.png]][[File:PMCoin.png]][[File:PMCoin.png]]<br>10 Coins | |||
|In the scene four scenes west and one south from the previous one, the brick block closest to the northern exit. | |||
|[[File:Dry Dry Desert Block 20.png|250px]] | |||
|- | |||
|[[File:PMCoin.png]][[File:PMCoin.png]][[File:PMCoin.png]][[File:PMCoin.png]][[File:PMCoin.png]][[File:PMCoin.png]][[File:PMCoin.png]][[File:PMCoin.png]][[File:PMCoin.png]][[File:PMCoin.png]]<br>10 Coins | |||
|In the scene three scenes east from the previous one. | |||
|[[File:Dry Dry Desert Block 21.png|250px]] | |||
|- | |||
|[[File:PMCoin.png]]<br>Coin | |||
|In the scene one west and one south from the previous one. | |||
|[[File:Dry Dry Desert Block 22.png|250px]] | |||
|- | |||
|[[File:PMCoin.png]][[File:PMCoin.png]][[File:PMCoin.png]][[File:PMCoin.png]][[File:PMCoin.png]][[File:PMCoin.png]][[File:PMCoin.png]][[File:PMCoin.png]][[File:PMCoin.png]][[File:PMCoin.png]]<br>10 Coins (all six blocks) | |||
|In the scene two east from the previous one. | |||
|[[File:Dry Dry Desert Blocks 23-28.png|250px]] | |||
|- | |||
|-style="background: #FFC639;font-size:120%;color:#202122" id="Dry Dry Ruins" | |||
!colspan=3|[[Dry_Dry_Ruins#Paper_Mario|{{color|#202122|Dry Dry Ruins}}]] ­ ­ ­ ­|­ ­ ­ ­ 1 ? Block | |||
|- | |||
|EMPTY/TRAP | |||
|Required to progress, found at the end of the room with [[Artifact|Ancient Artifact]]. | |||
|{{anchor|Dry Dry Ruins}}[[File:Dry Dry Ruins Block.png|250px]] | |||
|- | |||
|-style="background: #FFC639;font-size:120%;color:#202122" id="Toad Town Tunnels" | |||
!colspan=3|{{anchor|Toad Town Tunnels Part 2}}[[Toad Town Tunnels|{{color|#202122|Toad Town Tunnels}}]] ­ ­ ­ ­|­ ­ ­ ­ 3 ? Blocks | |||
|- | |||
|[[File:PMCoin.png]] [[File:PaperMario Items SnowmanDoll.png]] [[File:PMCoin.png]]<br>Coin, [[Snowman Doll]], Coin | |||
|In the room west of the entrance but before the pipe leading to the new area. | |||
|[[File:Toad Town Tunnels Blocks 2-4.png|250px]] | |||
|} | |||
==Chapter 3: The "Invincible" Tubba Blubba== | |||
There are a total of 11 Blocks to find during Chapter 3: | |||
*[[Forever Forest]] has '''2 ? Blocks''' | |||
*[[Boo's Mansion]] has '''1 ? Block''' | |||
*[[Gusty Gulch]] has '''7 Blocks''' - 6 ?, 1 Coin | |||
*[[Tubba Blubba's Castle]] has '''1 ? Block''' | |||
<br> | |||
{| style="text-align: center; width: 100%; margin: 0 auto; border: #C6BDDE; border-collapse: collapse;" border="1" cellpadding="4" cellspacing="1" | |||
|-style="background: #C6BDDE;font-size:14pt;color:white" | |||
!Item/s | |||
!Description | |||
!Image | |||
|- | |||
|-style="background: #C6BDDE;font-size:120%;color:#202122" id="Forever Forest" | |||
!colspan=3|[[Forever Forest|{{color|#202122|Forever Forest}}]] ­ ­ ­ ­|­ ­ ­ ­ 2 ? Blocks | |||
|- | |||
|[[File:HP Plus Badge.png]]<br>[[HP Plus (badge)|HP Plus]] | |||
|In the middle of a clearing found on a detour from the fifth area. | |||
|{{anchor|Forever Forest}}[[File:Forever Forest Block 1.png|250px]] | |||
|- | |||
|[[File:FP Plus Badge.png]]<br>[[FP Plus]] | |||
|In the middle of a clearing found on a detour from the seventh area. | |||
|[[File:Forever Forest Block 2.png|250px]] | |||
|- | |||
|-style="background: #C6BDDE;font-size:120%;color:#202122" id="Boo's Mansion" | |||
!colspan=3|[[Boo's Mansion|{{color|#202122|Boo's Mansion}}]] ­ ­ ­ ­|­ ­ ­ ­ 1 ? Block | |||
|- | |||
|[[File:PaperMario Items VoltShroom.png]]<br>[[Volt Mushroom|Volt Shroom]] | |||
|Outside the mansion, in front of the gate. | |||
|{{anchor|Boo's Mansion}}[[File:Boo Mansion Block.png|250px]] | |||
|- | |||
|-style="background: #C6BDDE;font-size:120%;color:#202122" id="Gusty Gulch" | |||
!colspan=3|[[Gusty Gulch|{{color|#202122|Gusty Gulch}}]] ­ ­ ­ ­|­ ­ ­ ­ 7 Blocks (6 ?, 1 Coin) | |||
|- | |||
|[[File:PMCoin.png]]<br>Coin | |||
|In the scene with a [[Save_Block#Paper_Mario_series|Save Block]], found in the house right of the Save Block. | |||
|{{anchor|Gusty Gulch}}[[File:Gusty Gulch Block 1.png|250px]] | |||
|- | |||
|[[File:PMCoin.png]]<br>Coin | |||
|At the start of the scene one scene to the east of the Boo's area. | |||
|[[File:Gusty Gulch Block 2.png|250px]] | |||
|- | |||
|[[File:PMCoin.png]] [[File:PaperMario Items RepelGel.png]]<br>Coin, [[Repel Gel]] | |||
|In the middle of the same scene. | |||
|[[File:Gusty Gulch Blocks 3-4.png|250px]] | |||
|- | |||
|[[File:PaperMario Items SuperShroom.png]] 10x[[File:PMCoin.png]] [[File:PMCoin.png]]<br>Super Shroom, 10 Coins, Coin | |||
|At the end of the scene before the scene with [[Tubba Blubba's Castle]] entrance. | |||
|[[File:Gusty Gulch Blocks 5-7.png|250px]] | |||
|- | |||
|-style="background: #C6BDDE;font-size:120%;color:#202122" id="Tubba Blubba's Castle" | |||
!colspan=3|[[Tubba Blubba's Castle|{{color|#202122|Tubba Blubba's Castle}}]] ­ ­ ­ ­|­ ­ ­ ­ 1 ? Block | |||
|- | |||
|[[File:PaperMario Items MapleSyrup.png]]<br>Maple Syrup | |||
|By the stairs that lead to the third floor. | |||
|{{anchor|Tubba Blubba's Castle}}[[File:Tubba Blubba's Castle Block.png|250px]] | |||
|} | |||
==Chapter 4: Trials in the Toy Box== | |||
There are a total of 16 Blocks to find in the [[Shy Guy's Toy Box]] during Chapter 4: | |||
*'''13 ? Blocks''' | |||
*'''3 Coin Blocks''' | |||
<br> | |||
{| style="text-align: center; width: 100%; margin: 0 auto; border: #A5CEDE; border-collapse: collapse;" border="1" cellpadding="4" cellspacing="1" | |||
|-style="background: #A5CEDE;font-size:14pt;color:white" | |||
!Item/s | |||
!Description | |||
!Image | |||
|- | |||
|-style="background: #A5CEDE;font-size:120%;color:#202122" id="Shy Guy's Toy Box" | |||
!colspan=3|[[Shy Guy's Toy Box|{{color|#202122|Shy Guy's Toy Box}}]] ­ ­ ­ ­|­ ­ ­ ­ 16 Blocks (13 ?, 3 Coin) | |||
|- | |||
|[[File:PMCoin.png]]<br>Coin | |||
|At the end of the scene one scene east of the blue station. | |||
|{{anchor|Shy Guy's Toy Box}}[[File:Shy Guy's Toy Box Block 1.png|250px]] | |||
|- | |||
|[[File:PMCoin.png]]<br>Coin | |||
|Left of the wall in the very east of the Blue Station area. | |||
|[[File:Shy Guy's Toy Box Block 2.png|250px]] | |||
|- | |||
|[[File:PMCoin.png]] [[File:PaperMario Items ThunderBolt.png]]<br>Coin, [[Thunder Bolt (item)|Thunder Bolt]] | |||
|In the same scene, on the opposite side of the wall. | |||
|[[File:Shy Guy's Toy Box Blocks 3-4.png|250px]] | |||
|- | |||
|[[File:PMCoin.png]]<br>Coin | |||
|In the scene east of the Pink Station area, found above the walkway with looping [[Shy Guy]]s. | |||
|[[File:Shy Guy's Toy Box Block 5 and Treasure Chest 5.png|250px]] | |||
|- | |||
|[[File:PMCoin.png]]<br>Coin | |||
|In the scene west of the Pink Station area, found above the flower boxes. | |||
|[[File:Shy Guy's Toy Box Block 6.png|250px]] | |||
|- | |||
|[[File:PMCoin.png]]<br>Coin (both blocks) | |||
|In the next scene, found in the northwestern corner. | |||
|[[File:Shy Guy's Toy Box Blocks 7-8.png|250px]] | |||
|- | |||
|[[File:PMCoin.png]] 10x[[File:PMCoin.png]] [[File:PMCoin.png]]<br>Coin, 10 Coins, Coin | |||
|In the previous scene, found on the northern side of the tracks. | |||
|[[File:Shy Guy's Toy Box Blocks 9-11.png|250px]] | |||
|- | |||
|[[File:PMCoin.png]][[File:PMCoin.png]][[File:PMCoin.png]][[File:PMCoin.png]][[File:PMCoin.png]][[File:PMCoin.png]][[File:PMCoin.png]][[File:PMCoin.png]][[File:PMCoin.png]][[File:PMCoin.png]]<br>10 Coins | |||
|In the scene east of the Green Station area, found above the moving pink platform near the end of the area. | |||
|[[File:Shy Guy's Toy Box Block 12.png|250px]] | |||
|- | |||
|[[File:PMCoin.png]][[File:PMCoin.png]][[File:PMCoin.png]][[File:PMCoin.png]][[File:PMCoin.png]][[File:PMCoin.png]][[File:PMCoin.png]][[File:PMCoin.png]][[File:PMCoin.png]][[File:PMCoin.png]]<br>10 Coins | |||
|In the scene west of the Red Station area, found above the ferris wheel. | |||
|[[File:Shy Guy's Toy Box Block 13.png|250px]] | |||
|- | |||
|[[File:PMCoin.png]]<br>Coin (both blocks) | |||
|In the same scene, in the lower part of the scene left of the ferris wheel. | |||
|[[File:Shy Guy's Toy Box Blocks 14-15.png|250px]] | |||
|- | |||
|[[File:PaperMario Items SleepySheep.png]]<br>Sleepy Sheep | |||
|In the northwestern corner of the scene to the east of the Red Station area. | |||
|[[File:Shy Guy's Toy Box Block 16.png|250px]] | |||
|} | |||
==Chapter 5: Hot Hot Times on Lavalava Island== | |||
There are a total of 7 ? Blocks to find during Chapter 3: | |||
*[[Jade Jungle]] has '''1 ? Block''' | |||
*[[Mt. Lavalava]] has '''6 ? Blocks''' | |||
<br> | |||
{| style="text-align: center; width: 100%; margin: 0 auto; border: #FFC6D6; border-collapse: collapse;" border="1" cellpadding="4" cellspacing="1" | |||
|-style="background: #FFC6D6;font-size:14pt;color:white" | |||
!Item/s | |||
!Description | |||
!Image | |||
|- | |||
|-style="background: #FFC6D6;font-size:120%;color:#202122" id="Jade Jungle" | |||
!colspan=3|[[Jade Jungle|{{color|#202122|Jade Jungle}}]] ­ ­ ­ ­|­ ­ ­ ­ 1 ? Block | |||
|- | |||
|[[File:Power Quake Badge.png]]<br>[[Power Quake]] | |||
|In the scene with jungle entrance to the [[Yoshi Village]], found on an island at the center. | |||
|{{anchor|Jade Jungle}}[[File:Jade Jungle Block.png|250px]] | |||
|- | |||
|-style="background: #FFC6D6;font-size:120%;color:#202122" id="Mt. Lavalava" | |||
!colspan=3|[[Mt. Lavalava|{{color|#202122|Mt. Lavalava}}]] ­ ­ ­ ­|­ ­ ­ ­ 6 ? Blocks | |||
|- | |||
|[[File:PMCoin.png]]<br>Coin (all four blocks) | |||
|On the top of the third scene, under the first zipline. | |||
|{{anchor|Mt. Lavalava}}[[File:Mt. Lavalava Blocks 1-4.png|250px]] | |||
|- | |||
|[[File:PaperMario Items SuperShroom.png]] [[File:PaperMario Items MapleSyrup.png]]<br>Super Shroom, Maple Syrup | |||
|In the scene above the Lava Piranha scene. | |||
|[[File:Mt. Lavalava Blocks 5-6.png|250px]] | |||
|} | |||
==Chapter 6: Dark Days in Flower Fields== | |||
There are a total of 7 Blocks to find during Chapter 6: | |||
*[[Flower Fields]] has '''2 Blocks''' - 1 ?, 1 Coin | |||
*[[Toad Town Tunnels]] has '''5 ? Blocks''' | |||
<br> | |||
{| style="text-align: center; width: 100%; margin: 0 auto; border: #E7E719; border-collapse: collapse;" border="1" cellpadding="4" cellspacing="1" | |||
|-style="background: #E7E719;font-size:14pt;color:white" | |||
!Item/s | |||
!Description | |||
!Image | |||
|- | |||
|-style="background: #E7E719;font-size:120%;color:#202122" id="Flower Fields" | |||
!colspan=3|[[Flower Fields|{{color|#202122|Flower Fields}}]] ­ ­ ­ ­|­ ­ ­ ­ 2 Blocks (1 ?, 1 Coin) | |||
|- | |||
|[[File:PaperMario Items DizzyDial.png]]<br>[[Dizzy Dial]] | |||
|In the second scene on the southeastern road. | |||
|{{anchor|Flower Fields}}[[File:Flower Fields Block 1.png|250px]] | |||
|- | |||
|[[File:PMCoin.png]][[File:PMCoin.png]][[File:PMCoin.png]][[File:PMCoin.png]][[File:PMCoin.png]][[File:PMCoin.png]][[File:PMCoin.png]][[File:PMCoin.png]][[File:PMCoin.png]][[File:PMCoin.png]]<br>10 Coins | |||
|In the center of the Hedge Maze found on the western road. Accessed by going right from the last pipe in the maze. | |||
|[[File:Flower Fields Block 2.png|250px]] | |||
|- | |||
|-style="background: #E7E719;font-size:120%;color:#202122" id="Toad Town Tunnels" | |||
!colspan=3|{{anchor|Toad Town Tunnels Part 3}}[[Toad Town Tunnels|{{color|#202122|Toad Town Tunnels}}]] ­ ­ ­ ­|­ ­ ­ ­ 5 ? Blocks | |||
|- | |||
|[[File:PMCoin.png]]<br>Coin | |||
|Beneath the entrance room, there is a pipe by the path to the right that eventually leads to the Ultra Boots. In the first room down the pipe, found near the exit. | |||
|[[File:Toad Town Tunnels Block 5.png|250px]] | |||
|- | |||
|[[File:PMCoin.png]]<br>Coin (both blocks) | |||
|In the next room, found between the brick blocks. They are high in the air, so [[Ultra Boots]] are required. | |||
|[[File:Toad Town Tunnels Blocks 6-7.png|250px]] | |||
|- | |||
|[[File:PaperMario Items ShootingStar.png]]<br>[[Shooting Star (item)|Shooting Star]] | |||
|Beneath the entrance room, in the northwestern corner and high in the air, so Ultra Boots are required. | |||
|[[File:Toad Town Tunnels Block 8.png|250px]] | |||
|- | |||
|[[File:PMCoin.png]]<br>Coin | |||
|In the area two screens east of the blue Warp Pipe to Yoshi's Village is a gap between two high platforms, with a doorway leading to [[Shiver City]] in the east. Found touching the western platform, high in the air, so Ultra Boots are required. | |||
|[[File:Toad Town Tunnels Block 9.png|250px]] | |||
|} | |||
==Chapter 7: A Star Spirit on Ice== | |||
There are a total of 5 Blocks to find during Chapter 7: | |||
*[[Shiver Mountain]] has '''1 ? Block''' | |||
*[[Crystal Palace]] has '''4 Blocks''' - 2 ?, 2 Coin | |||
<br> | |||
{| style="text-align: center; width: 100%; margin: 0 auto; border: #DED618; border-collapse: collapse;" border="1" cellpadding="4" cellspacing="1" | |||
|-style="background: #DED618;font-size:14pt;color:white" | |||
!Item/s | |||
!Description | |||
!Image | |||
|- | |||
|-style="background: #DED618;font-size:120%;color:#202122" id="Shiver Mountain" | |||
!colspan=3|[[Shiver Mountain|{{color|#202122|Shiver Mountain}}]] ­ ­ ­ ­|­ ­ ­ ­ 1 ? Block | |||
|- | |||
|[[File:Mega Jump Badge.png]]<br>[[Mega Jump]] | |||
|On the second floor in the fourth scene. | |||
|{{anchor|Shiver Mountain}}[[File:Shiver Mountain Block.png|250px]] | |||
|- | |||
|-style="background: #DED618;font-size:120%;color:#202122" id="Crystal Palace" | |||
!colspan=3|[[Crystal Palace|{{color|#202122|Crystal Palace}}]] ­ ­ ­ ­|­ ­ ­ ­ 4 Blocks (2 ?, 2 Coin) | |||
|- | |||
|[[File:PMCoin.png]][[File:PMCoin.png]][[File:PMCoin.png]][[File:PMCoin.png]][[File:PMCoin.png]][[File:PMCoin.png]][[File:PMCoin.png]][[File:PMCoin.png]][[File:PMCoin.png]][[File:PMCoin.png]]<br>10 Coins (both blocks) | |||
|In the second room after going through the blue locked door. | |||
|{{anchor|Crystal Palace}}[[File:Crystal Palace Blocks 1-2.png|250px]] | |||
|- | |||
|[[File:PaperMario Items SuperShroom.png]]<br>Super Shroom | |||
|Near the door in the room to the north of the first room. | |||
|[[File:Crystal Palace Block 3.png|250px]] | |||
|- | |||
|[[File:PaperMario Items MapleSyrup.png]]<br>Maple Syrup | |||
|Near the door in the big [[Albino Dino]] statue room. It is high in the air, so Ultra Boots are required. | |||
|[[File:Crystal Palace Block 4.png|250px]] | |||
|} | |||
==Chapter 8: A Star-Powered Showdown!== | |||
There are a total of 8 ? Blocks to find in [[Bowser%27s_Castle#Paper_Mario|Bowser's Castle]] during the Chapter 8. | |||
<br> | |||
{| style="text-align: center; width: 100%; margin: 0 auto; border: #ABC; border-collapse: collapse;" border="1" cellpadding="4" cellspacing="1" | |||
|-style="background: #ABC;font-size:14pt;color:white" | |||
!Item/s | |||
!Description | |||
!Image | |||
|- | |||
|-style="background: #ABC;font-size:120%;color:#202122" id="Bowser's Castle" | |||
!colspan=3|[[Bowser's Castle#Paper Mario|{{color|#202122|Bowser's Castle}}]] ­ ­ ­ ­|­ ­ ­ ­ 8 ? Blocks | |||
|- | |||
|[[File:PaperMario Items LifeShroom.png]]<br>[[Life Mushroom (Paper Mario series)|Life Shroom]] | |||
|On a platform in the lava area next to the front door scene. | |||
|{{anchor|Bowser's Castle}}[[File:Bowser's Castle Block 1.png|250px]] | |||
|- | |||
|[[File:Deep Focus Badge.png]]<br>[[Deep Focus]] | |||
|On a platform in the lava area, near the entrance. | |||
|[[File:Bowser's Castle Block 2.png|250px]] | |||
|- | |||
|[[File:PaperMario Items POWBlock.png]]<br>POW Block | |||
|At the end of the north fork road in the first grotto scene. | |||
|[[File:Bowser's Castle Block 3.png|250px]] | |||
|- | |||
|[[File:PaperMario Items ShootingStar.png]]<br>Shooting Star | |||
|At the end of the north fork road in the second grotto scene. | |||
|[[File:Bowser's Castle Block 4.png|250px]] | |||
|- | |||
|[[File:PaperMario Items SuperShroom.png]]<br>Super Shroom | |||
|In the middle of the first [[Dry_Bones#Paper_Mario|Dry Bones]] room. | |||
|[[File:Bowser's Castle Block 5.png|250px]] | |||
|- | |||
|[[File:PaperMario Items SuperShroom.png]] [[File:PaperMario Items MapleSyrup.png]]<br>Super Shroom, Maple Syrup | |||
|Found outside after the quiz room near the door. | |||
|[[File:Bowser's Castle Blocks 6-7.png|250px]] | |||
|- | |||
|[[File:PaperMario Items SuperShroom.png]]<br>Super Shroom | |||
|In the same scene, found after going to the right. | |||
|[[File:Bowser's Castle Block 8.png|250px]] | |||
|} | |||
Revision as of 04:55, August 3, 2024
List of treasure boxes in Super Mario RPG: Legend of the Seven Stars
Mushroom Kingdom Region
There are a total of 11 treasure boxes to find in the Mushroom Kingdom Region:
- Mushroom Way holds 4 boxes
- Mushroom Kingdom holds 3 boxes
- Bandit's Way holds 4 boxes
| Item | Description | Image (SNES) | Image (Switch) |
|---|---|---|---|
| Mushroom Way | 4 Treasures | |||
5 Coins |
In the first area, found near the first patrolling Paratroopa. | 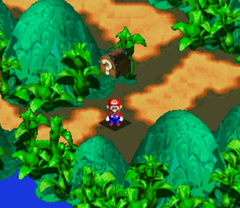
|
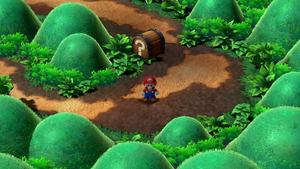
|
8 Coins |
In the same area, found next to Toad, being harassed by a Goomba. | 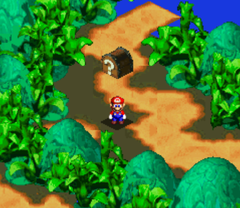
|
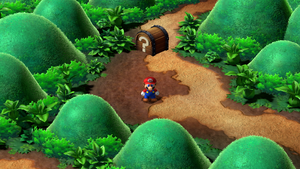
|
Flower |
In the second area with three rocky hills, found atop the left one. | 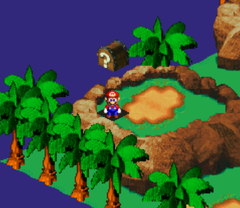
|
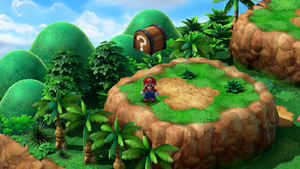
|
Mushroom |
In the same area, found right of the right rocky hill (the one where Toad was held captive by a Paratroopa). This treasure respawns each time Mario enters the world map. | 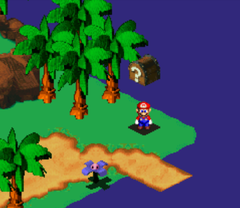
|
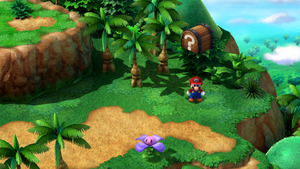
|
| Mushroom Kingdom | 3 Treasures | |||
10-Coin, Flower, Mushroom |
In the castle's vault. Can be obtained twice: First time after given permission from the Chancellor and second time during Claymorton's takeover of the town. | 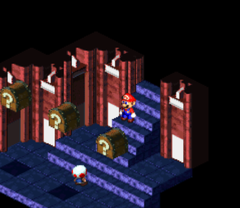
|
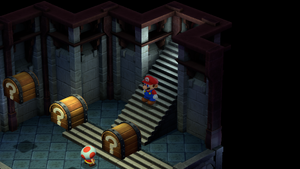
|
| Bandit's Way | 4 Treasures | |||
Mushroom |
In the third area, after going right at the last crossroads, found at the end and guarded by a K-9. | 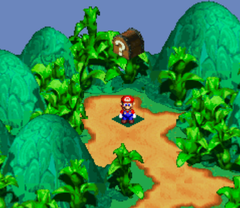
|
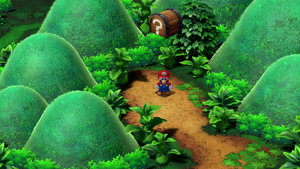
|
Star |
In the fourth area with two rotating blocks, found near the entrance. These two blocks are required to be used, so Mario can reach the treasure. | 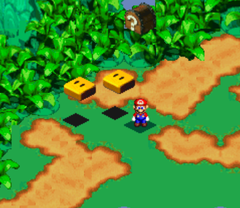
|
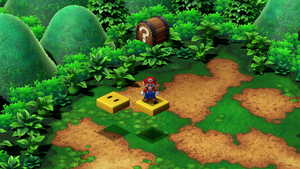
|
Flower |
In the same area, found in the middle of the area. Like the previous one, rotating blocks are required to be used, so Mario can reach the treasure. | 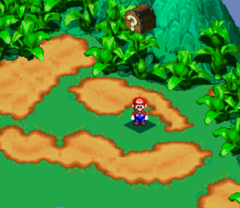
|
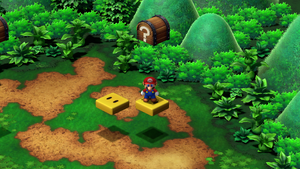
|
Mushroom |
In the last area, found near the entrance. | 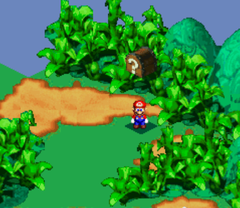
|
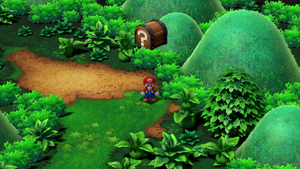
|
Tadpole Pond Region
There are a total of 24 treasure boxes to find in the Tadpole Pond Region:
- Kero Sewers holds 5 boxes
- Rose Way holds 6 boxes
- Rose Town holds 5 boxes
- Forest Maze holds 5 boxes
- Pipe Vault holds 3 boxes
| Item | Description | Image (SNES) | Image (Switch) |
|---|---|---|---|
| Kero Sewers | 5 Treasures | |||
Flower |
After using the pipe at the end of the first room, Mario should use the one next to it. In this room, he should reach another one at the bottom and use it to enter a room with yellow stairs. Here, he should go forwards to reach a treasure in front of yellow stairs. | 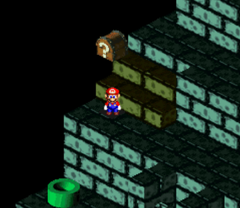
|
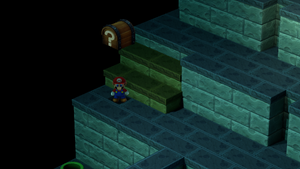
|
Huhwhat and Trueform Pin after its defeat (first time) 5 Coins (second time) |
In the same area, Mario should drop down to lowest level and go right to reach a treasure at the dead end. Jumping into this treasure triggers a battle with Huhwhat and Mario is awarded Trueform Pin after its defeat. After Mario leaves the room and comes back, this time the treasure contains five coins. | 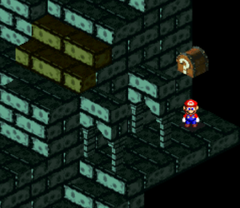
|
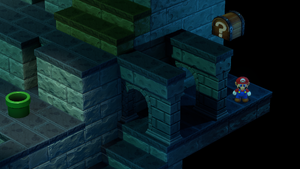
|
Star |
After Mario comes back onto the upper level of the room with yellow stairs, he should reach the top of them and enter a pipe there. Upon exiting said pipe, a treasure is seen to the right. | 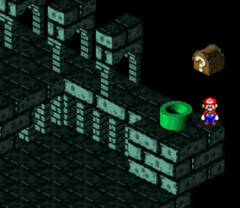
|
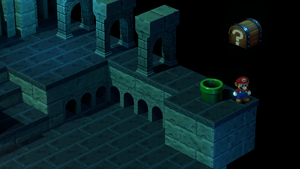
|
Mushroom (lower chest) Flower (upper chest, first time) Cricket Jam (upper chest, second time) |
After the water has been drained and Mario entered the previously unavailable pipe, two more treasures are seen. The lower one can be obtained normally, but the upper one has two methods of being accessed, each with its own reward (rewards are not mutually exclusive so both can be obtained without problem): If the Boo trick is used (go into the corner between the arch and the wall and let Mario be attacked by a Boo. Then run from the battle and use the blinking Boo as a platform to reach the top.), then Flower is rewarded. If the proper method is used (accessing Kero Sewers from Land's End via pipe), the Cricket Jam is rewarded. |
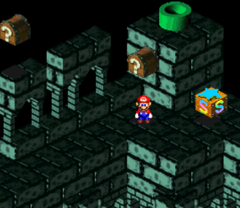
|
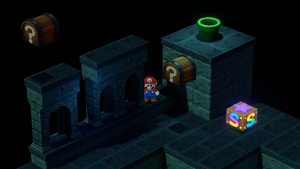
|
| Rose Way | 6 Treasures | |||
Frog Coin |
After using the moving blocks in the first area, Mario should reach the exit on the left. In this area, two Shy Guys are seen sitting on the moving blocks. Mario should defeat them, so he can use the moving blocks to reach a treasure high up in the air at the end of the area. | 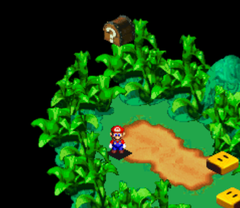
|
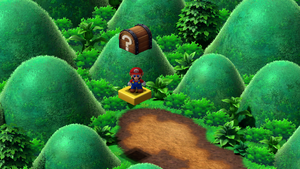
|
5 Coins |
In the second-to-last area, found right at the entrance. The Shy Guy must be knocked off the chest before Mario can access the contents. This treasure respawns each time Mario enters the world map. | 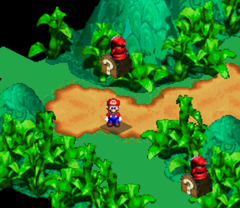
|
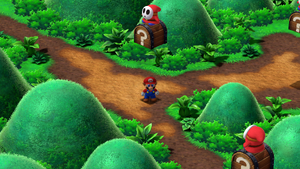
|
5 Coins |
In the same area, found downwards from the previous one. The Shy Guy must be knocked off the chest before Mario can access the contents. This treasure respawns each time Mario enters the world map. | 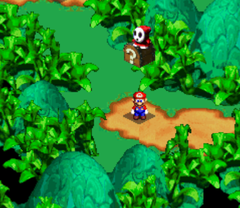
|
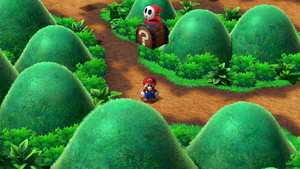
|
Mushroom |
In the same area, found right of the first one. The Shy Guy must be knocked off the chest before Mario can access the contents. This treasure respawns each time Mario enters the world map. | 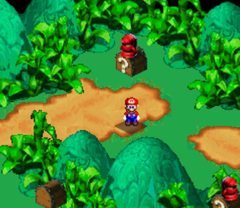
|
|
5 Coins (both chests) |
In the same area, found near the exit. The Shy Guys must be knocked off the chests before Mario can access the contents. These treasures respawn each time Mario enters the world map. | 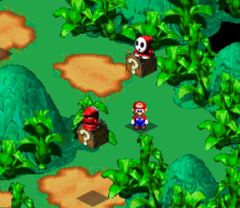
|
|
| Rose Town | 5 Treasures | |||
Flower |
After using the chimney of the Item Shop, Mario lands on the top of the bookcase with treasure floating above it | 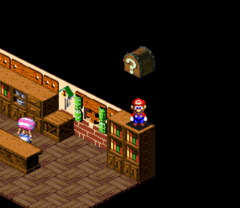
|
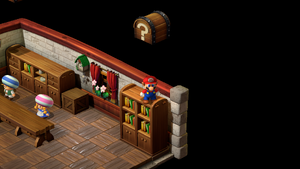
|
Flower (both chests) OR 5 Coins (left chest) 8 Coins (right chest) |
In the northeastern section of town is a house on a hill too high for Mario to reach. Mario must climb on top of the Mushroom person nearby and jump from him to the hill. Going inside the house, two treasures are seen. Depending on when the treasures are collected, different contents are rewarded: If Mario takes the contents before leaving the house, he gains two Flowers. If Mario lowers the stairs, leaves the house, talks to the Mushroom person and comes back inside, the left one contains 5 coins and the right one contains 8 coins. |
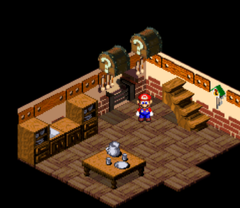
|
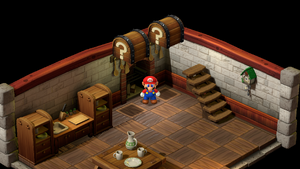
|
Lazy Shell (both chests) |
Only available after giving Gardener (available after talking to Rat Funk in Monstro Town) Seed (Found after defeating Smilax in Bean Valley) and Fertilizer (Given by Beezo in Nimbus Land after Valentina's defeat) and climbing the newly grown beanstalk. One treasure contains the Lazy Shell weapon, and the other one contains Lazy Shell armor. | 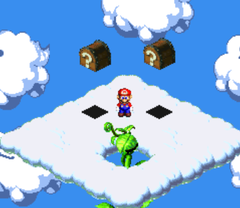
|
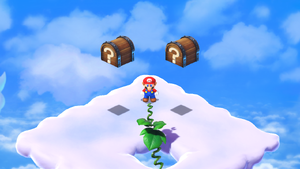
|
| Forest Maze | 5 Treasures | |||
3 Mushrooms, Flower and Frog Coin(Steal Treasures->Go To Forest) OR 3 Flowers, Mushroom and Frog Coin (Go To Forest->Steal Treasures) |
After reaching the maze portion of the area, Mario should go left, left, straight and then right (from Mario's perspective) to reach a pipe. Entering said pipe reveals a secret treasure room with 5 chests. Depending on when Mario took the treasures out of the house in Rose Town, different contents are rewarded: If Mario steals the treasures and then goes into the forest, the room contains 3 Mushrooms, Flower and a Frog Coin. If Mario goes into the forest first and then steals the treasures, the room contains 3 Flowers, Mushroom and a Frog Coin. |
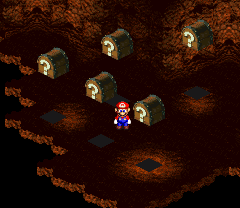
|
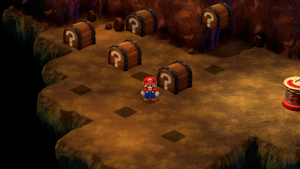
|
| Pipe Vault | 3 Treasures | |||
Flower |
In the third area, Mario should down the first pipe in front of him. In the next area, Mario must reveal an invisible platform to get to the brick platform above by jumping at the spot before the brick platform begins. Once at the top, Mario should stand at the end of the brick platform and jump. | 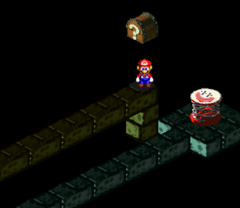
|
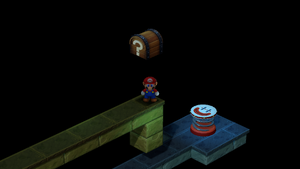
|
Flower |
In the last area, after exiting the pipe, a block is seen. This block is required to reach a treasure high up in the air. | 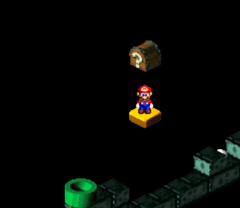
|
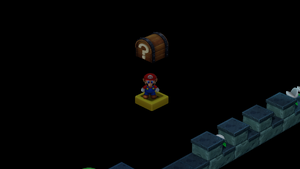
|
2 10-Coins (SNES) 10 Coins (Switch) |
In the same area, above 5 Nipper Plants. A block is seen moving above them and is required to access the treasure. | 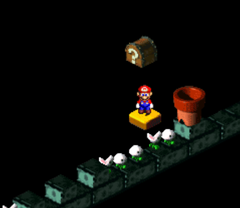
|
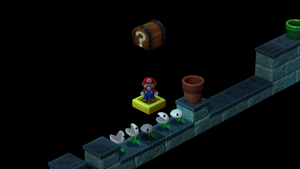
|
Moleville Region
There are a total of 11 treasure boxes to find in the Moleville Region:
- Moleville holds 4 boxes
- Booster Pass holds 3 boxes
- Booster Tower holds 4 boxes
| Item | Description | Image (SNES) | Image (Switch) |
|---|---|---|---|
| Moleville | 4 Treasures | |||
Star |
In the upper part of the area with first cart tracks. This treasure respawns each time Mario enters the world map. | 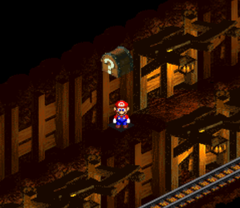
|
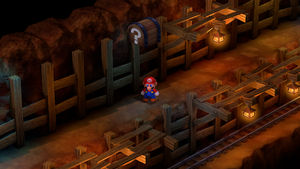
|
15 Coins |
In the upper part of the area two rooms from the previous one. | 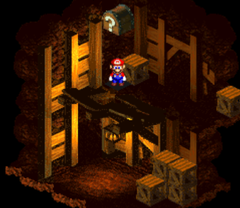
|
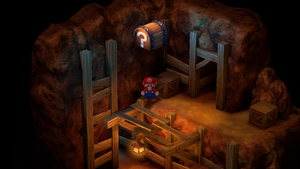
|
Mushroom |
In the area with the Save Block, found left of it. | 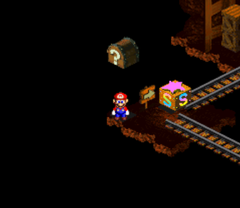
|
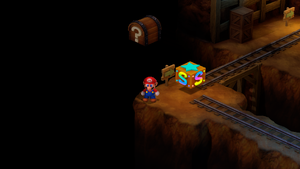
|
Flower |
In the same area, found high in the air near the exit. Mario must jump off two crates to reach it. | 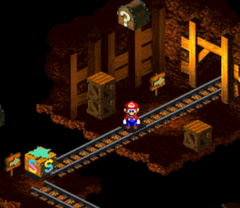
|
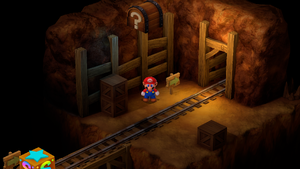
|
| Booster Pass | 3 Treasures | |||
Croaka Cola, Frog Coin and Flower |
Only available after pressing the button in Booster Tower. After pressing the button, Mario returns to the first area and find a new opening in the left part. Three treasures are found after entering the opening and reaching the end of the course. | 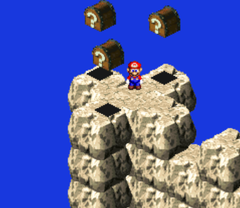
|
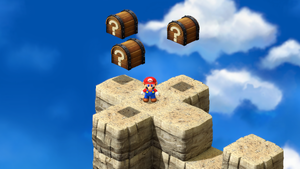
|
| Booster Tower | 4 Treasures | |||
Masher |
In the hallway with 4 circling Rob-ombs, Mario must enter the middle exit to find a treasure high in the air. To get it, he must jump down onto the see-saw and launch Bob-omb into the air. After Bob-omb falls back down, Mario is launched into the treasure. | 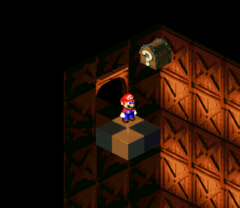
|
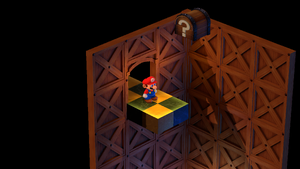
|
Mushroom |
In the room with a Thwomp on the see-saw, found right of it. | 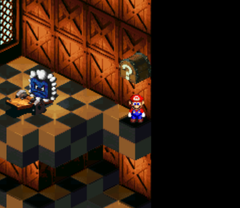
|
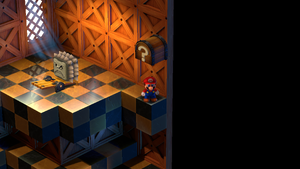
|
Zoom Shoes |
In the room accessed from the right exit of the invisible Lava Blubbles room. | 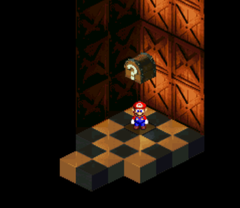
|
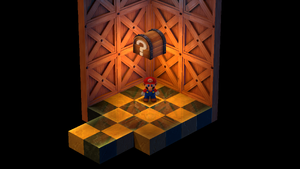
|
Frog Coin |
In the area just before Booster's room, Mario should jump to the orange platform in the southeast and continue jumping to the other ones until he finds a treasure. | 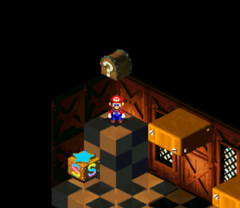
|
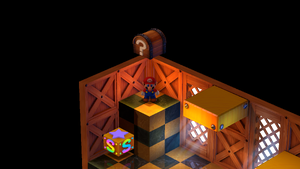
|
Star Hill Region
There are a total of 14 treasure boxes to find in the Star Hill Region:
- Sea holds 5 boxes
- Sunken Ship holds 9 boxes
| Item | Description | Image (SNES) | Image (Switch) |
|---|---|---|---|
| Sea | 5 Treasures | |||
Star |
In the third area (accessed from the lower exit), found near the exit. | 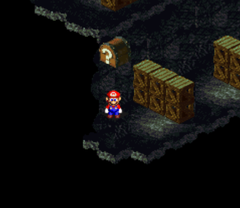
|
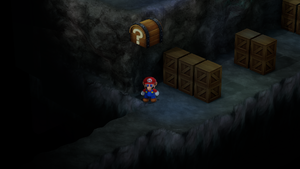
|
Mushroom, Flower, Frog Coin |
At the end of the fourth area are two exits. Mario should go into the right one to reach a previously unavailable area. Here, three more treasures can be found. | 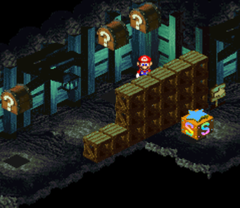
|
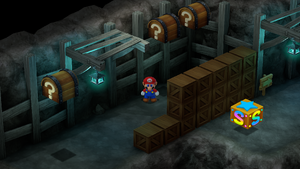
|
Max Mushroom |
In the fifth area, Mario should enter a whirlpool to sink underwater and then go through the opening on the right. Here, he should use the bubbles to reach an upper part of the fifth area and the treasure. | 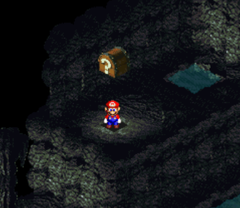
|
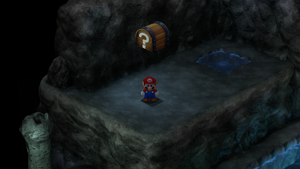
|
| Sunken Ship | 9 Treasures | |||
10 Coins |
In the first room with Alley Rats going up and down the stairs, found above the stack of 3 crates. | 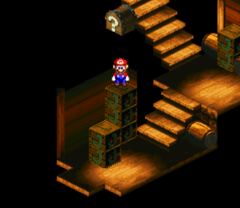
|
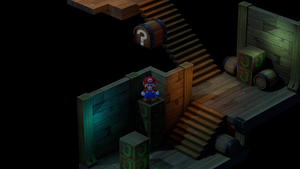
|
10 10-Coins |
In the room with Shaman's Shop, found in the left part, guarded by the Dry Bones. | 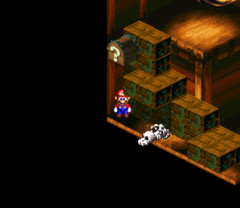
|
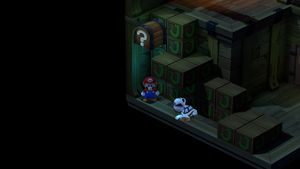
|
10 10-Coins (both chests) |
In the room after the second room with Alley Rats going up and down the stairs, Mario can see two treasures floating above a stack of crates. To reach them, he needs to make a running jump from the barrels in the northeastern corner. | 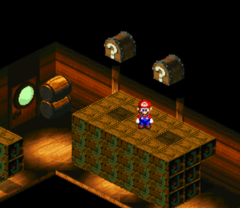
|
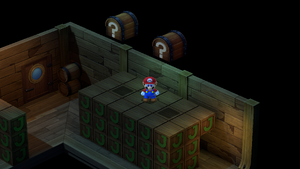
|
Frog Coin |
In the next area, there is a wall of crates. Behind said wall is a hidden opening. Going through said opening leads to a small room with a lone treasure. | 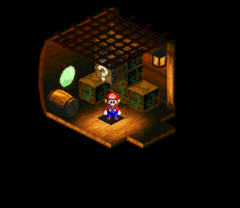
|
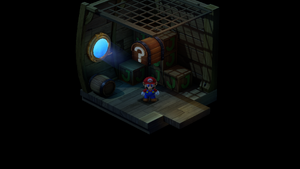
|
Mushroom (left chest) Whuhoh and Safety Badge after its defeat (right chest, first time) 10 10-Coins (right chest, second time) |
In the next room, there are two treasures. The one on the right is a normal one containing a Mushroom, while the one on the right triggers a battle with Whuhoh and Safety Badge is awarded after its defeat. If Mario leaves the room and then comes back, this chest will contain 10 10-Coins. | 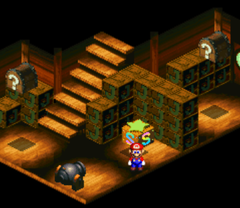
|
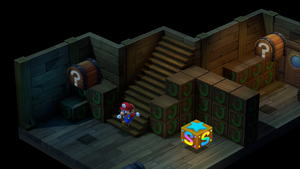
|
Safety Ring |
In the room accessed via underwater opening in the room with Blooper and its babies. | 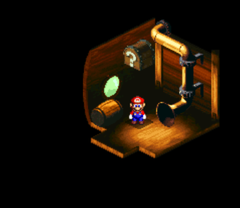
|
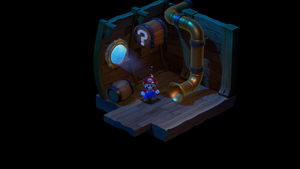
|
Mushroom |
In the room where 4 Bandana Reds are encountered. | 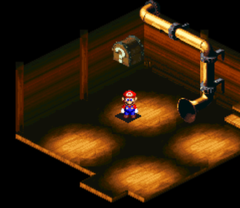
|
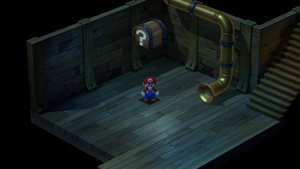
|
Land's End Region
There are a total of 21 treasure boxes to find in the Land's End Region:
- Land's End holds 9 boxes
- Bean Valley holds 11 boxes
- Grate Guy's Casino holds 1 boxes
| Item | Description | Image (SNES) | Image (Switch) |
|---|---|---|---|
| Land's End | 9 Treasures | |||
Frog Coin |
In the second area, Mario should hop into the cannon and fire into the hole in the rocky hill. Jumping out of the hole, Mario should jump at the southwestern edge of the hole to reveal a platform. Going into the cannon and firing out once more, Mario lands on the platform. Then he should wait a few moments so he reaches a treasure in the air. | 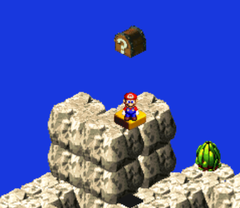
|
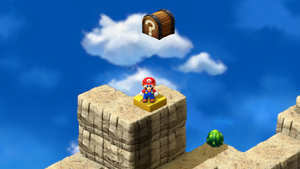
|
Frog Coin |
At the Sky Bridge area, Mario should jump into the cave beneath it to enter the secret passage to Kero Sewers. After a while, a treasure high in the air is seen. To reach it, Mario must jump off the small wall of crates right of it. | 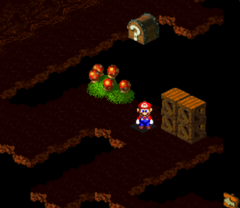
|
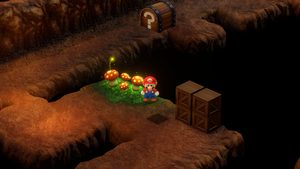
|
Mushroom |
In the next underground area, found at the end near the trampoline. | 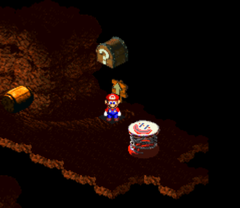
|
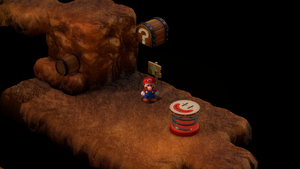
|
Star |
After going through the desert portion of the area, Mario reaches the underground with a Save Block. The treasure is found in the lower part of the room. | 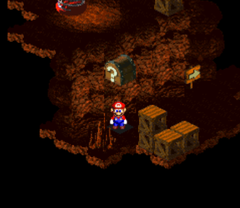
|
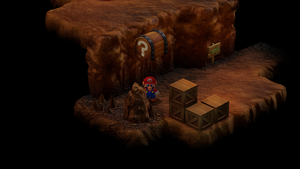
|
Star |
After going through a room and then falling through a hole in the next one, Mario lands in the room with the Belome Temple entrance. In this room, there is a small wall made out of crates with a Shaman hiding behind it. Pay this Shaman 400 coins to make a treasure appear, containing a Star. Shaman then asks if he should go out to find another and disappears if agreed to. After Mario leaves the area and comes back, Shaman comes back and the treasure containing a Star now costs 800 coins. This can be done indefinitely, with a fixed price of 800 Coins. | 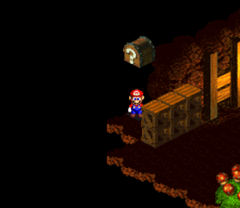
|
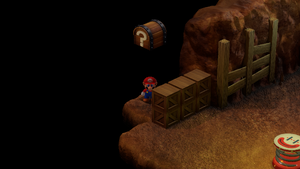
|
5 10-Coins |
In the second room, found at the start left of the Belome statue head. | 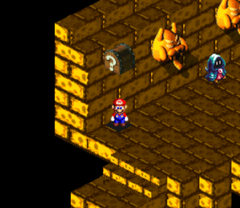
|
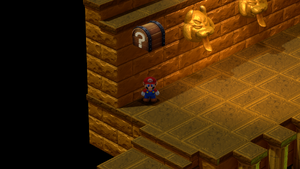
|
Mushroom OR Yoshi Cookie OR Frog Coin OR 10 10-Coins |
Found in the room with a gate, contents depend on which order were the Belome statue head pressed in the previous room. Those include: Mushroom (left, middle, right) Yoshi Cookie (left, middle, right OR left, right, middle) 10 10-Coins (right, left, middle OR right, middle, left) Frog Coin (right, left, middle) |
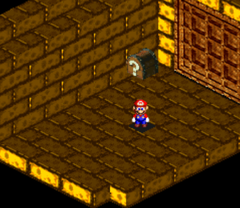
|
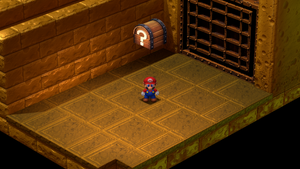
|
15 10-Coins |
In the next room, found at the entrance. | 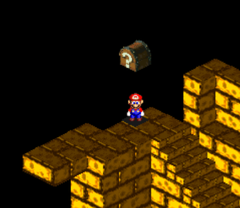
|
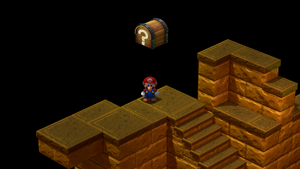
|
Frog Coin |
In the same area, found at the end. | 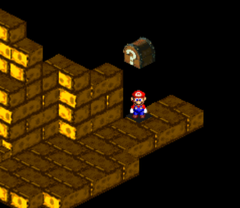
|
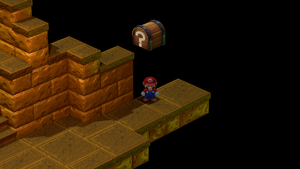
|
| Bean Valley | 11 Treasures | |||
Flower |
In the first area, after Mario reaches the end, he should go into the last remaining pipe, which takes him into an area with a lone treasure. | 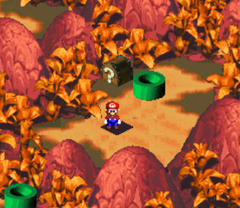
|
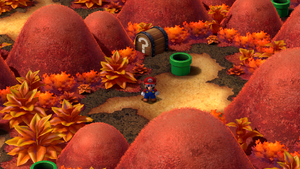
|
Pleaseno OR Mushroom OR Flower OR Rock Candy OR Frog Coin |
In the area with the five Chewies growing from the pipes, Mario should defeat the one blocking the southernmost pipe, then enter it. In the passageway, Mario should circle around to reach the treasure. This treasure is a slot machine and reward depends on the symbols at the end: If there is one Mushroom, one Flower and one Star, the battle with Pleaseno is triggered as a result. If there are two Mushrooms and either a Flower or a Star, a Mushroom is rewarded. If there are two Flowers and either a Mushroom or a Star, a Flower is rewarded. If there are two Stars and either a Mushroom or a Flower, a Rock Candy is rewarded. If there are 3 of any symbol, a Frog coin is rewarded. |
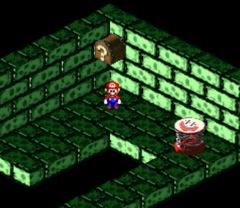
|
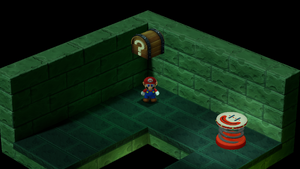
|
Pleaseno |
In the area with the five Chewies growing from the pipes, Mario should defeat the one blocking the central-west pipe, then enter it. A treasure is visible right away, but upon jumping into it, a battle with Pleaseno is triggered. | 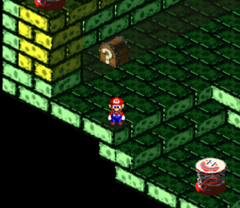
|
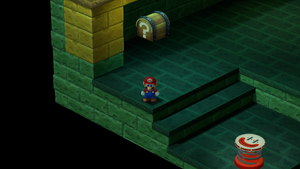
|
Frog Coin |
In the same area, Mario should head to the top of the room, where pipe awaits him. This pipe takes him back outside, to an area with a lone treasure. | 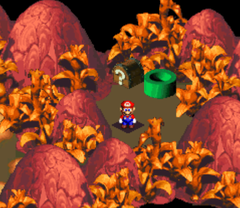
|
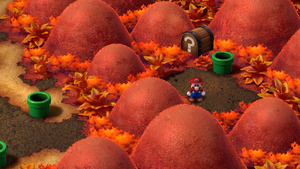
|
Pleaseno OR Mushroom OR Flower OR Rock Candy OR Frog Coin |
In the area with the five Chewies growing from the pipes, Mario should defeat the one blocking the central-east pipe, then enter it. A treasure is visible right away. This treasure is a slot machine and reward depends on the symbols at the end: If there is one Mushroom, one Flower and one Star, the battle with Pleaseno is triggered as a result. If there are two Mushrooms and either a Flower or a Star, a Mushroom is rewarded. If there are two Flowers and either a Mushroom or a Star, a Flower is rewarded. If there are two Stars and either a Mushroom or a Flower, a Rock Candy is rewarded. If there are 3 of any symbol, a Frog coin is rewarded. |
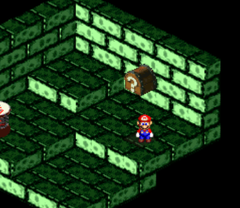
|
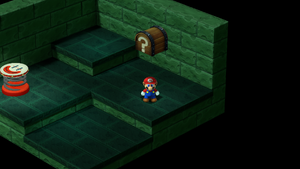
|
Pleaseno OR Mushroom OR Flower OR Rock Candy OR Frog Coin |
In the area with the five Chewies growing from the pipes, Mario should defeat the one blocking the northeastern pipe, then enter it. A treasure is visible right away. This treasure is a slot machine and reward reward depends on the symbols at the end: If there is one Mushroom, one Flower and one Star, the battle with Pleaseno is triggered as a result. If there are two Mushrooms and either a Flower or a Star, a Mushroom is rewarded. If there are two Flowers and either a Mushroom or a Star, a Flower is rewarded. If there are two Stars and either a Mushroom or a Flower, a Rock Candy is rewarded. If there are 3 of any symbol, a Frog coin is rewarded. |
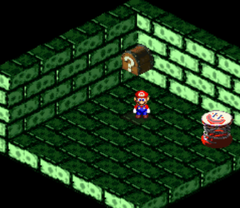
|
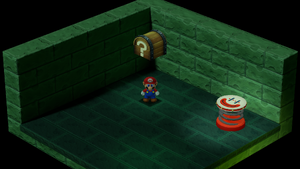
|
Flower |
SNES: In the second area of the beanstalk area, found between red and yellow ones on the left. Switch: In the second area of the beanstalk area, found on the lowest cloud between red and yellow vines. |
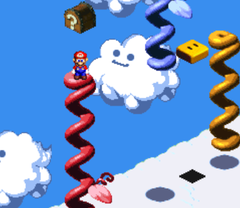
|
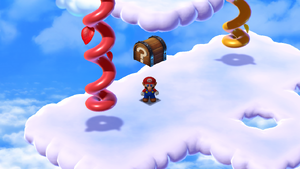
|
Frog Coin, Defense Scarf |
In the fourth area of the beanstalk area (after using the upper yellow beanstalk in the second area), found behind a hole. | 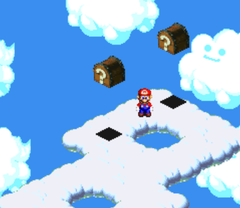
|
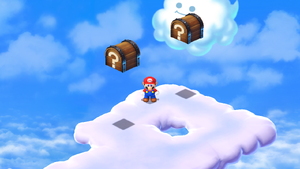
|
Flower (both chests) |
After jumping into a hole in the previous area. Mario lands between the two treasures. | 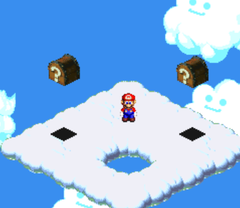
|
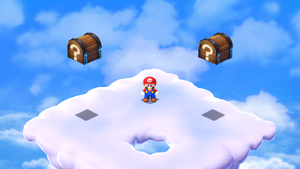
|
| Grate Guy's Casino | 1 Treasure | |||
Frog Coin or Empty (SNES) Mushroom or Honey Syrup or Energizer or Empty (Switch) |
Only treasure in the area, which acts as a slot machine. Any other combination other than three of any symbol results in failure. It rewards a Frog Coin each time if there are 3 of any symbol at the end. (SNES) It rewards Mushroom/Honey Syrup/Energizer if three Mushrooms/Flowers/Stars have been struck. (Switch) |
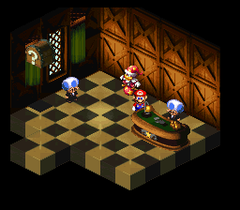
|
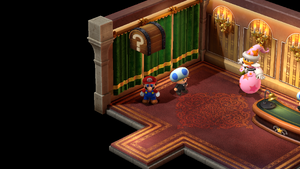
|
Nimbus Land Region
There are a total of 13 treasure boxes to find in the Nimbus Land Region:
- Nimbus Land holds 5 boxes
- Barrel Volcano holds 8 boxes
| Item | Description | Image (SNES) | Image (Switch) |
|---|---|---|---|
| Nimbus Land | 5 Treasures | |||
Flower |
After Mario goes to the entrance of the castle, then to the left and through 2 hallways, the treasure is found at the end of the second one. | 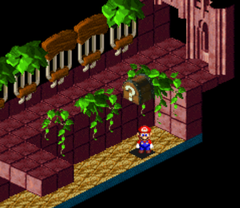
|
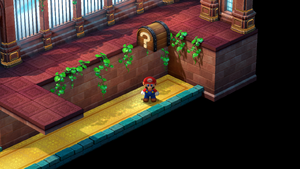
|
Mushroom |
In the crossroads room, Mario should go through the one with a door and through the following hallway. He then comes across a room with a lone statue and a treasure behind it. | 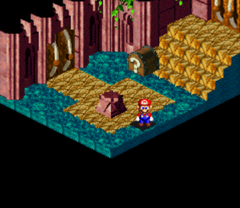
|
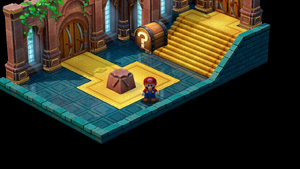
|
Flower |
In the grand hallway with the three doorways, found in the corner between a left doorway and a birdcage. | 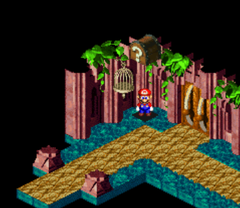
|
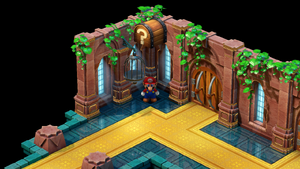
|
Flower |
In the grand hallway with the three doorways, Mario should go through the left one and through the next room, to reach a dead end in the next one. Here, he can find another Treasure. | 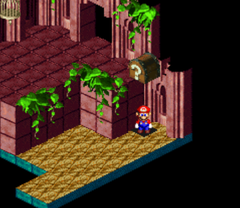
|
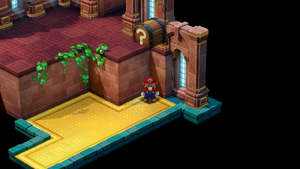
|
Star (first time) Flower (second time) |
After confronting Valentina in the throne room and following her through three hallways, this treasure is found high in the air in the middle of the second hallway. To reach it, Mario must jump under it to make a block appear. During the "chase", this treasure contains a Star, but after Valentina has been defeated and Mario returns here, it will be filled up again, this time with a Flower. | 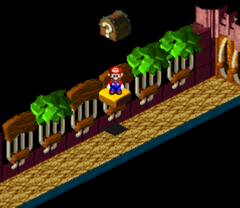
|
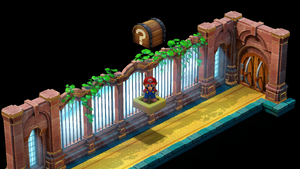
|
| Barrel Volcano | 8 Treasures | |||
Flower (both chests) |
In the second area, there are small platforms in the lava, leading to an opening on the right. Going through this opening lead to two treasures. | 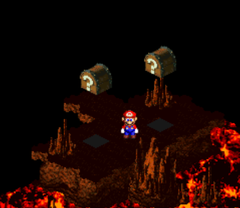
|
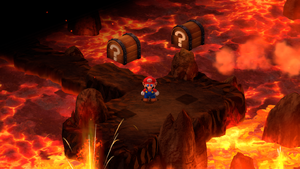
|
Flower |
In the fourth area, found right at the entrance. | 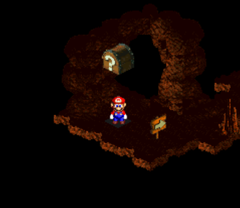
|
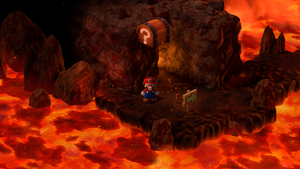
|
10 10-Coins |
In the same area, found near the end. | 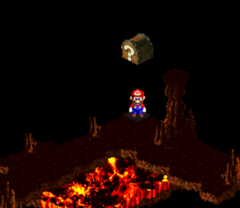
|
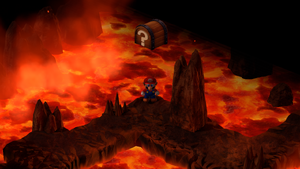
|
Star |
In the fifth area, found right at the entrance. | 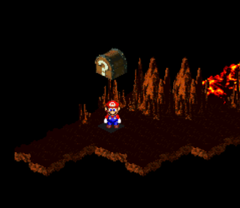
|
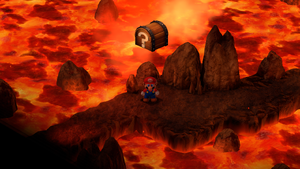
|
Flower, Frog Coin |
In the room with the Save Block, one found floating above the steps and another left of the Save Block. | 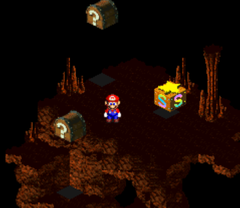
|
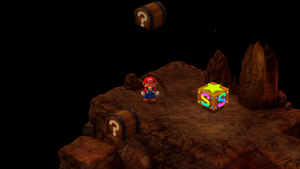
|
10 10-Coins |
In the room with Cinder Toad's shop entrance, found left of the entrance to the shop. | 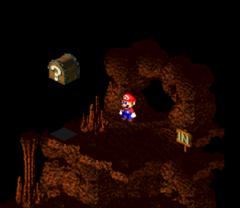
|
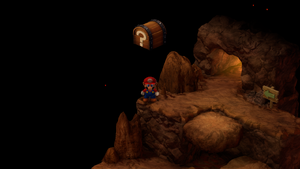
|
Bowser's Keep Region
There are a total of 35 treasure boxes to find in the Bowser's Keep Region:
- Bowser's Keep holds 27 boxes
- Weapon World holds 8 boxes
| Item | Description | Image (SNES) | Image (Switch) |
|---|---|---|---|
| Bowser's Keep | 27 Treasures | |||
Mushroom |
In the fourth area (the one with most of the screen blacked out), found after going left from the bridge. | 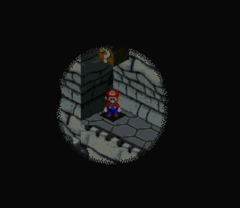
|
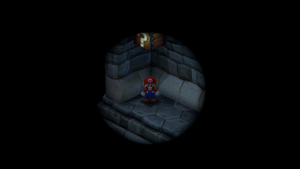
|
Mushroom, 15 10-Coins |
In fifth area is a detour found on the left. After going in, there is a small room with two treasures. | 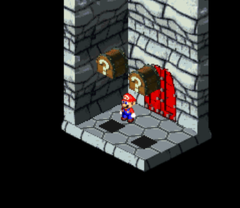
|
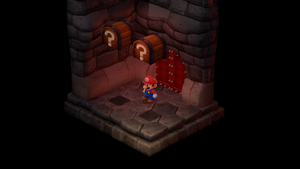
|
21 10-Coins |
Only treasure in the puzzle courses. As a part of the course, Mario is not able to get all 21 10-Coins and due to this, no coins are added to coin total. | 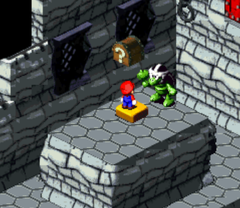
|
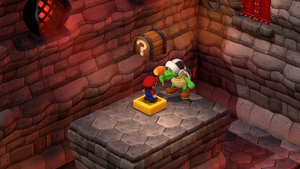
|
Croaka Cola |
At the end of the huge stone platform in the action course featuring rising/falling platforms. | 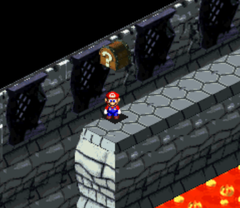
|
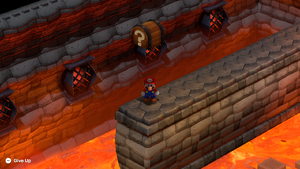
|
Pick Me Up |
Atop the first pillar in the action course featuring balancing on the ball. | 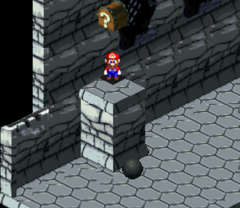
|
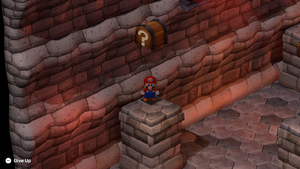
|
Flower |
Atop the second pillar in the action course featuring balancing on the ball. | 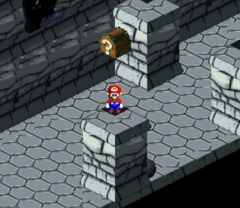
|
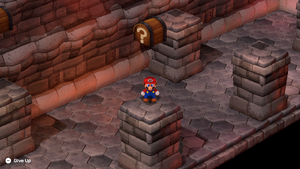
|
Rock Candy |
Atop the third right pillar in the action course featuring balancing on the ball. | 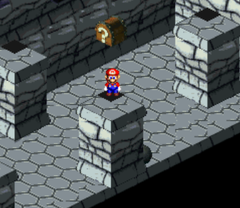
|
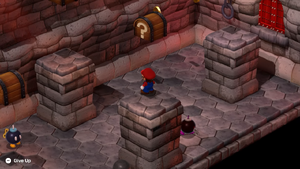
|
Max Mushroom |
Atop the third left pillar in the action course featuring balancing on the ball. | 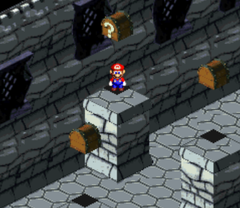
|
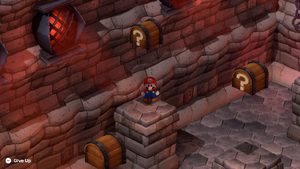
|
Flower |
Atop the last pillar in the action course featuring balancing on the ball. | 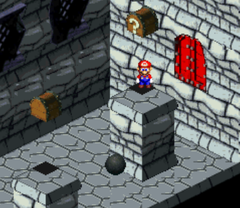
|
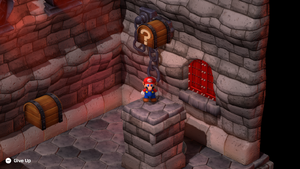
|
Flower |
First in the action course featuring two rotating platforms. | 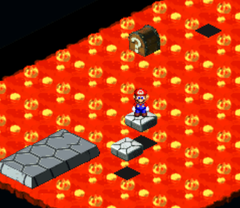
|
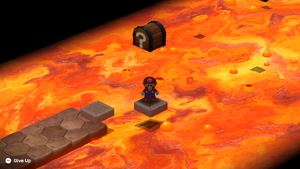
|
Royal Syrup |
Second in the action course featuring two rotating platforms. | 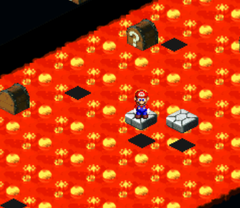
|
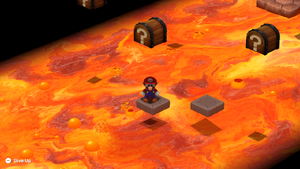
|
Flower |
Third in the action course featuring two rotating platforms. | 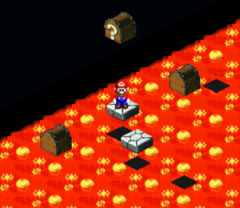
|
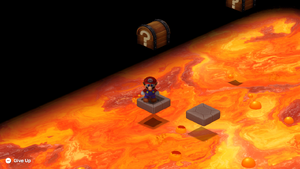
|
Fire Bomb |
Fourth in the action course featuring two rotating platforms. | 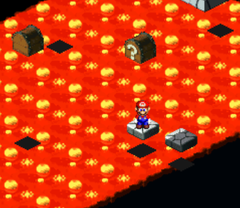
|
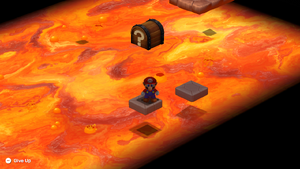
|
Pick Me Up |
Fifth in the action course featuring two rotating platforms. | 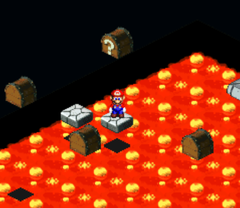
|
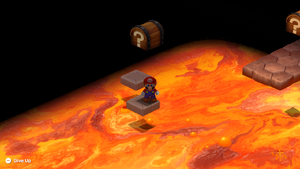
|
Croaka Cola |
Last in the action course featuring two rotating platforms. | 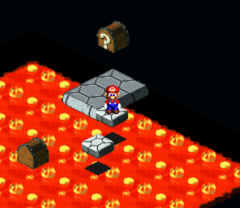
|
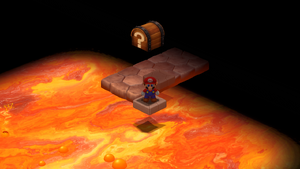
|
Fright Bomb |
First in the action course featuring invisible path. | 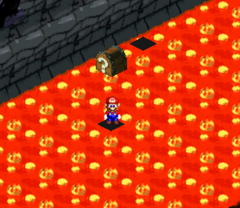
|
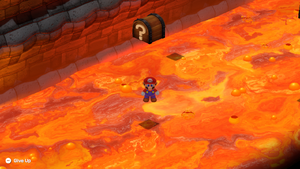
|
Ice Bomb |
Second in the action course featuring invisible path. | 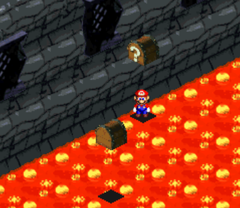
|
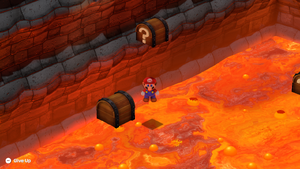
|
Royal Syrup |
Third in the action course featuring invisible path. | 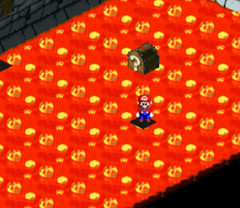
|
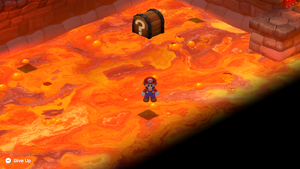
|
Rock Candy |
Last in the action course featuring invisible path. | 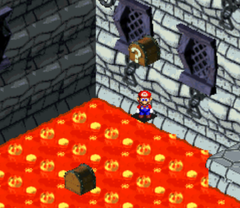
|
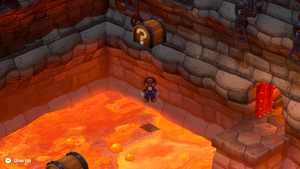
|
Max Mushroom |
First in the action course featuring moving platforms. | 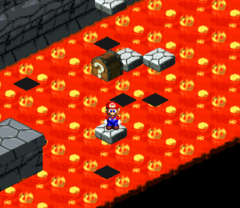
|
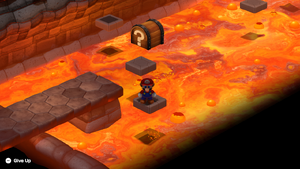
|
Red Essence |
Second in the action course featuring moving platforms. | 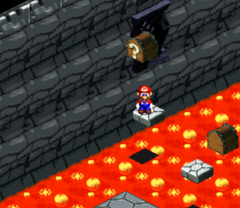
|
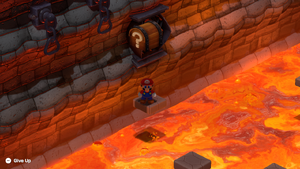
|
Flower |
Third in the action course featuring moving platforms. | 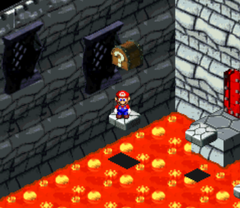
|
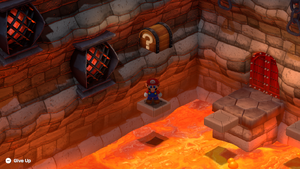
|
Fire Bomb |
Last in the action course featuring moving platforms. | 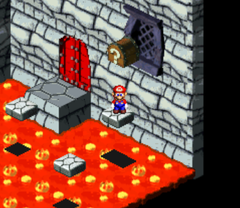
|
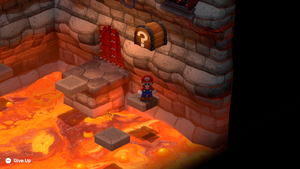
|
Rock Candy OR Sonic Cymbal OR Star Gun OR Drill Claw OR Super Slap |
In the room after completing a course. This room repeats after the second and third courses. This room can be also repeated two more times after Mario leaves the keep and then comes back. Depending on which course was completed, the reward is different: Action course ending with rotating platforms gives out Sonic Cymbal. Action course ending with Guerrilla throwing down barrels gives out Super Slap. Battle course ending with six Shamans gives out Star Gun (Drill Claw in the remake). Battle course ending with a Comeon spawning Bahamutts gives out Drill Claw (Star Gun in the remake). Both puzzle courses give out Rock Candy. |
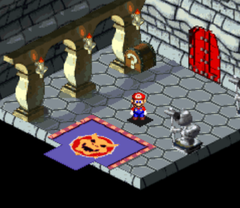
|
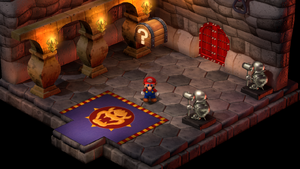
|
Rock Candy OR Sonic Cymbal OR Star Gun OR Drill Claw OR Super Slap |
In the room after completing a fourth/last course. Depending on which course was completed, the reward is different: Action course ending with rotating platforms gives out Sonic Cymbal. Action course ending with Guerrilla throwing down barrels gives out Super Slap. Battle course ending with six Shamans gives out Star Gun (Drill Claw in the remake). Battle course ending with a Comeon spawning Bahamutts gives out Drill Claw (Star Gun in the remake). Both puzzle courses give out Rock Candy. |
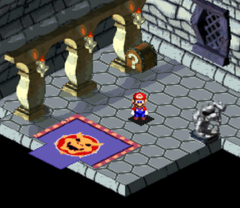
|
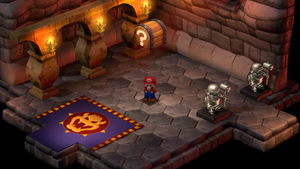
|
| ∞ Infinite Coins |
Created after a boss fight against Wizakoopa. | 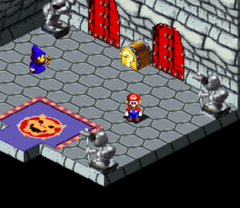
|
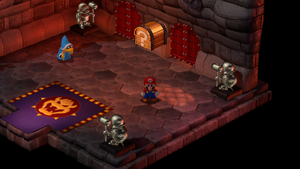
|
| Weapon World | 8 Treasures | |||
Ultra Hammer |
In the area after the area with second Save Block, found left of the screws and the trampoline. | 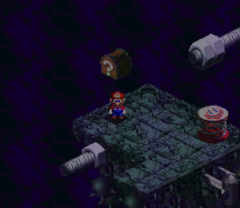
|
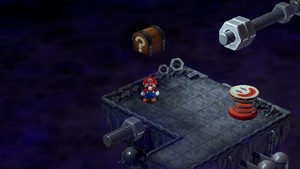
|
Mushroom |
In the first area with Conveyor Belts, the treasure is found atop the second one. | 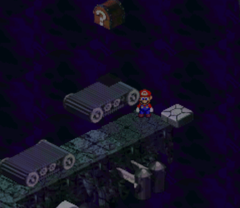
|
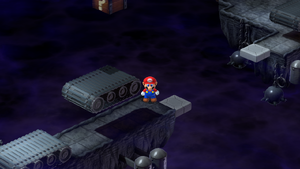
|
Flower, Mushroom |
In the same area, Mario must fall down the chasm. In this new area, Mario should continue forward to reach an area with two treasures. | 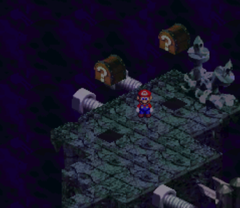
|
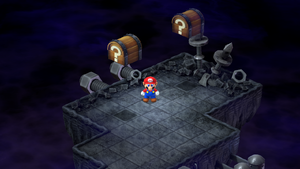
|
Royal Syrup |
In the area with Conveyor Belt bridges, found in the middle of the area after two patrolling High Boos. | 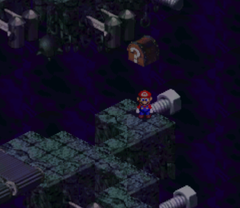
|
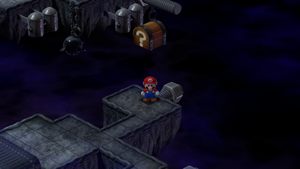
|
Max Mushroom |
In the same area, after crossing the second Conveyor Belt bridge, Mario should go to the left to find a treasure behind an another Conveyor Belt. | 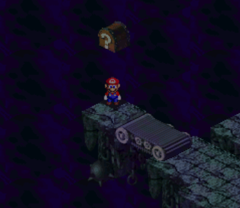
|
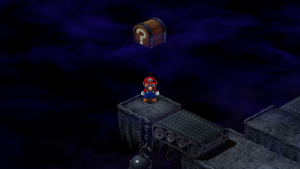
|
Mushroom, Flower |
In the area after the area with 3 Ninjas and a respawning Machine Made of Speardovich. | 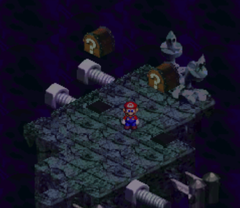
|
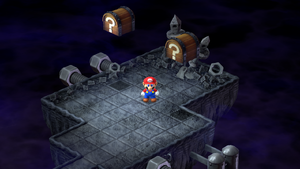
|
Hidden Treasure
| Location | Item | Description | Image (SNES) | Image (Switch) |
|---|---|---|---|---|
| Mushroom Kingdom | Frog Coin |
In the original, this Hidden Treasure can only be opened the first time Mario enters the castle. When Mario sees Toad, he should jump on his head. As Toad approaches the door, the player should jump up from him to the platform above the doorway. Jumping at the center of the platform reveals the Hidden Treasure.
In the remake, the player can get the chest at any time by jumping on a mushroom person's head and jumping up to it. |
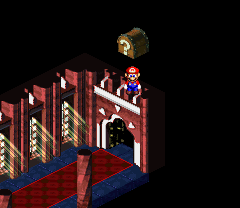
|
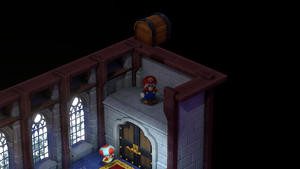
|
| Mushroom Kingdom | Flower |
In the shop's basement, Mario finds an elderly Mushroom person. When talking to her, she tells him to stand before her and order him to jump. By doing so, Mario reveals the Hidden Treasure. Alternatively, the player can reveal the Hidden Treasure without talking to the Mushroom person by jumping at the spot three tiles southwest and one tile northwest from the bottom of the stairs. In the remake, after opening the chest, the player gets the Signal Ring from the elderly mushroom person. |
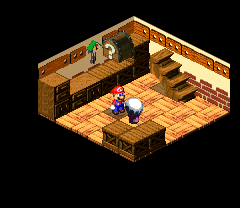
|
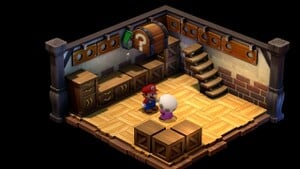
|
| Mushroom Kingdom | Flower |
In the same room, Mario needs to stand on top of the elderly Mushroom person and wait until she approaches the eastern corner of the room. Jumping at the corner from the Mushroom person reveals the Hidden Treasure. | 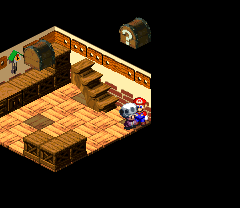
|
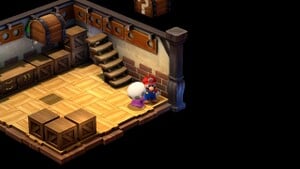
|
| Bandit's Way | Croaka Cola |
In the second area of Bandit's Way, over the two plateaus, is a Spinning Flower next to a blue one. The player should ride the Spinning Flower and jump when Mario faces the blue flower. When launched, Mario hits the Hidden Treasure at the middle of the jump. | 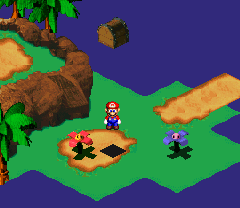
|
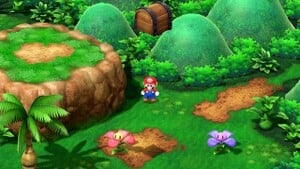
|
| Rose Town | Frog Coin |
In the Rose Town shop, Mario should climb on top of the bookshelf behind the counter. Jumping at the northwestern end reveals the Hidden Treasure. | 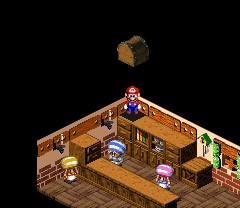
|
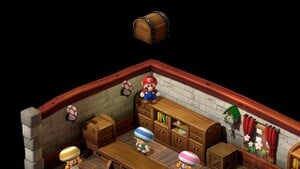
|
| Rose Town | Frog Coin |
In the northeastern section of town is a house on a hill too high for Mario to reach. The player could climb on top of the Mushroom person nearby and jump from him to the hill. Going inside the house, Mario should climb the stairs to the second floor. Jumping at the center of the bed reveals the Hidden Treasure. | 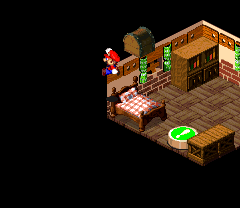
|
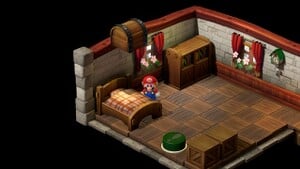
|
| Forest Maze | Croaka Cola |
At the forest's entrance, Mario should jump at the western corner to reveal the Hidden Treasure. | 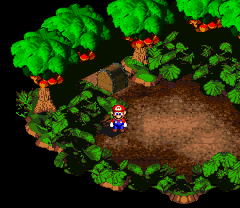
|
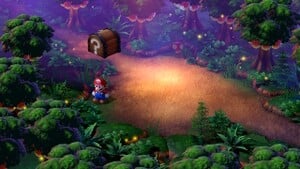
|
| Forest Maze | Frog Coin |
After working through the first cavern and out of the tree stump, Mario should walk to the bushes directly northwest of the stump and jump from that spot to reveal the Hidden Treasure. | 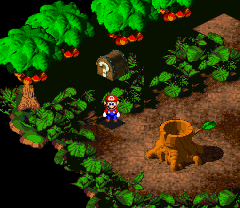
|
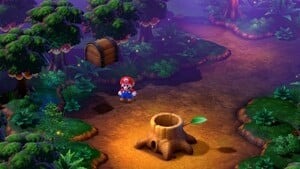
|
| Forest Maze | Croaka Cola |
In the next area are seven tree stumps. Mario should enter the one farthest northwest. In the cavern, he should make his way to the northwest until he finds a sleeping Wiggler. After awakening the Wiggler, the player should go back into the cavern, and jumping in the northeast corner of the recessed area behind where the Wiggler was reveals the Hidden Treasure. | 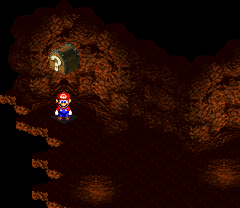
|
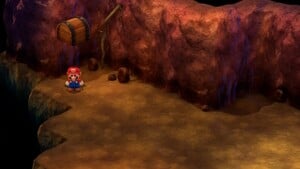
|
| Forest Maze | Flower |
In the area with the seven tree stumps, Mario should enter the one farthest east (the one north of the southeastern entrance). In the cavern, Mario should head southwest from the springboard to a lit area. Jumping at the spot reveals the Hidden Treasure. | 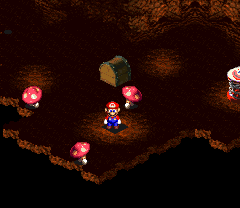
|
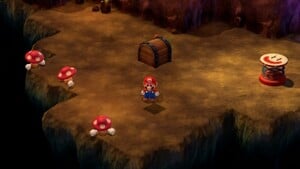
|
| Forest Maze | Empty | In the area with the seven tree stumps, Mario should enter the west-central one. In the cavern, Mario should head north-northwest from the springboard to the first corner. Jumping at the spot reveals an empty Hidden Treasure, with the screen displaying, "You missed!" | 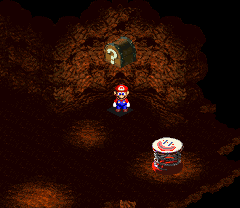
|
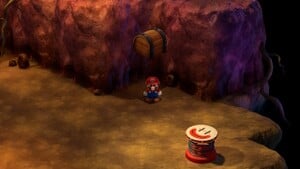
|
| Forest Maze | Red Essence |
After working through the second cavern and out of the tree stump, Mario should head all the way to the other side of the area, near the entrance. Jumping at the eastern corner reveals another Hidden Treasure. In the remake, the Hidden Treasure no longer here and is instead found in the southern corner of the last passageway, after navigating through the maze. |
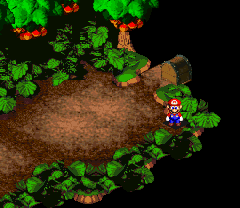
|
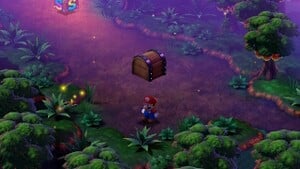
|
| Pipe Vault | Frog Coin |
In the third area of the Pipe Vault, Mario should down the first pipe in front of him. In the next area, Mario must reveal an invisible platform to get to the brick platform above by jumping at the spot before the brick platform begins. Once at the top, Mario should stand at the second brick crease from the revealed platform to reveal the Hidden Treasure. | 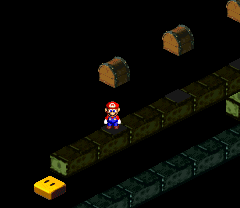
|
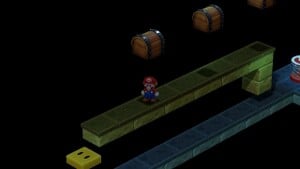
|
| Pipe Vault | Frog Coin |
In the same area, on the same brick platform, two brick creases from the visible Hidden Treasure, Mario should jump at the spot to reveal another Hidden Treasure. | 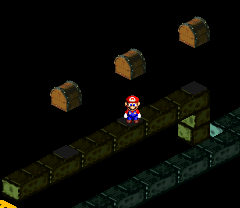
|
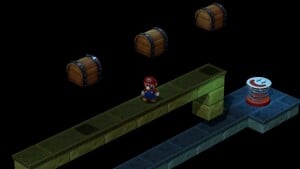
|
| Yo'ster Isle | Frog Coin |
From the Warp Pipe, Mario should go behind the Save Block and jump at the spot northwest of it to reveal the Hidden Treasure. | 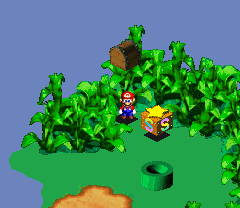
|
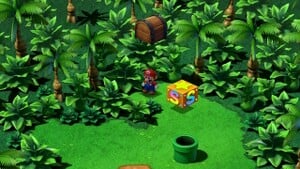
|
| Booster Pass | Flower |
In the first area, from the southwestern entrance, Mario should head north and climb up and over the two rocky steps then over two more northwest until he finds a lone bush against the area's boundary. Jumping on top of the bush reveals the Hidden Treasure. | 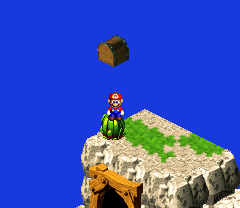
|
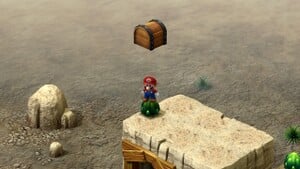
|
| Booster Pass | Rock Candy |
In the same area, Mario should make his way to the rocky hill in the east and climb up the steps all the way to the highest ground, near the entrance to the next area. Jumping at the northern corner near this entrance reveals another Hidden Treasure. | 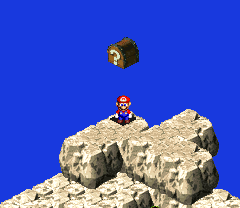
|
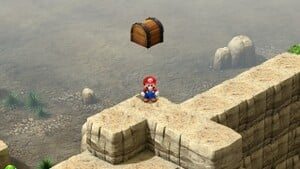
|
| Booster Tower | Frog Coin |
In the hallway with the Snifits walking down the stairs, Mario should climb up to the highest ground and jump one tile west from the northern corner to reveal the Hidden Treasure. | 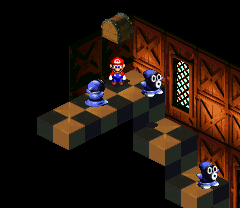
|
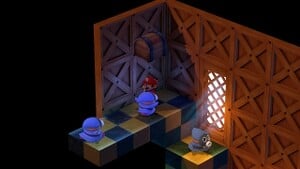
|
| Booster Tower | Frog Coin |
In the room where Mario is propelled up from the Thwomp on a see-saw below, the player would walk northwest along the lowest ground then jump at the westernmost corner to reveal the Hidden Treasure. | 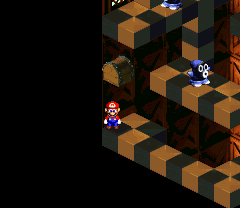
|
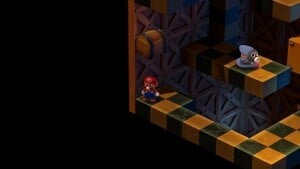
|
| Booster Tower | Goodie Bag |
In the area just before Booster's room, Mario should jump to the orange platform in the southeast and continue jumping to the other ones until he finds a Hidden Treasure. Jumping from the Hidden Treasure reveals the Hidden Treasure. | 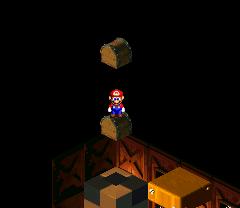
|
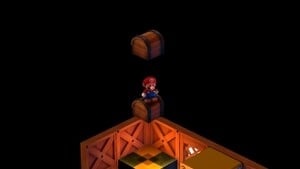
|
| Booster Tower | Mushroom |
In the same area, Mario should jump in the southeastern corner near the low orange platform to reveal another Hidden Treasure. | 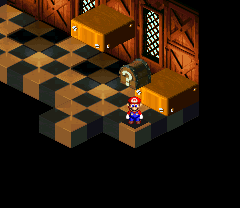
|
|
| Marrymore | Frog Coin |
In the hotel's regular room, Mario should jump on top of the bookcase in the western corner to reveal the Hidden Treasure. | 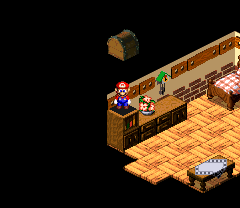
|
|
| Sunken Ship | Croaka Cola |
In the room with the doppelgänger of Mario, either one should jump in the center lit area, almost against the eastern wall, to reveal a J block which also reveals the Hidden Treasure on the opposite side. To reach the Hidden Treasure, Mario and the doppelgänger need to stand on top of each other, then jump to open it. | 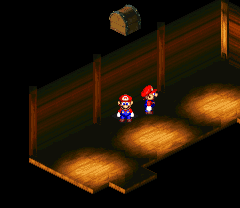
|
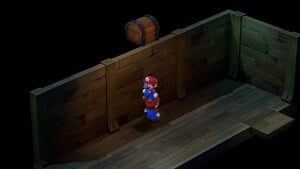
|
| Land's End | Red Essence |
In the first area, Mario should hop into the cannon and fire to the moving platform in front of it. Once on the platform, Mario should jump from the northern corner of the platform at its highest point to hit the Hidden Treasure in the middle of the jump. | 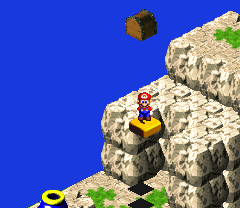
|
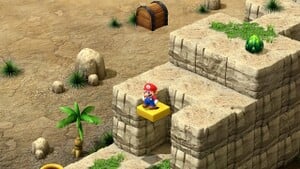
|
| Land's End | Croaka Cola |
In the second area, Mario should hop into the cannon and fire into the hole in the rocky hill. Jumping out of the hole, Mario should jump at the southwestern edge of the hole to reveal a platform. Going into the cannon and firing out once more, Mario lands on the platform. Jumping to the highest ground on the rocky hill, Mario should jump at the western corner to reveal the Hidden Treasure. | 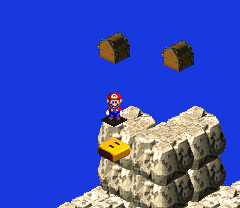
|
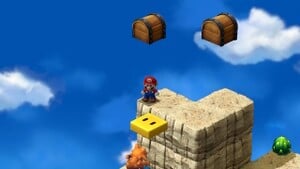
|
| Land's End | Frog Coin |
In the fourth area, with the Spinning Flowers, Mario should find two blue flowers at the area's boundary in the east. Jumping between the two flowers reveals the Hidden Treasure. | 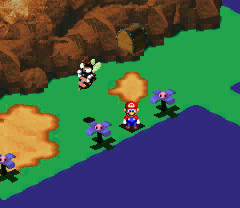
|
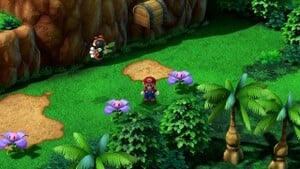
|
| Land's End | Frog Coin |
At the Sky Bridge, Mario should jump into the cave beneath it to enter the secret passage to Kero Sewers. Avoiding the Geckits and the Chow in the first area, Mario should then find a corner closest to the steps heading down. Jumping at the northern spot at the corner reveals the Hidden Treasure. | 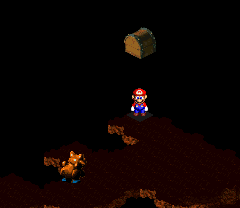
|
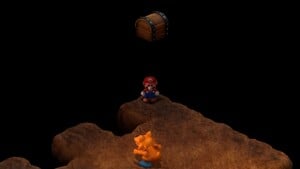
|
| Belome Temple | Frog Coin |
After having the first part of Mario's fortune revealed, a gate opens, admitting him to a passageway with two visible treasure boxes. Jumping from the wall to the Hidden Treasure, Mario should jump again to reveal the Hidden Treasure. | 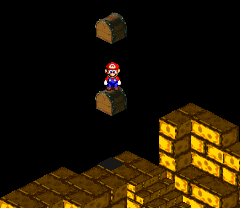
|
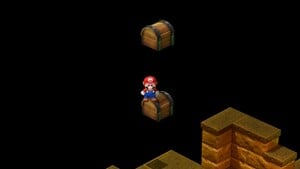
|
| Belome Temple | Frog Coin |
In the same area, going down the stairs, Mario should jump in the recessed corner nearby to reveal another Hidden Treasure. | 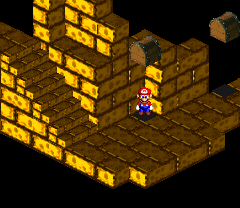
|
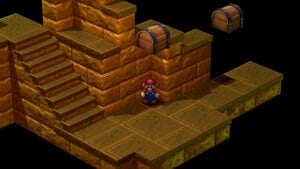
|
| Monstro Town | Frog Coin |
In the room leading to the exit, Mario should stand northwest between the flowering bush and the wall, then jump to reveal the Hidden Treasure. | 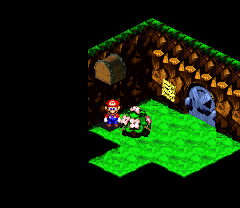
|
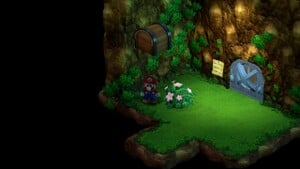
|
| Bean Valley | Frog Coin |
In the first area, Mario should go down the pipe in the east. Out of the pipe in the next area, Mario should make his way west all the way to a dead end and jump to reveal the Hidden Treasure. | 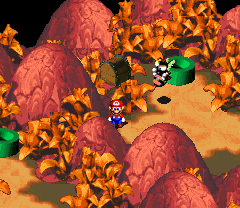
|
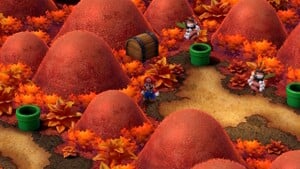
|
| Bean Valley | Croaka Cola |
In the area with the five Piranha Plants growing from the pipes, Mario should defeat the one blocking the lower-right pipe, then enter it. In the passageway, Mario should circle around to the far side and jump near the dead end to reveal the Hidden Treasure. | 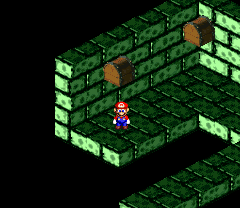
|
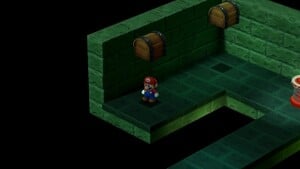
|
| Bean Valley | Red Essence |
In the area with the five Piranha Plants growing from the pipes, Mario should defeat the one blocking the pipe on the far right, then enter it. In the passageway, Mario should head northeast to the corner near the yellow steps. Jumping near the corner reveals the Hidden Treasure. | 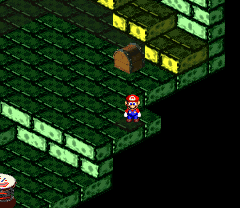
|
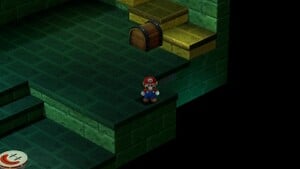
|
| Nimbus Land | Frog Coin |
In the Item Shop, Mario should climb up the boxes behind the shopkeep and jump at the highest point to reveal the Hidden Treasure. | 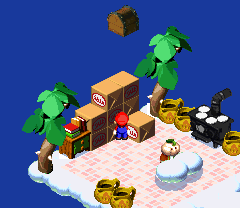
|
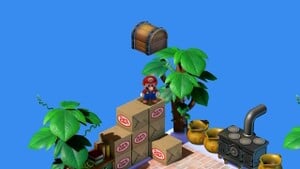
|
| Nimbus Castle | Frog Coin |
This Hidden Treasure is only available after defeating Valentina. Inside the castle, in the grand hallway with the three doorways, Mario should find a bird in a cage near the northwestern corner of the room. Jumping at the corner reveals the Hidden Treasure. | 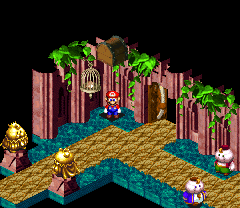
|
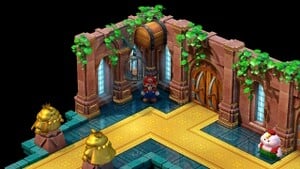
|
| Nimbus Castle | Frog Coin |
In the same area, Mario should enter the middle doorway to the next room, and -- after defeating Birdo -- proceed to the next area and jump on the visible treasure box. Jumping from it reveals the Hidden Treasure. | 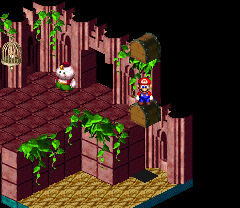
|
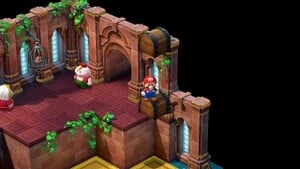
|
| Nimbus Castle | Frog Coin |
Back into the grand hallway with the three doorways, Mario should enter the one on the left and continue until he finds a set of stairs in the second room. Just near the entrance to a room with a Save Block, Mario should jump against the wall to reveal the Hidden Treasure. | 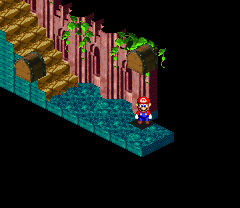
|
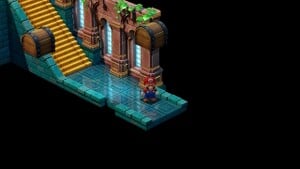
|
| Nimbus Castle | Frog Coin |
In the same area, at the bottom of the stairs, Mario should walk along the boundary of the hallway until he eventually walks on an invisible path. Mario should jump at the end of this invisible path to reveal another Hidden Treasure. | 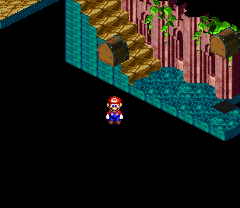
|
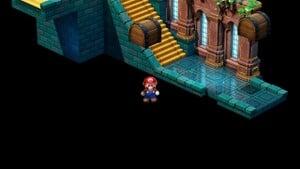
|
| Weapon World | Mushroom |
The final Hidden Treasure is west of the second Save Block. Jumping at the western corner reveals it. | 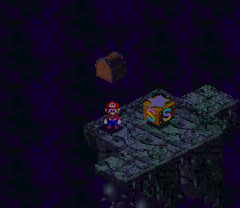
|
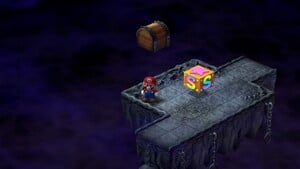
|
List of blocks in Paper Mario
- This page is about the visible blocks from Paper Mario. For the hidden ones from same game, see List of hidden blocks in Paper Mario.
This is a list of block from Paper Mario. There are 107 visible blocks in the game. There are two types of blocks:
- ? Block: Yellow/red blocks with white question mark on them. They contain mostly single coins or items, with occasional Badge.
- Coin Block: These blocks have same design as Brick Blocks and contain 10 coins.
Mario's House, Princess Peach's Castle, Shooting Star Summit, Koopa Village, Dry Dry Outpost, Windy Mill, Yoshi's Village, Shiver City, Shiver Snowfield, Starborn Valley, Star Way and Star Haven are the only locations without any visible block.
Prologue: A Plea from the Stars
There are a total of 7 Blocks to find during the Prologue:
- Goomba Village has 2 Blocks - 1 ? and 1 Coin
- Goomba Road has 5 ? Blocks
| Item/s | Description | Image | |
|---|---|---|---|
| Goomba Village | 2 Blocks (1 ?, 1 Coin) | |||
10 Coins |
At Jr. Troopa's playground, near the tree with Goombaria's Dolly. | 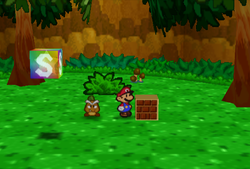
| |
Coin |
Near the entrance to Jr. Troopa's playground. | 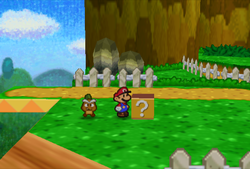
| |
| Goomba Road | 5 ? Blocks | |||
Coin (both blocks) |
In the middle of the first scene. | 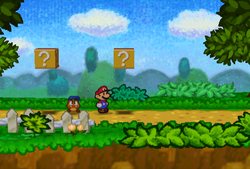
| |
Close Call |
In the red badge block on the second part of the path. | 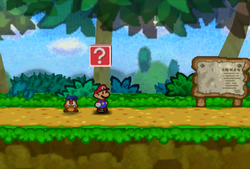
| |
Super Shroom |
To the south of the opening after Goomba King's Fortress, there is a brick which will reveal a ? Block after being hit. | 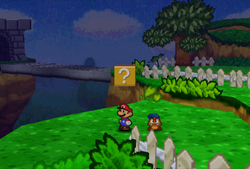
| |
Sleepy Sheep |
Near the descending stairs between Goomba King's Fortress and Toad Town. | 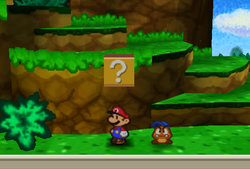
| |
Chapter 1: Storming Koopa Bros. Fortress
There are a total of 10 Blocks to find during Chapter 1:
- Pleasant Path has 6 Blocks - 5 ? and 1 Coin
- Koopa Bros. Fortress has 2 ? Blocks
- Toad Town has 1 Coin Block
- Toad Town Tunnels has 1 Coin Block
| Item/s | Description | Image |
|---|---|---|
| Pleasant Path | 6 Blocks (5 ?, 1 Coin) | ||
Coin, Dizzy Attack |
In the middle of the first scene. | 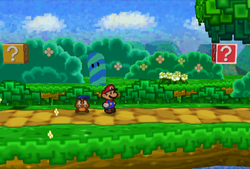
|
Fright Jar |
In the rightmost block at the first scene. | 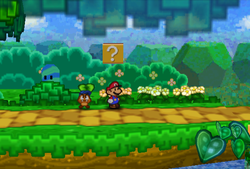
|
POW Block |
At the start of the second scene. | 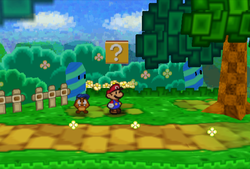
|
10 Coins |
At the end of the second scene. | 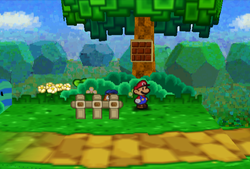
|
Attack FX B |
Smashing the blocks near the entrance of Koopa Village in the order "left, right, middle" will reveal a red ? Badge block. | 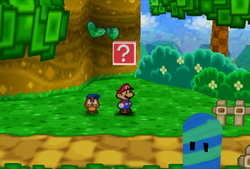
|
| Koopa Bros. Fortress | 2 ? Blocks | ||
| EMPTY/TRAP | Required to progress, found at the top of the room accessed by a second locked door. | 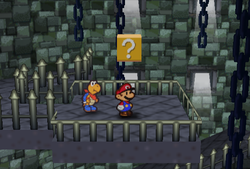
|
Maple Syrup |
At the Bullet Bill dodging scene, at the southwestern corner. | 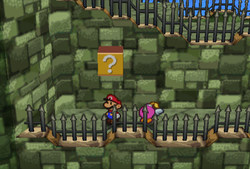
|
| Toad Town | 1 Coin Block | ||
10 Coins |
After gaining access to the rest of Toad Town, this block is found floating above wooden crates in the port. | 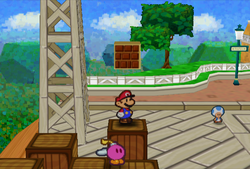
|
| Toad Town Tunnels | 1 Coin Block | ||
10 Coins |
Third brick block in the row of brick blocks found at the room right of the tunnels entrance. | 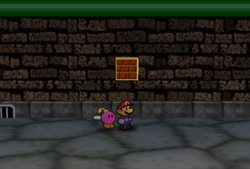
|
Chapter 2: The Mystery of Dry Dry Ruins
There are a total of 36 Blocks to find during Chapter 2:
- Mt. Rugged has 4 ? Blocks
- Dry Dry Desert has 28 Blocks - 15 ? and 13 Coin
- Dry Dry Ruins has 1 ? Block
- Toad Town Tunnels has 3 ? Blocks
| Item/s | Description | Image |
|---|---|---|
| Mt. Rugged | 4 ? Blocks | ||
Sleepy Sheep |
At the southeastern corner of the second scene. | 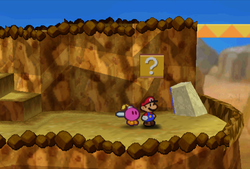
|
Mushroom |
Near the start of the scene to the north of the second scene, accessible after sliding the slope in the third scene. | 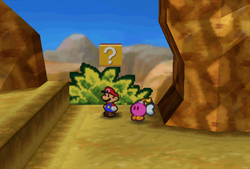
|
Coin |
After using the trampoline in the same scene, found on the left. | 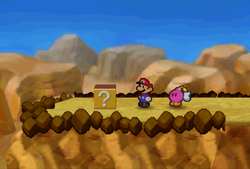
|
Honey Syrup |
After using the trampoline in the same scene, found after going to the right, guarded by a Cleft. | 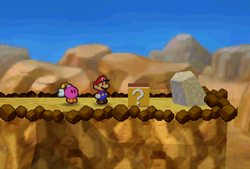
|
| Dry Dry Desert | 28 Blocks (15 ?, 13 Coin) | ||
Fright Jar, Coin |
In the scene three scenes north of the entrance. | 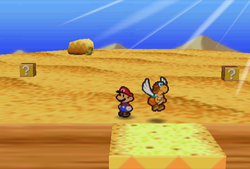
|
10 Coins |
In the scene six scenes east of the previous one, left of the tree. | 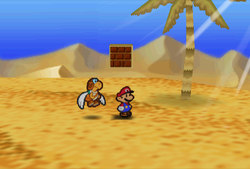
|
Coin, 10 Coins, Honey Syrup |
In the scene two scenes west and one south of the previous one. | 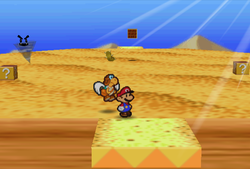
|
Mushroom, Super Shroom, Ultra Shroom |
In the scene four scenes west and one south of the previous one. Here, Mario must hammer the empty ? block to make others appear. One hit spawns a block to the left with a Mushroom, ten hits spawn a block to the right with a Super Shroom and one hundred hits spawns a block in the midle with a Ultra Shroom. | 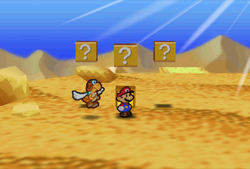
|
Coin, Coin, Fire Flower, Coin, Coin |
In the scene two scenes east from the previous one. | 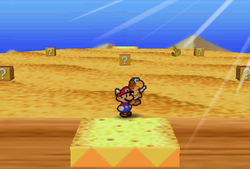
|
10 Coins (both blocks) |
In the scene three scenes east from the previous one, two brick blocks closest to the northern exit. | 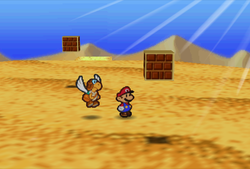
|
10 Coins |
In the scene five scenes west and two south from the previous one, the middle brick block. | 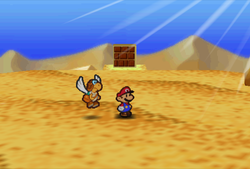
|
Coin |
In the scene three scenes east from the previous one. | 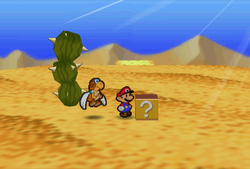
|
Coin |
In the scene three scenes east from the previous one. | 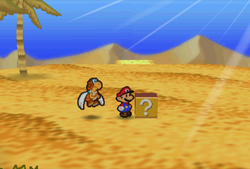
|
10 Coins |
In the scene four scenes west and one south from the previous one, the brick block closest to the northern exit. | 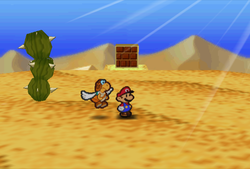
|
10 Coins |
In the scene three scenes east from the previous one. | 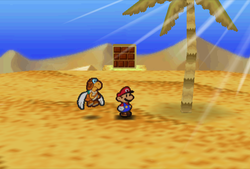
|
Coin |
In the scene one west and one south from the previous one. | 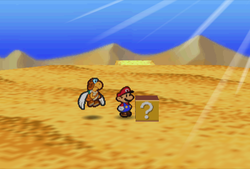
|
10 Coins (all six blocks) |
In the scene two east from the previous one. | 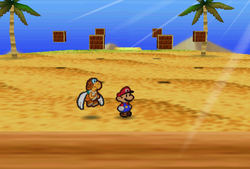
|
| Dry Dry Ruins | 1 ? Block | ||
| EMPTY/TRAP | Required to progress, found at the end of the room with Ancient Artifact. | 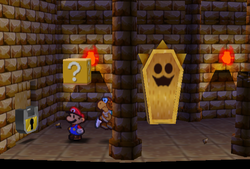
|
| Toad Town Tunnels | 3 ? Blocks | ||
Coin, Snowman Doll, Coin |
In the room west of the entrance but before the pipe leading to the new area. | 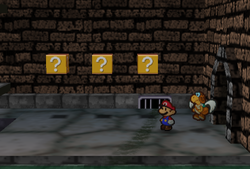
|
Chapter 3: The "Invincible" Tubba Blubba
There are a total of 11 Blocks to find during Chapter 3:
- Forever Forest has 2 ? Blocks
- Boo's Mansion has 1 ? Block
- Gusty Gulch has 7 Blocks - 6 ?, 1 Coin
- Tubba Blubba's Castle has 1 ? Block
| Item/s | Description | Image |
|---|---|---|
| Forever Forest | 2 ? Blocks | ||
HP Plus |
In the middle of a clearing found on a detour from the fifth area. | 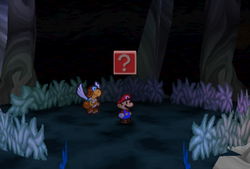
|
FP Plus |
In the middle of a clearing found on a detour from the seventh area. | 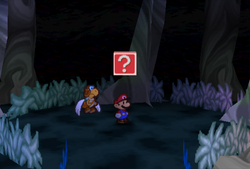
|
| Boo's Mansion | 1 ? Block | ||
Volt Shroom |
Outside the mansion, in front of the gate. | 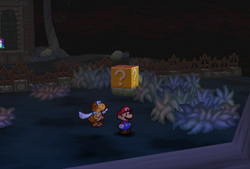
|
| Gusty Gulch | 7 Blocks (6 ?, 1 Coin) | ||
Coin |
In the scene with a Save Block, found in the house right of the Save Block. | 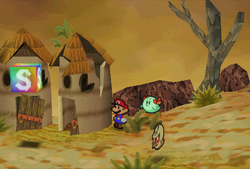
|
Coin |
At the start of the scene one scene to the east of the Boo's area. | 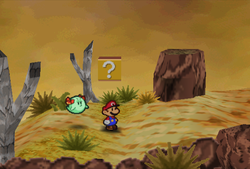
|
Coin, Repel Gel |
In the middle of the same scene. | 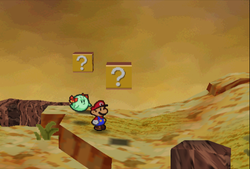
|
Super Shroom, 10 Coins, Coin |
At the end of the scene before the scene with Tubba Blubba's Castle entrance. | 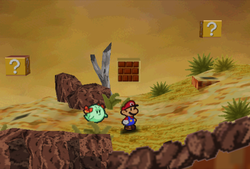
|
| Tubba Blubba's Castle | 1 ? Block | ||
Maple Syrup |
By the stairs that lead to the third floor. | 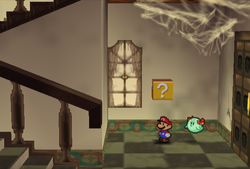
|
Chapter 4: Trials in the Toy Box
There are a total of 16 Blocks to find in the Shy Guy's Toy Box during Chapter 4:
- 13 ? Blocks
- 3 Coin Blocks
| Item/s | Description | Image |
|---|---|---|
| Shy Guy's Toy Box | 16 Blocks (13 ?, 3 Coin) | ||
Coin |
At the end of the scene one scene east of the blue station. | 
|
Coin |
Left of the wall in the very east of the Blue Station area. | 
|
Coin, Thunder Bolt |
In the same scene, on the opposite side of the wall. | 
|
Coin |
In the scene east of the Pink Station area, found above the walkway with looping Shy Guys. | 
|
Coin |
In the scene west of the Pink Station area, found above the flower boxes. | 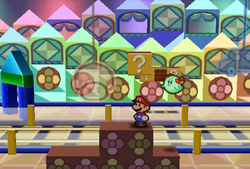
|
Coin (both blocks) |
In the next scene, found in the northwestern corner. | 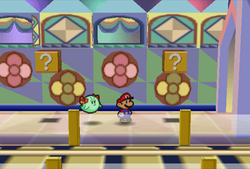
|
Coin, 10 Coins, Coin |
In the previous scene, found on the northern side of the tracks. | 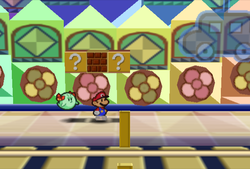
|
10 Coins |
In the scene east of the Green Station area, found above the moving pink platform near the end of the area. | 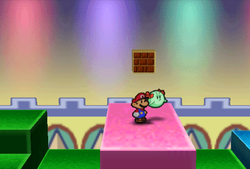
|
10 Coins |
In the scene west of the Red Station area, found above the ferris wheel. | 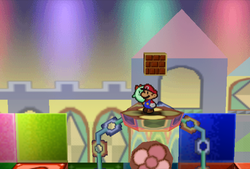
|
Coin (both blocks) |
In the same scene, in the lower part of the scene left of the ferris wheel. | 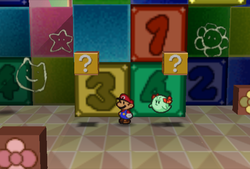
|
Sleepy Sheep |
In the northwestern corner of the scene to the east of the Red Station area. | 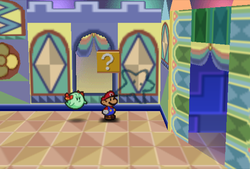
|
Chapter 5: Hot Hot Times on Lavalava Island
There are a total of 7 ? Blocks to find during Chapter 3:
- Jade Jungle has 1 ? Block
- Mt. Lavalava has 6 ? Blocks
| Item/s | Description | Image |
|---|---|---|
| Jade Jungle | 1 ? Block | ||
Power Quake |
In the scene with jungle entrance to the Yoshi Village, found on an island at the center. | 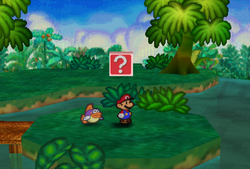
|
| Mt. Lavalava | 6 ? Blocks | ||
Coin (all four blocks) |
On the top of the third scene, under the first zipline. | 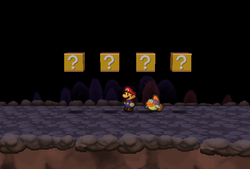
|
Super Shroom, Maple Syrup |
In the scene above the Lava Piranha scene. | 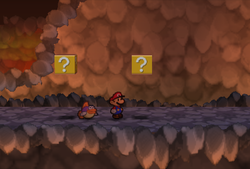
|
Chapter 6: Dark Days in Flower Fields
There are a total of 7 Blocks to find during Chapter 6:
- Flower Fields has 2 Blocks - 1 ?, 1 Coin
- Toad Town Tunnels has 5 ? Blocks
| Item/s | Description | Image |
|---|---|---|
| Flower Fields | 2 Blocks (1 ?, 1 Coin) | ||
Dizzy Dial |
In the second scene on the southeastern road. | 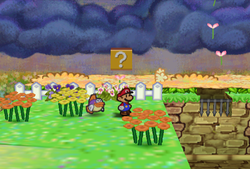
|
10 Coins |
In the center of the Hedge Maze found on the western road. Accessed by going right from the last pipe in the maze. | 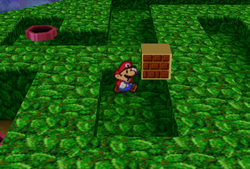
|
| Toad Town Tunnels | 5 ? Blocks | ||
Coin |
Beneath the entrance room, there is a pipe by the path to the right that eventually leads to the Ultra Boots. In the first room down the pipe, found near the exit. | 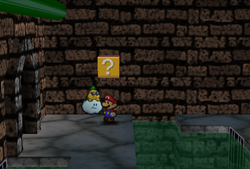
|
Coin (both blocks) |
In the next room, found between the brick blocks. They are high in the air, so Ultra Boots are required. | 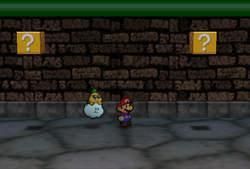
|
Shooting Star |
Beneath the entrance room, in the northwestern corner and high in the air, so Ultra Boots are required. | 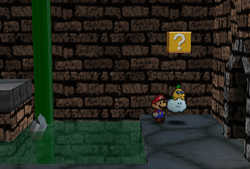
|
Coin |
In the area two screens east of the blue Warp Pipe to Yoshi's Village is a gap between two high platforms, with a doorway leading to Shiver City in the east. Found touching the western platform, high in the air, so Ultra Boots are required. | 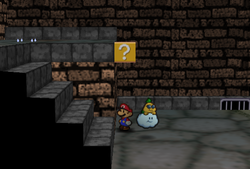
|
Chapter 7: A Star Spirit on Ice
There are a total of 5 Blocks to find during Chapter 7:
- Shiver Mountain has 1 ? Block
- Crystal Palace has 4 Blocks - 2 ?, 2 Coin
| Item/s | Description | Image |
|---|---|---|
| Shiver Mountain | 1 ? Block | ||
Mega Jump |
On the second floor in the fourth scene. | 
|
| Crystal Palace | 4 Blocks (2 ?, 2 Coin) | ||
10 Coins (both blocks) |
In the second room after going through the blue locked door. | 
|
Super Shroom |
Near the door in the room to the north of the first room. | 
|
Maple Syrup |
Near the door in the big Albino Dino statue room. It is high in the air, so Ultra Boots are required. | 
|
Chapter 8: A Star-Powered Showdown!
There are a total of 8 ? Blocks to find in Bowser's Castle during the Chapter 8.
| Item/s | Description | Image |
|---|---|---|
| Bowser's Castle | 8 ? Blocks | ||
Life Shroom |
On a platform in the lava area next to the front door scene. | 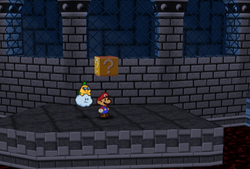
|
Deep Focus |
On a platform in the lava area, near the entrance. | 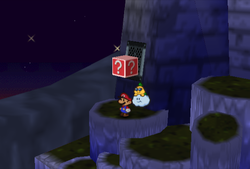
|
POW Block |
At the end of the north fork road in the first grotto scene. | 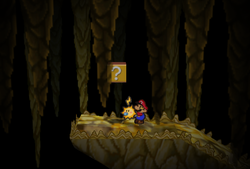
|
Shooting Star |
At the end of the north fork road in the second grotto scene. | 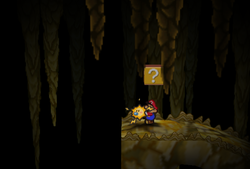
|
Super Shroom |
In the middle of the first Dry Bones room. | 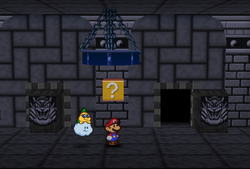
|
Super Shroom, Maple Syrup |
Found outside after the quiz room near the door. | 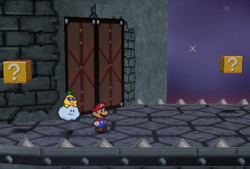
|
Super Shroom |
In the same scene, found after going to the right. | 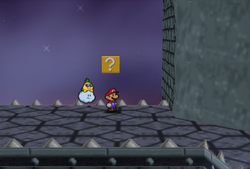
|