User:Nintendo101/garden: Difference between revisions
Nintendo101 (talk | contribs) (It has become cumbersome to draft large scale changes for articles alongside my general user info.) Tag: Disambiguation links |
Nintendo101 (talk | contribs) m (→Objects) |
||
| Line 1,158: | Line 1,158: | ||
|Dash Panels are pads that, when walked on, make the player travel at fast speeds for a short time. | |Dash Panels are pads that, when walked on, make the player travel at fast speeds for a short time. | ||
|- | |- | ||
|align=center style="background:#FFFFFF"|[[File:nocoverart.png|100x100px]]<br>[[gold P Switch|Gold P Switch]] | |align=center style="background:#FFFFFF"|[[File:nocoverart.png|100x100px]]<br>[[gold P Switch|Gold P Switch]]<ref>Prima eGuide, Conkdor Canyon</ref> | ||
|TBW | |TBW | ||
|- | |- | ||
| Line 1,181: | Line 1,181: | ||
|align=center style="background:#FFFFFF"|[[File:nocoverart.png|100x100px]]<br>[[Torch (Super Mario series)|Torch]] | |align=center style="background:#FFFFFF"|[[File:nocoverart.png|100x100px]]<br>[[Torch (Super Mario series)|Torch]] | ||
|Can be lit using Fire form. It can trigger events like releasing a Green Star. | |Can be lit using Fire form. It can trigger events like releasing a Green Star. | ||
|- | |||
|align=center style="background:#FFFFFF"|[[File:SM3DW Artwork Trample Switch.jpg|100x100px]]<br>[[P Switch|Trample Switch]] | |||
|TBW | |||
|- | |- | ||
!colspan=3 style="background:#FF7733;"|Climbable objects | !colspan=3 style="background:#FF7733;"|Climbable objects | ||
| Line 1,210: | Line 1,213: | ||
|Kick Bombs are bombs that, when kicked, bounce in a parabolic fashion before exploding on impact with a solid object. | |Kick Bombs are bombs that, when kicked, bounce in a parabolic fashion before exploding on impact with a solid object. | ||
|- | |- | ||
|align=center style="background:#FFFFFF"|[[File:nocoverart.png|100x100px]]<br>[[Sand statue]] | |align=center style="background:#FFFFFF"|[[File:nocoverart.png|100x100px]]<br>[[Sand statue]]<ref>Prima eGuide, Sunshine Seaside, Plessies Dune Downhill</ref> | ||
|Scupltures of Goombas and Bowser made of sand. It can be destroyed using a [[Fire Flower]] or [[Cannon Box]]es. | |Scupltures of Goombas and Bowser made of sand. It can be destroyed using a [[Fire Flower]] or [[Cannon Box]]es. | ||
|- | |- | ||
| Line 1,234: | Line 1,237: | ||
|- | |- | ||
|align=center style="background:#FFFFFF"|[[File:Warp Box SM3DW Prima.jpg|100x100px]]<br>[[Warp Box]] | |align=center style="background:#FFFFFF"|[[File:Warp Box SM3DW Prima.jpg|100x100px]]<br>[[Warp Box]] | ||
|When entered, Warp Boxes teleport the player to another area of a level. | |When entered, Warp Boxes teleport the player to another area of a level. [[Warp Box (With Key)|Certain Warp Boxes]] only become accessible once the player has collected five [[Key Coin]]s. | ||
|- | |- | ||
|align=center style="background:#FFFFFF"|[[File: | |align=center style="background:#FFFFFF"|[[File:SM3DW 1-2 Warp.jpg|100x100px]]<br>[[World Warp Pipe]] | ||
|TBW | |TBW | ||
|- | |- | ||
| Line 1,243: | Line 1,246: | ||
|align=center style="background:#FFFFFF"|[[File:Question Block Artwork - Super Mario 3D World.png|100x100px]]<br>[[? Block]] | |align=center style="background:#FFFFFF"|[[File:Question Block Artwork - Super Mario 3D World.png|100x100px]]<br>[[? Block]] | ||
|? Blocks contain power-ups or coins, which are released when the block is hit or ground-pounded. | |? Blocks contain power-ups or coins, which are released when the block is hit or ground-pounded. | ||
|- | |||
|align=center style="background:#FFFFFF"|[[File:nocoverart.png|100x100px]]<br>[[? Block tower]]<ref>Prima eGuide, Fort Fire Bros.</ref> | |||
|TBW | |||
|- | |- | ||
|align=center style="background:#FFFFFF"|[[File:Assist Block Artwork - Super Mario 3D World.png|100x100px]]<br>[[Assist Block]] | |align=center style="background:#FFFFFF"|[[File:Assist Block Artwork - Super Mario 3D World.png|100x100px]]<br>[[Assist Block]] | ||
| Line 1,249: | Line 1,255: | ||
|align=center style="background:#FFFFFF"|[[File:Big Block SM3DW Prima.jpg|100x100px]]<br>[[Mega Block|Big Block]] | |align=center style="background:#FFFFFF"|[[File:Big Block SM3DW Prima.jpg|100x100px]]<br>[[Mega Block|Big Block]] | ||
|Big Blocks are larger variations of Brick Blocks. They must be hit five times to be destroyed. | |Big Blocks are larger variations of Brick Blocks. They must be hit five times to be destroyed. | ||
|- | |- | ||
|align=center style="background:#FFFFFF"|[[File:Brick Block Artwork - Super Mario 3D World.png|100x100px]]<br>[[Brick Block]] | |align=center style="background:#FFFFFF"|[[File:Brick Block Artwork - Super Mario 3D World.png|100x100px]]<br>[[Brick Block]] | ||
| Line 1,267: | Line 1,267: | ||
|align=center style="background:#FFFFFF"|[[File:SM3DW Crystal Block.jpg|100x100px]]<br>[[Crystal Block]] | |align=center style="background:#FFFFFF"|[[File:SM3DW Crystal Block.jpg|100x100px]]<br>[[Crystal Block]] | ||
|Dark purple crystal blocks that move left to right. | |Dark purple crystal blocks that move left to right. | ||
|- | |||
|align=center style="background:#FFFFFF"|[[File:Used Block Artwork - Super Mario 3D World.png|100x100px]]<br>[[Empty Block]] | |||
|A block that cannot be broken. When a ? Block is hit, it turns into an Empty Block. | |||
|- | |- | ||
|align=center style="background:#FFFFFF"|[[File:SM3DW Gift Box.jpg|100x100px]]<br>[[Gift Box]] | |align=center style="background:#FFFFFF"|[[File:SM3DW Gift Box.jpg|100x100px]]<br>[[Gift Box]] | ||
| Line 1,293: | Line 1,296: | ||
|- | |- | ||
!colspan=3 style="background:#FF7733;"|Platforms | !colspan=3 style="background:#FF7733;"|Platforms | ||
|- | |||
|align=center|[[File:SpikeBar3dworld.jpg|100x100px]]<br>[[Arrow platform]] | |||
|Platforms with arrows that rise from lava and then sink back down after a short time. | |||
|- | |- | ||
|align=center style="background:#FFFFFF"|[[File:Beep Block SM3DW Prima.jpg|100x100px]]<br>[[Blinking Block|Beep Block]] | |align=center style="background:#FFFFFF"|[[File:Beep Block SM3DW Prima.jpg|100x100px]]<br>[[Blinking Block|Beep Block]] | ||
| Line 1,299: | Line 1,305: | ||
|align=center style="background:#FFFFFF"|[[File:SM3DW Cloud Lift.png|100x100px]]<br>[[Cloud Lift]] | |align=center style="background:#FFFFFF"|[[File:SM3DW Cloud Lift.png|100x100px]]<br>[[Cloud Lift]] | ||
|Cloud Lifts are moving platforms that can be jumped through. | |Cloud Lifts are moving platforms that can be jumped through. | ||
|- | |||
|align=center style="background:#FFFFFF"|[[File:nocoverart.png|100x100px]]<br>[[Conveyor Belt]] | |||
|Platforms that carry Mario from another place to another without him moving. The speed and direction varies depending on the time Mario enters the course. | |||
|- | |- | ||
|align=center style="background:#FFFFFF"|[[File:Donut Block SM3DW Prima.jpg|100x100px]]<br>[[Donut Block]] | |align=center style="background:#FFFFFF"|[[File:Donut Block SM3DW Prima.jpg|100x100px]]<br>[[Donut Block]] | ||
|Donut Blocks are platforms that slowly fall when stepped on. | |Donut Blocks are platforms that slowly fall when stepped on. | ||
|- | |- | ||
|align=center style="background:#FFFFFF"|[[File:nocoverart.png|100x100px]]<br>[[Invisible | |align=center style="background:#FFFFFF"|[[File:nocoverart.png|100x100px]]<br>[[Invisible walkway]]<ref>Prima eGuide, Footlight Lane</ref> | ||
|Blue platforms that are invisible. It becomes visible around the player, but the view of the paths expand on impact by Cat Bullet Bills, Thwomps, or Ground Pounds. Found in [[Footlight Lane]]. | |Blue platforms that are invisible. It becomes visible around the player, but the view of the paths expand on impact by Cat Bullet Bills, Thwomps, or Ground Pounds. Found in [[Footlight Lane]]. | ||
|- | |- | ||
|align=center style="background:#FFFFFF"|[[File:nocoverart.png|100x100px]]<br>[[Lift]] | |align=center style="background:#FFFFFF"|[[File:nocoverart.png|100x100px]]<br>[[Lift]] | ||
|Lifts are platforms that rise and fall. They are used to reach locations at a higher elevation. | |Lifts are platforms that rise and fall. They are used to reach locations at a higher elevation. Lifts bear different designs and movement patterns depending on the course. Some look like [[zipline lift|carnival ziplines]], and at least one resembles a [[Floating couch|spirited couch]]. | ||
|- | |- | ||
|align=center style="background:#FFFFFF"|[[File:SM3DW Multi-Vator.jpg|100x100px]]<br>[[Multi-Vator]] | |align=center style="background:#FFFFFF"|[[File:SM3DW Multi-Vator.jpg|100x100px]]<br>[[Multi-Vator]] | ||
| Line 1,320: | Line 1,329: | ||
|align=center style="background:#FFFFFF"|[[File:Red-Blue Panel SM3DW Prima.jpg|100x100px]]<br>[[Red-Blue Panel]] | |align=center style="background:#FFFFFF"|[[File:Red-Blue Panel SM3DW Prima.jpg|100x100px]]<br>[[Red-Blue Panel]] | ||
|Red-Blue Panels are tiles that flip when the player jumps. | |Red-Blue Panels are tiles that flip when the player jumps. | ||
|- | |||
|align=center style="background:#FFFFFF"|[[File:SM3DW FIre Bros. 2.png|100x100px]]<br>[[Rising pillar]] | |||
|Stone pillars that rises once the player scratches a Cat Wheel. Some rise and lower back down on its own. The player can also climb them in Cat form. | |||
|- | |||
|align=center style="background:#FFFFFF"|[[File:Rotating Panel SM3DW Prima.jpg|100x100px]]<br>[[Rotating Panel]] | |||
|Rotating Panels are tiles that continuously flip over, alternating between red and blue. | |||
|- | |- | ||
|align=center style="background:#FFFFFF"|<br>[[File:SM3DW World 5-2.png|100x100px]]<br>[[Seesaw]] | |align=center style="background:#FFFFFF"|<br>[[File:SM3DW World 5-2.png|100x100px]]<br>[[Seesaw]] | ||
|A long platform that tilt left or right depending on where the player walks. | |A long platform that tilt left or right depending on where the player walks. | ||
|- | |||
|align=center style="background:#FFFFFF"|[[File:nocoverart.png|100x100px]]<br>[[Swing]] | |||
|Hanging platforms that sway from side to side indefinitely. (In Mystery House Dash, Spike's Lost City, and Mystery House Marathon.) | |||
|- | |- | ||
|align=center style="background:#FFFFFF"|[[File:Switchboard SM3DW Prima.jpg|100x100px]]<br>[[Switchboard]] | |align=center style="background:#FFFFFF"|[[File:Switchboard SM3DW Prima.jpg|100x100px]]<br>[[Switchboard]] | ||
| Line 1,336: | Line 1,354: | ||
|TBW | |TBW | ||
|- | |- | ||
|align=center style="background:#FFFFFF"|[[File: | |align=center style="background:#FFFFFF"|[[File:Rainbow Run.jpg|x70px]]<br>[[Turning Floor]] | ||
| | |Continually moving platforms that turn clockwise or counterclockwise, moving anything on them. | ||
|- | |- | ||
!colspan=3 style="background:#FF7733;"|Other objects | !colspan=3 style="background:#FF7733;"|Other objects | ||
|- | |||
|align=center style="background:#FFFFFF"|[[File:nocoverart.png|100x100px]]<br>[[Arrow Sign]] | |||
|Directs the player one direction. | |||
|- | |- | ||
|align=center style="background:#FFFFFF"|[[File:Goal Pole SM3DW Prima.jpg|100x100px]]<br>[[Goal Pole|Big Goal Pole]] | |align=center style="background:#FFFFFF"|[[File:Goal Pole SM3DW Prima.jpg|100x100px]]<br>[[Goal Pole|Big Goal Pole]] | ||
| Line 1,346: | Line 1,367: | ||
|align=center style="background:#FFFFFF"|[[File:Binoculars SM3DW Prima.jpg|100x100px]]<br>[[Binoculars]] | |align=center style="background:#FFFFFF"|[[File:Binoculars SM3DW Prima.jpg|100x100px]]<br>[[Binoculars]] | ||
|Binoculars held by [[Sprixie]]s can be used to scope out certain parts of a level. | |Binoculars held by [[Sprixie]]s can be used to scope out certain parts of a level. | ||
|- | |||
|align=center style="background:#FFFFFF"|[[File:nocoverart.png|100x100px]]<br>[[Bowser Statue]] | |||
|align=left|A statue of Bowser that blocks new levels until the player has a certain amount of Green Stars to break them. | |||
|- | |- | ||
|align=center style="background:#FFFFFF"|[[File:Checkpoint Flag SM3DW Prima.jpg|100x100px]]<br>[[Checkpoint Flag]] | |align=center style="background:#FFFFFF"|[[File:Checkpoint Flag SM3DW Prima.jpg|100x100px]]<br>[[Checkpoint Flag]] | ||
| Line 1,365: | Line 1,389: | ||
|Manifestations of objects and items that turn into several [[Boo]]s once the player touches one. | |Manifestations of objects and items that turn into several [[Boo]]s once the player touches one. | ||
|- | |- | ||
|align=center style="background:#FFFFFF"|[[File:Searchlight.png|100x100px]]<br>[[Searchlight]] | |align=center style="background:#FFFFFF"|[[File:Searchlight.png|100x100px]]<br>[[Searchlight (Super Mario 3D World)|Searchlight]] | ||
|Activates obstacles when the player stands in it. | |Activates obstacles when the player stands in it. | ||
|- | |- | ||
| Line 1,398: | Line 1,422: | ||
|align=center|[[File:Mystery House Claw Climb.jpg|x70px]]<br>'''Falling block''' | |align=center|[[File:Mystery House Claw Climb.jpg|x70px]]<br>'''Falling block''' | ||
|align=left|Large red and yellow blocks that gradually fall once stepped on. | |align=left|Large red and yellow blocks that gradually fall once stepped on. | ||
|- | |- | ||
|-style="background:gold"align=center | |-style="background:gold"align=center | ||
!colspan=2 style="background:#fff3b2;"|'''Platforms''' | !colspan=2 style="background:#fff3b2;"|'''Platforms''' | ||
|- | |- | ||
|align=center|[[File:Rolling Ride Run.jpg|x70px]]<br>'''Rolling block''' | |align=center|[[File:Rolling Ride Run.jpg|x70px]]<br>'''Rolling block''' | ||
| Line 1,470: | Line 1,437: | ||
|align=center|[[File:nocoverart.png|x70px]]<br>'''Spinning floor''' | |align=center|[[File:nocoverart.png|x70px]]<br>'''Spinning floor''' | ||
|align=left|Continually moving platforms that spin clockwise or counterclockwise, moving anything on them. | |align=left|Continually moving platforms that spin clockwise or counterclockwise, moving anything on them. | ||
|- | |- | ||
|align=center|[[File:nocoverart.png|x70px]]<br>'''{{conjectural|Three quarter platform}}''' | |align=center|[[File:nocoverart.png|x70px]]<br>'''{{conjectural|Three quarter platform}}''' | ||
|align=left|Platforms shaped in three quarter circles that turn clockwise or counterclockwise in a 90 degree axis. | |align=left|Platforms shaped in three quarter circles that turn clockwise or counterclockwise in a 90 degree axis. | ||
|- | |- | ||
|-style="background:gold"align=center | |-style="background:gold"align=center | ||
!colspan=2 style="background:#fff3b2;"|'''Climbable objects''' | !colspan=2 style="background:#fff3b2;"|'''Climbable objects''' | ||
| Line 1,496: | Line 1,446: | ||
|-style="background:gold"align=center | |-style="background:gold"align=center | ||
!colspan=2 style="background:#fff3b2;"|'''Transportation objects''' | !colspan=2 style="background:#fff3b2;"|'''Transportation objects''' | ||
|- | |- | ||
|align=center|[[File:nocoverart.png|x70px]]<br>'''[[Warp Door]]''' | |align=center|[[File:nocoverart.png|x70px]]<br>'''[[Warp Door]]''' | ||
|align=left|Doors that take the player to another portion of the level. | |align=left|Doors that take the player to another portion of the level. | ||
|} | |} | ||
Revision as of 22:53, March 2, 2024
Controls
| Action(s) | Input(s) | |||
|---|---|---|---|---|
| Wii U GamePad | Wii U Pro Controller Wii Classic Controller Pro Wii Classic Controller |
Wii Remote (sideways) | Wii Remote + Nunchuk | |
| Course controls | ||||
| Move | ||||
| Dash (while moving), hold items (release to throw), attack (power-ups) | ||||
| Jump, swim, wall jump (against wall) | ||||
| Crouch, ground-pound (while in mid-air), go down pipe, slide (on a slope) | ||||
| Crouch jump (while idle) | ||||
| Roll | ||||
| Long jump (while moving) | ||||
| Rolling long jump (during a roll) | Crouch + Roll + Jump | |||
| Side Somersault | ||||
| Enter horizontal pipe | ||||
| Bubble (multiplayer only) | ||||
| Pause | ||||
| Use inventory item | ||||
| Camera | N/A | |||
| Move Propeller Platforms | N/A | |||
| Bring out Touchstones | N/A | |||
| World Screen controls | ||||
| Move | ||||
| Dash (while moving) | ||||
| Jump | ||||
| Menu | ||||
| View map, drop out (pause menu) | ||||
| Enter stage | ||||
| Menu controls | ||||
| Select option | ||||
| Confirm | ||||
| Cancel | ||||
Worlds
- Main article: World
The game features a large world map, consisting of eight worlds with four unlockable bonus worlds. Each world is connected by Clear Pipes. Unlike previous games, where players follow a fixed path through the maps, the map here can be freely roamed with full control of the characters, except with a limited jump. Each world features a set of levels along with Enemy Battles, Toad Houses, Sprixie Houses, Lucky Houses, and either Mystery Houses or a puzzle-focused series of levels called Captain Toad's Adventures with Captain Toad playable. The maps also contain items such as coins and 1-Up Mushrooms and other secrets.
When the player finishes a course with all Green Stars, the ball ornament on the Goal Pole is replaced with a Green Star, which can even become gold when the stage is cleared with all five characters, the stamp from that stage is collected (if any), and at least one character touches the top of the flag at the end of the stage. Upon reaching World Crown, the player can also see which stage has been cleared with which characters on the Map Progression screen or when approaching a stage. When all the stages in a world have been cleared with every character, a paw print mark is shown on the upper-right corner of the Map Progression screen.
Level names with a ![]() Green Star icon appended to them are locked upon discovery, and require the player to have the listed number of Green Stars to unlock and play the level.
Green Star icon appended to them are locked upon discovery, and require the player to have the listed number of Green Stars to unlock and play the level.
| Worlds | ||
|---|---|---|
| World 1 Template:Chart icon×24 Template:Chart icon×6 Template:Chart icon×1 |
Courses | |
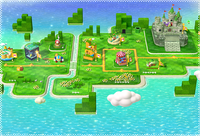
|
World 1-1 Super Bell Hill | World 1-2 Koopa Troopa Cave |
| World 1-A Chargin' Chuck Blockade | World 1-3 Mount Beanpole | |
| World 1-4 Plessie's Plunging Falls | World 1-5 Switch Scramble Circus | |
| World 1- |
World 1- | |
| The southernmost island in the Sprixie Kingdom, one that is covered in lush grass. The courses above ground are dotted by bell-shaped trees and feature the Super Bell. Plessie and rabbits appear in this world, and Bowser has imprisoned the green Sprixie Princess in a castle. | ||
| World 2 Template:Chart icon×24 Template:Chart icon×7 Template:Chart icon×1 |
Courses | |
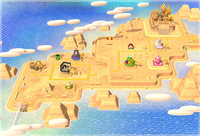
|
World 2-1 Conkdor Canyon | World 2-2 Puffprod Peaks (Template:Chart icon×15) |
| World 2-3 Shadow-Play Alley | World 2-4 Really Rolling Hills | |
| World 2-A Big Galoomba Blockade | World 2-5 Double Cherry Pass | |
| World 2- |
World 2- | |
| World 2- | ||
| This island looks like an arid desert, but Conkdor Canyon is the only location to take place in one. Other courses make use of Touchstones, shadows casted on walls, Potted Piranha Plants, and Double Cherries. The yellow Sprixie Princess is held by Boom Boom in a tank course. | ||
| World 3 Template:Chart icon×30 Template:Chart icon×9 Template:Chart icon×2 |
Courses | |
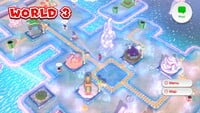
|
World 3-1 Snowball Park | World 3-2 Chain-Link Charge (Template:Chart icon×30) |
| World 3-3 Shifty Boo Mansion | World 3-4 Mount Beanpole | |
| World 3-A Magikoopa Blockade | World 3-5 Pipeline Lagoon | |
| World 3-6 Mount Must Dash | World 3-7 Switchboard Falls | |
| World 3- |
World 3-B A Banquet with Hisstocrat | |
| World 3- |
World 3- | |
| World 3 is in the northeast and has a crystalline landscape. The first course is covered in snow and features Ice Skates. Subsequent courses feature shifting Chain-Links, a Ghost House, and rotating platforms in a sea of pink clouds. The serpent Hisstocrat resides in World 3, and the Koopa, Pom Pom, keeps the blue Sprixie Princess on The Bullet Bill Express. | ||
| World 4 Template:Chart icon×30 Template:Chart icon×7 Template:Chart icon×1 |
Courses | |
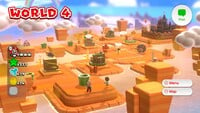
|
World 4-1 Ant Trooper Hill | World 4-2 Piranha Creeper Creek |
| World 4-A Brolder Blockade | World 4-3 Beep Block Skyway | |
| World 4-4 Big Bounce Byway | World 4-5 Spike's Lost City | |
| World 4-B Fire Bros. Hideout #1 | World 4- | |
| World 4- |
World 4- | |
| This island lies in the northwest and seems to be made of sandstone. Courses include a colony of Ant Troopers, a toxic creek of Piranha Creepers, and rows of Beep Blocks in the sky. Boss Brolder holds the orange Sprixie Princess captive in a castle. | ||
| World 5 Template:Chart icon×31 Template:Chart icon×9 Template:Chart icon×1 |
Courses | |
|
World 5-1 Sunshine Seaside | World 5-2 Tricky Trapeze Theater |
| World 5-3 Backstreet Bustle (Template:Chart icon×80) | World 5-A Chargin' Chuck Blockade Is Back | |
| World 5-4 Sprawling Savanna | World 5-5 Bob-ombs Below | |
| World 5-6 Cakewalk Flip | World 5-7 Searchlight Sneak | |
| World 5-B Fire Bros. Hideout #2 | World 5- | |
| World 5- |
World 5- | |
| World 5- | ||
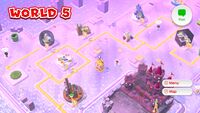
| In the southwest is World 5, which is covered in shimmering, lavender sand and dotted with coral-like plants. The first course takes place along a beach and features Plessie. Other courses include a series of circus platforms with trapezes and a vast savanna. King Ka-thunk keeps the purple Sprixie Princess in a ruined fortress. | ||
| World 6 Template:Chart icon×32 Template:Chart icon×9 Template:Chart icon×3 |
Courses | |
|
World 6-1 Clear Pipe Cruise | World 6-2 Spooky Seasick Wreck |
| World 6-3 Hands-On Hall (Template:Chart icon×100) | World 6-4 Deep Jungle Drift | |
| World 6-A Prince Bully Blockade | World 6-5 Ty-Foo Flurries | |
| World 6-6 Bullet Bill Base | World 6-B Fire Bros. Hideout #3 | |
| World 6-7 Fuzzy Time Mine | World 6- | |
| World 6-C Motley Bossblob's Big Battle | World 6- | |
| World 5- | ||
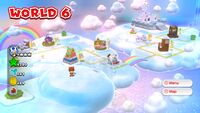
| This is the first world to not be part of the Sprixie Kingdom's landscape, instead being a collection of clouds in the southwest. Towers interconnected by Clear Pipes, a dojo-like castle, a haunted ship, a poisonous swamp, and snowy mountains occur amongst the clouds. Boom Boom holds the light-blue Sprixie Princess captive here, and the jester-like Motley Bossblob can be battled once she is freed. | ||
| World Castle Template:Chart icon×32 Template:Chart icon×9 Template:Chart icon×3 |
Courses | |
|
World |
World |
| World |
World | |
| World |
World | |
| World |
World | |
| World |
World | |
| World |
World | |
| World | ||
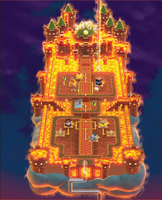
| This world is a floating fortress covered in lava and has been directly overtaken by Bowser. Most courses occur over lava flows, but there is one underwater course that is home to Rammerheads. Defeating Bowser frees the red Sprixie Princess, and forces him to take refuge in the next world. | ||
| World Bowser Template:Chart icon×39 Template:Chart icon×10 Template:Chart icon×4 |
Courses | |
|
World |
World |
| World |
World | |
| World |
World | |
| World |
World | |
| World |
World | |
| World |
World | |
| World | ||
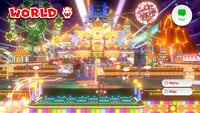
| Bowser's true domain – a theme park in his image. Most levels are fortress-themed obstacle courses, but it also includes a Plessie course over moving sand, a materializing path in the sky, and a ghost house set in the dark. Battles with Hisstocrat and Motley Bossblob proceed the final showdown with Bowser, who appears in his Cat form. Defeating him fully liberates the Sprixie Kingdom. | ||
| World Star Template:Chart icon×32 Template:Chart icon×10 |
Courses | |
|
World |
World |
| World |
World | |
| World |
World | |
| World |
World | |
| World |
World | |
| World | ||
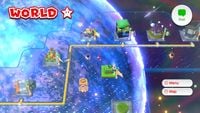
| World Star is in outer space, just above Mario's home world. It is accessible through a Rocket built by the Sprixie Princesses. A chase for a winged Goal Pole, a snow-cloaked cemetery, and a top-down shooting course appear here. The Comet Observatory appears here, alongside Lumas and their caretaker, Rosalina. | ||
| World Mushroom Template:Chart icon×31 |
Courses | |
|
World |
World |
| World |
World | |
| World |
World | |
| World |
World | |
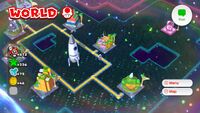
| Deeper in space, World Mushroom only contains iterations of previous courses. | ||
| World Flower Template:Chart icon×36 Template:Chart icon×7 |
Courses | |
|
World |
World |
| World |
World | |
| World |
World | |
| World |
World | |
| World |
World | |
| World |
World | |
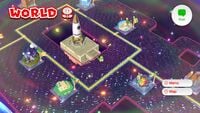
| World Flower has the largest number of traditional courses in the game, and is the only one to exclusively contain such courses. All but one are iterations of previous levels. The one that is not is a boss rush featuring rematches with King Ka-thunk, Pom Pom, Hisstocrats, Boss Brolder, Boom Boom, and Motley Bossblob. | ||
| World Crown Template:Chart icon×38 Template:Chart icon×4 |
Courses | |
|
World |
World |
| World |
World | |
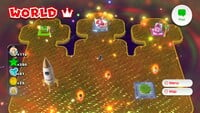
| The final world of the game is World Crown, containing the fewest number of courses of any world. In addition to containing the most challenging Captain Toad and Mystery Box courses, it contains the most challenging normal course in the game, Champion's Road. Plessie, Sprixies, Lumas, and Toads appear towards its Goal Pole to congratulate the player. | ||
Characters
Playable characters
| Name | Advantages | Disadvantages | Availability |
|---|---|---|---|
 Mario |
Balanced | From the start | |
 Luigi |
Jumps higher Can Scuttle, allowing his jumps to cover more ground |
Sprints later Low traction, making him slippery | |
 Peach |
Can float briefly after jumping Sprints sooner Falls slower |
Runs slower | |
 Toad |
Runs faster | Falls faster Sprints later, tied with Luigi Jumps lower | |
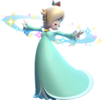 Rosalina |
Can use Spin attacks, allowing her to attack without a power-up or perform a double jump Sprints sooner, tied with Peach |
Runs slower, tied with Peach Loses her Spin attack when using power-ups (excluding the Super Mushroom, Double Cherry, and Super Star) |
After completing Template:World-link |
 Captain Toad |
Sprints sooner | Falls faster, tied with Toad Cannot jump |
Only in Captain Toad's Adventures |
Non-playable characters
| Name | Description |
|---|---|
 Sprixie Princesses |
The Sprixie Princesses rule the Sprixie Kingdom and are captured by Bowser at the beginning of the game. At the end of every world, the player rescues a Sprixie Princess and it builds a Clear Pipe to the next world. After World Castle, Bowser captures all the Sprixie Princesses again, but they are rescued permanently when the player defeats Meowser in World Bowser. |
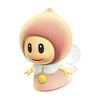 Sprixie |
Sprixies are fairy-like creatures that are ruled by Sprixie Princesses. They appear in many levels and hold binoculars, allowing the player to see the end of the level. They are also found in Sprixie Houses. |
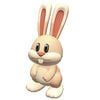 Rabbit |
Rabbits can be found in several levels, where they run from the player. When caught by the player, they release power-ups, Coins, or Green Stars. |
 Mega Rabbit |
Similar to normal rabbits, they try to run from the player and must be caught. These rabbits release Mega Mushrooms or Green Stars. |
 Toads |
Toads appear in and host Toad Houses, where the player can win power-ups. |
 Plessie |
Plessie is a character that the player can ride across water. The player must tilt |
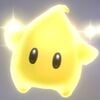 Lumas |
Lumas make a minor appearance as non-playable characters. They can be found floating around the maps of the special worlds, and they are also found directly in some of the courses. The player cannot interact with them. |
 Ghost Miis |
Mii characters that represent the ghost data of another player, recreating the exact movements of said player. They appear once Nintendo Network features have been enabled. However, as of November 7, 2017, Miiverse is discontinued and Ghost Miis no longer appear in the game. |
Enemies and obstacles
New enemies
| Name | Description | First appearance | Last appearance |
|---|---|---|---|
 Ant Trooper |
Ant Troopers are purple ant-like enemies that attack by marching in groups. They cannot be defeated with a jump, but they can be ground-pounded, pounced/tail-whipped, or hit with a Boomerang. | Ant Trooper Hill | Sprawling Savanna |
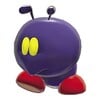 Big Ant Trooper |
Big Ant Troopers are larger versions of Ant Troopers. They cannot be defeated, but the player can jump on them to reach otherwise inaccessible areas. | Ant Trooper Hill | Sprawling Savanna |
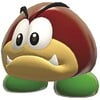 Big Galoomba |
Big Galoombas are larger versions of Galoombas. They attack by attempting to ram into the player and can be defeated if jumped on twice. A Ground Pound defeats them in one hit. | Big Galoomba Blockade | Gargantuan Grotto |
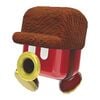 Blockstepper |
Blocksteppers are blocks with hats and feet that attack by marching in groups to the beat of the music in the current stage. They can be defeated by most attack methods, but if one member of a group is defeated, the rest hurriedly scatter and subsequently chase the player after a while. | Double Cherry Pass | Faster Fort Fire Bros. |
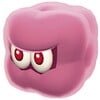 Blurker |
Blurkers are pink block-like enemies that are found in groups blocking areas. They temporarily disappear like a Boo if interacted with on the GamePad or attacked by normal means. They can be permanently defeated through use of a Mega Mushroom, a Piranha Plant, White Tanooki Mario, Lucky Cat Mario, or Invincible Mario. | Shadow Play Alley | Back to Hands-On Hall |
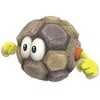 Brolder |
Brolders are boulder enemies found in lava levels. When the player approaches, they pop up from the ground and attempt to roll over the player. When attacked, they can be carried and thrown to press switches or obtain collectibles within the arc of throw. They can also be defeated permanently by throwing them into lava or attacking them with Lucky Cat Mario or White Tanooki Mario. | Brolder Blockade | Mystery House Marathon |
 Cat Banzai Bill |
Cat Banzai Bills are Banzai Bills with a cat appearance. They attack by following the player and can be defeated with most attacks. | The Bullet Bill Express | The Bullet Bill Express |
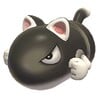 Cat Bullet Bill |
Cat Bullet Bills are Bullet Bills with a cat appearance. They attack by following the player, similarly to the Bull's-Eye Bill, and can be defeated with most attacks. | The Bullet Bill Express | Mystery House Marathon |
 Cat Goomba |
Cat Goombas are Goombas with a cat appearance. They attack by jumping and pouncing like Cat Mario to its original location. They can be defeated with most attacks. Some leave behind a Super Bell when defeated. | Super Bell Hill | The Great Tower of Bowser Land |
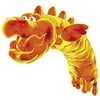 Charvaargh |
A dragon-like enemy that attacks the player by leaping out of the lava. They instantly defeat the player when touched, regardless of the player's current form. They cannot be defeated. | Simmering Lava Lake | Simmering Lava Lake |
Conkdor |
Conkdors are bird enemies that stay in place and slam down their beaks to attack once they spot the player. They can be defeated with most attacks, although the player cannot jump on their spiky shell. | Conkdor Canyon | Sprawling Savanna Rabbit Run |
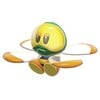 Flopter |
Flopters are bug-like enemies that attack by attempting to fly into the player. They can be defeated with most attacks. | The Bullet Bill Express | Mystery House Brawl |
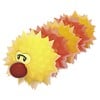 Fuzzler |
Fuzzlers are Wiggler-like and Fuzzy-like enemies that roll around on tracks used by a Switchboard. They can be defeated with Lucky Cat Mario or if they come into contact with water. | Switchboard Falls | Switchboard Falls |
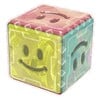 Grumblump |
A block obstacle that the player must use as a platform to progress. It moves faster for a short time if the player uses a Ground Pound on it. | Grumblump Inferno | Grumblump Inferno |
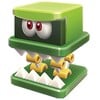 Hop-Chop |
Hop-Chops are spring-like enemies that attack the player by bouncing towards them. They can be defeated by most attacks, and some may temporarily turn into springboards upon being defeated. | Big Bounce Byway | Mystery House Marathon |
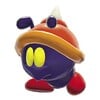 Horned Ant Trooper |
Horned Ant Troopers are Ant Troopers with spiked helmets. They can be defeated with most attacks, though jumping on them damages the player. | Ant Trooper Hill | Champion's Road |
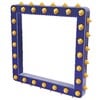 Ka-thunk |
Ka-thunks are rectangular frames covered in spikes that move around in certain patterns, similarly to a Tox Box. They can be defeated with Lucky Cat Mario or White Tanooki Mario. | King Ka-thunk's Castle | Bowser's Lava Lake Keep |
 Innertube Goomba |
Goombas in inflatable rings are first found asleep floating on water until a player is close to them, which causes them to wake up and chase the player. | Pipeline Lagoon | Sprawling Savanna Rabbit Run |
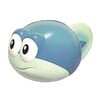 Madpole |
Madpoles are tadpole-like enemies that chase the player in the water. They can be defeated with most attacks. | Rammerhead Reef | Pipeline Boom Lagoon |
 Parabones |
Parabones are winged Dry Bones that attack the player by flying into them. Unlike Koopa Paratroopa, their wings do not disappear when jumped on. They can be defeated permanently by Invincible Mario, Lucky Cat Mario, and White Tanooki Mario. | Fuzzy Time Mine | Blast Block Skyway |
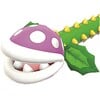 Piranha Creeper |
Piranha Creepers are Piranha Plant variants with long stems. They move around in a certain pattern and shorten their stems when attacked. | Piranha Creeper Creek | Champion's Road |
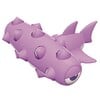 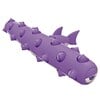 Rammerhead |
Rammerheads are hammerhead shark-like enemies that try to ram into the player with their heads. They can only be defeated with Lucky Cat Mario, Invincible Mario, or White Tanooki Mario. | Captain Toad Makes a Splash | Pipeline Boom Lagoon |
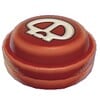 Ring Burner |
Ring Burners are robotic enemies that fire waves of plasma periodically. The player can stop the enemy from firing by standing on the switch. They cannot be defeated. | Cakewalk Flip | Champion's Road |
 Skating Goomba |
Goombas that ride Ice Skates are found on ice and attempt to attack the player characters by skating into them. When defeated, they may drop the Ice Skate for the player to use. | Snowball Park | Ty-Foo Flurries |
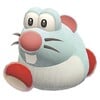 Skipsqueak |
Skipsqueaks are mouse enemies that run in place and jump on rotating platforms. They can be defeated by any attack. | Really Rolling Hills | Rainbow Run |
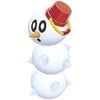 Snow Pokey |
Snow Pokeys are Pokeys made of snow that chase the player. They can be defeated with most attacks, allowing their body segments to be picked up and thrown. | Snowball Park | Mystery House Brawl |
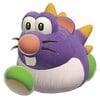 Spiny Skipsqueak |
Spiny Skipsqueaks are enemies that act identically to the Skipsqueak, but jumping on them damages the player. They can be defeated by any other attack. | Really Rolling Hills | Night Falls on Really Rolling Hills |
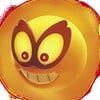 Splorch |
Splorches are fireballs that chase the player. They can only be defeated by Invincible Mario, Lucky Cat Mario, or White Tanooki Mario; though they can be pushed into the lava with projectile attacks from Boomerang Mario and Fire Mario. | Brolder Blockade Is Back | Broken Blue Bully Belt |
 Splounder |
Splounders are enemies only found in levels featuring Plessie. If Plessie collides with one, Plessie loses some of its speed. They can be jumped on to defeat them or reach objects high in the air. | Plessie's Plunging Falls | Rainbow Run |
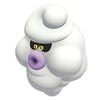 Ty-foo |
Ty-foos are cloud enemies that blow wind at the player in an attempt to push them off of the stage. The player can stun them temporarily through the touch screen on the GamePad or defeat them with Mega Mario, Lucky Cat Mario, and White Tanooki Mario. | Ty-Foo Flurries | Gigantic Seasick Wreck |
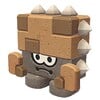 Walleye |
Walleyes are Wallop-like enemies that try to block the player. They can be stunned through the touch screen of the GamePad or defeated permanently by Lucky Cat Mario or White Tanooki Mario. | Ty-Foo Flurries | Mystery House Marathon |
Returning enemies
| Name | Description | First appearance | Last appearance |
|---|---|---|---|
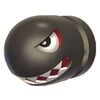 Banzai Bill |
Banzai Bills are a larger variety of Bullet Bills. They share the same weaknesses as the Cat Banzai Bill. | Mystery House Mad Dash | Bullet Bill Base |
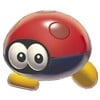 Biddybud |
Biddybuds are ladybug enemies that walk in a specific pattern. They can be defeated with any attack. | Switch Scramble Circus | Sunshine Seaside |
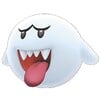 Big Boo |
Big Boos are a larger variant of Boo. They can only be defeated by Light Boxes, Invincible Mario, Lucky Cat Mario, and White Tanooki Mario. | Shifty Boo Mansion | Shiftier Boo Mansion |
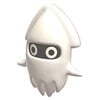 Blooper |
Bloopers are squid-like enemies that appear in underwater areas. They attack by charging at the player. They can be defeated by most attacks. | Rammerhead Reef | Pipeline Boom Lagoon |
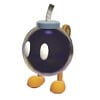 Bob-omb |
Bob-ombs are bomb enemies. They attack by following the player and attempting to explode near them. When attacked, they can be picked up, but they must be thrown because they explode after a few seconds. | Bob-ombs Below | Super Block Land |
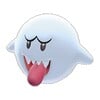 Boo |
Boos are ghost enemies. They attack by floating toward the player. When looked at, they stop moving. They can only be defeated by Invincible Mario, a Light Box, Lucky Cat Mario and White Tanooki Mario. | Shifty Boo Mansion | Deep-Black Jungle Drift |
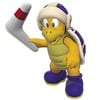 Boomerang Bro |
Boomerang Bros. are Koopa enemies that throw boomerangs. They can be defeated with most attacks. | Beep Block Skyway | Mystery House Brawl |
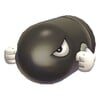 Bullet Bill |
Bullet Bills are bullets that shoot out of Bill Blasters in a straight line. They can be defeated with most attack methods. | Bowser's Bullet Bill Brigade | Footlight Lane |
 Bully |
Bullies are enemies that charge at the player in attempt to push them off the platform. They can be defeated with Mega Mario, Lucky Cat Mario, Invincible Mario and White Tanooki Mario, but they can be pushed off platforms by performing any attack repeatedly. | Spooky Seasick Wreck | Mystery House Marathon |
 Chargin' Chuck |
Chargin' Chucks are large Koopas with football gear. they attack by charging at the player and ramming into them. Most attacks can defeat them, but they usually must be hit twice. A Ground Pound defeats it in one hit. | Chargin' Chuck Blockade | Champion's Road |
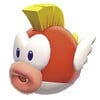 Cheep Cheep |
Cheep Cheeps are fish enemies that attack by swimming at the player. They can be defeated with most attacks. | Pipeline Lagoon | Pipeline Lagoon |
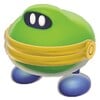 Coin Coffer |
Coin Coffers are enemies that try to run away from the player. They can be defeated by most attacks. When defeated, they release many coins. | Pipeline Lagoon | Sprawling Savanna Rabbit Run |
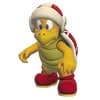 Fire Bro |
Fire Bros. are Koopa enemies that attack by throwing fireballs. They can be defeated with most attacks. | Double Cherry Pass | Champion's Road |
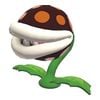 Fire Piranha Plant |
Fire Piranha Plants are a variant of Piranha Plant that can shoot fireballs. They can be defeated with most attacks. The player can also send its own fireballs back at it by using the touch screen of the GamePad. | Shadow-Play Alley | Captain Toad's Fiery Finale |
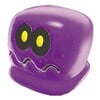 Fizzlit |
Fizzlits are purple blob enemies that melt into an electrically-charged puddle. They can be defeated with any attack while in their purple form, or by Fire Mario's fireballs, Invincible Mario, Lucky Cat Mario, and White Tanooki Mario when electrified. | Switchboard Falls | Switch Shock Circus |
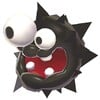 Fuzzy |
Fuzzies are black, furry creatures. They function as obstacles and they can only be defeated by a Super Star, Lucky Cat Mario, White Tanooki Mario, or a Piranha Plant. | Shadow-Play Alley | Champion's Road |
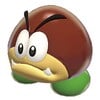 Galoomba |
Galoombas are Goomba-like enemies that are rounder and must be attacked twice or ground-pounded to be defeated. | Puffprod Peaks | Super Galaxy |
 Goomba |
Goombas are basic enemies that resemble brown mushrooms and attack by attempting to run into the player. They can be defeated with any attack. | Super Bell Hill | Mystery House Marathon |
 Goomba Tower |
Goomba Towers are stacks of Goombas. They act like normal Goombas do, but must be attacked multiple times or ground-pounded to be fully defeated. | Koopa Troopa Cave | Towering Sunshine Seaside |
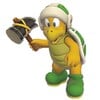 Hammer Bro |
Hammer Bros. are Koopa enemies that attack by throwing hammers at the player. They can be defeated by most attacks. | Fire Bros. Hideout #3 | Switch Shock Circus |
 Koopa Troopa |
Koopa Troopas are turtle-like creatures with shells. They attack by trying to walk into the player. When attacked, they lose their shell, which can be carried. | Koopa Troopa Cave | Mystery House Marathon |
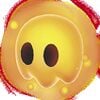 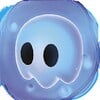 Lava Bubble |
Lava Bubbles are living fireballs that emerge from lava and attempt to collide with the player. They can only be defeated when the player is invincible. | Lava Rock Lair (Red) Backstreet Bustle (Blue) |
Back to Hands-On Hall (Red) Faster Fort Fire Bros. (Blue) |
 Magikoopa |
Magikoopas are enemies that fire spells to damage the player. They can be defeated by most attacks. | Magikoopa Blockade | Champion's Road |
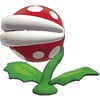 Mega Piranha Plant |
Mega Piranha Plants are a larger variant of Piranha Plant. They attack by attempting to bite the player. They can be defeated by most attacks, though they require two hits, but a Ground Pound defeats it instantly. | Mount Beanpole | Honeycomb Skyway |
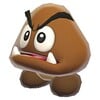 Mini Goomba |
Mini Goombas are very small variants of Goombas that attack by chasing the player. They can be defeated with any attack, but they can be pushed away if interacted with using the GamePad. | Koopa Troopa Cave | Mystery House Marathon |
 Octoomba |
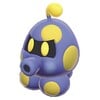
Octoombas are a variant of Goombas that throw projectiles at the player. They are only stunned for one second with a jump, but they can only be defeated with a ground pound. | Super Galaxy | Champion's Road |
Para-Biddybud |
Para-Biddybuds are a variant of Biddybuds that hover above the ground and fly in circles. They can be defeated with most attacks. | Switch Scramble Circus | Mystery House Marathon |
 Peepa |
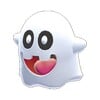
Peepas are Boo-like enemies that move in a set pattern, blocking a path. They can be defeated with a Light Box, Invincible Mario, Lucky Cat Mario, and White Tanooki Mario. | Shifty Boo Mansion | Mystery House Marathon |
 Piranha Plant |
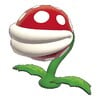
Piranha Plants are carnivorous plants that attack by attempting to bite the player. They can be defeated by most attacks. | Mount Beanpole | Mystery House Marathon |
 Porcupuffer |
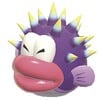
Porcupuffers are giant Cheep Cheeps that have spikes on their backs. They attempt to swim at the player and can be defeated by most attack methods (except jumps). | Pipeline Lagoon | Pipeline Lagoon |
 Spike |
Spikes are Koopa enemies that throw spiked rollers. They can be defeated with most attacks. | Spike's Lost City | Mystery House Marathon |
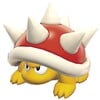 Spiny |
Spinies are red Koopa enemies with spikes on them. They damage the player if jumped on, but can otherwise be defeated with most attacks. | Big Bounce Byway | Floating Fuzzy Time Mine |
 Stingby |
Stingbies are bee-like enemies that attack by chasing the player and ramming into them. They can be defeated with most attacks. | Switch Scramble Circus | Honeycomb Starway |
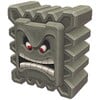 Thwomp |
Thwomps are large stone enemies that attack by falling on the player. They can be defeated by Lucky Cat Mario and White Tanooki Mario. | Bowser's Highway Showdown | Mystery House Marathon |
Obstacles
| Name | Description | First appearance | Last appearance |
|---|---|---|---|
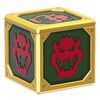 Baddie Box |
Baddie Boxes are blocks that release Bob-ombs when approached. They can be destroyed by Invincible Mario, Lucky Cat Mario, and White Tanooki Mario. | Bob-ombs Below | Super Block Land |
 Bill Blaster |
Bill Blasters are cannons that shoot Bullet Bills or Cat Bullet Bills. They cannot be destroyed. | Bowser's Bullet Bill Brigade | Footlight Lane |
 Cannon |
Cannons are boxes that can shoot either Cannonballs or Kick Bombs at the player. They can be destroyed if hit by a cannonball from a Cannon Box or if a Brick Block under it is hit. | Bowser's Highway Showdown | Trouble in Shadow-Play Alley |
 Dark |
Blocks the player's view. | Switchblack Ruins | Piranha Creeper Creek after Dark |
 Fire Bar |
Fire Bars are rotating sticks with fireballs on them. | Fort Fire Bros. | Champion's Road |
 Fuzzy Horde |
Fuzzy Hordes are very large groups of Fuzzies. They slowly move toward the player and cannot be defeated. They instantly defeat the player when touched, regardless of the player's current form. | Fuzzy Time Mine | Floating Fuzzy Time Mine |
  Lava |
Molten rock that can cause the player to instantly lose a life. In some courses, lava shifts up and down. | Brolder Blockade | Captain Toad's Fiery Finale |
 Poison |
A liquid hazard that can cause the player to instantly lose a life. | Piranha Creeper Creek | Piranha Creeper Creek after Dark |
Poison fog |
An enormous, red and black cloud that moves down very slowly. It can defeat the player in one hit. | Trick Trap Tower | |
 Quicksand |
Sand that sinks the player. | Conkdor Canyon | |
 Spike ball |
Spike balls are giant seeds that are often found in Clear Pipes as obstacles. They can be defeated by Invincible Mario, White Tanooki Mario or a fireball from Fire Mario. | Clear Pipe Cruise | Back to Hands-On Hall |
 Spike Block |
Blocks that damage the player when touched. Blue Spike Blocks are stationary while red Spike Blocks move. | Deepwater Dungeon | Champion's Road |
 Spike Trap |
A pointy obstacle that damages the player. They can be static or retractable. | Bowser's Highway Showdown | Champion's Road |
 Spiked roller |
A cylinder covered with spikes. They are swung on chains or thrown by Spikes. Some are also found spinning around a block, not unlike Spike Bars. | Spike's Lost City (normal) Boiling Blue Bully Belt (spinning) The Bowser Express (chain) |
Mystery House Marathon (normal) Broken Blue Bully Belt (spinning) Champion's Road (chain) |
 Volcanic debris |
Volcanic debris appear as molten lava falling from the sky. They cannot be destroyed, but Invincible Mario and White Tanooki Mario cannot be hurt by them. | Hisstocrat Returns | Boss Blitz |
Bosses
Bosses are listed in the order that they are first encountered.
| Name | Description | Courses |
|---|---|---|
 Bowser |
The Koopa King who attacks from his Muscle Car. | Bowser's Highway Showdown, Bowser's Lava Lake Keep |
 Boom Boom |
A big, brutish Koopa typically encountered in tank courses. He swings his fists and spins like a top. | Bowser's Bullet Bill Brigade, Bowser's Bob-omb Brigade, Boss Blitz, Mystery House Marathon |
 Pom Pom |
A pink Koopa with a spotted shell. She throws shuriken and leaps into the air. | The Bullet Bill Express, The Bowser Express, Boss Blitz |
 Hisstocrat |
A crowned serpent in a pit of sand. After making a pungi-like cry, additional plate-bearing snakes erupt from the sand. Based on the likely source of inspiration for this boss, these other snakes may be additional heads. There are two Hisstocrats – one purple, one pink. They are fought together in Boss Blitz. | A Banquet with Hisstocrat, Hisstocrat Returns, Boss Blitz |
 Boss Brolder |
The leader of the Brolders with a magmatic spinning attack. | Lava Rock Lair, Brolder Blockade Is Back, Boss Blitz |
 King Ka-thunk |
An armored creature gripping a Ka-thunk frame, with only his back vulnerable. | King Ka-thunk's Castle, Boss Blitz |
 Prince Bully |
The Bully leader, that can only be damaged after compressing him by jamming him into a Clear Pipe. | Prince Bully Blockade, Prince Bully Blockade Is Back |
 Motley Bossblob |
A jester-like Koopa. It assembles metallic blobs to take on the form of monstrous clown. | Motley Bossblob's Big Battle, Motley Bossblob's Encore, Boss Blitz |
 Meowser |
Bowser after using a Super Bell, granting him enhanced speed and a wall-climbing ability. | The Great Tower of Bowser Land |
Items and objects
Items
These are collectibles, pickups, and health-restoring objects.
| Name | Description | Name | Description |
|---|---|---|---|
 Coins |
Collecting 100 Coins grants the player an extra life. Some coins are stacked together and reward the player with multiple coins all at once. |  Hidden Coins |
Coins that are invisible to players unless they pass through one or touch the Wii U GamePad. |
 Red Coins |
Red Coins appear when the player passes through a Red Ring. When all eight are collected, the player receives a power-up. | 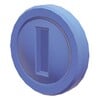 Blue Coins |
Blue Coins are coins that appear from a P Switch. They function the same as regular coins. |
 Key Coins |
When five Key Coins are collected, a Warp Box (With Key) turns into a regular Warp Box. | 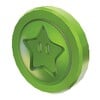 Green Star Coins |
Green Star Coins appear after a Green Star Ring is activated. When all eight are collected before the time runs out, a Green Star appears. |
 Green Stars |
Green Stars are used to unlock some levels. There are three per level, and all must be collected for 100% game completion. |  Stamps |
Stamps can be collected and used in Miiverse posts. There is one per level, and all must be collected for 100% game completion. However, as of November 7, 2017, the termination of the Miiverse service renders all stamps unusable, meaning that stamps can be collected but can no longer used. |
 + Clocks |
Clocks add either 10 seconds or 100 seconds to the timer. | 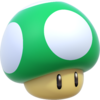 1-Up Mushrooms |
When collected, 1-Up Mushrooms grant the player an extra life. |
 Crown |
During multiplayer, a crown appears on the character of the player who scores the most points upon completing a course. It can be knocked-off and equipped by another player in the following course, awarding the thief an extra score bonus at the end. For more details, see "Multiplayer". |  Cannon Boxes |
Cannon Boxes are created when certain ? Blocks are hit. When worn, they continually shoot cannonballs that can defeat enemies or destroy objects. If the player holds |
 Light Boxes |
Light Boxes are wearable blocks with lamps that light up dark areas in front of the player. They are found mainly in Ghost Houses and can be used to defeat Boos and Boo variants. Light Boxes change color to match the user. |  Coin Boxes |
Coin Boxes are shiny Coin Blocks that can be worn by the player. As the player moves, they can collect up to 100 coins. |
 Propeller Boxes |
Propeller Boxes can be worn by the player and allow the player to fly for a short time. The box changes color to match the user. |  Goomba Masks |
When the player wears a Goomba Mask, Goombas and Goomba variants do not attack the player, though other types of enemies still can. When the player crawls or jumps, a Goomba sound effect can be heard. |
 Baseballs |
Baseballs can be thrown to defeat enemies. | 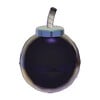 Bombs |
Bombs are inactive Bob-ombs that light their fuses when picked up. They can be used to destroy objects. |
 Snowballs |
Snowballs can be thrown to defeat enemies. | 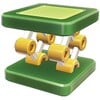 Springboards |
Springboards appear when Hop-Chops are defeated. They are used to reach heights. |
 Green Shells |
Green Shells are shells originally from Koopa Troopas. If the player crouches while holding one, they enter the shell and can slide around for a few seconds, defeating enemies and bouncing off walls. The shell changes color to match the user. |  Gold Shells |
Gold Shells are Koopa Troopa shells that give coins when they move, similar to ? Boxes. |
 Ice Skates |
Ice Skates are items based on Goomba's Shoes. They are found with Goombas in them and can be worn by the player to skate across ice; the skates change color to fit the user. The player defeats most enemies they run into, but cannot stop moving. |  Potted Piranha Plants |
These are a potted variation of Piranha Plant that the player can hold. They eat enemies they come in contact with and collect items. They also attack other players in multiplayer mode. |
Power-ups
Items that transform Mario's appearance and give him unique abilities.
| Power-up | Form | Description | ||
|---|---|---|---|---|
| Template:Chart icon | Template:Chart icon | Template:Chart icon | ||
| Template:Chart icon | Template:Chart icon | |||
| N/A |  Small Mario |
Small Luigi |
Small Peach |
Small Mario is his weakest form, as he loses a life if he takes damage in this form. He also cannot break Brick Blocks, and he only gets Super Mushrooms from blocks. |
Small Toad |
Small Rosalina | |||
 Super Mushroom |
 Mario |
 Luigi |
 Peach |
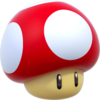
Collecting the Super Mushroom returns Small Mario to his normal size, making him bigger and allowing him to take a hit from an enemy without immediately losing a life and find higher-tiered power-ups in blocks. This is the default form of Mario. |
 Toad |
 Rosalina | |||
 Super Bell |
 Cat Mario |
Cat Luigi |
Cat Peach |
The Super Bell is a golden bell that transforms Mario into Cat Mario. This allows him to climb walls and the Goal Pole and pounce at enemies. He can also swipe at enemies near him. |
Cat Toad |
 Cat Rosalina | |||
 Double Cherry |
 Double Mario |
 Double Luigi |
 Double Peach |
The Double Cherry is a set of cherries that transform Mario into Double Mario. An identical clone of Mario appears. This allows the player to activate certain switches or defeat more enemies. |
 Double Toad |
 Double Rosalina | |||
 Super Leaf |
 Tanooki Mario |
Kitsune Luigi |
Tanooki Peach |
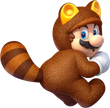
When Mario collects a Super Leaf, he becomes Tanooki Mario, allowing him to float through the air for a short time and whip enemies with his tail. |
Tanooki Toad |
Tanooki Rosalina | |||
 Fire Flower |
 Fire Mario |
Fire Luigi |
Fire Peach |
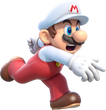
Collecting the Fire Flower transforms Mario into Fire Mario. This allows him to throw fireballs to defeat enemies. |
 Fire Toad |
 Fire Rosalina | |||
 Boomerang Flower |
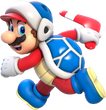 Boomerang Mario |
 Boomerang Luigi |
 Boomerang Peach |
When Mario collects the Boomerang Flower, he turns into Boomerang Mario, which lets him throw boomerangs to collect items or defeat enemies. |
 Boomerang Toad |
 Boomerang Rosalina | |||
 Mega Mushroom |
 Mega Mario |
 Mega Luigi |
 Mega Peach |
Collecting a Mega Mushroom makes Mario very large for a brief time. He can defeat most enemies and destroy most objects by touching them. He can also ground-pound to create a shockwave that can defeat nearby enemies and hit nearby blocks. |
 Mega Toad |
 Mega Rosalina | |||
 Super Star |
File:NSMB2 Invincible Mario Artwork.png Invincible Mario |
 Invincible Luigi |
 Invincible Peach |
When Mario collects a Super Star, he becomes invincible and can run faster for a short time and can defeat almost any enemy he touches. In multiplayer mode, players can also share the power with any teammates they touch. |
 Invincible Toad |
 Invincible Rosalina | |||
 Invincibility Leaf |
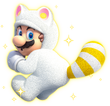 White Tanooki Mario |
 White Kitsune Luigi |
 White Tanooki Peach |
When the player dies more than five times in a level, an Assist Block appears, containing an Invincibility Leaf. When it is collected, Mario turns into White Tanooki Mario, which functions exactly like Tanooki Mario, but with the added feature of being permanently invincible for one level only. If this leaf is collected, the stars on the player's save file do not sparkle. |
 White Tanooki Toad |
 White Tanooki Rosalina | |||
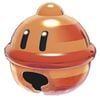 Lucky Bell |
 Lucky Cat Mario |
 Lucky Cat Luigi |
 Lucky Cat Peach |
The Lucky Bell is a bronze bell that also transforms Mario into Cat Mario, with the same abilities the Super Bell grants. However, he can also turn into an invincible golden statue called Lucky Cat Mario when ground-pounding. This allows him to collect coins while falling and defeat most enemies that cannot otherwise be defeated. It begins appearing in World Mushroom. |
 Lucky Cat Toad |
Lucky Cat Rosalina | |||
Objects
Objects are interactable elements of the environment that cannot be collected or worn by Mario. For objects that primarily function as obstructions or hazards, see above.
| Name | Description | |
|---|---|---|
| Trigger objects | ||
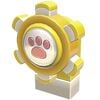 Cat Wheel |
Cat Wheels are wheels that spin when attacked by Cat Mario. They usually raise platforms or reveal secret areas. | |
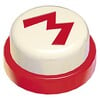 Character Switch |
Character Switches are switches that can only be activated by the character depicted on them. They reveal stamps, Green Stars, and coins. | |
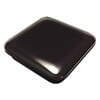 Color Panel |
Color Panels are found in bonus areas and light up when stepped on. When the player steps on all panels in an area, a Green Star appears. | |
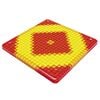 Dash Panel |
Dash Panels are pads that, when walked on, make the player travel at fast speeds for a short time. | |
| File:Nocoverart.png Gold P Switch[1] |
TBW | |
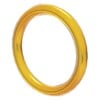 Gold Ring |
Gold Rings are mostly found in Plessie levels and grant the player three coins when passed through. | |
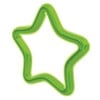 Green Star Ring |
When a Green Star Ring is passed through, Green Coins appear. | |
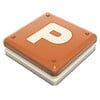 P Panel |
P Panels are orange panels that, when a group of them are all pressed simultaneously, release a Green Star or coins. | |
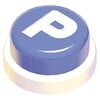 P Switch |
P Switches are switches that release balls in bonus areas or reveal blue coins. | |
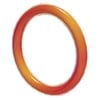 Red Ring |
Switch Panels change colors when stepped on. When all panels in an area are changed to yellow, a path opens or a Green Star appears. | |
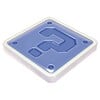 Switch Panel |
Switch Panels change colors when stepped on. When all panels in an area are changed to yellow, a path opens or a Green Star appears. | |
| File:Nocoverart.png Torch |
Can be lit using Fire form. It can trigger events like releasing a Green Star. | |
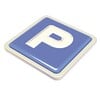 Trample Switch |
TBW | |
| Climbable objects | ||
Chain-Link |
Chain-Links are moving fence-like walls that the player can climb in Cat form. | |
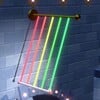 Trapeze |
Trapezes can be used to swing characters to distant areas. They first appear in Tricky Trapeze Theater. | |
 Tree |
Tall plants the player can cling on by jumping onto it. The player can ascend, descend, and change which face of the pole he is on by moving | |
| Strikable objects | ||
 Bowser Board |
The board is a wooden cutout of Bowser that can be knocked down when interacted with. | |
| File:Nocoverart.png Cactus |
TBW | |
| File:Nocoverart.png Glowing spot |
TBW | |
 Gong |
Triggers an event like summoning a warp pipe or rotating a wall by tapping the Wii U GamePad. It can also release coins and enemies. | |
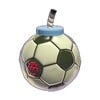 Kick Bomb |
Kick Bombs are bombs that, when kicked, bounce in a parabolic fashion before exploding on impact with a solid object. | |
| File:Nocoverart.png Sand statue[2] |
Scupltures of Goombas and Bowser made of sand. It can be destroyed using a Fire Flower or Cannon Boxes. | |
| Transportation objects | ||
 Clear Pipe |
Clear Pipes are a type of Warp Pipe. The player can enter one to travel from one place to another. | |
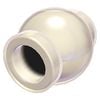 Clear Pipe Cannon |
Clear Pipe Cannons are cannons that automatically send the player through a Clear Pipe. In some circumstances, they may shoot the player to another area instead. | |
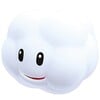 Cloud Cannon |
Cloud Cannons are cannons that automatically launch the player to a Coin Heaven. | |
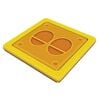 Jump Panel |
Jump Panels are pads that, when the player jumps after standing on them, launch them higher than normal. | |
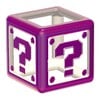 Mystery Box |
Mystery Boxes are Warp Boxes that warp the player to a bonus area. | |
 Pipe |
When entered, Warp Pipes teleport the player to another area of a level. | |
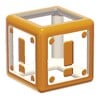 Warp Box |
When entered, Warp Boxes teleport the player to another area of a level. Certain Warp Boxes only become accessible once the player has collected five Key Coins. | |
 World Warp Pipe |
TBW | |
| Blocks and containers | ||
 ? Block |
? Blocks contain power-ups or coins, which are released when the block is hit or ground-pounded. | |
| File:Nocoverart.png ? Block tower[3] |
TBW | |
 Assist Block |
Assist Blocks contain the Invincibility Leaf. They appear after the player loses several lives in a course. | |
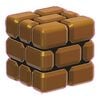 Big Block |
Big Blocks are larger variations of Brick Blocks. They must be hit five times to be destroyed. | |
 Brick Block |
Brick Blocks are blocks that the player can destroy. They are usually empty, but may contain items. | |
| File:Nocoverart.png Coin Block |
TBW | |
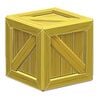 Crate |
Crates are wooden boxes that act as obstacles. | |
 Crystal Block |
Dark purple crystal blocks that move left to right. | |
 Empty Block |
A block that cannot be broken. When a ? Block is hit, it turns into an Empty Block. | |
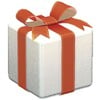 Gift Box |
Gift Boxes are blocks found exclusively in Toad Houses that, when hit, provide power-ups to players. | |
 Long ? Block |
A three-block-wide ? Block that holds three coins or two coins and a power-up. | |
 Red POW Block |
A red variant of POW Blocks that cause a shockwave that defeats all enemies and breaks all blocks within range of the effect. | |
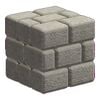 Rock Block |
Rock Blocks are gray Big Blocks that are more difficult to destroy. | |
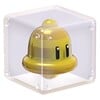 Roulette Block |
Roulette Blocks scroll items in a roulette and release the item that was onscreen when the block was hit. | |
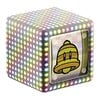 Slot Block |
Constantly scrolling images of five power-ups (the Double Cherry, Fire Flower, Boomerang Flower, Super Leaf, and Super Bell), which characters stop by hitting them. | |
| File:Nocoverart.png Super POW Block |
TBW | |
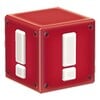 Switch Block |
Switch Blocks change the direction of or reveal new Switchboard paths. | |
| Platforms | ||
 Arrow platform |
Platforms with arrows that rise from lava and then sink back down after a short time. | |
 Beep Block |
Beep Blocks are platforms that appear and disappear at a time interval. The player must jump at the correct time to avoid falling. | |
 Cloud Lift |
Cloud Lifts are moving platforms that can be jumped through. | |
| File:Nocoverart.png Conveyor Belt |
Platforms that carry Mario from another place to another without him moving. The speed and direction varies depending on the time Mario enters the course. | |
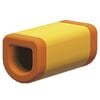 Donut Block |
Donut Blocks are platforms that slowly fall when stepped on. | |
| File:Nocoverart.png Invisible walkway[4] |
Blue platforms that are invisible. It becomes visible around the player, but the view of the paths expand on impact by Cat Bullet Bills, Thwomps, or Ground Pounds. Found in Footlight Lane. | |
| File:Nocoverart.png Lift |
Lifts are platforms that rise and fall. They are used to reach locations at a higher elevation. Lifts bear different designs and movement patterns depending on the course. Some look like carnival ziplines, and at least one resembles a spirited couch. | |
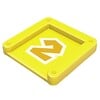 Multi-Vator |
Multi-Vators are Lifts that are activated when stood on by a certain number of characters. | |
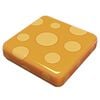 Mushroom Trampoline |
Mushroom Trampolines are bouncy platforms with a mushroom appearance. | |
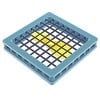 Propeller Platform |
Propeller Platforms are Lifts that, when the player blows into the mic, follow a predetermined path before returning to their starting point. These objects are replaced by Lifts in the Nintendo Switch port of the game due to the system's lack of a mic. | |
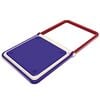 Red-Blue Panel |
Red-Blue Panels are tiles that flip when the player jumps. | |
 Rising pillar |
Stone pillars that rises once the player scratches a Cat Wheel. Some rise and lower back down on its own. The player can also climb them in Cat form. | |
 Rotating Panel |
Rotating Panels are tiles that continuously flip over, alternating between red and blue. | |
 Seesaw |
A long platform that tilt left or right depending on where the player walks. | |
| File:Nocoverart.png Swing |
Hanging platforms that sway from side to side indefinitely. (In Mystery House Dash, Spike's Lost City, and Mystery House Marathon.) | |
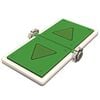 Switchboard |
Switchboards are platforms that move in the direction of the arrow the player stands on. | |
 Tank |
Heavily armed land vehicles that move slowly. Some are equipped with Spike Traps and Cannons. | |
 Touchstone |
Touchstones are platforms that change position when touched on the Wii U GamePad. | |
 Train |
TBW | |
 Turning Floor |
Continually moving platforms that turn clockwise or counterclockwise, moving anything on them. | |
| Other objects | ||
| File:Nocoverart.png Arrow Sign |
Directs the player one direction. | |
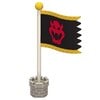 Big Goal Pole |
TBW | |
 Binoculars |
Binoculars held by Sprixies can be used to scope out certain parts of a level. | |
| File:Nocoverart.png Bowser Statue |
A statue of Bowser that blocks new levels until the player has a certain amount of Green Stars to break them. | |
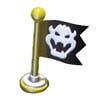 Checkpoint Flag |
Checkpoint Flags appear midway through a level and save the player's progress, allowing them to restart from the flag if they lose a life. | |
| File:Nocoverart.png Flower / Bush |
TBW | |
| File:Nocoverart.png Fluff |
TBW | |
Goal Pole |
Goal Poles are flagpoles found at the end of every level. Touching one completes the level. | |
 Goal Pole (flying) |
A Goal Pole that flies away when the player approaches one. | |
 Illusion |
Manifestations of objects and items that turn into several Boos once the player touches one. | |
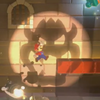 Searchlight |
Activates obstacles when the player stands in it. | |
 Sliding door |
Doors that can be opened by tapping the Wii U GamePad. | |
| Image | Description |
|---|---|
| Trigger objects | |
| File:Nocoverart.png Green Star ball |
A ball with green stars that is required to activate a P Panel for a Green Star to appear. |
| Blocks | |
| File:Nocoverart.png Mega ? Block |
Mega ? Blocks are larger variations of ? Blocks. When hit, multiple giant Empty Blocks extend out of it, allowing the player to reach otherwise unreachable areas. |
| File:Nocoverart.png Big Empty Block |
Giant variants of Empty Blocks. When a Mega ? Block is hit, it turns into multiple big Empty Blocks which serve as platforms. |
 Falling block |
Large red and yellow blocks that gradually fall once stepped on. |
| Platforms | |
 Rolling block |
A long cylindrical platform that, when stood on, roll over. Some roll on tracks where the player must run along them or jump carefully to avoid falling off until they reach their destination on a set path. |
| File:Nocoverart.png Rolling circle maze |
A maze that rolls when the player walks, depending on which direction. |
| File:Nocoverart.png Rotating dial |
A big circle on a wall that continuously spins in one direction. It can be climbed in Cat form to ride it. |
| File:Nocoverart.png Spinning floor |
Continually moving platforms that spin clockwise or counterclockwise, moving anything on them. |
| File:Nocoverart.png Three quarter platform |
Platforms shaped in three quarter circles that turn clockwise or counterclockwise in a 90 degree axis. |
| Climbable objects | |
| Transportation objects | |
| File:Nocoverart.png Warp Door |
Doors that take the player to another portion of the level. |
Luigi sightings
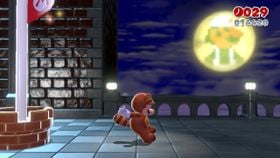
- Main article: List of Luigi sightings in Super Mario 3D World
Like with New Super Luigi U, Super Mario 3D World commemorates the Year of Luigi by featuring 8-bit Luigi sprites hidden in various parts of the game. However, they are not just restricted to levels, with some appearing in the worlds and elsewhere.