Time Trial (Mario Kart Tour): Difference between revisions
From the Super Mario Wiki, the Mario encyclopedia
Jump to navigationJump to search
mNo edit summary |
No edit summary |
||
| Line 47: | Line 47: | ||
{{!-}} | {{!-}} | ||
{{!}}[[File:MKT Tour85 FunkyKongCupChallenge.png|200px]] | {{!}}[[File:MKT Tour85 FunkyKongCupChallenge.png|200px]] | ||
{{!}}{{#ifeq:{{PAGENAME}}|Time Trial (Mario Kart Tour)|[[Vancouver Velocity|Vancouver Velocity 3]]|Regular}} | {{!}}{{#ifeq:{{PAGENAME}}|Time Trial (Mario Kart Tour)|[[Tour Vancouver Velocity|Vancouver Velocity 3]]|Regular}} | ||
{{!}}[[File:MKT Icon RedKoopaFreerunning.png|50px]]<br>[[Roving Racers|Red Koopa (Freerunning)]] | {{!}}[[File:MKT Icon RedKoopaFreerunning.png|50px]]<br>[[Roving Racers|Red Koopa (Freerunning)]] | ||
{{!}}[[File:MKT Icon PipeFrameRed.png|50px]]<br>[[Pipe Frame]] | {{!}}[[File:MKT Icon PipeFrameRed.png|50px]]<br>[[Pipe Frame]] | ||
| Line 60: | Line 60: | ||
{{!-}} | {{!-}} | ||
{{!}}[[File:MKT Tour82 HammerBroCupChallenge.png|200px]] | {{!}}[[File:MKT Tour82 HammerBroCupChallenge.png|200px]] | ||
{{!}}{{#ifeq:{{PAGENAME}}|Time Trial (Mario Kart Tour)|[[Los Angeles Laps|Los Angeles Laps 2]]|Regular}} | {{!}}{{#ifeq:{{PAGENAME}}|Time Trial (Mario Kart Tour)|[[Tour Los Angeles Laps|Los Angeles Laps 2]]|Regular}} | ||
{{!}}[[File:MKT Icon ToadPitCrew.png|50px]]<br>[[Toad (species)|Toad (Pit Crew)]] | {{!}}[[File:MKT Icon ToadPitCrew.png|50px]]<br>[[Toad (species)|Toad (Pit Crew)]] | ||
{{!}}[[File:MKT Icon PipeFrameBlue.png|50px]]<br>[[Pipe Frame]] | {{!}}[[File:MKT Icon PipeFrameBlue.png|50px]]<br>[[Pipe Frame]] | ||
| Line 73: | Line 73: | ||
{{!-}} | {{!-}} | ||
{{!}}[[File:MKT Tour82 NabbitCupChallenge.png|200px]] | {{!}}[[File:MKT Tour82 NabbitCupChallenge.png|200px]] | ||
{{!}}{{#ifeq:{{PAGENAME}}|Time Trial (Mario Kart Tour)|[[Los Angeles Laps|Los Angeles Laps 3]]|Regular}} | {{!}}{{#ifeq:{{PAGENAME}}|Time Trial (Mario Kart Tour)|[[Tour Los Angeles Laps|Los Angeles Laps 3]]|Regular}} | ||
{{!}}[[File:MKT Icon ShyGuy.png|50px]]<br>[[Shy Guy]] | {{!}}[[File:MKT Icon ShyGuy.png|50px]]<br>[[Shy Guy]] | ||
{{!}}[[File:MKT Icon PipeFrameGray.png|50px]]<br>[[Pipe Frame]] | {{!}}[[File:MKT Icon PipeFrameGray.png|50px]]<br>[[Pipe Frame]] | ||
| Line 161: | Line 161: | ||
{{!-}} | {{!-}} | ||
{{!}}[[File:MKT Tour88 ToadetteCupChallenge.png|200px]] | {{!}}[[File:MKT Tour88 ToadetteCupChallenge.png|200px]] | ||
{{!}}{{#ifeq:{{PAGENAME}}|Time Trial (Mario Kart Tour)|[[Singapore Speedway|Singapore Speedway R]]|R}} | {{!}}{{#ifeq:{{PAGENAME}}|Time Trial (Mario Kart Tour)|[[Tour Singapore Speedway|Singapore Speedway R]]|R}} | ||
{{!}}[[File:MKT Icon Waluigi.png|50px]]<br>[[Waluigi]] | {{!}}[[File:MKT Icon Waluigi.png|50px]]<br>[[Waluigi]] | ||
{{!}}[[File:MKT Icon PipeFrameIndigo.png|50px]]<br>[[Pipe Frame]] | {{!}}[[File:MKT Icon PipeFrameIndigo.png|50px]]<br>[[Pipe Frame]] | ||
| Line 249: | Line 249: | ||
{{!}}[[Exploration Tour (2023)]] | {{!}}[[Exploration Tour (2023)]] | ||
{{!}}[[File:MKT Icon Mario Cup.png|50px]]<br>[[Mario Cup]]}}</onlyinclude> | {{!}}[[File:MKT Icon Mario Cup.png|50px]]<br>[[Mario Cup]]}}</onlyinclude> | ||
<onlyinclude>{{#ifeq:{{{transcludesection|Time Trial Piranha Plant Cove 2R}}}|Time Trial Piranha Plant Cove 2R| | |||
{{!-}} | |||
{{!}}[[File:MKT Tour100 IggyCupChallenge.png|200px]] | |||
{{!}}{{#ifeq:{{PAGENAME}}|Time Trial (Mario Kart Tour)|[[Piranha Plant Cove|Piranha Plant Cove 2R]]|R}} | |||
{{!}}[[File:MKT Icon PinkShyGuy.png|50px]]<br>[[Shy Guy|Pink Shy Guy]] | |||
{{!}}[[File:MKT Icon PipeFramePink.png|50px]]<br>[[Pipe Frame]] | |||
{{!}}[[File:MKT Icon SuperGliderPink.png|50px]]<br>[[Super Glider]] | |||
{{!}} | |||
*2:00.00 | |||
*1:55.00 | |||
*1:50.00 | |||
{{!}}[[Pipe Tour]] | |||
{{!}}[[File:MKT Icon Iggy Cup.png|50px]]<br>[[Iggy Cup]]}}</onlyinclude> | |||
<onlyinclude>{{#ifeq:{{{transcludesection|Time Trial Athens Dash 2}}}|Time Trial Athens Dash 2| | <onlyinclude>{{#ifeq:{{{transcludesection|Time Trial Athens Dash 2}}}|Time Trial Athens Dash 2| | ||
{{!-}} | {{!-}} | ||
{{!}}[[File:MKT Tour94 PeachetteCupChallenge.png|200px]] | {{!}}[[File:MKT Tour94 PeachetteCupChallenge.png|200px]] | ||
{{!}}{{#ifeq:{{PAGENAME}}|Time Trial (Mario Kart Tour)|[[Athens Dash|Athens Dash 2]]|}} | {{!}}{{#ifeq:{{PAGENAME}}|Time Trial (Mario Kart Tour)|[[Tour Athens Dash|Athens Dash 2]]|Regular}} | ||
{{!}}[[File:MKT Icon HammerBro.png|50px]]<br>[[Hammer Bro]] | {{!}}[[File:MKT Icon HammerBro.png|50px]]<br>[[Hammer Bro]] | ||
{{!}}[[File:MKT Icon PipeFrameGreen.png|50px]]<br>[[Pipe Frame]] | {{!}}[[File:MKT Icon PipeFrameGreen.png|50px]]<br>[[Pipe Frame]] | ||
| Line 1,912: | Line 1,925: | ||
{{!}}[[Mii Tour (2023)]] | {{!}}[[Mii Tour (2023)]] | ||
{{!}}[[File:MKT Icon Baby Luigi Cup.png|50px]]<br>[[Baby Luigi Cup]]}}</onlyinclude> | {{!}}[[File:MKT Icon Baby Luigi Cup.png|50px]]<br>[[Baby Luigi Cup]]}}</onlyinclude> | ||
<onlyinclude>{{#ifeq:{{{transcludesection|Time Trial Wii Dry Dry Ruins}}}|Time Trial Wii Dry Dry Ruins| | |||
{{!-}} | |||
{{!}}[[File:MKT Tour100 MiiCupChallenge.png|200px]] | |||
{{!}}{{#ifeq:{{PAGENAME}}|Time Trial (Mario Kart Tour)|[[Wii Dry Dry Ruins|Dry Dry Ruins]]|Regular}} | |||
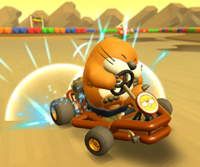
{{!}}[[File:MKT Icon MontyMole.png|50px]]<br>[[Monty Mole]] | |||
{{!}}[[File:MKT Icon PipeFrameBrown.png|50px]]<br>[[Pipe Frame]] | |||
{{!}}[[File:MKT Icon SuperGliderBrown.png|50px]]<br>[[Super Glider]] | |||
{{!}} | |||
*2:00.00 | |||
*1:50.00 | |||
*1:40.00 | |||
{{!}}[[Pipe Tour]] | |||
{{!}}[[File:MKT Icon Mii Cup.png|50px]]<br>[[Mii Cup]]}}</onlyinclude> | |||
<onlyinclude>{{#ifeq:{{{transcludesection|Time Trial Wii Rainbow Road}}}|Time Trial Wii Rainbow Road| | <onlyinclude>{{#ifeq:{{{transcludesection|Time Trial Wii Rainbow Road}}}|Time Trial Wii Rainbow Road| | ||
{{!-}} | {{!-}} | ||
Revision as of 14:40, July 13, 2023
Template:Quote2 Time Trial is a type of bonus challenge in Mario Kart Tour introduced in the 2019 Halloween Tour. The object in Time Trial bonus challenges is to finish a two-lap race (one-lap for 3DS Rainbow Road and Tokyo Blur 4) within a certain amount of time. Much like in the Time Trial mode featured in other Mario Kart titles, these bonus challenges feature no CPUs or Item Boxes, and the player starts with two Mushrooms in their reserve. In Team Rally tours starting from the Peach vs. Daisy Tour, it appears as the last bonus challenge (except for the two Peach vs. Bowser Tours and the 2023 Mario vs. Luigi Tour).
The following is a list of Time Trial bonus challenges by course.
New courses
Remix courses
SNES courses
N64 courses
GBA courses
GCN courses
| Icon | Course | Chosen driver |
Chosen kart |
Chosen glider |
Grand Star times | Tour appearances | Cup |
|---|---|---|---|---|---|---|---|
|
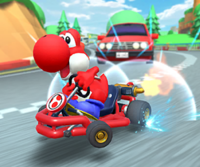
Mushroom Bridge | Red Yoshi |
Pipe Frame |
Super Glider |
|
Mii Tour (2023) | Cat Peach Cup |
|
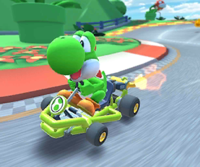
Yoshi Circuit | Yoshi |
Pipe Frame |
Super Glider |
|
London Tour | Peachette Cup |
|
Sydney Tour (September 2021) | Luigi Cup | |||||
|
Yoshi Tour (2023) | Yoshi Cup | |||||
|
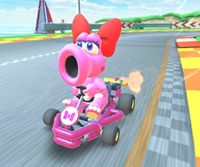
Yoshi Circuit R | Birdo |
Pipe Frame |
Super Glider |
|
Hammer Bro Tour | Peachette Cup |
|
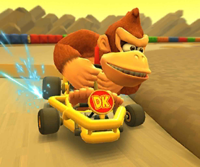
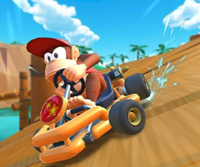
Dino Dino Jungle | Diddy Kong |
Pipe Frame |
Super Glider |
|
Halloween Tour (2019) | Mario Cup |
|
Exploration Tour (2020) | Larry Cup | |||||
|
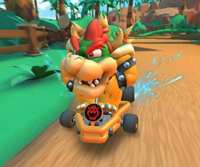
Dino Dino Jungle R | Bowser |
Pipe Frame |
Super Glider |
|
Ice Tour | Bowser Cup |
|
Halloween Tour (2021) | Lemmy Cup |
DS courses
Wii courses
3DS courses
In-game information
- Tap and hold the screen when the countdown reaches 2, release at GO for a Rocket Start!
Names in other languages
| Language | Name | Meaning | Notes |
|---|---|---|---|
| Chinese (simplified) | 计时赛[?] Jìshí Sài |
Time Trial | |
| Chinese (traditional) | 計時賽[?] Jìshí Sài |
Time Trial | |
| German | Zeitfahren[?] | Time Trial | |
| Italian | Prove a tempo[?] | Time Trials | |
| Korean | 타임 어택[?] Taim Eotaeg |
Time Attack | |
| Portuguese | Contrarrelógio[?] | Time Trial | |
| Spanish | Contrarreloj[?] | Time Trial |
See also
- Ready, Set, Rocket Start
- Ring Race
- Do Jump Boosts
- Big Reverse Race
- Goomba Takedown
- Glider Challenge
- Steer Clear of Obstacles
- Break Item Boxes
- Smash Small Dry Bones
- Vs. Mega
- Combo Attack
- Take them out quick!
- Snap a Photo
- Precision Gliding
