User:RHG1951: Difference between revisions
From the Super Mario Wiki, the Mario encyclopedia
Jump to navigationJump to search
No edit summary |
(New Locations table for the Sticker Star page soon) |
||
| Line 18: | Line 18: | ||
*Take images of the [[Super Mario Chess]] pieces | *Take images of the [[Super Mario Chess]] pieces | ||
*Find the elusive "[[Toadsworth]] is [[Peach]]'s father" citation | *Find the elusive "[[Toadsworth]] is [[Peach]]'s father" citation | ||
==the map== | |||
Unlike previous installments, the game's locations function much like a level progression system. Each level course is unlocked after collecting a Comet Piece in the preceding area. The map is reminiscent of the one used in ''[[Super Mario RPG: Legend of the Seven Stars]]'', though it is more open-ended and not linear. Players are not required to finish the levels in numerical order. Many levels contain alternate exits that lead to other levels, and the goal of entering a level is not always to "finish" it by touching the Comet Stickers. | |||
{|align="center" cellpadding=2 cellspacing=2 style="padding: 2px; background-color: #f9f9f9; border:1px solid lightgray; color:black; text-align:center;" width=100% | |||
!width="300px"|Image | |||
!width="12%"|Level | |||
!width="35%"|Description | |||
!width="15%"|Things found | |||
!width="20%"|Connects to | |||
|- | |||
!colspan=6 style="background:lightgray"|Main World | |||
|-style="background:lightgray" | |||
|[[File:DecalburgPMSS.png|200px]] | |||
|'''[[Decalburg]]''' | |||
|The only town within the game. After Bowser breaks the Sticker Comet, Mario must help the Toads to unroll the main plaza. Many services are found here, including a sticker shop, the Sticker Museum, and a Sling-a-Thing. | |||
|None | |||
|[[Warm Fuzzy Plains]]<br>[[Drybake Desert]]<br>[[Leaflitter Path]]<br>[[Surfshine Harbor]] | |||
|--style="background:lightgray" | |||
|[[File:HarbourBoat.png|200px]] | |||
|'''[[Surfshine Harbor]]''' | |||
|A harbor with nearby warehouses. To gain access to the rest of the worlds, Mario must help a Toad who has problems with his ship and defeat a [[Big Cheep Cheep]] in the harbor's waters. | |||
|[[Vacuum]] | |||
|[[Decalburg]]<br>[[Snow Rise]]<br>[[Shy Guy Jungle]]<br>[[Gate Cliff]] | |||
|- | |||
!colspan=6 style="background:lightgreen"|[[World 1 (Paper Mario: Sticker Star)|World 1]] | |||
|-style="background:lightgreen" | |||
|[[File:PMSS03.png|200px]] | |||
|'''1-1: [[Warm Fuzzy Plains]]''' | |||
|A typical grassland area. Mario first learns of Things, Scraps, paperization, and Comet Pieces during this level. Bowser Jr. is first fought here. | |||
|[[Scissors]]<br>[[Thumbtack]] | |||
|[[Decalburg]]<br>[[Bouquet Gardens]] | |||
|-style="background:lightgreen" | |||
|[[File:PM3DS21.png|200px]] | |||
|'''1-2: [[Bouquet Gardens]]''' | |||
|A region filled with flowers. To progress, Mario has to collect the Fan to stop its breeze. He can also restore a [[Toad (species)|Toad]]'s flower garden by sticking flower stickers and rescue the traveling Toad. Near the end, he is ambushed by five Goombas, prompting Kersti to introduce the Battle Spinner. | |||
|[[Fan]]<br>[[Cat-o-Luck]] | |||
|[[Warm Fuzzy Plains]]<br>[[Water's Edge Way]] | |||
|-style="background:lightgreen" | |||
|[[File:PM3DS25.png|200px]] | |||
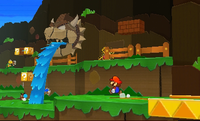
|'''1-3: [[Water's Edge Way]]'''* | |||
|with waterfalls and rivers. Kamek battles Mario uses his magic to turn the Comet Piece into a Scrap, forcing him to search for it. Along the way, Mario stops a cardboard Bowser from pumping water. | |||
|[[Faucet]]<br>[[Bed]] | |||
|[[Bouquet Gardens]]<br>[[Hither Thither Hill]]<br>[[Whammino Mountain]] | |||
|-style="background:lightgreen" | |||
|[[File:PMSS-Hither Shot1.png|200px]] | |||
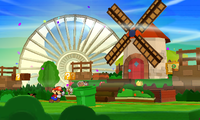
|'''1-4: [[Hither Thither Hill]]''' | |||
|An area with a significant underground portion. Mario must use the Fan to gain access inside the windmill. Before he can collect the Comet Piece, Mario has to battle a [[Big Buzzy Beetle]]. | |||
|[[Matches]] | |||
|[[Water's Edge Way]]<br>[[Goomba Fortress]] | |||
|-style="background:lightgreen" | |||
|[[File:Pmssguide44.png|200px]] | |||
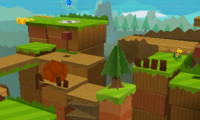
|'''1-5: [[Whammino Mountain]]''' | |||
|A mountainous area which has a sticker shop. Mario can cause a chain reaction which reveals a trapped Toad and allows him to get the White Gate Scrap. | |||
|[[Bellows]] | |||
|[[Water's Edge Way]]<br>[[Goomba Fortress]] | |||
|-style="background:lightgreen" | |||
|[[File:Pmssguide33.png|200px]] | |||
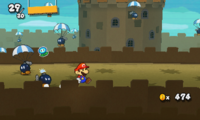
|'''1-6: [[Goomba Fortress]]''' | |||
|A fortress which barrages Mario with [[Bob-ombs]], wind vents, and turning floors. At the top of a tower, he battles the [[Megasparkle Goomba]]. | |||
|[[Trumpet]]<br>[[Squirt Gun]] | |||
|[[Hither Thither Hill]]<br>[[Whammino Mountain]] | |||
|- | |||
!colspan=6 style="background:lightyellow"|[[World 2 (Paper Mario: Sticker Star)|World 2]] | |||
|-style="background:lightyellow" | |||
|[[File:DrybakePMSS.png|200px]] | |||
|'''2-1: [[Drybake Desert]]''' | |||
|pyramid | |||
|[[Soda]]<br>[[Car Battery]] | |||
|[[Yoshi Sphinx]]<br>[[Damp Oasis]] | |||
|-style="background:lightyellow" | |||
|[[File:YoshisphinxPMSS.png|200px]] | |||
|'''2-2: [[Yoshi Sphinx]]''' | |||
|da yosh | |||
|[[Lightbulb]]<br>[[Paper Fan]] | |||
|[[Drybake Desert]]<br>[[Damp Oasis]] | |||
|-style="background:lightyellow" | |||
|[[File:Sandshifterruins.png|200px]] | |||
|'''2-3: [[Sandshifter Ruins]]''' | |||
|uhhhh | |||
|[[Bat (Thing)|Bat]]<br>[[Jackhammer]]<br>[[Magnifying Glass (Paper Mario: Sticker Star)|Magnifying Glass]]<br>[[Lighter]] | |||
|[[Damp Oasis]]<br>[[Drybake Stadium]] | |||
|-style="background:lightyellow" | |||
|[[File:DampOasis.png|200px]] | |||
|'''2-4: [[Damp Oasis]]''' | |||
|water | |||
|[[Shaved Ice]]<br>[[Hair Shears]] | |||
|[[Drybake Desert]]<br>[[Sandshifter Ruins]] | |||
|-style="background:lightyellow" | |||
|[[File:DrybakeStadium.png|200px]] | |||
|'''2-5: [[Drybake Stadium]]''' | |||
|baseball | |||
|None | |||
|[[Sandshifter Ruins]] | |||
|- | |||
!colspan=6 style="background:plum"|[[World 3 (Paper Mario: Sticker Star)|World 3]] | |||
|-style="background:plum" | |||
|[[File:PMSS-Wiggler Shot.png|200px]] | |||
|'''3-1: [[Leaflitter Path]]''' | |||
|hello wiggler | |||
|[[Searchlight]] | |||
|[[Decalburg]]<br>[[The Bafflewood]] | |||
|-style="background:plum" | |||
|[[File:TheBafflewood.png|200px]] | |||
|'''3-2: [[The Bafflewood]]''' | |||
|Similar to [[Forever Forest]], the Bafflewood acts like a maze that brings Mario to the beginning if he goes down an incorrect path. He later must find a Wiggler Segment here. | |||
|[[Bowling Ball]]<br>[[Trophy (Thing)|Trophy]]<br>[[Violin (Thing)|Violin]] | |||
|[[Leaflitter Path]]<br>[[Wiggler's Tree House]]<br>[[Loop Loop River]]<br>[[Tree Branch Trail]] | |||
|-style="background:plum" | |||
|[[File:WigglersTreeHouse.png|200px]] | |||
|'''3-3: [[Wiggler's Tree House]]'''** | |||
|home | |||
|[[High Heel]]<br>[[Boom Box (Thing)|Boom Box]] | |||
|[[The Bafflewood]]<br>[[Strike Lake]]<br>[[Rustle Burrow]]<br>[[Gauntlet Pond]] | |||
|-style="background:plum" | |||
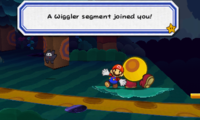
|[[File:FirstSegmentJoins.png|200px]] | |||
|'''3-4: [[Strike Lake]]'''* | |||
|bowling | |||
|[[Billiard Ball]]<br>[[Bowling Ball]]<br>[[Drum (Thing)|Drum]] | |||
|[[Wiggler's Tree House]]<br>[[Loop Loop River]]<br>[[Holey Thicket]] | |||
|-style="background:plum" | |||
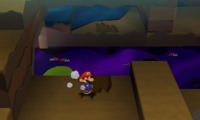
|[[File:LoopLoopRiver.png|200px]] | |||
|'''3-5: [[Loop Loop River]]'''* | |||
|circle | |||
|[[Pillow]] | |||
|[[The Bafflewood]]<br>[[Strike Lake]]<br>[[Outlook Point]] | |||
|-style="background:plum" | |||
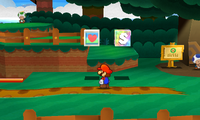
|[[File:OutlookpointPMSS.png|200px]] | |||
|'''3-6: [[Outlook Point]]''' | |||
|A location on the edge of the forest which contains a sticker shop and a Sling-a-Thing. Before Mario beats Gooper Blooper, poison can be seen emanating from a shipwreck in the distance. | |||
|[[Fishhook]] | |||
|[[Loop Loop River]] | |||
|-style="background:plum" | |||
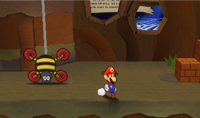
|[[File:RustleBurrow.png|200px]] | |||
|'''3-7: [[Rustle Burrow]]''' | |||
|A mostly underground level which mainly features [[Scuttlebug]]s. The first time Mario enters the level, he falls down a giant hole, losing his stickers, hammer, and Kersti. | |||
|[[Upright Vacuum]] | |||
|[[Wiggler's Tree House]]<br>[[Tree Branch Trail]]<br>[[Stump Glade]] | |||
|-style="background:plum" | |||
|[[File:TreeBranchTrail.png|200px]] | |||
|'''3-8: [[Tree Branch Trail]]''' | |||
|uh | |||
|[[Watch Battery]]<br>[[Tape (Thing)|Tape]] | |||
|[[The Bafflewood]]<br>[[Rustle Burrow]] | |||
|-style="background:plum" | |||
|[[File:GaunletPond.png|200px]] | |||
|'''3-9: [[Gauntlet Pond]]''' | |||
| | |||
|[[Sponge (Thing)|Sponge]] | |||
|[[Wiggler's Tree House]]<br>[[Stump Glade]]<br>[[Holey Thicket]] | |||
|-style="background:plum" | |||
|[[File:Snifit or Whiffit.png|200px]] | |||
|'''3-10: [[Stump Glade]]''' | |||
|''[[Snifit or Whiffit]]'' | |||
|[[Radiator]]<br>[[Square Can]] | |||
|[[Rustle Burrow]]<br>[[Gauntlet Pond]] | |||
|-style="background:plum" | |||
|[[File:HoleyThicket.png|200px]] | |||
|'''3-11: [[Holey Thicket]]'''* | |||
| | |||
|[[Balloon (Thing)|Balloon]] | |||
|[[Strike Lake]]<br>[[Gauntlet Pond]]<br>[[Whitecap Beach]] | |||
|-style="background:plum" | |||
|[[File:Whitecap beach shipwreck.png|200px]] | |||
|'''3-12: [[Whitecap Beach]]''' | |||
|The location of [[Gooper Blooper]]'s fight. Mario must first reassemble Wiggler before he can progress. | |||
|[[Pocket Watch]]<br>[[Newspaper]] | |||
|[[Holey Thicket]] | |||
|- | |||
!colspan=6 style="background:lightblue"|[[World 4 (Paper Mario: Sticker Star)|World 4]] | |||
|-style="background:lightblue" | |||
|[[File:SnowRise.png|200px]] | |||
|'''4-1: [[Snow Rise]]'''* | |||
|[[Birdo]] gives her performance of "[[Soul Rumblings|Swinging Swing]]" | |||
|[[Goat (Thing)|Goat]]<br>[[Cell Phone]] | |||
|[[Surfshine Harbor]]<br>[[Whiteout Valley]]<br>[[Shy Guy Jungle]]<br>[[Gate Cliff]] | |||
|-style="background:lightblue" | |||
|[[File:PMSS Ice Flow.png|200px]] | |||
|'''4-2: [[Ice Flow]]''' | |||
| | |||
|[[Curling Stone]]<br>[[Cat-o-Luck]]<br>[[Rubber Ducky]]<br>[[Hair Dryer]] | |||
|[[Snow Rise]]<br>[[The Enigmansion]] | |||
|-style="background:lightblue" | |||
|[[File:EnigmansionPMSS.png|200px]] | |||
|'''4-3: [[The Enigmansion]]''' | |||
|A mansion where Mario must seal 100 [[Boo]]s in the [[Book of Sealing]]. | |||
|[[Watering Can]]<br>[[Oven]]<br>[[Refrigerator]]<br>[[Stapler (Thing)|Stapler]]<br>[[Cake (Thing)|Cake]] | |||
|[[Ice Flow]]<br>[[Shaved-Ice Cave]] | |||
|-style="background:lightblue" | |||
|[[File:PMSS4-4.png|200px]] | |||
|'''4-4: [[Shaved-Ice Cave]]''' | |||
|A level which only serves as a sticker shop. Its owner is frozen in ice. | |||
|None | |||
|[[The Enigmansion]] | |||
|-style="background:lightblue" | |||
|[[File:Whiteoutvalley.png|200px]] | |||
|'''4-5: [[Whiteout Valley]]''' | |||
|ski | |||
|[[Flashlight (Thing)|Flashlight]] | |||
|[[Snow Rise]]<br>[[Bowser's Snow Fort]] | |||
|-style="background:lightblue" | |||
|[[File:Bowsersnowfort.png|200px]] | |||
|'''4-6: [[Bowser's Snow Fort]]''' | |||
|rollercoaster | |||
|[[Sewing Scissors]] | |||
|[[Whiteout Valley]] | |||
|- | |||
!colspan=6 style="background:sandybrown"|[[World 5 (Paper Mario: Sticker Star)|World 5]] | |||
|-style="background:sandybrown" | |||
|[[File:ShyGuyJungle.png|200px]] | |||
|'''5-1: [[Shy Guy Jungle]]''' | |||
|wild | |||
|[[Toy Bat]]<br>[[Powder Puff]]<br>[[Tailor Shears]] | |||
|[[Surfshine Harbor]]<br>[[Snow Rise]]<br>[[Jungle Rapids]]<br>[[Long Fall Falls]]<br>[[Gate Cliff]] | |||
|-style="background:sandybrown" | |||
|[[File:JungleRapids.png|200px]] | |||
|'''5-2: [[Jungle Rapids]]''' | |||
|rft | |||
|[[Rubber Ducky]]<br>[[Mini Vacuum]] | |||
|[[Shy Guy Jungle]]<br>[[Long Fall Falls]] | |||
|-style="background:sandybrown" | |||
|[[File:LongFallFalls.png|200px]] | |||
|'''5-3: [[Long Fall Falls]]'''* | |||
|chomp | |||
|[[Luxurious Bed]] | |||
|[[Shy Guy Jungle]]<br>[[Jungle Rapids]]<br>[[Chomp Ruins]] | |||
|-style="background:sandybrown" | |||
|[[File:ChompRuins.png|200px]] | |||
|'''5-4: [[Chomp Ruins]]''' | |||
|bark | |||
|[[Teapot (Paper Mario: Sticker Star)|Teapot]]<br>[[D-Cell Battery]]<br>[[Air Conditioner]] | |||
|[[Long Fall Falls]]<br>[[Rugged Road]] | |||
|-style="background:sandybrown" | |||
|[[File:RuggedRoad.png|200px]] | |||
|'''5-5: [[Rugged Road]]''' | |||
|FIRE | |||
|[[Car Sponge]]<br>[[Turkey]]<br>[[Basin (Thing)|Basin]] | |||
|[[Chomp Ruins]]<br>[[Rumble Volcano]] | |||
|-style="background:sandybrown" | |||
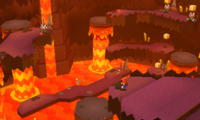
|[[File:Rumblevolcano.png|200px]] | |||
|'''5-6: [[Rumble Volcano]]''' | |||
|pete | |||
|[[Guitar (Thing)|Guitar]] | |||
|[[Rugged Road]] | |||
|- | |||
!colspan=6 style="background:midnightblue"|[[World 6 (Paper Mario: Sticker Star)|<span style="color:white">World 6</span>]] | |||
|-style="background:midnightblue" | |||
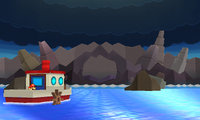
|[[File:Gatecliff.png|200px]] | |||
|<span style="color:white">'''6-1: </span>[[Gate Cliff|<span style="color:white">Gate Cliff</span>]]''' | |||
|{{color|Cliff faces which appears to be a dead end. Once Mario returns with five Royal Stickers, they cause five dots to appear on the cliff. This allows him to paperize and uncover Bowser's castle which then rises into the air.|white}} | |||
|{{color|None|white}} | |||
|{{color-link|Surfshine Harbor|white}}<br>{{color-link|Snow Rise|white}}<br>{{color-link|Shy Guy Jungle|white}}<br>{{color-link|Bowser Jr.'s Flotilla|white}} | |||
|-style="background:midnightblue" | |||
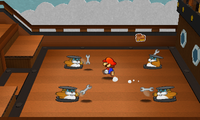
|[[File:JrsFlotilla1.png|200px]] | |||
|<span style="color:white">'''6-2: </span>[[Bowser Jr.'s Flotilla|<span style="color:white">Bowser Jr.'s Flotilla</span>]]''' | |||
|{{color|Bowser Jr.'s {{color-link|airship|white}}. In order to reach it, Mario must receive help from Flutter. Mario must navigate the airship and battle Bowser Jr. for the last time to collect the final Comet Piece.|white}} | |||
|{{color|None|white}} | |||
|{{color-link|Gate Cliff|white}}<br>{{color-link|Bowser's Sky Castle|white}} | |||
|-style="background:midnightblue" | |||
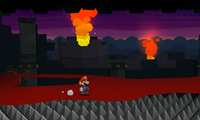
|[[File:BowsersSkyCastle.png|200px]] | |||
|<span style="color:white">'''6-3: </span>[[Bowser's Sky Castle|<span style="color:white">Bowser's Sky Castle</span>]]''' | |||
|{{color|The final level of the game. |white}} | |||
|{{color|None|white}} | |||
|{{color-link|Bowser Jr.'s Flotilla|white}} | |||
|} | |||
(*) = Level with an alternate exit.<br/>(**) = Level with two alternate exits. | |||
==Wario Table== | ==Wario Table== | ||
Revision as of 21:51, October 20, 2021
Hi, I'm RHG1951. You may know me for such classics as:
- Most of the Thing articles
- Taking care of pictures stuck in Category:Quality requested
- De-stubbing NES Remix 2
- Adding most of the commands for Listen to the Doctor!
- Improving Fortune Street
- Adding the flavor text for the WarioWare, Inc.: Mega Party Game$! minigames
- Adding the French translations for the WarioWare Gold microgames
- Adding top quotes on pages
Projects I will get to eventually
- Get Paper Mario: Sticker Star to featured status
- Upload the rest of the music for Fortune Street
- Make the articles for Sticker and Battle Card (Paper Mario: Color Splash)
- Upload images for List of Luigi sightings in NES Remix 2
- Make Sora Sora
- Take images of the Super Mario Chess pieces
- Find the elusive "Toadsworth is Peach's father" citation
the map
Unlike previous installments, the game's locations function much like a level progression system. Each level course is unlocked after collecting a Comet Piece in the preceding area. The map is reminiscent of the one used in Super Mario RPG: Legend of the Seven Stars, though it is more open-ended and not linear. Players are not required to finish the levels in numerical order. Many levels contain alternate exits that lead to other levels, and the goal of entering a level is not always to "finish" it by touching the Comet Stickers.
| Image | Level | Description | Things found | Connects to | |
|---|---|---|---|---|---|
| Main World | |||||
|
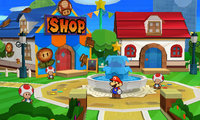
Decalburg | The only town within the game. After Bowser breaks the Sticker Comet, Mario must help the Toads to unroll the main plaza. Many services are found here, including a sticker shop, the Sticker Museum, and a Sling-a-Thing. | None | Warm Fuzzy Plains Drybake Desert Leaflitter Path Surfshine Harbor | |
|
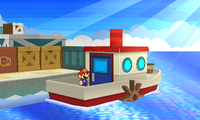
Surfshine Harbor | A harbor with nearby warehouses. To gain access to the rest of the worlds, Mario must help a Toad who has problems with his ship and defeat a Big Cheep Cheep in the harbor's waters. | Vacuum | Decalburg Snow Rise Shy Guy Jungle Gate Cliff | |
| World 1 | |||||
|
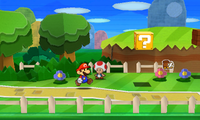
1-1: Warm Fuzzy Plains | A typical grassland area. Mario first learns of Things, Scraps, paperization, and Comet Pieces during this level. Bowser Jr. is first fought here. | Scissors Thumbtack |
Decalburg Bouquet Gardens | |
|
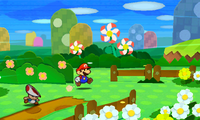
1-2: Bouquet Gardens | A region filled with flowers. To progress, Mario has to collect the Fan to stop its breeze. He can also restore a Toad's flower garden by sticking flower stickers and rescue the traveling Toad. Near the end, he is ambushed by five Goombas, prompting Kersti to introduce the Battle Spinner. | Fan Cat-o-Luck |
Warm Fuzzy Plains Water's Edge Way | |
|
1-3: Water's Edge Way* | with waterfalls and rivers. Kamek battles Mario uses his magic to turn the Comet Piece into a Scrap, forcing him to search for it. Along the way, Mario stops a cardboard Bowser from pumping water. | Faucet Bed |
Bouquet Gardens Hither Thither Hill Whammino Mountain | |
|
1-4: Hither Thither Hill | An area with a significant underground portion. Mario must use the Fan to gain access inside the windmill. Before he can collect the Comet Piece, Mario has to battle a Big Buzzy Beetle. | Matches | Water's Edge Way Goomba Fortress | |
|
1-5: Whammino Mountain | A mountainous area which has a sticker shop. Mario can cause a chain reaction which reveals a trapped Toad and allows him to get the White Gate Scrap. | Bellows | Water's Edge Way Goomba Fortress | |
|
1-6: Goomba Fortress | A fortress which barrages Mario with Bob-ombs, wind vents, and turning floors. At the top of a tower, he battles the Megasparkle Goomba. | Trumpet Squirt Gun |
Hither Thither Hill Whammino Mountain | |
| World 2 | |||||
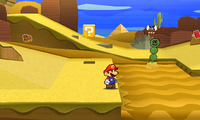
|
2-1: Drybake Desert | pyramid | Soda Car Battery |
Yoshi Sphinx Damp Oasis | |
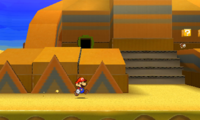
|
2-2: Yoshi Sphinx | da yosh | Lightbulb Paper Fan |
Drybake Desert Damp Oasis | |
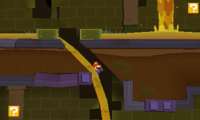
|
2-3: Sandshifter Ruins | uhhhh | Bat Jackhammer Magnifying Glass Lighter |
Damp Oasis Drybake Stadium | |
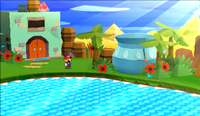
|
2-4: Damp Oasis | water | Shaved Ice Hair Shears |
Drybake Desert Sandshifter Ruins | |
|
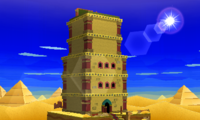
2-5: Drybake Stadium | baseball | None | Sandshifter Ruins | |
| World 3 | |||||
|
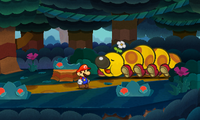
3-1: Leaflitter Path | hello wiggler | Searchlight | Decalburg The Bafflewood | |
|
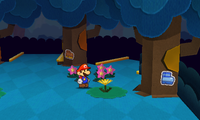
3-2: The Bafflewood | Similar to Forever Forest, the Bafflewood acts like a maze that brings Mario to the beginning if he goes down an incorrect path. He later must find a Wiggler Segment here. | Bowling Ball Trophy Violin |
Leaflitter Path Wiggler's Tree House Loop Loop River Tree Branch Trail | |
|
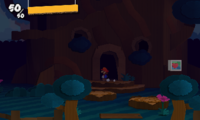
3-3: Wiggler's Tree House** | home | High Heel Boom Box |
The Bafflewood Strike Lake Rustle Burrow Gauntlet Pond | |
|
3-4: Strike Lake* | bowling | Billiard Ball Bowling Ball Drum |
Wiggler's Tree House Loop Loop River Holey Thicket | |
|
3-5: Loop Loop River* | circle | Pillow | The Bafflewood Strike Lake Outlook Point | |
|
3-6: Outlook Point | A location on the edge of the forest which contains a sticker shop and a Sling-a-Thing. Before Mario beats Gooper Blooper, poison can be seen emanating from a shipwreck in the distance. | Fishhook | Loop Loop River | |
|
3-7: Rustle Burrow | A mostly underground level which mainly features Scuttlebugs. The first time Mario enters the level, he falls down a giant hole, losing his stickers, hammer, and Kersti. | Upright Vacuum | Wiggler's Tree House Tree Branch Trail Stump Glade | |
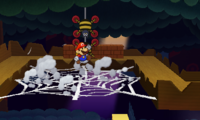
|
3-8: Tree Branch Trail | uh | Watch Battery Tape |
The Bafflewood Rustle Burrow | |
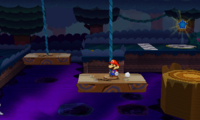
|
3-9: Gauntlet Pond | Sponge | Wiggler's Tree House Stump Glade Holey Thicket | ||
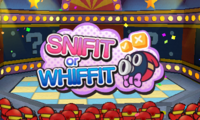
|
3-10: Stump Glade | Snifit or Whiffit | Radiator Square Can |
Rustle Burrow Gauntlet Pond | |
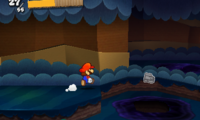
|
3-11: Holey Thicket* | Balloon | Strike Lake Gauntlet Pond Whitecap Beach | ||
|
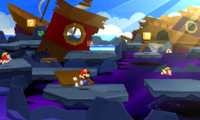
3-12: Whitecap Beach | The location of Gooper Blooper's fight. Mario must first reassemble Wiggler before he can progress. | Pocket Watch Newspaper |
Holey Thicket | |
| World 4 | |||||
|
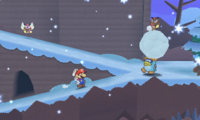
4-1: Snow Rise* | Birdo gives her performance of "Swinging Swing" | Goat Cell Phone |
Surfshine Harbor Whiteout Valley Shy Guy Jungle Gate Cliff | |
|
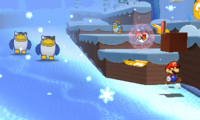
4-2: Ice Flow | Curling Stone Cat-o-Luck Rubber Ducky Hair Dryer |
Snow Rise The Enigmansion | ||
|
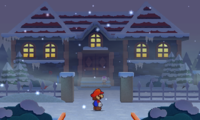
4-3: The Enigmansion | A mansion where Mario must seal 100 Boos in the Book of Sealing. | Watering Can Oven Refrigerator Stapler Cake |
Ice Flow Shaved-Ice Cave | |
|
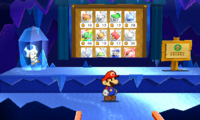
4-4: Shaved-Ice Cave | A level which only serves as a sticker shop. Its owner is frozen in ice. | None | The Enigmansion | |
|
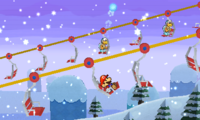
4-5: Whiteout Valley | ski | Flashlight | Snow Rise Bowser's Snow Fort | |
|
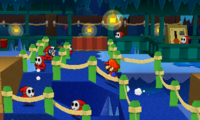
4-6: Bowser's Snow Fort | rollercoaster | Sewing Scissors | Whiteout Valley | |
| World 5 | |||||
|
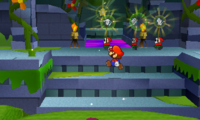
5-1: Shy Guy Jungle | wild | Toy Bat Powder Puff Tailor Shears |
Surfshine Harbor Snow Rise Jungle Rapids Long Fall Falls Gate Cliff | |
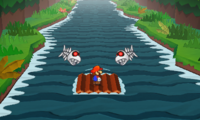
|
5-2: Jungle Rapids | rft | Rubber Ducky Mini Vacuum |
Shy Guy Jungle Long Fall Falls | |
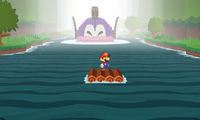
|
5-3: Long Fall Falls* | chomp | Luxurious Bed | Shy Guy Jungle Jungle Rapids Chomp Ruins | |
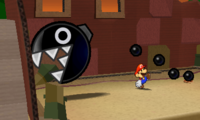
|
5-4: Chomp Ruins | bark | Teapot D-Cell Battery Air Conditioner |
Long Fall Falls Rugged Road | |
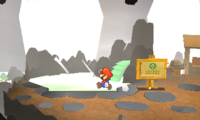
|
5-5: Rugged Road | FIRE | Car Sponge Turkey Basin |
Chomp Ruins Rumble Volcano | |
|
5-6: Rumble Volcano | pete | Guitar | Rugged Road | |
| World 6 | |||||
|
6-1: Gate Cliff | white | white | Template:Color-link Template:Color-link Template:Color-link Template:Color-link | |
|
6-2: Bowser Jr.'s Flotilla | white | white | Template:Color-link Template:Color-link | |
|
6-3: Bowser's Sky Castle | white | white | Template:Color-link | |
(*) = Level with an alternate exit.
(**) = Level with two alternate exits.
Wario Table
| Character | Special ability |
|---|---|
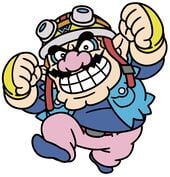 Wario |
"Dashes and hovers with a cool jet pack—oh yeah!" |
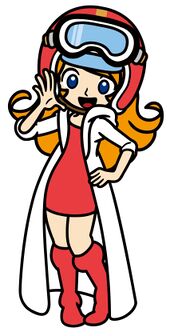 Mona |
"Zooms around on her scooter and throws a boomerang in any direction." |
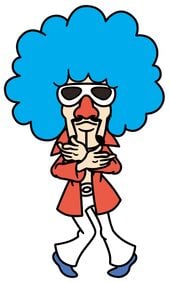 Jimmy T. |
"Thrusts his hips in multiple directions—sounds painful!" |
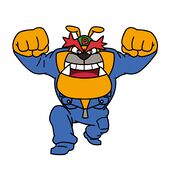 Dribble |
"Blasts shots from the right side." |
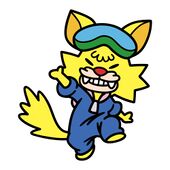 Spitz (2-player mode only) |
"Blasts shots from the left side." |
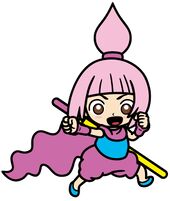 Kat |
"Jumps continuously and throws shuriken to the right." |
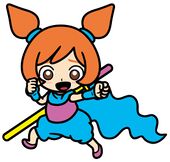 Ana (2-player mode only) |
"Jumps continuously and throws shuriken to the left." |
| File:WWGIT Orbulon.jpg Orbulon |
"Vacuums objects into a spaceship." |
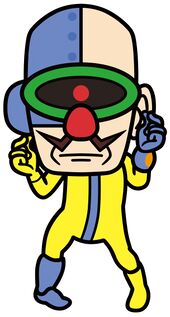 Dr. Crygor |
N/A |
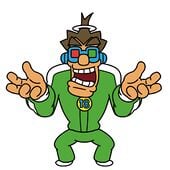 18-Volt |
"Shoots powerful discs." |
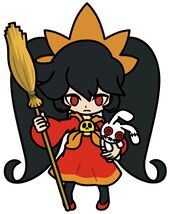 Ashley |
"Casts spooky spells and rides a broom." |
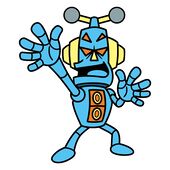 Mike |
"Glides through the air and blasts music notes straight up." |
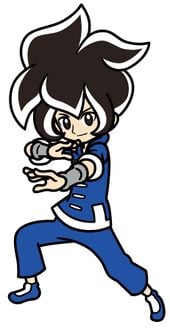 Young Cricket |
"Runs and leaps high into the air. You know—like a cricket?" |
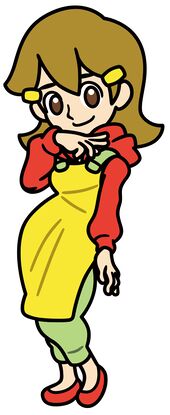 5-Volt |
"Teleports anywhere and creates a shockwave." |
Squares
Scraps
| Scrap | Location | Purpose |
|---|---|---|
 Wooden Bridge |
Warm Fuzzy Plains | Cross a river and continue with the level. |
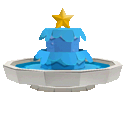 Decalburg Fountain |
Decalburg | Rescue the Sticker Museum curator. |
 Comet Piece |
Water's Edge Way | Complete the level. |
 Green Warp Pipe |
Hither Thither Hill | Progress through the level. |
 White Gate |
Whammino Mountain | Access the sticker shop and progress through the level. |
 Block Switch |
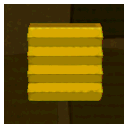
Goomba Fortress | Rotate a turntable. |
 Ship's Wheel |
Surfshine Harbor | Repair the boat at Surfshine Harbor. |
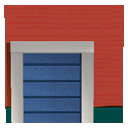 Warehouse Door |
Surfshine Harbor | Access a portion of the warehouse. |
 Tablet Pieces |
Drybake Desert, Yoshi Sphinx, Damp Oasis | Restore Drybake Stadium. |
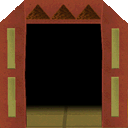 Stone Entry |
Drybake Stadium | Progress through the level. |
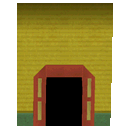 Tower Outer Wall |
Drybake Stadium | Progress through the level. |
 Tree Stump |
Loop Loop River | Access a Comet Piece. |


