Mario Kart Tour: Difference between revisions
MarioComix (talk | contribs) (→Daily Selects: 1. what was edited in the description was incorrectly written and 2. gathered this info from the in-game news) |
(→Courses: As with previous tours: BC2 / Waluigi Pinball / GV1 are R/T somewhere in the last 5 cups) |
||
| Line 6,523: | Line 6,523: | ||
| | | | ||
|style="background:palegreen"|R/T | |style="background:palegreen"|R/T | ||
| | |||
|- | |||
|} | |||
</div> | |||
{{br}} | |||
====Cooking Tour==== | |||
<div class="va-collapsible-content mw-collapsible mw-collapsed" data-expandtext="Show courses" data-collapsetext="Hide courses"> | |||
{| align=center width=100% cellspacing=0 border=1 cellpadding=3 style="border-collapse:collapse; font-family:Arial; text-align:center" class="sortable" | |||
|-style="background: #ABC" | |||
!rowspan=2 width=20%|Course | |||
!rowspan=2 width=8%|Origin | |||
!colspan=12 class=unsortable width=72%|Cup | |||
|-style="background: #ABC" | |||
!class=unsortable width=4%|[[File:MKT Icon Mario Cup.png|30px|link=Mario Cup]] | |||
!class=unsortable width=4%|[[File:MKT Icon Ludwig Cup.png|30px|link=Ludwig Cup]] | |||
!class=unsortable width=4%|[[File:MKT Icon Hammer Bro Cup.png|30px|link=Hammer Bro Cup]] | |||
!class=unsortable width=4%|[[File:MKT Icon Koopa Troopa Cup.png|30px|link=Koopa Troopa Cup]] | |||
!class=unsortable width=4%|[[File:MKT Icon Morton Cup.png|30px|link=Morton Cup]] | |||
!class=unsortable width=4%|[[File:MKT Icon Baby Luigi Cup.png|30px|link=Baby Luigi Cup]] | |||
!class=unsortable width=4%|[[File:MKT Icon Birdo Cup.png|30px|link=Birdo Cup]] | |||
!class=unsortable width=4%|[[File:MKT Icon Iggy Cup.png|30px|link=Iggy Cup]] | |||
!class=unsortable width=4%|[[File:MKT Icon Baby Daisy Cup.png|30px|link=Baby Daisy Cup]] | |||
!class=unsortable width=4%|[[File:MKT Icon Ice Mario Cup.png|30px|link=Ice Mario Cup]] | |||
!class=unsortable width=4%|[[File:MKT Icon Waluigi Cup.png|30px|link=Waluigi Cup]] | |||
!class=unsortable width=4%|[[File:MKT Icon Shy Guy Cup.png|30px|link=Shy Guy Cup]] | |||
|- | |||
|style="background:lightgrey"|[[Choco Island 1]] | |||
|SNES | |||
|style="background:palegreen"|N | |||
| | |||
|style="background:palegreen"|T | |||
| | |||
|style="background:palegreen"|R | |||
| | |||
|style="background:palegreen"|N | |||
| | |||
| | |||
| | |||
| | |||
| | |||
|- | |||
|style="background:white"|[[Yoshi Circuit]] | |||
|GCN | |||
|style="background:palegreen"|R | |||
| | |||
| | |||
| | |||
| | |||
| | |||
| | |||
| | |||
| | |||
| | |||
| | |||
| | |||
|- | |||
|style="background:white"|[[Luigi's Mansion (DS)|Luigi's Mansion]] | |||
|DS | |||
|style="background:palegreen"|T | |||
| | |||
|style="background:palegreen"|N | |||
| | |||
| | |||
|style="background:palegreen"|R | |||
| | |||
| | |||
| | |||
| | |||
| | |||
| | |||
|- | |||
|style="background:white"|[[Donut Plains 1 (SNES)|Donut Plains 1]] | |||
|SNES | |||
| | |||
|style="background:palegreen"|R | |||
| | |||
| | |||
| | |||
| | |||
| | |||
| | |||
| | |||
| | |||
| | |||
| | |||
|- | |||
|style="background:white"|[[RMX Mario Circuit 1]] | |||
|Original | |||
| | |||
|style="background:palegreen"|R | |||
| | |||
| | |||
| | |||
| | |||
|style="background:palegreen"|T | |||
| | |||
| | |||
| | |||
| | |||
| | |||
|- | |||
|style="background:white"|[[Frappe Snowland]] | |||
|N64 | |||
| | |||
|style="background:palegreen"|N | |||
| | |||
|style="background:palegreen"|R | |||
| | |||
| | |||
|style="background:palegreen"|T | |||
| | |||
| | |||
| | |||
| | |||
| | |||
|- | |||
|style="background:white"|[[Kalimari Desert]] | |||
|N64 | |||
| | |||
| | |||
|style="background:palegreen"|N | |||
| | |||
| | |||
|style="background:palegreen"|T | |||
| | |||
| | |||
| | |||
| | |||
| | |||
| | |||
|- | |||
|style="background:white"|[[Vanilla Lake 1]] | |||
|SNES | |||
| | |||
| | |||
| | |||
|style="background:palegreen"|R | |||
| | |||
|style="background:palegreen"|N | |||
| | |||
| | |||
| | |||
| | |||
| | |||
| | |||
|- | |||
|style="background:white"|[[Cheep Cheep Lagoon (3DS)|Cheep Cheep Lagoon]] | |||
|3DS | |||
| | |||
| | |||
| | |||
|style="background:palegreen"|R | |||
|style="background:palegreen"|T | |||
| | |||
| | |||
| | |||
| | |||
| | |||
| | |||
| | |||
|- | |||
|style="background:white"|[[Rock Rock Mountain]] | |||
|3DS | |||
| | |||
| | |||
| | |||
| | |||
|style="background:palegreen"|N | |||
| | |||
| | |||
| | |||
| | |||
| | |||
| | |||
| | |||
|- | |||
|style="background:white"|[[Bowser Castle 2 (GBA)|Bowser's Castle 2]] | |||
|GBA | |||
| | |||
| | |||
| | |||
| | |||
| | |||
| | |||
| | |||
| | |||
| | |||
| | |||
| | |||
| | |||
|- | |||
|style="background:white"|[[Waluigi Pinball (DS)|Waluigi Pinball]] | |||
|DS | |||
| | |||
| | |||
| | |||
| | |||
| | |||
| | |||
| | |||
| | |||
| | |||
| | |||
| | |||
| | |||
|- | |||
|style="background:white"|[[Ghost Valley 1]] | |||
|SNES | |||
| | |||
| | |||
| | |||
| | |||
| | |||
| | |||
| | |||
| | |||
| | |||
| | |||
| | |||
| | | | ||
|- | |- | ||
Revision as of 03:12, June 3, 2020
Template:Infobox Mario Kart Tour is a mobile game in the Mario Kart series. First announced during a financial briefing on January 31, 2018,[1] it is the third Mario mobile game overall, following Super Mario Run and Dr. Mario World, the ninth main installment in the Mario Kart series,[2] and the fourteenth installment overall. Like Super Mario Run, it is free-to-start from the App Store and Google Play.[3] Unlike Super Mario Run and similar to that of Dr. Mario World, the game more heavily incorporates a free-to-play microtransaction mechanic, where players have restrictions and timers unless they spend some of the various types of currencies in-game, as well as having gacha in the form of items being launched out of pipes. The game reuses many assets from Mario Kart 7 and Mario Kart 8, as well as returning gameplay mechanics such as gliding and character specific special items. In addition, the game introduces some features new to the Mario Kart franchise such as reverse tracks and ability to deploy a large amount of any item during a race, including Spiny Shells and Bullet Bills. On April 23, 2019, Nintendo opened applications for participating in a closed beta test of the game to Android users in North America and Japan, which began on May 22, 2019 and ended on June 4, 2019.[4]
The game officially launched for both iOS and Android devices on September 25, 2019, in 163 territories, which covers nearly the same roster of availability as Super Mario Run, with the exceptions of Belgium and Vietnam, the former of which banned games with loot boxes in 2019. Users who pre-registered acquired the game a day early. Unlike previous Mario mobile games, a Nintendo Account is required to be playable.
On March 2, 2020, Nintendo announced that multiplayer would officially be implemented into the game on March 8, 2020, 8:00 p.m. (PT).[5] Prior to this, on October 31, 2019, Nintendo announced the first multiplayer beta test exclusive to Gold Pass members,[6] which began on December 18, 2019, 11:00 p.m. (PT) and ended on December 26, 2019, 9:59 p.m. (PT). On January 21, 2020, Nintendo announced a second multiplayer beta test for all players, regardless of having a Gold Pass subscription or not,[7] which began on January 22, 2020, 11:00 p.m. (PT) and ended on January 28, 2020, 9:59 p.m. (PT). The second multiplayer beta test allowed players to play with each other in their immediate vicinity based on their device's location data.
Gameplay
The goal of the game is to be in first place at the end of each race, using items obtained by driving through Item Boxes. The game is played in a portrait position, while the phone's touch controls are used to play the game, such as dragging the finger across the screen to steer the kart. There are three ways the player can make turns. For the phones supporting it, the gyroscope can be used to steer. The player can choose what action is started when tapping and sliding the fingers on the main area of the screen, with the other action being performed by tapping a small circular button at the bottom and then sliding the fingers if needed. The main setting has the driver jumping every time the screen is tapped, allowing the kart to drift by sliding the fingers. In the other configuration, the kart does not jump when tapping the screen, which results in it steering when sliding the fingers on the screen. After steering for a while, the kart starts auto-drifting and charging Mini-Turbos and Super Mini-Turbos, but not Ultra Mini-Turbos that are only charged when drifting. Similarly to Mario Kart 8 Deluxe with auto-accelerate and smart-steering enabled, karts accelerate automatically and can steer players away from walls. The intensity of smart-steering can be changed in the game's settings.
The game's mechanics are based on Mario Kart 7 and most of the Retro Courses are also available as either normal or retro courses within the same game. A few features from Mario Kart 8 that required substantial changes to the game, such as Bikes, ATVs, anti-gravity, and 12-player races, are missing, while the 200cc class is present. Other features from Mario Kart 8 Deluxe, such as auto-accelerate, smart-steering, and Ultra Mini-Turbos return. Unlike previous games, the player cannot customize their tires.
When a race is completed, the player will be awarded with Grand Stars, experience points for the used driver, kart and glider whose base points are not maxed out and coins. If the player finishes in the top three places, the gauge to level up will be filled, while if the placement is 5th or lower, the gauge will be dropped. When the gauge is already empty, however, the player will not go level down. Only the points gained in the specific course will be lost, meaning that the first race on each course won't make the player lose experience points even if they arrive in 8th place; similarly, each course has an experience points cap. When arriving in the first three places, fewer experience points will be awarded until the cap is reached. At that point, only the experience points lost due to arriving in 5th place or lower will be regained when arriving in the first three places. The total amount of experience points gained in a course is never reset and is carried to the following tours, forcing the player to drive in new courses to still keep gaining experience points and leveling up. Grand Stars are awarded depending on whether a certain point threshold has been reached. Experience points for the driver, kart and glider are awarded depending on the placement. The coins obtained are those collected during the race, plus one additional coin for every 1,000 points obtained during the race. Each day, it is possible to obtain up to 450 experience points for the drivers, karts and gliders and up to 300 coins by racing. When those limits are reached the player cannot obtain experience points or coins by racing until the next day. In order to continue gaining experience points or collecting coins, the player can use point-boost tickets for the former and can play Coin Rush or get rewards from challenges for the latter. Filling up the gauge to level up gives a reward to the player, increases the points earned when reaching a specific placement in the race and, when level 7 or level 12 are reached, allows the player to buy more items in the shop. Currently, the maximum level the player can reach is 99, but at the start of a future tour the player will be able to increase past level 99.
| Placement | Experience points for each non-maxed out driver, kart and glider that was used in the race | ||
|---|---|---|---|
| 50cc | 100cc | 150cc and 200cc | |
| 1 | 8 | 9 | 10 |
| 2 | 7 | 8 | 9 |
| 3 | 6 | 7 | 8 |
| 4 | 5 | 6 | 7 |
| 5 | 4 | 5 | 6 |
| 6 | 3 | 4 | 5 |
| 7 | 2 | 3 | 4 |
| 8 | 1 | 2 | 3 |
The game features Tour Challenges and Gold Challenges, which reward Grand Stars, and Standard Challenges, which reward rubies, the main premium currency of the game.
Another premium item, bought with real-life currency according to a monthly subscription model, is the Gold Pass, which grants access to the 200cc engine class, additional items from Tour Gifts, and Gold Challenges. The course introduction fanfare also uses more instruments for players with an active gold pass.
Each driver, kart and glider have favored courses, on which they offer advantages if they are used. Each course has three tiers for each driver, kart and glider. Third-tier drivers receive one item from every Item Box, second-tier drivers receive two items and first-tier drivers receive three items. Second-tier karts give a bonus points multiplier of 1.5 and first-tier karts give a bonus points multiplier of 2. Second-tier gliders increase the time between two point-gaining actions to count as a combo and give a combo bonus multiplier of 2 and first-tier gliders increase the combo-time even longer and give a combo bonus multiplier of 3. The player can enter a Frenzy by obtaining three of the same item at the same time, which allows the player to temporarily use that item an infinite amount of times in addition to granting them invincibility. Super and High-End drivers, karts and gliders have a higher number of points gained when choosing them and more preferred courses. In addition, drivers have their own special items, similar to Mario Kart: Double Dash!!'s item system. Karts have their own driving-related bonus such as increasing the effectiveness of drafting, while gliders increase the likelihood of obtaining a certain item and the points gained when using this item. All drivers, karts and gliders can be leveled up, and they all come with upgrades when done so.
The courses the player can play depends on the tour, which changes every two weeks. Starting with the Baby Rosalina Tour, each tour has twelve cups, and adds new drivers, karts, gliders, and courses. During certain tours, mainly ones themed around real-world locations, the game includes one course that is new to the series. Each cup contains three races and one bonus challenge. Bonus challenges require the player to beat a certain goal with a certain character, kart, and glider. Once each of the courses and the bonus challenge is played and enough Grand Stars are obtained, the player can move on to the next cup. Tour Gifts appear between cups which give the player items if enough Grand Stars are obtained. Every week, one of the tour's cups is a ranked cup. In a ranked cup, the player is placed on a leaderboard based on their overall score in the game against nineteen other players. The player gains a reward and will increase in tier at the end of the week if the end position is within the best eight places, while they will lose one tier if the end position is the eleventh place or below.
| Placement | Rewards | Tier change | ||||||||||||
|---|---|---|---|---|---|---|---|---|---|---|---|---|---|---|
| From tier 1 | From tier 11 | From tier 21 | From tier 22 | From tier 25 | From tier 30 | From tier 40 | From tier 1 | From tier 21 | From tier 22 | From tier 25 | From tier 30 | From tier 35 | From tier 50 | |
| 1 | Rubies ×20 Coins ×1,000 Point-boost tickets ×3 of each type |
Rubies ×25 Coins ×1,100 Point-boost tickets ×3 of each type |
Rubies ×30 Coins ×1,200 Point-boost tickets ×3 of each type |
Rubies ×30 Coins ×1,200 Point-boost tickets ×3 of each type |
Rubies ×30 Coins ×1,200 Point-boost tickets ×3 of each type |
Rubies ×35 Coins ×1,500 Point-boost tickets ×3 of each type |
Rubies ×40 Coins ×2,000 Point-boost tickets ×3 of each type |
+3 | +3 | +3 | +3 | +2 | +1 | 0 |
| 2 | Rubies ×15 Coins ×1,000 Point-boost tickets ×2 of each type |
Rubies ×20 Coins ×1,100 Point-boost tickets ×2 of each type |
Rubies ×20 Coins ×1,200 Point-boost tickets ×2 of each type |
Rubies ×20 Coins ×1,200 Point-boost tickets ×2 of each type |
Rubies ×20 Coins ×1,200 Point-boost tickets ×2 of each type |
Rubies ×20 Coins ×1,200 Point-boost tickets ×2 of each type |
Rubies ×20 Coins ×1,200 Point-boost tickets ×2 of each type |
+2 | +2 | +2 | +1 | |||
| 3 | Rubies ×10 Coins ×1,000 Point-boost tickets ×1 of each type |
Rubies ×15 Coins ×1,100 Point-boost tickets ×1 of each type |
Rubies ×15 Coins ×1,200 Point-boost tickets ×1 of each type |
Rubies ×15 Coins ×1,200 Point-boost tickets ×1 of each type |
Rubies ×15 Coins ×1,200 Point-boost tickets ×1 of each type |
Rubies ×15 Coins ×1,200 Point-boost tickets ×1 of each type |
Rubies ×15 Coins ×1,200 Point-boost tickets ×1 of each type |
+1 | +1 | +1 | ||||
| 4 | Rubies ×5 Coins ×500 |
Rubies ×10 Coins ×600 |
Rubies ×10 Coins ×600 |
Rubies ×10 Coins ×600 |
Rubies ×10 Coins ×600 |
Rubies ×10 Coins ×600 |
Rubies ×10 Coins ×600 |
+2 | 0 | -1 | ||||
| 5 | ||||||||||||||
| 6 | 0 | -1 | ||||||||||||
| 7 | Rubies ×5 Coins ×300 |
Rubies ×5 Coins ×400 |
Rubies ×5 Coins ×400 |
Rubies ×5 Coins ×400 |
Rubies ×5 Coins ×400 |
Rubies ×5 Coins ×400 |
Rubies ×5 Coins ×400 |
+1 | 0 | |||||
| 8 | 0 | -1 | ||||||||||||
| 9 | 0 | -1 | ||||||||||||
| 10 | No reward | -1 | ||||||||||||
| 11-19 | No reward | 0 | -1 | |||||||||||
| 20 | No reward | -2 | -2 | -2 | -2 | -2 | ||||||||
Each tour has three sets of Tour Challenges. The first one is unlocked from the tour's beginning, the second one unlocks after the one week, and the third one is exclusive to Gold Pass members.
Points
- See also: Mario Kart Tour race points system
Points are collected during standard races and are used to gain Grand Stars and to rank the players, both overall and in ranked cups. There are three ways of obtaining points in races: base points, bonus points, and position points.
Base points
Base points are given at the beginning of the race and are the sum of the base points of the character, kart and glider selected. They range from 800 to 1600 points. The base points can be increased through experience points obtained at the end of the races or through point-boost tickets that provide 50 experience points each. The experience points are used to fill a gauge that when filled will increase the base points until the maximum amount has been reached. The amount of experience points needed to fill the gauge increases every time the gauge is filled.
| Base points of drivers and kart parts | ||||||
|---|---|---|---|---|---|---|
| Amount | Drivers |
Kart and gliders | ||||
Normal |
Super |
High-End |
Normal |
Super |
High-End | |
| Initial | 400 | 450 | 500 | 200 | 220 | 250 |
| Maximum | 600 | 675 | 800 | 300 | 330 | 400 |
At the start of a future tour, points-cap tickets will be added to the game, making it possible to to raise the maximum amount of base points of a driver, kart, or glider.
Bonus points
Bonus points are points awarded every time a special event happens during the race. Said event might be a Jump Boost, gliding for a certain amount of time, finishing the lap in a certain position, hitting opponents or hazards, and various other cases. If a further event happens before about two seconds have passed from the previous one, the combo indicator goes up and the points obtained are increased. The actual time that can pass between one event and the next can be increased by choosing a glider of a higher tier in the course, by choosing a glider of higher rarity or by leveling up the glider. The number of points given is calculated as follows:
Points = (base points of the event × multiplier due to kart tiering in the course × multiplier due to kart rarity and skill level) + combo bonus + bonus point boosts + eventual increase from kart's special skill + eventual increase from glider's special skill
The combo bonus is calculated as follows:
Combo bonus = multiplier from glider's tiering in the course × Min{combo count - 1 ; (cc of the engine class) / 10}
For the purpose of the calculation, 200cc is considered the same as 150cc.
The bonus point boost is calculated separately for the driver, kart and glider chosen, that are in the first tier of the course, as follows:
Bonus point boost = base points × (skill level - 1) × [(cc of the engine class) / 30000]
In this case as well, 200cc is considered the same as 150cc. If more than 200 events happen, the bonus point boost is not applied from the 201st event onward.
Position points
Position points are awarded to the player depending on their placement at the end of the race. They are calculated as follows:
Position points = [(position points due to the level of the player + engine class bonus) × position multiplier] + bonus point boosts for position
The bonus point boost for position is calculated separately for the driver, kart and glider chosen, that are in the first tier of the course, as follows:
Bonus point boost for position = base points × (skill level - 1) × number of events happened in the race × position multiplier × [(cc of the engine class) / 30000]
As in the other cases, 200cc is considered the same as 150cc.
The engine class bonus is the following:
| Engine class | 50cc |
100cc |
150cc |
200cc |
|---|---|---|---|---|
| Engine class bonus | 0 | 200 | 400 | 400 |
The position multiplier depends on the placement at the end of the race and works as follows:
| Placement | 1 | 2 | 3 | 4 | 5 | 6 | 7 | 8 |
|---|---|---|---|---|---|---|---|---|
| Position multiplier | 1 | 0.85 | 0.75 | 0.65 | 0.55 | 0.45 | 0.35 | 0.2 |
Additional internal data (RaceScoreParam)
The following internal data stems from the New Year's Tour.[8]
The engine class affect the obtained points in various other ways, as shown by the internal data:
The InterimRankBonus multiplied by the InterimRankBonusRate is the amount of points obtained at the end of the first lap or the first two sections of three-sectioned tracks. The InterimRankBonus has the following values:
| InterimRankBonus | ||||||||
|---|---|---|---|---|---|---|---|---|
| Position | 1st | 2nd | 3rd | 4th | 5th | 6th | 7th | 8th |
| Points | 100 | 80 | 60 | 50 | 40 | 30 | 20 | 10 |
Finally, the maximum time between events in a combo apparently depends on the combo counter, as shown by this combo-related data:
| Combo-related parameters (Combo) | ||||
|---|---|---|---|---|
| Score | 5 | 10 | 20 | 30 |
| Time | 1.39999998 | 1.79999995 | 2.0999999 | 2.4000001 |
| ComboScoreAdd | 1 | |||
| ComboScoreRate | 0.100000001 | |||
Collectibles and currencies
Grand Stars
Grand Stars are the main collectibles related to individual tours. Up to five of them can be earned by reaching certain points threshold in each standard race and up to three of them can be earned by clearing specific goals in each bonus challenge. Furthermore, clearing each day the daily challenge will warrant a Grand Star, and clearing Tour Challenges and Gold Challenges will reward the players with Grand Stars as well. Finally, using a star ticket will reward a Grand Star per ticket used.
They are used to unlock items in the cup bar of the course selection screen, namely cups and gifts. When the last gift will be obtained, coins will be rewarded in place of Grand Stars, and when a new tour starts, the Grand Stars obtained are reset to 0.
Rubies
Rubies are the main premium currency of Mario Kart Tour. Besides being bought with real-life currency at the Shop, rubies can be obtained as daily login bonuses, as a player level up bonus, as part of tour gifts, as a reward for the ranked cup, and as a reward for the Standard Challenges.
Rubies can be used in two different ways: to buy launch pipes and to play Coin Rush mode.
Coins

Coins are collected during a race and rewarded for the number of points obtained during said race, up to 300 per day. In a single race, the amount of coins earned is
Coins earned = coins obtained during the race + floor((total points earned in the race)/1000)
The coins obtained during the race are capped at 99, while no cap on the coins obtained through points is known yet.
Besides the main way of obtaining coins, coins can also be obtained in Coin Rush and in several rewards, such as obtaining three Standard Challenges, Tour Challenges or Gold Challenges in a row, column or diagonal, in gifts, as daily login bonuses, as player level up bonuses, while waiting for Multiplayer races, and as rewards for ranked cup placements and friend ranking.
In Coin Rush, the player can spend Rubies to obtain a great number of coins. Over 300 coins are found in the course. For each tour, another course is available in Coin Rush, Gold Mario is the regular driver, and the Gold Standard is the regular kart driven (although in the New York Tour, Gold Mario drove his respective Pipe Frame instead). The coins obtained from Coin Rush are multiplied by a certain number, depending on how many rubies a player has spent.
| Coins multiplier | Rubies |
|---|---|
| 2 | 5 |
| 6 | 15 |
| 10 | 25 |
At the start of a future tour, the Coin Aplenty Event will be added to the game. This event will allow the player to obtain a large amount of coins.
Coins are mainly used in the Daily Selects section of the shop.
Menu
| Banners | ||
|---|---|---|
| Pipes | Special offers | Gold Pass |
| Main Menu | |||
|---|---|---|---|
| Shop | Challenges | Friends | News |
| Drivers | Karts | Gliders | Multiplayer |

|
|||
| Badges | Tickets | Gifts | Settings |
Banners
On the top of the menu, players can purchase special offers or subscribe to the Gold Pass.
Shop
The shop consists of three different sections.
Pipes
Pipes can shoot out a driver, kart or glider, all of which have their own rarities. A pipe contains a determined amount of Normal, Super and High-End items, all of which are chosen randomly within their class and rarity, plus a featured driver, kart and glider. The items are not ordered, so each item, including the featured ones, can be potentially found in any placement within the pipe. It is possible that a player obtains an item from a pipe that already has been obtained. When this happens, the level gauge of that item will be increased by one unit. The player can reset the pipe at any moment. A new pipe is introduced each week and, since the Halloween Tour, the pipes last until the end of the tour. Usually, the pipe contains the following items:
| Items obtained from a new pipe | ||||||||||||
|---|---|---|---|---|---|---|---|---|---|---|---|---|
| Item | Normal |
Super |
High-End |
Featured High-End | ||||||||
| Character | Kart | Glider | Character | Kart | Glider | Character | Kart | Glider | Character | Kart | Glider | |
| Amount | 32 | 26 | 16 | 9 | 7 | 4 | 1 | 1 | 1 | 1 | 1 | 1 |
The probability of obtaining a certain type of item from the pipe is (number of items of that type remaining in the pipe)/(total number of items remaining in the pipe), the probability of obtaining a specific item is (probability of getting an item of the type of the desired item)/(number of available items of the same type of the desired item).
During the New Year's Tour, the amounts of the various items were changed:
During the Valentine's Tour, the amounts of the various items were changed just for Valentine's Pipe 2 due to having two spotlight drivers and no spotlight karts or gliders:
During the Mario Bros. Tour, the amounts of the various items were changed. These pipes hold 50 items instead of 100, and feature Super Spotlights for the first time:
During the Baby Rosalina Tour, the amounts of the various items were changed, with 50 items instead of 100 again. Baby Rosalina Pipe 1 contained these items:
Baby Rosalina Pipe 2 contained these items:
In the Hammer Bro Tour, the pipe held 100 items again instead of 50 and held these items:
In the Yoshi Tour, the pipe held 100 items again instead of 50. The amounts of the various items were changed for Yoshi Pipe 2 and held these items:
The Special Pipe held 50 items again and held these items:
| Items obtained from a new pipe during the Yoshi Tour | |||||||||||||||
|---|---|---|---|---|---|---|---|---|---|---|---|---|---|---|---|
| Item | Normal |
Super |
High-End | ||||||||||||
| Character | Kart | Glider | Character | Kart | Glider | Character | Kart | Glider | |||||||
| Amount | 15 | 11 | 9 | 5 | 4 | 3 | 1 | 1 | 1 | ||||||
In the Flower Tour, the amounts of various items were changed for Flower Pipe 2 and held these items:
In the Jungle Tour, the amounts of various items were changed. Jungle Pipe 1 held these items:
Jungle Pipe 2 held these items:
Daily Selects
The Daily Selects section is renewed each day. It consists of four rows, of which the first three each contain three items. The last row is Coin Rush. The first row is available to all players and contains only Normal items and point-boost tickets; the second row is available to players level 7 and above and contains Normal and Super items along with item tickets and quick tickets; and the third row is available to players of level 12 and above and contains only Super and High-End items. When an item's skill level is maxed out, the item is replaced with a level-boost ticket of the same rarity and price. The first time an item's skill level is maxed out, level-boost tickets of all rarities and types become available as well, having the price of the corresponding item type and rarity.
| Daily Selects' items | |||
|---|---|---|---|
| Item | Price | ||
| Item ticket | 50 | ||
| Point-boost ticket | 100 | ||
| Quick ticket | 1,000 | ||
| Normal | Kart or glider | 500 | |
| Driver | 800 | ||
| Super | Kart or glider | 2,000 | |
| Driver | 3,000 | ||
| High-End | Kart or glider | 10,000 | |
| Driver | 12,000 | ||
Since the Paris Tour, in addition to tickets, only a subset of non-tour-exclusive items can be found as Daily Selects. The listed items are most Normal items from the Tokyo Tour and most items from the New York Tour; more items were added as of the Cooking Tour and are marked with an asterisk (*).
Ruby purchase
The player can purchase different amounts of rubies with real-life currency.
Challenges
Challenges are objectives the player can complete to earn various badges and rewards depending on the type, of which there are four: Standard Challenges, long-term challenges the player accomplishes throughout the course of the game, Multiplayer Challenges (added in Baby Rosalina Tour), which are challenges for multiplayer mode, and Tour and Gold Challenges, challenges that last for the duration of the tour, the latter of which are exclusive to Gold Pass members. At the start of a future tour, expert challenges will be added to the game. Completing Standard and Multiplayer Challenges awards the player with rubies, while Tour and Gold Challenges award extra Grand Stars. Each challenge card holds nine challenges aligned in a 3×3 grid, and for every bingo the player acquires (i.e. any horizontal, vertical, or diagonal match), they earn 50 coins (100 coins for Standard Challenges). The player also receives a reward upon completing an entire challenge card.
The following are the Multiplayer and Standard Challenges in the game. For the tour-specific challenges, see List of tours in Mario Kart Tour.
Multiplayer Challenges
| Multiplayer Challenges | ||
|---|---|---|
| Three in a row reward: | ||
| Completion reward: | ||
 |
 |
 |
| Reach grade A in Multiplayer. | Reach grade B in Multiplayer. | Reach grade C in Multiplayer. |
 |
 |
 |
| Reach grade D in Multiplayer. | Reach grade E in Multiplayer. | Join 5 multiplayer races via With Friends or Others Nearby. |
 |
 |
 |
| Join 3 multiplayer races. | Join 15 multiplayer races. | Join 30 multiplayer races. |
Standard Challenges
| Standard Challenges 1-1 | Standard Challenges 1-2 | Standard Challenges 1-3 | ||||||||
|---|---|---|---|---|---|---|---|---|---|---|
| Three in a row reward: |
Three in a row reward: |
Three in a row reward: | ||||||||
| Completion reward: |
Completion reward: |
Completion reward: | ||||||||
 |
 |
 |
 |
 |
 |
 |
 |
 | ||
| Use 1 point-boost ticket. | Use 1 item ticket. | Complete Coin Rush 1 time. | Use 10 point-boost tickets. | Use 1 quick ticket. | Get 10 items from the Daily Selects section of the Shop. | Use 30 point-boost tickets. | Use 10 level-boost tickets. | Get 30 items from the Daily Selects section of the Shop. | ||
 |
 |
 |
 |
 |
 |
 |
 |
 | ||
| Make 3 friends. | Get 1 item from the Daily Selects section of the Shop. | Raise 1 driver, kart, or glider to skill level 2. | Make 5 friends. | Raise 1 driver, kart, or glider to skill level 3. | Raise 3 drivers, karts, or gliders to skill level 2. | Raise 10 drivers' points to 300 or more. | Raise 10 karts' points to 300 or more. | Raise 7 gliders' points to 300 or more. | ||
 |
 |
 |
 |
 |
 |
 |
 |
 | ||
| Raise 1 driver's points to 600 or more. | Raise 1 kart's points to 300 or more. | Raise 1 glider's points to 300 or more. | Raise 5 drivers' points to 600 or more. | Raise 5 karts' points to 300 or more. | Raise 5 gliders' points to 300 or more. | Raise 1 driver, kart, or glider to skill level 4. | Raise 3 drivers, karts, or gliders to skill level 3. | Raise 5 drivers, karts, or gliders to skill level 2. | ||
| Standard Challenges 1-4 | Standard Challenges 1-5 | |||||
|---|---|---|---|---|---|---|
| Three in a row reward: |
Three in a row reward: | |||||
| Completion reward: |
Completion reward: | |||||
 |
 |
 |
 |
 |
 | |
| Use 30 level-boost tickets. | Get 50 items from the Daily Selects section of the Shop. | Raise 15 drivers' points to 600 or more. | Use 50 level-boost tickets. | Get 100 items from the Daily Selects section of the Shop. | Raise 20 drivers' points to 600 or more. | |
 |
 |
 |
 |
 |
 | |
| Raise 15 karts' points to 300 or more. | Raise 10 gliders' points to 300 or more. | Raise 1 driver, kart, or glider to skill level 5. | Raise 20 karts' points to 300 or more. | Raise 15 gliders' points to 300 or more. | Raise 1 driver, kart, or glider to skill level 6. | |
 |
 |
 |
 |
 |
 | |
| Raise 3 drivers, karts, or gliders to skill level 4. | Raise 5 drivers, karts, or gliders to skill level 3. | Raise 10 drivers, karts, or gliders to skill level 2. | Raise 3 drivers, karts, or gliders to skill level 5. | Raise 5 drivers, karts, or gliders to skill level 4. | Raise 10 drivers, karts, or gliders to skill level 3. | |
| Standard Challenges 2-1 | Standard Challenges 2-2 | Standard Challenges 2-3 | ||||||||
|---|---|---|---|---|---|---|---|---|---|---|
| Three in a row reward: |
Three in a row reward: |
Three in a row reward: | ||||||||
| Completion reward: |
Completion reward: |
Completion reward: | ||||||||
 |
 |
 |
 |
 |
 |
 |
 |
 | ||
| Collect 10 different drivers. | Collect 10 different karts or gliders. | Get 1st place in a race 100 times. | Collect 20 different drivers. | Collect 20 different karts or gliders. | Get 1st place in a race 200 times. | Collect 25 different drivers. | Collect 30 different karts or gliders. | Get 1st place in a race 300 times. | ||
 |
 |
 |
 |
 |
 |
 |
 |
 | ||
| Land 100 hits with Green Shells. | Land 30 hits with Bob-ombs. | Land 200 hits with Bananas. | Land 200 hits with Green Shells. | Land 50 hits with Bob-ombs. | Land 500 hits with Bananas. | Land 300 hits with Green Shells. | Land 100 hits with Bob-ombs. | Land 800 hits with Bananas. | ||
 |
 |
 |
 |
 |
 |
 |
 |
 | ||
| Cause opponents to crash 300 times. | Reach player level 10. | Reach tier 5. | Cause opponents to crash 1,000 times. | Reach player level 20. | Reach tier 10. | Cause opponents to crash 2,000 times. | Reach player level 30. | Reach tier 20. | ||
| Standard Challenges 2-4 | Standard Challenges 2-5 | |||||
|---|---|---|---|---|---|---|
| Three in a row reward: |
Three in a row reward: | |||||
| Completion reward: |
Completion reward: | |||||
 |
 |
 |
 |
 |
 | |
| Collect 30 different drivers. | Collect 40 different karts or gliders. | Get 1st place in a race 500 times. | Collect 35 different drivers. | Collect 50 different karts or gliders. | Get 1st place in a race 700 times. | |
 |
 |
 |
 |
 |
 | |
| Land 400 hits with Green Shells. | Land 150 hits with Bob-ombs. | Land 1,200 hits with Bananas. | Land 500 hits with Green Shells. | Land 200 hits with Bob-ombs. | Land 1,500 hits with Bananas. | |
 |
 |
 |
 |
 |
 | |
| Cause opponents to crash 3,000 times. | Reach player level 40. | Reach tier 30. | Cause opponents to crash 4,000 times. | Reach player level 50. | Reach tier 40. | |
Friends
The player can become in-game friends with other players. The player can see the points of their friends on the different cups.
Since the Baby Rosalina Tour, an award is given to the player if the combined total cup points of the week's ranked cup of the player and all of their friends reach a certain amount.
| Coins | Total points of player and friends |
|---|---|
| 100 | 50,000 |
| 500 | 80,000 |
| 1000 | 150,000 |
News
Every time that an announcement is being made, a new part of a tour starts, an update of the game is released, a new special offer or pipe is available or something else has been changed, the player receives a message with detailed information about what is new. Messages regarding known issues also appear here.
Multiplayer
Multiplayer mode was added to Mario Kart Tour on March 8, 2020, where up to eight human players can play against each other.[5] There are three modes available: a mode to play with friends or other players nearby; Standard Races, a mode where the player competes against random players from around the world; and Gold Races, a mode exclusive to Gold Pass members where the player competes against other members. Players race against each other in three courses in a chosen cup of the current tour; the cup changes every 15 minutes. In the "With Friends or Others Nearby" mode, the player can set the rules themselves, including the engine class (50cc, 100cc or 150cc), number of item slots (1, 2 or default (3)), number of teams (none, 2, 3 or 4), and inclusion of COM racers. The player can also create a Room for which they can invite players to join with a code.
In Standard Races, there are two sets of rules that interchange daily: 100cc with default item slots, and 100cc with two item slots. In Gold Races, there are four: 150cc with default item slots, 150cc with two item slots, 200cc with default item slots, and 200cc with one item slot. The Team Game rule can also appear in Standard Races. In both of these modes, there is also a grading system for players that changes depending on their performance. The grades range from F to A (S then S+1 to S+6 in Gold Races).[9]
When the player is waiting for a multiplayer match to be found, they will earn coins. Every day, the player can earn up to 100 coins this way.
Badges
The player can collect badges by completing challenges. Sometimes badges will also be given in the Gift Box. Out of all their collected badges, the player can choose one that will be visible for other players next to their username.
Gifts
Sometimes the player receives additional gifts, which can be rubies, coins or badges. Mainly, these gifts are given at celebration occasions such as celebration days, the start of a new tour or the launch of Multiplayer mode. Sometimes it happens that the player does not receive a reward due to a technical problem in the game. These rewards can appear as gifts at a later time. Gifts remain available for 14 days.
Skill Level point requirements
The following table lists the amount of skill level points needed to bring an acquired driver, kart or glider to a certain skill level. Raising the skill level of a driver, kart or glider requires obtaining duplicates of them as Tour Gifts, from the Pipe or the Shop, or from using level-boost tickets that match the type and rarity.
| Skill level | 2 | 3 | 4 | 5 | 6 |
|---|---|---|---|---|---|
| Normal | 2 | 5 | 8 | 11 | 14 |
| Super | 1 | 2 | 3 | 4 | 5 |
| High-End | 1 | 1 | 2 | 2 | 3 |
Courses
In addition to the courses listed below, many alternate courses are also featured in the game; courses can have an "R" (Reverse) and/or "T" (Trick) variant. Courses marked with "R" are driven in backward orientation; the track will have alterations if necessary to make this possible. Courses marked with "T" feature many additional ramps and trickable obstacles, and are otherwise the same. "R/T" (Reverse/Trick) variants feature the elements of both reverse and trick courses. “RMX” (remix) tracks are courses with new layouts, albeit set in the same setting as their namesake course, and generally feature additional ramps and obstacles.
Nitro
| Course | Normal version | Reverse variation | Trick variation | Reverse/Trick variation |
|---|---|---|---|---|
| New York Minute | ||||
| Tokyo Blur | ||||
| Paris Promenade | ||||
| London Loop | ||||
| New York Minute 2 | ||||
| Tokyo Blur 2 | ||||
| Paris Promenade 2 | ||||
| Vancouver Velocity | ||||
| London Loop 2 |
Retro
Super Mario Kart (SNES)
| Course | Normal version | Reverse variation | Trick variation | Reverse/Trick variation |
|---|---|---|---|---|
| Mario Circuit 1 | ||||
| Donut Plains 1 | ||||
| Ghost Valley 1 | ||||
| Mario Circuit 2 | ||||
| Choco Island 1 | ||||
| Mario Circuit 3 | ||||
| Choco Island 2 | ||||
| Vanilla Lake 1 | ||||
| Rainbow Road |
Remix
| Course | Normal version | Reverse variation | Trick variation | Reverse/Trick variation |
|---|---|---|---|---|
| RMX Mario Circuit 1 | ||||
| RMX Choco Island 1 |
Mario Kart 64 (N64)
| Course | Normal version | Reverse variation | Trick variation | Reverse/Trick variation |
|---|---|---|---|---|
| Koopa Troopa Beach | ||||
| Kalimari Desert | ||||
| Frappe Snowland |
Mario Kart: Super Circuit (GBA)
| Course | Normal version | Reverse variation | Trick variation | Reverse/Trick variation |
|---|---|---|---|---|
| Bowser's Castle 1 | ||||
| Bowser's Castle 2 |
Mario Kart: Double Dash!! (GCN)
| Course | Normal version | Reverse variation | Trick variation | Reverse/Trick variation |
|---|---|---|---|---|
| Yoshi Circuit | ||||
| Dino Dino Jungle |
Mario Kart DS (DS)
| Course | Normal version | Reverse variation | Trick variation | Reverse/Trick variation |
|---|---|---|---|---|
| Luigi's Mansion | ||||
| Waluigi Pinball | ||||
| DK Pass |
Mario Kart 7 (3DS)
| Course | Normal version | Reverse variation | Trick variation | Reverse/Trick variation |
|---|---|---|---|---|
| Toad Circuit | ||||
| Daisy Hills | ||||
| Cheep Cheep Lagoon | ||||
| Shy Guy Bazaar | ||||
| Mario Circuit | ||||
| Rock Rock Mountain | ||||
| Neo Bowser City | ||||
| Rainbow Road |
Tours
- Main article: List of tours in Mario Kart Tour
Each tour consists of a series of cups, with each cup containing three courses and a bonus challenge. The featured character of the cup has the preference for every track in it increased by one tier. The following tables list the courses that make an appearance in each tour; "N" indicates a normal course, "R" a reversed course, "T" a trick course, and "R/T" a reversed trick course. Tracks in gray debuted during the respective tour. Click on a cup's icon to access the article of that cup.
Dates and spotlights
| Tour | Date | Week 1 spotlights | Week 2 spotlights |
|---|---|---|---|
| New York Tour | September 25, 2019 - October 8, 2019 | Pauline, Yellow Taxi, Fare Flier | Mario (Musician), Blue Badwagon, Bullet Bill Parachute |
| Tokyo Tour | October 9, 2019 - October 22, 2019 | Peach (Kimono), Quickshaw, Purple Oilpaper Umbrella | Mario (Hakama), Kabuki Dasher, Full Flight |
| Halloween Tour | October 23, 2019 - November 5, 2019 | Rosalina (Halloween), Trickster, Wicked Wings | King Boo (Luigi's Mansion), Ghost Ride, Rainy Balloons |
| Paris Tour | November 6, 2019 - November 19, 2019 | Peach (Vacation), Macharon, Strawberry Crêpe | Shy Guy (Pastry Chef), Carrot Kart, Le Tricolore |
| Winter Tour | November 20, 2019 - December 3, 2019 | Mario (Santa), Cheermellow, Starchute | Pink Gold Peach, Wildfire Flyer, Royal Parachute |
| London Tour | December 4, 2019 - December 17, 2019 | Daisy (Holiday Cheer), Ribbon Rider, Glitter Glider | Waluigi (Bus Driver), Double-Decker, Soaring Jack |
| Holiday Tour | December 18, 2019 - December 31, 2019 | Yoshi (Reindeer), Jingle Bells, Gift Glider | Pauline (Party Time), Platinum Taxi, New Year's 2020 |
| New Year's Tour | January 1, 2020 - January 14, 2020 | Mario (Happi), Quickshaw, New Year's Kite | Toad (Party Time), Glam Bruiser, Fireworks Parachute |
| Ice Tour | January 15, 2020 - January 28, 2020 | Peach (Wintertime), Gilded Prancer, Blizzard Parasol | Penguin Luigi, Ice-blue Poltergust, Blizzard Balloons |
| Valentine's Tour | January 29, 2020 - February 11, 2020 | Baby Peach (Cherub), Apple Kart, Sweetheart Glider | Peach (Vacation), Shy Guy (Pastry Chef) |
| Vancouver Tour | February 12, 2020 - February 25, 2020 | Rosalina (Aurora), Comet Tail, Luma Parafoil | Wario (Hiker), Snow Skimmer, Rainbow Starchute |
| Mario Bros. Tour | February 26, 2020 - March 10, 2020 | Mario (Classic), Mario, Super 1 | Luigi (Classic), Luigi, Dasher II |
| Baby Rosalina Tour | March 11, 2020 - March 24, 2020 | Baby Rosalina (Detective), Tea Coupe, Plaid Ribbon | Waluigi (Bus Driver), Rosalina, Double-Decker |
| Hammer Bro Tour | March 25, 2020 - April 7, 2020 | Hammer Bro, Boomerang Bro, Rainy Balloons | Ice Bro, Fire Bro, Blizzard Balloons |
| Yoshi Tour | April 8, 2020 - April 21, 2020 | Yoshi (Egg Hunt), Bright Bunny, Bright Glider | Birdo, Birdo (Light Blue), Birdo (Yellow), Turbo Birdo, Light-blue Turbo Birdo, Yellow Turbo Birdo |
| Trick Tour | April 22, 2020 - May 5, 2020 | Builder Mario, Dozer Dasher, Safety Glider | Builder Toad, Clanky Kart, Starchute |
| Flower Tour | May 6, 2020 - May 19, 2020 | Daisy (Fairy), Prancer, Daisy Glider | Monty Mole, Queen Bee, Heart Balloons |
| Jungle Tour | May 20, 2020 - June 2, 2020 | Funky Kong, Bolt Buggy, Banana Wingtip | Dixie Kong, Offroader, Pink Flower Glider |
| Cooking Tour | June 3, 2020 - June 16, 2020 | Mario (Chef), Choco Macharon, Chocolate Donut | Shy Guy (Pastry Chef), Baby Peach (Cherub) |
Courses
New York Tour
| Course | Origin | Cup | |||||||||||||||
|---|---|---|---|---|---|---|---|---|---|---|---|---|---|---|---|---|---|
| New York Minute | Original | T | N | R | R | N | R/T | T | R/T | ||||||||
| Cheep Cheep Lagoon | 3DS | N | N | T | R | ||||||||||||
| Mario Circuit 1 | SNES | N | R | N | T | ||||||||||||
| Dino Dino Jungle | GCN | N | N | T | R | ||||||||||||
| Toad Circuit | 3DS | N | N | T | R | ||||||||||||
| Rock Rock Mountain | 3DS | N | R | T | N | ||||||||||||
| Yoshi Circuit | GCN | N | R | N | T | ||||||||||||
| Daisy Hills | 3DS | N | T | N | R | ||||||||||||
| Koopa Troopa Beach | N64 | N | R | N | T | ||||||||||||
| Shy Guy Bazaar | 3DS | N | T | N | R | ||||||||||||
| Bowser's Castle 1 | GBA | N | N | T | R | ||||||||||||
Tokyo Tour
| Course | Origin | Cup | |||||||||||||||
|---|---|---|---|---|---|---|---|---|---|---|---|---|---|---|---|---|---|
| Tokyo Blur | Original | T | N | R | R | N | R/T | T | R/T | ||||||||
| Mario Circuit | 3DS | N | N | R | T | ||||||||||||
| Rainbow Road | SNES | N | N | T | R | ||||||||||||
| Neo Bowser City | 3DS | N | R | N | T | ||||||||||||
| Mario Circuit 2 | SNES | N | R | T | N | ||||||||||||
| Yoshi Circuit | GCN | N | R | N | T | ||||||||||||
| Shy Guy Bazaar | 3DS | N | R | T | N | ||||||||||||
| Toad Circuit | 3DS | N | N | T | R | ||||||||||||
| Choco Island 2 | SNES | N | R | N | T | ||||||||||||
| Kalimari Desert | N64 | N | T | R | N | ||||||||||||
| Rock Rock Mountain | 3DS | T | N | N | R | ||||||||||||
Halloween Tour
| Course | Origin | Cup | |||||||||||||||
|---|---|---|---|---|---|---|---|---|---|---|---|---|---|---|---|---|---|
| Luigi's Mansion | DS | N | N | R | T | T | |||||||||||
| Mario Circuit | 3DS | N | N | T | R | ||||||||||||
| Koopa Troopa Beach | N64 | N | N | T | R | ||||||||||||
| Daisy Hills | 3DS | N | T | R | N | ||||||||||||
| Kalimari Desert | N64 | N | N | R | T | T | |||||||||||
| Bowser's Castle 1 | GBA | N | R | N | T | ||||||||||||
| Neo Bowser City | 3DS | N | N | R | T | ||||||||||||
| Rainbow Road | SNES | N | N | T | R | ||||||||||||
| Ghost Valley 1 | SNES | N | R | N | T | T | |||||||||||
| Dino Dino Jungle | GCN | N | R | T | N | ||||||||||||
| Waluigi Pinball | DS | N | T | N | T | R | |||||||||||
Paris Tour
| Course | Origin | Cup | |||||||||||||||||
|---|---|---|---|---|---|---|---|---|---|---|---|---|---|---|---|---|---|---|---|
| Paris Promenade | Original | N | T | R | R | N | R/T | T | R/T | ||||||||||
| Cheep Cheep Lagoon | 3DS | N | N | R | T | ||||||||||||||
| Choco Island 2 | SNES | N | N | T | R | ||||||||||||||
| Mario Circuit 3 | SNES | N | N | T | R | T | |||||||||||||
| Shy Guy Bazaar | 3DS | N | R | N | T | ||||||||||||||
| Dino Dino Jungle | GCN | N | N | R | T | T | |||||||||||||
| Bowser Castle 1 | GBA | N | N | R | T | T | |||||||||||||
| Waluigi Pinball | DS | N | T | R | N | T | |||||||||||||
| Luigi's Mansion | DS | N | N | T | R | T | |||||||||||||
| Mario Circuit 1 | SNES | N | R | N | T | ||||||||||||||
| Yoshi Circuit | GCN | N | N | R | T | T | |||||||||||||
Winter Tour
| Course | Origin | Cup | |||||||||||||||||
|---|---|---|---|---|---|---|---|---|---|---|---|---|---|---|---|---|---|---|---|
| DK Pass | DS | N | N | T | R | R | T | ||||||||||||
| Cheep Cheep Lagoon | 3DS | N | N | R | R | T | |||||||||||||
| Toad Circuit | 3DS | N | N | T | R | T | |||||||||||||
| Kalimari Desert | N64 | N | R | N | T | ||||||||||||||
| Rock Rock Mountain | 3DS | N | R | N | T | R | |||||||||||||
| Neo Bowser City | 3DS | N | N | T | R | R | |||||||||||||
| Mario Circuit 1 | SNES | N | N | R | T | ||||||||||||||
| Koopa Troopa Beach | N64 | N | R | N | T | ||||||||||||||
| Choco Island 2 | SNES | N | N | T | R | T | |||||||||||||
| Mario Circuit 3 | SNES | T | N | N | R | T | |||||||||||||
| Daisy Hills | 3DS | R/T | R/T | ||||||||||||||||
| Rainbow Road | SNES | R/T | R/T | ||||||||||||||||
| Mario Circuit | 3DS | R/T | R/T | ||||||||||||||||
London Tour
| Course | Origin | Cup | |||||||||||||||||
|---|---|---|---|---|---|---|---|---|---|---|---|---|---|---|---|---|---|---|---|
| London Loop | Original | N | T | R | R/T | N | T | R | R/T | ||||||||||
| Mario Circuit 2 | SNES | N | N | R | T | ||||||||||||||
| Daisy Hills | 3DS | N | N | R | R | T | |||||||||||||
| Neo Bowser City | 3DS | N | N | R | T | ||||||||||||||
| Rock Rock Mountain | 3DS | N | T | R | N | ||||||||||||||
| Ghost Valley 1 | SNES | R | N | N | T | T | |||||||||||||
| Toad Circuit | 3DS | N | N | R | T | ||||||||||||||
| Rainbow Road | SNES | N | R | T | N | R | |||||||||||||
| Mario Circuit | 3DS | N | T | R | N | T | |||||||||||||
| DK Pass | DS | N | R | N | T | ||||||||||||||
| Yoshi Circuit | GCN | R/T | R/T | ||||||||||||||||
| Bowser's Castle 1 | GBA | R/T | R/T | ||||||||||||||||
| Luigi's Mansion | DS | R/T | R/T | ||||||||||||||||
Holiday Tour
| Course | Origin | Cup | |||||||||||||||||
|---|---|---|---|---|---|---|---|---|---|---|---|---|---|---|---|---|---|---|---|
| New York Minute 2 | Original | N | T | N | R | T | R/T | R | R/T | ||||||||||
| DK Pass | DS | N | R | N | T | R | T | ||||||||||||
| Mario Circuit 2 | SNES | N | N | R | T | ||||||||||||||
| Daisy Hills | 3DS | N | N | R | T | R | |||||||||||||
| Ghost Valley 1 | SNES | N | R | N | T | ||||||||||||||
| Rainbow Road | 3DS | N | R | R | T | N | T | ||||||||||||
| Waluigi Pinball | DS | N | N | T | T | R | |||||||||||||
| Shy Guy Bazaar | 3DS | N | N | R | T | T | |||||||||||||
| Yoshi Circuit | GCN | N | T | R | N | R | |||||||||||||
| Mario Circuit 1 | SNES | R/T | R/T | ||||||||||||||||
| Kalimari Desert | N64 | R/T | R/T | ||||||||||||||||
| Cheep Cheep Lagoon | 3DS | R/T | R/T | ||||||||||||||||
New Year's Tour
| Course | Origin | Cup | |||||||||||||||||
|---|---|---|---|---|---|---|---|---|---|---|---|---|---|---|---|---|---|---|---|
| Tokyo Blur 2 | Original | N | T | R | N | T | R/T | R | R/T | ||||||||||
| Mario Circuit 1 | SNES | N | N | R | T | ||||||||||||||
| Cheep Cheep Lagoon | 3DS | N | R | N | R | T | |||||||||||||
| Mario Circuit 3 | SNES | N | N | R | T | ||||||||||||||
| Yoshi Circuit | GCN | N | N | R | T | T | |||||||||||||
| Shy Guy Bazaar | 3DS | N | N | T | R | ||||||||||||||
| Dino Dino Jungle | GCN | N | R | R | N | T | |||||||||||||
| Rainbow Road | 3DS | N | R | N | T | ||||||||||||||
| Luigi's Mansion | DS | N | R | T | N | T | |||||||||||||
| Waluigi Pinball | DS | N | N | R | T | ||||||||||||||
| Mario Circuit 2 | SNES | R/T | R/T | ||||||||||||||||
| Toad Circuit | 3DS | R/T | R/T | ||||||||||||||||
| Neo Bowser City | 3DS | R/T | R/T | ||||||||||||||||
Ice Tour
| Course | Origin | Cup | |||||||||||||||||
|---|---|---|---|---|---|---|---|---|---|---|---|---|---|---|---|---|---|---|---|
| Frappe Snowland | N64 | N | T | R | R | N | T | ||||||||||||
| Cheep Cheep Lagoon | 3DS | N | N | R | T | ||||||||||||||
| Mario Circuit 3 | SNES | N | R | N | T | ||||||||||||||
| Vanilla Lake 1 | SNES | N | R | T | T | N | R | ||||||||||||
| Dino Dino Jungle | GCN | N | R | T | N | ||||||||||||||
| Kalimari Desert | N64 | N | N | R | R | T | |||||||||||||
| Koopa Troopa Beach | N64 | N | T | R | N | T | |||||||||||||
| Luigi's Mansion | DS | N | R | T | N | ||||||||||||||
| Bowser's Castle 1 | GBA | N | R | N | R | T | |||||||||||||
| Mario Circuit | 3DS | N | T | N | R | T | |||||||||||||
| Shy Guy Bazaar | 3DS | R/T | R/T | ||||||||||||||||
| Choco Island 2 | SNES | R/T | R/T | ||||||||||||||||
| DK Pass | DS | R/T | R/T | ||||||||||||||||
Valentine's Tour
| Course | Origin | Cup | |||||||||||||||||
|---|---|---|---|---|---|---|---|---|---|---|---|---|---|---|---|---|---|---|---|
| Paris Promenade 2 | Original | N | T | R | T | R | N | R/T | R/T | ||||||||||
| Toad Circuit | 3DS | N | N | R | R | T | |||||||||||||
| Choco Island 2 | SNES | N | N | R | T | T | |||||||||||||
| Neo Bowser City | 3DS | N | R | T | N | R | |||||||||||||
| Rock Rock Mountain | 3DS | N | R | T | N | T | |||||||||||||
| Vanilla Lake 1 | SNES | N | N | R | T | ||||||||||||||
| Frappe Snowland | N64 | N | T | N | R | ||||||||||||||
| Koopa Troopa Beach | N64 | N | N | R | T | ||||||||||||||
| Bowser's Castle 1 | GBA | N | R | N | T | ||||||||||||||
| Rainbow Road | SNES | N | N | T | R | ||||||||||||||
| Waluigi Pinball | DS | R/T | R/T | ||||||||||||||||
| Ghost Valley 1 | SNES | R/T | R/T | ||||||||||||||||
| Dino Dino Jungle | GCN | R/T | R/T | ||||||||||||||||
Vancouver Tour
| Course | Origin | Cup | |||||||||||||||||
|---|---|---|---|---|---|---|---|---|---|---|---|---|---|---|---|---|---|---|---|
| Vancouver Velocity | Original | N | T | R | T | R | N | R/T | R/T | ||||||||||
| Waluigi Pinball | DS | N | R | R | T | N | |||||||||||||
| Mario Circuit 2 | SNES | N | R | T | N | R | |||||||||||||
| Rock Rock Mountain | 3DS | N | N | R | T | ||||||||||||||
| DK Pass | DS | N | N | T | R | T | |||||||||||||
| Rainbow Road | SNES | N | R | N | T | ||||||||||||||
| Ghost Valley 1 | SNES | N | R | N | T | ||||||||||||||
| Daisy Hills | 3DS | N | T | N | R | T | |||||||||||||
| Neo Bowser City | 3DS | N | N | R | T | ||||||||||||||
| Choco Island 2 | SNES | N | N | R | T | ||||||||||||||
| Koopa Troopa Beach | N64 | R/T | R/T | ||||||||||||||||
| Frappe Snowland | N64 | R/T | R/T | ||||||||||||||||
| Mario Circuit 3 | SNES | R/T | R/T | ||||||||||||||||
Mario Bros. Tour
| Course | Origin | Cup | |||||||||||||||||
|---|---|---|---|---|---|---|---|---|---|---|---|---|---|---|---|---|---|---|---|
| RMX Mario Circuit 1 | Original | N | T | R | N | R | T | ||||||||||||
| Waluigi Pinball | DS | N | R | T | N | T | |||||||||||||
| Mario Circuit | 3DS | T | N | R | T | N | R/T | R/T | |||||||||||
| Mario Circuit 1 | SNES | N | T | N | R | R/T | R/T | ||||||||||||
| Yoshi Circuit | GCN | N | R | N | T | T | |||||||||||||
| Rainbow Road | 3DS | N | R | R | T | N | |||||||||||||
| Toad Circuit | 3DS | N | R | T | N | R | |||||||||||||
| Luigi's Mansion | DS | R | N | T | R | N | |||||||||||||
| Ghost Valley 1 | SNES | N | R | N | T | ||||||||||||||
| Mario Circuit 3 | SNES | N | N | T | R | ||||||||||||||
| Rainbow Road | SNES | R/T | R/T | ||||||||||||||||
Baby Rosalina Tour
| Course | Origin | Cup | |||||||||||
|---|---|---|---|---|---|---|---|---|---|---|---|---|---|
| London Loop 2 | Original | N | T | R | T | N | R/T | R | R/T | ||||
| Dino Dino Jungle | GCN | N | R | T | |||||||||
| Kalimari Desert | N64 | N | R | T | |||||||||
| Cheep Cheep Lagoon | 3DS | N | R | T | |||||||||
| Mario Circuit 1 | SNES | N | T | R | |||||||||
| Luigi's Mansion | DS | N | R | T | |||||||||
| Mario Circuit 3 | SNES | N | R | T | |||||||||
| Shy Guy Bazaar | 3DS | T | N | R | |||||||||
| RMX Mario Circuit 1 | Original | R | N | T | |||||||||
| Daisy Hills | 3DS | R/T | |||||||||||
| Neo Bowser City | 3DS | R/T | |||||||||||
| Mario Circuit 2 | SNES | R/T | |||||||||||
| Rainbow Road | 3DS | R/T | |||||||||||
Hammer Bro Tour
| Course | Origin | Cup | |||||||||||
|---|---|---|---|---|---|---|---|---|---|---|---|---|---|
| Donut Plains 1 | SNES | N | T | R | N | T | R | ||||||
| Koopa Troopa Beach | N64 | N | T | R | |||||||||
| DK Pass | DS | R | N | T | |||||||||
| Frappe Snowland | N64 | N | T | R | |||||||||
| Mario Circuit 2 | SNES | N | R | T | |||||||||
| Cheep Cheep Lagoon | 3DS | N | R | T | |||||||||
| Bowser's Castle 2 | GBA | N | R | T | |||||||||
| Kalimari Desert | N64 | R | N | T | |||||||||
| Dino Dino Jungle | GCN | N | R | T | |||||||||
| Shy Guy Bazaar | 3DS | R | N | T | |||||||||
| Yoshi Circuit | GCN | R/T | |||||||||||
| Luigi's Mansion | DS | R/T | |||||||||||
| Bowser's Castle 1 | GBA | R/T | |||||||||||
Yoshi Tour
| Course | Origin | Cup | |||||||||||
|---|---|---|---|---|---|---|---|---|---|---|---|---|---|
| Yoshi Circuit | GCN | N | R | T | |||||||||
| Rock Rock Mountain | 3DS | N | T | R | |||||||||
| Choco Island 2 | SNES | R | N | T | |||||||||
| Daisy Hills | 3DS | N | R | T | |||||||||
| Bowser's Castle 2 | GBA | R | N | T | |||||||||
| Frappe Snowland | N64 | N | R | T | |||||||||
| Neo Bowser City | 3DS | N | R | T | |||||||||
| DK Pass | DS | N | T | R | |||||||||
| Vanilla Lake 1 | SNES | N | T | R | |||||||||
| Koopa Troopa Beach | N64 | N | R | T | |||||||||
| Donut Plains 1 | SNES | R/T | R/T | ||||||||||
| Kalimari Desert | N64 | R/T | R/T | ||||||||||
| RMX Mario Circuit 1 | Original | R/T | R/T | ||||||||||
Trick Tour
| Course | Origin | Cup | |||||||||||
|---|---|---|---|---|---|---|---|---|---|---|---|---|---|
| Mario Circuit | 3DS | R/T | R/T | ||||||||||
| Yoshi Circuit | GCN | R/T | |||||||||||
| Bowser's Castle 2 | GBA | R/T | R/T | ||||||||||
| Cheep Cheep Lagoon | 3DS | R/T | R/T | ||||||||||
| Koopa Troopa Beach | N64 | R/T | |||||||||||
| Rainbow Road | SNES | R/T | |||||||||||
| Toad Circuit | 3DS | R/T | R/T | ||||||||||
| Daisy Hills | 3DS | R/T | |||||||||||
| Vanilla Lake 1 | SNES | R/T | R/T | ||||||||||
| Shy Guy Bazaar | 3DS | R/T | R/T | ||||||||||
| Bowser's Castle 1 | GBA | R/T | |||||||||||
| Kalimari Desert | N64 | R/T | |||||||||||
| Dino Dino Jungle | GCN | R/T | R/T | ||||||||||
| Mario Circuit 2 | SNES | R/T | |||||||||||
| Choco Island 2 | SNES | R/T | R/T | ||||||||||
| DK Pass | DS | R/T | R/T | ||||||||||
| Frappe Snowland | N64 | R/T | |||||||||||
| Neo Bowser City | 3DS | R/T | |||||||||||
| Ghost Valley 1 | SNES | R/T | |||||||||||
| Waluigi Pinball | DS | R/T | R/T | ||||||||||
| Luigi's Mansion | DS | R/T | |||||||||||
| Mario Circuit 3 | SNES | R/T | |||||||||||
| RMX Mario Circuit 1 | Original | R/T | |||||||||||
| Mario Circuit 1 | SNES | R/T | |||||||||||
| Rainbow Road | 3DS | R/T | |||||||||||
| Donut Plains 1 | SNES | R/T | |||||||||||
Flower Tour
| Course | Origin | Cup | |||||||||||
|---|---|---|---|---|---|---|---|---|---|---|---|---|---|
| Daisy Hills | 3DS | T | N | R | |||||||||
| Shy Guy Bazaar | 3DS | R | N | T | |||||||||
| RMX Choco Island 1 | Original | N | T | N | R | T | R | ||||||
| Mario Circuit 1 | SNES | R | N | T | |||||||||
| Waluigi Pinball | DS | N | T | R | |||||||||
| Rainbow Road | 3DS | N | R | T | |||||||||
| Toad Circuit | 3DS | R | T | N | |||||||||
| Mario Circuit | 3DS | R | N | T | |||||||||
| Bowser's Castle 1 | GBA | N | T | R | |||||||||
| Vanilla Lake 1 | SNES | R/T | R/T | ||||||||||
| Cheep Cheep Lagoon | 3DS | R/T | R/T | ||||||||||
| Koopa Troopa Beach | N64 | R/T | R/T | ||||||||||
Jungle Tour
| Course | Origin | Cup | |||||||||||
|---|---|---|---|---|---|---|---|---|---|---|---|---|---|
| DK Pass | DS | N | T | R | N | T | R | ||||||
| RMX Choco Island 1 | Original | N | R | T | |||||||||
| Dino Dino Jungle | GCN | T | N | R | |||||||||
| Daisy Hills | 3DS | R | N | T | |||||||||
| Mario Circuit | 3DS | R | T | N | |||||||||
| Vanilla Lake 1 | SNES | N | R | T | |||||||||
| Mario Circuit 1 | SNES | N | T | R | |||||||||
| Toad Circuit | 3DS | R | T | N | R/T | ||||||||
| Bowser's Castle 2 | GBA | N | T | R | |||||||||
| Luigi's Mansion | DS | R | T | N | |||||||||
| Shy Guy Bazaar | 3DS | R/T | |||||||||||
| Choco Island 2 | SNES | R/T | |||||||||||
Cooking Tour
| Course | Origin | Cup | |||||||||||
|---|---|---|---|---|---|---|---|---|---|---|---|---|---|
| Choco Island 1 | SNES | N | T | R | N | ||||||||
| Yoshi Circuit | GCN | R | |||||||||||
| Luigi's Mansion | DS | T | N | R | |||||||||
| Donut Plains 1 | SNES | R | |||||||||||
| RMX Mario Circuit 1 | Original | R | T | ||||||||||
| Frappe Snowland | N64 | N | R | T | |||||||||
| Kalimari Desert | N64 | N | T | ||||||||||
| Vanilla Lake 1 | SNES | R | N | ||||||||||
| Cheep Cheep Lagoon | 3DS | R | T | ||||||||||
| Rock Rock Mountain | 3DS | N | |||||||||||
| Bowser's Castle 2 | GBA | ||||||||||||
| Waluigi Pinball | DS | ||||||||||||
| Ghost Valley 1 | SNES | ||||||||||||
Drivers
- For the tables to convert the Level shown here in the actual statistics used by the game, see Mario Kart Tour in-game statistics.
There are currently 81 playable characters (82 if including Gold Mario, who appears exclusively in the Coin Rush mode) in Mario Kart Tour, making it the Mario game with the most playable characters. Upon launching the game for the first time, players start with either Toad, Toadette, or Peachette. After the tutorial they are granted a free pipe pull which grants either Peach, Bowser, Metal Mario or Dry Bowser. Unlike other Mario Kart games, characters are sorted by their rarity of unlocking them, via opening up randomized green or gold pipes with rubies. There are three tiers of rarity: Normal, Super, and High-End. While the Normal characters are easier to unlock, rarer characters have a greater amount of starting points and have more favored courses. Once players clear the tutorial, they are rewarded with a random Super-class character.
So far, the only changes in the main statistics that were found affect acceleration and weight, and depend on the kart size.
| Kart size | Small | Medium | Large |
|---|---|---|---|
| Acceleration | 17 | 10 | 3 |
| Weight | 6 | 10 | 14 |
Below is a list of all drivers in the game grouped by rarity, displaying the special item, kart size, date of availability and favored tracks, as well as traits, for each driver. Traits, such as a mustache, extended tongue, or shell, may be shared between drivers. Some challenges in the game require the player to perform a certain action or a number of actions using any driver with a certain trait.
Normal
| Baby Mario | Baby Peach | Baby Daisy | Baby Rosalina | Baby Luigi | Koopa Troopa | |||||||||||
|---|---|---|---|---|---|---|---|---|---|---|---|---|---|---|---|---|

|

|

|
File:MKT Artwork Baby Rosalina.png | 
|

| |||||||||||
| Special item | Boomerang Flower |
Special item | Bubble |
Special item | Bubble |
Special item | Bubble |
Special item | Boomerang Flower |
Special item | Triple Green Shells | |||||
| Kart size | Small | Kart size | Small | Kart size | Small | Kart size | Small | Kart size | Small | Kart size | Small | |||||
| Availability | September 25, 2019 | Availability | September 25, 2019 | Availability | September 25, 2019 | Availability | October 9, 2019 | Availability | October 23, 2019 | Availability | September 25, 2019 | |||||
| Special availability in | Winter (Tour gift) Baby Rosalina (Tour gift) Mario Bros. (Week 1 pack) |
Special availability in | Valentine's (Tour gift) Trick (Gold Pass gift) |
Special availability in | Ice (Gold Pass gift) Yoshi (Tour gift) Flower (Gold Pass gift) |
Special availability in | London (Tour gift) Holiday (Gold Pass gift) Vancouver (Gold Pass gift) Baby Rosalina (Week 1 pack) |
Special availability in | Valentine's (Week 2 pack) Mario Bros. (Week 2 pack) Jungle (Tour gift) |
Special availability in | New York (Tour gift) Holiday (Tour gift) Flower (Tour gift) | |||||
| Character traits | Baby, hat | Character traits | Baby, crown, short sleeves | Character traits | Baby, crown, short sleeves | Character traits | Baby, crown, short sleeves | Character traits | Baby, hat | Character traits | Shell | |||||
| Shy Guy | Dry Bones | Iggy | Larry | Lemmy | Ludwig | |||||||||||

|

|

|

|

|
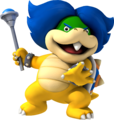
| |||||||||||
| Special item | Double Bob-ombs |
Special item | Triple Green Shells |
Special item | Triple Green Shells |
Special item | Boomerang Flower |
Special item | Bubble |
Special item | Dash Ring | |||||
| Kart size | Small | Kart size | Small | Kart size | Medium | Kart size | Small | Kart size | Small | Kart size | Medium | |||||
| Availability | September 25, 2019 | Availability | September 25, 2019 | Availability | October 9, 2019 | Availability | October 9, 2019 | Availability | October 9, 2019 | Availability | October 9, 2019 | |||||
| Special availability in | Ice (Tour gift) Trick (Tour gift) |
Special availability in | Mario Bros. (Tour gift) |
Special availability in | New Year's (Tour gift) |
Special availability in | None | Special availability in | None | Special availability in | None | |||||
| Character traits | Character traits | Gloves, shell | Character traits | Koopaling, shell | Character traits | Koopaling, shell | Character traits | Koopaling, shell | Character traits | Koopaling, shell | ||||||
| Morton | Roy | Wendy | ||||||||||||||
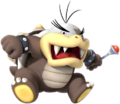
|

|
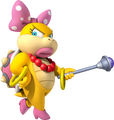
| ||||||||||||||
| Special item | Giant Banana |
Special item | Double Bob-ombs |
Special item | Heart | |||||||||||
| Kart size | Large | Kart size | Large | Kart size | Small | |||||||||||
| Availability | October 9, 2019 | Availability | October 9, 2019 | Availability | October 9, 2019 | |||||||||||
| Special availability in | New Year's (Gold Pass gift) Vancouver (Tour gift) Hammer Bro (Tour gift) |
Special availability in | None | Special availability in | Valentine's (Gold Pass gift) | |||||||||||
| Character traits | Koopaling, shell, three hairs | Character traits | Koopaling, shell | Character traits | Koopaling, ribbon, shell | |||||||||||
Super
Regular
These characters can be obtained from any tour.
| Mario | Peach | Yoshi | Daisy | Toad | Toadette | |||||||||||
|---|---|---|---|---|---|---|---|---|---|---|---|---|---|---|---|---|

|

|

|

|

|

| |||||||||||
| Special item | Fire Flower |
Special item | Heart |
Special item | Yoshi's Egg |
Special item | Heart |
Special item | Triple Mushrooms |
Special item | Triple Mushrooms | |||||
| Kart size | Medium | Kart size | Medium | Kart size | Medium | Kart size | Medium | Kart size | Small | Kart size | Small | |||||
| Availability | September 25, 2019 | Availability | September 25, 2019 | Availability | September 25, 2019 | Availability | September 25, 2019 | Availability | September 25, 2019 | Availability | September 25, 2019 | |||||
| Special availability in | New York (Pack) Mario Bros. (Week 1 spotlight, Gold Pass gift) |
Special availability in | Tokyo (Tour gift) |
Special availability in | New York (Tour gift) Yoshi (Week 1 pack) |
Special availability in | New York (Tour gift) Flower (Week 2 pack) |
Special availability in | None | Special availability in | None | |||||
| Character traits | Gloves, hat, mustache | Character traits | Crown, dress, earrings, gloves, short sleeves | Character traits | Extended tongue, shell | Character traits | Crown, dress, earrings, gloves, short sleeves | Character traits | Character traits | |||||||
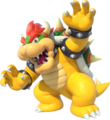
| Rosalina | Luigi | Toad (Pit Crew) (new variant) | Red Yoshi | Bowser | Donkey Kong | |||||||||||

|

|

|

|
|
![Artwork of Donkey Kong in Super Mario Party (also used for Mario Kart Tour and the Nintendo Switch version of Mario vs. Donkey Kong[1])](https://mario.wiki.gallery/images/thumb/b/b5/SuperMarioParty_DonkeyKong.png/105px-SuperMarioParty_DonkeyKong.png)
| |||||||||||
| Special item | Dash Ring |
Special item | Fire Flower |
Special item | Boomerang Flower |
Special item | Yoshi's Egg |
Special item | Bowser's Shell |
Special item | Giant Banana | |||||
| Kart size | Large | Kart size | Medium | Kart size | Small | Kart size | Medium | Kart size | Large | Kart size | Large | |||||
| Availability | October 9, 2019 | Availability | October 23, 2019 | Availability | November 6, 2019 | Availability | January 1, 2020 | Availability | September 25, 2019 | Availability | September 25, 2019 | |||||
| Special availability in | Tokyo (Pack) Baby Rosalina (Week 2 spotlight) |
Special availability in | Halloween (Pack) New Year's (Week 1 pack) Mario Bros. (Week 2 spotlight, Gold Pass gift) |
Special availability in | Paris (Pack) |
Special availability in | New Year's (Week 1 pack) Yoshi (Gold Pass gift) |
Special availability in | Halloween (Tour gift) Jungle (Week 1 pack) |
Special availability in | Halloween (Pack) Vancouver (Week 1 pack) Jungle (Gold Pass gift) | |||||
| Character traits | Crown, dress, earrings | Character traits | Gloves, hat, mustache | Character traits | Gloves, helmet | Character traits | Extended tongue, shell | Character traits | Horns, shell | Character traits | Kong family, tie | |||||
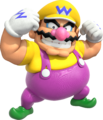
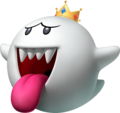
| Diddy Kong | Lakitu | Bowser Jr. | Wario | Waluigi | King Boo | |||||||||||

|

|

|
|

|
| |||||||||||
| Special item | Banana Barrels |
Special item | Triple Green Shells |
Special item | Bowser's Shell |
Special item | Double Bob-ombs |
Special item | Double Bob-ombs |
Special item | Lucky Seven | |||||
| Kart size | Medium | Kart size | Small | Kart size | Small | Kart size | Large | Kart size | Large | Kart size | Large | |||||
| Availability | September 25, 2019 | Availability | October 9, 2019 | Availability | October 9, 2019 | Availability | October 9, 2019 | Availability | October 23, 2019 | Availability | October 23, 2019 | |||||
| Special availability in | Tokyo (Pack) Paris (Tour gift) Jungle (Week 2 pack) |
Special availability in | London (Week 2 pack) Baby Rosalina (Gold Pass gift) |
Special availability in | Paris (Pack) Ice (Week 2 pack) |
Special availability in | Winter (Week 2 pack) |
Special availability in | Holiday (Week 2 pack) Baby Rosalina (Week 2 pack) |
Special availability in | New Year's (Week 2 pack) | |||||
| Character traits | Hat, Kong family | Character traits | Shell, three hairs | Character traits | Baby, horns, shell | Character traits | Gloves, hat, mustache, short sleeves | Character traits | Gloves, hat, mustache | Character traits | Crown, extended tongue | |||||
| Black Shy Guy | Red Koopa (Freerunning) (new variant) | Birdo | Pink Shy Guy | Birdo (Light Blue) (new variant) | Hammer Bro (new) | |||||||||||

|

|

|

|

|
![Artwork of Hammer Bro in Mario Party 8 (also used in Mario Super Sluggers, New Super Mario Bros. Wii, Super Mario 3D Land,[1] Super Mario Party and Mario Kart Tour)](https://mario.wiki.gallery/images/thumb/4/4c/MP8_Hammer_Bro_Artwork.png/99px-MP8_Hammer_Bro_Artwork.png)
| |||||||||||
| Special item | Bob-omb Cannon |
Special item | Fire Flower |
Special item | Birdo's Egg |
Special item | Heart |
Special item | Birdo's Egg |
Special item | Hammer | |||||
| Kart size | Small | Kart size | Small | Kart size | Medium | Kart size | Small | Kart size | Medium | Kart size | Medium | |||||
| Availability | November 20, 2019 | Availability | December 4, 2019 | Availability | December 18, 2019 | Availability | January 29, 2020 | Availability | February 12, 2020 | Availability | March 25, 2020 (March 11, 2020 as opponent in a Bonus Challenge) | |||||
| Special availability in | Winter (Week 1 pack) |
Special availability in | London (Week 1 pack) |
Special availability in | Holiday (Week 1 pack) Yoshi (Week 2 spotlight) |
Special availability in | Valentine's (Week 1 pack) |
Special availability in | Vancouver (Week 2 pack) Yoshi (Week 2 spotlight) |
Special availability in | Hammer Bro (Week 1 spotlight) | |||||
| Character traits | Character traits | Hat, shell | Character traits | Ribbon | Character traits | Character traits | Ribbon | Character Traits | Hat, helmet, shell | |||||||
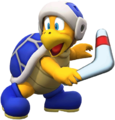
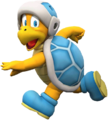
| Boomerang Bro (new) | Ice Bro (new) | Fire Bro (new) | Birdo (Yellow) (new variant) | |||||||||||||
|
|

|

| |||||||||||||
| Special item | Boomerang Flower |
Special item | Ice Flower |
Special item | Fire Flower |
Special item | Birdo's Egg | |||||||||
| Kart size | Medium | Kart size | Medium | Kart size | Medium | Kart size | Medium | |||||||||
| Availability | March 25, 2020 | Availability | March 25, 2020 | Availability | March 25, 2020 | Availability | April 8, 2020 | |||||||||
| Special availability in | Hammer Bro (Week 1 spotlight, Gold Pass gift) |
Special availability in | Hammer Bro (Week 2 spotlight) |
Special availability in | Hammer Bro (Week 2 spotlight, Gold Pass gift) |
Special availability in | Yoshi (Week 2 spotlight) | |||||||||
| Character Traits | Hat, helmet, shell | Character Traits | Hat, helmet, shell | Character Traits | Hat, helmet, shell | Character Traits | Ribbon | |||||||||
Tour-exclusive
These characters can only be obtained during certain tours from a pipe spotlight, special pipe, ruby pack, or Gold Pass-exclusive tour gift.
| Monty Mole (new) | |
|---|---|

| |
| Special item | Mushroom Cannon |
| Kart size | Medium |
| Availability | May 6, 2020 |
| Exclusive tour(s) | Flower (Week 2 spotlight) |
| Character Traits | Mustache |
High-End
Regular
These characters can be obtained from any tour.
| Metal Mario | Peachette (new) | Pauline (new) | Ice Mario (new) | Dry Bowser | |||||||||
|---|---|---|---|---|---|---|---|---|---|---|---|---|---|

|

|

|
| ||||||||||
| Special item | Fire Flower |
Special item | Mushroom Cannon |
Special item | Lucky Seven |
Special item | Ice Flower |
Special item | Bowser's Shell | ||||
| Kart size | Medium | Kart size | Medium | Kart size | Large | Kart size | Medium | Kart size | Large | ||||
| Availability | September 25, 2019 | Availability | September 25, 2019 | Availability | September 25, 2019 (Tour-exclusive) December 18, 2019 (Regular) |
Availability | January 15, 2020 | Availability | September 25, 2019 | ||||
| Special availability | New York (Gold Pass gift) Paris (Gold Pass gift) Trick (Week 1 pack) |
Special availability | Halloween (Gold Pass gift) London (Gold Pass gift) |
Special availability | New York (Week 1 spotlight) |
Special availability | Ice (Week 1 pack) |
Special availability | Tokyo (Gold Pass gift) Winter (Gold Pass gift) Hammer Bro (Week 1 pack) | ||||
| Character traits | Gloves, hat, mustache | Character traits | Crown, dress, gloves, ribbon, short sleeves | Character traits | Dress, earrings | Character traits | Gloves, hat, mustache | Character traits | Horns, shell | ||||
Tour-exclusive
These characters can only be obtained during certain tours from a pipe spotlight, special pipe, ruby pack, or Gold Pass-exclusive tour gift.
| Mario (Musician) (new variant) | Peach (Kimono) (new variant) | Mario (Hakama) (new variant) | Rosalina (Halloween) (new variant) | Peach (Vacation) (new variant) | Mario (Santa) (new variant) | |||||||||||
|---|---|---|---|---|---|---|---|---|---|---|---|---|---|---|---|---|
| File:MKT Artwork Mario Musician.png | 
|

|

|

|

| |||||||||||
| Special item | Double Bob-ombs |
Special item | Mushroom Cannon |
Special item | Coin Box |
Special item | Dash Ring |
Special item | Coin Box |
Special item | Fire Flower | |||||
| Kart size | Medium | Kart size | Medium | Kart size | Medium | Kart size | Large | Kart size | Medium | Kart size | Medium | |||||
| Availability | September 25, 2019 | Availability | October 9, 2019 | Availability | October 9, 2019 | Availability | October 23, 2019 | Availability | November 6, 2019 | Availability | November 20, 2019 | |||||
| Exclusive tour(s) | New York (Week 2 spotlight) New Year's (Non-spotlight) |
Exclusive tour(s) | Tokyo (Week 1 spotlight) New Year's (Non-spotlight) |
Exclusive tour(s) | Tokyo (Week 2 spotlight) New Year's (Non-spotlight) |
Exclusive tour(s) | Halloween (Week 1 spotlight) New Year's (Non-spotlight) |
Exclusive tour(s) | Paris (Week 1 spotlight) Valentine's (Week 2 spotlight) |
Exclusive tour(s) | Winter (Week 1 spotlight) London, Holiday (Non-spotlight) | |||||
| Character traits | Gloves, hat, mustache, tie | Character traits | Dress, earrings, ribbon | Character traits | Gloves, mustache | Character traits | Dress, earrings, hat | Character traits | Dress, earrings, hat, short sleeves | Character traits | Gloves, hat, mustache | |||||
| Pink Gold Peach | Daisy (Holiday Cheer) (new variant) | Yoshi (Reindeer) (new variant) | Pauline (Party Time) (new variant) | Mario (Happi) (new variant) | Toad (Party Time) (new variant) | |||||||||||

|

|

|

|

|

| |||||||||||
| Special item | Coin Box |
Special item | Lucky Seven |
Special item | Yoshi's Egg |
Special item | Coin Box |
Special item | Bob-omb Cannon |
Special item | Mushroom Cannon | |||||
| Kart size | Medium | Kart size | Medium | Kart size | Medium | Kart size | Large | Kart size | Medium | Kart size | Small | |||||
| Availability | November 20, 2019 | Availability | December 4, 2019 | Availability | December 18, 2019 | Availability | December 18, 2019 | Availability | January 1, 2020 | Availability | January 1, 2020 | |||||
| Exclusive tour(s) | Winter (Week 2 spotlight) Yoshi (Special Pipe) Flower (Week 1 pack) |
Exclusive tour(s) | London (Week 1 spotlight) Holiday (Non-spotlight) |
Exclusive tour(s) | Holiday (Week 1 spotlight) |
Exclusive tour(s) | Holiday (Week 2 spotlight) New Year's (Non-spotlight) Yoshi (Special Pipe) |
Exclusive tour(s) | New Year's (Week 1 spotlight) |
Exclusive tour(s) | New Year's (Week 2 spotlight) Yoshi (Special Pipe) | |||||
| Character traits | Crown, dress, earrings, gloves, short sleeves | Character traits | Dress, earrings, gloves, hat | Character traits | Extended tongue, horns, shell | Character traits | Dress, earrings, gloves, short sleeves | Character traits | Gloves, mustache, short sleeves | Character traits | Hat, mustache, ribbon | |||||
| Peach (Wintertime) (new variant) | Penguin Luigi (new variant) | Baby Peach (Cherub) (new variant) | Rosalina (Aurora) (new variant) | Mario (Classic) (new variant) | Luigi (Classic) (new variant) | |||||||||||

|
|

|

|

| ||||||||||||
| Special item | Dash Ring |
Special item | Ice Flower |
Special item | Heart |
Special item | Ice Flower |
Special item | Triple Mushrooms |
Special item | Lucky Seven | |||||
| Kart size | Medium | Kart size | Medium | Kart size | Small | Kart size | Large | Kart size | Medium | Kart size | Medium | |||||
| Availability | January 15, 2020 | Availability | January 15, 2020 | Availability | January 29, 2020 | Availability | February 12, 2020 | Availability | February 26, 2020 | Availability | February 26, 2020 | |||||
| Exclusive tour(s) | Ice (Week 1 spotlight) |
Exclusive tour(s) | Ice (Week 2 spotlight) |
Exclusive tour(s) | Valentine's (Week 1 spotlight) Cooking (Week 2 spotlight) |
Exclusive tour(s) | Vancouver (Week 1 spotlight) |
Exclusive tour(s) | Mario Bros. (Week 1 spotlight) |
Exclusive tour(s) | Mario Bros. (Week 2 spotlight) | |||||
| Character traits | Dress, earrings, gloves, hat | Character traits | Hat, mustache | Character traits | Baby, crown, short sleeves | Character traits | Crown, dress, earrings, gloves | Character traits | Gloves, hat, mustache | Character traits | Gloves, hat, mustache | |||||
| Baby Rosalina (Detective) (new variant) | Yoshi (Egg Hunt) (new variant) | Black Yoshi | Builder Mario (new variant) | Builder Toad (new variant) | Daisy (Fairy) (new variant) | |||||||||||

|
|

|

|
|

| |||||||||||
| Special item | Dash Ring |
Special item | Yoshi's Egg |
Special item | Double Bob-ombs |
Special item | Hammer |
Special item | Bob-omb Cannon |
Special item | Heart | |||||
| Kart size | Small | Kart size | Medium | Kart size | Medium | Kart size | Medium | Kart size | Small | Kart size | Medium | |||||
| Availability | March 11, 2020 | Availability | April 8, 2020 | Availability | April 15, 20201 | Availability | April 22, 2020 | Availability | April 22, 2020 | Availability | May 6, 2020 | |||||
| Exclusive tour(s) | Baby Rosalina (Week 1 spotlight) |
Exclusive tour(s) | Yoshi (Week 1 spotlight) |
Exclusive tour(s) | Yoshi (Week 2 pack) |
Exclusive tour(s) | Trick (Week 1 spotlight) |
Exclusive tour(s) | Trick (Week 2 spotlight) |
Exclusive tour(s) | Flower (Week 1 spotlight) | |||||
| Character traits | Baby, hat, ribbon, short sleeves | Character traits | Extended tongue, helmet, shell | Character traits | Extended tongue, shell | Character traits | Gloves, helmet, mustache | Character traits | Helmet | Character traits | Dress, earrings, hat | |||||
| Mario (Chef) (new variant) | King Boo (Luigi's Mansion) (new variant) | Shy Guy (Pastry Chef) (new variant) | Waluigi (Bus Driver) (new variant) | Gold Koopa (Freerunning) (new variant) | Wario (Hiker) (new variant) | |||||||||||
| File:Nocoverart.png | 
|

|

|

|

| |||||||||||
| Special item | Lucky Seven |
Special item | Bob-omb Cannon |
Special item | Mushroom Cannon |
Special item | Triple Bananas |
Special item | Coin Box |
Special item | Bob-omb Cannon | |||||
| Kart size | Large | Kart size | Small | Kart size | Large | Kart size | Small | Kart size | Large | Kart size | Small | |||||
| Availability | June 3, 2020 | Availability | October 23, 2019 | Availability | November 6, 2019 | Availability | December 4, 2019 | Availability | January 1, 2020 | Availability | February 12, 2020 | |||||
| Exclusive tour(s) | Cooking (Week 1 spotlight) |
Exclusive tour(s) | Halloween (Week 2 spotlight) New Year's (Non-spotlight) |
Exclusive tour(s) | Paris (Week 2 spotlight) Valentine's (Week 2 spotlight) Cooking (Week 2 spotlight) |
Exclusive tour(s) | London (Week 2 spotlight) Baby Rosalina (Week 2 spotlight) Yoshi (Special Pipe) |
Exclusive tour(s) | New Year's (Gold Pass gift) Hammer Bro (Week 1 pack) Cooking (Special Pipe) |
Exclusive tour(s) | Vancouver (Week 2 spotlight) | |||||
| Character traits | Hat, mustache, tie | Character traits | Crown, extended tongue | Character traits | Hat, tie | Character traits | Gloves, hat, mustache, tie | Character traits | Hat, shell | Character traits | Gloves, hat, mustache | |||||
| Dry Bones (Gold) (new variant) | Funky Kong | Dixie Kong (new) | Dry Bowser (Gold) (new variant) | |||||||||||||

|

|

|
File:Nocoverart.png | |||||||||||||
| Special item | Coin Box |
Special item | Banana Barrels |
Special item | Triple Bananas |
Special item | Bob-omb Cannon | |||||||||
| Kart size | Small | Kart size | Large | Kart size | Medium | Kart size | Large | |||||||||
| Availability | April 29, 20202 | Availability | May 20, 2020 | Availability | May 20, 2020 | Availability | June 3, 2020 | |||||||||
| Exclusive tour(s) | Trick (Week 2 pack) Cooking (Special Pipe) |
Exclusive tour(s) | Jungle (Week 1 spotlight) |
Exclusive tour(s) | Jungle (Week 2 spotlight) |
Exclusive tour(s) | Cooking (Special Pipe) | |||||||||
| Character traits | Gloves, shell | Character traits | Hat, Kong family | Character traits | Earrings, hat, Kong family | Character traits | Horns, shell | |||||||||
1 - This character was added to the game on April 8, 2020, but could not be unlocked until April 15, 2020.
2 - This character was added to the game on April 22, 2020, but could not be unlocked until April 29, 2020.
Other
| Gold Mario | |
|---|---|
| File:MKT Artwork Gold Mario.png | |
| Special item | Coin Box[10] |
| Kart size | Medium |
| Availability | Coin Rush Mode |
Chance increase of obtaining a Frenzy
| Skill level | 1 | 2 | 3 | 4 | 5 | 6 | |
|---|---|---|---|---|---|---|---|
| Normal | 0% | 2% | 2% | 4% | 4% | 6% | |
| Super | 1% | 3% | 3% | 5% | 5% | 8% | |
| High-End | 2% | 4% | 4% | 7% | 7% | 10% |
Karts
Normal
Regular
| Pipe Frame | Birthday Girl | Mushmellow | Koopa Dasher | Biddybuggy | Cheep Charger | |||||||||||
|---|---|---|---|---|---|---|---|---|---|---|---|---|---|---|---|---|
| Special skill | Slipstream Plus |
Special skill | Dash Panel Plus |
Special skill | Jump Boost Plus |
Special skill | Rocket Start Plus |
Special skill | Slipstream Plus |
Special skill | Jump Boost Plus | |||||
| Availability | September 25, 2019 | Availability | September 25, 2019 | Availability | September 25, 2019 | Availability | September 25, 2019 | Availability | October 9, 2019 | Availability | October 9, 2019 | |||||
| Special availability in | Available upon starting the game | Special availability in | Holiday (Tour gift) Valentine's (Tour gift) Yoshi (Tour gift) |
Special availability in | London (Tour gift) |
Special availability in | New York (Tour gift) |
Special availability in | None | Special availability in | Ice (Tour gift) Hammer Bro (Tour gift) | |||||
| Green Kiddie Kart (new) | Red Kiddie Kart (new variant) | Bullet Blaster | Landship | Pipe Buggy (new) | ||||||||||||
| Special skill | Rocket Start Plus |
Special skill | Slipstream Plus |
Special skill | Rocket Start Plus |
Special skill | Mini-Turbo Plus |
Special skill | Slipstream Plus | |||||||
| Availability | January 29, 2020 | Availability | February 26, 2020 | Availability | September 25, 2019 | Availability | October 9, 2019 | Availability | October 23, 2019 | |||||||
| Special availability in | Valentine's (Week 2 pack) Jungle (Tour gift) |
Special availability in | Mario Bros. (Gold Pass gift) Flower (Tour gift) |
Special availability in | New Year's (Tour gift) Baby Rosalina (Tour gift) |
Special availability in | Tokyo (Tour gift) Mario Bros. (Tour gift) Trick (Tour gift) |
Special availability in | Winter (Tour gift) Vancouver (Tour gift) | |||||||
Tour-exclusive
| Blue Biddybuggy | Pink Mushmellow (new variant) | Birthday Girl Rosalina | Bull's-Eye Banzai (new variant) | Warship (new variant) | Green Cheep Charger (new variant) | |||||||||||
|---|---|---|---|---|---|---|---|---|---|---|---|---|---|---|---|---|
| Special skill | Slipstream Plus |
Special skill | Dash Panel Plus |
Special skill | Slipstream Plus |
Special skill | Rocket Start Plus |
Special skill | Mini-Turbo Plus |
Special skill | Jump Boost Plus | |||||
| Availability | October 9, 2019 | Availability | November 6, 2019 | Availability | December 4, 2019 | Availability | September 25, 2019 | Availability | October 23, 2019 | Availability | November 20, 2019 | |||||
| Exclusive tour(s) | Tokyo (Gold Pass gift) |
Exclusive tour | Paris (Gold Pass gift) |
Exclusive tour | London (Gold Pass gift) |
Exclusive tour | New York (Gold Pass gift) Hammer Bro (Gold Pass gift) |
Exclusive tour | Halloween (Gold Pass gift) |
Exclusive tour | Winter (Gold Pass gift) | |||||
Super
Regular
| Mach 8 | Daytripper | Turbo Yoshi | Soda Jet | Super Blooper | Royale | |||||||||||
|---|---|---|---|---|---|---|---|---|---|---|---|---|---|---|---|---|
| Special skill | Slipstream Plus |
Special skill | Dash Panel Plus |
Special skill | Jump Boost Plus |
Special skill | Mini-Turbo Plus |
Special skill | Mini-Turbo Plus |
Special skill | Slipstream Plus | |||||
| Availability | September 25, 2019 | Availability | September 25, 2019 | Availability | September 25, 2019 | Availability | September 25, 2019 | Availability | September 25, 2019 | Availability | October 9, 2019 | |||||
| Special availability in | None | Special availability in | New York (Tour gift) |
Special availability in | Yoshi (Week 2 pack) |
Special availability in | None | Special availability in | Halloween (Tour gift) |
Special availability in | London (Gold Pass gift) | |||||
| Cloud 9 | Poltergust 4000 | Streamliner | Zucchini | Red Turbo Yoshi (new variant) | Blue Seven | |||||||||||
| Special skill | Jump Boost Plus |
Special skill | Slipstream Plus |
Special skill | Slipstream Plus |
Special skill | Mini-Turbo Plus |
Special skill | Rocket Start Plus |
Special skill | Rocket Start Plus | |||||
| Availability | October 9, 2019 | Availability | October 23, 2019 | Availability | November 6, 2019 | Availability | November 20, 2019 | Availability | January 1, 2020 | Availability | January 15, 2020 | |||||
| Special availability in | Winter (Gold Pass gift) |
Special availability in | None | Special availability in | None | Special availability in | None | Special availability in | New Year's (Week 1 pack) Yoshi (Gold Pass gift) |
Special availability in | Ice (Week 1 pack) | |||||
| Yellow Turbo Birdo (new variant) | Egg 1 | Flame Flyer | Barrel Train | DK Jumbo | Koopa Clown | |||||||||||
| Special skill | Dash Panel Plus |
Special skill | Mini-Turbo Plus |
Special skill | Rocket Start Plus |
Special skill | Rocket Start Plus |
Special skill | Jump Boost Plus |
Special skill | Mini-Turbo Plus | |||||
| Availability | April 8, 2020 | Availability | April 8, 2020 | Availability | September 25, 2019 | Availability | September 25, 2019 | Availability | October 9, 2019 | Availability | October 9, 2019 | |||||
| Special availability in | Yoshi (Week 2 spotlight) |
Special availability in | Yoshi (Week 1 pack) |
Special availability in | None | Special availability in | None | Special availability in | Paris (Tour gift) |
Special availability in | None | |||||
| Para-Wing | Turbo Birdo | Light-blue Turbo Birdo (new variant) | ||||||||||||||
| Special skill | Jump Boost Plus |
Special skill | Mini-Turbo Plus |
Special skill | Rocket Start Plus | |||||||||||
| Availability | December 4, 2019 | Availability | December 18, 2019 | Availability | February 12, 2020 | |||||||||||
| Special availability in | None | Special availability in | Holiday (Week 1 pack) Yoshi (Week 2 spotlight) |
Special availability in | Vancouver (Week 2 pack) Yoshi (Week 2 spotlight) | |||||||||||
Tour-exclusive
| Gold Blooper (new variant) | White Royale (new variant) | Red Streamliner (new variant) | Super 1 (new variant) | Dasher II (new variant) | Tea Coupe (new) | |||||||||||
|---|---|---|---|---|---|---|---|---|---|---|---|---|---|---|---|---|
| Special skill | Mini-Turbo Plus |
Special skill | Rocket Start Plus |
Special skill | Slipstream Plus |
Special skill | Jump Boost Plus |
Special skill | Dash Panel Plus |
Special skill | Jump Boost Plus | |||||
| Availability | September 25, 2019 | Availability | November 6, 2019 | Availability | December 18, 2019 | Availability | February 26, 2020 | Availability | February 26, 2020 | Availability | March 11, 2020 | |||||
| Exclusive tour(s) | New York (Gold Pass gift) New Year's (Gold Pass gift) Hammer Bro (Week 1 pack) |
Exclusive tour(s) | Paris (Gold Pass gift) Trick (Gold Pass gift) |
Exclusive tour(s) | Holiday (Gold Pass gift) |
Exclusive tour(s) | Mario Bros. (Week 1 spotlight/pack) |
Exclusive tour(s) | Mario Bros. (Week 2 spotlight/pack) |
Exclusive tour(s) | Baby Rosalina (Week 1 spotlight/pack) | |||||
| Birthday Girl Daisy | Chrome DK Jumbo (new variant) | Dark Clown (new variant) | Bolt Buggy | Rambi Rider | ||||||||||||
| Special skill | Rocket Start Plus |
Special skill | Jump Boost Plus |
Special skill | Mini-Turbo Plus |
Special skill | Slipstream Plus |
Special skill | Rocket Start Plus | |||||||
| Availability | May 6, 2020 | Availability | October 9, 2019 | Availability | October 23, 2019 | Availability | May 20, 2020 | Availability | May 20, 2020 | |||||||
| Exclusive tour(s) | Flower (Gold Pass gift) |
Exclusive tour(s) | Tokyo (Gold Pass gift) Jungle (Gold Pass gift) |
Exclusive tour(s) | Halloween (Gold Pass gift) Hammer Bro (Week 2 pack) |
Exclusive tour(s) | Jungle (Week 1 spotlight) |
Exclusive tour(s) | Jungle (Week 1 pack) | |||||||
High-End
Regular
| B Dasher | Circuit Special | Bumble V | Wild Wing | Red B Dasher (new variant) | P-Wing | |||||||||||
|---|---|---|---|---|---|---|---|---|---|---|---|---|---|---|---|---|
| Special skill | Dash Panel Plus |
Special skill | Slipstream Plus |
Special skill | Dash Panel Plus |
Special skill | Dash Panel Plus |
Special skill | Rocket Start Plus |
Special skill | Mini-Turbo Plus | |||||
| Availability | September 25, 2019 | Availability | October 9, 2019 | Availability | October 23, 2019 | Availability | November 20, 2019 | Availability | December 4, 2019 | Availability | January 15, 2020 | |||||
| Special availability in | None | Special availability in | Vancouver (Week 1 pack) |
Special availability in | Valentine's (Week 1 pack) |
Special availability in | Winter (Week 1 pack) |
Special availability in | London (Week 1 pack) |
Special availability in | Ice (Week 2 pack) | |||||
| Dozer Dasher (new) | Green Apple Kart (new variant) | Badwagon | Bruiser | Offroader | Banana Master (new) | |||||||||||
| Special skill | Dash Panel Plus |
Special skill | Slipstream Plus |
Special skill | Mini-Turbo Plus |
Special skill | Jump Boost Plus |
Special skill | Jump Boost Plus |
Special skill | Mini-Turbo Plus | |||||
| Availability | April 22, 2020 | Availability | May 6, 2020 | Availability | September 25, 2019 | Availability | December 18, 2019 | Availability | May 20, 2020 | Availability | May 20, 2020 | |||||
| Special availability in | Trick (Week 1 spotlight) |
Special availability in | Flower (Week 2 pack) |
Special availability in | None | Special availability in | Holiday (Week 2 pack) |
Special availability in | Jungle (Week 2 spotlight) |
Special availability in | Jungle (Week 2 Pack) | |||||
| Poison Apple Kart (new variant) | ||||||||||||||||
| File:Nocoverart.png | ||||||||||||||||
| Special skill | Dash Panel Plus | |||||||||||||||
| Special availability in | Cooking (Week 2 Pack) | |||||||||||||||
Tour-exclusive
| Black B Dasher (new variant) | Yellow Taxi (new) | Quickshaw (new) | Kabuki Dasher (new variant) | Black Circuit | Queen Bee (new variant) | |||||||||||
|---|---|---|---|---|---|---|---|---|---|---|---|---|---|---|---|---|
| Special skill | Dash Panel Plus |
Special skill | Jump Boost Plus |
Special skill | Rocket Start Plus |
Special skill | Dash Panel Plus |
Special skill | Slipstream Plus |
Special skill | Dash Panel Plus | |||||
| Availability | September 25, 2019 | Availability | September 25, 2019 | Availability | October 9, 2019 | Availability | October 9, 2019 | Availability | October 9, 2019 | Availability | October 23, 2019 | |||||
| Exclusive tour(s) | New York (Gold Pass gift) Ice (Gold Pass gift) |
Exclusive tour(s) | New York (Week 1 spotlight) Holiday (Gold Pass gift) New Year's (Non-spotlight) |
Exclusive tour(s) | Tokyo (Week 1 spotlight) New Year's (Week 1 spotlight) |
Exclusive tour(s) | Tokyo (Week 2 spotlight) New Year's (Non-spotlight) |
Exclusive tour(s) | Tokyo (Gold Pass gift) |
Exclusive tour(s) | Halloween (Gold Pass gift) Flower (Week 2 spotlight) | |||||
| Trickster (new) | Ghost Ride (new) | Macharon (new) | Carrot Kart (new) | Cheermellow (new variant) | Radish Rider (new variant) | |||||||||||
| Special skill | Dash Panel Plus |
Special skill | Rocket Start Plus |
Special skill | Jump Boost Plus |
Special skill | Mini-Turbo Plus |
Special skill | Rocket Start Plus |
Special skill | Slipstream Plus | |||||
| Availability | October 23, 2019 | Availability | October 23, 2019 | Availability | November 6, 2019 | Availability | November 6, 2019 | Availability | November 20, 2019 | Availability | November 20, 2019 | |||||
| Exclusive tour(s) | Halloween (Week 1 spotlight) New Year's (Non-spotlight) |
Exclusive tour(s) | Halloween (Week 2 spotlight) New Year's (Non-spotlight) |
Exclusive tour(s) | Paris (Week 1 spotlight) Valentine's (Non-spotlight, Gold Pass gift) |
Exclusive tour(s) | Paris (Week 2 spotlight) Valentine's (Non-spotlight) |
Exclusive tour(s) | Winter (Week 1 spotlight) London, Holiday (Non-spotlight) |
Exclusive tour(s) | Winter (Gold Pass gift) | |||||
| Wildfire Flyer (new variant) | Ribbon Rider (new variant) | Double-Decker (new) | Swift Jack (new variant) | Jingle Bells (new) | Platinum Taxi (new variant) | |||||||||||
| Special skill | Jump Boost Plus |
Special skill | Mini-Turbo Plus |
Special skill | Dash Panel Plus |
Special skill | Slipstream Plus |
Special skill | Dash Panel Plus |
Special skill | Mini-Turbo Plus | |||||
| Availability | November 20, 2019 | Availability | December 4, 2019 | Availability | December 4, 2019 | Availability | December 4, 2019 | Availability | December 18, 2019 | Availability | December 18, 2019 | |||||
| Exclusive tour(s) | Winter (Week 2 spotlight) Yoshi (Special Pipe) |
Exclusive tour(s) | London (Week 1 spotlight) Holiday (Non-spotlight) |
Exclusive tour(s) | London (Week 2 spotlight) Baby Rosalina (Week 2 spotlight, Gold Pass gift) Yoshi (Special Pipe) |
Exclusive tour(s) | London (Gold Pass gift) Baby Rosalina (Week 2 pack) |
Exclusive tour(s) | Holiday (Week 1 spotlight) |
Exclusive tour(s) | Holiday (Week 2 spotlight) New Year's (Non-spotlight) Yoshi (Special Pipe) | |||||
| Glam Bruiser (new variant) | Gilded Prancer (new variant) | Ice-blue Poltergust (new variant) | Apple Kart (new) | Comet Tail (new) | Bright Bunny (new) | |||||||||||
| Special skill | Slipstream Plus |
Special skill | Jump Boost Plus |
Special skill | Dash Panel Plus |
Special skill | Jump Boost Plus |
Special skill | Dash Panel Plus |
Special skill | Jump Boost Plus | |||||
| Availability | January 1, 2020 | Availability | January 15, 2020 | Availability | January 15, 2020 | Availability | January 29, 2020 | Availability | February 12, 2020 | Availability | April 8, 2020 | |||||
| Exclusive tour(s) | New Year's (Week 2 spotlight) Yoshi (Special Pipe) |
Exclusive tour(s) | Ice (Week 1 spotlight) |
Exclusive tour(s) | Ice (Week 2 spotlight) |
Exclusive tour(s) | Valentine's (Week 1 spotlight) Flower (Gold Pass gift) |
Exclusive tour(s) | Vancouver (Week 1 spotlight) |
Exclusive tour(s) | Yoshi (Week 1 spotlight) | |||||
| Clanky Kart (new) | Wild Black (new variant) | Karp Kart (new variant) | Prancer | Rose Queen (new variant) | Choco Macharon (new variant) | |||||||||||
| File:Nocoverart.png | ||||||||||||||||
| Special skill | Jump Boost Plus |
Special skill | Mini-Turbo Plus |
Special skill | Rocket Start Plus |
Special skill | Slipstream Plus |
Special skill | Mini-Turbo Plus |
Special skill | Mini-Turbo Plus | |||||
| Availability | April 22, 2020 | Availability | April 22, 2020 | Availability | April 29, 20201 | Availability | May 6, 2020 | Availability | May 6, 2020 | Availability | June 3, 2020 | |||||
| Exclusive tour(s) | Trick (Week 1 spotlight) |
Exclusive tour(s) | Trick (Week 1 pack) |
Exclusive tour(s) | Trick (Week 2 pack) |
Exclusive tour(s) | Flower (Week 1 spotlight) |
Exclusive tour(s) | Flower (Week 1 pack) |
Exclusive tour(s) | Cooking (Week 1 spotlight) | |||||
| Gold Egg (new variant) | Blue Badwagon (new variant) | Gold Train (new variant) | Snow Skimmer (new) | |||||||||||||
| File:Nocoverart.png | ||||||||||||||||
| Special skill | Jump Boost Plus |
Special skill | Mini-Turbo Plus |
Special skill | Rocket Start Plus |
Special skill | Jump Boost Plus | |||||||||
| Availability | June 3, 2020 | Availability | September 25, 2019 | Availability | November 6, 2019 | Availability | February 12, 2020 | |||||||||
| Exclusive tour(s) | Cooking (Special Pipe) |
Exclusive tour(s) | New York (Week 2 spotlight) New Year's (Non-spotlight) |
Exclusive tour(s) | Paris (Gold Pass gift) Trick (Gold Pass gift) |
Exclusive tour(s) | Vancouver (Week 2 spotlight, Gold Pass gift) | |||||||||
1 - This kart was added to the game on April 22, 2020, but could not be unlocked until April 29, 2020.
Other
| Gold Standard | |
|---|---|
| Availability | Coin Rush Mode |
Bonus points multiplier
| Skill level | 1 | 2 | 3 | 4 | 5 | 6 | |
|---|---|---|---|---|---|---|---|
| Normal | 1 | 1.05 | 1.05 | 1.1 | 1.1 | 1.15 | |
| Super | 1.05 | 1.1 | 1.1 | 1.15 | 1.15 | 1.2 | |
| High-End | 1.1 | 1.15 | 1.15 | 1.2 | 1.2 | 1.25 |
Gliders
Normal
| Super Glider | Parachute | Parafoil | Paper Glider | Droplet Glider (new variant) | BBIA Parafoil (new variant) | |||||||||||
|---|---|---|---|---|---|---|---|---|---|---|---|---|---|---|---|---|
| Special skill | Mushroom Plus |
Special skill | Blooper Plus |
Special skill | Green Shell Plus |
Special skill | Green Shell Plus |
Special skill | Blooper Plus |
Special skill | Banana Plus | |||||
| Availability | September 25, 2019 | Availability | September 25, 2019 | Availability | September 25, 2019 | Availability | October 9, 2019 | Availability | October 9, 2019 | Availability | October 9, 2019 | |||||
| Special availability in | Available upon starting the game | Special availability in | Halloween (Tour gift) Holiday (Tour gift) Yoshi (Tour gift) |
Special availability in | New York (Tour gift) Ice (Tour gift) Baby Rosalina (Tour gift) |
Special availability in | Tokyo (Tour gift) London (Tour gift) |
Special availability in | Paris (Tour gift) Vancouver (Tour gift) |
Special availability in | Winter (Tour gift) Mario Bros. (Tour gift) | |||||
| Minion Paper Glider (new variant) | Piston Glider (new variant) | Piranha Plant Parafoil (new variant) | ||||||||||||||
| Special skill | Blooper Plus |
Special skill | Mushroom Plus |
Special skill | Mega Mushroom Plus | |||||||||||
| Availability | November 20, 2019 | Availability | December 4, 2019 | Availability | October 23, 2019 | |||||||||||
| Special availability in | Jungle (Tour gift) |
Special availability in | Trick (Tour gift) |
Special availability in | Valentine's (Tour gift) Hammer Bro (Tour gift) Flower (Tour gift) | |||||||||||
Super
Regular
| Peach Parasol | Flower Glider | Oilpaper Umbrella (new) | Lightning Oilpaper (new variant) | Pink Flower Glider (new variant) | 8-Bit Jumping Mario (new) | |||||||||||
|---|---|---|---|---|---|---|---|---|---|---|---|---|---|---|---|---|
| Special skill | Red Shell Plus |
Special skill | Banana Plus |
Special skill | Red Shell Plus |
Special skill | Lightning Plus |
Special skill | Super Horn Plus |
Special skill | Mega Mushroom Plus | |||||
| Availability | September 25, 2019 | Availability | September 25, 2019 | Availability | October 9, 2019 | Availability | October 9, 2019 | Availability | December 18, 2019 | Availability | February 26, 2020 | |||||
| Special availability in | None | Special availability in | New York (Tour gift) Flower (Gold Pass gift) |
Special availability in | Yoshi (Gold Pass gift) |
Special availability in | None | Special availability in | Holiday (Week 1 pack) |
Special availability in | Mario Bros. (Week 1 pack) | |||||
| ? Block (new variant) | Eggshell Glider (new) | Bob-omb Parafoil (new variant) | Shell Parachute (new variant) | Wario Wing | Waluigi Wing (new variant) | |||||||||||
| Special skill | Coin Plus |
Special skill | Green Shell Plus |
Special skill | Bob-omb Plus |
Special skill | Green Shell Plus |
Special skill | Bullet Bill Plus |
Special skill | Bullet Bill Plus | |||||
| Availability | February 26, 2020 | Availability | April 8, 2020 | Availability | September 25, 2019 | Availability | September 25, 2019 | Availability | October 9, 2019 | Availability | October 23, 2019 | |||||
| Special availability in | Mario Bros. (Week 2 pack) |
Special availability in | Yoshi (Week 2 pack) |
Special availability in | New Year's (Tour gift) |
Special availability in | None | Special availability in | None | Special availability in | Baby Rosalina (Week 2 pack) | |||||
| BaNaNa Parafoil (new variant) | Blue Flower Glider (new variant) | |||||||||||||||
| Special skill | Banana Plus |
Special skill | Blooper Plus | |||||||||||||
| Availability | November 6, 2019 | Availability | February 12, 2020 | |||||||||||||
| Special availability in | Jungle (Gold Pass gift) |
Special availability in | Vancouver (Week 2 pack) | |||||||||||||
Tour-exclusive
| Plaid Ribbon (new variant) | |
|---|---|
| Special skill | Green Shell Plus |
| Availability | March 11, 2020 |
| Exclusive tour(s) | Baby Rosalina (Week 1 spotlight) |
High-End
Regular
| Gold Glider | Crimson Crane (new) | Heart Balloons (new) | Pink Gold Paper Glider (new variant) | Butterfly Sunset (new) | Swooper | |||||||||||
|---|---|---|---|---|---|---|---|---|---|---|---|---|---|---|---|---|
| Special skill | Coin Plus |
Special skill | Red Shell Plus |
Special skill | Red Shell Plus |
Special skill | Bob-omb Plus |
Special skill | Mega Mushroom Plus |
Special skill | Bob-omb Plus | |||||
| Availability | September 25, 2019 | Availability | January 1, 2020 | Availability | January 29, 2020 | Availability | May 6, 2020 | Availability | May 6, 2020 | Availability | September 25, 2019 | |||||
| Special availability in | Winter (Week 2 pack) Mario Bros. (Gold Pass gift) |
Special availability in | New Year's (Week 2 pack) |
Special availability in | Valentine's (Week 2 pack) Flower (Week 2 spotlight) |
Special availability in | Flower (Week 1 pack) |
Special availability in | Flower (Week 2 pack) |
Special availability in | None | |||||
| Cloud Glider | Tropical Glider (new) | |||||||||||||||
| Special skill | Lightning Plus |
Special skill | Banana Plus | |||||||||||||
| Availability | October 9, 2019 | Availability | May 20, 2020 | |||||||||||||
| Special availability in | London (Week 2 pack) |
Special availability in | Jungle (Week 2 pack) | |||||||||||||
Tour-exclusive
| Fare Flier (new) | Purple Oilpaper Umbrella (new variant) | Full Flight (new) | Strawberry Crêpe (new) | Le Tricolore (new variant) | Starchute (new) | |||||||||||
|---|---|---|---|---|---|---|---|---|---|---|---|---|---|---|---|---|
| Special skill | Super Horn Plus |
Special skill | Mushroom Plus |
Special skill | Mega Mushroom Plus |
Special skill | Red Shell Plus |
Special skill | Mushroom Plus |
Special skill | Coin Plus | |||||
| Availability | September 25, 2019 | Availability | October 9, 2019 | Availability | October 9, 2019 | Availability | November 6, 2019 | Availability | November 6, 2019 | Availability | November 20, 2019 | |||||
| Exclusive tour(s) | New York (Week 1 spotlight) Holiday (Gold Pass gift) New Year's (Non-spotlight) |
Exclusive tour(s) | Tokyo (Week 1 spotlight) New Year's (Non-spotlight) |
Exclusive tour(s) | Tokyo (Week 2 spotlight) New Year's (Non-spotlight) |
Exclusive tour(s) | Paris (Week 1 spotlight) Valentine's (Non-spotlight, Gold Pass gift) |
Exclusive tour(s) | Paris (Week 2 spotlight) Valentine's (Non-spotlight) |
Exclusive tour(s) | Winter (Week 1 spotlight) London, Holiday (Non-spotlight) Trick (Week 2 spotlight) | |||||
| Royal Parachute (new variant) | Glitter Glider (new) | Soaring Jack (new variant) | Gift Glider (new) | New Year's 2020 (new) | New Year's Kite (new variant) | |||||||||||
| Special skill | Red Shell Plus |
Special skill | Lightning Plus |
Special skill | Green Shell Plus |
Special skill | Coin Plus |
Special skill | Mushroom Plus |
Special skill | Coin Plus | |||||
| Availability | November 20, 2019 | Availability | December 4, 2019 | Availability | December 4, 2019 | Availability | December 18, 2019 | Availability | December 18, 2019 | Availability | January 1, 2020 | |||||
| Exclusive tour(s) | Winter (Week 2 spotlight) Yoshi (Special Pipe) |
Exclusive tour(s) | London (Week 1 spotlight) Holiday (Non-spotlight) |
Exclusive tour(s) | London (Week 2 spotlight) Baby Rosalina (Gold Pass gift) Yoshi (Special Pipe) |
Exclusive tour(s) | Holiday (Week 1 spotlight) |
Exclusive tour(s) | Holiday (Week 2 spotlight/pack) New Year's (Non-spotlight, pack) Yoshi (Special Pipe) |
Exclusive tour(s) | New Year's (Week 1 spotlight) | |||||
| Fireworks Parachute (new variant) | Blizzard Parasol (new variant) | Blizzard Balloons (new variant) | Sweetheart Glider (new variant) | Luma Parafoil (new variant) | Rainbow Starchute (new variant) | |||||||||||
| Special skill | Bob-omb Plus |
Special skill | Super Horn Plus |
Special skill | Bullet Bill Plus |
Special skill | Banana Plus |
Special skill | Lightning Plus |
Special skill | Mega Mushroom Plus | |||||
| Availability | January 1, 2020 | Availability | January 15, 2020 | Availability | January 15, 2020 | Availability | January 29, 2020 | Availability | February 12, 2020 | Availability | February 12, 2020 | |||||
| Exclusive tour(s) | New Year's (Week 2 spotlight) Yoshi (Special Pipe) |
Exclusive tour(s) | Ice (Week 1 spotlight) |
Exclusive tour(s) | Ice (Week 2 spotlight) Hammer Bro (Week 2 spotlight) |
Exclusive tour(s) | Valentine's (Week 1 spotlight) |
Exclusive tour(s) | Vancouver (Week 1 spotlight) |
Exclusive tour(s) | Vancouver (Week 2 spotlight) | |||||
| Bright Glider (new variant) | Safety Glider (new variant) | Daisy Glider (new variant) | Bullet Bill Parachute (new variant) | Rainy Balloons (new variant) | Wicked Wings (new) | |||||||||||
| Special skill | Banana Plus |
Special skill | Bob-omb Plus |
Special skill | Super Horn Plus |
Special skill | Bullet Bill Plus |
Special skill | Lightning Plus |
Special skill | Super Horn Plus | |||||
| Availability | April 8, 2020 | Availability | April 22, 2020 | Availability | May 6, 2020 | Availability | September 25, 2019 | Availability | October 23, 2019 | Availability | October 23, 2019 | |||||
| Exclusive tour(s) | Yoshi (Week 1 spotlight/pack) |
Exclusive tour(s) | Trick (Week 1 spotlight) |
Exclusive tour(s) | Flower (Week 1 spotlight) |
Exclusive tour(s) | New York (Week 2 spotlight) New Year's (Non-spotlight) |
Exclusive tour(s) | Halloween (Week 2 spotlight) New Year's (Non-spotlight) Hammer Bro (Week 1 spotlight) |
Exclusive tour(s) | Halloween (Week 1 spotlight) New Year's (Non-spotlight) Hammer Bro (Week 2 pack) | |||||
| Gold Swooper (new variant) | Banana Wingtip (new) | Dragon Wings (new variant) | Baby Mario Hanafuda (new variant) | Yoshi's Egg Hanafuda (new variant) | Peach Hanafuda (new variant) | |||||||||||
| Special skill | Coin Plus |
Special skill | Banana Plus |
Special skill | Green Shell Plus |
Special skill | Mushroom Plus |
Special skill | Red Shell Plus |
Special skill | Mega Mushroom Plus | |||||
| Availability | January 15, 2020 | Availability | May 20, 2020 | Availability | May 20, 2020 | Availability | January 1, 2020 | Availability | February 12, 2020 | Availability | March 25, 2020 | |||||
| Exclusive tour(s) | Ice (Gold Pass gift) Hammer Bro (Week 1 pack) |
Exclusive tour(s) | Jungle (Week 1 spotlight) |
Exclusive tour(s) | Jungle (Week 1 pack) |
Exclusive tour(s) | New Year's (Gold Pass gift) |
Exclusive tour(s) | Vancouver (Gold Pass gift) |
Exclusive tour(s) | Hammer Bro (Gold Pass gift) | |||||
| Barrel Hanafuda (new variant) | Blooper Hanafuda (new variant) | |||||||||||||||
| Special skill | Bullet Bill Plus |
Special skill | Blooper Plus | |||||||||||||
| Availability | April 22, 2020 | Availability | May 20, 2020 | |||||||||||||
| Exclusive tour(s) | Trick (Gold Pass gift) |
Exclusive tour(s) | Jungle (Gold Pass gift) | |||||||||||||
Combo time increase
| Skill level | 1 | 2 | 3 | 4 | 5 | 6 | |
|---|---|---|---|---|---|---|---|
| Normal | 0 | 5% | 5% | 10% | 10% | 15% | |
| Super | 5% | 10% | 10% | 15% | 15% | 20% | |
| High-End | 10% | 15% | 15% | 20% | 20% | 25% |
Tires
| Bicycle Tires | Monster | Blue Monster | Black Monster | Red Monster | Off-Road | |||||||||||
|---|---|---|---|---|---|---|---|---|---|---|---|---|---|---|---|---|
 Bicycle_Black |
 Big_Black |
 BigB_Blue |
 BigR_BlackBlack |
 BigR_Red |
 Block_Black | |||||||||||
| Karts | White Royale Quickshaw |
Karts | Bolt Buggy Offroader |
Karts | Pipe Buggy Ice-blue Poltergust |
Karts | Dozer Dasher | Karts | Rambi Rider | Karts | Flame Flyer Barrel Train Ghost Ride Blue Badwagon | |||||
| Green Off-Road | Retro Off-Road | Bongo Tires | Iron Tires | Lemon Tires | Macaron Tires | |||||||||||
 Block_BlackGreenWheel |
 Block_White |
 Drum_Brown |
 Iron_Brown |
 Lemon_Yellow |
 Macaron_Pink | |||||||||||
| Karts | Dasher II | Karts | Badwagon | Karts | Banana Master | Karts | Clanky Kart | Karts | Tea Coupe | Karts | Macharon | |||||
| Rainbow Tires | Slim (Mario Kart 7) | Slim (Mario Kart 8) | Orange Mushroom | Pink Mushroom | Mushroom | |||||||||||
 Rainbow_Rainbow |
 Ring7_Black |
 Ring8_Black |
 SKinoko_Orange |
 SKinoko_Pink |
 SKinoko_Red | |||||||||||
| Karts | Glam Bruiser | Karts | Yellow Taxi Platinum Taxi Bruiser |
Karts | Landship Mach 8 |
Karts | Birthday Girl Daisy | Karts | Pink Mushmellow | Karts | Cheermellow | |||||
| Slick | Cyber Slick | Roller (Mario Kart 7) | Roller (Mario Kart 8) | Blue Roller (Mario Kart 8) | Sponge | |||||||||||
 Slick_Black |
 Slick_Purple |
 Small_Black |
 SmallR_Red |
 SmallB_Blue |
 Sponge_Orange' | |||||||||||
| Karts | Circuit Special Black Circuit Carrot Kart |
Karts | Dark Clown Trickster Radish Rider |
Karts | Birthday Girl Birthday Girl Rosalina Bullet Blaster Bull's-Eye Banzai Egg 1 |
Karts | Ribbon Rider | Karts | Karp Kart | Karts | Cheep Charger Green Cheep Charger Soda Jet Cloud 9 Queen Bee Bright Bunny | |||||
| Standard | Blue Standard | Red Standard | Blue Standard (Monster threads) | SFC Standard | Wood (Mario Kart 7) | |||||||||||
 Std_Black |
 Std_BlueSilver |
 Std_BlackRed |
 StdB_Blue |
 StdSFC_Black |
 Wood7_Brown | |||||||||||
| Karts | Biddybuggy Blue Biddybuggy Green Kiddie Kart Red Kiddie Kart Royale Poltergust 4000 Streamliner Red Streamliner Blue Seven Koopa Clown Wild Wing Double-Decker Snow Skimmer |
Karts | Super 1 P-Wing Comet Tail |
Karts | Wild Black | Karts | Jingle Bells | Karts | Pipe Frame Mushmellow Super Blooper Zucchini B Dasher Black B Dasher Kabuki Dasher Wildfire Flyer Swift Jack Bumble V Red B Dasher |
Karts | DK Jumbo Apple Kart | |||||
| Wood (Mario Kart 8) | Grey Wood (Mario Kart 8) | Yoshi Tires | ||||||||||||||
 Wood8_Brown |
 Wood8_Gray |
 Yoshi_Black | ||||||||||||||
| Karts | Daytripper Chrome DK Jumbo Prancer |
Karts | Warship Gilded Prancer |
Karts | Koopa Dasher Turbo Yoshi Red Turbo Yoshi Yellow Turbo Birdo Para-Wing Turbo Birdo Light-blue Turbo Birdo | |||||||||||
| Gold Off-Road | Gold Tires | Gold SFC Standard | Pink Gold SFC Standard | Gold Wood (Mario Kart 8) | ||||||||||||
 Block_Gold |
 Std_Gold |
 StdSFC_Gold |
 StdSFC_PinkGold |
 Wood8_Gold | ||||||||||||
| Karts | Gold Train | Karts | Gold Standard | Karts | Gold Blooper | Karts | Rose Queen | Karts | Green Apple Kart | |||||||
Items
Frenzy
Depending on the character and course they're used on, players can get one to three items at once. In the case that a character gets three of the same item, they will activate the new Frenzy Mode, in which they immediately activate a Star, can charge all the Mini-Turbo stages much more quickly and can use unlimited supplies of the respective item until the invincibility runs out. Any item can appear in Frenzy Mode, except for the Star, which is exclusive to certain bonus challenges.
The probability of obtaining a Frenzy depends on the current position and lap and on the driver chosen. In particular, the current position and lap define a base probability that is then increased by a bonus depending on the rarity and skill level of the driver chosen.
The following is the base probability of a Frenzy used in the New Year's Tour,[11] since only two laps are coded, three-sectioned tracks presumably reuse one of those two rows for one of its sections.
| Base probability of a Frenzy | ||||||||
|---|---|---|---|---|---|---|---|---|
| Position | 1st | 2nd | 3rd | 4th | 5th | 6th | 7th | 8th |
| First lap | 5 | 6 | 7 | 9 | 13 | 15 | 18 | 22 |
| Second lap | 6 | 7 | 11 | 12 | 18 | 22 | 29 | 41 |
Item Box items
Items function mostly the same as in previous installments in the series. As in Mario Kart: Double Dash!!, every character has their own special item that most other characters cannot get.
The game introduces eight new items to the series: the Double Bob-ombs, the Ice Flower, the Bubble, the Banana Barrels, the Mushroom Cannon, the Coin Box, the Dash Ring, and the Bob-omb Cannon, all of which are character-exclusive items.
| Image | Name | Description | Characters |
|---|---|---|---|
| Banana | "Don't let this one give you the slip! Your kart will spin out if you hit one. You can carry one behind your kart to protect yourself from a single attack." | All | |
| Triple Bananas | "Three bananas revolve around your kart. Tap the screen to throw them all at once and they'll land all lined up in a nice, tidy row!" | ||
| Giant Banana | "Not only does this big banana spin out karts that hit it, but after being struck it breaks into three regular-sized Bananas. The only banana split you'll be sad to see!" | ||
| Green Shell | "Flies straight and crashes any kart it hits. Keep it behind your kart to protect yourself from a single attack." | All | |
| Triple Green Shells | "Three Green Shells revolve around your kart. Tap the screen to throw all of them at once and they'll fly in a straight line." | ||
| Red Shell | "Homes in on a kart in front of you and crashes whatever it hits. Keep it behind your kart to protect yourself from a single attack." | All | |
| Spiny Shell | "Chases down the kart in 1st place, crashing through anyone it hits before reaching its target. This will make you regret being in 1st place! Or even near the kart in 1st place..." | All | |
| Bowser's Shell | "This big ol' shell on loan from Bowser will crash any karts it hits and keep on going. It can only be thrown forward." | ||
| Bob-omb | "This will walk towards opponents who get too close, and then explode when it touches a kart or when some time has passed. Karts caught in its blast will crash." | All | |
| Double Bob-ombs (new) | "Two Bob-ombs will revolve around your kart. Tap the screen to throw them both at once. Two is better than one, right?" | ||
| Mushroom | "This classic item gives your kart a speed boost. Doesn't get much simpler than that!" | All | |
| Triple Mushrooms | "Why use just one Mushroom when you can use three? Tap the screen to use them all at once for a longer-lasting speed boost." | ||
| Mega Mushroom | "Increases your kart's size, allowing you to crash any opponents you hit. You'll return to regular size after some time or when you're hit by an item." | All | |
| Bullet Bill | "Transforms you into a Bullet Bill for a set amount of time. You'll dash forward with all the power of a Bullet Bill and crash any opponents that you hit." | All | |
| Blooper | "Squirts ink onto the karts in a higher position than yours, blinding the other drivers for a set amount of time. You can wipe the ink off by swiping the screen." | All | |
| Lightning | "Calls down lightning to spin out your opponents and destroy the items they hold. Those struck will be smaller and slower for a set amount of time." | All | |
| Fire Flower | "Three fireballs will revolve around your kart. Tap the screen to throw them all at once, spinning out any kart they hit. You're really burning up the track now!" | ||
| Boomerang Flower | "Tap the screen to throw a boomerang. Not only will it spin out any karts it hits, but it will collect any surrounding Coins for you, too." | ||
| Ice Flower (new) | "Three balls of ice will revolve around your kart. Tap the screen to throw them all at once and they'll freeze any kart they hit, causing them to slide." | ||
| Super Horn | "The loudness of this horn will blow away any surrounding items and karts. It can repel Bloopers, and even Spiny Shells!" | All | |
| Coin | "This gives you two Coins. It's used automatically once you pick it up." | All | |
| Heart | "This protective Heart revolves around your kart for a set amount of time, shielding you from attacks. It will vanish upon taking damage. You can stack up to five at once." | ||
| Yoshi's Egg | "Homes in on the kart in front of you and crashes once it hits. Three more items will fly out when it breaks. It's the item that keeps on giving!" | ||
| Birdo's Egg | |||
| Bubble (new) | "Briefly envelops your kart and protects you from damage for a set time. While in the bubble, you will get a speed boost and float in the air. Watch out, because it will vanish upon taking damage!" | ||
| Banana Barrels (new) | "Arm your kart with two fully-loaded barrels of Bananas! Continually shoots out Bananas in front of your kart for a set time." | ||
| Mushroom Cannon (new) | "A cannon designed to resemble a Mushroom. Continually shoots out Mushrooms in front of your kart for a set time." | ||
| Lucky Seven | "Seven items (Red Shell, Banana, Green Shell, Bob-omb, Super Horn, Mushroom, and Blooper) revolve around your kart. Tap the screen to use all seven items at once." | ||
| Coin Box (new) | "A box with a golden sheen. Generates a large amount of Coins in front of your kart for a set time." | ||
| Dash Ring (new) | "Tosses out three rings in front of you along the track. Pass through them for a speed boost!" | ||
| Bob-omb Cannon (new) | "A dangerous cannon fueled by red-hot coals! Continually shoots out Bob-ombs in front of your kart for a set time." | ||
| Super Star | "Turns you invincible for a time. Your kart will be faster and any karts you hit will crash." | Single player All (Item appears in certain bonus challenges, and Frenzy mode in normal races.) | |
| Multiplayer All (Item appears in rulesets with less than 3 item slots, and Frenzy mode in rulesets with 3 item slots.) | |||
| Hammer | "Throws multiple Hammers in an arc aimed at karts in front of yours." |
Inventory items
These items are collected throughout the course of the game through various means, such as challenges, log-in bonuses, and Tour Gifts.
| Image | Name | Description |
|---|---|---|
| Coin | Coins gathered during races are used to purchase items and characters in the Shop. Only 300 coins can be obtained per day by racing. To obtain more coins once the cap has been reached, different means such as rewards or Coin Rush are needed. | |
| Ruby | Special currency used to either play Coin Rush without an appropriate ticket, or fire the pipe containing drivers, karts and gliders. | |
| Grand Star | Rewards for scores in races and challenges. The added total allows to participate in more cups and open presents in every Tour. If all the gifts have been opened during a Tour coins will be awarded instead of stars. Once the Tour ends, the total resets to zero. | |
| Item ticket | Allows to get a free item chance during a race. Only one ticket is allowed to be used per race. | |
| Point-boost ticket | Provides 50 experience points to the base Points awarded to the player by using a specific character, kart, or glider during the race. If the character, kart, or glider is already at maximum, no further Point-boost tickets can be used. | |
| Level-boost ticket | Increases the skill level of a particular character, kart, or glider by one unit. The type of ticket must match the rarity. If a character, kart, or glider is already at level 6, no further Level-boost tickets can be used. | |
| Points-cap ticket | Increases the base-points cap of a driver, kart, or glider. | |
| Coin Rush ticket | Allows the player to participate once on the Coin Rush mode of the current Tour without spending Rubies. | |
| Star ticket | Grants a Grand Star. | |
| Quick ticket | Subtracts a day out of the remaining time needed to unlock new cups on the Tour. |
Hazards, obstacles, and other elements
The following table lists elements that slow racers down, crash them, offer them a Jump Boost and/or simply give them points when interacted with in a certain way.
| Subject | Location | Description |
|---|---|---|
 Barrel |
London Loop | An obstacle that breaks upon collision with a racer, slowing them down if they are not invincible or Mega. Barrels can also be destroyed from a distance with an offensive item. |
| London Loop 2 | ||
| Cheep Cheep Lagoon (Break Item Boxes) | ||
 Barrel Bomb |
GBA Bowser's Castle 2 | An explosive object that can be triggered by throwing a projectile or by driving into it. Upon exploding, a Barrel Bomb will also cause other Barrel Bombs within range to detonate and defeat any nearby Goombas. Some Barrel Bombs stand on the ground, while others float or fly using propellers. |
| SNES Mario Circuit 1 (Goomba Takedown) | ||
| GCN Dino Dino Jungle (Goomba Takedown) | ||
| DS Luigi's Mansion (Goomba Takedown) | ||
| DS DK Pass (Goomba Takedown) | ||
| 3DS Rock Rock Mountain (Steer Clear of Obstacles) | ||
| 3DS Neo Bowser City (Goomba Takedown) | ||
| London Loop 2 (Steer Clear of Obstacles) | ||
 Big Piranha Plant (ground) |
GCN Yoshi Circuit (Steer Clear of Obstacles) | Piranha Plant variants found on the track. When a driver collides with a Big Piranha Plant, they spin out. Big Piranha Plants can be taken out by hitting them with an offensive item or by driving into them while invincible or Mega. |
| SNES Choco Island 2R/T | ||
 Big Piranha Plant (pipe) |
SNES Choco Island 2T | Big Piranha Plants that reside in pipes behave like the Piranha Plants found on GCN Yoshi Circuit, lunging at racers who drive nearby. Those found in Paris Promenade 1, Paris Promenade 2, and their versions also periodically turn to a different direction. They can be hit with a shell, a Bob-omb, or driven into while invincible or Mega for points. |
| SNES Choco Island 2R/T | ||
| SNES Ghost Valley 1R | ||
| GCN Yoshi Circuit (Steer Clear of Obstacles) | ||
| Paris Promenade 1 | ||
| Paris Promenade 2 | ||
| RMX Mario Circuit 1 (Glider Challenge) | ||
 Bumper |
DS Waluigi Pinball | An object that bounces metal balls and racers off when they collide with it. Some bumpers are stationary, while others move around in circles. Racers can get a Jump Boost by bouncing on top of a bumper, which is possible in DS Waluigi Pinball T after they drive off a ramp. |
 Chain Chomp |
SNES Mario Circuit 2T | A large chained enemy that lunges towards racers who drive past it, turning them over if it reaches them. The Chain Chomp can be taken out by touching it while in an invincible state. |
| SNES Mario Circuit 3R/T | ||
| London Loop | ||
| London Loop 2 | ||
| London Loop 2R | ||
| London Loop 2T | ||
 Chain Chomp |
3DS Rainbow Road | A large obstacle that rolls around in circles. They are found on the planet portion of the racetrack and flip drivers over when they roll into them. Chomps can be taken out with a Bowser's Shell or by driving into them while invincible or Mega. |
 Cheep Cheep |
3DS Cheep Cheep Lagoon | Fish that swim around in a body of water. Cheep Cheeps usually swim out of the racers' reach, but if a racer bumps into a Cheep Cheep, they lose some speed. |
 Clampy |
3DS Cheep Cheep Lagoon | An oyster enemy that periodically opens and closes their valves to reveal objects such as coins and Item Boxes that racers can drive into to collect. If a Clampy closes its valves in on a racer, it will flip them over. |
 Crate |
London Loop | An object that slows down any racer that collides with it. When hit, crates break and release an item such as a Banana or Mushroom. |
| London Loop 2 | ||
 Festive tree |
Every course for the duration of the Winter Tour, London Tour and the first week of the Holiday Tour | A background element that gives bonus points when hit with a shell or a Bob-omb or by driving into them while invincible or Mega. |
| File:Flipper MKT.png Flipper |
DS Waluigi Pinball | An object that sends metal balls in another direction when they collide with it. Racers that drive into a flipper will crash. |
 Flying Shy Guy |
3DS Shy Guy Bazaar | Shy Guys that use magic carpets to fly around. Flying Shy Guys appear above the glider section. Colliding with a Flying Shy Guy will cause racers to simply lose speed. |
 Goat |
3DS Daisy Hills | Obstacles that spin racers around when driven into. They walk around the track slowly. They can be taken out using any offensive item or by touching them while invincible. |
 Goomba |
Any course where a Goomba Takedown challenge takes place | Short enemies that stand in the racers' way or walk left and right. They can be taken out with an offensive item or by simply driving into them, although the latter will also cause the racer to spin out if they are not in an invincible or Mega state. They can also be defeated by landing on them while gliding or after driving off a ramp, which gives the racer a Jump Boost. |
| GCN Yoshi Circuit (Do Jump Boosts) | ||
| DS Waluigi Pinball (Steer Clear of Obstacles) | ||
| DS DK Pass (Do Jump Boosts) | ||
| 3DS Toad Circuit R | ||
| 3DS Mario Circuit | ||
| Tokyo Blur (Do Jump Boosts) | ||
| Paris Promenade 1 | ||
| RMX Mario Circuit 1 | ||
 Goomba Tower |
SNES Mario Circuit 1 (Goomba Takedown) | A stack of Goombas that can be defeated the same way as an individual Goomba. If the Goomba at the bottom of a tower is defeated, all of the ones above it will collapse and be defeated as well. |
| SNES Ghost Valley 1 (Goomba Takedown) | ||
| SNES Choco Island 2 (Goomba Takedown) | ||
| SNES Rainbow Road (Goomba Takedown) | ||
| GCN Dino Dino Jungle (Goomba Takedown) | ||
| DS Luigi's Mansion (Goomba Takedown) | ||
| 3DS Shy Guy Bazaar (Goomba Takedown) | ||
| 3DS Neo Bowser City (Goomba Takedown) | ||
| RMX Mario Circuit 1 (Goomba Takedown) | ||
 Hot-air balloon |
N64 Koopa Troopa Beach R | An obstacle that floats in one place. They cause racers who glide into them to bounce back. However, if a racer lands on top of a hot air balloon, they receive a Jump Boost. |
| GCN Yoshi Circuit (Glider Challenge) | ||
| DS DK Pass (Do Jump Boosts) | ||
| DS DK Pass R/T | ||
| 3DS Daisy Hills | ||
| 3DS Rock Rock Mountain R | ||
| Paris Promenade 1 | ||
| Vancouver Velocity R | ||
 Jar / Snake jar |
3DS Shy Guy Bazaar | An object found on the track. Jars will break upon collision with an item or a racer. Running into a jar will slow the racer down if they are not in an invincible or Mega state. Some jars, referred to as snake jars, move around and release small snakes when broken. |
Jump Boost field |
3DS Rainbow Road R | An upward force that gives drivers a Jump Boost. |
| 3DS Rainbow Road R/T | ||
 Kadomatsu |
Every course for the duration of the New Year's Tour | A background element that gives bonus points when hit with a shell or a Bob-omb or by driving into them while invincible or Mega. |
 Lava Bubble |
GBA Bowser's Castle 1 | An obstacle that jumps out of lava at regular intervals, in gaps that racers must jump over. They cause any player who collides with them to spin out. |
| GBA Bowser's Castle 2 | ||
 Magic carpet |
3DS Shy Guy Bazaar (Do Jump Boosts) | Magic carpets that are not used by Flying Shy Guys can be found floating in one place in mid-air. When a racer lands on a magic carpet, they bounce off it while receiving a Jump Boost. |
 Metal ball |
DS Waluigi Pinball | A large rolling obstacle. Metal balls are first seen in the background of the track, traversing the pinball machine that the course is set on. Once they reach the pinball table section, they are bounced around by bumpers and flippers, crashing any racer that collides with them. They can be taken out with a Bowser's Shell or by driving into them while invincible or Mega. |
Mushroom Trampoline |
SNES Rainbow Road R/T | A large mushroom that racers can bounce off of to receive a Jump Boost. |
| DS DK Pass R/T | ||
| 3DS Mario Circuit | ||
| 3DS Rainbow Road | ||
 Noshi |
GCN Dino Dino Jungle | A sauropod that plows its big feet on the track. Racers caught under a foot are squashed. When on the ground, the feet also act as walls that bounce racers back. If a racer lands on top of a Noshi while gliding, they get a Jump Boost. |
| N64 Koopa Troopa Beach T | ||
| N64 Koopa Troopa Beach R/T | ||
| Tokyo Blur R/T | ||
Oil slick |
SNES Mario Circuit 1R | An obstacle that causes any racer who drives into it to spin out. It cannot be removed, but can be driven over safely if the racer is in an invincible state. |
| SNES Mario Circuit 1R/T | ||
| SNES Mario Circuit 2 | ||
| SNES Mario Circuit 3 | ||
 Penguin |
SNES Vanilla Lake 1 (Steer Clear of Obstacles) | An enemy that waddles in circular or oval patterns. Driving into them causes the player to spin out. |
 Pipe |
SNES Mario Circuit 1 | An obstacle that slows down any racer who collides with it. Pipes are spread on the track, usually in off-road sections, and can be taken out by driving into them while in an invincible state. Piranha Plants commonly occupy pipes. Some pipes exhale upward currents which can be used to maintain gliding drivers in the air while offering them a Jump Boost. |
| SNES Ghost Valley 1R | ||
| SNES Mario Circuit 2 | ||
| SNES Mario Circuit 3 | ||
| SNES Choco Island 2T | ||
| SNES Vanilla Lake 1 | ||
| GCN Yoshi Circuit | ||
| DS Luigi's Mansion (Glider Challenge) | ||
| 3DS Toad Circuit | ||
| 3DS Daisy Hills | ||
| 3DS Shy Guy Bazaar (Do Jump Boosts) | ||
| 3DS Mario Circuit | ||
| Paris Promenade 1 | ||
| Paris Promenade 2 | ||
| Vancouver Velocity R | ||
| Vancouver Velocity R/T | ||
| RMX Mario Circuit 1 | ||
| RMX Choco Island 1 | ||
 Piranha Plant (ground) |
SNES Choco Island 2 | A passive type of Piranha Plant that resides on the ground, always facing its head upward. Racers that drive into one will spin out. This type of Piranha Plant can be taken out by hitting it with an offensive item or by driving into it while invincible. |
| RMX Choco Island 1 | ||
 Piranha Plant (pipe) |
GCN Yoshi Circuit | An enemy that attacks passer-by racers by lunging at them from its pipe. Racers that are hit by a Piranha Plant spin out. Pipe Piranha Plants can be taken out by using a Bob-omb on them or by driving into them while invincible. |
| GCN Yoshi Circuit R | ||
| GCN Yoshi Circuit R/T | ||
Puddle |
3DS Neo Bowser City | An obstacle that, like oil slicks, causes drivers to spin out. Puddles do not affect invincible racers. |
 Rolling rock |
3DS Rock Rock Mountain | A large obstacle that rolls down the track's steep incline section. They come from the cliffs on the left and right sides of the incline in an alternative fashion. Colliding with rolling rocks cause racers to be crushed or to spin out. However, rolling rocks will be destroyed once they hit a wall or a racer who is invincible. |
| 3DS Rock Rock Mountain T | ||
 Sidestepper |
N64 Koopa Troopa Beach | A crab enemy that paces from side to side across a track. When a racer comes into contact with a Sidestepper, they will spin out. Sidesteppers can be taken out with any offensive item or by driving into them while invincible. |
| 3DS Cheep Cheep Lagoon | ||
 Snow block |
SNES Vanilla Lake 1 | A block that knocks racers away when crashed into and disappears. |
 Snowball |
DS DK Pass | A large obstacle that rolls down a portion of the track. If a racer is hit by a snowball, they crash. Snowballs can be destroyed with a Bowser's Shell or by touching them while invincible or Mega. |
| N64 Frappe Snowland (Steer Clear of Obstacles) | ||
 Snowperson |
DS DK Pass | An obstacle that stays in one place. Racers can drive through and destroy them, although this also slows them down if they are not in an invincible or Mega state, or they do not use a Mushroom. Snowpeople will also break if they are hit with an offensive item. |
| N64 Frappe Snowland | ||
| Vancouver Velocity R | ||
 Star Ring |
SNES Rainbow Road R/T | An object that gives drivers a boost and several points when passed through. |
| 3DS Rainbow Road | ||
 Star Thwomp |
SNES Rainbow Road | An invincible version of a Thwomp that repeatedly falls down to the track and rises back, creating ripples that racers can perform Jump Boosts on. Racers that touch a Star Thwomp will crash. |
| SNES Rainbow Road R | ||
| SNES Rainbow Road R/T | ||
| 3DS Rainbow Road (Glider Challenge) | ||
 Swoop |
3DS Rock Rock Mountain | Swoops are bats that fly in rows along a certain portion of a track, usually coming the opposite way of racers. Racers that bump into a Swoop will simply lose speed. |
| Tokyo Blur R/T | ||
| Vancouver Velocity | ||
 Thwomp |
GBA Bowser's Castle 1 | An obstacle that falls down on the track repeatedly, squashing any drivers caught underneath. If a racer drives into a Thwomp, they lose some speed. When a racer drives off a ramp and lands on a Thwomp, they get a Jump Boost. Thwomps can be taken out with a Bowser's Shell, a Bob-omb, or by driving into them while invincible or Mega. |
| GBA Bowser's Castle 2 | ||
| Tokyo Blur 2 | ||
 Traffic cone |
SNES Mario Circuit 1R | An object that gets knocked away when bumped into, giving bonus points to the racer. |
| SNES Mario Circuit 1R/T | ||
| GBA Bowser's Castle 1R | ||
| DS DK Pass (Do Jump Boosts) | ||
| 3DS Toad Circuit | ||
| 3DS Toad Circuit R | ||
| 3DS Toad Circuit R/T | ||
| 3DS Daisy Hills R | ||
| 3DS Rock Rock Mountain | ||
| 3DS Neo Bowser City R | ||
| 3DS Rainbow Road R | ||
| New York Minute R | ||
| Paris Promenade 1 | ||
| Paris Promenade 2 | ||
| London Loop 2 (Steer Clear of Obstacles) | ||
 Train |
N64 Kalimari Desert | Trains cross the track in front of racers. If a racer drives into a train, they will be thrown to the other side while receiving a Jump Boost. |
 Walking Tree |
DS Luigi's Mansion | An obstacle that shuffles from side to side on the track. If a racer drives into one, they lose speed. |
  Water Geyser |
GCN Dino Dino Jungle | A hazard that periodically spouts a column of water. Racers caught by the water are sprung high into the air and receive a Jump Boost. In New York Minute and 2, water erupts from underneath manhole covers, while in GCN Dino Dino Jungle they emerge from raised cracks in the road. Jump Boosts can be performed when driving over the cracks, while they are only performed over manhole covers when they are shaking. |
| New York Minute | ||
| New York Minute 2 | ||

|
GCN Yoshi Circuit | A stationary obstacle that can be destroyed by driving through it. This also causes a racer to spin out unless they use a Mushroom to dash through it or are in an invincible state. In GCN Yoshi Circuit and both Paris Promenade 1 & 2, wooden cutouts are made to resemble Piranha Plants, while in SNES Ghost Valley 1 and DS Luigi's Mansion, they resemble Boos. |
| Paris Promenade 1 | ||
| Paris Promenade 2 | ||
| File:Boo Wooden Cutout MKT.png Wooden cutout |
SNES Ghost Valley 1 | |
| DS Luigi's Mansion |
Cameo appearances
The following are only seen as background or intangible elements.
| Subject | Location | Description |
|---|---|---|
 Boo |
SNES Ghost Valley 1 | Boos appear and disappear above courses. In DS Luigi's Mansion, they also appear on paintings which they occasionally stretch out of. |
| DS Luigi's Mansion | ||
 Snake |
3DS Shy Guy Bazaar | Tiny, green snakes that come out of snake jars upon breaking them. Given the theme of 3DS Shy Guy Bazaar, they may be a reference to Cobrats, who also hide in jars. |
Bonus challenges
Bonus challenges are similar to the Missions mode from Mario Kart DS and the tournaments from Mario Kart Wii, and are found at the end of each cup. In contrast to races, these challenges offer 3 Grand stars instead of 5 when completed with the highest score needed. The game will set the character for the challenge, even if the player has not obtained them yet, and give them the Pipe Frame and the Super Glider, though this rule does not apply for some challenges, all Big Reverse Races, and all Vs. Mega (opponent) challenges.
| New York | Tokyo | Halloween | Paris | Winter | London | Holiday | New Year's | Ice | Valentine's | Vancouver | Mario Bros. | Baby Rosalina | Hammer Bro | Yoshi | Trick | Flower | Jungle | ||
|---|---|---|---|---|---|---|---|---|---|---|---|---|---|---|---|---|---|---|---|
| Ready, Set, Rocket Start | "Pull off a Rocket Start!" | 1 | 1 | 1 | |||||||||||||||
| Time Trial | "Go for your best time!" | 3 | 3 | 3 | 3 | 2 | 1 | 2 | 2 | 2 | 2 | 1 | 2 | 2 | 2 | 1 | 1 | ||
| Ring Race | "Pass through rings!"1 | 3 | 2 | 2 | 3 | 2 | 2 | 2 | 2 | 2 | 2 | 3 | 2 | 1 | 1 | 1 | 1 | 1 | 1 |
| Do Jump Boosts | "Do Jump Boosts!"2 | 2 | 3 | 3 | 2 | 2 | 2 | 1 | 2 | 2 | 2 | 2 | 2 | 1 | 1 | 1 | 1 | 1 | 1 |
| Big Reverse Race | "Aim for 1st!" | 1 | 1 | 1 | 1 | 1 | 1 | 1 | 1 | 1 | 1 | 1 | 1 | 1 | 1 | 1 | 1 | 1 | 1 |
| Goomba Takedown | "Take down Goombas!"3 | 2 | 2 | 1 | 3 | 2 | 3 | 2 | 2 | 1 | 2 | 2 | 2 | 1 | 1 | 1 | 1 | 2 | 1 |
| Glider Challenge | "Glide as far as you can!"4 | 1 | 1 | 1 | 1 | 1 | 1 | 1 | 1 | 1 | 1 | 1 | 1 | 1 | 1 | ||||
| Steer Clear of Obstacles | "Don't crash!" | 2 | 1 | 1 | 1 | 2 | 1 | 2 | 1 | 2 | 1 | 1 | 2 | 1 | 1 | 1 | 2 | 2 | 2 |
| Break Item Boxes | "Break item boxes!"5 | 1 | 2 | 1 | 1 | 2 | 2 | 2 | 2 | 2 | 2 | 2 | 1 | 1 | 1 | 1 | 1 | 1 | 2 |
| Smash Small Dry Bones | "Smash Dry Bones!"6 | 1 | 1 | 1 | 1 | 1 | 1 | 1 | 1 | 1 | 1 | 1 | 1 | 1 | 1 | 1 | 1 | 1 | 1 |
| Vs. Mega (opponent) | "Aim for 1st!" | 2 | 2 | 2 | 2 | 2 | 2 | 2 | 2 | 2 | 2 | 2 | 2 | 1 | 1 | 1 | 1 | 1 | 1 |
| Combo Attack | "Keep the combo going!" | 2 | 2 | 2 | 2 | 2 | 2 | 2 | 1 | 1 | 1 | 1 | 1 |
1 - Formerly "Clear (number) rings."
2 - Formerly "Do (number) Jump Boosts."
3 - Formerly "Hit (number) Goombas."
4 - Formerly "Glide at least (distance)."
5 - Formerly "Hit (number) Item Boxes."
6 - Formerly "Smash (number) opponents."
Apple Store demo
The special demo of Mario Kart Tour is made playable at Apple Store outlets and kiosks.[12] Unlike the full consumer version, only three cups are available, the menu and Coin Rush mode are inaccessible, and points cannot be saved when the player quits the app.
Toad Cup |
New York Minute |
3DS Toad Circuit |
N64 Koopa Troopa Beach |
Do Jump Boosts Yoshi, New York Minute |
|---|---|---|---|---|
Mario Cup |
Tokyo Blur |
3DS Cheep Cheep Lagoon |
3DS Rock Rock Mountain |
Goomba Takedown Mario, Tokyo Blur |
Peach Cup |
Paris Promenade |
3DS Daisy Hills |
3DS Shy Guy Bazaar |
Vs. Mega Bowser Any character, Paris Promenade |
There are only 10 playable characters, 7 karts, and 6 gliders available in the demo.
| Drivers | Karts | Gliders |
|---|---|---|
Updates
The following is a list of updates the game has received since launch.
Version 1.0.2
Release date: October 3rd 2019
- The game may become unplayable if a nickname is not entered when linking a Nintendo Account.
- Certain players may encounter error code 805-9314 after linking a Nintendo Account and become unable to play the game.
- The game may become unplayable when players transition to the main screen after the game starts up.
- Other minor issues.
Version 1.1.0
Release date: October 16, 2019
- You can now view a list of badges you have obtained.
- You can now check the points required to get Grand Stars, the number of Grand Stars, and your current best score on the screen for courses and bonus challenges.
- Addressed known issues.
- Specific/unlisted changes
- CPU drivers are now able to use item frenzies during a race.
- The "FINISH!" label for cups that have been finished but not yet fully completed has been changed to "CLEARED!"
- On the final race results screen after the base point increases, and when using point-boost tickets, the player can tap the screen to proceed through the animations faster.
- Selecting a challenge on a challenge card highlights it with a yellow frame.
Version 1.1.1
Release date: October 23, 2019
Addressed known issues.
Version 1.2.0
Release date: November 17, 2019
- Adjusted race controls.
- (A button has been added to the bottom of the screen that allows a player to drift or steer depending on the Manual Drift setting. The rearview mirror button has been relocated to the bottom-right of the screen.)
- (A player can now perform Ultra-Mini Turbos even when Manual Drift is off by using the drift button. Using the steer button with Manual Drift on does not allow Ultra-Mini Turbos.)
- Added a list of tickets you currently have. (A player can now see the inventory of tickets at a glance by tapping Tickets in the Menu.)
- You can now earn bonus points for finishing a race in Frenzy mode. (A "Frenzy Finish" action has been added.)
- Specific/unlisted changes
- The FAQ text describing how long Gold Pass benefits remain valid has been changed from "until 06:00 UTC" into "until the daily reset (06:00 UTC)".
- The names for New York Minute, Tokyo Blur, and Paris Promenade have been changed into New York Minute, Tokyo Blur, and Paris Promenade 1 respectively.
- "Badge" on the menu has been corrected to "Badges".
- The tires of the Pink Mushmellow were changed to a lighter shade of pink.
Version 1.2.1
Release date: November 18, 2019 (Android)
Addressed known issues.
- Specific/unlisted changes
- This update fixed an issue in version 1.2.0 where the game would not start in Android versions.
Version 1.4.0
Release date: December 11, 2019
- You can now see more information about other players in your ranking tier, including the driver they are using.
- Adjusted how the ranking announcement and menu screens are displayed.
- Specific/unlisted changes
- Along with the driver being used by other players in the same ranking tier, the kart, glider, and score for each course are now visible.
- Multiplayer is no longer darkened with "Inbound!" in front of it. It was under maintenance at the time.
- Certain icons appear next to drivers, kart, and gliders that have not been unlocked yet indicating whether they are available as a spotlight (a green pipe icon), as a Gold Gift (a Gold Pass icon), or a special offer in the Shop (a pink starburst icon), similar to the existing Shop icon.
- Coin Rush is selectable in the Shop under Daily Selects.
Version 1.4.1
Release date: December 12, 2019
Improved various features.
Addressed known issues.
Version 1.6.0
Release date: January 20, 2020
Addressed known issues.
Version 2.0.0
Release date: March 4, 2020
- Added support for racing against players from around the world via multiplayer. This service is scheduled to become available on March 8th, at 8:00 PM PT.
- Added a camera feature. Using this feature during a race allows you to freely move the camera around your driver as they automatically steer. Use it to view the action from different angles!
- (Items can also be used while the camere feature is enabled.)
- (The camera can rotate and zoom around the kart. This feature can also be accessed when the player finishes a race.)
- (When this feature is enabled, it will not transition to the placement screen until the player exits this feature.)
- (This feature cannot be used in multiplayer or bonus challenges.)
- Made other adjustments and addressed known issues to improve the overall gameplay experience.
- Specific/unlisted changes
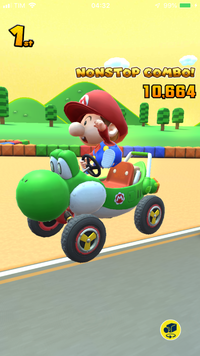
- The startup screen and the game icon have been changed to a scene featuring Peach and Mario racing against each other.
- The pre- and post-race screens have been adjusted.
- Base points and level information for each driver, kart, and glider is now displayed on the “Ready to Race!” screen. When playing single player, you can tap on the base points or level to use boost tickets. This feature cannot be used in multiplayer or bonus challenges.
- The bonus-points boost is now displayed on the results screen. When a bonus-points boost is applied to a driver, kart, or glider, their level will light up.
- The player can earn a "NONSTOP COMBO!" if a player maintains an unbroken combo between the Rocket Start and the end of the race, and is displayed when finishing a race. It is also displayed on the results screen.
- In the results screen, points flash when the player reaches a high score.
- The "Got it!" screen for a Grand Star is no longer played when acquiring them. It still plays when redeeming with star tickets, however.
- The icons (shop, spotlight, special offer, Gold Gift) are also displayed for the unlocked drivers, karts, and gliders.
- The multiplayer icon is altered to a group of Toads.
- The experience points are no longer given to drivers, karts and gliders whose base points are maxed out, as a consequence, a single driver, kart or glider can acquire up to 450 experience points per day and the player is now warned when 90 or less experience points are left to be gained in the day.
- When tapping the screen as the camera changes angle before the race countdown starts, the driver performs a brief animation.
- Red Koopa (Freerunning) and Gold Koopa (Freerunning) now make a sound when they are selected.
- In Combo Attack bonus challenges, points are no longer given to actions during the challenge.
- The Friends list now displays friends' ranking tier alongside their badge.
- During a Bob-omb or Double Bob-omb frenzy, the Bob-ombs that get thrown no longer explode instantly once they hit the ground.
- Competitors' ranking scores at the start of a ranked cup are displayed as "???" instead of "0".
- The confirmation screen for launching a pipe is different, and features a large, flashing button that the player taps to confirm.
Version 2.0.1
Release date: March 12, 2020
Addressed known issues.
Version 2.1.0
Release date: May 13, 2020
- The Team Game rule has been added to multiplayer.
- (The Team Game rule will routinely appear in the Standard Race rule rotation.)
- The Room Code feature has been added to multiplayer.
- Support for Expert Challenges has been added. These challenges will become available in future tours.
- Support for the Coins Aplenty event has been added. This event will become available in future tours.
- (This event will allow you to obtain a large amount of coins.)
- The issue preventing players from receiving a level-up reward when they advance to the next player level has been addressed.
- Specific/unlisted changes
- Players can now earn up to 100 coins a day as they wait for a multiplayer match to be found.
- Players can now move the camera around before the race begins.
- High scores earned by friends in a particular cup can now be seen for every cup. Scores shown are those recorded after updating to Version 2.1.0.
- The Points-cap ticket has been added, it's used to increase the base points cap.
- Drivers, karts, and gliders that have reached their base points cap is indicated by the word LOCKED.
- Support has been added for player level 100 and beyond.
- When a driver, kart, or glider that the player owns appears in the Daily Selects, the number of duplicates needed to level them up is displayed.
- The levels and base-points of the drivers, karts, and gliders that opponents have used for their scores in the ranked cup is displayed.
- In addition, the label showing the tier of the driver, kart, and glider in the course appears above the respective icons, for all the records obtained after the update to version 2.1.0.
- The buttons for Standard Race and Gold Race are adjusted.
- The notification bar on the main screen scrolls faster.
- There is a short period of time before the icons of drivers, karts, gliders, items (for drivers and gliders), and skills (for karts) appears on the button backgrounds.
- A new sound effect is added when the player achieves a "NONSTOP COMBO!" race.
- In rulesets with less than 3 item slots in multiplayer, the action of hitting an opponent with a Super Star displays "Super Star strike!" rather than "Frenzy strike!" (as Frenzy mode do not occur in this ruleset).
- All the courses and bonus challenge of each cup are unlocked as soon as the cup is unlocked.
- A special sound effect is played when obtaining the last Grand Star from a race or a bonus challenge
Differences from previous Mario Kart games
- This is the first Mario Kart game where every character must be unlocked.
- The number of racers has reverted back to eight, like in all mainline games up to Mario Kart DS and in Mario Kart 7.
- Aside from 3DS Rainbow Road, all races consist of two laps as opposed to the usual three.
- Racers, karts, and gliders can be leveled up.
- The music continues from where it leaves off after the final lap fanfare plays, instead of restarting like in past games.
- In addition, on the final lap, the music's pitch is increased by four semitones, as opposed to one.
- The only exception to both of these is 3DS Rainbow Road, which reuses its final lap music from Mario Kart 7 and always begins at the start of the song.
- In addition, on the final lap, the music's pitch is increased by four semitones, as opposed to one.
- The Lakitu referee does not appear at all throughout the race.
- Stars are not obtainable from regular item boxes in single player mode, with item frenzies having similar effects instead. However in multiplayer mode, stars appear from item boxes in rulesets with less than three item slots, as frenzies are not obtainable.
- For the first time since Super Mario Kart, Triple Red Shells are absent.
- This is the first Mario Kart game since Mario Kart: Super Circuit to have numbered nitro courses (e.g. RMX Mario Circuit 1 or Tokyo Blur 2).
- For the first time since Mario Kart: Super Circuit, the Golden Mushroom is absent, as it is functionally replaced by the Mushroom frenzy.
- Multiple items can be received from a single item box.
- So far, there are no retro tracks from Mario Kart Wii or Mario Kart 8 in this game, making it the first Mario Kart title since Mario Kart: Super Circuit to not feature retro tracks from every previous Mario Kart entry (excluding games lacking retro tracks overall).
- This is the first Mario Kart game to lack losing themes and character losing animations. If the player finishes 5th or lower, the 2nd to 4th place theme will play and no animation will be performed.
Reception
Critical reception
Initial impressions of the beta were mixed. Journalists praised the gameplay and graphics, but criticized the free-to-play gacha elements of the game. Sam Machkovech of Ars Technica compared the game's in-app purchases to Spiny Shells, blowing up the classic Mario Kart experience. He suggested that "the developers pick a side: attach an annoying economy to a deeper control scheme and more legitimate online options, or make it cheaper and less obnoxious to watch Mario drive himself."[13] Ethan Gach of Kotaku also stated that the game is "a mostly faithful but stripped-down recreation of Mario Kart decked out with all the microtransactions and lottery mechanics mobile games are infamous for" and also lamenting the lack of a multiplayer mode.[14] Steven Asarch of Newsweek complained about the game's "freemium greed" and that it is "ruined by microtransactions".[15]
The game's reception on release was mixed to negative. Andrew Webster of The Verge praised how intuitive using items is, while criticizing the controls, calling them imprecise, and the game's monetization, stating that "The problem is so much of the game feels designed around monetization, as opposed to just being a fun game."[16] Chris Scullion of Nintendo Life gave a positive review, praising the lack of an energy system, the points system, and the large amount of cups, while criticizing the time required to get used to the controls, the gyro controls, and listing the game's monetization as a con, stating that opinions on the game's monetization will vary for each person, while arguing that "It’s rubbish to an extent, absolutely, but despite the outrage you may be seeing in some circles, it’s no different to any other game with a loot box system; it’s always nearly impossible to guarantee you’ll get the exact thing you want" when talking about the game's gacha mechanics, and that "More than the gacha system, the Gold Pass is gaining a lot more controversy than it really should be, with some misunderstanding what it does and assuming this subscription service is necessary in some way. To be clear, it really isn’t, and absolutely won’t be of interest to 99% of the player base." when talking about the game's Gold Pass subscription.[17] Michael McWhertor of Polygon gave a negative review, stating that the game "lacks the joy of its fully-featured counterparts", criticizing that the steering feels inconsequential, stating that "the game can feel as if it’s playing itself", the lack of difficulty when playing against computers, the lack of motivation to continue playing, and the game's microtransactions.[18] CJ Andriessen of Destructoid gave a negative review, criticizing the game's microtransactions and how the game rarely gives the player Rubies, stating "Tour's fatal flaw is it's continually pushing players into ham-fisted situations where they have to spend money rather than creating a game so exceptional they'll want to spend money.", the limitations on unlocking, collecting, or upgrading certain things, the game's controls, stating "There are three control options, none of which are completely sufficient.", while praising the variations to courses, though noting that "there is still a bit of disappointment when you wait a day to unlock a new cup only to find it's Daisy Hills again.", the New York Minute track and that Nintendo at the time of the article's publication planned to add more new tracks to the game, though noting that "One of the great joys of any Mario Kart title is seeing what types of new courses the developers have designed and that joy just isn't present in Tour."[19] Kyle Hilliard of IGN, in a mixed review, praised the series' transition from consoles to mobile phones, stating that "during those moments where I was speeding down the track expertly launching turtle shells at my opponents I felt like I was playing a real Mario Kart game" though stating that Mario Kart Tour is an "undeniable downgrade from Mario Kart 8", praised how items are used, the game's bonus challenges, and the brevity of the races, cups, and bonus challenges, while criticizing the game launching without multiplayer, the game's microtransactions and their cost, having to wait for later cups to unlock, and the quantity of Grand Stars unlocked being affected by the kart or character the player unlocked.[20] Jon Cartwright of GameXplain, in a negative review, stated that "Mario Kart is better than this", stating "Because it's so similar to the core games, it becomes comparable to them, amplifying its faults even further.", criticizing the controls, calling them "extremely unintuitive", and "a huge, restrained, letdown" after stating that the controls felt "extremely simplistic", the game's monetization, stating that "This may be a free game compared to a full sixty dollar release, but money has never felt so intrusive in Mario Kart, and the track New York Minute, stating that "this track is not good enough for Mario Kart.", while praising the game's bonus challenges, the game's Reverse tracks, calling them "really cool ideas", while also praising the game's roster and its graphics.[21]
As of May 5, 2020, Mario Kart Tour received a mixed Metacritic Metascore of 58, and a negative User Score of 4.0.[22] Despite receiving negative reviews from critics, as of May 5, 2020, Mario Kart Tour received an average of 4.0 stars on Google Play[23], and an average of 4.8 stars on the App Store.[24]
| Reviews | |||
|---|---|---|---|
| Release | Reviewer, Publication | Score | Comment |
| Unknown | Andrew Webster, The Verge | N/A | "This doesn’t mean Mario Kart Tour won’t be successful. In fact, early signs point to the game having a record-breaking launch. But that success isn’t because the game is good, and it’s especially disappointing from a company that prides itself on quality. Mobile aside, Nintendo is at a creative high point, regularly launching major Switch games to near-universal acclaim. They’re games that sell hardware and help players think differently about what games can be. On console, Nintendo sets its own pace; on mobile, it follows." |
| Unknown | Chris Scullion, Nintendo Life | 7/10 | "Get used to Mario Kart Tour’s unconventional control system and ignore its overpriced and unnecessary subscription service and you’re left with a fun, free mobile take on the series. It was never going to replace Mario Kart 8 Deluxe, but by not including an energy system and promising regular new content Nintendo is at least offering a decent alternative to pass the time when you’re out and about without your Switch." |
| iOS | Michael McWhertor, Polygon | N/A | "Mario Kart Tour stalls right from the starting line. It lacks the competitive thrills of other Mario Kart games, focusing more on an endless series of unlockable virtual things to acquire.
But it appears that a full multiplayer mode is coming to Mario Kart Tour, which may provide more thrills than chasing AI-controlled kart racers and the daily drip feed of currency. For now, however, this is hardly a vital addition to Nintendo’s library of games, mobile or otherwise." |
| Unknown | CJ Andriessen, Destructoid | 4.5/10 | "Mario Kart Tour is a blemish on the franchise it shares its name with. The genre-defining creativity found in past entries is completely absent here, replaced by a hollow experience that's simply coasting on the name and goodwill of the games that came before it. I can only hope this is Nintendo's mobile initiative hitting rock bottom, and that it's all uphill from here. Because I can't stand the thought of another one of my favorite series having its reputation dragged the mud in search of a quick buck." |
| iOS | Kyle Hilliard, IGN | 6.7/10 | "The actual gameplay and racing of Mario Kart Tour is well done: controlling the karts feels good, the courses and characters look and sound great, and playing simplified one-handed Mario can be a lot of fun. But the road to a mobile version of Mario Kart is a bumpy one. On top of multiplayer not currently being available at all, Nintendo continues to struggle with how to comfortably monetize a mobile game without hamstringing its gameplay. Tour’s prices are prohibitively high and not getting top honors on a race despite winning first place just because you don’t have the right racer or kart feels unfair." |
| Unknown | Jon Cartwright, GameXplain | Disliked | "If you're someone who doesn't own a Nintendo console and just want a quick Mario Kart fix, I guess this is it. It comes with a lot of roadblocks, and it isn't anywhere near as fun to control as the console games. And for me it just made me want to play Mario Kart 8 again. I disliked Mario Kart Tour. It looks like a quality Mario Kart game, but it isn't particularly fun to play, and the aggressive monetization is so prominent that it intrudes on the experience. The last new Mario Kart game may have been five years ago with Mario Kart 8 on Wii U, but this isn't even worth a pit stop to me. Mario Kart is better than this." |
| Aggregators | |||
| Compiler | Template:Nowrap | ||
| Metacritic | iOS: 58 | ||
Awards and acknowledgements
Mario Kart Tour was nominated for the "User's Choice Game of 2019" from Google Play, losing to Call of Duty: Mobile.[25] The game won the "Racing Game of the Year" award at the 23rd annual D.I.C.E Awards.[26]
Pre-release and unused content
- Main article: List of Mario Kart Tour pre-release and unused content
The beta version of the game saw multiple changes in the final game. The stamina element was removed, and the timers restricting access to certain cups can be sped up using quick tickets. Additionally, rubies were originally emeralds.
Gallery
- For this subject's image gallery, see Gallery:Mario Kart Tour.
- Toad MKT artwork.jpg
Media
- For a complete list of media for this subject, see List of Mario Kart Tour media.
References to other games
- Donkey Kong: Portions of this game can be seen in Times Square's screens in New York Minute and New York Minute 2. The clothing colors of Mario (Classic) reference Mario's original design from this game.
- Super Mario Bros.: The 8-Bit Jumping Mario glider uses Mario's jumping sprite from this game. The game's Japanese logo appears on the Super 1 kart.
- Super Mario Bros.: The Lost Levels: The clothing colors of Luigi (Classic) reference Luigi's artwork from this game.
- Super Mario Bros. 3: A Boomerang Bro and a Fire Bro appear as playable characters.
- Super Mario Kart: Mario Circuit 1, Donut Plains 1, Ghost Valley 1, Mario Circuit 2, Mario Circuit 3, Choco Island 2, Vanilla Lake 1, and Rainbow Road appear as returning courses. The tires resembling the tires from this game returns as the Pipe Frame's assigned tires, as well as other certain karts with these tires. Also, one of Princess Peach's artworks from this game is reused for the "Dash Panel Plus" Special Skill icon.
- Donkey Kong Country: A special video promoting the Rambi Rider as a commemorative kart for the Jungle Tour was released, using clips from the opening and gameplay.
- Mario Kart 64: Koopa Troopa Beach, Kalimari Desert, and Frappe Snowland appear as returning courses. The results theme is an arrangement of the winning results theme from this game.
- Mario Kart: Super Circuit: Bowser Castle 1 and Bowser Castle 2 appear as returning courses.
- Mario Kart: Double Dash!!: Special Items such as the Giant Banana and the Heart return. Yoshi Circuit and Dino Dino Jungle appear as returning courses. The Turbo Yoshi, Turbo Birdo, Koopa Dasher, Para-Wing, Bullet Blaster, and DK Jumbo return as karts. Birdo's voice clips are reused from this game.
- Mario Party 6: Both Mario (Classic) and Luigi (Classic)'s artworks are based on Mario and Luigi's profile artworks from this game.
- Mario Kart DS: Luigi's Mansion, Waluigi Pinball, and DK Pass appear as returning courses. The Poltergust 4000, Streamliner, Royale, Egg 1, Mushmellow, and Rambi Rider return as karts. Challenges with unique objectives return as the fourth and final race in every cup.
- Super Mario Strikers: Some of Hammer Bro's voice clips are reused from this game.
- Mario Party 8: Dry Bones' artwork is reused from this game. Hammer Bro's artwork, as well as some of his voice clips, are reused from this game.
- Super Mario Galaxy: Ice Mario appears as a playable variant. Bowser Jr.'s artwork is reused from this game.
- Mario Party DS: Diddy Kong's artwork is reused from this game.
- Mario Super Sluggers: Black Shy Guy and Pink Shy Guy's artworks are based on Shy Guy's artwork from this game.
- Mario Kart Wii: The Wild Wing, Daytripper, Super Blooper, Cheep Charger, Flame Flyer, and Offroader return as karts. The jingle that plays when earning a High-End kart, glider, racer, or level-boost ticket is recreated. Diddy Kong and Funky Kong's voice clips are reused.
- New Super Mario Bros. Wii: Peach's artwork is reused from this game. Penguin Luigi and an Ice Bro appear as playable characters. Iggy's artwork is based off his artwork from this game, albeit without the magic coming from his wand.
- Mario Kart 7: Toad Circuit, Daisy Hills, Cheep Cheep Lagoon, Shy Guy Bazaar, Mario Circuit, Rock Rock Mountain, Neo Bowser City and Rainbow Road appear as returning courses. SNES Rainbow Road retains its retro course design from this game. Daisy's artwork is an updated version of her artwork from this game. The Birthday Girl, Soda Jet, Cloud 9, Bumble V, Zucchini, Bruiser, Blue Seven, and Bolt Buggy return as karts, and the Barrel Train retains its design from this game. The Swooper returns as a glider. Various tire parts return retaining their design, which are only assigned to certain karts. The Lucky Seven reappears as a Special Item. The rankings screen and multiplayer menu use the themes from this game's Local Multiplayer and Online Multiplayer menus respectively. Metal Mario's voice clips are reused. Lakitu and Metal Mario's artworks are also reused from this game. Honey Queen's emblem is reused from this game as part of the Racer's Soda Lemonade badge.
- Mario Party 9: Birdo's artwork is reused from this game. Birdo (Light Blue)'s and Birdo (Yellow)'s artworks are based on Birdo's artwork from this game.
- Super Mario 3D World: The artwork for the Double Cherry is reused from this game for the Tropical Grocery badge.
- Mario Party: Island Tour: Luigi's artwork is reused from this game.
- Mario Kart 8: Many characters' animations and voice clips are reused from this game. Metal Mario's voice clips are reused exclusively for Gold Mario. Yoshi Circuit retains its retro course design from this game. The flying train seen in N64 Rainbow Road returns in the Ring Race challenge set in 3DS Rainbow Road. The Mach 8, Badwagon, Biddybuggy, Landship, Circuit Special, and P-Wing return as karts, and the Pipe Frame and B Dasher retain their designs from this game. The Parafoil, Peach Parasol, Flower Glider, Wario Wing, and Cloud Glider return as gliders, retaining their design from this game. Various tire parts return retaining their design. The Boomerang Flower and Super Horn return as items. The courses from this game are referenced in advertisements and badges, including Toad Harbor, Sunshine Airport, and Mount Wario. The designs of the icons for the Mushroom Cup, the Flower Cup, the Star Cup, the Shell Cup, and the Lightning Cup are reused from this game as badges.
- Mario Kart 8 Deluxe: The third-level Mini-Turbo boost, Ultra Mini-Turbo, returns. The Koopa Clown retains its design from this game. King Boo’s head icon is recycled from this game.
- Captain Toad: Treasure Tracker: The Clanky Kart is based off the mine cart from this game.
- Donkey Kong Country: Tropical Freeze: Dixie Kong and Funky Kong's artworks are reused from this game. Dixie Kong's emblem is derived from the Dixie Kong Barrel's design in this game.
- Mario Party 10: Yoshi, Bowser, Toad, Waluigi, and Toadette's artworks are reused from this game. Red Yoshi's and Black Yoshi's artwork are based on Yoshi's artwork from this game.
- Super Mario Maker / Super Mario Maker 2: Builder Mario and Builder Toad appear as playable variants. Their respective artworks are reused from these games.
- Mario & Sonic at the Rio 2016 Olympic Games: Nabbit's emblem is reused from this game as part of the Racer's Soda Grape badge.
- Super Mario Odyssey: Mario (Musician), Mario (Santa), and Mario (Happi) use Mario's Musician outfit, Santa outfit, and Happi outfit respectively from this game. The Yellow Taxi is based on the taxis from this game. Pauline's voice clips reference her singing from this game. Peach (Vacation) and Peach (Wintertime) use her post-game "tourist" outfits from this game. The red and gold Roving Racers appear as playable characters as Red Koopa (Freerunning) and Gold Koopa (Freerunning) respectively. The artwork of Earth, which is used for promotional material and the title screen, resembles the Earth from this game; The Metro, Snow, Seaside, and Luncheon Kingdoms are visible in the artwork, as well as inaccurate representations of Cap and Cascade Kingdoms.
- Mario Party: The Top 100: Rosalina and Wario's artworks are reused from this game.
- Super Mario Party: Donkey Kong's artwork is reused from this game.
- Mario Tennis Aces: Pauline's kart emblem is reused from this game.
- New Super Mario Bros. U Deluxe: Peachette appears as a playable character with her emblem being a Super Crown; as a result, her artwork is reused from this game.
- Luigi's Mansion 3: King Boo (Luigi's Mansion) uses King Boo's design from this game.
Names in other languages
| Language | Name | Meaning | Notes |
|---|---|---|---|
| Chinese (simplified) | 马力欧卡丁车 巡回赛[27] Mǎlìōu Kǎdīngchē Xúnhuí Sài |
Mario Kart Tour | |
| Chinese (traditional) | 瑪利歐賽車 巡迴賽[28] Mǎlìōu Sàichē Xúnhuí Sài |
Mario Racing Tour |
External links
References
- ^ Nine Months Financial Results Briefing for Fiscal Year Ending March 2018 (2018). Nintendo. Retrieved May 24, 2019.
- ^ Section about the Mario Kart series in the official Mario Portal.
- ^ Takashi Mochizuki (February 7, 2018). 'DeNA CEO said "Mario Kart Tour," a Nintendo-DeNA smartphone game planned for FY18, will be free-to-start.' Twitter. Retrieved May 24, 2019.
- ^ Romano, Sal (April 24, 2019). Mario Kart Tour Android closed beta test set for May 22 to June 4. Gematsu. Retrieved May 22, 2019.
- ^ a b @mariokarttourEN (March 2, 2020). Multiplayer mode announcement. Twitter. Retrieved March 2, 2020.
- ^ @mariokarttourEN (October 31, 2019). Multiplayer beta test announcement. Twitter. Retrieved October 31, 2019.
- ^ @mariokarttourEN (January 21, 2020). Second multiplayer beta test announcement. Twitter. Retrieved January 21, 2020.
- ^ A human readable transcription of the main content of the RaceScoreParam container.
- ^ @mariokarttourEN (March 2, 2020). Multiplayer rules. Twitter. Retrieved March 2, 2020.
- ^ As seen in Coin Rush during Valentine's Tour
- ^ A human-readable transcription of the main content of the ItemSlotTable container.
- ^ Ryuk3112 (December 2, 2019). Demo iPhones have a demo version of Mario Kart Tour. Reddit. Retrieved December 8, 2019.
- ^ Machkovech, Sam (May 22, 2019). Mario Kart Tour beta hands-on: Microtransactions land like a nasty blue shell. Ars Technica. Retrieved May 23, 2019.
- ^ Gach, Ethan (May 22, 2019). Mario Kart Tour Is Pretty Good When It’s Not Nickel And Diming You. Kotaku. Retrieved May 23, 2019.
- ^ Asarch, Steven (May 23, 2019) ‘Mario Kart Tour’ Beta Potential Bogged Down By Microtransactions. Newsweek. Retrieved May 23, 2019.
- ^ Webster, Andrew (September 26, 2019). Mario Kart Tour is too cynical to be fun. The Verge. Retrieved March 31, 2020.
- ^ Scullion, Chris (September 26, 2019). Mario Kart Tour Review. Nintendo Life. Retrieved March 31, 2020.
- ^ McWhertor, Micheal (September 27, 2019). Mario Kart Tour review: Mario Kart just doesn’t feel right on a phone. Polygon. Retrieved March 31, 2019.
- ^ Andriessen, CJ (September 29, 2019). Review: Mario Kart Tour. Destructoid. Retrieved March 31, 2020.
- ^ Hilliard, Kyle (October 1, 2019). Mario Kart Tour Review. IGN. Retrieved March 31, 2020.
- ^ GameXplain (October 2, 2019). Mario Kart Tour REVIEW - Free to Play but Money Has Never Been More Intrusive. YouTube. Retrieved March 31, 2019.
- ^ Mario Kart Tour (iOS). Metacritic. Retrieved May 5, 2020.
- ^ Mario Kart Tour. Google Play. Retrieved May 5, 2020.
- ^ Mario Kart Tour. App Store. Retrieved May 5, 2020.
- ^ Users’ Choice Game of 2019. Google Play. Retrieved April 2, 2020.
- ^ Academy of Interactive Arts & Sciences (February 14, 2020). Congratulations to @mariokarttourEN for winning Racing Game of the Year! #DICEAwards. Twitter. Retrieved April 2,2020.
- ^ mariokarttour.com (simplified Chinese). Retrieved September 2, 2019.
- ^ mariokarttour.com (traditional Chinese). Retrieved September 2, 2019.
| Mobile games and applications | |
|---|---|
| Super Mario franchise | Super Mario Run (2016) • Dr. Mario World (2019) • Mario Kart Tour (2019) |
| Miscellaneous | Nintendo Music (2024) |


