Golf: Japan Course: Difference between revisions
Seandwalsh (talk | contribs) No edit summary |
Tags: Mobile edit Advanced mobile edit |
||
| (8 intermediate revisions by 5 users not shown) | |||
| Line 4: | Line 4: | ||
|developer=[[HAL Laboratory]] | |developer=[[HAL Laboratory]] | ||
|publisher=[[Nintendo]] | |publisher=[[Nintendo]] | ||
|release={{ | |release={{flag list|Japan|February 21, 1987<ref>{{Cite|url=https://www.nintendo.com/jp/famicom/software/fmc-gj/index.html|title=''Golf: Japan Course'' website|publisher=Nintendo of Japan}}</ref>}} | ||
|languages={{languages|jp=y}} | |languages={{languages|jp=y}} | ||
|genre=Sports ( | |genre=Sports (golf) | ||
|modes=1–2 players | |modes=1–2 players | ||
|ratings= | |ratings= | ||
|platforms=[[Family Computer Disk System]] | |platforms=[[Family Computer Disk System]] | ||
|format={{format|fds=1}} | |format={{format|fds=1}} | ||
|input={{input| | |input={{input|fc=1}} | ||
|serials=FSC-GFJE | |serials=FSC-GFJE | ||
}} | }} | ||
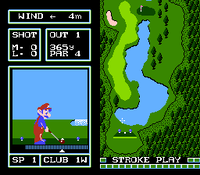
'''''Golf: Japan Course''''' is a Japan-exclusive golf game released for the [[Family Computer Disk System]] on February 21, 1987. It | '''''Golf: Japan Course''''' is a Japan-exclusive golf game released for the [[Family Computer Disk System]] on February 21, 1987. It stars [[Mario]] and [[Luigi]] and is considered the earliest entry in the ''[[Mario Golf (series)|Mario Golf]]'' series. It is similar in gameplay to the earlier ''[[Golf]]'', though with polished mechanics. The holes in the game are fictional. The game received a companion title a few months later known as ''[[Golf: U.S. Course]]'', which also had fictional holes and improves even further on the mechanics. As with most FDS games, side A of the disk is reserved for menus and saving scores, while side B is used for the gameplay. | ||
==Gameplay== | ==Gameplay== | ||
[[File:FCGJPC Gameplay.png|thumb|left|Mario on the first hole]] | [[File:FCGJPC Gameplay.png|thumb|left|Mario on the first hole]] | ||
The gameplay is similar to the original ''Golf'', though new features are added to improve the immersion and quality-of-life. There is now a distinction between fairways and rough grass, and trees now act as solid obstacles rather than simply an indicator of out-of-bounds areas; the out-of-bounds areas now have a clear boundary surrounding densely-packed forest instead. There are four levels for rough grass and three for sand bunkers, with each making the ball more difficult to hit far. The player can now swing in any direction regardless of whether they are on the green or not. The greens themselves can now push the ball in multiple directions rather than only a single direction at a time, and each hole may appear in one of three positions on each green. The player can move away from the ball to do a practice swing by pressing {{button|NES|select}}, or view the current score sheet by pressing {{button|NES|start}}. To change clubs, the player now needs to hold down {{button|NES|B}} and press {{button|NES|pad}} up or down; pressing {{button|NES|pad}} left or right while doing that switches between one of three swing speeds. The middle "2" speed is closest to what the swing speed in ''Golf'' is, while the default "1" is slower and "3" is faster. | The gameplay is similar to that of the original ''Golf'', though new features are added to improve the immersion and quality-of-life. There is now a distinction between fairways and rough grass, and trees now act as solid obstacles rather than simply an indicator of out-of-bounds areas; the out-of-bounds areas now have a clear boundary surrounding densely-packed forest instead. There are four levels for rough grass and three for sand bunkers, with each making the ball more difficult to hit far. The player can now swing in any direction regardless of whether they are on the green or not. The greens themselves can now push the ball in multiple directions rather than only a single direction at a time, and each hole may appear in one of three positions on each green. The player can move away from the ball to do a practice swing by pressing {{button|NES|select}}, or view the current score sheet by pressing {{button|NES|start}}. To change clubs, the player now needs to hold down {{button|NES|B}} and press {{button|NES|pad}} up or down; pressing {{button|NES|pad}} left or right while doing that switches between one of three swing speeds. The middle "2" speed is closest to what the swing speed in ''Golf'' is, while the default "1" is slower and "3" is faster. | ||
<gallery class="graybg"widths=48px heights=56px style="display:inline-block;image-rendering:pixelated"> | |||
<gallery class="graybg" widths=48px heights=56px style="display:inline-block; image-rendering:pixelated"> | |||
Golf JC P1 Mario swing.gif|Speed 1 | Golf JC P1 Mario swing.gif|Speed 1 | ||
Golf JC P1 Mario swing med.gif|Speed 2 | Golf JC P1 Mario swing med.gif|Speed 2 | ||
Golf JC P1 Mario swing fast.gif|Speed 3 | Golf JC P1 Mario swing fast.gif|Speed 3 | ||
</gallery> | </gallery> | ||
{{multiframe|[[File:Golf JC P2 Luigi.png]][[File:Golf JC P2 COMP1.png]]|bg=gray|Luigi and COMP1}} | {{multiframe|[[File:Golf JC P2 Luigi.png]][[File:Golf JC P2 COMP1.png]]|bg=gray|Luigi and COMP1}} | ||
There are four game modes, which can be chosen between by pressing {{button|NES|pad}} left and right or {{button|NES|select}} at the top option of the main menu: | There are four game modes, which can be chosen between by pressing {{button|NES|pad}} left and right or {{button|NES|select}} at the top option of the main menu: | ||
| Line 33: | Line 31: | ||
*2 Player Match Play: Mario and Luigi play against each other. | *2 Player Match Play: Mario and Luigi play against each other. | ||
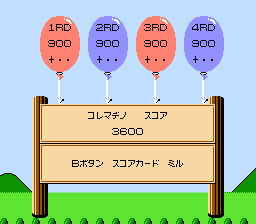
There are four slots to save scores (represented by balloons, the strings being cut by a crab when overwriting) with blank slots recorded as 900. | There are four slots to save scores (represented by balloons, the strings being cut by a crab when overwriting) with blank slots recorded as 900. | ||
===Clubs=== | ===Clubs=== | ||
The draws listed are as they are on the tee or fairway with no wind resistance. The four levels of rough grass and three levels of bunker sand all detract varying amounts from it. Swinging at a higher speed usually increases it, but runs a greater risk of losing control on the ball's curve. | The draws listed are as they are on the tee or fairway with no wind resistance. The four levels of rough grass and three levels of bunker sand all detract varying amounts from it. Swinging at a higher speed usually increases it, but runs a greater risk of losing control on the ball's curve. | ||
{|border=1 style="text-align:center; display:inline-block" | {|border=1 style="text-align:center;display:inline-block" | ||
|- | |- | ||
!style="background:#88D800"|Club | !style="background:#88D800"|Club | ||
| Line 50: | Line 47: | ||
|style="background:black;color:white"|210y | |style="background:black;color:white"|210y | ||
|} | |} | ||
{|border=1 style="text-align:center; display:inline-block" | {|border=1 style="text-align:center;display:inline-block" | ||
|- | |- | ||
!style="background:#88D800"|Club | !style="background:#88D800"|Club | ||
| Line 64: | Line 61: | ||
|style="background:black;color:white"|165y | |style="background:black;color:white"|165y | ||
|} | |} | ||
{|border=1 style="text-align:center; display:inline-block" | {|border=1 style="text-align:center;display:inline-block" | ||
|- | |- | ||
!style="background:#88D800"|Club | !style="background:#88D800"|Club | ||
| Line 78: | Line 75: | ||
|style="background:black;color:white"|130y | |style="background:black;color:white"|130y | ||
|} | |} | ||
{|border=1 style="text-align:center; display:inline-block" | {|border=1 style="text-align:center;display:inline-block" | ||
|- | |- | ||
!style="background:#88D800"|Club | !style="background:#88D800"|Club | ||
| Line 92: | Line 89: | ||
|style="background:black;color:white"|90y | |style="background:black;color:white"|90y | ||
|} | |} | ||
{|border=1 style="text-align:center; display:inline-block" | {|border=1 style="text-align:center;display:inline-block" | ||
|- | |- | ||
!style="background:#88D800"|Club | !style="background:#88D800"|Club | ||
| Line 115: | Line 112: | ||
==Maps== | ==Maps== | ||
Each hole can appear in three locations, which is picked depending on how many strokes were made in the previous holes; this number does not change the hole in any regular interval, ie, per each swing, but instead uses more complex measures to determine it. In some holes, mainly in the Prize Card variants, all water on the map is randomly replaced with sand, which is determined at the game's beginning. | Each hole can appear in three locations, which is picked depending on how many strokes were made in the previous holes; this number does not change the hole in any regular interval, ie, per each swing, but instead uses more complex measures to determine it. In some holes, mainly in the Prize Card variants, all water on the map is randomly replaced with sand, which is determined at the game's beginning. | ||
===''Japan Course''=== | ===''Japan Course''=== | ||
;Outward nine | ;Outward nine | ||
{|border=1 style="text-align:center; display:inline-block" | {|border=1 style="text-align:center;display:inline-block" | ||
|- | |- | ||
!colspan=2 style="background:#88D800"|<big>Hole 1</big> | !colspan=2 style="background:#88D800"|<big>Hole 1</big> | ||
| Line 131: | Line 127: | ||
!height=128px style="background:black"|[[File:Golf JC Hole 1 green.png]] | !height=128px style="background:black"|[[File:Golf JC Hole 1 green.png]] | ||
|} | |} | ||
{|border=1 style="text-align:center;display:inline-block" | |||
{|border=1 style="text-align:center; display:inline-block" | |||
|- | |- | ||
!colspan=2 style="background:#88D800"|<big>Hole 2</big> | !colspan=2 style="background:#88D800"|<big>Hole 2</big> | ||
| Line 145: | Line 140: | ||
!height=128px style="background:black"|[[File:Golf JC Hole 2 green.png]] | !height=128px style="background:black"|[[File:Golf JC Hole 2 green.png]] | ||
|} | |} | ||
{|border=1 style="text-align:center;display:inline-block" | |||
{|border=1 style="text-align:center; display:inline-block" | |||
|- | |- | ||
!colspan=2 style="background:#88D800"|<big>Hole 3</big> | !colspan=2 style="background:#88D800"|<big>Hole 3</big> | ||
| Line 159: | Line 153: | ||
!height=128px style="background:black"|[[File:Golf JC Hole 3 green.png]] | !height=128px style="background:black"|[[File:Golf JC Hole 3 green.png]] | ||
|} | |} | ||
{|border=1 style="text-align:center;display:inline-block" | |||
{|border=1 style="text-align:center; display:inline-block" | |||
|- | |- | ||
!colspan=2 style="background:#88D800"|<big>Hole 4</big> | !colspan=2 style="background:#88D800"|<big>Hole 4</big> | ||
| Line 173: | Line 166: | ||
!height=128px style="background:black"|[[File:Golf JC Hole 4 green.png]] | !height=128px style="background:black"|[[File:Golf JC Hole 4 green.png]] | ||
|} | |} | ||
{|border=1 style="text-align:center;display:inline-block" | |||
{|border=1 style="text-align:center; display:inline-block" | |||
|- | |- | ||
!colspan=2 style="background:#88D800"|<big>Hole 5</big> | !colspan=2 style="background:#88D800"|<big>Hole 5</big> | ||
| Line 187: | Line 179: | ||
!height=128px style="background:black"|[[File:Golf JC Hole 5 green.png]] | !height=128px style="background:black"|[[File:Golf JC Hole 5 green.png]] | ||
|} | |} | ||
{|border=1 style="text-align:center;display:inline-block" | |||
{|border=1 style="text-align:center; display:inline-block" | |||
|- | |- | ||
!colspan=2 style="background:#88D800"|<big>Hole 6</big> | !colspan=2 style="background:#88D800"|<big>Hole 6</big> | ||
| Line 201: | Line 192: | ||
!height=128px style="background:black"|[[File:Golf JC Hole 6 green.png]] | !height=128px style="background:black"|[[File:Golf JC Hole 6 green.png]] | ||
|} | |} | ||
{|border=1 style="text-align:center;display:inline-block" | |||
{|border=1 style="text-align:center; display:inline-block" | |||
|- | |- | ||
!colspan=2 style="background:#88D800"|<big>Hole 7</big> | !colspan=2 style="background:#88D800"|<big>Hole 7</big> | ||
| Line 215: | Line 205: | ||
!height=128px style="background:black"|[[File:Golf JC Hole 7 green.png]] | !height=128px style="background:black"|[[File:Golf JC Hole 7 green.png]] | ||
|} | |} | ||
{|border=1 style="text-align:center;display:inline-block" | |||
{|border=1 style="text-align:center; display:inline-block" | |||
|- | |- | ||
!colspan=2 style="background:#88D800"|<big>Hole 8</big> | !colspan=2 style="background:#88D800"|<big>Hole 8</big> | ||
| Line 229: | Line 218: | ||
!height=128px style="background:black"|[[File:Golf JC Hole 8 green.png]] | !height=128px style="background:black"|[[File:Golf JC Hole 8 green.png]] | ||
|} | |} | ||
{|border=1 style="text-align:center;display:inline-block" | |||
{|border=1 style="text-align:center; display:inline-block" | |||
|- | |- | ||
!colspan=2 style="background:#88D800"|<big>Hole 9</big> | !colspan=2 style="background:#88D800"|<big>Hole 9</big> | ||
| Line 243: | Line 231: | ||
!height=128px style="background:black"|[[File:Golf JC Hole 9 green.png]] | !height=128px style="background:black"|[[File:Golf JC Hole 9 green.png]] | ||
|} | |} | ||
;Inward nine | ;Inward nine | ||
{|border=1 style="text-align:center; display:inline-block" | {|border=1 style="text-align:center;display:inline-block" | ||
|- | |- | ||
!colspan=2 style="background:#88D800"|<big>Hole 10</big> | !colspan=2 style="background:#88D800"|<big>Hole 10</big> | ||
| Line 258: | Line 245: | ||
!height=128px style="background:black"|[[File:Golf JC Hole 10 green.png]] | !height=128px style="background:black"|[[File:Golf JC Hole 10 green.png]] | ||
|} | |} | ||
{|border=1 style="text-align:center;display:inline-block" | |||
{|border=1 style="text-align:center; display:inline-block" | |||
|- | |- | ||
!colspan=2 style="background:#88D800"|<big>Hole 11</big> | !colspan=2 style="background:#88D800"|<big>Hole 11</big> | ||
| Line 272: | Line 258: | ||
!height=128px style="background:black"|[[File:Golf JC Hole 11 green.png]] | !height=128px style="background:black"|[[File:Golf JC Hole 11 green.png]] | ||
|} | |} | ||
{|border=1 style="text-align:center;display:inline-block" | |||
{|border=1 style="text-align:center; display:inline-block" | |||
|- | |- | ||
!colspan=2 style="background:#88D800"|<big>Hole 12</big> | !colspan=2 style="background:#88D800"|<big>Hole 12</big> | ||
| Line 286: | Line 271: | ||
!height=128px style="background:black"|[[File:Golf JC Hole 12 green.png]] | !height=128px style="background:black"|[[File:Golf JC Hole 12 green.png]] | ||
|} | |} | ||
{|border=1 style="text-align:center;display:inline-block" | |||
{|border=1 style="text-align:center; display:inline-block" | |||
|- | |- | ||
!colspan=2 style="background:#88D800"|<big>Hole 13</big> | !colspan=2 style="background:#88D800"|<big>Hole 13</big> | ||
| Line 300: | Line 284: | ||
!height=128px style="background:black"|[[File:Golf JC Hole 13 green.png]] | !height=128px style="background:black"|[[File:Golf JC Hole 13 green.png]] | ||
|} | |} | ||
{|border=1 style="text-align:center;display:inline-block" | |||
{|border=1 style="text-align:center; display:inline-block" | |||
|- | |- | ||
!colspan=2 style="background:#88D800"|<big>Hole 14</big> | !colspan=2 style="background:#88D800"|<big>Hole 14</big> | ||
| Line 314: | Line 297: | ||
!height=128px style="background:black"|[[File:Golf JC Hole 14 green.png]] | !height=128px style="background:black"|[[File:Golf JC Hole 14 green.png]] | ||
|} | |} | ||
{|border=1 style="text-align:center;display:inline-block" | |||
{|border=1 style="text-align:center; display:inline-block" | |||
|- | |- | ||
!colspan=2 style="background:#88D800"|<big>Hole 15</big> | !colspan=2 style="background:#88D800"|<big>Hole 15</big> | ||
| Line 328: | Line 310: | ||
!height=128px style="background:black"|[[File:Golf JC Hole 15 green.png]] | !height=128px style="background:black"|[[File:Golf JC Hole 15 green.png]] | ||
|} | |} | ||
{|border=1 style="text-align:center;display:inline-block" | |||
{|border=1 style="text-align:center; display:inline-block" | |||
|- | |- | ||
!colspan=2 style="background:#88D800"|<big>Hole 16</big> | !colspan=2 style="background:#88D800"|<big>Hole 16</big> | ||
| Line 342: | Line 323: | ||
!height=128px style="background:black"|[[File:Golf JC Hole 16 green.png]] | !height=128px style="background:black"|[[File:Golf JC Hole 16 green.png]] | ||
|} | |} | ||
{|border=1 style="text-align:center;display:inline-block" | |||
{|border=1 style="text-align:center; display:inline-block" | |||
|- | |- | ||
!colspan=2 style="background:#88D800"|<big>Hole 17</big> | !colspan=2 style="background:#88D800"|<big>Hole 17</big> | ||
| Line 356: | Line 336: | ||
!height=128px style="background:black"|[[File:Golf JC Hole 17 green.png]] | !height=128px style="background:black"|[[File:Golf JC Hole 17 green.png]] | ||
|} | |} | ||
{|border=1 style="text-align:center;display:inline-block" | |||
{|border=1 style="text-align:center; display:inline-block" | |||
|- | |- | ||
!colspan=2 style="background:#88D800"|<big>Hole 18</big> | !colspan=2 style="background:#88D800"|<big>Hole 18</big> | ||
| Line 373: | Line 352: | ||
===''Professional Course''=== | ===''Professional Course''=== | ||
;Outward nine | ;Outward nine | ||
{|border=1 style="text-align:center; display:inline-block" | {|border=1 style="text-align:center;display:inline-block" | ||
|- | |- | ||
!colspan=2 style="background:#EA9E22"|<big>Hole 1</big> | !colspan=2 style="background:#EA9E22"|<big>Hole 1</big> | ||
| Line 386: | Line 365: | ||
!height=128px style="background:black"|[[File:Golf PrC Hole 1 green.png]] | !height=128px style="background:black"|[[File:Golf PrC Hole 1 green.png]] | ||
|} | |} | ||
{|border=1 style="text-align:center;display:inline-block" | |||
{|border=1 style="text-align:center; display:inline-block" | |||
|- | |- | ||
!colspan=2 style="background:#EA9E22"|<big>Hole 2</big> | !colspan=2 style="background:#EA9E22"|<big>Hole 2</big> | ||
| Line 400: | Line 378: | ||
!height=128px style="background:black"|[[File:Golf PrC Hole 2 green.png]] | !height=128px style="background:black"|[[File:Golf PrC Hole 2 green.png]] | ||
|} | |} | ||
{|border=1 style="text-align:center;display:inline-block" | |||
{|border=1 style="text-align:center; display:inline-block" | |||
|- | |- | ||
!colspan=2 style="background:#EA9E22"|<big>Hole 3</big> | !colspan=2 style="background:#EA9E22"|<big>Hole 3</big> | ||
| Line 414: | Line 391: | ||
!height=128px style="background:black"|[[File:Golf PrC Hole 3 green.png]] | !height=128px style="background:black"|[[File:Golf PrC Hole 3 green.png]] | ||
|} | |} | ||
{|border=1 style="text-align:center;display:inline-block" | |||
{|border=1 style="text-align:center; display:inline-block" | |||
|- | |- | ||
!colspan=2 style="background:#EA9E22"|<big>Hole 4</big> | !colspan=2 style="background:#EA9E22"|<big>Hole 4</big> | ||
| Line 428: | Line 404: | ||
!height=128px style="background:black"|[[File:Golf PrC Hole 4 green.png]] | !height=128px style="background:black"|[[File:Golf PrC Hole 4 green.png]] | ||
|} | |} | ||
{|border=1 style="text-align:center;display:inline-block" | |||
{|border=1 style="text-align:center; display:inline-block" | |||
|- | |- | ||
!colspan=2 style="background:#EA9E22"|<big>Hole 5</big> | !colspan=2 style="background:#EA9E22"|<big>Hole 5</big> | ||
| Line 442: | Line 417: | ||
!height=128px style="background:black"|[[File:Golf PrC Hole 5 green.png]] | !height=128px style="background:black"|[[File:Golf PrC Hole 5 green.png]] | ||
|} | |} | ||
{|border=1 style="text-align:center;display:inline-block" | |||
{|border=1 style="text-align:center; display:inline-block" | |||
|- | |- | ||
!colspan=2 style="background:#EA9E22"|<big>Hole 6</big> | !colspan=2 style="background:#EA9E22"|<big>Hole 6</big> | ||
| Line 456: | Line 430: | ||
!height=128px style="background:black"|[[File:Golf PrC Hole 6 green.png]] | !height=128px style="background:black"|[[File:Golf PrC Hole 6 green.png]] | ||
|} | |} | ||
{|border=1 style="text-align:center;display:inline-block" | |||
{|border=1 style="text-align:center; display:inline-block" | |||
|- | |- | ||
!colspan=2 style="background:#EA9E22"|<big>Hole 7</big> | !colspan=2 style="background:#EA9E22"|<big>Hole 7</big> | ||
| Line 470: | Line 443: | ||
!height=128px style="background:black"|[[File:Golf PrC Hole 7 green.png]] | !height=128px style="background:black"|[[File:Golf PrC Hole 7 green.png]] | ||
|} | |} | ||
{|border=1 style="text-align:center;display:inline-block" | |||
{|border=1 style="text-align:center; display:inline-block" | |||
|- | |- | ||
!colspan=2 style="background:#EA9E22"|<big>Hole 8</big> | !colspan=2 style="background:#EA9E22"|<big>Hole 8</big> | ||
| Line 484: | Line 456: | ||
!height=128px style="background:black"|[[File:Golf PrC Hole 8 green.png]] | !height=128px style="background:black"|[[File:Golf PrC Hole 8 green.png]] | ||
|} | |} | ||
{|border=1 style="text-align:center;display:inline-block" | |||
{|border=1 style="text-align:center; display:inline-block" | |||
|- | |- | ||
!colspan=2 style="background:#EA9E22"|<big>Hole 9</big> | !colspan=2 style="background:#EA9E22"|<big>Hole 9</big> | ||
| Line 498: | Line 469: | ||
!height=128px style="background:black"|[[File:Golf PrC Hole 9 green.png]] | !height=128px style="background:black"|[[File:Golf PrC Hole 9 green.png]] | ||
|} | |} | ||
;Inward nine | ;Inward nine | ||
{|border=1 style="text-align:center; display:inline-block" | {|border=1 style="text-align:center;display:inline-block" | ||
|- | |- | ||
!colspan=2 style="background:#EA9E22"|<big>Hole 10</big> | !colspan=2 style="background:#EA9E22"|<big>Hole 10</big> | ||
| Line 513: | Line 483: | ||
!height=128px style="background:black"|[[File:Golf PrC Hole 10 green.png]] | !height=128px style="background:black"|[[File:Golf PrC Hole 10 green.png]] | ||
|} | |} | ||
{|border=1 style="text-align:center;display:inline-block" | |||
{|border=1 style="text-align:center; display:inline-block" | |||
|- | |- | ||
!colspan=2 style="background:#EA9E22"|<big>Hole 11</big> | !colspan=2 style="background:#EA9E22"|<big>Hole 11</big> | ||
| Line 527: | Line 496: | ||
!height=128px style="background:black"|[[File:Golf PrC Hole 11 green.png]] | !height=128px style="background:black"|[[File:Golf PrC Hole 11 green.png]] | ||
|} | |} | ||
{|border=1 style="text-align:center;display:inline-block" | |||
{|border=1 style="text-align:center; display:inline-block" | |||
|- | |- | ||
!colspan=2 style="background:#EA9E22"|<big>Hole 12</big> | !colspan=2 style="background:#EA9E22"|<big>Hole 12</big> | ||
| Line 541: | Line 509: | ||
!height=128px style="background:black"|[[File:Golf PrC Hole 12 green.png]] | !height=128px style="background:black"|[[File:Golf PrC Hole 12 green.png]] | ||
|} | |} | ||
{|border=1 style="text-align:center;display:inline-block" | |||
{|border=1 style="text-align:center; display:inline-block" | |||
|- | |- | ||
!colspan=2 style="background:#EA9E22"|<big>Hole 13</big> | !colspan=2 style="background:#EA9E22"|<big>Hole 13</big> | ||
| Line 555: | Line 522: | ||
!height=128px style="background:black"|[[File:Golf PrC Hole 13 green.png]] | !height=128px style="background:black"|[[File:Golf PrC Hole 13 green.png]] | ||
|} | |} | ||
{|border=1 style="text-align:center;display:inline-block" | |||
{|border=1 style="text-align:center; display:inline-block" | |||
|- | |- | ||
!colspan=2 style="background:#EA9E22"|<big>Hole 14</big> | !colspan=2 style="background:#EA9E22"|<big>Hole 14</big> | ||
| Line 569: | Line 535: | ||
!height=128px style="background:black"|[[File:Golf PrC Hole 14 green.png]] | !height=128px style="background:black"|[[File:Golf PrC Hole 14 green.png]] | ||
|} | |} | ||
{|border=1 style="text-align:center;display:inline-block" | |||
{|border=1 style="text-align:center; display:inline-block" | |||
|- | |- | ||
!colspan=2 style="background:#EA9E22"|<big>Hole 15</big> | !colspan=2 style="background:#EA9E22"|<big>Hole 15</big> | ||
| Line 583: | Line 548: | ||
!height=128px style="background:black"|[[File:Golf PrC Hole 15 green.png]] | !height=128px style="background:black"|[[File:Golf PrC Hole 15 green.png]] | ||
|} | |} | ||
{|border=1 style="text-align:center;display:inline-block" | |||
{|border=1 style="text-align:center; display:inline-block" | |||
|- | |- | ||
!colspan=2 style="background:#EA9E22"|<big>Hole 16</big> | !colspan=2 style="background:#EA9E22"|<big>Hole 16</big> | ||
| Line 597: | Line 561: | ||
!height=128px style="background:black"|[[File:Golf PrC Hole 16 green.png]] | !height=128px style="background:black"|[[File:Golf PrC Hole 16 green.png]] | ||
|} | |} | ||
{|border=1 style="text-align:center;display:inline-block" | |||
{|border=1 style="text-align:center; display:inline-block" | |||
|- | |- | ||
!colspan=2 style="background:#EA9E22"|<big>Hole 17</big> | !colspan=2 style="background:#EA9E22"|<big>Hole 17</big> | ||
| Line 611: | Line 574: | ||
!height=128px style="background:black"|[[File:Golf PrC Hole 17 green.png]] | !height=128px style="background:black"|[[File:Golf PrC Hole 17 green.png]] | ||
|} | |} | ||
{|border=1 style="text-align:center;display:inline-block" | |||
{|border=1 style="text-align:center; display:inline-block" | |||
|- | |- | ||
!colspan=2 style="background:#EA9E22"|<big>Hole 18</big> | !colspan=2 style="background:#EA9E22"|<big>Hole 18</big> | ||
| Line 629: | Line 591: | ||
{{image|more=yes|section=yes|Consistency with other two sections}} | {{image|more=yes|section=yes|Consistency with other two sections}} | ||
;Outward nine | ;Outward nine | ||
{|border=1 style="text-align:center; display:inline-block" | {|border=1 style="text-align:center;display:inline-block" | ||
|- | |- | ||
!width=262px style="background:#FF8170"|<big>Hole 1</big> | !width=262px style="background:#FF8170"|<big>Hole 1</big> | ||
| Line 639: | Line 601: | ||
|height=63px style="background:black;color:white"|<big>'''Par 4'''</big> | |height=63px style="background:black;color:white"|<big>'''Par 4'''</big> | ||
|} | |} | ||
{|border=1 style="text-align:center;display:inline-block" | |||
{|border=1 style="text-align:center; display:inline-block" | |||
|- | |- | ||
!width=262px style="background:#FF8170"|<big>Hole 2</big> | !width=262px style="background:#FF8170"|<big>Hole 2</big> | ||
| Line 650: | Line 611: | ||
|height=63px style="background:black;color:white"|<big>'''Par 5'''</big> | |height=63px style="background:black;color:white"|<big>'''Par 5'''</big> | ||
|} | |} | ||
{|border=1 style="text-align:center;display:inline-block" | |||
{|border=1 style="text-align:center; display:inline-block" | |||
|- | |- | ||
!width=262px style="background:#FF8170"|<big>Hole 3</big> | !width=262px style="background:#FF8170"|<big>Hole 3</big> | ||
| Line 661: | Line 621: | ||
|height=63px style="background:black;color:white"|<big>'''Par 3'''</big> | |height=63px style="background:black;color:white"|<big>'''Par 3'''</big> | ||
|} | |} | ||
{|border=1 style="text-align:center;display:inline-block" | |||
{|border=1 style="text-align:center; display:inline-block" | |||
|- | |- | ||
!width=262px style="background:#FF8170"|<big>Hole 4</big> | !width=262px style="background:#FF8170"|<big>Hole 4</big> | ||
| Line 672: | Line 631: | ||
|height=63px style="background:black;color:white"|<big>'''Par 4'''</big> | |height=63px style="background:black;color:white"|<big>'''Par 4'''</big> | ||
|} | |} | ||
{|border=1 style="text-align:center;display:inline-block" | |||
{|border=1 style="text-align:center; display:inline-block" | |||
|- | |- | ||
!width=262px style="background:#FF8170"|<big>Hole 5</big> | !width=262px style="background:#FF8170"|<big>Hole 5</big> | ||
| Line 683: | Line 641: | ||
|height=63px style="background:black;color:white"|<big>'''Par 4'''</big> | |height=63px style="background:black;color:white"|<big>'''Par 4'''</big> | ||
|} | |} | ||
{|border=1 style="text-align:center;display:inline-block" | |||
{|border=1 style="text-align:center; display:inline-block" | |||
|- | |- | ||
!width=262px style="background:#FF8170"|<big>Hole 6</big> | !width=262px style="background:#FF8170"|<big>Hole 6</big> | ||
| Line 694: | Line 651: | ||
|height=63px style="background:black;color:white"|<big>'''Par 3'''</big> | |height=63px style="background:black;color:white"|<big>'''Par 3'''</big> | ||
|} | |} | ||
{|border=1 style="text-align:center;display:inline-block" | |||
{|border=1 style="text-align:center; display:inline-block" | |||
|- | |- | ||
!width=262px style="background:#FF8170"|<big>Hole 7</big> | !width=262px style="background:#FF8170"|<big>Hole 7</big> | ||
| Line 705: | Line 661: | ||
|height=63px style="background:black;color:white"|<big>'''Par 5'''</big> | |height=63px style="background:black;color:white"|<big>'''Par 5'''</big> | ||
|} | |} | ||
{|border=1 style="text-align:center;display:inline-block" | |||
{|border=1 style="text-align:center; display:inline-block" | |||
|- | |- | ||
!width=262px style="background:#FF8170"|<big>Hole 8</big> | !width=262px style="background:#FF8170"|<big>Hole 8</big> | ||
| Line 716: | Line 671: | ||
|height=63px style="background:black;color:white"|<big>'''Par 4'''</big> | |height=63px style="background:black;color:white"|<big>'''Par 4'''</big> | ||
|} | |} | ||
{|border=1 style="text-align:center;display:inline-block" | |||
{|border=1 style="text-align:center; display:inline-block" | |||
|- | |- | ||
!width=262px style="background:#FF8170"|<big>Hole 9</big> | !width=262px style="background:#FF8170"|<big>Hole 9</big> | ||
| Line 727: | Line 681: | ||
|height=63px style="background:black;color:white"|<big>'''Par 4'''</big> | |height=63px style="background:black;color:white"|<big>'''Par 4'''</big> | ||
|} | |} | ||
;Inward nine | ;Inward nine | ||
{|border=1 style="text-align:center; display:inline-block" | {|border=1 style="text-align:center;display:inline-block" | ||
|- | |- | ||
!width=262px style="background:#FF8170"|<big>Hole 10</big> | !width=262px style="background:#FF8170"|<big>Hole 10</big> | ||
| Line 739: | Line 692: | ||
|height=63px style="background:black;color:white"|<big>'''Par 4'''</big> | |height=63px style="background:black;color:white"|<big>'''Par 4'''</big> | ||
|} | |} | ||
{|border=1 style="text-align:center;display:inline-block" | |||
{|border=1 style="text-align:center; display:inline-block" | |||
|- | |- | ||
!width=262px style="background:#FF8170"|<big>Hole 11</big> | !width=262px style="background:#FF8170"|<big>Hole 11</big> | ||
| Line 750: | Line 702: | ||
|height=63px style="background:black;color:white"|<big>'''Par 5'''</big> | |height=63px style="background:black;color:white"|<big>'''Par 5'''</big> | ||
|} | |} | ||
{|border=1 style="text-align:center;display:inline-block" | |||
{|border=1 style="text-align:center; display:inline-block" | |||
|- | |- | ||
!width=262px style="background:#FF8170"|<big>Hole 12</big> | !width=262px style="background:#FF8170"|<big>Hole 12</big> | ||
| Line 761: | Line 712: | ||
|height=63px style="background:black;color:white"|<big>'''Par 4'''</big> | |height=63px style="background:black;color:white"|<big>'''Par 4'''</big> | ||
|} | |} | ||
{|border=1 style="text-align:center;display:inline-block" | |||
{|border=1 style="text-align:center; display:inline-block" | |||
|- | |- | ||
!width=262px style="background:#FF8170"|<big>Hole 13</big> | !width=262px style="background:#FF8170"|<big>Hole 13</big> | ||
| Line 772: | Line 722: | ||
|height=63px style="background:black;color:white"|<big>'''Par 4'''</big> | |height=63px style="background:black;color:white"|<big>'''Par 4'''</big> | ||
|} | |} | ||
{|border=1 style="text-align:center;display:inline-block" | |||
{|border=1 style="text-align:center; display:inline-block" | |||
|- | |- | ||
!width=262px style="background:#FF8170"|<big>Hole 14</big> | !width=262px style="background:#FF8170"|<big>Hole 14</big> | ||
| Line 783: | Line 732: | ||
|height=63px style="background:black;color:white"|<big>'''Par 3'''</big> | |height=63px style="background:black;color:white"|<big>'''Par 3'''</big> | ||
|} | |} | ||
{|border=1 style="text-align:center;display:inline-block" | |||
{|border=1 style="text-align:center; display:inline-block" | |||
|- | |- | ||
!width=262px style="background:#FF8170"|<big>Hole 15</big> | !width=262px style="background:#FF8170"|<big>Hole 15</big> | ||
| Line 794: | Line 742: | ||
|height=63px style="background:black;color:white"|<big>'''Par 4'''</big> | |height=63px style="background:black;color:white"|<big>'''Par 4'''</big> | ||
|} | |} | ||
{|border=1 style="text-align:center;display:inline-block" | |||
{|border=1 style="text-align:center; display:inline-block" | |||
|- | |- | ||
!width=262px style="background:#FF8170"|<big>Hole 16</big> | !width=262px style="background:#FF8170"|<big>Hole 16</big> | ||
| Line 805: | Line 752: | ||
|height=63px style="background:black;color:white"|<big>'''Par 4'''</big> | |height=63px style="background:black;color:white"|<big>'''Par 4'''</big> | ||
|} | |} | ||
{|border=1 style="text-align:center;display:inline-block" | |||
{|border=1 style="text-align:center; display:inline-block" | |||
|- | |- | ||
!width=262px style="background:#FF8170"|<big>Hole 17</big> | !width=262px style="background:#FF8170"|<big>Hole 17</big> | ||
| Line 816: | Line 762: | ||
|height=63px style="background:black;color:white"|<big>'''Par 3'''</big> | |height=63px style="background:black;color:white"|<big>'''Par 3'''</big> | ||
|} | |} | ||
{|border=1 style="text-align:center;display:inline-block" | |||
{|border=1 style="text-align:center; display:inline-block" | |||
|- | |- | ||
!width=262px style="background:#FF8170"|<big>Hole 18</big> | !width=262px style="background:#FF8170"|<big>Hole 18</big> | ||
| Line 830: | Line 775: | ||
==Menus== | ==Menus== | ||
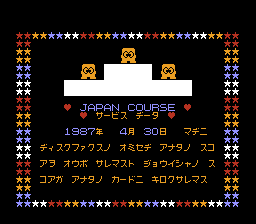
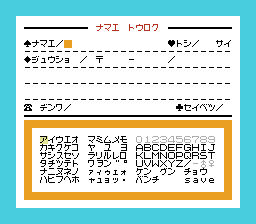
Most of the game's menus relate to the contest, and vary depending on whether the disk had been registered with a high-ranking score. | Most of the game's menus relate to the contest, and vary depending on whether the disk had been registered with a high-ranking score. | ||
{|border=1 style="text-align:center; display:inline-block" | {|border=1 style="text-align:center;display:inline-block" | ||
|- | |- | ||
!style="background:#88D800"|Menu | !style="background:#88D800"|Menu | ||
| Line 861: | Line 806: | ||
==Names in other languages== | ==Names in other languages== | ||
{{foreign names | {{foreign names | ||
|Jap=ゴルフ{{ | |Jap=ゴルフ{{ruby|JAPAN|ジャパン}}コース | ||
|JapR=Gorufu Japan Kōsu | |JapR=Gorufu Japan Kōsu | ||
|JapM=Golf: Japan Course | |JapM=Golf: Japan Course | ||
| Line 875: | Line 820: | ||
{{NES}} | {{NES}} | ||
[[Category:Japan-only games]] | [[Category:Japan-only games]] | ||
[[Category: | [[Category:Family Computer Disk System games]] | ||
[[Category:Games]] | [[Category:Games]] | ||
[[Category:1987 games]] | [[Category:1987 games]] | ||
[[Category:Sports games]] | [[Category:Sports games]] | ||
[[Category:Mario Golf series]] | |||
[[Category:HAL Laboratory games]] | |||
Latest revision as of 11:32, November 30, 2024
| Golf: Japan Course | |
|---|---|
 For alternate box art, see the game's gallery. | |
| Developer | HAL Laboratory |
| Publisher | Nintendo |
| Platform(s) | Family Computer Disk System |
| Release date | |
| Language(s) | Japanese |
| Genre | Sports (golf) |
| Mode(s) | 1–2 players |
| Format | FDS:
|
| Input | Famicom:
|
| Serial code(s) | FSC-GFJE |
Golf: Japan Course is a Japan-exclusive golf game released for the Family Computer Disk System on February 21, 1987. It stars Mario and Luigi and is considered the earliest entry in the Mario Golf series. It is similar in gameplay to the earlier Golf, though with polished mechanics. The holes in the game are fictional. The game received a companion title a few months later known as Golf: U.S. Course, which also had fictional holes and improves even further on the mechanics. As with most FDS games, side A of the disk is reserved for menus and saving scores, while side B is used for the gameplay.
Gameplay[edit]
The gameplay is similar to that of the original Golf, though new features are added to improve the immersion and quality-of-life. There is now a distinction between fairways and rough grass, and trees now act as solid obstacles rather than simply an indicator of out-of-bounds areas; the out-of-bounds areas now have a clear boundary surrounding densely-packed forest instead. There are four levels for rough grass and three for sand bunkers, with each making the ball more difficult to hit far. The player can now swing in any direction regardless of whether they are on the green or not. The greens themselves can now push the ball in multiple directions rather than only a single direction at a time, and each hole may appear in one of three positions on each green. The player can move away from the ball to do a practice swing by pressing , or view the current score sheet by pressing
. To change clubs, the player now needs to hold down
and press
up or down; pressing
left or right while doing that switches between one of three swing speeds. The middle "2" speed is closest to what the swing speed in Golf is, while the default "1" is slower and "3" is faster.
There are four game modes, which can be chosen between by pressing left and right or
at the top option of the main menu:
- Mario Stroke Play: Mario plays by himself.
- 2 Player Stroke Play: Mario and Luigi play alongside each other.
- Mario Match Play (not available in the gold editions): Mario plays against the computer opponent, called "COMP1," which is a palette swap of the brothers. He wears black overalls and hat over a brown shirt and shoes.
- 2 Player Match Play: Mario and Luigi play against each other.
There are four slots to save scores (represented by balloons, the strings being cut by a crab when overwriting) with blank slots recorded as 900.
Clubs[edit]
The draws listed are as they are on the tee or fairway with no wind resistance. The four levels of rough grass and three levels of bunker sand all detract varying amounts from it. Swinging at a higher speed usually increases it, but runs a greater risk of losing control on the ball's curve.
| Club | Draw |
|---|---|
| 1W | 240y |
| 3W | 220y |
| 4W | 210y |
| Club | Draw |
|---|---|
| 1I | 195y |
| 3I | 175y |
| 4I | 165y |
| Club | Draw |
|---|---|
| 5I | 155y |
| 6I | 145y |
| 7I | 130y |
| Club | Draw |
|---|---|
| 8I | 115y |
| 9I | 100y |
| PW | 90y |
| Club | Draw |
|---|---|
| SW | 80y |
| PT | 50y |
Contest and alternate editions[edit]
The game comes on a blue disk, meaning it is compatible with the Disk Fax, a device found in public places across Japan such as department stores. These machines would send the player's saved games and high score information to Nintendo. Nintendo held a contest centered around this game, and winners received one of two special versions of this game that came on a gold disk.[2] Both versions are harder, replacing the course with new, more challenging holes. Around 80,000 contestants submitted their Mario Stroke Play scores with the national winner beating the rest with his cumulative score of 87.[3][4] Contestants who had the same score were ranked by when their submission was received.
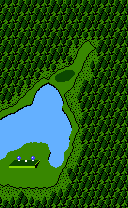
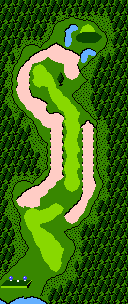
Around 5,000 runners-up and raffle winners received the Professional Course gold disk (white sticker), which came in a Diskun case. The redesigned title screen removes "Family Computer" at the top and adds「入賞」(nyūshō, "prize-winning") at the bottom.[5] It is mildly more difficult.
The top 100 contestants received the Champions' Course gold disk (yellow sticker), which came in a luxury case along with a gold plaque with the winner's name and rank inscribed. On the game's title screen are the contestant's name and rank, making each disk unique.[6] The Champions' Course is much more difficult[7] and one of the rarest games Nintendo ever made.
Maps[edit]
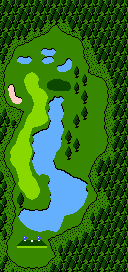
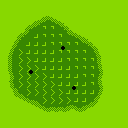
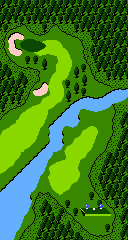
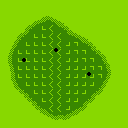
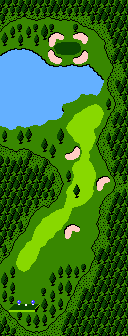
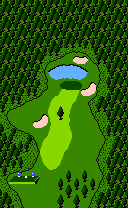
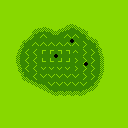
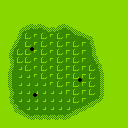
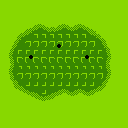
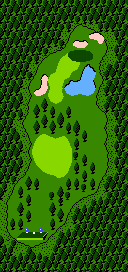
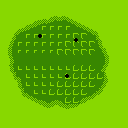
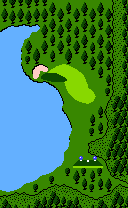
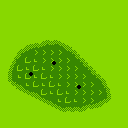
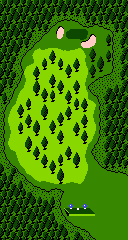
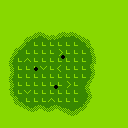
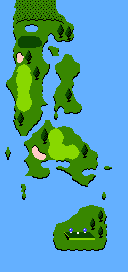
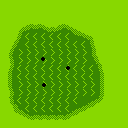
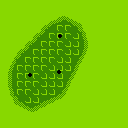
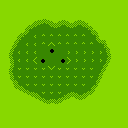
Each hole can appear in three locations, which is picked depending on how many strokes were made in the previous holes; this number does not change the hole in any regular interval, ie, per each swing, but instead uses more complex measures to determine it. In some holes, mainly in the Prize Card variants, all water on the map is randomly replaced with sand, which is determined at the game's beginning.
Japan Course[edit]
- Outward nine
| Hole 1 | |
|---|---|
|
365y |
| HDCP 10 | |
| Par 4 | |
| |
| Hole 2 | |
|---|---|
|
401y |
| HDCP 4 | |
| Par 4 | |
| |
| Hole 3 | |
|---|---|
|
590y |
| HDCP 6 | |
| Par 4 | |

| |
| Hole 4 | |
|---|---|
|
223y |
| HDCP 16 | |
| Par 3 | |
| |
| Hole 5 | |
|---|---|
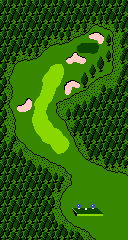
|
410y |
| HDCP 12 | |
| Par 4 | |
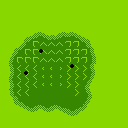
| |
| Hole 6 | |
|---|---|
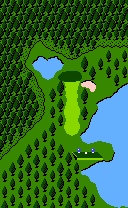
|
181y |
| HDCP 18 | |
| Par 3 | |
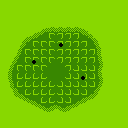
| |
| Hole 7 | |
|---|---|
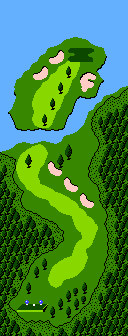
|
589y |
| HDCP 14 | |
| Par 5 | |
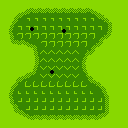
| |
| Hole 8 | |
|---|---|
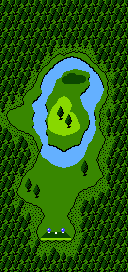
|
342y |
| HDCP 18 | |
| Par 4 | |
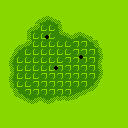
| |
| Hole 9 | |
|---|---|
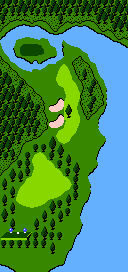
|
441y |
| HDCP 2 | |
| Par 4 | |
| |
- Inward nine
| Hole 10 | |
|---|---|
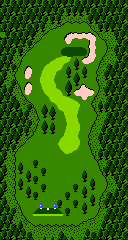
|
350y |
| HDCP 9 | |
| Par 4 | |
| |
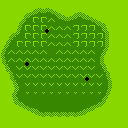
| Hole 11 | |
|---|---|
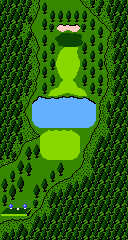
|
401y |
| HDCP 17 | |
| Par 4 | |
| |
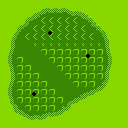
| Hole 12 | |
|---|---|
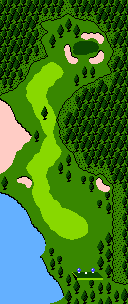
|
564y |
| HDCP 15 | |
| Par 5 | |
| |
| Hole 13 | |
|---|---|
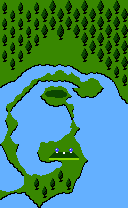
|
131y |
| HDCP 13 | |
| Par 3 | |
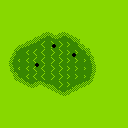
| |
| Hole 14 | |
|---|---|
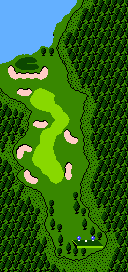
|
414y |
| HDCP 3 | |
| Par 4 | |
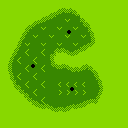
| |
| Hole 15 | |
|---|---|
|
412y |
| HDCP 11 | |
| Par 4 | |
| |
| Hole 16 | |
|---|---|
|
198y |
| HDCP 7 | |
| Par 3 | |
| |
| Hole 17 | |
|---|---|
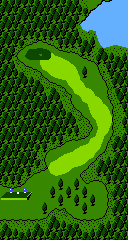
|
434y |
| HDCP 5 | |
| Par 4 | |
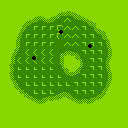
| |
| Hole 18 | |
|---|---|
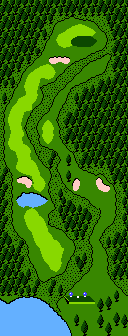
|
661y |
| HDCP 1 | |
| Par 5 | |
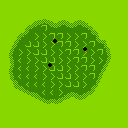
| |
Professional Course[edit]
- Outward nine
| Hole 1 | |
|---|---|
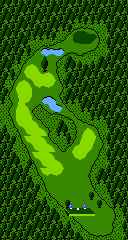
|
403y |
| HDCP 13 | |
| Par 4 | |
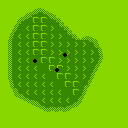
| |
| Hole 2 | |
|---|---|
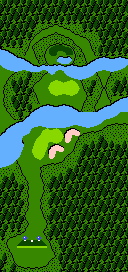
|
388y |
| HDCP 7 | |
| Par 4 | |
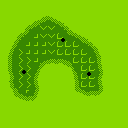
| |
| Hole 3 | |
|---|---|
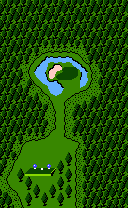
|
198y |
| HDCP 9 | |
| Par 3 | |
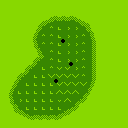
| |
| Hole 4 | |
|---|---|
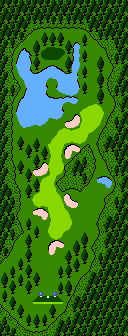
|
524y |
| HDCP 5 | |
| Par 5 | |
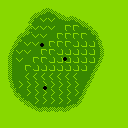
| |
| Hole 5 | |
|---|---|
|
355y |
| HDCP 17 | |
| Par 4 | |
| |
| Hole 6 | |
|---|---|
|
398y |
| HDCP 11 | |
| Par 4 | |
| |
| Hole 7 | |
|---|---|
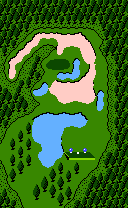
|
180y |
| HDCP 15 | |
| Par 3 | |
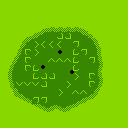
| |
| Hole 8 | |
|---|---|
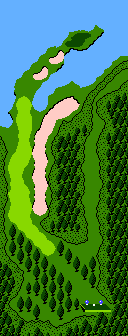
|
609y |
| HDCP 1 | |
| Par 5 | |
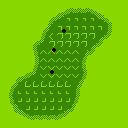
| |
| Hole 9 | |
|---|---|
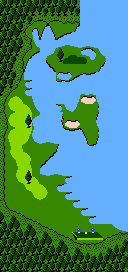
|
430y |
| HDCP 3 | |
| Par 4 | |
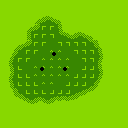
| |
- Inward nine
| Hole 10 | |
|---|---|
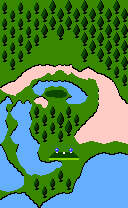
|
119y |
| HDCP 16 | |
| Par 3 | |
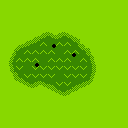
| |
| Hole 11 | |
|---|---|
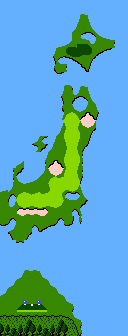
|
518y |
| HDCP 6 | |
| Par 5 | |
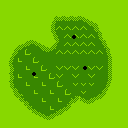
| |
| Hole 12 | |
|---|---|
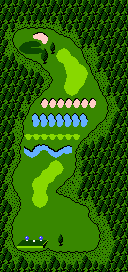
|
403y |
| HDCP 8 | |
| Par 4 | |
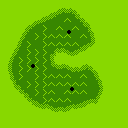
| |
| Hole 13 | |
|---|---|
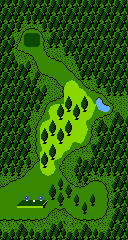
|
383y |
| HDCP 12 | |
| Par 4 | |
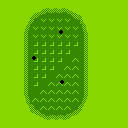
| |
| Hole 14 | |
|---|---|
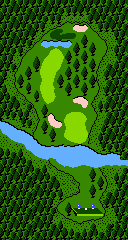
|
348y |
| HDCP 14 | |
| Par 4 | |
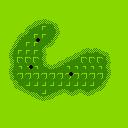
| |
| Hole 15 | |
|---|---|
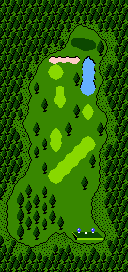
|
394y |
| HDCP 4 | |
| Par 4 | |
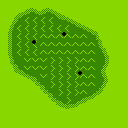
| |
| Hole 16 | |
|---|---|
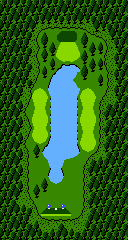
|
356y |
| HDCP 18 | |
| Par 4 | |
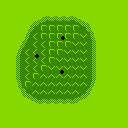
| |
| Hole 17 | |
|---|---|
|
185y |
| HDCP 10 | |
| Par 3 | |
| |
| Hole 18 | |
|---|---|
|
534y |
| HDCP 2 | |
| Par 5 | |
| |
Champions' Course[edit]
It has been requested that more images be uploaded for this section. Remove this notice only after the additional images have been added. Specifics: Consistency with other two sections
- Outward nine
| Hole 1 |
|---|
| 354y |
| HDCP 6 |
| Par 4 |
| Hole 2 |
|---|
| 588y |
| HDCP 14 |
| Par 5 |
| Hole 3 |
|---|
| 192y |
| HDCP 10 |
| Par 3 |
| Hole 4 |
|---|
| 418y |
| HDCP 8 |
| Par 4 |
| Hole 5 |
|---|
| 363y |
| HDCP 12 |
| Par 4 |
| Hole 6 |
|---|
| 213y |
| HDCP 18 |
| Par 3 |
| Hole 7 |
|---|
| 529y |
| HDCP 16 |
| Par 5 |
| Hole 8 |
|---|
| 381y |
| HDCP 4 |
| Par 4 |
| Hole 9 |
|---|
| 401y |
| HDCP 2 |
| Par 4 |
- Inward nine
| Hole 10 |
|---|
| 356y |
| HDCP 13 |
| Par 4 |
| Hole 11 |
|---|
| 495y |
| HDCP 7 |
| Par 5 |
| Hole 12 |
|---|
| 386y |
| HDCP 3 |
| Par 4 |
| Hole 13 |
|---|
| 440y |
| HDCP 5 |
| Par 4 |
| Hole 14 |
|---|
| 161y |
| HDCP 17 |
| Par 3 |
| Hole 15 |
|---|
| 414y |
| HDCP 15 |
| Par 4 |
| Hole 16 |
|---|
| 363y |
| HDCP 11 |
| Par 4 |
| Hole 17 |
|---|
| 153y |
| HDCP 9 |
| Par 3 |
| Hole 18 |
|---|
| 533y |
| HDCP 1 |
| Par 5 |
Menus[edit]
Most of the game's menus relate to the contest, and vary depending on whether the disk had been registered with a high-ranking score.
Staff[edit]
- Main article: List of Golf: Japan Course staff
Gallery[edit]
- For this subject's image gallery, see Gallery:Golf: Japan Course.
Princess Peach kissing Mario
Names in other languages[edit]
| Language | Name | Meaning | Notes |
|---|---|---|---|
| Japanese | ゴルフ Gorufu Japan Kōsu |
Golf: Japan Course |
References[edit]
- ^ Golf: Japan Course website. Nintendo of Japan.
- ^ ◆オリジナルコース入りゴールデンカードはコースが2種類!. Family Computer Disk System Art Database (Japanese). Retrieved January 22, 2021.
- ^ August 16, 2022. 【ゴルフJAPANコース】インターネットの無い時代に、通信の持つ可能性をゲームにもたらした意欲作!【ファミコン・ディスクシステム・任天堂・レビュー】. サブカルチャーのある生活]. Retrieved January 23, 2021.
- ^ ゴルフJAPANコース. Famicon Masterpieces. Retrieved January 23, 2021.
- ^ やまだくん (June 9, 2018). ゴルフJAPANコース オリジナルコース(賞品) プレイ動画 / Golf Tournament Japan Course Prize Cart (FDS) Playthrough. YouTube (Japanese). Retrieved January 22, 2021.
- ^ January 17, 2013. 昔のファミコンソフトをやってみた⑮ (ゴルフ・チャンピオンズコース編). てぷこだんブログ (Japanese). Retrieved January 22, 2021.
- ^ TEPCODAN (January 14, 2013). 任天堂ゴルフチャンピオンズコース. YouTube (Japanese). Retrieved January 22, 2021.
