Doctor Tour (2023): Difference between revisions
TongMK Tony (talk | contribs) No edit summary |
Vernon3264 (talk | contribs) mNo edit summary |
||
| (40 intermediate revisions by 16 users not shown) | |||
| Line 1: | Line 1: | ||
{{tour infobox | {{tour infobox | ||
|image=[[File:MKT Doctor Tour 2023.png|200px]] | |image=[[File:MKT Doctor Tour 2023.png|200px]] | ||
|start=February 21, 2023<br>10:00 p.m. (PT) | |start=February 21, 2023<br>February 20, 2024<br>February 18, 2025<br>10:00 p.m. (PT) | ||
|end=March 7, 2023<br>9:59 p.m. (PT) | |end=March 7, 2023<br>March 5, 2024<br>March 4, 2025<br>9:59 p.m. (PT) | ||
|cups=15 | |cups=15 | ||
|rank=[[Chargin' Chuck Cup]] (week 1)<br>[[Pink Gold Peach Cup]] (week 2) | |rank=[[Chargin' Chuck Cup]] (week 1)<br>[[Pink Gold Peach Cup]] (week 2) | ||
| Line 8: | Line 8: | ||
|before=[[Exploration Tour (2023)|<<]] | |before=[[Exploration Tour (2023)|<<]] | ||
|after=[[Mario Tour (2023)|>>]] | |after=[[Mario Tour (2023)|>>]] | ||
}} | }} | ||
The '''Doctor Tour''' was the ninetieth tour of ''[[Mario Kart Tour]]'', which began on February 22, 2023 and ended on March 7, 2023. It | The '''Doctor Tour''' was the ninetieth tour of ''[[Mario Kart Tour]]'', which began on February 22, 2023 and ended on March 7, 2023. It was rerun from February 21, 2024 to March 5, 2024 as the game's hundred-and-sixteenth tour, and was rerun a second time from February 19, 2025 to March 4, 2025 as the hundred-and-forty-second tour. | ||
Reflecting the theme, the tour featured the return of all four doctor characters in the game and their respective [[Capsule Kart]] colors, on top of introducing a [[Gold Capsule Kart]]. The tour also introduced [[DS Shroom Ridge|Shroom Ridge]] from ''[[Mario Kart DS]]'' as a [[classic course]], as well as the R/T variants of [[RMX Choco Island 2]] and [[Wii Coconut Mall]]. The tour's banner is very similar to that of the [[Doctor Tour (2022)|previous Doctor Tour]], but replaces [[Luigi#Dr. Mario series|Dr. Luigi]] with [[Princess Peach#Dr. Mario series|Dr. Peach]], switches her and [[Dr. Mario]]'s positions, and features a different shot of Coconut Mall. | Reflecting the theme, the tour featured the return of all four doctor characters in the game and their respective [[Capsule Kart]] colors, on top of introducing a [[Gold Capsule Kart]]. The tour also introduced [[DS Shroom Ridge|Shroom Ridge]] from ''[[Mario Kart DS]]'' as a [[classic course]], as well as the R/T variants of [[RMX Choco Island 2]] and [[Wii Coconut Mall]]. The tour's banner is very similar to that of the [[Doctor Tour (2022)|previous Doctor Tour]], but replaces [[Luigi#Dr. Mario series|Dr. Luigi]] with [[Princess Peach#Dr. Mario series|Dr. Peach]], switches her and [[Dr. Mario]]'s positions, and features a different shot of Coconut Mall. | ||
| Line 26: | Line 22: | ||
{| align=center width=85% cellspacing=0 border=1 cellpadding=3 style="border-collapse:collapse; font-family:Arial; text-align:center" | {| align=center width=85% cellspacing=0 border=1 cellpadding=3 style="border-collapse:collapse; font-family:Arial; text-align:center" | ||
|-style="background: #89A" | |-style="background: #89A" | ||
|colspan=5|'''Week 1/2 banner items'''<br>February 21, 2023, 10:00 p.m. (PT) – March 7, 2023, 9:59 p.m. (PT) | |colspan=5|'''Week 1/2 banner items'''<br>February 21, 2023, 10:00 p.m. (PT) – March 7, 2023, 9:59 p.m. (PT)<br>February 20, 2024, 10:00 p.m. (PT) – March 5, 2024, 9:59 p.m. (PT)<br>February 18, 2025, 10:00 p.m. (PT) – March 4, 2025, 9:59 p.m. (PT) | ||
|-style="background: #ABC" | |-style="background: #ABC" | ||
! style="width: 8%;"|Item type | ! style="width: 8%;"|Item type | ||
| Line 40: | Line 36: | ||
|[[File:MKT Tour90 DrLuigi.png|x150px]] | |[[File:MKT Tour90 DrLuigi.png|x150px]] | ||
|-style="background: #89A" | |-style="background: #89A" | ||
|colspan=5|'''Week 1 banner items'''<br>February 21, 2023, 10:00 p.m. (PT) – February 28, 2023, 9:59 p.m. (PT) | |colspan=5|'''Week 1 banner items'''<br>February 21, 2023, 10:00 p.m. (PT) – February 28, 2023, 9:59 p.m. (PT)<br>February 20, 2024, 10:00 p.m. (PT) – February 27, 2024, 9:59 p.m. (PT)<br>February 18, 2025, 10:00 p.m. (PT) – February 25, 2025, 9:59 p.m. (PT) | ||
|-style="background: #ABC" | |-style="background: #ABC" | ||
!Item type | !Item type | ||
| Line 60: | Line 56: | ||
|[[File:MKT Tour90 MagniflyingGlass.png|x150px]] | |[[File:MKT Tour90 MagniflyingGlass.png|x150px]] | ||
|-style="background: #89A" | |-style="background: #89A" | ||
|colspan=5|'''Week 2 banner items'''<br>February 28, 2023, 10:00 p.m. (PT) – March 7, 2023, 9:59 p.m. (PT) | |colspan=5|'''Week 2 banner items'''<br>February 28, 2023, 10:00 p.m. (PT) – March 7, 2023, 9:59 p.m. (PT)<br>February 27, 2024, 10:00 p.m. (PT) – March 5, 2024, 9:59 p.m. (PT)<br>February 25, 2025, 10:00 p.m. (PT) – March 4, 2025, 9:59 p.m. (PT) | ||
|-style="background: #ABC" | |-style="background: #ABC" | ||
!Item type | !Item type | ||
| Line 85: | Line 81: | ||
{|class="wikitable" style="margin:auto; text-align:center" | {|class="wikitable" style="margin:auto; text-align:center" | ||
!colspan=2|High-End items obtainable from Daily Spotlight during the Doctor Tour | !colspan=2|High-End items obtainable from Daily Spotlight during the 2023 Doctor Tour | ||
!Rate (each) | !Rate (each) | ||
|- | |- | ||
| Line 117: | Line 113: | ||
|[[Gold Glider]], [[Gold Crane]], [[Silver-and-Gold Hearts]], [[Gold Home-Field Glider]], [[Gold Tanooki Parafoil]], [[Gold Penguin Wingtip]], [[Gold Toe-Bean Balloons]], [[Gold Eggshell Glider]], [[Gold Cloud Balloons]], [[Gold Meteors]], [[Gold Swooper]], [[Golden Wings]] | |[[Gold Glider]], [[Gold Crane]], [[Silver-and-Gold Hearts]], [[Gold Home-Field Glider]], [[Gold Tanooki Parafoil]], [[Gold Penguin Wingtip]], [[Gold Toe-Bean Balloons]], [[Gold Eggshell Glider]], [[Gold Cloud Balloons]], [[Gold Meteors]], [[Gold Swooper]], [[Golden Wings]] | ||
|0.1112% | |0.1112% | ||
|} | |||
<br> | |||
{|class="wikitable" style="margin:auto; text-align:center" | |||
!colspan=2|High-End items obtainable from Daily Spotlight during the 2024+ Doctor Tour | |||
!Rate (each) | |||
|- | |||
!rowspan=3|High-End drivers | |||
|[[Baby Peach|Baby Peach (Cherub)]], [[Rosalina|Rosalina (Chef)]], [[Birdo|Birdo (White)]], [[Bowser#Dr. Mario World|Dr. Bowser]] | |||
|5.92% | |||
|- | |||
|[[Pink Gold Peach]], [[Mario|Mario (Tuxedo)]], [[Princess Peach|Peach (Happi)]], [[Mario (Golf)]], [[Luigi|Luigi (Golf)]], [[Princess Peach|Peach (Yukata)]], [[Princess Daisy|Daisy (Farmer)]], [[Dr. Mario]]*, [[Cat Mario]], [[Cat Mario|Cat Luigi]], [[Princess Daisy|Daisy (Sailor)]], [[Toadette|Toadette (Sailor)]], [[Luigi|Luigi (Chef)]], [[Tanooki Mario|Kitsune Luigi]], [[Toad|Toad (Astronaut]], [[Poochy]], [[Mario|Mario (Black Suit)]], [[Chargin' Chuck]], [[Shy Guy|Pink Shy Guy (Ninja)]] | |||
|3.95% | |||
|- | |||
|[[Yoshi (species)|Yoshi (Gold Egg)]], [[Roving Racers|Gold Koopa (Freerunning)]], [[Dry Bones|Dry Bones (Gold)]], [[Dry Bowser|Dry Bowser (Gold)]], [[Shy Guy|Shy Guy (Gold)]], [[King Boo|King Boo (Gold)]], [[King Bob-omb|King Bob-omb (Gold)]], [[Chargin' Chuck|Chargin' Chuck (Gold)]] | |||
|0.16% | |||
|- | |||
!rowspan=3|High-End karts | |||
|[[Cupid's Arrow]], [[Capsule Kart]], [[Blue-Green Capsule Kart]], [[White Bruiser]], [[Coconut 1]], [[Pink Capsule Kart]], [[White Turbo Birdo]], [[Green-Yellow Capsule Kart]] | |||
|2.45% | |||
|- | |||
|[[Orange Streamliner]], [[Pink B Dasher Mk. 2]], [[Cream B Dasher Mk. 2]], [[Gray Cat Cruiser]], [[Sneeker]], [[Yellow 8-Bit Pipe Frame]], [[Black Turbo Yoshi]], [[Flower Kart]], [[Daikon Rocket]], [[Cream Cat Cruiser]], [[Goo-Goo Buggy]], [[White Fast Frank]], [[Tropical Truck]], [[Flowery Badwagon]], [[Coral Jet Cruiser]], [[Ice-Cream Minibus]], [[Strawberry Soft Swerve]], [[Streetle]], [[Swift Talon]], [[Blazing Eagle]], [[Camo Tanooki Kart]], [[Pink Speeder]], [[Pink Sneeker]], [[Rainbow Taxi]], [[Blooper Shuttle]], [[Bright Girl]], [[Huffin Puffin Egg]], [[Jumbo Jetter]], [[Bronze Cucumber]], [[Red Comet]], [[Pink Comet]], [[Mach 8-R]], [[Silver Cupid's Arrow]], [[Black Shielded Speedster]], [[Blue Sub Scooter]], [[Purple Rattle Buggy]], [[Spicy Zucchini]], [[Black B Dasher Mk. 2]], [[DK Maximum]], [[Red Crawly Kart]], [[Piranha Pipes]], [[Goo-Goo Black]], [[Cact-B]], [[Dry Bones Dasher]], [[Chain Chomp Chariot]], [[Fish Bone Ferry]], [[Boo Pipes]] | |||
|1.63% | |||
|- | |||
|[[Gold Egg]], [[Gold Pipe Frame]], [[Gold Snow Skimmer]], [[Gold Pumpkin Kart]], [[Gold Bunny]], [[Gold Kiddie Kart]], [[Gold Zucchini]], [[Gold Standard]], [[Gold Double-Decker]], [[Gold Sweet Ride]], [[Gold Eagle]], [[Gold Rambi Rider]], [[Gold Jingle Bell]], [[Wild Gold]], [[Gold Paintster]], [[Gold Comet]], [[Gold Cupid's Arrow]], [[Gold Warrior Wagon]], [[Gold Driver]], [[Goo-Goo Gold]], [[Gold Wild Slugger]], [[Gold Soft Swerve]], [[Gold B Dasher]], [[Gold Train]], [[Gold Cheep Snorkel]], [[Gold Cheep Charger]], [[Gold Bullet Blaster]], [[Gold Trickster]], [[Gold Bruiser]], [[Gold Sushi Racer]], [[Gold Fish Bone Ferry]], [[Gold Pipes]] | |||
|0.07% | |||
|- | |||
!rowspan=3|High-End gliders | |||
|[[Flybrary Book]], [[Wonderful Wings]], [[Wicked Topaz]] | |||
|2.53% | |||
|- | |||
|[[Super Mario Kart Glider]], [[Snow Crystals]], [[8-Bit Bullet Bill]], [[Ship's Wheel]], [[Magic Parasol]], [[8-Bit Super Mushroom]], [[Candlelight Flight]], [[Aurora Balloons]], [[Luigi Parafoil]], [[Mario's Mustache]], [[Origami Glider]], [[Magniflying Glass]]*, [[Cream Toe-Bean Balloons]], [[Green Cat Parafoil]], [[Candlelight Flight Cake]], [[Tulip Corsage]], [[Fire Manta Glider]], [[Mario's Hat Balloon]], [[Luigi's Hat Balloon]], [[White Waves Origami Glider]], [[Chocolate Pretzel]], [[Para-Panini]], [[Autumn Leaves]], [[Calico Toe-Bean Balloons]], [[Wonderful Garnet]], [[Yellow Hard Hat Balloon]], [[New Year's 2023]], [[Rainbow Fare Flier]], [[8-Bit Super Glider]], [[8-Bit Block Glider]], [[Bright Ribbon]], [[Yoshi's Cookies]], [[Smiley Flower Glider]], [[Red Checkered Glider]], [[Pink Checkered Glider]], [[Green Checkered Glider]], [[Green Emblem]], [[Jellychute]], [[Wavy Great Sail]], [[Dolphin Great Sail]], [[Mario Golf Cap]], [[Luigi Golf Cap]], [[Spooky Sprinkle Balloons]], [[Royal Flush]], [[Rainbow Bells]], [[Banana Wingtip]], [[Nabbit Oilpaper Umbrella]], [[Wario's Mustache]], [[Waluigi's Mustache]], [[Piranha Plant Balloons]], [[Secret Scroll]], [[Black Starchute]], [[Rainbow Flappy Wings]], [[Wiggler Parachute]] | |||
|1.69% | |||
|- | |||
|[[Gold Glider]], [[Gold Crane]], [[Silver-and-Gold Hearts]], [[Gold Home-Field Glider]], [[Gold Tanooki Parafoil]], [[Gold Penguin Wingtip]], [[Gold Toe-Bean Balloons]], [[Gold Eggshell Glider]], [[Gold Cloud Balloons]], [[Gold Meteors]], [[Golden Glider]], [[Gold Tulips]], [[Gold Checkered Glider]], [[Gold Bells]], [[Glittering Glider]], [[Gold Mario Golf Cap]], [[Gold Swooper]], [[Golden Wings]], [[Gold Boo Masks]], [[Gold Piranha Plant Balloons]] | |||
|0.07% | |||
|} | |} | ||
| Line 126: | Line 157: | ||
|R2=[[RMX Choco Island 2|RMX Choco Island 2R/T]]||R2.I=RMXChocoIsland2RT DrBowser||R2.1=1,100||R2.2=1,600||R2.3=1,900||R2.4=2,100||R2.5=2,400 | |R2=[[RMX Choco Island 2|RMX Choco Island 2R/T]]||R2.I=RMXChocoIsland2RT DrBowser||R2.1=1,100||R2.2=1,600||R2.3=1,900||R2.4=2,100||R2.5=2,400 | ||
|R3=[[DS Shroom Ridge]]||R3.I=ShroomRidgeDS DrLuigi||R3.1=900||R3.2=1,300||R3.3=1,500||R3.4=1,800||R3.5=2,000 | |R3=[[DS Shroom Ridge]]||R3.I=ShroomRidgeDS DrLuigi||R3.1=900||R3.2=1,300||R3.3=1,500||R3.4=1,800||R3.5=2,000 | ||
|CN=[[Ring Race]]||C.I=Tour77 PeachCupChallenge||CC=[[ | |CN=[[Ring Race]]||C.I=Tour77 PeachCupChallenge||CC=[[Morton]]||CT=[[RMX Bowser's Castle 1]]||C.1=10||C.2=20||C.3=26 | ||
}} | }} | ||
{{MKT cup table row | {{MKT cup table row | ||
| Line 253: | Line 284: | ||
==Rewards== | ==Rewards== | ||
Gold cells indicate rewards that are exclusive to Gold Pass members. | Gold cells indicate rewards that are exclusive to Gold Pass members. | ||
===2023=== | |||
{|class="wikitable" style="margin:auto; text-align:center" | {|class="wikitable" style="margin:auto; text-align:center" | ||
|- | |- | ||
| Line 331: | Line 364: | ||
|-style=background:gold | |-style=background:gold | ||
|||||||||||||||||[[File:MKT Icon Level-boostticket3.png|30px]]<br>(3)||[[File:MKT Icon Level-boostticket2.png|30px]]<br>(3)||[[File:MKT Icon Level-boostticket1.png|30px]]<br>(3)||||||[[File:MKT Icon Level-boostticket6.png|30px]]<br>(2)||[[File:MKT Icon Level-boostticket5.png|30px]]<br>(2)||[[File:MKT Icon Level-boostticket4.png|30px]]<br>(2)||||||||||||[[File:MKT Icon Level-boostticket9.png|30px]]||[[File:MKT Icon Level-boostticket8.png|30px]]||[[File:MKT Icon Level-boostticket7.png|30px]]||||||||||||||||||||[[File:MKT Icon Level-boostticket8.png|30px]]||||||||19 | |||||||||||||||||[[File:MKT Icon Level-boostticket3.png|30px]]<br>(3)||[[File:MKT Icon Level-boostticket2.png|30px]]<br>(3)||[[File:MKT Icon Level-boostticket1.png|30px]]<br>(3)||||||[[File:MKT Icon Level-boostticket6.png|30px]]<br>(2)||[[File:MKT Icon Level-boostticket5.png|30px]]<br>(2)||[[File:MKT Icon Level-boostticket4.png|30px]]<br>(2)||||||||||||[[File:MKT Icon Level-boostticket9.png|30px]]||[[File:MKT Icon Level-boostticket8.png|30px]]||[[File:MKT Icon Level-boostticket7.png|30px]]||||||||||||||||||||[[File:MKT Icon Level-boostticket8.png|30px]]||||||||19 | ||
|} | |||
===2024+=== | |||
{|class="wikitable" style="margin:auto; text-align:center" | |||
|- | |||
![[File:MKT Icon GrandStar.png|20x20px]] 40 | |||
|- | |||
|[[File:MKT Icon GoldCapsuleKart.png|75x75px]] | |||
|- | |||
|style=background:gold|[[Gold Capsule Kart]] | |||
|} | |||
<br> | |||
{|class="wikitable scrollable" style="margin:auto; text-align:center; font-size:90%" | |||
|- | |||
!Grand Stars!![[File:MKT Icon GrandStar.png|20x20px]]!!10!!20!!30!!40!!50!!60!!70!!80!!90!!100!!110!!120!!130!!140!!150!!160!!170!!180!!190!!200!!210!!220!!230!!240!!260!!280!!300!!320!!Total!!Grand total | |||
|- | |||
!rowspan=2 colspan=2|[[Pipe Cannon|Pipes]] | |||
|||[[File:MKT Icon Launch Pipe Green.png|20px]]<br>(10)||||||||||||[[File:MKT Icon Launch Pipe Green.png|20px]]||||||[[File:MKT Icon Launch Pipe Green.png|20px]]||||||||[[File:MKT Icon Launch Pipe Green.png|20px]]||||||||||||[[File:MKT Icon Launch Pipe Green.png|20px]]||||||||||||||||14 | |||
!rowspan=2|31 | |||
|-style=background:gold | |||
|||[[File:MKT Icon Launch Pipe Green.png|20px]]<br>(10)||||||[[File:MKT Icon Launch Pipe Green.png|20px]]||[[File:MKT Icon Launch Pipe Gold.png|20px]]||||||||||[[File:MKT Icon Launch Pipe Gold.png|20px]]||||||||[[File:MKT Icon Launch Pipe Green.png|20px]]||||[[File:MKT Icon Launch Pipe Green.png|20px]]||||||||[[File:MKT Icon Launch Pipe Green.png|20px]]||||||||[[File:MKT Icon Launch Pipe Green.png|20px]]||||||||17 | |||
|- | |||
!rowspan=2|[[Coin]]s | |||
!rowspan=2|[[File:MKT Icon Coins 2.png|50x50px]] | |||
|500||||||500||||1000||||||1000||||||||||||||||1000||||||||||||||||1000||||||||5000 | |||
!rowspan=2|15000 | |||
|-style=background:gold | |||
|5000||||||5000||||||||||||||||||||||||||||||||||||||||||||||||||10000 | |||
|- | |||
!rowspan=2|[[Ruby|Rubies]] | |||
!rowspan=2|[[File:MKT Icon 1Ruby.png|50x50px]] | |||
|10||||||5||||3||||||||||3||||||||||||||||||||||||||||||||||||21 | |||
!rowspan=2|56 | |||
|-style=background:gold | |||
|15||||||||||10||||||||||10||||||||||||||||||||||||||||||||||||35 | |||
|- | |||
!rowspan=2|[[Item ticket]]s | |||
!rowspan=2|[[File:MKT Icon ItemTicket.png|50x50px]] | |||
|||||5||||||||||||||||||||||||||5||||||||||||||||||||||||||10 | |||
!rowspan=2|30 | |||
|-style=background:gold | |||
|||||10||||||||||||||||||||||||||10||||||||||||||||||||||||||20 | |||
|- | |||
!rowspan=2|[[Star ticket]]s | |||
!rowspan=2|[[File:MKT Icon StarTicket.png|50x50px]] | |||
|||||||||2||||||||||3||||||||||||||||||||||||||||||||||||||5 | |||
!rowspan=2|5 | |||
|-style=background:gold | |||
|||||||||||||||||||||||||||||||||||||||||||||||||||||||||0 | |||
|- | |||
!rowspan=2|[[Quick ticket]]s | |||
!rowspan=2|[[File:MKT Icon QuickTicket.png|50x50px]] | |||
|||||||||||||1||||||||||||||||||||||||||||||||||||||||||||1 | |||
!rowspan=2|4 | |||
|-style=background:gold | |||
|||||||||||||3||||||||||||||||||||||||||||||||||||||||||||3 | |||
|- | |||
!rowspan=6|[[Point-boost ticket]]s | |||
!rowspan=2|[[File:MKT Icon Point-boostticket1.png|50x50px]] | |||
|||||||||||||||||||||||||||1||||||||||||1||||||||1||||||||||3 | |||
!rowspan=2|8 | |||
|-style=background:gold | |||
|||||||||||||||||||||||||||||||||||||||||||||||5||||||||||5 | |||
|- | |||
!rowspan=2|[[File:MKT Icon Point-boostticket2.png|50x50px]] | |||
|||||||||||||||||||||||||1||||||||||||1||||||||1||||||||||||3 | |||
!rowspan=2|8 | |||
|-style=background:gold | |||
|||||||||||||||||||||||||||||||||||||||||||||5||||||||||||5 | |||
|- | |||
!rowspan=2|[[File:MKT Icon Point-boostticket3.png|50x50px]] | |||
|||||||||||||||||||||||1||||||||||||1||||||||1||||||||||||||3 | |||
!rowspan=2|8 | |||
|-style=background:gold | |||
|||||||||||||||||||||||||||||||||||||||||||5||||||||||||||5 | |||
|- | |||
!rowspan=2 colspan=2|[[Level-boost ticket]]s | |||
|||||||||||||||||||||||||||||||||||||||||||||||||||[[File:MKT Icon Level-boostticket2.png|30px]]||[[File:MKT Icon Level-boostticket5.png|30px]]||[[File:MKT Icon Level-boostticket8.png|30px]]||3 | |||
!rowspan=2|22 | |||
|-style=background:gold | |||
|||||||||||||||[[File:MKT Icon Level-boostticket3.png|30px]]<br>(3)||[[File:MKT Icon Level-boostticket2.png|30px]]<br>(3)||[[File:MKT Icon Level-boostticket1.png|30px]]<br>(3)||||[[File:MKT Icon Level-boostticket6.png|30px]]<br>(2)||[[File:MKT Icon Level-boostticket5.png|30px]]<br>(2)||[[File:MKT Icon Level-boostticket4.png|30px]]<br>(2)||||||||[[File:MKT Icon Level-boostticket9.png|30px]]||[[File:MKT Icon Level-boostticket8.png|30px]]||[[File:MKT Icon Level-boostticket7.png|30px]]||||||||||||[[File:MKT Icon Level-boostticket8.png|30px]]||||||19 | |||
|} | |} | ||
==New content== | ==New content== | ||
The following content was introduced during the tour's debut in 2023. | |||
===Drivers=== | ===Drivers=== | ||
<gallery> | <gallery> | ||
| Line 377: | Line 492: | ||
|- | |- | ||
|'''Value Pack''' | |'''Value Pack''' | ||
|February 22, 2023 – March 7, 2023 | |February 22, 2023 – March 7, 2023<br>February 21, 2024 – March 5, 2024<br>February 19, 2025 – March 4, 2025 | ||
|US$1.99 | |US$1.99 | ||
|[[File:MKT Icon Ruby.png|30px]] [[Ruby|Rubies]] ×6<br> | |[[File:MKT Icon Ruby.png|30px]] [[Ruby|Rubies]] ×6<br> | ||
| Line 385: | Line 500: | ||
|- | |- | ||
|'''Driver Point-Boost Tickets 10 Ticket Set''' | |'''Driver Point-Boost Tickets 10 Ticket Set''' | ||
|February 22, 2023 – March 7, 2023 | |February 22, 2023 – March 7, 2023<br>February 21, 2024 – March 5, 2024<br>February 19, 2025 – March 4, 2025 | ||
|US$3.99 | |US$3.99 | ||
|[[File:MKT Icon Point-boostticket1.png|30px]] [[Point-boost ticket|Driver point-boost ticket]] ×10 | |[[File:MKT Icon Point-boostticket1.png|30px]] [[Point-boost ticket|Driver point-boost ticket]] ×10 | ||
| Line 391: | Line 506: | ||
|- | |- | ||
|'''Celebrate the Doctor Tour with the Rainbow Streetle!''' | |'''Celebrate the Doctor Tour with the Rainbow Streetle!''' | ||
|February 22, 2023 – March 7, 2023 | |February 22, 2023 – March 7, 2023<br>February 21, 2024 – March 5, 2024<br>February 19, 2025 – March 4, 2025 | ||
|US$3.99 | |US$3.99 | ||
|[[File:MKT Icon RainbowStreetle.png|30px]] [[Rainbow Streetle]] ×1 | |[[File:MKT Icon RainbowStreetle.png|30px]] [[Rainbow Streetle]] ×1 | ||
| Line 397: | Line 512: | ||
|- | |- | ||
|'''70 Rubies and Ticket Pack''' | |'''70 Rubies and Ticket Pack''' | ||
|February 22, 2023 – March 7, 2023 | |February 22, 2023 – March 7, 2023<br>February 21, 2024 – March 5, 2024<br>February 19, 2025 – March 4, 2025 | ||
|US$19.99 | |US$19.99 | ||
|[[File:MKT Icon Ruby 4.png|30px]] [[Ruby|Rubies]] ×70<br> | |[[File:MKT Icon Ruby 4.png|30px]] [[Ruby|Rubies]] ×70<br> | ||
| Line 405: | Line 520: | ||
|- | |- | ||
|'''150 Rubies and Ticket Pack''' | |'''150 Rubies and Ticket Pack''' | ||
|February 22, 2023 – March 7, 2023 | |February 22, 2023 – March 7, 2023<br>February 21, 2024 – March 5, 2024<br>February 19, 2025 – March 4, 2025 | ||
|US$39.99 | |US$39.99 | ||
|[[File:MKT Icon Ruby 5.png|30px]] [[Ruby|Rubies]] ×150<br> | |[[File:MKT Icon Ruby 5.png|30px]] [[Ruby|Rubies]] ×150<br> | ||
| Line 417: | Line 532: | ||
|TCR1=[[File:MKT Icon CoinRushTicket.png|70px]] [[Coin Rush ticket]] ×1 | |TCR1=[[File:MKT Icon CoinRushTicket.png|70px]] [[Coin Rush ticket]] ×1 | ||
|T1.1=134 | |T1.1=134 | ||
|T1.1E=Do 50 {{Color | |T1.1E=Do 50 {{Color link|#A1A1FF|Jump Boost|Jump Boosts}}. | ||
|T1.1S=1 | |T1.1S=1 | ||
|T1.2=002 | |T1.2=002 | ||
|T1.2E=Land 5 hits with {{Color | |T1.2E=Land 5 hits with {{Color link|#A1A1FF|Banana|Bananas}}. | ||
|T1.2S=1 | |T1.2S=1 | ||
|T1.3=347-3 | |T1.3=347-3 | ||
| Line 426: | Line 541: | ||
|T1.3S=1 | |T1.3S=1 | ||
|T1.4=428 | |T1.4=428 | ||
|T1.4E=Use {{Color | |T1.4E=Use {{Color link|#A1A1FF|point-boost ticket|point-boost tickets}} 3 times. | ||
|T1.4S=2 | |T1.4S=2 | ||
|T1.5=347 | |T1.5=347 | ||
| Line 432: | Line 547: | ||
|T1.5S=2 | |T1.5S=2 | ||
|T1.6=073 | |T1.6=073 | ||
|T1.6E=Land a hit with a {{Color | |T1.6E=Land a hit with a {{Color link|#A1A1FF|Blooper}}. | ||
|T1.6S=2 | |T1.6S=2 | ||
|T1.7=061 | |T1.7=061 | ||
| Line 438: | Line 553: | ||
|T1.7S=2 | |T1.7S=2 | ||
|T1.8=404 | |T1.8=404 | ||
|T1.8E=Cause opponents to crash using a {{Color | |T1.8E=Cause opponents to crash using a {{Color link|#A1A1FF|Mega Mushroom}}. | ||
|T1.8S=2 | |T1.8S=2 | ||
|T1.9=410 | |T1.9=410 | ||
| Line 445: | Line 560: | ||
|TCR2=[[File:MKT Icon QuickTicket.png|70px]] [[Quick ticket]] ×1 | |TCR2=[[File:MKT Icon QuickTicket.png|70px]] [[Quick ticket]] ×1 | ||
|T2.1=392 | |T2.1=392 | ||
|T2.1E=Use 10 {{Color | |T2.1E=Use 10 {{Color link|#A1A1FF|Mushroom|Mushrooms}}. | ||
|T2.1S=1 | |T2.1S=1 | ||
|T2.2=175-1 | |T2.2=175-1 | ||
|T2.2E=Land 5 hits with {{Color | |T2.2E=Land 5 hits with {{Color link|#A1A1FF|Red Shell|Red Shells}}. | ||
|T2.2S=1 | |T2.2S=1 | ||
|T2.3=399 | |T2.3=399 | ||
|T2.3E=Use {{Color | |T2.3E=Use {{Color link|#A1A1FF|Lightning}}. | ||
|T2.3S=1 | |T2.3S=1 | ||
|T2.4=427 | |T2.4=427 | ||
| Line 466: | Line 581: | ||
|T2.7S=2 | |T2.7S=2 | ||
|T2.8=196 | |T2.8=196 | ||
|T2.8E=Earn a total score of 15,000 or higher in the {{Color | |T2.8E=Earn a total score of 15,000 or higher in the {{Color link|#A1A1FF|Morton Cup}}. | ||
|T2.8S=2 | |T2.8S=2 | ||
|T2.9=121 | |T2.9=121 | ||
|T2.9E=Complete {{Color | |T2.9E=Complete {{Color link|#A1A1FF|Coin Rush (Mario Kart Tour)|Coin Rush}} 1 time. | ||
|T2.9S=2 | |T2.9S=2 | ||
|GCR=[[File:MKT Icon 1Ruby.png|70px]] [[Ruby|Rubies]] ×5 | |GCR=[[File:MKT Icon 1Ruby.png|70px]] [[Ruby|Rubies]] ×5 | ||
| Line 476: | Line 591: | ||
|G.1S=1 | |G.1S=1 | ||
|G.2=069 | |G.2=069 | ||
|G.2E=Land 5 hits with {{Color | |G.2E=Land 5 hits with {{Color link|#A1A1FF|Bob-omb|Bob-ombs}}. | ||
|G.2S=1 | |G.2S=1 | ||
|G.3=410 | |G.3=410 | ||
| Line 482: | Line 597: | ||
|G.3S=1 | |G.3S=1 | ||
|G.4=376 | |G.4=376 | ||
|G.4E=Use a {{Color | |G.4E=Use a {{Color link|#A1A1FF|level-boost ticket}}. | ||
|G.4S=2 | |G.4S=2 | ||
|G.5=074 | |G.5=074 | ||
|G.5E=Activate {{Color | |G.5E=Activate {{Color link|#A1A1FF|Frenzy}} mode 5 times using a driver with a mustache. | ||
|G.5S=2 | |G.5S=2 | ||
|G.6=427 | |G.6=427 | ||
| Line 494: | Line 609: | ||
|G.7S=2 | |G.7S=2 | ||
|G.8=344 | |G.8=344 | ||
|G.8E=Earn a total score of 25,000 or higher in the {{Color | |G.8E=Earn a total score of 25,000 or higher in the {{Color link|#A1A1FF|Monty Mole Cup}}. | ||
|G.8S=2 | |G.8S=2 | ||
|G.9=030 | |G.9=030 | ||
|G.9E=Send Greeting {{Color | |G.9E=Send Greeting {{Color link|#A1A1FF|Coin|Coins}} to a friend. | ||
|G.9S=2 | |G.9S=2 | ||
}} | }} | ||
| Line 561: | Line 676: | ||
|width=10% style="background:linear-gradient(#F2E18F,#B9800F)"|[[File:MKT Icon Level-boostticket9.png|70px]] | |width=10% style="background:linear-gradient(#F2E18F,#B9800F)"|[[File:MKT Icon Level-boostticket9.png|70px]] | ||
|-style="color: #FFF" | |-style="color: #FFF" | ||
|style="background:linear-gradient(#864D00,#A26000); border-top:1px solid #B9800F;"|{{Color | |style="background:linear-gradient(#864D00,#A26000); border-top:1px solid #B9800F;"|{{Color link|#A1A1FF|Coins}} ×3,000 | ||
|style="background:linear-gradient(#864D00,#A26000); border-top:1px solid #B9800F;"|{{Color | |style="background:linear-gradient(#864D00,#A26000); border-top:1px solid #B9800F;"|{{Color link|#A1A1FF|Ruby|Rubies}} ×10 | ||
|style="background:linear-gradient(#864D00,#A26000); border-top:1px solid #B9800F;"|{{Color | |style="background:linear-gradient(#864D00,#A26000); border-top:1px solid #B9800F;"|{{Color link|#A1A1FF|Point-boost ticket}} (Kart) ×3 | ||
|style="background:linear-gradient(#864D00,#A26000); border-top:1px solid #B9800F;"|Point-boost ticket (Kart) ×5 | |style="background:linear-gradient(#864D00,#A26000); border-top:1px solid #B9800F;"|Point-boost ticket (Kart) ×5 | ||
|style="background:linear-gradient(#864D00,#A26000); border-top:1px solid #B9800F;"|Rubies ×20 | |style="background:linear-gradient(#864D00,#A26000); border-top:1px solid #B9800F;"|Rubies ×20 | ||
|style="background:linear-gradient(#864D00,#A26000); border-top:1px solid #B9800F;"|{{Color | |style="background:linear-gradient(#864D00,#A26000); border-top:1px solid #B9800F;"|{{Color link|#A1A1FF|Points-cap ticket}} (High-end kart) ×1 | ||
|style="background:linear-gradient(#864D00,#A26000); border-top:1px solid #B9800F;"|Level-boost ticket (High-End driver) ×2 | |style="background:linear-gradient(#864D00,#A26000); border-top:1px solid #B9800F;"|Level-boost ticket (High-End driver) ×2 | ||
|style="background:linear-gradient(#864D00,#A26000); border-top:1px solid #B9800F;"|Level-boost ticket (High-End kart) ×2 | |style="background:linear-gradient(#864D00,#A26000); border-top:1px solid #B9800F;"|Level-boost ticket (High-End kart) ×2 | ||
| Line 591: | Line 706: | ||
|width=10% style="background:linear-gradient(#F2E18F,#B9800F)"|[[File:MKT Icon Points-capticket9.png|70px]] | |width=10% style="background:linear-gradient(#F2E18F,#B9800F)"|[[File:MKT Icon Points-capticket9.png|70px]] | ||
|-style="color: #FFF" | |-style="color: #FFF" | ||
|style="background:linear-gradient(#864D00,#A26000); border-top:1px solid #B9800F;"|{{Color | |style="background:linear-gradient(#864D00,#A26000); border-top:1px solid #B9800F;"|{{Color link|#A1A1FF|Level-boost ticket}} (Normal kart) ×1 | ||
|style="background:linear-gradient(#864D00,#A26000); border-top:1px solid #B9800F;"|Level-boost ticket (Super kart) ×1 | |style="background:linear-gradient(#864D00,#A26000); border-top:1px solid #B9800F;"|Level-boost ticket (Super kart) ×1 | ||
|style="background:linear-gradient(#864D00,#A26000); border-top:1px solid #B9800F;"|Level-boost ticket (High-End kart) ×1 | |style="background:linear-gradient(#864D00,#A26000); border-top:1px solid #B9800F;"|Level-boost ticket (High-End kart) ×1 | ||
| Line 668: | Line 783: | ||
<br> | <br> | ||
{|class="wikitable" style="margin:auto; text-align:center" width=65% | {|class="wikitable" style="margin:auto; text-align:center" width=65% | ||
!colspan=2 width=30%|Total Points Challenge 1 | !colspan=2 width=30%|Total Points Challenge 1 (2023) | ||
|rowspan=8 style="border-top:1px solid #FFF; border-bottom:1px solid #FFF;" width=5%| | |rowspan=8 style="border-top:1px solid #FFF; border-bottom:1px solid #FFF;" width=5%| | ||
!colspan=2 width=30%|Total Points Challenge 2 | !colspan=2 width=30%|Total Points Challenge 2 (2023) | ||
|- | |- | ||
!Points | !Points | ||
| Line 722: | Line 837: | ||
|[[File:MKT Icon Coins 3.png|30px]] Coins ×1,000<br> | |[[File:MKT Icon Coins 3.png|30px]] Coins ×1,000<br> | ||
[[File:MKT Icon Level-boostticket4.png|30px]] Level-boost ticket (Super driver) ×1 | [[File:MKT Icon Level-boostticket4.png|30px]] Level-boost ticket (Super driver) ×1 | ||
|} | |||
<br> | |||
{|class="wikitable" style="margin:auto; text-align:center" width=65% | |||
!colspan=2 width=30%|Total Points Challenge 1 (2024+) | |||
|rowspan=8 style="border-top:1px solid #FFF; border-bottom:1px solid #FFF;" width=5%| | |||
!colspan=2 width=30%|Total Points Challenge 2 (2024+) | |||
|- | |||
!Points | |||
!Rewards | |||
!Points | |||
!Rewards | |||
|- | |||
!400,000 | |||
|[[File:MKT Icon 1Ruby.png|20px]] [[Ruby|Rubies]] ×3<br> | |||
[[File:MKT Icon Point-boostticket1.png|30px]] [[Point-boost ticket]]s (driver) ×5<br> | |||
[[File:MKT Icon Point-boostticket2.png|30px]] Point-boost tickets (kart) ×5<br> | |||
[[File:MKT Icon Point-boostticket3.png|30px]] Point-boost tickets (glider) ×5 | |||
!999,999 | |||
|[[File:MKT Icon 1Ruby.png|20px]] [[Ruby|Rubies]] ×3<br> | |||
[[File:MKT Icon Point-boostticket1.png|30px]] Point-boost tickets (driver) ×5<br> | |||
[[File:MKT Icon Point-boostticket2.png|30px]] Point-boost tickets (kart) ×5<br> | |||
[[File:MKT Icon Point-boostticket3.png|30px]] Point-boost tickets (glider) ×5 | |||
|- | |||
!300,000 | |||
|[[File:MKT Icon Coins 2.png|30px]] [[Coin]]s ×500<br> | |||
[[File:MKT Icon ItemTicket.png|30px]] [[Item ticket]]s ×10<br> | |||
[[File:MKT Icon StarTicket.png|30px]] [[Star ticket]]s ×3 | |||
!900,000 | |||
|[[File:MKT Icon Coins 2.png|30px]] Coins ×500<br> | |||
[[File:MKT Icon ItemTicket.png|30px]] Item tickets ×10<br> | |||
[[File:MKT Icon QuickTicket.png|30px]] Quick ticket ×1 | |||
|- | |||
!250,000 | |||
|[[File:MKT Icon Coins 2.png|30px]] Coins ×500<br> | |||
[[File:MKT Icon Points-capticket4.png|30px]] Points-cap ticket (Super driver) ×1<br> | |||
[[File:MKT Icon ItemTicket.png|30px]] Item tickets ×2 | |||
!800,000 | |||
|[[File:MKT Icon Coins 2.png|30px]] Coins ×500<br> | |||
[[File:MKT Icon Points-capticket7.png|30px]] Points-cap ticket (High-End driver) ×1<br> | |||
[[File:MKT Icon QuickTicket.png|30px]] Quick ticket ×1 | |||
|- | |||
!200,000 | |||
|[[File:MKT Icon Coins 2.png|30px]] Coins ×500<br> | |||
[[File:MKT Icon Level-boostticket4.png|30px]] Level-boost ticket (Super driver) ×1<br> | |||
[[File:MKT Icon ItemTicket.png|30px]] Item tickets ×2 | |||
!700,000 | |||
|[[File:MKT Icon Coins 2.png|30px]] Coins ×500<br> | |||
[[File:MKT Icon Level-boostticket7.png|30px]] Level-boost ticket (High-End driver) ×1<br> | |||
[[File:MKT Icon QuickTicket.png|30px]] Quick ticket ×1 | |||
|- | |||
!150,000 | |||
|[[File:MKT Icon Coins 2.png|30px]] Coins ×500<br> | |||
[[File:MKT Icon Points-capticket1.png|30px]] [[Points-cap ticket]] (Normal driver) ×1<br> | |||
[[File:MKT Icon ItemTicket.png|30px]] Item tickets ×2 | |||
!600,000 | |||
|[[File:MKT Icon Coins 2.png|30px]] Coins ×500<br> | |||
[[File:MKT Icon Points-capticket4.png|30px]] Points-cap ticket (Super driver) ×1<br> | |||
[[File:MKT Icon ItemTicket.png|30px]] Item tickets ×3 | |||
|- | |||
!100,000 | |||
|[[File:MKT Icon Coins 2.png|30px]] Coins ×500<br> | |||
[[File:MKT Icon Level-boostticket1.png|30px]] [[Level-boost ticket]] (Normal driver) ×1<br> | |||
[[File:MKT Icon ItemTicket.png|30px]] Item tickets ×2 | |||
!500,000 | |||
|[[File:MKT Icon Coins 2.png|30px]] Coins ×500<br> | |||
[[File:MKT Icon Level-boostticket4.png|30px]] Level-boost ticket (Super driver) ×1<br> | |||
[[File:MKT Icon ItemTicket.png|30px]] Item tickets ×3 | |||
|} | |} | ||
| Line 727: | Line 909: | ||
The Gold Pipe, including the All-Clear Pipe, randomly shoots out one of the following regular High-End items. The appearance rate can be viewed via the "Pipe content" link on the Gold Pass purchase screen. | The Gold Pipe, including the All-Clear Pipe, randomly shoots out one of the following regular High-End items. The appearance rate can be viewed via the "Pipe content" link on the Gold Pass purchase screen. | ||
{|class="wikitable" style="margin:auto; text-align:center" | {|class="wikitable" style="margin:auto; text-align:center" | ||
!colspan=2|High-End items obtainable from Gold Pipes during the 2023 | !colspan=2|High-End items obtainable from Gold Pipes during the 2023 Doctor Tour | ||
!Rate (each) | !Rate (each) | ||
|- | |- | ||
| Line 757: | Line 939: | ||
===Other items=== | ===Other items=== | ||
====Initial run==== | |||
{| class="wikitable" style="margin:auto; text-align:center" width=50% | {| class="wikitable" style="margin:auto; text-align:center" width=50% | ||
!colspan=3|Items available in Mii Racing Suit Shop | !colspan=3|Items available in Mii Racing Suit Shop | ||
|- | |- | ||
|width=33%|[[File:MKT Artwork BrownMiiRacingSuit.png|80x80px]] | |width=33%|[[File:MKT Artwork BrownMiiRacingSuit.png|80x80px]] | ||
| Line 783: | Line 966: | ||
![[Mii|King Bob-omb Mii Racing Suit]]<br>[[File:MKT Icon 1Ruby.png|20px]] 100<br>Amount: 3 | ![[Mii|King Bob-omb Mii Racing Suit]]<br>[[File:MKT Icon 1Ruby.png|20px]] 100<br>Amount: 3 | ||
![[Mii|Donkey Kong Mii Racing Suit]]<br>[[File:MKT Icon 1Ruby.png|20px]] 100<br>Amount: 3 | ![[Mii|Donkey Kong Mii Racing Suit]]<br>[[File:MKT Icon 1Ruby.png|20px]] 100<br>Amount: 3 | ||
|} | |||
====Reruns==== | |||
{| class="wikitable" style="margin:auto; text-align:center" width=50% | |||
!colspan=3|Items available in Mii Racing Suit Shop | |||
|- | |||
|width=33%|[[File:MKT Artwork PeachMiiRacingSuit.png|80x80px]] | |||
|width=34%|[[File:MKT Artwork DonkeyKongMiiRacingSuit.png|80x80px]] | |||
|width=33%|[[File:MKT Artwork WarioMiiRacingSuit.png|80x80px]] | |||
|- | |||
![[Mii|Peach Mii Racing Suit]]<br>[[File:MKT Icon 1Ruby.png|20px]] 100<br>Amount: 3 | |||
![[Mii|Donkey Kong Mii Racing Suit]]<br>[[File:MKT Icon 1Ruby.png|20px]] 100<br>Amount: 3 | |||
![[Mii|Wario Mii Racing Suit]]<br>[[File:MKT Icon 1Ruby.png|20px]] 100<br>Amount: 3 | |||
|- | |||
|[[File:MKT Artwork PastryChefMiiRacingSuit.png|80x80px]] | |||
|[[File:MKT Artwork LightBlueMiiRacingSuit.png|80x80px]] | |||
|[[File:MKT Artwork IceCreamMiiRacingSuit.png|80x80px]] | |||
|- | |||
![[Mii|Pastry Chef Mii Racing Suit]]<br>70 [[File:MKT Icon 1Ruby.png|20px]] [[ruby|rubies]] for 1st purchase;<br>100 rubies for 2nd and 3rd purchases respectively | |||
![[Mii|Light Blue Mii Racing Suit]]<br>[[File:MKT Icon 1Ruby.png|20px]] 100<br>Amount: 3 | |||
![[Mii|Ice-Cream Mii Racing Suit]]<br>[[File:MKT Icon 1Ruby.png|20px]] 100<br>Amount: 3 | |||
|- | |||
|[[File:MKT Artwork IggyMiiRacingSuit.png|80x80px]] | |||
|[[File:MKT Artwork MontyMoleMiiRacingSuit.png|80x80px]] | |||
|[[File:MKT Artwork CheepCheepMiiRacingSuit.png|80x80px]] | |||
|- | |||
![[Mii|Iggy Mii Racing Suit]]<br>[[File:MKT Icon 1Ruby.png|20px]] 100<br>Amount: 3 | |||
![[Mii|Monty Mole Mii Racing Suit]]<br>[[File:MKT Icon 1Ruby.png|20px]] 100<br>Amount: 3 | |||
![[Mii|Cheep Cheep Mii Racing Suit]]<br>[[File:MKT Icon 1Ruby.png|20px]] 100<br>Amount: 3 | |||
|} | |} | ||
==Token Shop== | ==Token Shop== | ||
The limited-time event where [[event token]]s appear | The limited-time event where [[event token]]s appear started on February 22, 2023 and ended on March 7, 2023; and started on February 21, 2024 and ended on March 5, 2024 for the first rerun; and started on February 19, 2025 and ended on March 4, 2025 for the second rerun. Event tokens could be earned by causing opponents to crash. | ||
{| class="wikitable" style="margin:auto; text-align:center" width=50% | {| class="wikitable" style="margin:auto; text-align:center" width=50% | ||
!colspan=3|'''Token Shop''' | !colspan=3|'''Token Shop''' | ||
|- | |- | ||
|width=33%|[[File:MKT Icon Launch Pipe Green.png|70px]] | |width=33%|[[File:MKT Icon Launch Pipe Green.png|70px]] | ||
| Line 809: | Line 1,021: | ||
==Tier Shop== | ==Tier Shop== | ||
The shop features a variety of set and randomized items available for purchase. The item slots in the shop are unlocked based on the highest tier of players. | The shop features a variety of set and randomized items available for purchase. The item slots in the shop are unlocked based on the highest tier of players. | ||
{| class="wikitable" style="margin:auto; text-align:center" width=50% | {| class="wikitable" style="margin:auto; text-align:center" width=50% | ||
!colspan=3|Items available in Tier Shop | !colspan=3|Items available in Tier Shop | ||
|- | |- | ||
|[[File:MKT Icon Level-boostticket1.png|80px]] | |[[File:MKT Icon Level-boostticket1.png|80px]] | ||
| Line 852: | Line 1,065: | ||
==Names in other languages== | ==Names in other languages== | ||
{{foreign names | {{foreign names | ||
| | |Jpn=ドクターツアー | ||
| | |JpnR=Dokutā Tsuā | ||
| | |JpnM=Doctor Tour | ||
|ChiS=医生巡回赛 | |ChiS=医生巡回赛 | ||
|ChiSR=Yīshēng Xúnhuísài | |ChiSR=Yīshēng Xúnhuísài | ||
| Line 868: | Line 1,081: | ||
|ItaM=Medical Tour | |ItaM=Medical Tour | ||
|Kor=닥터 투어 | |Kor=닥터 투어 | ||
|KorR= | |KorR=Dakteo Tueo | ||
|KorM=Doctor Tour | |KorM=Doctor Tour | ||
|Por=Temporada Médica | |Por=Temporada Médica | ||
Latest revision as of 14:52, March 20, 2025
| Doctor Tour | |
|---|---|

| |
| Start date | February 21, 2023 February 20, 2024 February 18, 2025 10:00 p.m. (PT)[?] |
| End date | March 7, 2023 March 5, 2024 March 4, 2025 9:59 p.m. (PT)[?] |
| Number of cups | 15 |
| Ranked cups | Chargin' Chuck Cup (week 1) Pink Gold Peach Cup (week 2) |
| Coin Rush course | RMX Bowser's Castle 1 |
| << List of tours >> | |
The Doctor Tour was the ninetieth tour of Mario Kart Tour, which began on February 22, 2023 and ended on March 7, 2023. It was rerun from February 21, 2024 to March 5, 2024 as the game's hundred-and-sixteenth tour, and was rerun a second time from February 19, 2025 to March 4, 2025 as the hundred-and-forty-second tour.
Reflecting the theme, the tour featured the return of all four doctor characters in the game and their respective Capsule Kart colors, on top of introducing a Gold Capsule Kart. The tour also introduced Shroom Ridge from Mario Kart DS as a classic course, as well as the R/T variants of RMX Choco Island 2 and Wii Coconut Mall. The tour's banner is very similar to that of the previous Doctor Tour, but replaces Dr. Luigi with Dr. Peach, switches her and Dr. Mario's positions, and features a different shot of Coconut Mall.
For this tour, players could earn the newly introduced Nabbit Parachute glider and White Shy Guy for placing high in the ranked cups, making this tour the first to feature a glider as a ranked reward.
This was the first tour since the New York Tour, the first tour of the game, to give the Gold Blooper a new favorite course. It was also the first tour since the 2022 Cat Tour nineteen tours prior to include RMX Choco Island 2, the first reappearance of N64 Luigi Raceway after its debut in the 2022 Mario vs. Luigi Tour twelve tours prior, and the first reappearance of DS Peach Gardens after its debut in the second 2022 Peach vs. Bowser Tour six tours prior.
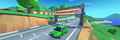
The Coin Rush course for this tour was RMX Bowser's Castle 1, which was reused from the 2022 Bowser Tour. The menu's background featured Coconut Mall as the landmark for this tour, which was reused from the 2022 Doctor Tour.
Spotlight Shop[edit]
| Week 1/2 banner items February 21, 2023, 10:00 p.m. (PT) – March 7, 2023, 9:59 p.m. (PT) February 20, 2024, 10:00 p.m. (PT) – March 5, 2024, 9:59 p.m. (PT) February 18, 2025, 10:00 p.m. (PT) – March 4, 2025, 9:59 p.m. (PT) | ||||
| Item type | Name | Cost | Contents | Banner image |
|---|---|---|---|---|
| Driver | Dr. Luigi | 105 150 rubies for 2nd and 3rd purchases respectively |
 Dr. Luigi ×1 |

|
| Week 1 banner items February 21, 2023, 10:00 p.m. (PT) – February 28, 2023, 9:59 p.m. (PT) February 20, 2024, 10:00 p.m. (PT) – February 27, 2024, 9:59 p.m. (PT) February 18, 2025, 10:00 p.m. (PT) – February 25, 2025, 9:59 p.m. (PT) | ||||
| Item type | Name | Cost | Contents | Banner image |
| Driver | Dr. Mario | 105 150 rubies for 2nd and 3rd purchases respectively |
 Dr. Mario ×1 |

|
| Glider | Magniflying Glass | 70 100 rubies for 2nd and 3rd purchases respectively |
Magniflying Glass ×1 |

|
| Week 2 banner items February 28, 2023, 10:00 p.m. (PT) – March 7, 2023, 9:59 p.m. (PT) February 27, 2024, 10:00 p.m. (PT) – March 5, 2024, 9:59 p.m. (PT) February 25, 2025, 10:00 p.m. (PT) – March 4, 2025, 9:59 p.m. (PT) | ||||
| Item type | Name | Cost | Contents | Banner image |
| Driver | Dr. Peach | 105 150 rubies for 2nd and 3rd purchases respectively |
Dr. Peach ×1 |

|
| Glider | Pink Magniflying Glass | 70 100 rubies for 2nd and 3rd purchases respectively |
Pink Magniflying Glass ×1 |

|
Daily Spotlight[edit]
The Daily Spotlight contains a mixture of items themed around the tour, items that have ranked tracks as favorites, and gold items. The rates listed are specific for that type of item; drivers, karts, and gliders are selected separately. Items marked with an asterisk (*) do not appear in the Daily Spotlight during the week they are available as Spotlight Shop banner items.
Cups[edit]
Chargin' Chuck Cup Ranked cup (week 1) |
Wii Coconut Mall |
RMX Choco Island 2R/T |
DS Shroom Ridge |
Ring Race | ||||
 RMX Bowser's Castle 1 |
Morton | |||||||
Mii Cup |
3DS Toad Circuit |
DS Twilight House (Balloon Battle) |
GBA Sky Garden T |
Take them out quick! | ||||
 N64 Luigi Raceway |
Luigi | |||||||
Pink Gold Peach Cup Ranked cup (week 2) |
DS Peach Gardens T |
DS Shroom Ridge R/T |
Wii Coconut Mall R/T |
Time Trial | ||||
 DS Peach Gardens R |
Peach | |||||||
Fire Rosalina Cup |
RMX Choco Island 2 |
N64 Luigi Raceway T |
GCN DK Mountain R/T |
Break Item Boxes | ||||
 RMX Bowser's Castle 1 |
Koopa Troopa | |||||||
Dixie Kong Cup |
RMX Vanilla Lake 1R |
DS Shroom Ridge T |
RMX Bowser's Castle 1 |
Goomba Takedown | ||||
 RMX Choco Island 2 |
Red Yoshi | |||||||
Kamek Cup |
GBA Sky Garden R |
GCN DK Mountain |
Wii Coconut Mall T |
Vs. Mega Bowser | ||||
 3DS Toad Circuit |
Any character | |||||||
King Boo Cup |
DS Peach Gardens R |
DS Shroom Ridge R |
RMX Bowser's Castle 1R |
Time Trial | ||||
 GBA Sky Garden |
Mario | |||||||
Lemmy Cup |
N64 Luigi Raceway R |
3DS Toad Circuit R |
GCN Cookie Land (Balloon Battle) |
Steer Clear of Obstacles | ||||
 RMX Choco Island 2 |
Baby Daisy | |||||||
Cat Peach Cup |
DS Shroom Ridge |
N64 Luigi Raceway |
RMX Vanilla Lake 1T |
Smash Small Dry Bones | ||||
 3DS Toad Circuit |
Daisy | |||||||
Diddy Kong Cup |
RMX Bowser's Castle 1T |
Wii Coconut Mall R |
GCN DK Mountain T |
Do Jump Boosts | ||||
 DS Shroom Ridge |
Hammer Bro | |||||||
Nabbit Cup |
3DS Toad Circuit T |
RMX Choco Island 2T |
DS Shroom Ridge T |
Big Reverse Race | ||||
 GCN DK Mountain |
Any character | |||||||
Baby Peach Cup |
DS Twilight House (Balloon Battle) |
GBA Sky Garden R/T |
DS Peach Gardens |
Combo Attack | ||||
 RMX Vanilla Lake 1T |
Birdo (Yellow) | |||||||
Funky Kong Cup |
DS Shroom Ridge R |
RMX Vanilla Lake 1 |
RMX Choco Island 2R |
Goomba Takedown | ||||
 DS Peach Gardens |
Pink Shy Guy | |||||||
Morton Cup |
GCN DK Mountain R |
GCN Cookie Land (Balloon Battle) |
3DS Toad Circuit R/T |
Big Reverse Race vs. 100 | ||||
 DS Shroom Ridge |
Toad (Pit Crew) | |||||||
Monty Mole Cup |
GBA Sky Garden |
DS Peach Gardens R/T |
DS Shroom Ridge R/T |
Steer Clear of Obstacles | ||||
 Wii Coconut Mall |
Red Koopa (Freerunning) | |||||||
Today's Challenge[edit]
Players' most recently used kart and glider are chosen, and favorite and favored ones have extra priority. Opponents are arranged randomly. On day 1 of this tour, players finish a race in 3DS Toad Circuit in the Mii Cup using the Para-Biddybud Mii Racing Suit for a free pipe launch. Starting from day 2, players have to finish a race in the earliest incomplete course that is not in any of the ranked cups using the driver shown on the course's thumbnail every day to obtain the corresponding reward in the table below. Once all of the courses are completed, the courses are selected at random.
| Day(s) | Reward |
| 1-13 | Free pipe launch |
|---|---|
| 14 |  Badge |
| Today's Challenge Pipe | |

| |
| Pipe contents | |
| Rubies, coins, driver (Normal/Super/High-End), kart (Normal/Super/High-End), glider (Normal/Super/High-End), item tickets | |
Rewards[edit]
Gold cells indicate rewards that are exclusive to Gold Pass members.
2023[edit]
| Gold Capsule Kart |
| Grand Stars | 15 | 20 | 25 | 30 | 35 | 40 | 45 | 50 | 55 | 60 | 65 | 70 | 80 | 90 | 100 | 110 | 120 | 130 | 140 | 150 | 160 | 170 | 180 | 190 | 200 | 210 | 220 | 230 | 240 | 250 | 260 | 270 | 280 | 290 | 300 | 310 | 320 | Total | Grand total | |
|---|---|---|---|---|---|---|---|---|---|---|---|---|---|---|---|---|---|---|---|---|---|---|---|---|---|---|---|---|---|---|---|---|---|---|---|---|---|---|---|---|
| Pipes | 10 | 26 | ||||||||||||||||||||||||||||||||||||||
| 16 | ||||||||||||||||||||||||||||||||||||||||
| Coins | 500 | 500 | 500 | 500 | 500 | 500 | 500 | 500 | 500 | 500 | 5000 | 15000 | ||||||||||||||||||||||||||||
| 5000 | 5000 | 10000 | ||||||||||||||||||||||||||||||||||||||
| Rubies | 10 | 5 | 3 | 3 | 21 | 56 | ||||||||||||||||||||||||||||||||||
| 15 | 10 | 10 | 35 | |||||||||||||||||||||||||||||||||||||
| Item tickets | 5 | 5 | 10 | 30 | ||||||||||||||||||||||||||||||||||||
| 10 | 10 | 20 | ||||||||||||||||||||||||||||||||||||||
| Star tickets | 2 | 3 | 5 | 5 | ||||||||||||||||||||||||||||||||||||
| 0 | ||||||||||||||||||||||||||||||||||||||||
| Quick tickets | 1 | 1 | 4 | |||||||||||||||||||||||||||||||||||||
| 3 | 3 | |||||||||||||||||||||||||||||||||||||||
| Point-boost tickets | 1 | 1 | 1 | 3 | 8 | |||||||||||||||||||||||||||||||||||
| 5 | 5 | |||||||||||||||||||||||||||||||||||||||
| 1 | 1 | 1 | 3 | 8 | ||||||||||||||||||||||||||||||||||||
| 5 | 5 | |||||||||||||||||||||||||||||||||||||||
| 1 | 1 | 1 | 3 | 8 | ||||||||||||||||||||||||||||||||||||
| 5 | 5 | |||||||||||||||||||||||||||||||||||||||
| Level-boost tickets | 3 | 22 | ||||||||||||||||||||||||||||||||||||||
(3) |
(3) |
(3) |
(2) |
(2) |
(2) |
19 | ||||||||||||||||||||||||||||||||||
2024+[edit]
| Gold Capsule Kart |
| Grand Stars | 10 | 20 | 30 | 40 | 50 | 60 | 70 | 80 | 90 | 100 | 110 | 120 | 130 | 140 | 150 | 160 | 170 | 180 | 190 | 200 | 210 | 220 | 230 | 240 | 260 | 280 | 300 | 320 | Total | Grand total | |
|---|---|---|---|---|---|---|---|---|---|---|---|---|---|---|---|---|---|---|---|---|---|---|---|---|---|---|---|---|---|---|---|
| Pipes | (10) |
14 | 31 | ||||||||||||||||||||||||||||
(10) |
17 | ||||||||||||||||||||||||||||||
| Coins | 500 | 500 | 1000 | 1000 | 1000 | 1000 | 5000 | 15000 | |||||||||||||||||||||||
| 5000 | 5000 | 10000 | |||||||||||||||||||||||||||||
| Rubies | 10 | 5 | 3 | 3 | 21 | 56 | |||||||||||||||||||||||||
| 15 | 10 | 10 | 35 | ||||||||||||||||||||||||||||
| Item tickets | 5 | 5 | 10 | 30 | |||||||||||||||||||||||||||
| 10 | 10 | 20 | |||||||||||||||||||||||||||||
| Star tickets | 2 | 3 | 5 | 5 | |||||||||||||||||||||||||||
| 0 | |||||||||||||||||||||||||||||||
| Quick tickets | 1 | 1 | 4 | ||||||||||||||||||||||||||||
| 3 | 3 | ||||||||||||||||||||||||||||||
| Point-boost tickets | 1 | 1 | 1 | 3 | 8 | ||||||||||||||||||||||||||
| 5 | 5 | ||||||||||||||||||||||||||||||
| 1 | 1 | 1 | 3 | 8 | |||||||||||||||||||||||||||
| 5 | 5 | ||||||||||||||||||||||||||||||
| 1 | 1 | 1 | 3 | 8 | |||||||||||||||||||||||||||
| 5 | 5 | ||||||||||||||||||||||||||||||
| Level-boost tickets | 3 | 22 | |||||||||||||||||||||||||||||
(3) |
(3) |
(3) |
(2) |
(2) |
(2) |
19 | |||||||||||||||||||||||||
New content[edit]
The following content was introduced during the tour's debut in 2023.
Drivers[edit]

Mii Racing Suits[edit]

Karts[edit]
Gliders[edit]
Balloon designs[edit]
Chain Chomp Balloon
Courses[edit]
DS Shroom Ridge (N, R, T, R/T)
RMX Choco Island 2 (R/T)

Wii Coconut Mall (R/T)
Paid banners[edit]
| Name | Availability | Cost | Contents | Banner image |
|---|---|---|---|---|
| Value Pack | February 22, 2023 – March 7, 2023 February 21, 2024 – March 5, 2024 February 19, 2025 – March 4, 2025 |
US$1.99 |
|

|
| Driver Point-Boost Tickets 10 Ticket Set | February 22, 2023 – March 7, 2023 February 21, 2024 – March 5, 2024 February 19, 2025 – March 4, 2025 |
US$3.99 | 
| |
| Celebrate the Doctor Tour with the Rainbow Streetle! | February 22, 2023 – March 7, 2023 February 21, 2024 – March 5, 2024 February 19, 2025 – March 4, 2025 |
US$3.99 | 
| |
| 70 Rubies and Ticket Pack | February 22, 2023 – March 7, 2023 February 21, 2024 – March 5, 2024 February 19, 2025 – March 4, 2025 |
US$19.99 | 
| |
| 150 Rubies and Ticket Pack | February 22, 2023 – March 7, 2023 February 21, 2024 – March 5, 2024 February 19, 2025 – March 4, 2025 |
US$39.99 |
|

|
Challenges[edit]
| Tour Challenges 1 | Tour Challenges 2 | Gold Challenges | ||||||||
|---|---|---|---|---|---|---|---|---|---|---|
| Completion reward: |
Completion reward: |
Completion reward: | ||||||||
 |
 |
 |
 |
 |
 |
 |
 |
 | ||
| Do 50 Jump Boosts. | Land 5 hits with Bananas. | Get a Fantastic combo a total of 5 times. | Use 10 Mushrooms. | Land 5 hits with Red Shells. | Use Lightning. | Get a combo count of ×30 or higher. | Land 5 hits with Bob-ombs. | Get 1st place 3 times in a row in 100cc or above. | ||
 |
 |
 |
 |
 |
 |
 |
 |
 | ||
| Use point-boost tickets 3 times. | Get 3rd place or higher 30 times. | Land a hit with a Blooper. | Get 1 item from the Daily Selects section of the Shop. | Earn a score of 6,000 or higher using a driver wearing earrings. | Earn a score of 7,000 or higher on 3 T or R/T courses. | Use a level-boost ticket. | Activate Frenzy mode 5 times using a driver with a mustache. | Cause opponents to crash 3 times while gliding. | ||
 |
 |
 |
 |
 |
 |
 |
 |
 | ||
| Drive a distance of 20,000 or more. | Cause opponents to crash using a Mega Mushroom. | Finish every course of every cup, including bonus challenges. | Glide a total distance of 5,000. | Earn a total score of 15,000 or higher in the Morton Cup. | Complete Coin Rush 1 time. | Cause opponents to crash in Frenzy mode. | Earn a total score of 25,000 or higher in the Monty Mole Cup. | Send Greeting Coins to a friend. | ||
| Premium Challenges | Premium Challenges+ | Premium Challenges++ | ||||||||
|---|---|---|---|---|---|---|---|---|---|---|
| Cost: US$4.99 | Cost: US$9.99 | Cost: US$19.99 | ||||||||
| Three in a row reward: |
Three in a row reward: |
Three in a row reward: | ||||||||
| Completion reward: |
Completion reward: |
Completion reward: | ||||||||
| Pipe ×1 | Pipe ×1 | Pipe ×1 | Pipe ×1 | Gold Pipe ×1 | Coins ×5,000 | Gold Pipe ×1 | Rubies ×30 | Coins ×10,000 | ||
| Land 5 hits with Green Shells. | Land 5 hits with Bananas. | Land 3 hits with Bob-ombs. | Land 10 hits with Green Shells. | Land 10 hits with Bananas. | Use 10 Mushrooms. | Land 10 hits with Red Shells. | Start a new tour. | Land 20 hits with Bananas. | ||
| Coins ×3,000 | Rubies ×10 | Point-boost ticket (Kart) ×3 | Point-boost ticket (Kart) ×5 | Rubies ×20 | Points-cap ticket (High-end kart) ×1 | Level-boost ticket (High-End driver) ×2 | Level-boost ticket (High-End kart) ×2 | Level-boost ticket (High-End glider) ×2 | ||
| Do 20 Jump Boosts. | Start a new tour. | Do 50 Mini-Turbo boosts. | Do 50 Jump Boosts. | Start a new tour. | Do 100 Mini-Turbo boosts. | Land 5 hits with Bob-ombs. | Do 100 Jump Boosts. | Do 150 Mini-Turbo boosts. | ||
| Level-boost ticket (Normal kart) ×1 | Level-boost ticket (Super kart) ×1 | Level-boost ticket (High-End kart) ×1 | Level-boost ticket (High-End driver) ×1 | Level-boost ticket (High-End kart) ×1 | Level-boost ticket (High-End glider) ×1 | Points-cap ticket (High-end driver) ×2 | Points-cap ticket (High-end kart) ×2 | Points-cap ticket (High-end glider) ×2 | ||
| Get 1st place 3 times. | Get 1st place 5 times. | Get 1st place 10 times. | Get 1st place 5 times. | Get 1st place 10 times. | Get 1st place 15 times. | Get 1st place 10 times. | Get 1st place 15 times. | Get 1st place 20 times. | ||
| Kart Pro Challenges | Tour Multiplayer Challenges | |||||
|---|---|---|---|---|---|---|
| Three in a row reward: |
Three in a row reward: | |||||
| Completion reward: |
Completion reward: | |||||
 |
 |
 |
 |
 |
 | |
| Play multiplayer. | Play multiplayer 3 times. | Play multiplayer 5 times. | Land 3 hits with Green Shells in multiplayer. | Land 3 hits with Bananas in multiplayer. | Do 3 Rocket Starts in multiplayer[sic] | |
 |
 |
 |
 |
 |
 | |
| Get 1 win in Kart Pro. | Achieve a winning streak that includes 3 1st-place wins. | Achieve a winning streak that includes 2 1st-place wins. | Land 3 hits with Red Shells in multiplayer. | Play multiplayer. | Use the Bullet Bill item in multiplayer. | |
 |
 |
 |
 |
 |
 | |
| Play multiplayer 10 times. | Get 3rd place or higher 3 times in multiplayer. | Get 3rd place or higher 5 times in multiplayer. | Do 50 Jump Boosts in multiplayer. | Do 50 Mini-Turbo boosts in multiplayer. | Cause opponents to crash 30 times in multiplayer. | |
| Total Points Challenge 1 (2023) | Total Points Challenge 2 (2023) | |||
|---|---|---|---|---|
| Points | Rewards | Points | Rewards | |
| 400,000 |
|
999,999 |
| |
| 300,000 |
|
900,000 |
| |
| 250,000 |
|
800,000 |
| |
| 200,000 |
|
700,000 |
| |
| 150,000 |
|
600,000 |
| |
| 100,000 |
|
500,000 |
| |
| Total Points Challenge 1 (2024+) | Total Points Challenge 2 (2024+) | |||
|---|---|---|---|---|
| Points | Rewards | Points | Rewards | |
| 400,000 |
|
999,999 |
| |
| 300,000 |
|
900,000 |
| |
| 250,000 |
|
800,000 |
| |
| 200,000 |
|
700,000 |
| |
| 150,000 |
|
600,000 |
| |
| 100,000 |
|
500,000 |
| |
Gold Pipe[edit]
The Gold Pipe, including the All-Clear Pipe, randomly shoots out one of the following regular High-End items. The appearance rate can be viewed via the "Pipe content" link on the Gold Pass purchase screen.
Mii Racing Suit Shop[edit]
Banner items[edit]
| Name | Cost | Contents | Banner image |
|---|---|---|---|
| Para-Biddybud Mii Racing Suit | 70 100 rubies for 2nd and 3rd purchases respectively |
Para-Biddybud Mii Racing Suit ×1 |

|
Other items[edit]
Initial run[edit]
| Items available in Mii Racing Suit Shop | ||
|---|---|---|
| Brown Mii Racing Suit Amount: 3 |
Black Mii Racing Suit Amount: 3 |
Ice-Cream Mii Racing Suit Amount: 3 |
| Cheep Cheep Mii Racing Suit Amount: 3 |
Pastry Chef Mii Racing Suit Amount: 3 |
Wario Mii Racing Suit Amount: 3 |
| Birdo Mii Racing Suit Amount: 3 |
King Bob-omb Mii Racing Suit Amount: 3 |
Donkey Kong Mii Racing Suit Amount: 3 |
Reruns[edit]
| Items available in Mii Racing Suit Shop | ||
|---|---|---|
| Peach Mii Racing Suit Amount: 3 |
Donkey Kong Mii Racing Suit Amount: 3 |
Wario Mii Racing Suit Amount: 3 |
| Pastry Chef Mii Racing Suit 70 100 rubies for 2nd and 3rd purchases respectively |
Light Blue Mii Racing Suit Amount: 3 |
Ice-Cream Mii Racing Suit Amount: 3 |
| Iggy Mii Racing Suit Amount: 3 |
Monty Mole Mii Racing Suit Amount: 3 |
Cheep Cheep Mii Racing Suit Amount: 3 |
Token Shop[edit]
The limited-time event where event tokens appear started on February 22, 2023 and ended on March 7, 2023; and started on February 21, 2024 and ended on March 5, 2024 for the first rerun; and started on February 19, 2025 and ended on March 4, 2025 for the second rerun. Event tokens could be earned by causing opponents to crash.
| Token Shop | ||
|---|---|---|
| Pipe Amount: 34 |
Ruby ×3 Amount: 5 |
Coin ×500 Amount: 5 |
| Chain Chomp Balloon Amount: 1 |
Level-boost ticket (Normal) Amount: 3 |
Level-boost ticket (Super) Amount: 2 |
Tier Shop[edit]
The shop features a variety of set and randomized items available for purchase. The item slots in the shop are unlocked based on the highest tier of players.
| Items available in Tier Shop | ||
|---|---|---|
| Level-boost ticket (Normal) Amount: 3 per week |
Level-boost ticket (Normal) Amount: 3 per week |
Level-boost ticket (Normal) Amount: 3 per week |
OR |
OR |
OR |
| Level-boost ticket (Super) Amount: 2 per week OR Level-boost ticket (High-End) Amount: 1 per week |
Level-boost ticket (Super) Amount: 2 per week OR Level-boost ticket (High-End) Amount: 1 per week |
Level-boost ticket (Super) Amount: 2 per week OR Level-boost ticket (High-End) Amount: 1 per week |
OR OR |
OR OR |
OR OR |
| Points-cap ticket (Normal) Amount: 1 per week |
Points-cap ticket (Super) Amount: 1 per week |
Points-cap ticket (High-End) Amount: 1 per week |
| Level-boost ticket (High-End) Amount: 1 per week |
Level-boost ticket (High-End) Amount: 1 per week |
Level-boost ticket (High-End) Amount: 1 per week |
Gallery[edit]
Landscape version of the loading screen

Names in other languages[edit]
| Language | Name | Meaning | Notes |
|---|---|---|---|
| Japanese | ドクターツアー[?] Dokutā Tsuā |
Doctor Tour | |
| Chinese (simplified) | 医生巡回赛[?] Yīshēng Xúnhuísài |
Doctor Tour | |
| Chinese (traditional) | 醫生巡迴賽[?] Yīshēng Xúnhuísài |
Doctor Tour | |
| French | Saison des médecins[?] | Doctors' Season | |
| German | Doktor-Tour-Saison[?] | Doctor Tour Season | |
| Italian | Tour medico[?] | Medical Tour | |
| Korean | 닥터 투어[?] Dakteo Tueo |
Doctor Tour | |
| Portuguese | Temporada Médica[?] | Medical Season | |
| Spanish | Temporada médica[?] | Medical Season |