Winter Tour (2023): Difference between revisions
Ku Zheng Kai (talk | contribs) Tag: Mobile edit |
m (Text replacement - "(\| *)Jap([RMCN\d]* *=)" to "$1Jpn$2") |
||
| (16 intermediate revisions by 9 users not shown) | |||
| Line 2: | Line 2: | ||
|title=Winter Tour | |title=Winter Tour | ||
|image=[[File:MKT Winter Tour 2023.png|200px]] | |image=[[File:MKT Winter Tour 2023.png|200px]] | ||
|start=January 24, 2023<br>January 23, 2024 | |start=January 24, 2023<br>January 23, 2024<br>January 21, 2025<br>10:00 p.m. (PT) | ||
|end=February 7, 2023<br>February 6, 2024 | |end=February 7, 2023<br>February 6, 2024<br>February 4, 2025<br>9:59 p.m. (PT) | ||
|cups=15 | |cups=15 | ||
|rank=[[Metal Mario Cup]] (week 1)<br>[[Funky Kong Cup]] (week 2) | |rank=[[Metal Mario Cup]] (week 1)<br>[[Funky Kong Cup]] (week 2) | ||
| Line 9: | Line 9: | ||
|before=[[Space Tour (2023)|<<]] | |before=[[Space Tour (2023)|<<]] | ||
|after=[[Exploration Tour (2023)|>>]] | |after=[[Exploration Tour (2023)|>>]] | ||
}} | }} | ||
The '''Winter Tour''' was the eighty-eighth tour of ''[[Mario Kart Tour]]'', which began on January 25, 2023 and ended on February 7, 2023. It | The '''Winter Tour''' was the eighty-eighth tour of ''[[Mario Kart Tour]]'', which began on January 25, 2023 and ended on February 7, 2023. It was rerun from January 24, 2024 to February 6, 2024 as the game's hundred-and-fourteenth tour, and will be rerun again from January 22, 2025 to February 4, 2025 as the hundred-and-fourty tour. | ||
The tour introduced three [[New course|new]] city courses, namely [[Tour Singapore Speedway|Singapore Speedway 3]], [[Tour Bangkok Rush|Bangkok Rush 2]], and Bangkok Rush 3, making this the first tour since the [[Halloween Tour (2019)|2019 Halloween Tour]] (the third tour of the game) to introduce three race courses, the first to introduce three city courses, and the first to introduce multiple routes of the same city simultaneously. Like the [[Summer Festival Tour]] and the [[Mario vs. Peach Tour]], the tour featured the return of the [[Tour Tokyo Blur|Tokyo Blur]] courses; additionally, the R/T variants of Tokyo Blurs 2, 3, and 4 returned for the first time. The tour's inclusion of the three {{wp|Asia}}n cities in the game, as well as Singapore Speedway 3 featuring a {{wp|Chinatown, Singapore|Chinatown}} section, may be a reference to the {{wp|Lunar New Year}}. This tour was one of three tours to have all of its race courses be city courses all set in the same continent, after the [[Metropolitan Tour]] and the [[Autumn Tour (2022)|2022 Autumn Tour]], which were set in Europe and North America respectively. | The tour introduced three [[New course|new]] city courses, namely [[Tour Singapore Speedway|Singapore Speedway 3]], [[Tour Bangkok Rush|Bangkok Rush 2]], and Bangkok Rush 3, making this the first tour since the [[Halloween Tour (2019)|2019 Halloween Tour]] (the third tour of the game) to introduce three race courses, the first to introduce three city courses, and the first to introduce multiple routes of the same city simultaneously. Like the [[Summer Festival Tour]] and the [[Mario vs. Peach Tour]], the tour featured the return of the [[Tour Tokyo Blur|Tokyo Blur]] courses; additionally, the R/T variants of Tokyo Blurs 2, 3, and 4 returned for the first time. The tour's inclusion of the three {{wp|Asia}}n cities in the game, as well as Singapore Speedway 3 featuring a {{wp|Chinatown, Singapore|Chinatown}} section, may be a reference to the {{wp|Lunar New Year}}. This tour was one of three tours to have all of its race courses be city courses all set in the same continent, after the [[Metropolitan Tour]] and the [[Autumn Tour (2022)|2022 Autumn Tour]], which were set in Europe and North America respectively. | ||
| Line 84: | Line 80: | ||
{|class="wikitable" style="margin:auto; text-align:center" | {|class="wikitable" style="margin:auto; text-align:center" | ||
!colspan=2|High-End items obtainable from Daily Spotlight during the Winter Tour | !colspan=2|High-End items obtainable from Daily Spotlight during the 2023 Winter Tour | ||
!Rate (each) | !Rate (each) | ||
|- | |- | ||
| Line 116: | Line 112: | ||
|[[Gold Glider]], [[Gold Crane]], [[Silver-and-Gold Hearts]], [[Gold Home-Field Glider]], [[Gold Tanooki Parafoil]], [[Gold Penguin Wingtip]], [[Gold Toe-Bean Balloons]], [[Gold Eggshell Glider]], [[Gold Cloud Balloons]], [[Gold Swooper]], [[Golden Wings]] | |[[Gold Glider]], [[Gold Crane]], [[Silver-and-Gold Hearts]], [[Gold Home-Field Glider]], [[Gold Tanooki Parafoil]], [[Gold Penguin Wingtip]], [[Gold Toe-Bean Balloons]], [[Gold Eggshell Glider]], [[Gold Cloud Balloons]], [[Gold Swooper]], [[Golden Wings]] | ||
|0.0910% | |0.0910% | ||
|} | |||
<br> | |||
{|class="wikitable" style="margin:auto; text-align:center" | |||
!colspan=2|High-End items obtainable from Daily Spotlight during the 2024 Winter Tour | |||
!Rate (each) | |||
|- | |||
!rowspan=3|High-End drivers | |||
|[[Princess Peach|Peach (Kimono)]], [[Mario|Mario (Hakama)]], [[Mario|Mario (Happi)]], [[Princess Peach|Peach (Happi)]] | |||
|4.7893% | |||
|- | |||
|[[Metal Mario]], [[Mario|Mario (Classic)]], [[Yoshi (species)|Black Yoshi]], [[Builder Mario|Builder Toad]], [[Pauline|Pauline (Rose)]], [[Yoshi (species)|White Yoshi]], [[Luigi|Luigi (Vacation)]]*, [[Mario|Mario (Samurai)]], [[Princess Daisy|Daisy (Farmer)]], [[Dr. Mario]], [[Luigi#Dr. Mario series|Dr. Luigi]], [[Princess Peach#Dr. Mario World|Dr. Peach]], [[Cat Mario|Cat Luigi]], [[Princess Daisy|Daisy (Sailor)]], [[Toadette|Toadette (Sailor)]], [[White Tanooki Mario]], [[Luigi|Luigi (Chef)]], [[Tanooki Mario|Kitsune Luigi]], [[Poochy]], [[Mario|Mario (Black Suit)]], [[Funky Kong]], [[Wario|Wario (Cowboy)]], [[Birdo|Birdo (Black)]], [[Birdo|Birdo (White)]], [[Petey Piranha]] | |||
|3.1928% | |||
|- | |||
|[[Yoshi (species)|Yoshi (Gold Egg)]], [[Roving Racers|Gold Koopa (Freerunning)]], [[Dry Bones|Dry Bones (Gold)]], [[Dry Bowser|Dry Bowser (Gold)]], [[Shy Guy|Shy Guy (Gold)]], [[King Boo|King Boo (Gold)]], [[King Bob-omb|King Bob-omb (Gold)]], [[Chargin' Chuck|Chargin' Chuck (Gold)]] | |||
|0.1277% | |||
|- | |||
!rowspan=3|High-End karts | |||
|[[Quickshaw]], [[Kabuki Dasher]], [[Black Kabuki Dasher]], [[Sakura Quickshaw]], [[Jukebox Buggy]], [[Tropical Truck]] | |||
|2.57% | |||
|- | |||
|[[Black B Dasher]], [[Gilded Prancer]], [[Pink Wing]], [[Festival Girl]], [[Surf Sailer]], [[Green Circuit]], [[Decal Streamliner]], [[White Turbo Yoshi]], [[Pink B Dasher Mk. 2]], [[Cream B Dasher Mk. 2]], [[Roaring Racer]]*, [[Yellow 8-Bit Pipe Frame]], [[Armored Rider]], [[Goo-Goo Pink]], [[Sweet Ride]], [[Shielded Speedster]], [[Flaming Speeder]], [[Streetle]], [[Blue Speeder]], [[Swift Talon]], [[Blazing Eagle]], [[Camo Tanooki Kart]], [[Pink Speeder]], [[Pink Sneeker]], [[Taiko Drum Dasher]], [[Sakura Sports Coupe]], [[Bright Girl]], [[Huffin Puffin Egg]], [[Jumbo Jetter]], [[Cream Classic]], [[Red Comet]], [[Black Shielded Speedster]], [[Blue Sub Scooter]], [[Dolphin Dasher]], [[Chocolate Mint Soft Swerve]], [[Black B Dasher Mk. 2]], [[Badwagon]], [[Black Penguin Slider]], [[Purple Bunny]], [[Dark Hop Rod]], [[White Turbo Birdo]], [[Piranha Pipes]], [[Goo-Goo Black]], [[Black Sneeker]], [[Rainbow Pipe Buggy]], [[Black Jingle Bell]], [[Dry Bones Dasher]], [[Wiggler Egg]] | |||
|1.71% | |||
|- | |||
|[[Gold Egg]], [[Gold Clanky Kart]], [[Gold Pipe Frame]], [[Gold Snow Skimmer]], [[Gold Pumpkin Kart]], [[Gold Bunny]], [[Gold Kiddie Kart]], [[Gold Zucchini]], [[Gold Standard]], [[Gold Double-Decker]], [[Gold Sweet Ride]], [[Gold Eagle]], [[Gold Rambi Rider]], [[Gold Jingle Bell]], [[Gold Capsule Kart]], [[Gold Paintster]], [[Gold Comet]], [[Gold Cupid's Arrow]], [[Gold Warrior Wagon]], [[Gold Driver]], [[Goo-Goo Gold]], [[Gold Wild Slugger]], [[Gold Soft Swerve]], [[Gold B Dasher]], [[Gold Train]], [[Gold Cheep Snorkel]], [[Gold Cheep Charger]], [[Gold Bullet Blaster]], [[Gold Trickster]], [[Gold Bruiser]], [[Gold Sushi Racer]], [[Gold Fish Bone Ferry]], [[Gold Pipes]] | |||
|0.07% | |||
|- | |||
!rowspan=3|High-End gliders | |||
|[[Purple Oilpaper Umbrella]], [[Full Flight]], [[Silver Manta Glider]], [[Springtime Crane]], [[Origami Glider]], [[Sakura Origami Glider]], [[White Waves Origami Glider]] | |||
|2.62% | |||
|- | |||
|[[Fireworks Parachute]], [[Safety Glider]], [[8-Bit Fire Flower]], [[8-Bit Bullet Bill]], [[Glinting Glider]], [[Sunny Surf Master]], [[Galaxy Glider]], [[Record Setter]], [[Candlelight Flight Cake]], [[Pretzel Glider]], [[8-Bit 1-Up Mushroom]], [[Tropical Balloons]], [[Fire Manta Glider]], [[Mint & Berry Balloons]], [[Vanilla & Chocolate Balloons]], [[Icy Mario's Mustache]], [[Silver Luigi's Mustache]], [[Mario's Hat Balloon]], [[Luigi's Hat Balloon]], [[Chocolate Pretzel]], [[Para-Panini]], [[Silver Candlelight Flight]], [[Autumn Leaves]], [[Calico Toe-Bean Balloons]], [[Wonderful Garnet]], [[New Year's 2023]], [[Stealth Glider]]*, [[Wonderful Diamond]], [[8-Bit Block Glider]], [[Green Emblem]], [[Mario Bros. Parafoil]], [[Wavy Great Sail]], [[Luigi Golf Cap]], [[Melon & Banana Balloons]], [[Royal Flush]], [[Banana Wingtip]], [[Nabbit Oilpaper Umbrella]], [[Dry Bowser Umbrella]], [[Bright Balloons]], [[Wario's Mustache]], [[Piranha Plant Balloons]], [[Secret Scroll]], [[Black Starchute]], [[Boo Masks]], [[Roy Oilpaper]], [[Rainbow Flappy Wings]] | |||
|1.75% | |||
|- | |||
|[[Gold Glider]], [[Gold Crane]], [[Silver-and-Gold Hearts]], [[Gold Home-Field Glider]], [[Gold Tanooki Parafoil]], [[Gold Penguin Wingtip]], [[Gold Toe-Bean Balloons]], [[Gold Eggshell Glider]], [[Gold Cloud Balloons]], [[Gold Candlelight Flight]], [[Golden Glider]], [[Gold Tulips]], [[Gold Checkered Glider]], [[Gold Bells]], [[Glittering Glider]], [[Gold Mario Golf Cap]], [[Gold Swooper]], [[Golden Wings]], [[Gold Boo Masks]], [[Gold Piranha Plant Balloons]] | |||
|0.07% | |||
|} | |} | ||
| Line 195: | Line 226: | ||
|R2=Singapore Speedway 2R/T||R2.I=SingaporeSpeedway2RT PeteyPiranha||R2.1=1,900||R2.2=3,800||R2.3=4,300||R2.4=5,300||R2.5=8,100 | |R2=Singapore Speedway 2R/T||R2.I=SingaporeSpeedway2RT PeteyPiranha||R2.1=1,900||R2.2=3,800||R2.3=4,300||R2.4=5,300||R2.5=8,100 | ||
|R3=Bangkok Rush R||R3.I=BangkokRushR DiddyKong||R3.1=1,600||R3.2=3,200||R3.3=3,600||R3.4=4,500||R3.5=6,800 | |R3=Bangkok Rush R||R3.I=BangkokRushR DiddyKong||R3.1=1,600||R3.2=3,200||R3.3=3,600||R3.4=4,500||R3.5=6,800 | ||
|CN=[[Combo Attack]]||C.I=Tour88 DiddyKongCupChallenge||CC=[[ | |CN=[[Combo Attack]]||C.I=Tour88 DiddyKongCupChallenge||CC=[[Larry]]||CT=Bangkok Rush 3T||C.1=6||C.2=12||C.3=18 | ||
}} | }} | ||
{{MKT cup table row | {{MKT cup table row | ||
| Line 254: | Line 285: | ||
==Rewards== | ==Rewards== | ||
Gold cells indicate rewards that are exclusive to Gold Pass members. | Gold cells indicate rewards that are exclusive to Gold Pass members. | ||
===2023=== | |||
{|class="wikitable" style="margin:auto; text-align:center" | {|class="wikitable" style="margin:auto; text-align:center" | ||
|- | |- | ||
| Line 335: | Line 368: | ||
|-style=background:gold | |-style=background:gold | ||
|||||||||||||||||[[File:MKT Icon Level-boostticket3.png|30px]]<br>(3)||[[File:MKT Icon Level-boostticket2.png|30px]]<br>(3)||[[File:MKT Icon Level-boostticket1.png|30px]]<br>(3)||||||[[File:MKT Icon Level-boostticket6.png|30px]]<br>(2)||[[File:MKT Icon Level-boostticket5.png|30px]]<br>(2)||[[File:MKT Icon Level-boostticket4.png|30px]]<br>(2)||||||||||||[[File:MKT Icon Level-boostticket9.png|30px]]||[[File:MKT Icon Level-boostticket8.png|30px]]||[[File:MKT Icon Level-boostticket7.png|30px]]||||||||||||||||||||[[File:MKT Icon Level-boostticket9.png|30px]]||||||||19 | |||||||||||||||||[[File:MKT Icon Level-boostticket3.png|30px]]<br>(3)||[[File:MKT Icon Level-boostticket2.png|30px]]<br>(3)||[[File:MKT Icon Level-boostticket1.png|30px]]<br>(3)||||||[[File:MKT Icon Level-boostticket6.png|30px]]<br>(2)||[[File:MKT Icon Level-boostticket5.png|30px]]<br>(2)||[[File:MKT Icon Level-boostticket4.png|30px]]<br>(2)||||||||||||[[File:MKT Icon Level-boostticket9.png|30px]]||[[File:MKT Icon Level-boostticket8.png|30px]]||[[File:MKT Icon Level-boostticket7.png|30px]]||||||||||||||||||||[[File:MKT Icon Level-boostticket9.png|30px]]||||||||19 | ||
|} | |||
===2024=== | |||
{|class="wikitable" style="margin:auto; text-align:center" | |||
|- | |||
![[File:MKT Icon GrandStar.png|20x20px]] 40 | |||
![[File:MKT Icon GrandStar.png|20x20px]] 80 | |||
|- | |||
|[[File:MKT Icon GoldUmbrella.png|75x75px]] | |||
|[[File:MKT Icon GoldQuickshaw.png|75x75px]] | |||
|- | |||
|style=background:gold|[[Gold Umbrella]] | |||
|style=background:gold|[[Gold Quickshaw]] | |||
|} | |||
<br> | |||
{|class="wikitable scrollable" style="margin:auto; text-align:center; font-size:90%" | |||
|- | |||
!Grand Stars!![[File:MKT Icon GrandStar.png|20x20px]]!!10!!20!!30!!40!!50!!60!!70!!80!!90!!100!!110!!120!!130!!140!!150!!160!!170!!180!!190!!200!!210!!220!!230!!240!!260!!280!!300!!320!!Total!!Grand total | |||
|- | |||
!rowspan=2 colspan=2|[[Pipe Cannon|Pipes]] | |||
|||[[File:MKT Icon Launch Pipe Green.png|20px]]<br>(10)||||||||||||[[File:MKT Icon Launch Pipe Green.png|20px]]||||||[[File:MKT Icon Launch Pipe Green.png|20px]]||||||||[[File:MKT Icon Launch Pipe Green.png|20px]]||||||||||||[[File:MKT Icon Launch Pipe Green.png|20px]]||||||||||||||||14 | |||
!rowspan=2|31 | |||
|-style=background:gold | |||
|||[[File:MKT Icon Launch Pipe Green.png|20px]]<br>(10)||||||[[File:MKT Icon Launch Pipe Green.png|20px]]||[[File:MKT Icon Launch Pipe Gold.png|20px]]||||||||||[[File:MKT Icon Launch Pipe Gold.png|20px]]||||||||[[File:MKT Icon Launch Pipe Green.png|20px]]||||[[File:MKT Icon Launch Pipe Green.png|20px]]||||||||[[File:MKT Icon Launch Pipe Green.png|20px]]||||||||[[File:MKT Icon Launch Pipe Green.png|20px]]||||||||17 | |||
|- | |||
!rowspan=2|[[Coin]]s | |||
!rowspan=2|[[File:MKT Icon Coins 2.png|50x50px]] | |||
|500||||||500||||1000||||||1000||||||||||||||||1000||||||||||||||||1000||||||||5000 | |||
!rowspan=2|15000 | |||
|-style=background:gold | |||
|5000||||||5000||||||||||||||||||||||||||||||||||||||||||||||||||10000 | |||
|- | |||
!rowspan=2|[[Ruby|Rubies]] | |||
!rowspan=2|[[File:MKT Icon 1Ruby.png|50x50px]] | |||
|10||||||5||||3||||||||||3||||||||||||||||||||||||||||||||||||21 | |||
!rowspan=2|56 | |||
|-style=background:gold | |||
|15||||||||||10||||||||||10||||||||||||||||||||||||||||||||||||35 | |||
|- | |||
!rowspan=2|[[Item ticket]]s | |||
!rowspan=2|[[File:MKT Icon ItemTicket.png|50x50px]] | |||
|||||5||||||||||||||||||||||||||5||||||||||||||||||||||||||10 | |||
!rowspan=2|30 | |||
|-style=background:gold | |||
|||||10||||||||||||||||||||||||||10||||||||||||||||||||||||||20 | |||
|- | |||
!rowspan=2|[[Star ticket]]s | |||
!rowspan=2|[[File:MKT Icon StarTicket.png|50x50px]] | |||
|||||||||2||||||||||3||||||||||||||||||||||||||||||||||||||5 | |||
!rowspan=2|5 | |||
|-style=background:gold | |||
|||||||||||||||||||||||||||||||||||||||||||||||||||||||||0 | |||
|- | |||
!rowspan=2|[[Quick ticket]]s | |||
!rowspan=2|[[File:MKT Icon QuickTicket.png|50x50px]] | |||
|||||||||||||1||||||||||||||||||||||||||||||||||||||||||||1 | |||
!rowspan=2|4 | |||
|-style=background:gold | |||
|||||||||||||3||||||||||||||||||||||||||||||||||||||||||||3 | |||
|- | |||
!rowspan=6|[[Point-boost ticket]]s | |||
!rowspan=2|[[File:MKT Icon Point-boostticket1.png|50x50px]] | |||
|||||||||||||||||||||||||||1||||||||||||1||||||||1||||||||||3 | |||
!rowspan=2|8 | |||
|-style=background:gold | |||
|||||||||||||||||||||||||||||||||||||||||||||||5||||||||||5 | |||
|- | |||
!rowspan=2|[[File:MKT Icon Point-boostticket2.png|50x50px]] | |||
|||||||||||||||||||||||||1||||||||||||1||||||||1||||||||||||3 | |||
!rowspan=2|8 | |||
|-style=background:gold | |||
|||||||||||||||||||||||||||||||||||||||||||||5||||||||||||5 | |||
|- | |||
!rowspan=2|[[File:MKT Icon Point-boostticket3.png|50x50px]] | |||
|||||||||||||||||||||||1||||||||||||1||||||||1||||||||||||||3 | |||
!rowspan=2|8 | |||
|-style=background:gold | |||
|||||||||||||||||||||||||||||||||||||||||||5||||||||||||||5 | |||
|- | |||
!rowspan=2 colspan=2|[[Level-boost ticket]]s | |||
|||||||||||||||||||||||||||||||||||||||||||||||||||[[File:MKT Icon Level-boostticket3.png|30px]]||[[File:MKT Icon Level-boostticket6.png|30px]]||[[File:MKT Icon Level-boostticket9.png|30px]]||3 | |||
!rowspan=2|22 | |||
|-style=background:gold | |||
|||||||||||||||[[File:MKT Icon Level-boostticket3.png|30px]]<br>(3)||[[File:MKT Icon Level-boostticket2.png|30px]]<br>(3)||[[File:MKT Icon Level-boostticket1.png|30px]]<br>(3)||||[[File:MKT Icon Level-boostticket6.png|30px]]<br>(2)||[[File:MKT Icon Level-boostticket5.png|30px]]<br>(2)||[[File:MKT Icon Level-boostticket4.png|30px]]<br>(2)||||||||[[File:MKT Icon Level-boostticket9.png|30px]]||[[File:MKT Icon Level-boostticket8.png|30px]]||[[File:MKT Icon Level-boostticket7.png|30px]]||||||||||||[[File:MKT Icon Level-boostticket9.png|30px]]||||||19 | |||
|} | |} | ||
==New content== | ==New content== | ||
The following content was introduced during the tour's debut in 2023. | |||
===Drivers=== | ===Drivers=== | ||
<gallery> | <gallery> | ||
| Line 389: | Line 507: | ||
|- | |- | ||
|'''Value Pack''' | |'''Value Pack''' | ||
|January 25, 2023 – February 7, 2023 | |January 25, 2023 – February 7, 2023<br>January 24, 2024 – February 6, 2024 | ||
|US$1.99 | |US$1.99 | ||
|[[File:MKT Icon Ruby.png|30px]] [[Ruby|Rubies]] ×6<br> | |[[File:MKT Icon Ruby.png|30px]] [[Ruby|Rubies]] ×6<br> | ||
| Line 397: | Line 515: | ||
|- | |- | ||
|'''Driver Point-Boost Tickets 10 Ticket Set''' | |'''Driver Point-Boost Tickets 10 Ticket Set''' | ||
|January 25, 2023 – February 7, 2023 | |January 25, 2023 – February 7, 2023<br>January 24, 2024 – February 6, 2024 | ||
|US$3.99 | |US$3.99 | ||
|[[File:MKT Icon Point-boostticket1.png|30px]] [[Point-boost ticket|Driver point-boost ticket]] ×10 | |[[File:MKT Icon Point-boostticket1.png|30px]] [[Point-boost ticket|Driver point-boost ticket]] ×10 | ||
| Line 403: | Line 521: | ||
|- | |- | ||
|'''Enjoy the Winter Tour with the Hot Pot Hot Rod kart!''' | |'''Enjoy the Winter Tour with the Hot Pot Hot Rod kart!''' | ||
|January 25, 2023 – February 7, 2023 | |January 25, 2023 – February 7, 2023<br>January 24, 2024 – February 6, 2024 | ||
|US$3.99 | |US$3.99 | ||
|[[File:MKT Icon HotPotHotRod.png|30px]] [[Hot Pot Hot Rod]] ×1 | |[[File:MKT Icon HotPotHotRod.png|30px]] [[Hot Pot Hot Rod]] ×1 | ||
| Line 409: | Line 527: | ||
|- | |- | ||
|'''Celebrate the Winter Tour with the Pineapple 1 kart!''' | |'''Celebrate the Winter Tour with the Pineapple 1 kart!''' | ||
|January 25, 2023 – February 7, 2023 | |January 25, 2023 – February 7, 2023<br>January 24, 2024 – February 6, 2024 | ||
|US$3.99 | |US$3.99 | ||
|[[File:MKT Icon Pineapple1.png|30px]] [[Pineapple 1]] ×1 | |[[File:MKT Icon Pineapple1.png|30px]] [[Pineapple 1]] ×1 | ||
| Line 415: | Line 533: | ||
|- | |- | ||
|'''70 Rubies and Ticket Pack''' | |'''70 Rubies and Ticket Pack''' | ||
|January 25, 2023 – February 7, 2023 | |January 25, 2023 – February 7, 2023<br>January 24, 2024 – February 6, 2024 | ||
|US$19.99 | |US$19.99 | ||
|[[File:MKT Icon Ruby 4.png|30px]] [[Ruby|Rubies]] ×70<br> | |[[File:MKT Icon Ruby 4.png|30px]] [[Ruby|Rubies]] ×70<br> | ||
| Line 423: | Line 541: | ||
|- | |- | ||
|'''150 Rubies and Ticket Pack''' | |'''150 Rubies and Ticket Pack''' | ||
|January 25, 2023 – February 7, 2023 | |January 25, 2023 – February 7, 2023<br>January 24, 2024 – February 6, 2024 | ||
|US$39.99 | |US$39.99 | ||
|[[File:MKT Icon Ruby 5.png|30px]] [[Ruby|Rubies]] ×150<br> | |[[File:MKT Icon Ruby 5.png|30px]] [[Ruby|Rubies]] ×150<br> | ||
| Line 435: | Line 553: | ||
|TCR1=[[File:MKT Icon CoinRushTicket.png|70px]] [[Coin Rush ticket]] ×1 | |TCR1=[[File:MKT Icon CoinRushTicket.png|70px]] [[Coin Rush ticket]] ×1 | ||
|T1.1=115 | |T1.1=115 | ||
|T1.1E=Do 5 {{Color | |T1.1E=Do 5 {{Color link|#A1A1FF|Rocket Start|Rocket Starts}}. | ||
|T1.1S=1 | |T1.1S=1 | ||
|T1.2=018 | |T1.2=018 | ||
|T1.2E=Land 3 hits with {{Color | |T1.2E=Land 3 hits with {{Color link|#A1A1FF|Green Shell|Green Shells}}. | ||
|T1.2S=1 | |T1.2S=1 | ||
|T1.3=420 | |T1.3=420 | ||
| Line 444: | Line 562: | ||
|T1.3S=1 | |T1.3S=1 | ||
|T1.4=072 | |T1.4=072 | ||
|T1.4E=Use {{Color | |T1.4E=Use {{Color link|#A1A1FF|point-boost ticket|point-boost tickets}} 3 times. | ||
|T1.4S=2 | |T1.4S=2 | ||
|T1.5=001 | |T1.5=001 | ||
| Line 450: | Line 568: | ||
|T1.5S=2 | |T1.5S=2 | ||
|T1.6=421 | |T1.6=421 | ||
|T1.6E=Do 30 {{Color | |T1.6E=Do 30 {{Color link|#A1A1FF|Jump Boost|Jump Boosts}} on a city course. | ||
|T1.6S=2 | |T1.6S=2 | ||
|T1.7=007 | |T1.7=007 | ||
| Line 456: | Line 574: | ||
|T1.7S=2 | |T1.7S=2 | ||
|T1.8=205 | |T1.8=205 | ||
|T1.8E=Land a hit with a {{Color | |T1.8E=Land a hit with a {{Color link|#A1A1FF|Blooper}}. | ||
|T1.8S=2 | |T1.8S=2 | ||
|T1.9=367 | |T1.9=367 | ||
| Line 463: | Line 581: | ||
|TCR2=[[File:MKT Icon QuickTicket.png|70px]] [[Quick ticket]] ×1 | |TCR2=[[File:MKT Icon QuickTicket.png|70px]] [[Quick ticket]] ×1 | ||
|T2.1=117 | |T2.1=117 | ||
|T2.1E=Do a total of 5 {{Color | |T2.1E=Do a total of 5 {{Color link|#A1A1FF|Slipstream}} boosts. | ||
|T2.1S=1 | |T2.1S=1 | ||
|T2.2=049 | |T2.2=049 | ||
|T2.2E=Land 5 hits with {{Color | |T2.2E=Land 5 hits with {{Color link|#A1A1FF|Banana|Bananas}}. | ||
|T2.2S=1 | |T2.2S=1 | ||
|T2.3=409 | |T2.3=409 | ||
| Line 484: | Line 602: | ||
|T2.7S=2 | |T2.7S=2 | ||
|T2.8=160 | |T2.8=160 | ||
|T2.8E=Earn a total score of 15,000 or higher in the {{Color | |T2.8E=Earn a total score of 15,000 or higher in the {{Color link|#A1A1FF|Diddy Kong Cup}}. | ||
|T2.8S=2 | |T2.8S=2 | ||
|T2.9=101 | |T2.9=101 | ||
| Line 494: | Line 612: | ||
|G.1S=1 | |G.1S=1 | ||
|G.2=175 | |G.2=175 | ||
|G.2E=Land 10 hits with {{Color | |G.2E=Land 10 hits with {{Color link|#A1A1FF|Red Shell|Red Shells}}. | ||
|G.2S=1 | |G.2S=1 | ||
|G.3=001 | |G.3=001 | ||
| Line 500: | Line 618: | ||
|G.3S=1 | |G.3S=1 | ||
|G.4=426 | |G.4=426 | ||
|G.4E=Use a {{Color | |G.4E=Use a {{Color link|#A1A1FF|level-boost ticket}}. | ||
|G.4S=2 | |G.4S=2 | ||
|G.5=061 | |G.5=061 | ||
|G.5E=Activate {{Color | |G.5E=Activate {{Color link|#A1A1FF|Frenzy}} mode 5 times using a driver with a mustache. | ||
|G.5S=2 | |G.5S=2 | ||
|G.6=367 | |G.6=367 | ||
| Line 512: | Line 630: | ||
|G.7S=2 | |G.7S=2 | ||
|G.8=166 | |G.8=166 | ||
|G.8E=Earn a total score of 20,000 or higher in the {{Color | |G.8E=Earn a total score of 20,000 or higher in the {{Color link|#A1A1FF|Lakitu Cup}}. | ||
|G.8S=2 | |G.8S=2 | ||
|G.9=409 | |G.9=409 | ||
|G.9E=Complete {{Color | |G.9E=Complete {{Color link|#A1A1FF|Coin Rush (Mario Kart Tour)|Coin Rush}} 1 time. | ||
|G.9S=2 | |G.9S=2 | ||
}} | }} | ||
| Line 579: | Line 697: | ||
|width=10% style="background:linear-gradient(#F2E18F,#B9800F)"|[[File:MKT Icon Level-boostticket9.png|70px]] | |width=10% style="background:linear-gradient(#F2E18F,#B9800F)"|[[File:MKT Icon Level-boostticket9.png|70px]] | ||
|-style="color: #FFF" | |-style="color: #FFF" | ||
|style="background:linear-gradient(#864D00,#A26000); border-top:1px solid #B9800F;"|{{Color | |style="background:linear-gradient(#864D00,#A26000); border-top:1px solid #B9800F;"|{{Color link|#A1A1FF|Coins}} ×3,000 | ||
|style="background:linear-gradient(#864D00,#A26000); border-top:1px solid #B9800F;"|{{Color | |style="background:linear-gradient(#864D00,#A26000); border-top:1px solid #B9800F;"|{{Color link|#A1A1FF|Ruby|Rubies}} ×10 | ||
|style="background:linear-gradient(#864D00,#A26000); border-top:1px solid #B9800F;"|{{Color | |style="background:linear-gradient(#864D00,#A26000); border-top:1px solid #B9800F;"|{{Color link|#A1A1FF|Point-boost ticket}} (Glider) ×3 | ||
|style="background:linear-gradient(#864D00,#A26000); border-top:1px solid #B9800F;"|Point-boost ticket (Glider) ×5 | |style="background:linear-gradient(#864D00,#A26000); border-top:1px solid #B9800F;"|Point-boost ticket (Glider) ×5 | ||
|style="background:linear-gradient(#864D00,#A26000); border-top:1px solid #B9800F;"|Rubies ×20 | |style="background:linear-gradient(#864D00,#A26000); border-top:1px solid #B9800F;"|Rubies ×20 | ||
|style="background:linear-gradient(#864D00,#A26000); border-top:1px solid #B9800F;"|{{Color | |style="background:linear-gradient(#864D00,#A26000); border-top:1px solid #B9800F;"|{{Color link|#A1A1FF|Points-cap ticket}} (High-end glider) ×1 | ||
|style="background:linear-gradient(#864D00,#A26000); border-top:1px solid #B9800F;"|Level-boost ticket (High-End driver) ×2 | |style="background:linear-gradient(#864D00,#A26000); border-top:1px solid #B9800F;"|Level-boost ticket (High-End driver) ×2 | ||
|style="background:linear-gradient(#864D00,#A26000); border-top:1px solid #B9800F;"|Level-boost ticket (High-End kart) ×2 | |style="background:linear-gradient(#864D00,#A26000); border-top:1px solid #B9800F;"|Level-boost ticket (High-End kart) ×2 | ||
| Line 609: | Line 727: | ||
|width=10% style="background:linear-gradient(#F2E18F,#B9800F)"|[[File:MKT Icon Points-capticket9.png|70px]] | |width=10% style="background:linear-gradient(#F2E18F,#B9800F)"|[[File:MKT Icon Points-capticket9.png|70px]] | ||
|-style="color: #FFF" | |-style="color: #FFF" | ||
|style="background:linear-gradient(#864D00,#A26000); border-top:1px solid #B9800F;"|{{Color | |style="background:linear-gradient(#864D00,#A26000); border-top:1px solid #B9800F;"|{{Color link|#A1A1FF|Level-boost ticket}} (Normal glider) ×1 | ||
|style="background:linear-gradient(#864D00,#A26000); border-top:1px solid #B9800F;"|Level-boost ticket (Super glider) ×1 | |style="background:linear-gradient(#864D00,#A26000); border-top:1px solid #B9800F;"|Level-boost ticket (Super glider) ×1 | ||
|style="background:linear-gradient(#864D00,#A26000); border-top:1px solid #B9800F;"|Level-boost ticket (High-End glider) ×1 | |style="background:linear-gradient(#864D00,#A26000); border-top:1px solid #B9800F;"|Level-boost ticket (High-End glider) ×1 | ||
| Line 719: | Line 837: | ||
[[File:MKT Icon Level-boostticket5.png|30px]] Level-boost ticket (Super kart) ×1 | [[File:MKT Icon Level-boostticket5.png|30px]] Level-boost ticket (Super kart) ×1 | ||
|} | |} | ||
<br> | |||
{|class="wikitable" style="margin:auto; text-align:center" width=65% | {|class="wikitable" style="margin:auto; text-align:center" width=65% | ||
!colspan=2 width=30%|Total Points Challenge 1 (2024) | !colspan=2 width=30%|Total Points Challenge 1 (2024) | ||
| Line 731: | Line 849: | ||
|- | |- | ||
!400,000 | !400,000 | ||
|<br> | |[[File:MKT Icon 1Ruby.png|20px]] [[Ruby|Rubies]] ×3<br> | ||
[[File:MKT Icon Point-boostticket1.png|30px]] [[Point-boost ticket]]s (driver) ×5<br> | |||
[[File:MKT Icon Point-boostticket2.png|30px]] Point-boost tickets (kart) ×5<br> | |||
[[File:MKT Icon Point-boostticket3.png|30px]] Point-boost tickets (glider) ×5 | |||
!999,999 | !999,999 | ||
|<br> | |[[File:MKT Icon 1Ruby.png|20px]] [[Ruby|Rubies]] ×3<br> | ||
[[File:MKT Icon Point-boostticket1.png|30px]] Point-boost tickets (driver) ×5<br> | |||
[[File:MKT Icon Point-boostticket2.png|30px]] Point-boost tickets (kart) ×5<br> | |||
[[File:MKT Icon Point-boostticket3.png|30px]] Point-boost tickets (glider) ×5 | |||
|- | |- | ||
!300,000 | !300,000 | ||
|<br> | |[[File:MKT Icon Coins 2.png|30px]] [[Coin]]s ×500<br> | ||
[[File:MKT Icon ItemTicket.png|30px]] [[Item ticket]]s ×10<br> | |||
[[File:MKT Icon StarTicket.png|30px]] [[Star ticket]]s ×3 | |||
!900,000 | !900,000 | ||
|<br> | |[[File:MKT Icon Coins 2.png|30px]] Coins ×500<br> | ||
[[File:MKT Icon ItemTicket.png|30px]] Item tickets ×10<br> | |||
[[File:MKT Icon QuickTicket.png|30px]] Quick ticket ×1 | |||
|- | |- | ||
!250,000 | !250,000 | ||
|<br> | |[[File:MKT Icon Coins 2.png|30px]] Coins ×500<br> | ||
[[File:MKT Icon Points-capticket5.png|30px]] Points-cap ticket (Super kart) ×1<br> | |||
[[File:MKT Icon ItemTicket.png|30px]] Item tickets ×2 | |||
!800,000 | !800,000 | ||
|<br> | |[[File:MKT Icon Coins 2.png|30px]] Coins ×500<br> | ||
[[File:MKT Icon Points-capticket8.png|30px]] Points-cap ticket (High-End kart) ×1<br> | |||
[[File:MKT Icon QuickTicket.png|30px]] Quick ticket ×1 | |||
|- | |- | ||
!200,000 | !200,000 | ||
|<br> | |[[File:MKT Icon Coins 2.png|30px]] Coins ×500<br> | ||
[[File:MKT Icon Level-boostticket5.png|30px]] Level-boost ticket (Super kart) ×1<br> | |||
[[File:MKT Icon ItemTicket.png|30px]] Item tickets ×2 | |||
!700,000 | !700,000 | ||
|<br> | |[[File:MKT Icon Coins 2.png|30px]] Coins ×500<br> | ||
[[File:MKT Icon Level-boostticket8.png|30px]] Level-boost ticket (High-End kart) ×1<br> | |||
[[File:MKT Icon QuickTicket.png|30px]] Quick ticket ×1 | |||
|- | |- | ||
!150,000 | !150,000 | ||
|<br> | |[[File:MKT Icon Coins 2.png|30px]] Coins ×500<br> | ||
[[File:MKT Icon Points-capticket2.png|30px]] [[Points-cap ticket]] (Normal kart) ×1<br> | |||
[[File:MKT Icon ItemTicket.png|30px]] Item tickets ×2 | |||
!600,000 | !600,000 | ||
|<br> | |[[File:MKT Icon Coins 2.png|30px]] Coins ×500<br> | ||
[[File:MKT Icon Points-capticket5.png|30px]] Points-cap ticket (Super kart) ×1<br> | |||
[[File:MKT Icon ItemTicket.png|30px]] Item tickets ×3 | |||
|- | |- | ||
!100,000 | !100,000 | ||
|<br> | |[[File:MKT Icon Coins 2.png|30px]] Coins ×500<br> | ||
[[File:MKT Icon Level-boostticket2.png|30px]] [[Level-boost ticket]] (Normal kart) ×1<br> | |||
[[File:MKT Icon ItemTicket.png|30px]] Item tickets ×2 | |||
!500,000 | !500,000 | ||
|<br> | |[[File:MKT Icon Coins 2.png|30px]] Coins ×500<br> | ||
[[File:MKT Icon Level-boostticket5.png|30px]] Level-boost ticket (Super kart) ×1<br> | |||
[[File:MKT Icon ItemTicket.png|30px]] Item tickets ×3 | |||
|} | |} | ||
| Line 917: | Line 1,061: | ||
==Names in other languages== | ==Names in other languages== | ||
{{Foreign names | {{Foreign names | ||
| | |Jpn=ウィンターツアー | ||
| | |JpnR=Wintā Tsuā | ||
| | |JpnM=Winter Tour | ||
|ChiS=冬季巡回赛 | |ChiS=冬季巡回赛 | ||
|ChiSR=Dōngjì Xúnhuísài | |ChiSR=Dōngjì Xúnhuísài | ||
| Line 940: | Line 1,084: | ||
|SpaM=Winter Season | |SpaM=Winter Season | ||
}} | }} | ||
==Trivia== | |||
*In the [[Big Reverse Race]] during the tour's original run, the Mario opponent would not be replaced by another driver if the player also played as Mario.<ref>JoshuaGames7007 (January 28, 2023). [https://www.youtube.com/watch?v=DVY4LYbFvTk&t=75s Big Reverse Race with my Mario Characters in Singapore Speedway 3 (Part 1 of 3) | Mario Kart Tour]. ''YouTube''. Retrieved February 2, 2024.</ref> He was changed to [[Koopa Troopa]] in the tour's re-run. | |||
==References== | |||
<references/> | |||
{{MKT}} | {{MKT}} | ||
[[Category:Mario Kart Tour tours]] | [[Category:Mario Kart Tour tours]] | ||
[[it:Tour invernale (2023)]] | [[it:Tour invernale (2023)]] | ||
Latest revision as of 16:20, January 7, 2025
| Winter Tour | |
|---|---|

| |
| Start date | January 24, 2023 January 23, 2024 January 21, 2025 10:00 p.m. (PT)[?] |
| End date | February 7, 2023 February 6, 2024 February 4, 2025 9:59 p.m. (PT)[?] |
| Number of cups | 15 |
| Ranked cups | Metal Mario Cup (week 1) Funky Kong Cup (week 2) |
| Coin Rush course | Singapore Speedway |
| << List of tours >> | |
The Winter Tour was the eighty-eighth tour of Mario Kart Tour, which began on January 25, 2023 and ended on February 7, 2023. It was rerun from January 24, 2024 to February 6, 2024 as the game's hundred-and-fourteenth tour, and will be rerun again from January 22, 2025 to February 4, 2025 as the hundred-and-fourty tour.
The tour introduced three new city courses, namely Singapore Speedway 3, Bangkok Rush 2, and Bangkok Rush 3, making this the first tour since the 2019 Halloween Tour (the third tour of the game) to introduce three race courses, the first to introduce three city courses, and the first to introduce multiple routes of the same city simultaneously. Like the Summer Festival Tour and the Mario vs. Peach Tour, the tour featured the return of the Tokyo Blur courses; additionally, the R/T variants of Tokyo Blurs 2, 3, and 4 returned for the first time. The tour's inclusion of the three Asian cities in the game, as well as Singapore Speedway 3 featuring a Chinatown section, may be a reference to the Lunar New Year. This tour was one of three tours to have all of its race courses be city courses all set in the same continent, after the Metropolitan Tour and the 2022 Autumn Tour, which were set in Europe and North America respectively.
The Big Reverse Race vs. 100 bonus challenge, which was announced in the Bangkok Tour fifteen tours prior, debuted in this tour.
A Winterfest began in this tour and lasted until the end of the following tour.
The Coin Rush course of this tour was Singapore Speedway, which was reused from the Singapore Tour. The menu's background featured Marina Bay Sands and the Singapore Flyer as the landmarks for this tour, which were also reused from the Singapore Tour.
Spotlight Shop[edit]
| Week 1 banner items January 24, 2023, 10:00 p.m. (PT) – January 31, 2023, 9:59 p.m. (PT) | ||||
| Item type | Name | Cost | Contents | Banner image |
|---|---|---|---|---|
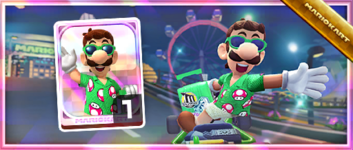
| Driver | Luigi (Vacation) | 105 150 rubies for 2nd and 3rd purchases respectively |
 Luigi (Vacation) ×1 |
|
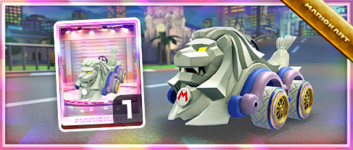
| Kart | Roaring Racer | 70 100 rubies for 2nd and 3rd purchases respectively |
Roaring Racer ×1 |
|
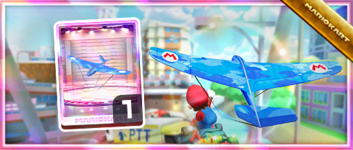
| Glider | Stealth Glider | 70 100 rubies for 2nd and 3rd purchases respectively |
Stealth Glider ×1 |
|
| Week 2 banner items January 31, 2023, 10:00 p.m. (PT) – February 7, 2023, 9:59 p.m. (PT) | ||||
| Item type | Name | Cost | Contents | Banner image |
| Driver | Daisy (Thai Dress) | 105 150 rubies for 2nd and 3rd purchases respectively |
 Daisy (Thai Dress) ×1 |

|
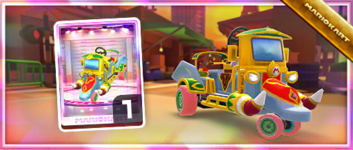
| Kart | Tuk-Tuk Kart | 70 100 rubies for 2nd and 3rd purchases respectively |
Tuk-Tuk Kart ×1 |
|
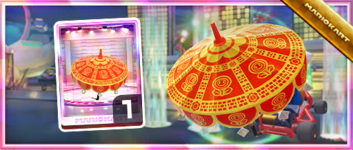
| Glider | Red and Gold Umbrella | 70 100 rubies for 2nd and 3rd purchases respectively |
Red and Gold Umbrella ×1 |
|
Daily Spotlight[edit]
The Daily Spotlight contains a mixture of items themed around the tour, items that have ranked tracks as favorites, and gold items. The rates listed are specific for that type of item; drivers, karts, and gliders are selected separately. Items marked with an asterisk (*) do not appear in the Daily Spotlight during the week they are available as Spotlight Shop banner items.
Cups[edit]
Metal Mario Cup Ranked cup (week 1) |
Singapore Speedway 3 |
Tokyo Blur 3T |
Bangkok Rush 2R |
Time Trial | ||||
 Tokyo Blur 4 |
Red Koopa (Freerunning) | |||||||
Mii Cup |
Bangkok Rush |
Singapore Speedway 2T |
Tokyo Blur R |
Goomba Takedown | ||||
 Tokyo Blur 2 |
Peach | |||||||
Funky Kong Cup Ranked cup (week 2) |
Tokyo Blur 4T |
Bangkok Rush 3 |
Singapore Speedway 3R/T |
Ring Race | ||||
 Bangkok Rush |
Daisy | |||||||
Birdo Cup |
GBA Battle Course 1 (Balloon Battle) |
Singapore Speedway T |
Tokyo Blur 2 |
Steer Clear of Obstacles | ||||
 Singapore Speedway 3 |
Diddy Kong | |||||||
Pink Gold Peach Cup |
Tokyo Blur 4R |
Bangkok Rush 2 |
Tokyo Blur 3R/T |
Vs. Mega Donkey Kong | ||||
 Tokyo Blur 2 |
Any character | |||||||
Toadette Cup |
Singapore Speedway 3R |
Tokyo Blur 2R/T |
Bangkok Rush 3T |
Time Trial | ||||
 Singapore Speedway R |
Waluigi | |||||||
Waluigi Cup |
Tokyo Blur |
Singapore Speedway 3T |
DS Twilight House (Balloon Battle) |
Ring Race | ||||
 Tokyo Blur 3 |
Lakitu | |||||||
Daisy Cup |
Singapore Speedway |
Tokyo Blur 3 |
Bangkok Rush T |
Smash Small Dry Bones | ||||
 Singapore Speedway 2 |
Red Koopa (Freerunning) | |||||||
Wario Cup |
Tokyo Blur 2R |
Bangkok Rush 2R/T |
Singapore Speedway 2 |
Do Jump Boosts | ||||
 Tokyo Blur |
Peachette | |||||||
Baby Daisy Cup |
Bangkok Rush 3R |
Singapore Speedway R/T |
Tokyo Blur R/T |
Time Trial | ||||
 Bangkok Rush 2 |
Fire Bro | |||||||
Diddy Kong Cup |
Tokyo Blur 2T |
Singapore Speedway 2R/T |
Bangkok Rush R |
Combo Attack | ||||
 Bangkok Rush 3T |
Larry | |||||||
Baby Peach Cup |
Singapore Speedway R |
Bangkok Rush 2T |
Tokyo Blur T |
Big Reverse Race | ||||
 Singapore Speedway 3 |
Any character | |||||||
Mario Cup |
Bangkok Rush 3R/T |
Tokyo Blur 4 |
GBA Battle Course 1 (Balloon Battle) |
Break Item Boxes | ||||
 Tokyo Blur 2 |
Mario (Hakama) | |||||||
Lakitu Cup |
Tokyo Blur 3R |
Bangkok Rush R/T |
Singapore Speedway 2R |
Glider Challenge | ||||
 Tokyo Blur |
Mario (Hakama) | |||||||
Cat Peach Cup |
DS Twilight House (Balloon Battle) |
Singapore Speedway 3R/T |
Tokyo Blur 4R/T |
Big Reverse Race vs. 100 | ||||
 Bangkok Rush |
Mario | |||||||
Today's Challenge[edit]
Players' most recently used kart and glider are chosen, and favorite and favored ones have extra priority. Opponents are arranged randomly. On day 1 of this tour, players finish a race in Bangkok Rush in the Mii Cup using the Roaring Racer Mii Racing Suit for a free pipe launch. Starting from day 2, players have to finish a race in the earliest incomplete course that is not in any of the ranked cups using the driver shown on the course's thumbnail every day to obtain the corresponding reward in the table below. Once all of the courses are completed, the courses are selected at random.
The badge for this tour's Today's Challenge is reused from the Singapore Tour.
| Day(s) | Reward |
| 1-13 | Free pipe launch |
|---|---|
| 14 |  Badge |
| Today's Challenge Pipe | |

| |
| Pipe contents | |
| Rubies, coins, driver (Normal/Super/High-End), kart (Normal/Super/High-End), glider (Normal/Super/High-End), item tickets | |
Rewards[edit]
Gold cells indicate rewards that are exclusive to Gold Pass members.
2023[edit]
| Gold Umbrella | Gold Quickshaw |
| Grand Stars | 15 | 20 | 25 | 30 | 35 | 40 | 45 | 50 | 55 | 60 | 65 | 70 | 80 | 90 | 100 | 110 | 120 | 130 | 140 | 150 | 160 | 170 | 180 | 190 | 200 | 210 | 220 | 230 | 240 | 250 | 260 | 270 | 280 | 290 | 300 | 310 | 320 | Total | Grand total | |
|---|---|---|---|---|---|---|---|---|---|---|---|---|---|---|---|---|---|---|---|---|---|---|---|---|---|---|---|---|---|---|---|---|---|---|---|---|---|---|---|---|
| Pipes | 10 | 26 | ||||||||||||||||||||||||||||||||||||||
| 16 | ||||||||||||||||||||||||||||||||||||||||
| Coins | 500 | 500 | 500 | 500 | 500 | 500 | 500 | 500 | 500 | 500 | 5000 | 15000 | ||||||||||||||||||||||||||||
| 5000 | 5000 | 10000 | ||||||||||||||||||||||||||||||||||||||
| Rubies | 10 | 5 | 3 | 3 | 21 | 56 | ||||||||||||||||||||||||||||||||||
| 15 | 10 | 10 | 35 | |||||||||||||||||||||||||||||||||||||
| Item tickets | 5 | 5 | 10 | 30 | ||||||||||||||||||||||||||||||||||||
| 10 | 10 | 20 | ||||||||||||||||||||||||||||||||||||||
| Star tickets | 2 | 3 | 5 | 5 | ||||||||||||||||||||||||||||||||||||
| 0 | ||||||||||||||||||||||||||||||||||||||||
| Quick tickets | 1 | 1 | 4 | |||||||||||||||||||||||||||||||||||||
| 3 | 3 | |||||||||||||||||||||||||||||||||||||||
| Point-boost tickets | 1 | 1 | 1 | 3 | 8 | |||||||||||||||||||||||||||||||||||
| 5 | 5 | |||||||||||||||||||||||||||||||||||||||
| 1 | 1 | 1 | 3 | 8 | ||||||||||||||||||||||||||||||||||||
| 5 | 5 | |||||||||||||||||||||||||||||||||||||||
| 1 | 1 | 1 | 3 | 8 | ||||||||||||||||||||||||||||||||||||
| 5 | 5 | |||||||||||||||||||||||||||||||||||||||
| Level-boost tickets | 3 | 22 | ||||||||||||||||||||||||||||||||||||||
(3) |
(3) |
(3) |
(2) |
(2) |
(2) |
19 | ||||||||||||||||||||||||||||||||||
2024[edit]
| Gold Umbrella | Gold Quickshaw |
| Grand Stars | 10 | 20 | 30 | 40 | 50 | 60 | 70 | 80 | 90 | 100 | 110 | 120 | 130 | 140 | 150 | 160 | 170 | 180 | 190 | 200 | 210 | 220 | 230 | 240 | 260 | 280 | 300 | 320 | Total | Grand total | |
|---|---|---|---|---|---|---|---|---|---|---|---|---|---|---|---|---|---|---|---|---|---|---|---|---|---|---|---|---|---|---|---|
| Pipes | (10) |
14 | 31 | ||||||||||||||||||||||||||||
(10) |
17 | ||||||||||||||||||||||||||||||
| Coins | 500 | 500 | 1000 | 1000 | 1000 | 1000 | 5000 | 15000 | |||||||||||||||||||||||
| 5000 | 5000 | 10000 | |||||||||||||||||||||||||||||
| Rubies | 10 | 5 | 3 | 3 | 21 | 56 | |||||||||||||||||||||||||
| 15 | 10 | 10 | 35 | ||||||||||||||||||||||||||||
| Item tickets | 5 | 5 | 10 | 30 | |||||||||||||||||||||||||||
| 10 | 10 | 20 | |||||||||||||||||||||||||||||
| Star tickets | 2 | 3 | 5 | 5 | |||||||||||||||||||||||||||
| 0 | |||||||||||||||||||||||||||||||
| Quick tickets | 1 | 1 | 4 | ||||||||||||||||||||||||||||
| 3 | 3 | ||||||||||||||||||||||||||||||
| Point-boost tickets | 1 | 1 | 1 | 3 | 8 | ||||||||||||||||||||||||||
| 5 | 5 | ||||||||||||||||||||||||||||||
| 1 | 1 | 1 | 3 | 8 | |||||||||||||||||||||||||||
| 5 | 5 | ||||||||||||||||||||||||||||||
| 1 | 1 | 1 | 3 | 8 | |||||||||||||||||||||||||||
| 5 | 5 | ||||||||||||||||||||||||||||||
| Level-boost tickets | 3 | 22 | |||||||||||||||||||||||||||||
(3) |
(3) |
(3) |
(2) |
(2) |
(2) |
19 | |||||||||||||||||||||||||
New content[edit]
The following content was introduced during the tour's debut in 2023.
Drivers[edit]
Mii Racing Suits[edit]
Karts[edit]
Gliders[edit]
Balloon designs[edit]
Luigi Balloon
Courses[edit]
Singapore Speedway 3 (N, R, T, R/T)
Bangkok Rush 2 (N, R, T, R/T)
Bangkok Rush 3 (N, R, T, R/T)
Bonus challenges[edit]
Paid banners[edit]
| Name | Availability | Cost | Contents | Banner image |
|---|---|---|---|---|
| Value Pack | January 25, 2023 – February 7, 2023 January 24, 2024 – February 6, 2024 |
US$1.99 |
|

|
| Driver Point-Boost Tickets 10 Ticket Set | January 25, 2023 – February 7, 2023 January 24, 2024 – February 6, 2024 |
US$3.99 | 
| |
| Enjoy the Winter Tour with the Hot Pot Hot Rod kart! | January 25, 2023 – February 7, 2023 January 24, 2024 – February 6, 2024 |
US$3.99 | 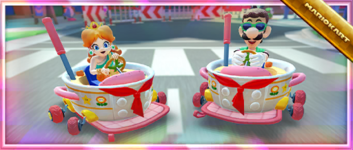
| |
| Celebrate the Winter Tour with the Pineapple 1 kart! | January 25, 2023 – February 7, 2023 January 24, 2024 – February 6, 2024 |
US$3.99 | 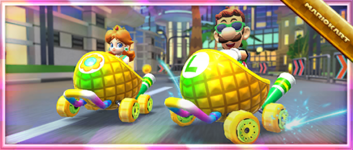
| |
| 70 Rubies and Ticket Pack | January 25, 2023 – February 7, 2023 January 24, 2024 – February 6, 2024 |
US$19.99 | 
| |
| 150 Rubies and Ticket Pack | January 25, 2023 – February 7, 2023 January 24, 2024 – February 6, 2024 |
US$39.99 |
|

|
Challenges[edit]
| Tour Challenges 1 | Tour Challenges 2 | Gold Challenges | ||||||||
|---|---|---|---|---|---|---|---|---|---|---|
| Completion reward: |
Completion reward: |
Completion reward: | ||||||||
 |
 |
 |
 |
 |
 |
 |
 |
 | ||
| Do 5 Rocket Starts. | Land 3 hits with Green Shells. | Get a Fantastic combo a total of 5 times. | Do a total of 5 Slipstream boosts. | Land 5 hits with Bananas. | Get 1st place 2 times in a row in 100cc or above. | Get a combo count of ×30 or higher. | Land 10 hits with Red Shells. | Get 1st place 3 times in a row in 100cc or above. | ||
 |
 |
 |
 |
 |
 |
 |
 |
 | ||
| Use point-boost tickets 3 times. | Get 3rd place or higher 30 times. | Do 30 Jump Boosts on a city course. | Get 1 item from the Daily Selects section of the Shop. | Cause opponents to crash a total of 3 times using a driver wearing gloves. | Earn a score of 7,000 or higher on 3 T or R/T courses. | Use a level-boost ticket. | Activate Frenzy mode 5 times using a driver with a mustache. | Earn a score of 10,000 or higher on 5 courses. | ||
 |
 |
 |
 |
 |
 |
 |
 |
 | ||
| Drive a distance of 20,000 or more. | Land a hit with a Blooper. | Finish every course of every cup, including bonus challenges. | Glide a total distance of 5,000. | Earn a total score of 15,000 or higher in the Diddy Kong Cup. | Race in auto mode. | Cause opponents to crash in Frenzy mode. | Earn a total score of 20,000 or higher in the Lakitu Cup. | Complete Coin Rush 1 time. | ||
| Premium Challenges | Premium Challenges+ | Premium Challenges++ | ||||||||
|---|---|---|---|---|---|---|---|---|---|---|
| Cost: US$4.99 | Cost: US$9.99 | Cost: US$19.99 | ||||||||
| Three in a row reward: |
Three in a row reward: |
Three in a row reward: | ||||||||
| Completion reward: |
Completion reward: |
Completion reward: | ||||||||
| Pipe ×1 | Pipe ×1 | Pipe ×1 | Pipe ×1 | Gold Pipe ×1 | Coins ×5,000 | Gold Pipe ×1 | Rubies ×30 | Coins ×10,000 | ||
| Land 5 hits with Green Shells. | Land 5 hits with Bananas. | Land 3 hits with Bob-ombs. | Land 10 hits with Green Shells. | Land 10 hits with Bananas. | Use 10 Mushrooms. | Land 10 hits with Red Shells. | Start a new tour. | Land 20 hits with Bananas. | ||
| Coins ×3,000 | Rubies ×10 | Point-boost ticket (Glider) ×3 | Point-boost ticket (Glider) ×5 | Rubies ×20 | Points-cap ticket (High-end glider) ×1 | Level-boost ticket (High-End driver) ×2 | Level-boost ticket (High-End kart) ×2 | Level-boost ticket (High-End glider) ×2 | ||
| Do 20 Jump Boosts. | Start a new tour. | Do 50 Mini-Turbo boosts. | Do 50 Jump Boosts. | Start a new tour. | Do 100 Mini-Turbo boosts. | Land 5 hits with Bob-ombs. | Do 100 Jump Boosts. | Do 150 Mini-Turbo boosts. | ||
| Level-boost ticket (Normal glider) ×1 | Level-boost ticket (Super glider) ×1 | Level-boost ticket (High-End glider) ×1 | Level-boost ticket (High-End driver) ×1 | Level-boost ticket (High-End kart) ×1 | Level-boost ticket (High-End glider) ×1 | Points-cap ticket (High-end driver) ×2 | Points-cap ticket (High-end kart) ×2 | Points-cap ticket (High-end glider) ×2 | ||
| Get 1st place 3 times. | Get 1st place 5 times. | Get 1st place 10 times. | Get 1st place 5 times. | Get 1st place 10 times. | Get 1st place 15 times. | Get 1st place 10 times. | Get 1st place 15 times. | Get 1st place 20 times. | ||
| Tour Multiplayer Challenges | ||
|---|---|---|
| Three in a row reward: | ||
| Completion reward: | ||
 |
 |
 |
| Do 10 Jump Boosts in multiplayer. | Do 3 Rocket Starts in multiplayer[sic] | Land 3 hits with Green Shells in multiplayer. |
 |
 |
 |
| Play multiplayer 3 times. | Play multiplayer 5 times. | Play multiplayer 10 times. |
 |
 |
 |
| Get 3rd place or higher in multiplayer. | Get 3rd place or higher 3 times in multiplayer. | Get 3rd place or higher 5 times in multiplayer. |
| Total Points Challenge 1 (2023) | Total Points Challenge 2 (2023) | |||
|---|---|---|---|---|
| Points | Rewards | Points | Rewards | |
| 400,000 |
|
999,999 |
| |
| 300,000 |
|
900,000 | ||
| 250,000 | 800,000 | |||
| 200,000 | 700,000 | |||
| 150,000 |
|
600,000 | ||
| 100,000 |
|
500,000 | ||
| Total Points Challenge 1 (2024) | Total Points Challenge 2 (2024) | |||
|---|---|---|---|---|
| Points | Rewards | Points | Rewards | |
| 400,000 |
|
999,999 |
| |
| 300,000 |
|
900,000 | ||
| 250,000 | 800,000 | |||
| 200,000 | 700,000 | |||
| 150,000 |
|
600,000 | ||
| 100,000 |
|
500,000 | ||
Gold Pipe[edit]
The Gold Pipe, including the All-Clear Pipe, randomly shoots out one of the following regular High-End items. The appearance rate can be viewed via the "Pipe content" link on the Gold Pass purchase screen.
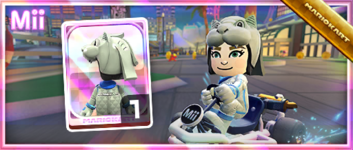
Mii Racing Suit Shop[edit]
Banner items[edit]
| Name | Cost | Contents | Banner image |
|---|---|---|---|
| Roaring Racer Mii Racing Suit | 70 100 rubies for 2nd and 3rd purchases respectively |
Roaring Racer Mii Racing Suit ×1 |
|
Other items[edit]
| Items available in Mii Racing Suit Shop (January 25, 2023 - February 7, 2023) | ||
|---|---|---|
| Purple Mii Racing Suit Amount: 3 |
Yellow Mii Racing Suit Amount: 3 |
White Mii Racing Suit Amount: 3 |
| Dry Bowser Mii Racing Suit Amount: 3 |
Rosalina Mii Racing Suit Amount: 3 |
King Boo Mii Racing Suit Amount: 3 |
| Yoshi Mii Racing Suit Amount: 3 |
Luigi Mii Racing Suit Amount: 3 |
Peach Mii Racing Suit Amount: 3 |
| Items available in Mii Racing Suit Shop (January 24, 2024 - February 6, 2024) | ||
|---|---|---|
| Rosalina Mii Racing Suit Amount: 3 |
Wendy Mii Racing Suit Amount: 3 |
Goomba Mii Racing Suit Amount: 3 |
| Yellow Mii Racing Suit 70 100 rubies for 2nd and 3rd purchases respectively |
Green Mii Racing Suit Amount: 3 |
Orange Mii Racing Suit Amount: 3 |
| Chain Chomp Mii Racing Suit Amount: 3 |
Rocky Wrench Mii Racing Suit Amount: 3 |
Fish Bone Mii Racing Suit Amount: 3 |
Token Shop[edit]
The limited-time event where event tokens appear began on January 25, 2023 and ended on February 7, 2023; and also started on January 24, 2024 and ended on February 6, 2024 for the rerun. Event tokens could be earned by causing opponents to crash.
| Token Shop (January 25, 2023 - February 7, 2023; January 24, 2024 - February 6, 2024) | ||
|---|---|---|
| Pipe Amount: 34 |
Ruby ×3 Amount: 5 |
Coin ×500 Amount: 5 |
| Luigi Balloon Amount: 1 |
Level-boost ticket (Normal) Amount: 3 |
Level-boost ticket (Super) Amount: 2 |
Tier Shop[edit]
The shop features a variety of set and randomized items available for purchase. The item slots in the shop are unlocked based on the highest tier of players.
| Items available in Tier Shop (January 25, 2023 - February 7, 2023; January 24, 2024 - February 6, 2024) | ||
|---|---|---|
| Level-boost ticket (Normal) Amount: 3 per week |
Level-boost ticket (Normal) Amount: 3 per week |
Level-boost ticket (Normal) Amount: 3 per week |
OR |
OR |
OR |
| Level-boost ticket (Super) Amount: 2 per week OR Level-boost ticket (High-End) Amount: 1 per week |
Level-boost ticket (Super) Amount: 2 per week OR Level-boost ticket (High-End) Amount: 1 per week |
Level-boost ticket (Super) Amount: 2 per week OR Level-boost ticket (High-End) Amount: 1 per week |
OR OR |
OR OR |
OR OR |
| Points-cap ticket (Normal) Amount: 1 per week |
Points-cap ticket (Super) Amount: 1 per week |
Points-cap ticket (High-End) Amount: 1 per week |
| Level-boost ticket (High-End) Amount: 1 per week |
Level-boost ticket (High-End) Amount: 1 per week |
Level-boost ticket (High-End) Amount: 1 per week |
Gallery[edit]
Names in other languages[edit]
| Language | Name | Meaning | Notes |
|---|---|---|---|
| Japanese | ウィンターツアー[?] Wintā Tsuā |
Winter Tour | |
| Chinese (simplified) | 冬季巡回赛[?] Dōngjì Xúnhuísài |
Winter Tour | |
| Chinese (traditional) | 冬季巡迴賽[?] Dōngjì Xúnhuísài |
Winter Tour | |
| French | Saison hivernale[?] | Wintry Season | |
| German | Tour-Saison Winter[?] | Tour Season Winter | |
| Italian | Tour invernale[?] | Wintry Tour | |
| Korean | 윈터 투어[?] Winteo Tueo |
Winter Tour | |
| Portuguese | Temporada de inverno[?] | Winter Season | |
| Spanish | Temporada de invierno[?] | Winter Season |
Trivia[edit]
- In the Big Reverse Race during the tour's original run, the Mario opponent would not be replaced by another driver if the player also played as Mario.[1] He was changed to Koopa Troopa in the tour's re-run.
References[edit]
- ^ JoshuaGames7007 (January 28, 2023). Big Reverse Race with my Mario Characters in Singapore Speedway 3 (Part 1 of 3) | Mario Kart Tour. YouTube. Retrieved February 2, 2024.


