Croctopus Chase: Difference between revisions
mNo edit summary |
Apikachu68 (talk | contribs) m (→Names in other languages: Added Italian translation.) |
||
| (81 intermediate revisions by 38 users not shown) | |||
| Line 1: | Line 1: | ||
{{level | {{DKC level infobox | ||
|title = Croctopus Chase | |title=Croctopus Chase | ||
|image = [[ | |image=[[File:Croctopus Chase SNES.png]] | ||
|code = 4 - 4 | |code=4 - 4 (SNES & GBC)<br>4 - 3 (GBA) | ||
|game = ''[[Donkey Kong Country]] | |world=[[Gorilla Glacier]] | ||
| | |game=''[[Donkey Kong Country]] | ||
| | |before2=[[Ice Age Alley|<<]] | ||
| | |after2=[[Torchlight Trouble|>>]] | ||
| | |before3=[[Slipslide Ride|<<]] | ||
|after3=[[Ice Age Alley|>>]] | |||
|track=Aquatic Ambiance | |||
}} | }} | ||
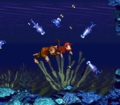
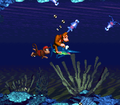
'''Croctopus Chase''' is the twentieth level of ''[[Donkey Kong Country]]'', and is the | '''Croctopus Chase''' is the twentieth level of ''[[Donkey Kong Country]]'' and the fourth level of [[Gorilla Glacier]]. In the [[Donkey Kong Country (Game Boy Advance)|Game Boy Advance version]], Crocotopus Chase swapped positions with [[Ice Age Alley]] and became the world's third level, and the nineteenth overall level. Croctopus Chase is the third underwater level, taking place in the depths of a freezing lake. The [[Kong]]s are not affected by the freezing temperatures, just like the other Gorilla Glacier levels. The main obstacle is a [[Croctopus]] chasing [[Donkey Kong]] and [[Diddy Kong]] between each of the sections, each starting with a Croctopus chasing the [[Kong]]s up until reaching an alcove, where the Croctopus rests. After passing the next Croctopus, it begins chasing the Kongs in place of the previous one. An [[animal crate]] with [[Enguarde]] is located in a hidden area near the level exit. Croctopus Chase is the first underwater level to feature [[Barrel Cannon]]s, and is the only level in the game with two arrow signs. | ||
==Layout== | |||
{{multiframe|[[File:CroctopusChase-GBC-1.png]] [[File:CroctopusChase-GBA-2.png|180px]]|Croctopus Chase's appearance in the Game Boy Color version, top, and the Game Boy Advance version, bottom|align=left|size=200}} | |||
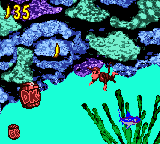
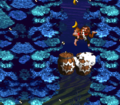
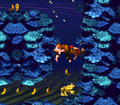
At the beginning of the level, the Kongs make their way through a narrow passage. A Squidge floats past them as the continue to a 90 degree turn in the pathway. Once they swim to the top of the pathway, it leads them to the east, where a Croctopus waits in an alcove. Shortly after passing it, it begins to chase them, soon stopping in a second alcove nearby. Another alcove holds a wobbling [[DK Barrel]]. As the heroes continue down the passage, they come up to a Squidge and another Croctopus, who follows them around a U shaped pathway. They meet another Croctopus at the bottom of the passage, and it chases them north through an area with the [[KONG Letters|letter K]] in it. An alcove is located at the top of the area, which the Croctopus swims into once it is passed. A passage branches off of it, leading to the left, where a slightly wider area can be found with another DK Barrel. | |||
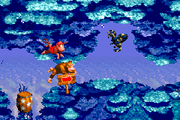
Soon, the duo approaches another Croctopus that chases them through a bendy passage with several turns in it. Eventually, the heroes pass an alcove that the Croctopus stops in once it is reached. A pair of [[Blast Barrel]]s sit ahead, blocking the Kongs' path. They blast them past an intersection and into another set of Barrel Cannons. The letter O and a DK Barrel is located on other pathways of the intersection, which can only be reached if the heroes enter a secret passage after the second pair of barrels. A wider area follows the barrels with a Croctopus waiting in it. The passage narrows again as the two friends pass the Croctopus, who immediately begins to pursue them. It chases them up a pathway full of several small, sharp turns. At the top of the area, an alcove can be found that the Croctopus soon rests in. A passage to the right of here leads the heroes to an alcove with level's [[Star Barrel|Continue Barrel]] in it. | |||
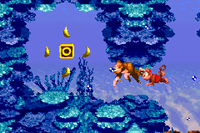
A sign indicating that the Kongs are nearing the exit is ahead of here, being followed by another alcove with a Croctopus in it. The enemy pursues them through a straight passage, until they reach a pair of alcoves. A DK Barrel wobbles in one, while the Croctopus rests in the other hole. Another straight pathway leading upwards is ahead. As it is traveled through, a Croctopus chases the heroes. It ceases to chase the Kongs at the top of the area, where they can find a Chomps enemy swimming above a passage that takes the primates south. At the bottom of this pathway, they meet another Crotopus that chases them towards an intersection. It makes a circle around the intersection and then moves upwards into an alcove. If the heroes head east from this alcove, they can discover a lone Barrel Cannon that shoots them across a passage full of bananas. Another Barrel Cannon then catches them and shoots them into a wider area with a Chomps in it. A passage containing another Chomps is located to the west. A Croctopus chases them as the travel through it. The passage leads them downwards through many small, tight turns. At the lowest part of this pathway, they can find a small alcove that the octopus enemy soon stops in. Two Chomps swim parallel to each other in a wider area ahead. | |||
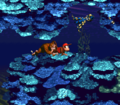
The fourth DK Barrel in the level and another Croctopus follow. The enemy pursues them as they swim upwards through a thin pathway. Soon, they approach a small turn in the pathway that leads them to the east, where an alcove can be found. The Croctopus rests in the gap when it reaches it. The letter N waits in a passage to the north of here. At the end of this passage, the heroes can find a lone Croctopus who begins to chase them farther up the area. After swimming around a few tight turns, they can reach a pair of alcoves placed across from each other. The previous Croctopus rests in the top gap once it reaches it, while a new Croctopus waits in the lower alcove. It pursues the duo as they swim through an area full of several sharp turns. Soon, the Croctopus ceases to chase them, making its way into a small alcove. Another passage branches off of this area. A sign stands at the beginning of it, indicating that the level is near complete. After passing through an area infested with Squidges, the primates reach the letter G and an exit sign. If they travel ahead of the sign, they finish the level successfully. | |||
In some parts of this map, it is possible to avoid being chased by a Croctopus if the player swims above them as they're in their pathway, given if they have enough room not to be hit. While there is no significance in this, it may relieve the player by allowing them to progress the map without much effort. | |||
{{br|left}} | |||
{{ | |||
[[ | ==Enemies== | ||
[[Category: | The following enemies appear in the following quantities: | ||
[[Category: Donkey Kong | |||
[[Category: | <gallery> | ||
Chomps Jr DKC sprite.png|[[Chomps Jr.]] (2) | |||
Chomps.png|[[Chomps]] (7) | |||
Croctopus.png|[[Croctopus]] (blue) (13) | |||
Squidge DKC.png|[[Squidge]] (10) | |||
</gallery> | |||
== Items and objects== | |||
The following items and objects appear in the following quantities: | |||
<gallery> | |||
Banana DKC SNES.png|[[Banana]] (57) | |||
Banana Bunch DKC SNES.png|[[Banana Bunch]] (5) | |||
DK Barrel DKC.png|[[DK Barrel]] (5) | |||
Enguarde Token Sprite SNES.png|[[Enguarde]] [[animal token|Token]]{{footnote|main|a}} | |||
Red Balloon DKC SNES.png|[[Red Balloon|Life Balloon]] (1) | |||
Winky Token Sprite SNES.png|[[Winky]] [[animal token|Token]]{{footnote|main|a}} | |||
</gallery> | |||
{{footnote|note|a|At a bottom-right corner of a maze, shortly after the [[Star Barrel|Continue Barrel]] and after passing two Croctopuses.}} | |||
===K-O-N-G Letters=== | |||
[[File:CroctopusChase-GBA-1.png|thumb|The location of the letter O in the Game Boy Advance version]] | |||
*'''K:''' Located up a narrow passage during the third Croctopus chase. | |||
*'''O:''' After blasting through two [[Blast Barrel]]s, the Kongs can swim to a DK Barrel by passing through a wall. They can swim around the bend to find the letter O in a small alcove. | |||
*'''N:''' After blasting through the second set of Blast Barrels, the Kongs must swim past some Chomps, then outswim a Croctopus. The letter N appears in the passage of when the following Croctopus chases the Kongs. | |||
*'''G:''' Right before the level exit. | |||
===Key items=== | |||
*'''[[Photograph]]''' (Game Boy Advance version only): After the Continue Barrel and firing through two Blast Barrels, the Kongs must swim through a tight gap between the upper Barrel Cannon, and swim into a room on the left. The photograph is guarded by two moving Croctopus. The photograph shows an image of Croctopus, on the second page of their [[Scrapbook (Donkey Kong Country series)|scrapbook]]. | |||
==Gallery== | |||
<gallery> | |||
Croctopus Chase 2.png|The Kongs approach a Croctopus | |||
Croctopus Chase 3.png|The Kongs are blasted by two Barrel Cannons | |||
Croctopus Chase 4.png|Squidges ambush the Kongs | |||
Croctopus Chase 5.png|Donkey Kong rides Enguarde through an area with Squidges | |||
Croctopus Chase 6.png|The duo swims towards a Winky Token | |||
Croctopus Chase 7.png|The characters find an Enguarde Box in a hidden area | |||
Donkey Kong Country (U) (V1.2) !003.png|The location of the letter G | |||
CroctopusChase-GBC-2.png|The location of the letter N in the Game Boy Color version | |||
CroctopusChase-GBA-3.png|The Kongs find an Enguarde Token in a hidden room in the Game Boy Advance version | |||
</gallery> | |||
==Names in other languages== | |||
{{foreign names | |||
|Jap=クロクトパスの海 | |||
|JapR=Kurokutopasu no umi | |||
|JapM=Croctopus' Sea | |||
|Fre=Course de Croctopus (SNES)<br>Croctopus Fou (GBC) | |||
|FreM=Croctopus Race<br>Crazy Croctopus | |||
|Ger=Croctopus Safari (SNES)<br>Krocto-Safari (GBC) | |||
|GerM=Croctopus Safari<br>Krocto Safari | |||
|Ita=Caccia i Polidrilli | |||
|ItaM=Hunting and Croctopuses | |||
|Spa=Croctopus te sigue... | |||
|SpaM=Croctopus follows you... | |||
}} | |||
{{DKC}} | |||
{{DKC levels}} | |||
[[Category:Aquatic areas]] | |||
[[Category:Donkey Kong Island]] | |||
[[Category:Donkey Kong Country levels]] | |||
Latest revision as of 20:54, August 31, 2024
| Level | |
|---|---|
| Croctopus Chase | |
| |
| Level code | 4 - 4 (SNES & GBC) 4 - 3 (GBA) |
| World | Gorilla Glacier |
| Game | Donkey Kong Country |
| Music track | Aquatic Ambiance |
| << Directory of levels (SNES & GBC) >> | |
| << Directory of levels (GBA) >> | |
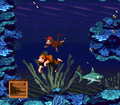
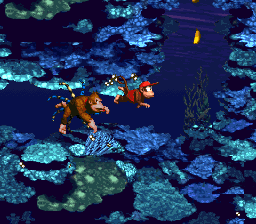
Croctopus Chase is the twentieth level of Donkey Kong Country and the fourth level of Gorilla Glacier. In the Game Boy Advance version, Crocotopus Chase swapped positions with Ice Age Alley and became the world's third level, and the nineteenth overall level. Croctopus Chase is the third underwater level, taking place in the depths of a freezing lake. The Kongs are not affected by the freezing temperatures, just like the other Gorilla Glacier levels. The main obstacle is a Croctopus chasing Donkey Kong and Diddy Kong between each of the sections, each starting with a Croctopus chasing the Kongs up until reaching an alcove, where the Croctopus rests. After passing the next Croctopus, it begins chasing the Kongs in place of the previous one. An animal crate with Enguarde is located in a hidden area near the level exit. Croctopus Chase is the first underwater level to feature Barrel Cannons, and is the only level in the game with two arrow signs.
Layout[edit]
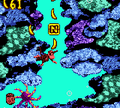
At the beginning of the level, the Kongs make their way through a narrow passage. A Squidge floats past them as the continue to a 90 degree turn in the pathway. Once they swim to the top of the pathway, it leads them to the east, where a Croctopus waits in an alcove. Shortly after passing it, it begins to chase them, soon stopping in a second alcove nearby. Another alcove holds a wobbling DK Barrel. As the heroes continue down the passage, they come up to a Squidge and another Croctopus, who follows them around a U shaped pathway. They meet another Croctopus at the bottom of the passage, and it chases them north through an area with the letter K in it. An alcove is located at the top of the area, which the Croctopus swims into once it is passed. A passage branches off of it, leading to the left, where a slightly wider area can be found with another DK Barrel.
Soon, the duo approaches another Croctopus that chases them through a bendy passage with several turns in it. Eventually, the heroes pass an alcove that the Croctopus stops in once it is reached. A pair of Blast Barrels sit ahead, blocking the Kongs' path. They blast them past an intersection and into another set of Barrel Cannons. The letter O and a DK Barrel is located on other pathways of the intersection, which can only be reached if the heroes enter a secret passage after the second pair of barrels. A wider area follows the barrels with a Croctopus waiting in it. The passage narrows again as the two friends pass the Croctopus, who immediately begins to pursue them. It chases them up a pathway full of several small, sharp turns. At the top of the area, an alcove can be found that the Croctopus soon rests in. A passage to the right of here leads the heroes to an alcove with level's Continue Barrel in it.
A sign indicating that the Kongs are nearing the exit is ahead of here, being followed by another alcove with a Croctopus in it. The enemy pursues them through a straight passage, until they reach a pair of alcoves. A DK Barrel wobbles in one, while the Croctopus rests in the other hole. Another straight pathway leading upwards is ahead. As it is traveled through, a Croctopus chases the heroes. It ceases to chase the Kongs at the top of the area, where they can find a Chomps enemy swimming above a passage that takes the primates south. At the bottom of this pathway, they meet another Crotopus that chases them towards an intersection. It makes a circle around the intersection and then moves upwards into an alcove. If the heroes head east from this alcove, they can discover a lone Barrel Cannon that shoots them across a passage full of bananas. Another Barrel Cannon then catches them and shoots them into a wider area with a Chomps in it. A passage containing another Chomps is located to the west. A Croctopus chases them as the travel through it. The passage leads them downwards through many small, tight turns. At the lowest part of this pathway, they can find a small alcove that the octopus enemy soon stops in. Two Chomps swim parallel to each other in a wider area ahead.
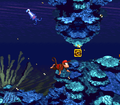
The fourth DK Barrel in the level and another Croctopus follow. The enemy pursues them as they swim upwards through a thin pathway. Soon, they approach a small turn in the pathway that leads them to the east, where an alcove can be found. The Croctopus rests in the gap when it reaches it. The letter N waits in a passage to the north of here. At the end of this passage, the heroes can find a lone Croctopus who begins to chase them farther up the area. After swimming around a few tight turns, they can reach a pair of alcoves placed across from each other. The previous Croctopus rests in the top gap once it reaches it, while a new Croctopus waits in the lower alcove. It pursues the duo as they swim through an area full of several sharp turns. Soon, the Croctopus ceases to chase them, making its way into a small alcove. Another passage branches off of this area. A sign stands at the beginning of it, indicating that the level is near complete. After passing through an area infested with Squidges, the primates reach the letter G and an exit sign. If they travel ahead of the sign, they finish the level successfully.
In some parts of this map, it is possible to avoid being chased by a Croctopus if the player swims above them as they're in their pathway, given if they have enough room not to be hit. While there is no significance in this, it may relieve the player by allowing them to progress the map without much effort.
Enemies[edit]
The following enemies appear in the following quantities:
Chomps Jr. (2)
Chomps (7)
Croctopus (blue) (13)
Squidge (10)
Items and objects[edit]
The following items and objects appear in the following quantities:
Banana (57)
Banana Bunch (5)
DK Barrel (5)
Life Balloon (1)
a - At a bottom-right corner of a maze, shortly after the Continue Barrel and after passing two Croctopuses.
K-O-N-G Letters[edit]
- K: Located up a narrow passage during the third Croctopus chase.
- O: After blasting through two Blast Barrels, the Kongs can swim to a DK Barrel by passing through a wall. They can swim around the bend to find the letter O in a small alcove.
- N: After blasting through the second set of Blast Barrels, the Kongs must swim past some Chomps, then outswim a Croctopus. The letter N appears in the passage of when the following Croctopus chases the Kongs.
- G: Right before the level exit.
Key items[edit]
- Photograph (Game Boy Advance version only): After the Continue Barrel and firing through two Blast Barrels, the Kongs must swim through a tight gap between the upper Barrel Cannon, and swim into a room on the left. The photograph is guarded by two moving Croctopus. The photograph shows an image of Croctopus, on the second page of their scrapbook.
Gallery[edit]
Names in other languages[edit]
| Language | Name | Meaning | Notes |
|---|---|---|---|
| Japanese | クロクトパスの海[?] Kurokutopasu no umi |
Croctopus' Sea | |
| French | Course de Croctopus (SNES) Croctopus Fou (GBC)[?] |
Croctopus Race Crazy Croctopus |
|
| German | Croctopus Safari (SNES) Krocto-Safari (GBC)[?] |
Croctopus Safari Krocto Safari |
|
| Italian | Caccia i Polidrilli[?] | Hunting and Croctopuses | |
| Spanish | Croctopus te sigue...[?] | Croctopus follows you... |
