Vacation Tour: Difference between revisions
mNo edit summary |
m (Text replacement - "(\| *)Jap([RMCN\d]* *=)" to "$1Jpn$2") |
||
| (35 intermediate revisions by 18 users not shown) | |||
| Line 2: | Line 2: | ||
|title=Vacation Tour | |title=Vacation Tour | ||
|image=[[File:MKT Vacation Tour.png|200px]] | |image=[[File:MKT Vacation Tour.png|200px]] | ||
|start=August 8, 2023<br>11:00 p.m. (PT) | |start=August 8, 2023<br>11:00 p.m. (PT)<br>August 6, 2024 (rerun)<br>11:00 p.m. (PT) | ||
|end=August 22, 2023<br>10:59 p.m. (PT) | |end=August 22, 2023<br>10:59 p.m. (PT)<br>August 20, 2024 (rerun)<br>10:59 p.m. (PT) | ||
|cups=15 | |cups=15 | ||
|rank=[[Rosalina Cup]] (week 1)<br>[[Daisy Cup]] (week 2) | |rank=[[Rosalina Cup]] (week 1)<br>[[Daisy Cup]] (week 2) | ||
|coin=[[Squeaky Clean Sprint]] | |coin=[[Squeaky Clean Sprint]] | ||
|before=[[Sunshine Tour|<<]] | |before=[[Sunshine Tour|<<]] | ||
|after= | |after=[[Summer Tour (2023)|>>]] | ||
}} | }} | ||
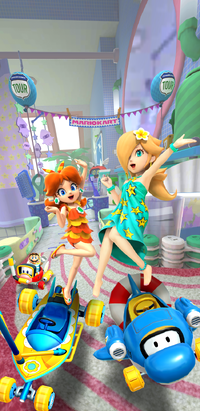
The '''Vacation Tour''' | The '''Vacation Tour''' was the hundred-and-second tour of ''[[Mario Kart Tour]]'', which began on August 9, 2023 and ended on August 22, 2023. It was rerun from August 7, 2024 to August 20, 2024 as the game's hundred-and-twenty-eighth tour. | ||
This tour also | This tour introduced [[Squeaky Clean Sprint]], which first appeared in Wave 5 of the ''[[Mario Kart 8 Deluxe – Booster Course Pass]]'', as a new course. It also featured the first reappearances of [[Tour Athens Dash|Athens Dash 1]] and [[Tour Athens Dash|2]], [[Tour Bangkok Rush|Bangkok Rush 2]], [[GBA Peach Circuit]], [[GCN Mushroom Bridge]], and [[GBA Bowser's Castle 4]] since their debuts in the [[Spring Tour]], the [[Winter Tour (2023)|2023 Winter Tour]], the [[Princess Tour]], the [[Mii Tour (2023)|2023 Mii Tour]], and the [[Bowser Tour (2023)|2023 Bowser Tour]], respectively. The [[Boomerang Bro Cup]] also debuted in this tour, making it the first tour since the [[Space Tour (2021)|2021 Space Tour]] where the new cup is for a non-High-End driver, and marking the longest gap between the cup's character's [[Hammer Bro Tour|addition to the game]] and the debut of their respective cup. This was the first tour since the [[Peach Tour]] where the new cup does not fall on the ranked week. | ||
This was the second tour in a row where the [[Daisy Cup]] is a ranked cup, being in the second week. | |||
As of this tour, all [[Birdo]] colors from the Booster Course Pass are present in ''Mario Kart Tour''. Additionally, all of the [[Koopalings]] now have a Mii Racing Suit as of this tour. | As of this tour, all [[Birdo]] colors from the Booster Course Pass are present in ''Mario Kart Tour''. Additionally, all of the [[Koopalings]] now have a Mii Racing Suit as of this tour. | ||
The Summertime Celebration that started in the [[Sunshine Tour]] | The Summertime Celebration that started in the [[Sunshine Tour]] continued in this tour, and ended in the [[Summer Tour (2023)|2023 Summer Tour]]. | ||
The [[Coin Rush (Mario Kart Tour)|Coin Rush]] course for this tour was Squeaky Clean Sprint. The menu background featured the lawnchair, front-load washer and laundry basket, suitcase, and potted plant from Squeaky Clean Sprint as the landmark for the tour. This tour's trailer featured floating bubbles during its opening splash screen. | |||
This was the first tour to repeat a [[Big Reverse Race vs. 100]] bonus challenge. It was also the first tour to give favorite courses to [[Koopa Troopa]], [[Birdo|Birdo (Light Blue)]], [[Rosalina|Rosalina (Swimwear)]], the [[Koopa Dasher]], the [[Super Blooper (kart)|Super Blooper]], the [[Light-blue Turbo Birdo]], and the [[Great Sail]] since the [[Anniversary Tour (2022)|2022 Anniversary Tour]], [[Hammer Bro Tour]], [[Sundae Tour (2022)|2022 Sundae Tour]], [[New York Tour]], [[Tokyo Tour]], [[Marine Tour]], and [[Los Angeles Tour (2022)|2022 Los Angeles Tour]], respectively. | |||
Despite Paris Promenade being featured in this tour, its Battle map is not present. The Daisy Mii Racing Suit appears in the course icon for GCN Baby Park, despite not being available in the initial run of this tour or the rerun. This is the first tour since the [[Bowser Tour (2022)|2022 Bowser Tour]] to not feature a new Mii Racing Suit in the icon of a course in the Mii Cup. | |||
This | This was the final tour to introduce a "new" non-city course and Super kart to the game. | ||
{{br|toc=1}} | {{br|toc=1}} | ||
| Line 124: | Line 130: | ||
|R2=[[GCN Mushroom Bridge|GCN Mushroom Bridge T]]||R2.I=MushroomBridgeTGCN DaisySailor||R2.1=1,400||R2.2=2,200||R2.3=2,500||R2.4=2,900||R2.5=3,400 | |R2=[[GCN Mushroom Bridge|GCN Mushroom Bridge T]]||R2.I=MushroomBridgeTGCN DaisySailor||R2.1=1,400||R2.2=2,200||R2.3=2,500||R2.4=2,900||R2.5=3,400 | ||
|R3=Paris Promenade||R3.I=ParisPromenade CatPeach||R3.1=1,000||R3.2=1,500||R3.3=1,800||R3.4=2,000||R3.5=2,400 | |R3=Paris Promenade||R3.I=ParisPromenade CatPeach||R3.1=1,000||R3.2=1,500||R3.3=1,800||R3.4=2,000||R3.5=2,400 | ||
|CN=[[Do Jump Boosts]]||C.I=Tour102 MiiCupChallenge||CC= | |CN=[[Do Jump Boosts]]||C.I=Tour102 MiiCupChallenge||CC=[[Iggy]]||CT=[[Tour Bangkok Rush|Bangkok Rush]]||C.1=10||C.2=15||C.3=22 | ||
}} | }} | ||
{{MKT cup table row | {{MKT cup table row | ||
| Line 219: | Line 225: | ||
|} | |} | ||
==Today's Challenge== | |||
Players' most recently used kart and glider are chosen, and favorite and favored ones have extra priority. Opponents are arranged randomly. On day 1 of this tour, players finish a race in [[ | Players' most recently used kart and glider are chosen, and favorite and favored ones have extra priority. Opponents are arranged randomly. On day 1 of this tour, players finish a race in [[GCN Baby Park]] in the [[Mii Cup]] using the [[Mii|Daisy Mii Racing Suit]] for a free pipe launch. Starting from day 2, players have to finish a race in the earliest incomplete course that is not in any of the ranked cups using the driver shown on the course's thumbnail every day to obtain the corresponding reward in the table below. Once all of the courses are completed, the courses are selected at random. | ||
{| align=center width=40% cellspacing=0 border=1 cellpadding=3 style="border-collapse:collapse; font-family:Arial; text-align:center" | {| align=center width=40% cellspacing=0 border=1 cellpadding=3 style="border-collapse:collapse; font-family:Arial; text-align:center" | ||
| Line 231: | Line 237: | ||
|- | |- | ||
!14 | !14 | ||
|<br>Badge | |[[File:MKT 087QB.png|50px]]<br>Badge | ||
|-style="background: #89A" | |-style="background: #89A" | ||
|colspan=2|'''Today's Challenge Pipe''' | |colspan=2|'''Today's Challenge Pipe''' | ||
| Line 240: | Line 246: | ||
|- | |- | ||
|colspan=2|[[Ruby|Rubies]], [[coin]]s, driver (Normal/Super/High-End), kart (Normal/Super/High-End), glider (Normal/Super/High-End), [[item ticket]]s | |colspan=2|[[Ruby|Rubies]], [[coin]]s, driver (Normal/Super/High-End), kart (Normal/Super/High-End), glider (Normal/Super/High-End), [[item ticket]]s | ||
|} | |} | ||
==Rewards== | ==Rewards== | ||
| Line 329: | Line 335: | ||
==New content== | ==New content== | ||
The following content was introduced during the tour's debut in 2023. | |||
===Cups=== | ===Cups=== | ||
<gallery> | <gallery> | ||
| Line 412: | Line 419: | ||
[[File:MKT Icon StarTicket.png|30px]] [[Star ticket]] ×10<br> | [[File:MKT Icon StarTicket.png|30px]] [[Star ticket]] ×10<br> | ||
|[[File:MKT Tour80 150RubiesandTicketPack.png|x150px]] | |[[File:MKT Tour80 150RubiesandTicketPack.png|x150px]] | ||
|} | |||
==Challenges== | |||
{{MKT challenge table | |||
|TCR1=[[File:MKT Icon CoinRushTicket.png|70px]] [[Coin Rush ticket]] ×1 | |||
|T1.1=224 | |||
|T1.1E=Land 5 hits with {{Color link|#A1A1FF|Red Shell|Red Shells}}. | |||
|T1.1S=1 | |||
|T1.2=068 | |||
|T1.2E=Land 3 hits with {{Color link|#A1A1FF|Green Shell|Green Shells}}. | |||
|T1.2S=1 | |||
|T1.3=047 | |||
|T1.3E=Get a Fantastic combo a total of 5 times. | |||
|T1.3S=1 | |||
|T1.4=121 | |||
|T1.4E=Get 1 item from the Daily Selects section of the Shop. | |||
|T1.4S=2 | |||
|T1.5=110 | |||
|T1.5E=Get 3rd place or higher 30 times. | |||
|T1.5S=2 | |||
|T1.6=229 | |||
|T1.6E=Do 100 {{Color link|#A1A1FF|Jump Boost|Jump Boosts}}. | |||
|T1.6S=2 | |||
|T1.7=054 | |||
|T1.7E=Glide a total distance of 5,000. | |||
|T1.7S=2 | |||
|T1.8=400 | |||
|T1.8E=Land a hit with a {{Color link|#A1A1FF|Blooper}}. | |||
|T1.8S=2 | |||
|T1.9=087 | |||
|T1.9E=Finish every course of every cup, including bonus challenges. | |||
|T1.9S=2 | |||
|TCR2=[[File:MKT Icon QuickTicket.png|70px]] [[Quick ticket]] ×1 | |||
|T2.1=103 | |||
|T2.1E=Do a total of 5 {{Color link|#A1A1FF|Slipstream}} boosts. | |||
|T2.1S=1 | |||
|T2.2=076 | |||
|T2.2E=Use 15 {{Color link|#A1A1FF|Mushroom|Mushrooms}}. | |||
|T2.2S=1 | |||
|T2.3=043 | |||
|T2.3E=Get 1st place 2 times in a row in 100cc or above. | |||
|T2.3S=1 | |||
|T2.4=141 | |||
|T2.4E=Use {{Color link|#A1A1FF|point-boost ticket|point-boost tickets}} 3 times. | |||
|T2.4S=2 | |||
|T2.5=199 | |||
|T2.5E=Land a hit with a {{Color link|#A1A1FF|Bob-omb}} using a driver with a ribbon. | |||
|T2.5S=2 | |||
|T2.6=423 | |||
|T2.6E=Earn a score of 7,000 or higher on 3 T or R/T courses. | |||
|T2.6S=2 | |||
|T2.7=404 | |||
|T2.7E=Cause opponents to crash using a {{Color link|#A1A1FF|Mega Mushroom}}. | |||
|T2.7S=2 | |||
|T2.8=186-1 | |||
|T2.8E=Earn a total score of 15,000 or higher in the {{Color link|#A1A1FF|Boomerang Bro Cup}}. | |||
|T2.8S=2 | |||
|T2.9=237 | |||
|T2.9E=Race in auto mode. | |||
|T2.9S=2 | |||
|GCR=[[File:MKT Icon 1Ruby.png|70px]] [[Ruby|Rubies]] ×5 | |||
|G.1=239 | |||
|G.1E=Get a combo count of ×30 or higher. | |||
|G.1S=1 | |||
|G.2=086 | |||
|G.2E=Land 15 hits with {{Color link|#A1A1FF|Banana|Bananas}}. | |||
|G.2S=1 | |||
|G.3=143 | |||
|G.3E=Get 1st place 3 times in a row in 100cc or above. | |||
|G.3S=1 | |||
|G.4=078 | |||
|G.4E=Use a {{Color link|#A1A1FF|points-cap ticket}}. | |||
|G.4S=2 | |||
|G.5=119 | |||
|G.5E=Do 10 {{Color link|#A1A1FF|Mini-Turbo|Mini-Turbos}} in a single race using a driver wearing earrings. | |||
|G.5S=2 | |||
|G.6=424 | |||
|G.6E=Earn a score of 10,000 or higher on 5 courses. | |||
|G.6S=2 | |||
|G.7=063 | |||
|G.7E=Cause opponents to crash 3 times while gliding. | |||
|G.7S=2 | |||
|G.8=154 | |||
|G.8E=Earn a total score of 20,000 or higher in the {{Color link|#A1A1FF|Baby Peach Cup}}. | |||
|G.8S=2 | |||
|G.9=037 | |||
|G.9E=Complete {{Color link|#A1A1FF|Coin Rush (Mario Kart Tour)|Coin Rush}} 1 time. | |||
|G.9S=2 | |||
}} | |||
<br> | |||
{| align=center width=100% cellspacing=0 border=1 cellpadding=3 style="border-collapse:collapse; font-family:Arial; text-align:center" | |||
|- | |||
!colspan=3 style="background: #EEEEFF"|'''Premium Challenges''' | |||
|rowspan=13 style="border-top:1px solid #FFF; border-bottom:1px solid #FFF;" width=5%| | |||
!colspan=3 style="background: #EEEEFF"|'''Premium Challenges+''' | |||
|rowspan=13 style="border-top:1px solid #FFF; border-bottom:1px solid #FFF;" width=5%| | |||
!colspan=3 style="background: #EEEEFF"|'''Premium Challenges++''' | |||
|- | |||
|colspan=3 style="background: #EEEEFF"|'''Cost:''' US$4.99 | |||
|colspan=3 style="background: #EEEEFF"|'''Cost:''' US$9.99 | |||
|colspan=3 style="background: #EEEEFF"|'''Cost:''' US$19.99 | |||
|- | |||
|colspan=3 style="background: #EEEEFF"|'''Three in a row reward:''' [[File:MKT Icon Coins 2.png|70px]] [[Coin|Coins]] ×300 | |||
|colspan=3 style="background: #EEEEFF"|'''Three in a row reward:''' [[File:MKT Icon Coins 2.png|70px]] [[Coin|Coins]] ×300 | |||
|colspan=3 style="background: #EEEEFF"|'''Three in a row reward:''' [[File:MKT Icon Coins 2.png|70px]] [[Coin|Coins]] ×300 | |||
|- | |||
|colspan=3 style="background: #EEEEFF"|'''Completion reward:''' [[File:MKT Icon Launch Pipe Gold.png|70px]] Gold Pipe ×1 | |||
|colspan=3 style="background: #EEEEFF"|'''Completion reward:''' [[File:MKT Icon Launch Pipe Gold.png|70px]] Gold Pipe ×1 | |||
|colspan=3 style="background: #EEEEFF"|'''Completion reward:''' [[File:MKT Icon Launch Pipe Gold.png|70px]] Gold Pipe ×1 | |||
|-style="height: 80px" | |||
|width=10% style="background:linear-gradient(#F2E18F,#B9800F)"|[[File:MKT Icon Launch Pipe Green.png|70px]] | |||
|width=10% style="background:linear-gradient(#F2E18F,#B9800F)"|[[File:MKT Icon Launch Pipe Green.png|70px]] | |||
|width=10% style="background:linear-gradient(#F2E18F,#B9800F)"|[[File:MKT Icon Launch Pipe Green.png|70px]] | |||
|width=10% style="background:linear-gradient(#F2E18F,#B9800F)"|[[File:MKT Icon Launch Pipe Green.png|70px]] | |||
|width=10% style="background:linear-gradient(#F2E18F,#B9800F)"|[[File:MKT Icon Launch Pipe Gold.png|70px]] | |||
|width=10% style="background:linear-gradient(#F2E18F,#B9800F)"|[[File:MKT Icon Coins 3.png|70px]] | |||
|width=10% style="background:linear-gradient(#F2E18F,#B9800F)"|[[File:MKT Icon Launch Pipe Gold.png|70px]] | |||
|width=10% style="background:linear-gradient(#F2E18F,#B9800F)"|[[File:MKT Icon Ruby 2.png|70px]] | |||
|width=10% style="background:linear-gradient(#F2E18F,#B9800F)"|[[File:MKT Icon Coins 3.png|70px]] | |||
|-style="color: #FFF" | |||
|style="background:linear-gradient(#864D00,#A26000); border-top:1px solid #B9800F;"|Pipe ×1 | |||
|style="background:linear-gradient(#864D00,#A26000); border-top:1px solid #B9800F;"|Pipe ×1 | |||
|style="background:linear-gradient(#864D00,#A26000); border-top:1px solid #B9800F;"|Pipe ×1 | |||
|style="background:linear-gradient(#864D00,#A26000); border-top:1px solid #B9800F;"|Pipe ×1 | |||
|style="background:linear-gradient(#864D00,#A26000); border-top:1px solid #B9800F;"|Gold Pipe ×1 | |||
|style="background:linear-gradient(#864D00,#A26000); border-top:1px solid #B9800F;"|Coins ×5,000 | |||
|style="background:linear-gradient(#864D00,#A26000); border-top:1px solid #B9800F;"|Gold Pipe ×1 | |||
|style="background:linear-gradient(#864D00,#A26000); border-top:1px solid #B9800F;"|Rubies ×30 | |||
|style="background:linear-gradient(#864D00,#A26000); border-top:1px solid #B9800F;"|Coins ×10,000 | |||
|-style="color: #FFF" | |||
|style="background:linear-gradient(#A26000,#C88512); border-top:1px solid #A26000;"|''Land 5 hits with Green Shells.'' | |||
|style="background:linear-gradient(#A26000,#C88512); border-top:1px solid #A26000;"|''Land 5 hits with Bananas.'' | |||
|style="background:linear-gradient(#A26000,#C88512); border-top:1px solid #A26000;"|''Land 3 hits with Bob-ombs.'' | |||
|style="background:linear-gradient(#A26000,#C88512); border-top:1px solid #A26000;"|''Land 10 hits with Green Shells.'' | |||
|style="background:linear-gradient(#A26000,#C88512); border-top:1px solid #A26000;"|''Land 10 hits with Bananas.'' | |||
|style="background:linear-gradient(#A26000,#C88512); border-top:1px solid #A26000;"|''Use 10 Mushrooms.'' | |||
|style="background:linear-gradient(#A26000,#C88512); border-top:1px solid #A26000;"|''Land 10 hits with Red Shells.'' | |||
|style="background:linear-gradient(#A26000,#C88512); border-top:1px solid #A26000;"|''Start a new tour.'' | |||
|style="background:linear-gradient(#A26000,#C88512); border-top:1px solid #A26000;"|''Land 20 hits with Bananas.'' | |||
|-style="height: 80px" | |||
|width=10% style="background:linear-gradient(#F2E18F,#B9800F)"|[[File:MKT Icon Coins 3.png|70px]] | |||
|width=10% style="background:linear-gradient(#F2E18F,#B9800F)"|[[File:MKT Icon Ruby.png|70px]] | |||
|width=10% style="background:linear-gradient(#F2E18F,#B9800F)"|[[File:MKT Icon Point-boostticket2.png|70px]] | |||
|width=10% style="background:linear-gradient(#F2E18F,#B9800F)"|[[File:MKT Icon Point-boostticket2.png|70px]] | |||
|width=10% style="background:linear-gradient(#F2E18F,#B9800F)"|[[File:MKT Icon Ruby 2.png|70px]] | |||
|width=10% style="background:linear-gradient(#F2E18F,#B9800F)"|[[File:MKT Icon Points-capticket8.png|70px]] | |||
|width=10% style="background:linear-gradient(#F2E18F,#B9800F)"|[[File:MKT Icon Level-boostticket7.png|70px]] | |||
|width=10% style="background:linear-gradient(#F2E18F,#B9800F)"|[[File:MKT Icon Level-boostticket8.png|70px]] | |||
|width=10% style="background:linear-gradient(#F2E18F,#B9800F)"|[[File:MKT Icon Level-boostticket9.png|70px]] | |||
|-style="color: #FFF" | |||
|style="background:linear-gradient(#864D00,#A26000); border-top:1px solid #B9800F;"|{{Color link|#A1A1FF|Coins}} ×3,000 | |||
|style="background:linear-gradient(#864D00,#A26000); border-top:1px solid #B9800F;"|{{Color link|#A1A1FF|Ruby|Rubies}} ×10 | |||
|style="background:linear-gradient(#864D00,#A26000); border-top:1px solid #B9800F;"|{{Color link|#A1A1FF|Point-boost ticket}} (Kart) ×3 | |||
|style="background:linear-gradient(#864D00,#A26000); border-top:1px solid #B9800F;"|Point-boost ticket (Kart) ×5 | |||
|style="background:linear-gradient(#864D00,#A26000); border-top:1px solid #B9800F;"|Rubies ×20 | |||
|style="background:linear-gradient(#864D00,#A26000); border-top:1px solid #B9800F;"|{{Color link|#A1A1FF|Points-cap ticket}} (High-end kart) ×1 | |||
|style="background:linear-gradient(#864D00,#A26000); border-top:1px solid #B9800F;"|Level-boost ticket (High-End driver) ×2 | |||
|style="background:linear-gradient(#864D00,#A26000); border-top:1px solid #B9800F;"|Level-boost ticket (High-End kart) ×2 | |||
|style="background:linear-gradient(#864D00,#A26000); border-top:1px solid #B9800F;"|Level-boost ticket (High-End glider) ×2 | |||
|-style="color: #FFF" | |||
|style="background:linear-gradient(#A26000,#C88512); border-top:1px solid #A26000;"|''Do 20 Jump Boosts.'' | |||
|style="background:linear-gradient(#A26000,#C88512); border-top:1px solid #A26000;"|''Start a new tour.'' | |||
|style="background:linear-gradient(#A26000,#C88512); border-top:1px solid #A26000;"|''Do 50 Mini-Turbo boosts.'' | |||
|style="background:linear-gradient(#A26000,#C88512); border-top:1px solid #A26000;"|''Do 50 Jump Boosts.'' | |||
|style="background:linear-gradient(#A26000,#C88512); border-top:1px solid #A26000;"|''Start a new tour.'' | |||
|style="background:linear-gradient(#A26000,#C88512); border-top:1px solid #A26000;"|''Do 100 Mini-Turbo boosts.'' | |||
|style="background:linear-gradient(#A26000,#C88512); border-top:1px solid #A26000;"|''Land 5 hits with Bob-ombs.'' | |||
|style="background:linear-gradient(#A26000,#C88512); border-top:1px solid #A26000;"|''Do 100 Jump Boosts.'' | |||
|style="background:linear-gradient(#A26000,#C88512); border-top:1px solid #A26000;"|''Do 150 Mini-Turbo boosts.'' | |||
|-style="height: 80px" | |||
|width=10% style="background:linear-gradient(#F2E18F,#B9800F)"|[[File:MKT Icon Level-boostticket2.png|70px]] | |||
|width=10% style="background:linear-gradient(#F2E18F,#B9800F)"|[[File:MKT Icon Level-boostticket5.png|70px]] | |||
|width=10% style="background:linear-gradient(#F2E18F,#B9800F)"|[[File:MKT Icon Level-boostticket8.png|70px]] | |||
|width=10% style="background:linear-gradient(#F2E18F,#B9800F)"|[[File:MKT Icon Level-boostticket7.png|70px]] | |||
|width=10% style="background:linear-gradient(#F2E18F,#B9800F)"|[[File:MKT Icon Level-boostticket8.png|70px]] | |||
|width=10% style="background:linear-gradient(#F2E18F,#B9800F)"|[[File:MKT Icon Level-boostticket9.png|70px]] | |||
|width=10% style="background:linear-gradient(#F2E18F,#B9800F)"|[[File:MKT Icon Points-capticket7.png|70px]] | |||
|width=10% style="background:linear-gradient(#F2E18F,#B9800F)"|[[File:MKT Icon Points-capticket8.png|70px]] | |||
|width=10% style="background:linear-gradient(#F2E18F,#B9800F)"|[[File:MKT Icon Points-capticket9.png|70px]] | |||
|-style="color: #FFF" | |||
|style="background:linear-gradient(#864D00,#A26000); border-top:1px solid #B9800F;"|{{Color link|#A1A1FF|Level-boost ticket}} (Normal kart) ×1 | |||
|style="background:linear-gradient(#864D00,#A26000); border-top:1px solid #B9800F;"|Level-boost ticket (Super kart) ×1 | |||
|style="background:linear-gradient(#864D00,#A26000); border-top:1px solid #B9800F;"|Level-boost ticket (High-End kart) ×1 | |||
|style="background:linear-gradient(#864D00,#A26000); border-top:1px solid #B9800F;"|Level-boost ticket (High-End driver) ×1 | |||
|style="background:linear-gradient(#864D00,#A26000); border-top:1px solid #B9800F;"|Level-boost ticket (High-End kart) ×1 | |||
|style="background:linear-gradient(#864D00,#A26000); border-top:1px solid #B9800F;"|Level-boost ticket (High-End glider) ×1 | |||
|style="background:linear-gradient(#864D00,#A26000); border-top:1px solid #B9800F;"|Points-cap ticket (High-end driver) ×2 | |||
|style="background:linear-gradient(#864D00,#A26000); border-top:1px solid #B9800F;"|Points-cap ticket (High-end kart) ×2 | |||
|style="background:linear-gradient(#864D00,#A26000); border-top:1px solid #B9800F;"|Points-cap ticket (High-end glider) ×2 | |||
|-style="color: #FFF" | |||
|style="background:linear-gradient(#A26000,#C88512); border-top:1px solid #A26000;"|''Get 1st place 3 times.'' | |||
|style="background:linear-gradient(#A26000,#C88512); border-top:1px solid #A26000;"|''Get 1st place 5 times.'' | |||
|style="background:linear-gradient(#A26000,#C88512); border-top:1px solid #A26000;"|''Get 1st place 10 times.'' | |||
|style="background:linear-gradient(#A26000,#C88512); border-top:1px solid #A26000;"|''Get 1st place 5 times.'' | |||
|style="background:linear-gradient(#A26000,#C88512); border-top:1px solid #A26000;"|''Get 1st place 10 times.'' | |||
|style="background:linear-gradient(#A26000,#C88512); border-top:1px solid #A26000;"|''Get 1st place 15 times.'' | |||
|style="background:linear-gradient(#A26000,#C88512); border-top:1px solid #A26000;"|''Get 1st place 10 times.'' | |||
|style="background:linear-gradient(#A26000,#C88512); border-top:1px solid #A26000;"|''Get 1st place 15 times.'' | |||
|style="background:linear-gradient(#A26000,#C88512); border-top:1px solid #A26000;"|''Get 1st place 20 times.'' | |||
|} | |||
<br> | |||
{| align=center width=30% cellspacing=0 border=1 cellpadding=3 style="border-collapse:collapse; font-family:Arial; text-align:center" | |||
|- | |||
!colspan=3 style="background: #C3F84E"|'''Tour Multiplayer Challenges''' | |||
|-style="color: #000" | |||
|colspan=3 style="background: #C3F84E"|'''Three in a row reward:''' [[File:MKT Icon Coins 2.png|60px]] [[Coin|Coins]] ×300 | |||
|-style="color: #000" | |||
|colspan=3 style="background: #C3F84E"|'''Completion reward:''' [[File:MKT Icon 1Ruby.png|60px]] Rubies ×5 | |||
|-style="color: #FFF" | |||
|width=10% style="background: #2F5D1C"|[[File:MKT 134CB.png|70px]]<br>[[File:MKT Icon GrandStar.png|15px]] | |||
|width=10% style="background: #2F5D1C"|[[File:MKT 146CB.png|70px]]<br>[[File:MKT Icon GrandStar.png|15px]] | |||
|width=10% style="background: #2F5D1C"|[[File:MKT 127CB.png|70px]]<br>[[File:MKT Icon GrandStar.png|15px]] | |||
|-style="color: #FFF" | |||
|style="background: #2F5D1C; border-top:1px solid #2F5D1C;"|''Do 10 Jump Boosts in multiplayer.'' | |||
|style="background: #2F5D1C; border-top:1px solid #2F5D1C;"|''Do 3 Rocket Starts in multiplayer{{sic}}'' | |||
|style="background: #2F5D1C; border-top:1px solid #2F5D1C;"|''Land 3 hits with Green Shells in multiplayer.'' | |||
|-style="color: #FFF" | |||
|width=10% style="background: #2F5D1C"|[[File:MKT 112-3CB.png|70px]]<br>[[File:MKT Icon GrandStar.png|15px]] [[File:MKT Icon GrandStar.png|15px]] | |||
|width=10% style="background: #2F5D1C"|[[File:MKT 112-1CB.png|70px]]<br>[[File:MKT Icon GrandStar.png|15px]] [[File:MKT Icon GrandStar.png|15px]] | |||
|width=10% style="background: #2F5D1C"|[[File:MKT 112CB.png|70px]]<br>[[File:MKT Icon GrandStar.png|15px]] [[File:MKT Icon GrandStar.png|15px]] | |||
|-style="color: #FFF" | |||
|style="background: #2F5D1C; border-top:1px solid #2F5D1C;"|''Play multiplayer 3 times.'' | |||
|style="background: #2F5D1C; border-top:1px solid #2F5D1C;"|''Play multiplayer 5 times.'' | |||
|style="background: #2F5D1C; border-top:1px solid #2F5D1C;"|''Play multiplayer 10 times.'' | |||
|-style="color: #FFF" | |||
|width=10% style="background: #2F5D1C"|[[File:MKT 130CB.png|70px]]<br>[[File:MKT Icon GrandStar.png|15px]] [[File:MKT Icon GrandStar.png|15px]] | |||
|width=10% style="background: #2F5D1C"|[[File:MKT 131CB.png|70px]]<br>[[File:MKT Icon GrandStar.png|15px]] [[File:MKT Icon GrandStar.png|15px]] | |||
|width=10% style="background: #2F5D1C"|[[File:MKT 129CB.png|70px]]<br>[[File:MKT Icon GrandStar.png|15px]] [[File:MKT Icon GrandStar.png|15px]] | |||
|-style="color: #FFF" | |||
|style="background: #2F5D1C; border-top:1px solid #2F5D1C;"|''Get 3rd place or higher in multiplayer.'' | |||
|style="background: #2F5D1C; border-top:1px solid #2F5D1C;"|''Get 3rd place or higher 3 times in multiplayer.'' | |||
|style="background: #2F5D1C; border-top:1px solid #2F5D1C;"|''Get 3rd place or higher 5 times in multiplayer.'' | |||
|} | |||
<br> | |||
{|class="wikitable" style="margin:auto; text-align:center" width=65% | |||
!colspan=2 width=30%|Total Points Challenge 1 (2023) | |||
|rowspan=8 style="border-top:1px solid #FFF; border-bottom:1px solid #FFF;" width=5%| | |||
!colspan=2 width=30%|Total Points Challenge 2 (2023) | |||
|- | |||
!Points | |||
!Rewards | |||
!Points | |||
!Rewards | |||
|- | |||
!400,000 | |||
|[[File:MKT Icon 1Ruby.png|20px]] [[Ruby|Rubies]] ×3<br> | |||
[[File:MKT Icon Point-boostticket1.png|30px]] [[Point-boost ticket]]s (driver) ×5<br> | |||
[[File:MKT Icon Point-boostticket2.png|30px]] Point-boost tickets (kart) ×5<br> | |||
[[File:MKT Icon Point-boostticket3.png|30px]] Point-boost tickets (glider) ×5 | |||
!999,999 | |||
|[[File:MKT Icon 1Ruby.png|20px]] [[Ruby|Rubies]] ×3<br> | |||
[[File:MKT Icon Point-boostticket1.png|30px]] Point-boost tickets (driver) ×5<br> | |||
[[File:MKT Icon Point-boostticket2.png|30px]] Point-boost tickets (kart) ×5<br> | |||
[[File:MKT Icon Point-boostticket3.png|30px]] Point-boost tickets (glider) ×5 | |||
|- | |||
!300,000 | |||
|[[File:MKT Icon Coins 3.png|30px]] [[Coin]]s ×1,000<br> | |||
[[File:MKT Icon ItemTicket.png|30px]] [[Item ticket]]s ×10<br> | |||
!900,000 | |||
|[[File:MKT Icon Coins 3.png|30px]] Coins ×1,000<br> | |||
[[File:MKT Icon ItemTicket.png|30px]] Item tickets ×10<br> | |||
|- | |||
!250,000 | |||
|[[File:MKT Icon Coins 3.png|30px]] Coins ×1,000<br> | |||
[[File:MKT Icon Points-capticket4.png|30px]] Points-cap ticket (Super driver) ×1 | |||
!800,000 | |||
|[[File:MKT Icon Coins 3.png|30px]] Coins ×1,000<br> | |||
[[File:MKT Icon Points-capticket7.png|30px]] Points-cap ticket (High-End driver) ×1 | |||
|- | |||
!200,000 | |||
|[[File:MKT Icon Coins 3.png|30px]] Coins ×1,000<br> | |||
[[File:MKT Icon Level-boostticket4.png|30px]] Level-boost ticket (Super driver) ×1 | |||
!700,000 | |||
|[[File:MKT Icon Coins 3.png|30px]] Coins ×1,000<br> | |||
[[File:MKT Icon Level-boostticket7.png|30px]] Level-boost ticket (High-End driver) ×1 | |||
|- | |||
!150,000 | |||
|[[File:MKT Icon Coins 3.png|30px]] Coins ×1,000<br> | |||
[[File:MKT Icon Points-capticket1.png|30px]] [[Points-cap ticket]] (Normal driver) ×1 | |||
!600,000 | |||
|[[File:MKT Icon Coins 3.png|30px]] Coins ×1,000<br> | |||
[[File:MKT Icon Points-capticket4.png|30px]] Points-cap ticket (Super driver) ×1 | |||
|- | |||
!100,000 | |||
|[[File:MKT Icon Coins 3.png|30px]] Coins ×1,000<br> | |||
[[File:MKT Icon Level-boostticket1.png|30px]] [[Level-boost ticket]] (Normal driver) ×1 | |||
!500,000 | |||
|[[File:MKT Icon Coins 3.png|30px]] Coins ×1,000<br> | |||
[[File:MKT Icon Level-boostticket4.png|30px]] Level-boost ticket (Super driver) ×1 | |||
|} | |||
<br> | |||
{|class="wikitable" style="margin:auto; text-align:center" width=65% | |||
!colspan=2 width=30%|Total Points Challenge 1 (2024) | |||
|rowspan=8 style="border-top:1px solid #FFF; border-bottom:1px solid #FFF;" width=5%| | |||
!colspan=2 width=30%|Total Points Challenge 2 (2024) | |||
|- | |||
!Points | |||
!Rewards | |||
!Points | |||
!Rewards | |||
|- | |||
!400,000 | |||
|[[File:MKT Icon 1Ruby.png|20px]] [[Ruby|Rubies]] ×3<br> | |||
[[File:MKT Icon Point-boostticket1.png|30px]] [[Point-boost ticket]]s (driver) ×5<br> | |||
[[File:MKT Icon Point-boostticket2.png|30px]] Point-boost tickets (kart) ×5<br> | |||
[[File:MKT Icon Point-boostticket3.png|30px]] Point-boost tickets (glider) ×5 | |||
!999,999 | |||
|[[File:MKT Icon 1Ruby.png|20px]] [[Ruby|Rubies]] ×3<br> | |||
[[File:MKT Icon Point-boostticket1.png|30px]] Point-boost tickets (driver) ×5<br> | |||
[[File:MKT Icon Point-boostticket2.png|30px]] Point-boost tickets (kart) ×5<br> | |||
[[File:MKT Icon Point-boostticket3.png|30px]] Point-boost tickets (glider) ×5 | |||
|- | |||
!300,000 | |||
|[[File:MKT Icon Coins 2.png|30px]] [[Coin]]s ×500<br> | |||
[[File:MKT Icon ItemTicket.png|30px]] [[Item ticket]]s ×10<br> | |||
[[File:MKT Icon StarTicket.png|30px]] [[Star ticket]]s ×3 | |||
!900,000 | |||
|[[File:MKT Icon Coins 2.png|30px]] Coins ×500<br> | |||
[[File:MKT Icon ItemTicket.png|30px]] Item tickets ×10<br> | |||
[[File:MKT Icon QuickTicket.png|30px]] Quick ticket ×1 | |||
|- | |||
!250,000 | |||
|[[File:MKT Icon Coins 2.png|30px]] Coins ×500<br> | |||
[[File:MKT Icon Points-capticket4.png|30px]] Points-cap ticket (Super driver) ×1<br> | |||
[[File:MKT Icon ItemTicket.png|30px]] Item tickets ×2 | |||
!800,000 | |||
|[[File:MKT Icon Coins 2.png|30px]] Coins ×500<br> | |||
[[File:MKT Icon Points-capticket7.png|30px]] Points-cap ticket (High-End driver) ×1<br> | |||
[[File:MKT Icon QuickTicket.png|30px]] Quick ticket ×1 | |||
|- | |||
!200,000 | |||
|[[File:MKT Icon Coins 2.png|30px]] Coins ×500<br> | |||
[[File:MKT Icon Level-boostticket4.png|30px]] Level-boost ticket (Super driver) ×1<br> | |||
[[File:MKT Icon ItemTicket.png|30px]] Item tickets ×2 | |||
!700,000 | |||
|[[File:MKT Icon Coins 2.png|30px]] Coins ×500<br> | |||
[[File:MKT Icon Level-boostticket7.png|30px]] Level-boost ticket (High-End driver) ×1<br> | |||
[[File:MKT Icon QuickTicket.png|30px]] Quick ticket ×1 | |||
|- | |||
!150,000 | |||
|[[File:MKT Icon Coins 2.png|30px]] Coins ×500<br> | |||
[[File:MKT Icon Points-capticket1.png|30px]] [[Points-cap ticket]] (Normal driver) ×1<br> | |||
[[File:MKT Icon ItemTicket.png|30px]] Item tickets ×2 | |||
!600,000 | |||
|[[File:MKT Icon Coins 2.png|30px]] Coins ×500<br> | |||
[[File:MKT Icon Points-capticket4.png|30px]] Points-cap ticket (Super driver) ×1<br> | |||
[[File:MKT Icon ItemTicket.png|30px]] Item tickets ×3 | |||
|- | |||
!100,000 | |||
|[[File:MKT Icon Coins 2.png|30px]] Coins ×500<br> | |||
[[File:MKT Icon Level-boostticket1.png|30px]] [[Level-boost ticket]] (Normal driver) ×1<br> | |||
[[File:MKT Icon ItemTicket.png|30px]] Item tickets ×2 | |||
!500,000 | |||
|[[File:MKT Icon Coins 2.png|30px]] Coins ×500<br> | |||
[[File:MKT Icon Level-boostticket4.png|30px]] Level-boost ticket (Super driver) ×1<br> | |||
[[File:MKT Icon ItemTicket.png|30px]] Item tickets ×3 | |||
|} | |} | ||
| Line 418: | Line 781: | ||
{|class="wikitable" style="margin:auto; text-align:center" | {|class="wikitable" style="margin:auto; text-align:center" | ||
!colspan=2|High-End items obtainable from Gold Pipes during the | !colspan=2|High-End items obtainable from Gold Pipes during the Vacation Tour | ||
!Rate (each) | !Rate (each) | ||
|- | |- | ||
| Line 449: | Line 812: | ||
===Other items=== | ===Other items=== | ||
{| class="wikitable" style="margin:auto; text-align:center" width=50% | {| class="wikitable" style="margin:auto; text-align:center" width=50% | ||
!colspan=3|Items available in Mii Racing Suit Shop ( | !colspan=3|Items available in Mii Racing Suit Shop (August 8, 2023 - August 22, 2023) | ||
|- | |- | ||
|width=33%|[[File:MKT Artwork FishBoneMiiRacingSuit.png|80x80px]] | |width=33%|[[File:MKT Artwork FishBoneMiiRacingSuit.png|80x80px]] | ||
| Line 474: | Line 837: | ||
![[Mii|Nabbit Mii Racing Suit]]<br>[[File:MKT Icon 1Ruby.png|20px]] 100<br>Amount: 3 | ![[Mii|Nabbit Mii Racing Suit]]<br>[[File:MKT Icon 1Ruby.png|20px]] 100<br>Amount: 3 | ||
![[Mii|Pastry Chef Mii Racing Suit]]<br>[[File:MKT Icon 1Ruby.png|20px]] 100<br>Amount: 3 | ![[Mii|Pastry Chef Mii Racing Suit]]<br>[[File:MKT Icon 1Ruby.png|20px]] 100<br>Amount: 3 | ||
|} | |||
{| class="wikitable" style="margin:auto; text-align:center" width=50% | |||
!colspan=3|Items available in Mii Racing Suit Shop (August 6, 2024 - August 20, 2024) | |||
|- | |||
|width=33%|[[File:MKT Artwork IggyMiiRacingSuit.png|80x80px]] | |||
|width=34%|[[File:MKT Artwork RockyWrenchMiiRacingSuit.png|80x80px]] | |||
|width=33%|[[File:MKT Artwork SpikeMiiRacingSuit.png|80x80px]] | |||
|- | |||
![[Mii|Iggy Mii Racing Suit]]<br>[[File:MKT Icon 1Ruby.png|20px]] 100<br>Amount: 3 | |||
![[Mii|Rocky Wrench Mii Racing Suit]]<br>[[File:MKT Icon 1Ruby.png|20px]] 100<br>Amount: 3 | |||
![[Mii|Spike Mii Racing Suit]]<br>70 [[File:MKT Icon 1Ruby.png|20px]] [[ruby|rubies]] for 1st purchase;<br>100 rubies for 2nd and 3rd purchases respectively | |||
|- | |||
|[[File:MKT Artwork GreenMiiRacingSuit.png|80x80px]] | |||
|[[File:MKT Artwork PurpleMiiRacingSuit.png|80x80px]] | |||
|[[File:MKT Artwork MooMooMiiRacingSuit.png|80x80px]] | |||
|- | |||
![[Mii|Green Mii Racing Suit]]<br>[[File:MKT Icon 1Ruby.png|20px]] 100<br>Amount: 3 | |||
![[Mii|Purple Mii Racing Suit]]<br>[[File:MKT Icon 1Ruby.png|20px]] 100<br>Amount: 3 | |||
![[Mii|Moo Moo Mii Racing Suit]]<br>[[File:MKT Icon 1Ruby.png|20px]] 100<br>Amount: 3 | |||
|- | |||
|[[File:MKT Artwork WarioMiiRacingSuit.png|80x80px]] | |||
|[[File:MKT Artwork LudwigMiiRacingSuit.png|80x80px]] | |||
|[[File:MKT Artwork HammerBroMiiRacingSuit.png|80x80px]] | |||
|- | |||
![[Mii|Wario Mii Racing Suit]]<br>[[File:MKT Icon 1Ruby.png|20px]] 100<br>Amount: 3 | |||
![[Mii|Ludwig Mii Racing Suit]]<br>[[File:MKT Icon 1Ruby.png|20px]] 100<br>Amount: 3 | |||
![[Mii|Hammer Bro Mii Racing Suit]]<br>[[File:MKT Icon 1Ruby.png|20px]] 100<br>Amount: 3 | |||
|} | |} | ||
==Token Shop== | ==Token Shop== | ||
The limited-time event where [[event token]]s appear began on August 8, 2023 and ended on August 22, 2023. Event tokens could be earned by collecting them on courses. | The limited-time event where [[event token]]s appear began on August 8, 2023 and ended on August 22, 2023; and began on August 6, 2024 and ended on August 20, 2024 for the rerun. Event tokens could be earned by collecting them on courses. | ||
{| class="wikitable" style="margin:auto; text-align:center" width=50% | {| class="wikitable" style="margin:auto; text-align:center" width=50% | ||
!colspan=3|'''Token Shop''' ( | !colspan=3|'''Token Shop''' (August 8, 2023 - August 22, 2023; August 6, 2024 - August 20, 2024) | ||
|- | |- | ||
|[[File:MKT Icon Launch Pipe Gold.png|70px]] | |[[File:MKT Icon Launch Pipe Gold.png|70px]] | ||
| Line 505: | Line 896: | ||
!Level-boost ticket (High-End)<br>[[File:MKT Icon Eventtoken.png|20px]] 120<br>Amount: 1 | !Level-boost ticket (High-End)<br>[[File:MKT Icon Eventtoken.png|20px]] 120<br>Amount: 1 | ||
!Level-boost ticket (High-End)<br>[[File:MKT Icon Eventtoken.png|20px]] 120<br>Amount: 1 | !Level-boost ticket (High-End)<br>[[File:MKT Icon Eventtoken.png|20px]] 120<br>Amount: 1 | ||
|} | |||
==Tier Shop== | |||
The shop features a variety of set and randomized items available for purchase. The item slots in the shop are unlocked based on the highest tier of players. | |||
{| class="wikitable" style="margin:auto; text-align:center" width=50% | |||
!colspan=3|Items available in Tier Shop (August 8, 2023 - August 22, 2023; August 6, 2024 - August 20, 2024) | |||
|- | |||
|[[File:MKT Icon Level-boostticket1.png|80px]] | |||
|[[File:MKT Icon Level-boostticket2.png|80px]] | |||
|[[File:MKT Icon Level-boostticket3.png|80px]] | |||
|- | |||
![[Level-boost ticket]] (Normal)<br>[[File:MKT Icon Coin.png|20px]] 1,000<br>Amount: 3 per week | |||
!Level-boost ticket (Normal)<br>[[File:MKT Icon Coin.png|20px]] 800<br>Amount: 3 per week | |||
!Level-boost ticket (Normal)<br>[[File:MKT Icon Coin.png|20px]] 800<br>Amount: 3 per week | |||
|- | |||
|[[File:MKT Icon Level-boostticket4.png|80px]]<br>OR<br>[[File:MKT Icon Level-boostticket7.png|80px]] | |||
|[[File:MKT Icon Level-boostticket5.png|80px]]<br>OR<br>[[File:MKT Icon Level-boostticket8.png|80px]] | |||
|[[File:MKT Icon Level-boostticket6.png|80px]]<br>OR<br>[[File:MKT Icon Level-boostticket9.png|80px]] | |||
|- | |||
!Level-boost ticket (Super)<br>[[File:MKT Icon Coin.png|20px]] 4,000<br>Amount: 2 per week<br>OR<br>Level-boost ticket (High-End)<br>[[File:MKT Icon Coin.png|20px]] 15,000<br>Amount: 1 per week | |||
!Level-boost ticket (Super)<br>[[File:MKT Icon Coin.png|20px]] 3,000<br>Amount: 2 per week<br>OR<br>Level-boost ticket (High-End)<br>[[File:MKT Icon Coin.png|20px]] 13,000<br>Amount: 1 per week | |||
!Level-boost ticket (Super)<br>[[File:MKT Icon Coin.png|20px]] 3,000<br>Amount: 2 per week<br>OR<br>Level-boost ticket (High-End)<br>[[File:MKT Icon Coin.png|20px]] 13,000<br>Amount: 1 per week | |||
|- | |||
|[[File:MKT Icon Points-capticket1.png|80px]]<br>OR<br>[[File:MKT Icon Points-capticket2.png|80px]]<br>OR<br>[[File:MKT Icon Points-capticket3.png|80px]] | |||
|[[File:MKT Icon Points-capticket4.png|80px]]<br>OR<br>[[File:MKT Icon Points-capticket5.png|80px]]<br>OR<br>[[File:MKT Icon Points-capticket6.png|80px]] | |||
|[[File:MKT Icon Points-capticket7.png|80px]]<br>OR<br>[[File:MKT Icon Points-capticket8.png|80px]]<br>OR<br>[[File:MKT Icon Points-capticket9.png|80px]] | |||
|- | |||
![[Points-cap ticket]] (Normal)<br>[[File:MKT Icon Coin.png|20px]] 2,000<br>Amount: 1 per week | |||
!Points-cap ticket (Super)<br>[[File:MKT Icon Coin.png|20px]] 5,000<br>Amount: 1 per week | |||
!Points-cap ticket (High-End)<br>[[File:MKT Icon Coin.png|20px]] 20,000<br>Amount: 1 per week | |||
|- | |||
|[[File:MKT Icon Level-boostticket9.png|80px]] | |||
|[[File:MKT Icon Level-boostticket8.png|80px]] | |||
|[[File:MKT Icon Level-boostticket7.png|80px]] | |||
|- | |||
!Level-boost ticket (High-End)<br>[[File:MKT Icon Coin.png|20px]] 13,000<br>Amount: 1 per week | |||
!Level-boost ticket (High-End)<br>[[File:MKT Icon Coin.png|20px]] 13,000<br>Amount: 1 per week | |||
!Level-boost ticket (High-End)<br>[[File:MKT Icon Coin.png|20px]] 15,000<br>Amount: 1 per week | |||
|} | |} | ||
| Line 514: | Line 943: | ||
==Names in other languages== | ==Names in other languages== | ||
{{foreign names | {{foreign names | ||
| | |Jpn=バカンスツアー | ||
| | |JpnR=Bakansu Tsuā | ||
| | |JpnM=Vacation Tour | ||
|ChiS=度假巡回赛 | |ChiS=度假巡回赛 | ||
|ChiSR=Dùjià Xúnhuísài | |ChiSR=Dùjià Xúnhuísài | ||
Latest revision as of 17:12, January 7, 2025
| Vacation Tour | |
|---|---|
| |
| Start date | August 8, 2023 11:00 p.m. (PT) August 6, 2024 (rerun) 11:00 p.m. (PT)[?] |
| End date | August 22, 2023 10:59 p.m. (PT) August 20, 2024 (rerun) 10:59 p.m. (PT)[?] |
| Number of cups | 15 |
| Ranked cups | Rosalina Cup (week 1) Daisy Cup (week 2) |
| Coin Rush course | Squeaky Clean Sprint |
| << List of tours >> | |
The Vacation Tour was the hundred-and-second tour of Mario Kart Tour, which began on August 9, 2023 and ended on August 22, 2023. It was rerun from August 7, 2024 to August 20, 2024 as the game's hundred-and-twenty-eighth tour.
This tour introduced Squeaky Clean Sprint, which first appeared in Wave 5 of the Mario Kart 8 Deluxe – Booster Course Pass, as a new course. It also featured the first reappearances of Athens Dash 1 and 2, Bangkok Rush 2, GBA Peach Circuit, GCN Mushroom Bridge, and GBA Bowser's Castle 4 since their debuts in the Spring Tour, the 2023 Winter Tour, the Princess Tour, the 2023 Mii Tour, and the 2023 Bowser Tour, respectively. The Boomerang Bro Cup also debuted in this tour, making it the first tour since the 2021 Space Tour where the new cup is for a non-High-End driver, and marking the longest gap between the cup's character's addition to the game and the debut of their respective cup. This was the first tour since the Peach Tour where the new cup does not fall on the ranked week.
This was the second tour in a row where the Daisy Cup is a ranked cup, being in the second week.
As of this tour, all Birdo colors from the Booster Course Pass are present in Mario Kart Tour. Additionally, all of the Koopalings now have a Mii Racing Suit as of this tour.
The Summertime Celebration that started in the Sunshine Tour continued in this tour, and ended in the 2023 Summer Tour.
The Coin Rush course for this tour was Squeaky Clean Sprint. The menu background featured the lawnchair, front-load washer and laundry basket, suitcase, and potted plant from Squeaky Clean Sprint as the landmark for the tour. This tour's trailer featured floating bubbles during its opening splash screen.
This was the first tour to repeat a Big Reverse Race vs. 100 bonus challenge. It was also the first tour to give favorite courses to Koopa Troopa, Birdo (Light Blue), Rosalina (Swimwear), the Koopa Dasher, the Super Blooper, the Light-blue Turbo Birdo, and the Great Sail since the 2022 Anniversary Tour, Hammer Bro Tour, 2022 Sundae Tour, New York Tour, Tokyo Tour, Marine Tour, and 2022 Los Angeles Tour, respectively.
Despite Paris Promenade being featured in this tour, its Battle map is not present. The Daisy Mii Racing Suit appears in the course icon for GCN Baby Park, despite not being available in the initial run of this tour or the rerun. This is the first tour since the 2022 Bowser Tour to not feature a new Mii Racing Suit in the icon of a course in the Mii Cup.
This was the final tour to introduce a "new" non-city course and Super kart to the game.
Spotlight Shop[edit]
| Week 1 banner items August 8, 2023, 11:00 p.m. (PT) – August 15, 2023, 10:59 p.m. (PT) | ||||
| Item type | Name | Cost | Contents | Banner image |
|---|---|---|---|---|
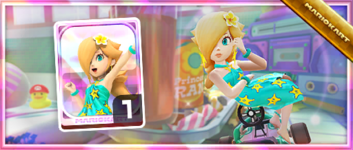
| Driver | Rosalina (Swimwear) | 105 150 rubies for 2nd and 3rd purchases respectively |
 Rosalina (Swimwear) ×1 |
|
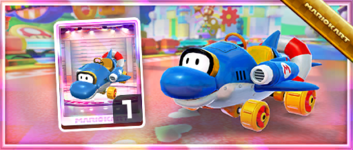
| Kart | Dolphin Drifter | 70 100 rubies for 2nd and 3rd purchases respectively |
Dolphin Drifter ×1 |
|
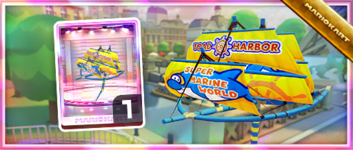
| Glider | Dolphin Great Sail | 70 100 rubies for 2nd and 3rd purchases respectively |
Dolphin Great Sail ×1 |
|
| Week 2 banner items August 15, 2023, 11:00 p.m. (PT) – August 22, 2023, 10:59 p.m. (PT) | ||||
| Item type | Name | Cost | Contents | Banner image |
| Driver | Daisy (Swimwear) | 105 150 rubies for 2nd and 3rd purchases respectively |
Daisy (Swimwear) ×1 |
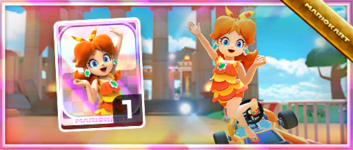
|
| Glider | Pink Bubble Balloon | 70 100 rubies for 2nd and 3rd purchases respectively |
Pink Bubble Balloon ×1 |
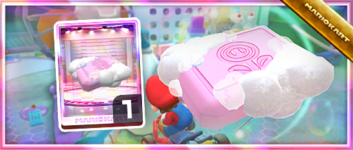
|
Daily Spotlight[edit]
The Daily Spotlight contains a mixture of items themed around the tour, items that have ranked tracks as favorites, and gold items. The rates listed are specific for that type of item; drivers, karts, and gliders are selected separately. Items marked with an asterisk (*) do not appear in the Daily Spotlight during the week they are available as Spotlight Shop banner items.
Cups[edit]
Rosalina Cup Ranked cup (week 1) |
Squeaky Clean Sprint |
Paris Promenade R/T |
Athens Dash 2R/T |
Time Trial | ||||
 Squeaky Clean Sprint |
Red Yoshi | |||||||
Mii Cup |
GCN Baby Park |
GCN Mushroom Bridge T |
Paris Promenade |
Do Jump Boosts | ||||
 Bangkok Rush |
Iggy | |||||||
Daisy Cup Ranked cup (week 2) |
Bangkok Rush 2R/T |
GBA Peach Circuit R/T |
Squeaky Clean Sprint R |
Break Item Boxes | ||||
 Paris Promenade 2 |
Peach | |||||||
Lakitu Cup |
GCN Cookie Land (Balloon Battle) |
Athens Dash R |
Paris Promenade T |
Precision Gliding | ||||
 Squeaky Clean Sprint |
Baby Luigi | |||||||
Bowser Cup |
Bangkok Rush |
GCN Mushroom Bridge |
GBA Bowser's Castle 4R |
Time Trial | ||||
 Athens Dash 2R |
Black Shy Guy | |||||||
Bowser Jr. Cup |
GBA Peach Circuit |
GCN Baby Park R |
Bangkok Rush 2 |
Big Reverse Race vs. 100 | ||||
 Bangkok Rush |
Mario | |||||||
Larry Cup |
Paris Promenade R |
Squeaky Clean Sprint R/T |
Athens Dash 2T |
Goomba Takedown | ||||
 Paris Promenade 2 |
Baby Rosalina | |||||||
Poochy Cup |
Athens Dash |
GBA Peach Circuit R |
Bangkok Rush T |
Ring Race | ||||
 GCN Baby Park |
Baby Peach | |||||||
Peach Cup |
GCN Mushroom Bridge R |
Bangkok Rush 2T |
Paris Promenade 2 |
Big Reverse Race | ||||
 GBA Peach Circuit |
Any character | |||||||
Boomerang Bro Cup |
GCN Baby Park T |
Athens Dash 2R |
DS Twilight House (Balloon Battle) |
Time Trial | ||||
 Athens Dash |
Boomerang Bro | |||||||
Diddy Kong Cup |
Squeaky Clean Sprint T |
Bangkok Rush 2R |
GBA Peach Circuit T |
Smash Small Dry Bones | ||||
 GCN Baby Park |
Bowser Jr. | |||||||
Baby Luigi Cup |
Bangkok Rush R |
Paris Promenade 2R |
Athens Dash T |
Steer Clear of Obstacles | ||||
 Paris Promenade |
Baby Mario | |||||||
Pauline Cup |
Paris Promenade 2R/T |
GBA Bowser's Castle 4 |
GCN Mushroom Bridge R/T |
Do Jump Boosts | ||||
 Squeaky Clean Sprint |
Mario (Swimwear) | |||||||
Yoshi Cup |
Athens Dash 2 |
Bangkok Rush R/T |
Squeaky Clean Sprint R/T |
Combo Attack | ||||
 Bangkok Rush 2T |
Koopa Troopa | |||||||
Baby Peach Cup |
Paris Promenade 2T |
Athens Dash R/T |
GCN Baby Park R/T |
Vs. Mega Bowser | ||||
 Paris Promenade |
Any character | |||||||
Today's Challenge[edit]
Players' most recently used kart and glider are chosen, and favorite and favored ones have extra priority. Opponents are arranged randomly. On day 1 of this tour, players finish a race in GCN Baby Park in the Mii Cup using the Daisy Mii Racing Suit for a free pipe launch. Starting from day 2, players have to finish a race in the earliest incomplete course that is not in any of the ranked cups using the driver shown on the course's thumbnail every day to obtain the corresponding reward in the table below. Once all of the courses are completed, the courses are selected at random.
| Day(s) | Reward |
| 1-13 | Free pipe launch |
|---|---|
| 14 |  Badge |
| Today's Challenge Pipe | |

| |
| Pipe contents | |
| Rubies, coins, driver (Normal/Super/High-End), kart (Normal/Super/High-End), glider (Normal/Super/High-End), item tickets | |
Rewards[edit]
Gold cells indicate rewards that are exclusive to Gold Pass members.
| Goo-Goo Gold | Gold Umbrella |
| Grand Stars | 15 | 20 | 25 | 30 | 35 | 40 | 45 | 50 | 55 | 60 | 65 | 70 | 80 | 90 | 100 | 110 | 120 | 130 | 140 | 150 | 160 | 170 | 180 | 190 | 200 | 210 | 220 | 230 | 240 | 250 | 260 | 270 | 280 | 290 | 300 | 310 | 320 | Total | Grand total | |
|---|---|---|---|---|---|---|---|---|---|---|---|---|---|---|---|---|---|---|---|---|---|---|---|---|---|---|---|---|---|---|---|---|---|---|---|---|---|---|---|---|
| Pipes | 10 | 26 | ||||||||||||||||||||||||||||||||||||||
| 16 | ||||||||||||||||||||||||||||||||||||||||
| Coins | 500 | 500 | 500 | 500 | 500 | 500 | 500 | 500 | 500 | 500 | 5000 | 15000 | ||||||||||||||||||||||||||||
| 5000 | 5000 | 10000 | ||||||||||||||||||||||||||||||||||||||
| Rubies | 10 | 5 | 3 | 3 | 21 | 56 | ||||||||||||||||||||||||||||||||||
| 15 | 10 | 10 | 35 | |||||||||||||||||||||||||||||||||||||
| Item tickets | 5 | 5 | 10 | 30 | ||||||||||||||||||||||||||||||||||||
| 10 | 10 | 20 | ||||||||||||||||||||||||||||||||||||||
| Star tickets | 2 | 3 | 5 | 5 | ||||||||||||||||||||||||||||||||||||
| 0 | ||||||||||||||||||||||||||||||||||||||||
| Quick tickets | 1 | 1 | 4 | |||||||||||||||||||||||||||||||||||||
| 3 | 3 | |||||||||||||||||||||||||||||||||||||||
| Point-boost tickets | 1 | 1 | 1 | 3 | 8 | |||||||||||||||||||||||||||||||||||
| 5 | 5 | |||||||||||||||||||||||||||||||||||||||
| 1 | 1 | 1 | 3 | 8 | ||||||||||||||||||||||||||||||||||||
| 5 | 5 | |||||||||||||||||||||||||||||||||||||||
| 1 | 1 | 1 | 3 | 8 | ||||||||||||||||||||||||||||||||||||
| 5 | 5 | |||||||||||||||||||||||||||||||||||||||
| Level-boost tickets | 3 | 22 | ||||||||||||||||||||||||||||||||||||||
(3) |
(3) |
(3) |
(2) |
(2) |
(2) |
19 | ||||||||||||||||||||||||||||||||||
New content[edit]
The following content was introduced during the tour's debut in 2023.
Cups[edit]
Drivers[edit]
Mii Racing Suits[edit]
Karts[edit]
Gliders[edit]
Balloon designs[edit]
Rosalina Balloon
Courses[edit]
Squeaky Clean Sprint (N, R, T, R/T)
Paid banners[edit]
| Name | Availability | Cost | Contents | Banner image |
|---|---|---|---|---|
| Value Pack | August 8, 2023 – August 22, 2023 | US$1.99 |
|

|
| Driver Point-Boost Tickets 10 Ticket Set | August 8, 2023 – August 22, 2023 | US$3.99 | 
| |
| Celebrate the Vacation Tour with the Purple Rattle Buggy! | August 8, 2023 – August 22, 2023 | US$3.99 | 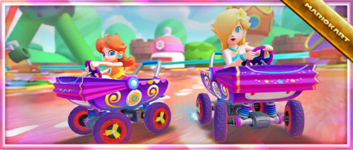
| |
| 70 Rubies and Ticket Pack | August 8, 2023 – August 22, 2023 | US$19.99 | 
| |
| 150 Rubies and Ticket Pack | August 8, 2023 – August 22, 2023 | US$39.99 |
|

|
Challenges[edit]
| Tour Challenges 1 | Tour Challenges 2 | Gold Challenges | ||||||||
|---|---|---|---|---|---|---|---|---|---|---|
| Completion reward: |
Completion reward: |
Completion reward: | ||||||||
 |
 |
 |
 |
 |
 |
 |
 |
 | ||
| Land 5 hits with Red Shells. | Land 3 hits with Green Shells. | Get a Fantastic combo a total of 5 times. | Do a total of 5 Slipstream boosts. | Use 15 Mushrooms. | Get 1st place 2 times in a row in 100cc or above. | Get a combo count of ×30 or higher. | Land 15 hits with Bananas. | Get 1st place 3 times in a row in 100cc or above. | ||
 |
 |
 |
 |
 |
 |
 |
 |
 | ||
| Get 1 item from the Daily Selects section of the Shop. | Get 3rd place or higher 30 times. | Do 100 Jump Boosts. | Use point-boost tickets 3 times. | Land a hit with a Bob-omb using a driver with a ribbon. | Earn a score of 7,000 or higher on 3 T or R/T courses. | Use a points-cap ticket. | Do 10 Mini-Turbos in a single race using a driver wearing earrings. | Earn a score of 10,000 or higher on 5 courses. | ||
 |
 |
 |
 |
 |
 |
 |
 |
 | ||
| Glide a total distance of 5,000. | Land a hit with a Blooper. | Finish every course of every cup, including bonus challenges. | Cause opponents to crash using a Mega Mushroom. | Earn a total score of 15,000 or higher in the Boomerang Bro Cup. | Race in auto mode. | Cause opponents to crash 3 times while gliding. | Earn a total score of 20,000 or higher in the Baby Peach Cup. | Complete Coin Rush 1 time. | ||
| Premium Challenges | Premium Challenges+ | Premium Challenges++ | ||||||||
|---|---|---|---|---|---|---|---|---|---|---|
| Cost: US$4.99 | Cost: US$9.99 | Cost: US$19.99 | ||||||||
| Three in a row reward: |
Three in a row reward: |
Three in a row reward: | ||||||||
| Completion reward: |
Completion reward: |
Completion reward: | ||||||||
| Pipe ×1 | Pipe ×1 | Pipe ×1 | Pipe ×1 | Gold Pipe ×1 | Coins ×5,000 | Gold Pipe ×1 | Rubies ×30 | Coins ×10,000 | ||
| Land 5 hits with Green Shells. | Land 5 hits with Bananas. | Land 3 hits with Bob-ombs. | Land 10 hits with Green Shells. | Land 10 hits with Bananas. | Use 10 Mushrooms. | Land 10 hits with Red Shells. | Start a new tour. | Land 20 hits with Bananas. | ||
| Coins ×3,000 | Rubies ×10 | Point-boost ticket (Kart) ×3 | Point-boost ticket (Kart) ×5 | Rubies ×20 | Points-cap ticket (High-end kart) ×1 | Level-boost ticket (High-End driver) ×2 | Level-boost ticket (High-End kart) ×2 | Level-boost ticket (High-End glider) ×2 | ||
| Do 20 Jump Boosts. | Start a new tour. | Do 50 Mini-Turbo boosts. | Do 50 Jump Boosts. | Start a new tour. | Do 100 Mini-Turbo boosts. | Land 5 hits with Bob-ombs. | Do 100 Jump Boosts. | Do 150 Mini-Turbo boosts. | ||
| Level-boost ticket (Normal kart) ×1 | Level-boost ticket (Super kart) ×1 | Level-boost ticket (High-End kart) ×1 | Level-boost ticket (High-End driver) ×1 | Level-boost ticket (High-End kart) ×1 | Level-boost ticket (High-End glider) ×1 | Points-cap ticket (High-end driver) ×2 | Points-cap ticket (High-end kart) ×2 | Points-cap ticket (High-end glider) ×2 | ||
| Get 1st place 3 times. | Get 1st place 5 times. | Get 1st place 10 times. | Get 1st place 5 times. | Get 1st place 10 times. | Get 1st place 15 times. | Get 1st place 10 times. | Get 1st place 15 times. | Get 1st place 20 times. | ||
| Tour Multiplayer Challenges | ||
|---|---|---|
| Three in a row reward: | ||
| Completion reward: | ||
 |
 |
 |
| Do 10 Jump Boosts in multiplayer. | Do 3 Rocket Starts in multiplayer[sic] | Land 3 hits with Green Shells in multiplayer. |
 |
 |
 |
| Play multiplayer 3 times. | Play multiplayer 5 times. | Play multiplayer 10 times. |
 |
 |
 |
| Get 3rd place or higher in multiplayer. | Get 3rd place or higher 3 times in multiplayer. | Get 3rd place or higher 5 times in multiplayer. |
| Total Points Challenge 1 (2023) | Total Points Challenge 2 (2023) | |||
|---|---|---|---|---|
| Points | Rewards | Points | Rewards | |
| 400,000 |
|
999,999 |
| |
| 300,000 |
|
900,000 | ||
| 250,000 | 800,000 | |||
| 200,000 | 700,000 | |||
| 150,000 |
|
600,000 | ||
| 100,000 |
|
500,000 | ||
| Total Points Challenge 1 (2024) | Total Points Challenge 2 (2024) | |||
|---|---|---|---|---|
| Points | Rewards | Points | Rewards | |
| 400,000 |
|
999,999 |
| |
| 300,000 |
|
900,000 | ||
| 250,000 | 800,000 | |||
| 200,000 | 700,000 | |||
| 150,000 |
|
600,000 | ||
| 100,000 |
|
500,000 | ||
Gold Pipe[edit]
Gold Pipes, including the All-Clear Pipe, randomly shoot out one of the following regular High-End items. The appearance rates can be viewed via the "Pipe content" link on the Gold Pass purchase screen.
Mii Racing Suit Shop[edit]
Banner items[edit]
| Name | Cost | Contents | Banner image |
|---|---|---|---|
| Wendy Mii Racing Suit | 70 100 rubies for 2nd and 3rd purchases respectively |
Wendy Mii Racing Suit ×1 |
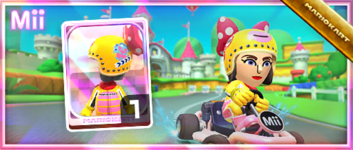
|
Other items[edit]
| Items available in Mii Racing Suit Shop (August 8, 2023 - August 22, 2023) | ||
|---|---|---|
| Fish Bone Mii Racing Suit 70 100 rubies for 2nd and 3rd purchases respectively |
Toadette Mii Racing Suit Amount: 3 |
Dry Bowser Mii Racing Suit Amount: 3 |
| Larry Mii Racing Suit Amount: 3 |
Iggy Mii Racing Suit Amount: 3 |
Ludwig Mii Racing Suit Amount: 3 |
| Spike Mii Racing Suit Amount: 3 |
Nabbit Mii Racing Suit Amount: 3 |
Pastry Chef Mii Racing Suit Amount: 3 |
| Items available in Mii Racing Suit Shop (August 6, 2024 - August 20, 2024) | ||
|---|---|---|
| Iggy Mii Racing Suit Amount: 3 |
Rocky Wrench Mii Racing Suit Amount: 3 |
Spike Mii Racing Suit 70 100 rubies for 2nd and 3rd purchases respectively |
| Green Mii Racing Suit Amount: 3 |
Purple Mii Racing Suit Amount: 3 |
Moo Moo Mii Racing Suit Amount: 3 |
| Wario Mii Racing Suit Amount: 3 |
Ludwig Mii Racing Suit Amount: 3 |
Hammer Bro Mii Racing Suit Amount: 3 |
Token Shop[edit]
The limited-time event where event tokens appear began on August 8, 2023 and ended on August 22, 2023; and began on August 6, 2024 and ended on August 20, 2024 for the rerun. Event tokens could be earned by collecting them on courses.
| Token Shop (August 8, 2023 - August 22, 2023; August 6, 2024 - August 20, 2024) | ||
|---|---|---|
| Gold Pipe Amount: 1 |
Pipe Amount: 34 |
Ruby ×3 Amount: 5 |
| Coin ×500 Amount: 5 |
Rosalina Balloon Amount: 1 |
Quick ticket Amount: 5 |
| Level-boost ticket (High-End) Amount: 1 |
Level-boost ticket (High-End) Amount: 1 |
Level-boost ticket (High-End) Amount: 1 |
Tier Shop[edit]
The shop features a variety of set and randomized items available for purchase. The item slots in the shop are unlocked based on the highest tier of players.
| Items available in Tier Shop (August 8, 2023 - August 22, 2023; August 6, 2024 - August 20, 2024) | ||
|---|---|---|
| Level-boost ticket (Normal) Amount: 3 per week |
Level-boost ticket (Normal) Amount: 3 per week |
Level-boost ticket (Normal) Amount: 3 per week |
OR |
OR |
OR |
| Level-boost ticket (Super) Amount: 2 per week OR Level-boost ticket (High-End) Amount: 1 per week |
Level-boost ticket (Super) Amount: 2 per week OR Level-boost ticket (High-End) Amount: 1 per week |
Level-boost ticket (Super) Amount: 2 per week OR Level-boost ticket (High-End) Amount: 1 per week |
OR OR |
OR OR |
OR OR |
| Points-cap ticket (Normal) Amount: 1 per week |
Points-cap ticket (Super) Amount: 1 per week |
Points-cap ticket (High-End) Amount: 1 per week |
| Level-boost ticket (High-End) Amount: 1 per week |
Level-boost ticket (High-End) Amount: 1 per week |
Level-boost ticket (High-End) Amount: 1 per week |
Gallery[edit]
Names in other languages[edit]
| Language | Name | Meaning | Notes |
|---|---|---|---|
| Japanese | バカンスツアー[?] Bakansu Tsuā |
Vacation Tour | |
| Chinese (simplified) | 度假巡回赛[?] Dùjià Xúnhuísài |
Vacation Tour | |
| Chinese (traditional) | 度假巡迴賽[?] Dùjià Xúnhuísài |
Vacation Tour | |
| French | Saison des vacances[?] | Vacation Season | |
| German | Urlaubs-Tour-Saison[?] | Vacation Tour Season | |
| Italian | Tour in vacanza[?] | Tour on vacation | |
| Korean | 바캉스 투어[?] Bakangseu Tueo |
Vacation Tour | |
| Portuguese | Temporada de Férias[?] | Vacation Season | |
| Spanish | Temporada de vacaciones[?] | Vacation Season |


