Sky Tour: Difference between revisions
No edit summary |
m (Text replacement - "([Cc])olor-link" to "$1olor link") |
||
| (4 intermediate revisions by 2 users not shown) | |||
| Line 18: | Line 18: | ||
Starting from this tour, [[Captain Toad]] and [[Bowser Jr.|Bowser Jr. (Pirate)]] are available in regular tour pipes, including the All-Clear Pipe. | Starting from this tour, [[Captain Toad]] and [[Bowser Jr.|Bowser Jr. (Pirate)]] are available in regular tour pipes, including the All-Clear Pipe. | ||
==Spotlights== | ==Spotlights== | ||
{| align=center width=75% cellspacing=0 border=1 cellpadding=3 style="border-collapse:collapse; font-family:Arial; text-align:center" | {|align=center width=75% cellspacing=0 border=1 cellpadding=3 style="border-collapse:collapse;font-family:Arial;text-align:center" | ||
|-style="background: #89A" | |-style="background: #89A" | ||
|colspan=3|'''Sky Pipe 1'''<br>February 22, 2022, 10:00 p.m. (PT) – <br>March 8, 2022, 9:59 p.m. (PT) | |colspan=3|'''Sky Pipe 1'''<br>February 22, 2022, 10:00 p.m. (PT) – <br>March 8, 2022, 9:59 p.m. (PT) | ||
| Line 27: | Line 26: | ||
|colspan=3|[[File:MKT Tour64 SkyPipe1.png|x150px]] | |colspan=3|[[File:MKT Tour64 SkyPipe1.png|x150px]] | ||
|colspan=3|[[File:MKT Tour64 SkyPipe2.png|x150px]] | |colspan=3|[[File:MKT Tour64 SkyPipe2.png|x150px]] | ||
|-style="background: #ABC" | |-style="background:#ABC" | ||
! style="width: 15%;"|Drivers | !style="width:15%;"|Drivers | ||
! style="width: 15%;"|Karts | !style="width:15%;"|Karts | ||
! style="width: 15%;"|Gliders | !style="width:15%;"|Gliders | ||
! style="width: 15%;"|Drivers | !style="width:15%;"|Drivers | ||
! style="width: 15%;"|Karts | !style="width:15%;"|Karts | ||
! style="width: 15%;"|Gliders | !style="width:15%;"|Gliders | ||
|- | |- | ||
|[[File:MKT Artwork MarioAviator.png|100x100px]] | |[[File:MKT Artwork MarioAviator.png|100x100px]] | ||
| Line 51: | Line 50: | ||
==Special pipe== | ==Special pipe== | ||
{| align=center width=50% cellspacing=0 border=1 cellpadding=3 style="border-collapse:collapse; font-family:Arial; text-align:center" | {|align=center width=50% cellspacing=0 border=1 cellpadding=3 style="border-collapse:collapse;font-family:Arial;text-align:center" | ||
|-style="background: #89A" | |-style="background:#89A" | ||
|colspan=3|'''8-Bit Gliders Pipe'''<br>February 26, 2022, 10:00 p.m. (PT) – <br>March 3, 2022, 9:59 p.m. (PT) | |colspan=3|'''8-Bit Gliders Pipe'''<br>February 26, 2022, 10:00 p.m. (PT) – <br>March 3, 2022, 9:59 p.m. (PT) | ||
|- | |- | ||
|colspan=4|[[File:MKT Tour64 8BitGlidersPipe.png|x150px]] | |colspan=4|[[File:MKT Tour64 8BitGlidersPipe.png|x150px]] | ||
|-style="background: #ABC" | |-style="background:#ABC" | ||
! style="width: 10%;"|High-End Spotlight Glider | !style="width:10%;"|High-End Spotlight Glider | ||
! style="width: 20%;"|High-End Gliders | !style="width:20%;"|High-End Gliders | ||
! style="width: 20%;"|Super Gliders | !style="width:20%;"|Super Gliders | ||
|- | |- | ||
|[[File:MKT Icon RecordSetter.png|100x100px]] | |[[File:MKT Icon RecordSetter.png|100x100px]] | ||
| Line 69: | Line 68: | ||
|[[8-Bit Jumping Mario]] and [[8-Bit Jumping Luigi]] | |[[8-Bit Jumping Mario]] and [[8-Bit Jumping Luigi]] | ||
|} | |} | ||
;Names in other languages | ;Names in other languages | ||
{{foreign names | {{foreign names | ||
| Line 101: | Line 99: | ||
==Cups== | ==Cups== | ||
{| align=center width=90% cellspacing=0 border=1 cellpadding=3 style="border-collapse:collapse; font-family:Arial; text-align:center" | {|align=center width=90% cellspacing=0 border=1 cellpadding=3 style="border-collapse:collapse;font-family:Arial;text-align:center" | ||
{{MKT cup table row | {{MKT cup table row | ||
|C=Mario||Ra=1 | |C=Mario||Ra=1 | ||
| Line 163: | Line 161: | ||
|R2=DS Luigi's Mansion||R2.I=LuigisMansionDS BabyLuigi||R2.1=1,300||R2.2=2,500||R2.3=2,800||R2.4=3,400||R2.5=6,500 | |R2=DS Luigi's Mansion||R2.I=LuigisMansionDS BabyLuigi||R2.1=1,300||R2.2=2,500||R2.3=2,800||R2.4=3,400||R2.5=6,500 | ||
|R3=Wii Maple Treeway T||R3.I=MapleTreewayTWii||R3.1=2,600||R3.2=5,000||R3.3=5,600||R3.4=6,800||R3.5=13,100 | |R3=Wii Maple Treeway T||R3.I=MapleTreewayTWii||R3.1=2,600||R3.2=5,000||R3.3=5,600||R3.4=6,800||R3.5=13,100 | ||
|CN=[[Combo Attack]]||C.I=Tour30 HammerBroCupChallenge||CC=[[ | |CN=[[Combo Attack]]||C.I=Tour30 HammerBroCupChallenge||CC=[[Lemmy]]||CT=N64 Kalimari Desert 2T||C.1=4||C.2=7||C.3=14 | ||
}} | }} | ||
{{MKT cup table row | {{MKT cup table row | ||
| Line 187: | Line 185: | ||
}} | }} | ||
|} | |} | ||
===Signature kart sets=== | ===Signature kart sets=== | ||
Drivers with a corresponding cup are bumped one rank up in every course of their cup. | Drivers with a corresponding cup are bumped one rank up in every course of their cup. | ||
{| class="wikitable" style="text-align: center" width=50% | {|class="wikitable"style="text-align:center"width=50% | ||
!width=10%|Cup | !width=10%|Cup | ||
!width=20%|Driver | !width=20%|Driver | ||
| Line 268: | Line 265: | ||
==Today's Challenge== | ==Today's Challenge== | ||
Players' most recently used kart and glider are chosen, and favorite and favored ones have extra priority. Opponents are arranged randomly. On day 1 of this tour, players finish a race in [[SNES Mario Circuit 2|SNES Mario Circuit 2R]] in the [[Morton Cup]] using [[ | Players' most recently used kart and glider are chosen, and favorite and favored ones have extra priority. Opponents are arranged randomly. On day 1 of this tour, players finish a race in [[SNES Mario Circuit 2|SNES Mario Circuit 2R]] in the [[Morton Cup]] using [[Morton]] for a free pipe launch. Starting from day 2, players have to finish a race in the earliest incomplete course that is not in any of the ranked cups using the driver shown on the course's thumbnail every day to obtain the corresponding reward in the table below. Once all of the courses are completed, the courses are selected at random. | ||
{|align=center width=40% cellspacing=0 border=1 cellpadding=3 style="border-collapse:collapse;font-family:Arial;text-align:center" | |||
{| align=center width=40% cellspacing=0 border=1 cellpadding=3 style="border-collapse:collapse; font-family:Arial; text-align:center" | |-style="background:#89A" | ||
|-style="background: #89A" | |||
|'''Day(s)''' | |'''Day(s)''' | ||
|'''Reward''' | |'''Reward''' | ||
| Line 283: | Line 279: | ||
!14 | !14 | ||
|[[File:MKT 036QB.png|60px]]<br>Badge | |[[File:MKT 036QB.png|60px]]<br>Badge | ||
|-style="background: #89A" | |-style="background:#89A" | ||
|colspan=2|'''Today's Challenge Pipe''' | |colspan=2|'''Today's Challenge Pipe''' | ||
|- | |- | ||
|colspan=2|[[File:MKT Tour45 TodaysChallengePipe.png|x150px]] | |colspan=2|[[File:MKT Tour45 TodaysChallengePipe.png|x150px]] | ||
|-style="background: #ABC" | |-style="background:#ABC" | ||
|colspan=2|'''Pipe contents''' | |colspan=2|'''Pipe contents''' | ||
|- | |- | ||
| Line 295: | Line 291: | ||
==Rewards== | ==Rewards== | ||
Gold cells indicate rewards that are exclusive to Gold Pass members. | Gold cells indicate rewards that are exclusive to Gold Pass members. | ||
{|class="wikitable" style="margin:auto; text-align:center" | {|class="wikitable"style="margin:auto;text-align:center" | ||
|- | |- | ||
!colspan=2|[[File:MKT Icon GrandStar.png|20x20px]] 15 | !colspan=2|[[File:MKT Icon GrandStar.png|20x20px]] 15 | ||
| Line 319: | Line 315: | ||
|} | |} | ||
<br> | <br> | ||
{|class="wikitable" style="margin:auto; text-align:center" | {|class="wikitable"style="margin:auto;text-align:center" | ||
|- | |- | ||
!Grand Stars!![[File:MKT Icon GrandStar.png|20x20px]]!!15!!20!!25!!30!!35!!40!!50!!60!!70!!85!!100!!115!!130!!145!!160!!180!!200!!215!!230!!240!!250!!255!!260!!265!!Total!!Grand total | !Grand Stars!![[File:MKT Icon GrandStar.png|20x20px]]!!15!!20!!25!!30!!35!!40!!50!!60!!70!!85!!100!!115!!130!!145!!160!!180!!200!!215!!230!!240!!250!!255!!260!!265!!Total!!Grand total | ||
| Line 409: | Line 405: | ||
==Paid banners== | ==Paid banners== | ||
{| align=center width=960px cellspacing=0 border=1 cellpadding=3 style="border-collapse:collapse; font-family:Arial; text-align:center" | {|align=center width=960px cellspacing=0 border=1 cellpadding=3 style="border-collapse:collapse;font-family:Arial;text-align:center" | ||
|-style="background: #ABC" | |-style="background:#ABC" | ||
!Name | !Name | ||
!Availability | !Availability | ||
| Line 462: | Line 458: | ||
|TCR1=[[File:MKT Icon CoinRushTicket.png|70px]] [[Coin Rush ticket]] ×1 | |TCR1=[[File:MKT Icon CoinRushTicket.png|70px]] [[Coin Rush ticket]] ×1 | ||
|T1.1=068 | |T1.1=068 | ||
|T1.1E=Land 3 hits with {{Color | |T1.1E=Land 3 hits with {{Color link|#A1A1FF|Green Shell|Green Shells}}. | ||
|T1.1S=1 | |T1.1S=1 | ||
|T1.2=104 | |T1.2=104 | ||
|T1.2E=Use 10 {{Color | |T1.2E=Use 10 {{Color link|#A1A1FF|Mushroom|Mushrooms}}. | ||
|T1.2S=1 | |T1.2S=1 | ||
|T1.3=024 | |T1.3=024 | ||
| Line 471: | Line 467: | ||
|T1.3S=1 | |T1.3S=1 | ||
|T1.4=007 | |T1.4=007 | ||
|T1.4E=Use {{Color | |T1.4E=Use {{Color link|#A1A1FF|point-boost ticket|point-boost tickets}} 3 times. | ||
|T1.4S=2 | |T1.4S=2 | ||
|T1.5=054 | |T1.5=054 | ||
| Line 480: | Line 476: | ||
|T1.6S=2 | |T1.6S=2 | ||
|T1.7=133 | |T1.7=133 | ||
|T1.7E=Do 100 {{Color | |T1.7E=Do 100 {{Color link|#A1A1FF|Jump Boost|Jump Boosts}}. | ||
|T1.7S=2 | |T1.7S=2 | ||
|T1.8=009 | |T1.8=009 | ||
| Line 490: | Line 486: | ||
|TCR2=[[File:MKT Icon QuickTicket.png|70px]] [[Quick ticket]] ×1 | |TCR2=[[File:MKT Icon QuickTicket.png|70px]] [[Quick ticket]] ×1 | ||
|T2.1=041 | |T2.1=041 | ||
|T2.1E=Land 5 hits with {{Color | |T2.1E=Land 5 hits with {{Color link|#A1A1FF|Red Shell|Red Shells}}. | ||
|T2.1S=1 | |T2.1S=1 | ||
|T2.2=002 | |T2.2=002 | ||
|T2.2E=Land 5 hits with {{Color | |T2.2E=Land 5 hits with {{Color link|#A1A1FF|Banana|Bananas}}. | ||
|T2.2S=1 | |T2.2S=1 | ||
|T2.3=023 | |T2.3=023 | ||
| Line 502: | Line 498: | ||
|T2.4S=2 | |T2.4S=2 | ||
|T2.5=208 | |T2.5=208 | ||
|T2.5E=Do 20 {{Color | |T2.5E=Do 20 {{Color link|#A1A1FF|Mini-Turbo}} boosts using a driver with a hat. | ||
|T2.5S=2 | |T2.5S=2 | ||
|T2.6=042 | |T2.6=042 | ||
| Line 511: | Line 507: | ||
|T2.7S=2 | |T2.7S=2 | ||
|T2.8=183 | |T2.8=183 | ||
|T2.8E=Earn a total score of 25,000 or higher in the {{Color | |T2.8E=Earn a total score of 25,000 or higher in the {{Color link|#A1A1FF|Wario Cup}}. | ||
|T2.8S=2 | |T2.8S=2 | ||
|T2.9=101 | |T2.9=101 | ||
| Line 518: | Line 514: | ||
|GCR=[[File:MKT Icon 1Ruby.png|70px]] [[Ruby|Rubies]] ×5 | |GCR=[[File:MKT Icon 1Ruby.png|70px]] [[Ruby|Rubies]] ×5 | ||
|G.1=117 | |G.1=117 | ||
|G.1E=Do a total of 5 {{Color | |G.1E=Do a total of 5 {{Color link|#A1A1FF|Slipstream}} boosts. | ||
|G.1S=1 | |G.1S=1 | ||
|G.2=175 | |G.2=175 | ||
|G.2E=Land 10 hits with {{Color | |G.2E=Land 10 hits with {{Color link|#A1A1FF|Red Shell|Red Shells}}. | ||
|G.2S=1 | |G.2S=1 | ||
|G.3=036 | |G.3=036 | ||
| Line 527: | Line 523: | ||
|G.3S=1 | |G.3S=1 | ||
|G.4=003 | |G.4=003 | ||
|G.4E=Use a {{Color | |G.4E=Use a {{Color link|#A1A1FF|level-boost ticket}}. | ||
|G.4S=2 | |G.4S=2 | ||
|G.5=141 | |G.5=141 | ||
|G.5E=Activate {{Color | |G.5E=Activate {{Color link|#A1A1FF|Frenzy}} mode 5 times using a driver with a hat. | ||
|G.5S=2 | |G.5S=2 | ||
|G.6=040 | |G.6=040 | ||
|G.6E=Cause opponents to crash using a {{Color | |G.6E=Cause opponents to crash using a {{Color link|#A1A1FF|Mega Mushroom}}. | ||
|G.6S=2 | |G.6S=2 | ||
|G.7=376 | |G.7=376 | ||
| Line 539: | Line 535: | ||
|G.7S=2 | |G.7S=2 | ||
|G.8=165 | |G.8=165 | ||
|G.8E=Earn a total score of 25,000 or higher in the {{Color | |G.8E=Earn a total score of 25,000 or higher in the {{Color link|#A1A1FF|Dry Bowser Cup}}. | ||
|G.8S=2 | |G.8S=2 | ||
|G.9=316 | |G.9=316 | ||
|G.9E=Take out 10 {{Color | |G.9E=Take out 10 {{Color link|#A1A1FF|Snowman|snowpeople}}. | ||
|G.9S=2 | |G.9S=2 | ||
}} | }} | ||
<br> | <br> | ||
{| align=center width=30% cellspacing=0 border=1 cellpadding=3 style="border-collapse:collapse; font-family:Arial; text-align:center" | {|align=center width=30% cellspacing=0 border=1 cellpadding=3 style="border-collapse:collapse;font-family:Arial;text-align:center" | ||
|- | |- | ||
!colspan=3 style="background: #EEEEFF"|'''Premium Challenges''' | !colspan=3 style="background:#EEEEFF"|'''Premium Challenges''' | ||
|- | |- | ||
|colspan=3 style="background: #EEEEFF"|'''Cost:''' US$4.99 | |colspan=3 style="background:#EEEEFF"|'''Cost:''' US$4.99 | ||
|- | |- | ||
|colspan=3 style="background: #EEEEFF"|'''Three in a row reward:''' [[File:MKT Icon Coins 2.png|60px]] [[Coin|Coins]] ×300 | |colspan=3 style="background:#EEEEFF"|'''Three in a row reward:''' [[File:MKT Icon Coins 2.png|60px]] [[Coin|Coins]] ×300 | ||
|- | |- | ||
|colspan=3 style="background: #EEEEFF"|'''Completion reward:''' [[File:MKT Icon DaisyGlider.png|70px]] [[Daisy Glider]] ×1 | |colspan=3 style="background:#EEEEFF"|'''Completion reward:''' [[File:MKT Icon DaisyGlider.png|70px]] [[Daisy Glider]] ×1 | ||
|-style="height: 80px" | |-style="height:80px" | ||
|width=10% style="background:linear-gradient(#F2E18F,#B9800F)"|[[File:Wario MP100.png|50x75px]] | |width=10% style="background:linear-gradient(#F2E18F,#B9800F)"|[[File:Wario MP100.png|50x75px]] | ||
|width=10% style="background:linear-gradient(#F2E18F,#B9800F)"|[[File:MKT Icon Egg1.png|50x75px]] | |width=10% style="background:linear-gradient(#F2E18F,#B9800F)"|[[File:MKT Icon Egg1.png|50x75px]] | ||
|width=10% style="background:linear-gradient(#F2E18F,#B9800F)"|[[File:MKT Icon ShellParachute.png|50x75px]] | |width=10% style="background:linear-gradient(#F2E18F,#B9800F)"|[[File:MKT Icon ShellParachute.png|50x75px]] | ||
|-style="color: #FFF" | |-style="color:#FFF" | ||
|style="background:linear-gradient(#864D00,#A26000); border-top:1px solid #B9800F;"|{{Color | |style="background:linear-gradient(#864D00,#A26000);border-top:1px solid #B9800F;"|{{Color link|#A1A1FF|Wario}} ×1 | ||
|style="background:linear-gradient(#864D00,#A26000); border-top:1px solid #B9800F;"|{{Color | |style="background:linear-gradient(#864D00,#A26000);border-top:1px solid #B9800F;"|{{Color link|#A1A1FF|Egg 1}} ×1 | ||
|style="background:linear-gradient(#864D00,#A26000); border-top:1px solid #B9800F;"|{{Color | |style="background:linear-gradient(#864D00,#A26000);border-top:1px solid #B9800F;"|{{Color link|#A1A1FF|Shell Parachute}} ×1 | ||
|-style="color: #FFF" | |-style="color:#FFF" | ||
|style="background:linear-gradient(#A26000,#C88512); border-top:1px solid #A26000;"|''Land 5 hits with Green Shells.'' | |style="background:linear-gradient(#A26000,#C88512);border-top:1px solid #A26000;"|''Land 5 hits with Green Shells.'' | ||
|style="background:linear-gradient(#A26000,#C88512); border-top:1px solid #A26000;"|''Land 10 hits with Bananas.'' | |style="background:linear-gradient(#A26000,#C88512);border-top:1px solid #A26000;"|''Land 10 hits with Bananas.'' | ||
|style="background:linear-gradient(#A26000,#C88512); border-top:1px solid #A26000;"|''Land 10 hits with Bob-ombs.'' | |style="background:linear-gradient(#A26000,#C88512);border-top:1px solid #A26000;"|''Land 10 hits with Bob-ombs.'' | ||
|-style="height: 80px" | |-style="height:80px" | ||
|width=10% style="background:linear-gradient(#F2E18F,#B9800F)"|[[File:MKT Icon Coins 3.png|70px]] | |width=10% style="background:linear-gradient(#F2E18F,#B9800F)"|[[File:MKT Icon Coins 3.png|70px]] | ||
|width=10% style="background:linear-gradient(#F2E18F,#B9800F)"|[[File:MKT Icon Ruby.png|70px]] | |width=10% style="background:linear-gradient(#F2E18F,#B9800F)"|[[File:MKT Icon Ruby.png|70px]] | ||
|width=10% style="background:linear-gradient(#F2E18F,#B9800F)"|[[File:MKT Icon Point-boostticket3.png|70px]] | |width=10% style="background:linear-gradient(#F2E18F,#B9800F)"|[[File:MKT Icon Point-boostticket3.png|70px]] | ||
|-style="color: #FFF" | |-style="color:#FFF" | ||
|style="background:linear-gradient(#864D00,#A26000); border-top:1px solid #B9800F;"|{{Color | |style="background:linear-gradient(#864D00,#A26000);border-top:1px solid #B9800F;"|{{Color link|#A1A1FF|Coin|Coins}} ×3,000 | ||
|style="background:linear-gradient(#864D00,#A26000); border-top:1px solid #B9800F;"|{{Color | |style="background:linear-gradient(#864D00,#A26000);border-top:1px solid #B9800F;"|{{Color link|#A1A1FF|Ruby|Rubies}} ×10 | ||
|style="background:linear-gradient(#864D00,#A26000); border-top:1px solid #B9800F;"|Glider {{Color | |style="background:linear-gradient(#864D00,#A26000);border-top:1px solid #B9800F;"|Glider {{Color link|#A1A1FF|point-boost ticket}} ×3 | ||
|-style="color: #FFF" | |-style="color:#FFF" | ||
|style="background:linear-gradient(#A26000,#C88512); border-top:1px solid #A26000;"|''Do 50 Jump Boosts.'' | |style="background:linear-gradient(#A26000,#C88512);border-top:1px solid #A26000;"|''Do 50 Jump Boosts.'' | ||
|style="background:linear-gradient(#A26000,#C88512); border-top:1px solid #A26000;"|''Participate in a race.'' | |style="background:linear-gradient(#A26000,#C88512);border-top:1px solid #A26000;"|''Participate in a race.'' | ||
|style="background:linear-gradient(#A26000,#C88512); border-top:1px solid #A26000;"|''Do 100 Mini-Turbo boosts.'' | |style="background:linear-gradient(#A26000,#C88512);border-top:1px solid #A26000;"|''Do 100 Mini-Turbo boosts.'' | ||
|-style="height: 80px" | |-style="height:80px" | ||
|width=10% style="background:linear-gradient(#F2E18F,#B9800F)"|[[File:MKT Icon Level-boostticket3.png|70px]] | |width=10% style="background:linear-gradient(#F2E18F,#B9800F)"|[[File:MKT Icon Level-boostticket3.png|70px]] | ||
|width=10% style="background:linear-gradient(#F2E18F,#B9800F)"|[[File:MKT Icon Level-boostticket6.png|70px]] | |width=10% style="background:linear-gradient(#F2E18F,#B9800F)"|[[File:MKT Icon Level-boostticket6.png|70px]] | ||
|width=10% style="background:linear-gradient(#F2E18F,#B9800F)"|[[File:MKT Icon Level-boostticket9.png|70px]] | |width=10% style="background:linear-gradient(#F2E18F,#B9800F)"|[[File:MKT Icon Level-boostticket9.png|70px]] | ||
|-style="color: #FFF" | |-style="color:#FFF" | ||
|style="background:linear-gradient(#864D00,#A26000); border-top:1px solid #B9800F;"|Normal glider {{Color | |style="background:linear-gradient(#864D00,#A26000);border-top:1px solid #B9800F;"|Normal glider {{Color link|#A1A1FF|level-boost ticket}} ×1 | ||
|style="background:linear-gradient(#864D00,#A26000); border-top:1px solid #B9800F;"|Super glider level-boost ticket ×1 | |style="background:linear-gradient(#864D00,#A26000);border-top:1px solid #B9800F;"|Super glider level-boost ticket ×1 | ||
|style="background:linear-gradient(#864D00,#A26000); border-top:1px solid #B9800F;"|High-End glider level-boost ticket ×1 | |style="background:linear-gradient(#864D00,#A26000);border-top:1px solid #B9800F;"|High-End glider level-boost ticket ×1 | ||
|-style="color: #FFF" | |-style="color:#FFF" | ||
|style="background:linear-gradient(#A26000,#C88512); border-top:1px solid #A26000;"|''Get 1st place in a race 10 times.'' | |style="background:linear-gradient(#A26000,#C88512);border-top:1px solid #A26000;"|''Get 1st place in a race 10 times.'' | ||
|style="background:linear-gradient(#A26000,#C88512); border-top:1px solid #A26000;"|''Get 1st place in a race 15 times.'' | |style="background:linear-gradient(#A26000,#C88512);border-top:1px solid #A26000;"|''Get 1st place in a race 15 times.'' | ||
|style="background:linear-gradient(#A26000,#C88512); border-top:1px solid #A26000;"|''Get 1st place in a race 20 times.'' | |style="background:linear-gradient(#A26000,#C88512);border-top:1px solid #A26000;"|''Get 1st place in a race 20 times.'' | ||
|} | |} | ||
<br> | <br> | ||
{| align=center width=30% cellspacing=0 border=1 cellpadding=3 style="border-collapse:collapse; font-family:Arial; text-align:center" | {|align=center width=30% cellspacing=0 border=1 cellpadding=3 style="border-collapse:collapse;font-family:Arial;text-align:center" | ||
|- | |- | ||
!colspan=3 style="background: #C3F84E"|'''Tour Multiplayer Challenges''' | !colspan=3 style="background:#C3F84E"|'''Tour Multiplayer Challenges''' | ||
|-style="color: #000" | |-style="color:#000" | ||
|colspan=3 style="background: #C3F84E"|'''Three in a row reward:''' [[File:MKT Icon Coins 2.png|60px]] [[Coin|Coins]] ×300 | |colspan=3 style="background:#C3F84E"|'''Three in a row reward:''' [[File:MKT Icon Coins 2.png|60px]] [[Coin|Coins]] ×300 | ||
|-style="color: #000" | |-style="color:#000" | ||
|colspan=3 style="background: #C3F84E"|'''Completion reward:''' [[File:MKT Icon 1Ruby.png|60px]] Rubies ×5 | |colspan=3 style="background:#C3F84E"|'''Completion reward:''' [[File:MKT Icon 1Ruby.png|60px]] Rubies ×5 | ||
|-style="color: #FFF" | |-style="color:#FFF" | ||
|width=10% style="background: #2F5D1C"|[[File:MKT 069CB.png|70px]]<br>[[File:MKT Icon GrandStar.png|15px]] | |width=10% style="background:#2F5D1C"|[[File:MKT 069CB.png|70px]]<br>[[File:MKT Icon GrandStar.png|15px]] | ||
|width=10% style="background: #2F5D1C"|[[File:MKT 119-1CB.png|70px]]<br>[[File:MKT Icon GrandStar.png|15px]] | |width=10% style="background:#2F5D1C"|[[File:MKT 119-1CB.png|70px]]<br>[[File:MKT Icon GrandStar.png|15px]] | ||
|width=10% style="background: #2F5D1C"|[[File:MKT 147CB.png|70px]]<br>[[File:MKT Icon GrandStar.png|15px]] | |width=10% style="background:#2F5D1C"|[[File:MKT 147CB.png|70px]]<br>[[File:MKT Icon GrandStar.png|15px]] | ||
|-style="color: #FFF" | |-style="color:#FFF" | ||
|style="background: #2F5D1C; border-top:1px solid #2F5D1C;"|''Land 3 hits with Bob-ombs in multiplayer.'' | |style="background:#2F5D1C;border-top:1px solid #2F5D1C;"|''Land 3 hits with Bob-ombs in multiplayer.'' | ||
|style="background: #2F5D1C; border-top:1px solid #2F5D1C;"|''Do 30 Mini-Turbo boosts in multiplayer.'' | |style="background:#2F5D1C;border-top:1px solid #2F5D1C;"|''Do 30 Mini-Turbo boosts in multiplayer.'' | ||
|style="background: #2F5D1C; border-top:1px solid #2F5D1C;"|''Cause opponents to crash 5 times in multiplayer.'' | |style="background:#2F5D1C;border-top:1px solid #2F5D1C;"|''Cause opponents to crash 5 times in multiplayer.'' | ||
|-style="color: #FFF" | |-style="color:#FFF" | ||
|width=10% style="background: #2F5D1C"|[[File:MKT 112-3CB.png|70px]]<br>[[File:MKT Icon GrandStar.png|15px]] [[File:MKT Icon GrandStar.png|15px]] | |width=10% style="background:#2F5D1C"|[[File:MKT 112-3CB.png|70px]]<br>[[File:MKT Icon GrandStar.png|15px]] [[File:MKT Icon GrandStar.png|15px]] | ||
|width=10% style="background: #2F5D1C"|[[File:MKT 112-1CB.png|70px]]<br>[[File:MKT Icon GrandStar.png|15px]] [[File:MKT Icon GrandStar.png|15px]] | |width=10% style="background:#2F5D1C"|[[File:MKT 112-1CB.png|70px]]<br>[[File:MKT Icon GrandStar.png|15px]] [[File:MKT Icon GrandStar.png|15px]] | ||
|width=10% style="background: #2F5D1C"|[[File:MKT 112CB.png|70px]]<br>[[File:MKT Icon GrandStar.png|15px]] [[File:MKT Icon GrandStar.png|15px]] | |width=10% style="background:#2F5D1C"|[[File:MKT 112CB.png|70px]]<br>[[File:MKT Icon GrandStar.png|15px]] [[File:MKT Icon GrandStar.png|15px]] | ||
|-style="color: #FFF" | |-style="color:#FFF" | ||
|style="background: #2F5D1C; border-top:1px solid #2F5D1C;"|''Join 3 multiplayer races.'' | |style="background:#2F5D1C;border-top:1px solid #2F5D1C;"|''Join 3 multiplayer races.'' | ||
|style="background: #2F5D1C; border-top:1px solid #2F5D1C;"|''Join 5 multiplayer races.'' | |style="background:#2F5D1C;border-top:1px solid #2F5D1C;"|''Join 5 multiplayer races.'' | ||
|style="background: #2F5D1C; border-top:1px solid #2F5D1C;"|''Join 10 multiplayer races.'' | |style="background:#2F5D1C;border-top:1px solid #2F5D1C;"|''Join 10 multiplayer races.'' | ||
|-style="color: #FFF" | |-style="color:#FFF" | ||
|width=10% style="background: #2F5D1C"|[[File:MKT 130CB.png|70px]]<br>[[File:MKT Icon GrandStar.png|15px]] [[File:MKT Icon GrandStar.png|15px]] | |width=10% style="background:#2F5D1C"|[[File:MKT 130CB.png|70px]]<br>[[File:MKT Icon GrandStar.png|15px]] [[File:MKT Icon GrandStar.png|15px]] | ||
|width=10% style="background: #2F5D1C"|[[File:MKT 131CB.png|70px]]<br>[[File:MKT Icon GrandStar.png|15px]] [[File:MKT Icon GrandStar.png|15px]] | |width=10% style="background:#2F5D1C"|[[File:MKT 131CB.png|70px]]<br>[[File:MKT Icon GrandStar.png|15px]] [[File:MKT Icon GrandStar.png|15px]] | ||
|width=10% style="background: #2F5D1C"|[[File:MKT 129CB.png|70px]]<br>[[File:MKT Icon GrandStar.png|15px]] [[File:MKT Icon GrandStar.png|15px]] | |width=10% style="background:#2F5D1C"|[[File:MKT 129CB.png|70px]]<br>[[File:MKT Icon GrandStar.png|15px]] [[File:MKT Icon GrandStar.png|15px]] | ||
|-style="color: #FFF" | |-style="color:#FFF" | ||
|style="background: #2F5D1C; border-top:1px solid #2F5D1C;"|''Get 3rd place or higher in a multiplayer race.'' | |style="background:#2F5D1C; border-top:1px solid #2F5D1C;"|''Get 3rd place or higher in a multiplayer race.'' | ||
|style="background: #2F5D1C; border-top:1px solid #2F5D1C;"|''Get 3rd place or higher 3 times in a multiplayer race.'' | |style="background:#2F5D1C; border-top:1px solid #2F5D1C;"|''Get 3rd place or higher 3 times in a multiplayer race.'' | ||
|style="background: #2F5D1C; border-top:1px solid #2F5D1C;"|''Get 3rd place or higher 5 times in a multiplayer race.'' | |style="background:#2F5D1C; border-top:1px solid #2F5D1C;"|''Get 3rd place or higher 5 times in a multiplayer race.'' | ||
|} | |} | ||
<br> | <br> | ||
{|class="wikitable" style="margin:auto; text-align:center" width=30% | {|class="wikitable"style="margin:auto; text-align:center"width=30% | ||
!colspan=2|Total Points Challenge 1 | !colspan=2|Total Points Challenge 1 | ||
|- | |- | ||
| Line 659: | Line 655: | ||
|} | |} | ||
<br> | <br> | ||
{|class="wikitable" style="margin:auto; text-align:center" width=30% | {|class="wikitable"style="margin:auto;text-align:center"width=30% | ||
!colspan=2|Total Points Challenge 2 | !colspan=2|Total Points Challenge 2 | ||
|- | |- | ||
| Line 693: | Line 689: | ||
==2-Player Challenge== | ==2-Player Challenge== | ||
{| class="wikitable" style="text-align:center" width=100% | {|class="wikitable"style="text-align:center"width=100% | ||
!rowspan=2|Name | !rowspan=2|Name | ||
!colspan=3|Courses | !colspan=3|Courses | ||
| Line 741: | Line 737: | ||
===All-Clear Pipe=== | ===All-Clear Pipe=== | ||
The All-Clear Pipe randomly shoots out one of the following regular High-End items. The appearance rate can be viewed via the "Pipe content" link on the Gold Pass purchase screen. | The All-Clear Pipe randomly shoots out one of the following regular High-End items. The appearance rate can be viewed via the "Pipe content" link on the Gold Pass purchase screen. | ||
{|class="wikitable" style="margin:auto; text-align:center" | {|class="wikitable"style="margin:auto;text-align:center" | ||
!colspan=2|High-End items obtainable from the All-Clear Pipe during the Sky Tour | !colspan=2|High-End items obtainable from the All-Clear Pipe during the Sky Tour | ||
!Rate (each) | !Rate (each) | ||
|- | |- | ||
!High-End drivers | !High-End drivers | ||
|[[Dry Bowser]], [[Metal Mario]], [[Pink Gold Peach]], [[Cat Mario|Cat Peach]], [[Pauline]], [[Princess Peach|Peach (Explorer)]], [[Nabbit]], [[Captain Toad]], [[King Bob-omb]], [[Peachette]], [[Yoshi (species)|Black Yoshi]], [[Yoshi (species)|White Yoshi]], [[Princess Peach|Peach (Wintertime)]], [[Birdo | |[[Dry Bowser]], [[Metal Mario]], [[Pink Gold Peach]], [[Cat Mario|Cat Peach]], [[Pauline]], [[Princess Peach|Peach (Explorer)]], [[Nabbit]], [[Captain Toad]], [[King Bob-omb]], [[Peachette]], [[Yoshi (species)|Black Yoshi]], [[Yoshi (species)|White Yoshi]], [[Princess Peach|Peach (Wintertime)]], [[Birdo|Birdo (Black)]], [[Penguin Mario|Penguin Luigi]], [[Dixie Kong]], [[Funky Kong]], [[Bowser Jr.|Bowser Jr. (Pirate)]], [[Ice Mario (Super Mario Galaxy)|Ice Mario]] | ||
|rowspan=3|1.2346% | |rowspan=3|1.2346% | ||
|- | |- | ||
| Line 758: | Line 754: | ||
===Sky Pipe 1=== | ===Sky Pipe 1=== | ||
{|class="wikitable" style="margin:auto; text-align:center" | {|class="wikitable"style="margin:auto;text-align:center" | ||
!colspan=16|Items obtained from a new Sky Pipe 1 | !colspan=16|Items obtained from a new Sky Pipe 1 | ||
|- | |- | ||
| Line 795: | Line 791: | ||
|} | |} | ||
<br> | <br> | ||
{|class="wikitable"style="margin:auto;text-align:center" | |||
{|class="wikitable" style="margin:auto; text-align:center" | |||
!Class | !Class | ||
!Parts | !Parts | ||
| Line 814: | Line 809: | ||
|- | |- | ||
!High-End drivers | !High-End drivers | ||
|[[Dry Bowser]], [[Metal Mario]], [[Pink Gold Peach]], [[Cat Mario|Cat Peach]], [[Pauline]], [[Princess Peach|Peach (Explorer)]], [[Nabbit]], [[Captain Toad]], [[King Bob-omb]], [[Kamek]], [[Peachette]], [[Yoshi (species)|Black Yoshi]], [[Yoshi (species)|White Yoshi]], [[Princess Peach|Peach (Wintertime)]], [[Princess Peach|Peach (Halloween)]], [[Birdo | |[[Dry Bowser]], [[Metal Mario]], [[Pink Gold Peach]], [[Cat Mario|Cat Peach]], [[Pauline]], [[Princess Peach|Peach (Explorer)]], [[Nabbit]], [[Captain Toad]], [[King Bob-omb]], [[Kamek]], [[Peachette]], [[Yoshi (species)|Black Yoshi]], [[Yoshi (species)|White Yoshi]], [[Princess Peach|Peach (Wintertime)]], [[Princess Peach|Peach (Halloween)]], [[Birdo|Birdo (Black)]], [[Penguin Mario|Penguin Luigi]], [[Dixie Kong]], [[Funky Kong]], [[Rosalina|Rosalina (Halloween)]], [[Bowser Jr.|Bowser Jr. (Pirate)]], [[Ice Mario (Super Mario Galaxy)|Ice Mario]] | ||
|0.0455% | |0.0455% | ||
|- | |- | ||
| Line 826: | Line 821: | ||
|- | |- | ||
!Super drivers | !Super drivers | ||
|[[Donkey Kong]], [[Toad]], [[Bowser]], [[Luigi]], [[Mario]], [[Princess Peach|Peach]], [[Yoshi]], [[Princess Daisy|Daisy]], [[Lakitu]], [[King Boo]], [[Toadette]], [[Bowser Jr.]], [[Waluigi]], [[Wario]], [[Rosalina]], [[Birdo]], [[Diddy Kong]], [[Hammer Bro]], [[Boomerang Bro]], [[Fire Bro]], [[Ice Bro]], [[Red Yoshi]], [[Black Shy Guy]], [[Pink Shy Guy]], [[Toad (species)|Toad (Pit Crew)]], [[Monty Mole]], [[Birdo | |[[Donkey Kong]], [[Toad]], [[Bowser]], [[Luigi]], [[Mario]], [[Princess Peach|Peach]], [[Yoshi]], [[Princess Daisy|Daisy]], [[Lakitu]], [[King Boo]], [[Toadette]], [[Bowser Jr.]], [[Waluigi]], [[Wario]], [[Rosalina]], [[Birdo]], [[Diddy Kong]], [[Hammer Bro]], [[Boomerang Bro]], [[Fire Bro]], [[Ice Bro]], [[Red Yoshi]], [[Black Shy Guy]], [[Pink Shy Guy]], [[Toad (species)|Toad (Pit Crew)]], [[Monty Mole]], [[Birdo|Birdo (Light Blue)]], [[Birdo|Birdo (Yellow)]], [[Roving Racers|Red Koopa (Freerunning)]] | ||
|0.3103% | |0.3103% | ||
|- | |- | ||
| Line 852: | Line 847: | ||
===Sky Pipe 2=== | ===Sky Pipe 2=== | ||
{|class="wikitable" style="margin:auto; text-align:center" | {|class="wikitable"style="margin:auto;text-align:center" | ||
!colspan=16|Items obtained from a new Sky Pipe 2 | !colspan=16|Items obtained from a new Sky Pipe 2 | ||
|- | |- | ||
| Line 889: | Line 884: | ||
|} | |} | ||
<br> | <br> | ||
{|class="wikitable"style="margin:auto;text-align:center" | |||
{|class="wikitable" style="margin:auto; text-align:center" | |||
!Class | !Class | ||
!Parts | !Parts | ||
| Line 908: | Line 902: | ||
|- | |- | ||
!High-End drivers | !High-End drivers | ||
|[[Dry Bowser]], [[Metal Mario]], [[Pink Gold Peach]], [[Cat Mario|Cat Peach]], [[Pauline]], [[Princess Peach|Peach (Explorer)]], [[Nabbit]], [[Captain Toad]], [[King Bob-omb]], [[Peachette]], [[Yoshi (species)|Black Yoshi]], [[Yoshi (species)|White Yoshi]], [[Princess Peach|Peach (Wintertime)]], [[Birdo | |[[Dry Bowser]], [[Metal Mario]], [[Pink Gold Peach]], [[Cat Mario|Cat Peach]], [[Pauline]], [[Princess Peach|Peach (Explorer)]], [[Nabbit]], [[Captain Toad]], [[King Bob-omb]], [[Peachette]], [[Yoshi (species)|Black Yoshi]], [[Yoshi (species)|White Yoshi]], [[Princess Peach|Peach (Wintertime)]], [[Birdo|Birdo (Black)]], [[Penguin Mario|Penguin Luigi]], [[Dixie Kong]], [[Funky Kong]], [[Mario|Mario (Aviator)]], [[Bowser Jr.|Bowser Jr. (Pirate)]], [[Ice Mario (Super Mario Galaxy)|Ice Mario]] | ||
|0.0500% | |0.0500% | ||
|- | |- | ||
| Line 920: | Line 914: | ||
|- | |- | ||
!Super drivers | !Super drivers | ||
|[[Donkey Kong]], [[Toad]], [[Bowser]], [[Luigi]], [[Mario]], [[Princess Peach|Peach]], [[Yoshi]], [[Princess Daisy|Daisy]], [[Lakitu]], [[King Boo]], [[Toadette]], [[Bowser Jr.]], [[Waluigi]], [[Wario]], [[Rosalina]], [[Birdo]], [[Diddy Kong]], [[Hammer Bro]], [[Boomerang Bro]], [[Fire Bro]], [[Ice Bro]], [[Red Yoshi]], [[Black Shy Guy]], [[Pink Shy Guy]], [[Toad (species)|Toad (Pit Crew)]], [[Monty Mole]], [[Birdo | |[[Donkey Kong]], [[Toad]], [[Bowser]], [[Luigi]], [[Mario]], [[Princess Peach|Peach]], [[Yoshi]], [[Princess Daisy|Daisy]], [[Lakitu]], [[King Boo]], [[Toadette]], [[Bowser Jr.]], [[Waluigi]], [[Wario]], [[Rosalina]], [[Birdo]], [[Diddy Kong]], [[Hammer Bro]], [[Boomerang Bro]], [[Fire Bro]], [[Ice Bro]], [[Red Yoshi]], [[Black Shy Guy]], [[Pink Shy Guy]], [[Toad (species)|Toad (Pit Crew)]], [[Monty Mole]], [[Birdo|Birdo (Light Blue)]], [[Birdo|Birdo (Yellow)]], [[Roving Racers|Red Koopa (Freerunning)]] | ||
|0.3103% | |0.3103% | ||
|- | |- | ||
| Line 946: | Line 940: | ||
===8-Bit Gliders Pipe=== | ===8-Bit Gliders Pipe=== | ||
{|class="wikitable" style="margin:auto; text-align:center" | {|class="wikitable"style="margin:auto;text-align:center" | ||
!colspan=16|Items obtained from a new 8-Bit Gliders Pipe | !colspan=16|Items obtained from a new 8-Bit Gliders Pipe | ||
|- | |- | ||
| Line 983: | Line 977: | ||
|} | |} | ||
<br> | <br> | ||
{|class="wikitable"style="margin:auto;text-align:center" | |||
{|class="wikitable" style="margin:auto; text-align:center" | |||
!Class | !Class | ||
!Parts | !Parts | ||
| Line 998: | Line 991: | ||
|- | |- | ||
!Super drivers | !Super drivers | ||
|[[Donkey Kong]], [[Toad]], [[Bowser]], [[Luigi]], [[Mario]], [[Princess Peach|Peach]], [[Yoshi]], [[Princess Daisy|Daisy]], [[Lakitu]], [[King Boo]], [[Toadette]], [[Bowser Jr.]], [[Waluigi]], [[Wario]], [[Rosalina]], [[Birdo]], [[Diddy Kong]], [[Hammer Bro]], [[Boomerang Bro]], [[Fire Bro]], [[Ice Bro]], [[Red Yoshi]], [[Black Shy Guy]], [[Pink Shy Guy]], [[Toad (species)|Toad (Pit Crew)]], [[Monty Mole]], [[Birdo | |[[Donkey Kong]], [[Toad]], [[Bowser]], [[Luigi]], [[Mario]], [[Princess Peach|Peach]], [[Yoshi]], [[Princess Daisy|Daisy]], [[Lakitu]], [[King Boo]], [[Toadette]], [[Bowser Jr.]], [[Waluigi]], [[Wario]], [[Rosalina]], [[Birdo]], [[Diddy Kong]], [[Hammer Bro]], [[Boomerang Bro]], [[Fire Bro]], [[Ice Bro]], [[Red Yoshi]], [[Black Shy Guy]], [[Pink Shy Guy]], [[Toad (species)|Toad (Pit Crew)]], [[Monty Mole]], [[Birdo|Birdo (Light Blue)]], [[Birdo|Birdo (Yellow)]], [[Roving Racers|Red Koopa (Freerunning)]] | ||
|0.3448% | |0.3448% | ||
|- | |- | ||
| Line 1,028: | Line 1,021: | ||
==Token Shop== | ==Token Shop== | ||
The limited-time event where [[event token]]s appeared began on February 23, 2022 and ended on March 8, 2022. Event tokens could be earned by collecting them on courses. | The limited-time event where [[event token]]s appeared began on February 23, 2022 and ended on March 8, 2022. Event tokens could be earned by collecting them on courses. | ||
{|class="wikitable"style="margin:auto;text-align:center"width=50% | |||
{|class="wikitable" style="margin:auto; text-align:center" width=50% | |||
!colspan=3|'''Token Shop''' (February 9, 2022 - February 22, 2022) | !colspan=3|'''Token Shop''' (February 9, 2022 - February 22, 2022) | ||
|- | |- | ||
| Line 1,075: | Line 1,067: | ||
==Tier Shop== | ==Tier Shop== | ||
The shop features a variety of set and randomized items available for purchase. The item slots in the shop are unlocked based on the highest tier of players. | The shop features a variety of set and randomized items available for purchase. The item slots in the shop are unlocked based on the highest tier of players. | ||
{|class="wikitable"style="margin:auto;text-align:center"width=50% | |||
{| class="wikitable" style="margin:auto; text-align:center" width=50% | |||
!colspan=3|Items available in Tier Shop (February 23, 2022 - March 1, 2022) | !colspan=3|Items available in Tier Shop (February 23, 2022 - March 1, 2022) | ||
|- | |- | ||
| Line 1,149: | Line 1,140: | ||
|SpaM=Sky Season | |SpaM=Sky Season | ||
}} | }} | ||
{{MKT}} | {{MKT}} | ||
[[Category:Mario Kart Tour tours]] | [[Category:Mario Kart Tour tours]] | ||
[[it:Tour volante]] | [[it:Tour volante]] | ||
Latest revision as of 17:41, December 31, 2024
- This article is about the Mario Kart Tour event. For information about the course that was added to the game with this event and was misnamed "GBA Sky Tour" in an App Store article, see GBA Sky Garden.
| Sky Tour | |
|---|---|
| |
| Start date | February 22, 2022 10:00 p.m. (PT)[?] |
| End date | March 8, 2022 9:59 p.m. (PT)[?] |
| Number of cups | 12 |
| Ranked cups | Mario Cup (week 1) Wario Cup (week 2) |
| Coin Rush course | RMX Mario Circuit 1 |
| << List of tours >> | |
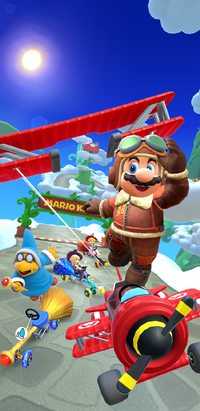
The Sky Tour was the sixty-fourth tour of Mario Kart Tour, which began on February 23, 2022 and ended on March 8, 2022. As its name suggests, it introduced a newly remade Sky Garden from Mario Kart: Super Circuit as a classic course after its last appearance in Mario Kart DS. This tour also introduced a variant of Mario donning his aviator helmet and outfit from Super Mario Odyssey. Kamek, Peach (Halloween), and Rosalina (Halloween) returned as spotlight drivers for the second week of the tour, along with variants of Kamek's Zoom Broom as the spotlight karts.
This tour concluded the Winter Celebration event that began in the Wario vs. Waluigi Tour. In addition to retaining the Winter Challenges, the tour featured a set of Winter Multiplayer Challenges that rewarded Black Yoshi upon completion, which would last until the following tour, the 2022 Mii Tour, as well as another new driver, Light-blue Shy Guy, as a reward for placing high in the ranked cups. This tour was also the first tour to include two Glider Challenges, and the second one after the 1st Anniversary Tour to have only one Time Trial challenge instead of two or three.
This tour's Coin Rush course was RMX Mario Circuit 1, which was reused from the Mario Bros. Tour and the 2021 Mario Tour. The menu's background featured some beanstalks and a Toad House from GBA Sky Garden as the landmark for this tour. Up until the release of Version 2.12.0, the title screen image for this tour was changed to represent Team Waluigi's victory over Team Wario during the Wario vs. Waluigi Tour. After downloading the update, the title screen would feature artwork of Mario and Miis in Pipe Frames on celebration of the 2022 Mii Tour until the 2022 Yoshi Tour. This tour's trailer featured clouds during its opening splash screen.
Starting from this tour, Captain Toad and Bowser Jr. (Pirate) are available in regular tour pipes, including the All-Clear Pipe.
Spotlights[edit]
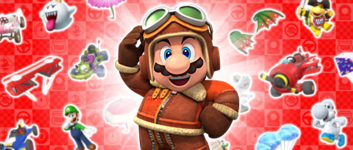
| Sky Pipe 1 February 22, 2022, 10:00 p.m. (PT) – March 8, 2022, 9:59 p.m. (PT) |
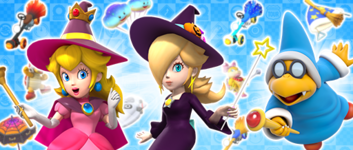
Sky Pipe 2 March 1, 2022, 10:00 p.m. (PT) – March 8, 2022, 9:59 p.m. (PT) | ||||
|
| ||||
| Drivers | Karts | Gliders | Drivers | Karts | Gliders |
|---|---|---|---|---|---|

|
  
|
||||
| Mario (Aviator) | Prop Kart | Sky-High Flyer | Rosalina (Halloween), Peach (Halloween), and Kamek | Star Broom, Magma Broom, and Kamek's Zoom Broom | Aurora Balloons, Magic Parasol, and Dream Glider |
Special pipe[edit]
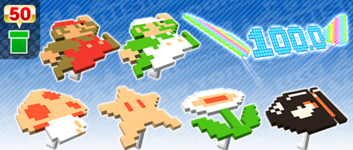
| 8-Bit Gliders Pipe February 26, 2022, 10:00 p.m. (PT) – March 3, 2022, 9:59 p.m. (PT) | |||
| |||
| High-End Spotlight Glider | High-End Gliders | Super Gliders | |
|---|---|---|---|
| Record Setter | 8-Bit Super Mushroom, 8-Bit Star, 8-Bit Fire Flower, and 8-Bit Bullet Bill | 8-Bit Jumping Mario and 8-Bit Jumping Luigi | |
- Names in other languages
| Language | Name | Meaning | Notes |
|---|---|---|---|
| Chinese (simplified) | 点阵图滑翔翼水[?] Diǎnzhèntú Huáxiángyì Shuǐguǎn |
Bitmap Glider Pipe | |
| Chinese (traditional) | 點陣圖滑翔翼管[?] Diǎnzhèntú Huáxiángyì Shuǐguǎn |
Bitmap Glider Pipe | |
| German | 8-Bit-Gleiter-Röhre[?] | 8-Bit Glider Pipe |
Cups[edit]
Mario Cup Ranked cup (week 1) |
GBA Sky Garden |
GCN Yoshi Circuit R/T |
N64 Kalimari Desert 2R/T |
Glider Challenge | ||||
 3DS Rock Rock Mountain |
Baby Luigi | |||||||
Morton Cup |
SNES Mario Circuit 2R |
RMX Mario Circuit 1R |
Wii DK Summit |
Goomba Takedown | ||||
 N64 Frappe Snowland |
Baby Mario | |||||||
Wario Cup Ranked cup (week 2) |
3DS Rock Rock Mountain T |
GBA Sky Garden T |
RMX Ghost Valley 1R/T |
Break Item Boxes | ||||
 DS Luigi's Mansion |
Baby Peach | |||||||
Toadette Cup |
Wii Maple Treeway R |
N64 Frappe Snowland R |
Wii DK Summit R |
Snap a Photo | ||||
 GBA Sky Garden T |
Mario (Aviator) | |||||||
Bowser Cup |
3DS Rock Rock Mountain R |
GBA Sky Garden R |
RMX Ghost Valley 1 |
Do Jump Boosts | ||||
 Wii DK Summit |
Ice Bro | |||||||
Cat Peach Cup |
Wii Maple Treeway |
Wii DK Summit T |
GCN Yoshi Circuit |
Ring Race | ||||
 RMX Mario Circuit 1 |
Daisy | |||||||
Baby Rosalina Cup |
DS Luigi's Mansion T |
RMX Ghost Valley 1T |
GBA Sky Garden |
Glider Challenge | ||||
 SNES Mario Circuit 2 |
Donkey Kong | |||||||
Daisy Cup |
N64 Frappe Snowland T |
GCN Yoshi Circuit T |
SNES Mario Circuit 2 |
Steer Clear of Obstacles | ||||
 GBA Sky Garden |
Mario | |||||||
Baby Luigi Cup |
RMX Ghost Valley 1R |
DS Luigi's Mansion |
Wii Maple Treeway T |
Combo Attack | ||||
 N64 Kalimari Desert 2T |
Lemmy | |||||||
Dry Bowser Cup |
GBA Sky Garden T |
N64 Frappe Snowland |
RMX Mario Circuit 1T |
Time Trial | ||||
 RMX Ghost Valley 1R |
Black Shy Guy | |||||||
Lemmy Cup |
GCN Yoshi Circuit R |
SNES Mario Circuit 2T |
DS Luigi's Mansion R |
Smash Small Dry Bones | ||||
 Wii Maple Treeway |
Yoshi | |||||||
Ice Mario Cup |
GBA Sky Garden R |
RMX Mario Circuit 1 |
3DS Rock Rock Mountain |
vs. Mega Birdo | ||||
 GCN Yoshi Circuit |
Any character | |||||||
Signature kart sets[edit]
Drivers with a corresponding cup are bumped one rank up in every course of their cup.
| Cup | Driver | Kart | Glider |
|---|---|---|---|
| Second course of every cup | |||
| Third course of every cup | |||
| — | — | ||
| — | — | ||
| — | — | ||
| — | — | ||
| — | — | ||
| — | — | ||
| — | — | ||
| — | — | ||
| — | — | ||
| — | — | ||
| — | — | ||
| — | — |
Today's Challenge[edit]
Players' most recently used kart and glider are chosen, and favorite and favored ones have extra priority. Opponents are arranged randomly. On day 1 of this tour, players finish a race in SNES Mario Circuit 2R in the Morton Cup using Morton for a free pipe launch. Starting from day 2, players have to finish a race in the earliest incomplete course that is not in any of the ranked cups using the driver shown on the course's thumbnail every day to obtain the corresponding reward in the table below. Once all of the courses are completed, the courses are selected at random.
| Day(s) | Reward |
| 1-4, 6-9, 11-13 | Free pipe launch |
|---|---|
| 5, 10 | Rubies ×5 |
| 14 |  Badge |
| Today's Challenge Pipe | |

| |
| Pipe contents | |
| Rubies, coins, driver (Normal/Super/High-End), kart (Normal/Super/High-End), glider (Normal/Super/High-End), item tickets | |
Rewards[edit]
Gold cells indicate rewards that are exclusive to Gold Pass members.

|
||||||
| Paper Glider | Toad (Pit Crew) | Red Kiddie Kart | Cloud Glider | Baby Luigi | Zucchini | Rainy Balloons |
| Grand Stars | 15 | 20 | 25 | 30 | 35 | 40 | 50 | 60 | 70 | 85 | 100 | 115 | 130 | 145 | 160 | 180 | 200 | 215 | 230 | 240 | 250 | 255 | 260 | 265 | Total | Grand total | |
|---|---|---|---|---|---|---|---|---|---|---|---|---|---|---|---|---|---|---|---|---|---|---|---|---|---|---|---|
| Free pipe launch | 1 | 1 | 1 | 1 | 4 | ||||||||||||||||||||||
| Coin | 300 | 300 | 300 | 300 | 300 | 500 | 1000 | 3000 | 7600 | ||||||||||||||||||
| 1000 | 600 | 1000 | 2000 | 4600 | |||||||||||||||||||||||
| Rubies | 3 | 3 | 5 | 5 | 5 | 21 | 46 | ||||||||||||||||||||
| 5 | 5 | 5 | 5 | 5 | 25 | ||||||||||||||||||||||
| Item tickets | 10 | 10 | 25 | ||||||||||||||||||||||||
| 15 | 15 | ||||||||||||||||||||||||||
| Star tickets | 4 | 4 | 4 | ||||||||||||||||||||||||
| 0 | |||||||||||||||||||||||||||
| Point-boost tickets | 1 | 1 | 1 | 3 | 6 | ||||||||||||||||||||||
| 3 | 3 | ||||||||||||||||||||||||||
| 1 | 1 | 1 | 3 | 6 | |||||||||||||||||||||||
| 3 | 3 | ||||||||||||||||||||||||||
| 1 | 1 | 1 | 3 | 6 | |||||||||||||||||||||||
| 3 | 3 | ||||||||||||||||||||||||||
| Level-boost ticket | 3 | 12 | |||||||||||||||||||||||||
| 9 | |||||||||||||||||||||||||||
New content[edit]
Drivers[edit]
Karts[edit]
Gliders[edit]
Courses[edit]
GBA Sky Garden (N, R, T)
Paid banners[edit]
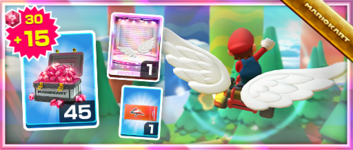
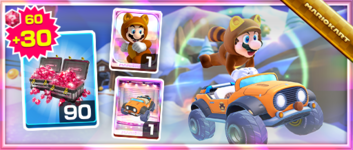
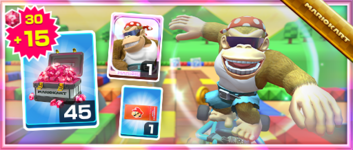
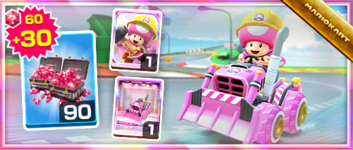
| Name | Availability | Cost | Contents | Banner image |
|---|---|---|---|---|
| Value Pack | February 23, 2022 – March 8, 2022 | US$1.99 |
|

|
| Wonderful Wings Pack | February 23, 2022 – March 8, 2022 | US$19.99 |
|
|
| Tanooki Mario Pack | February 23, 2022 – March 8, 2022 | US$39.99 |
|
|
| Funky Kong Pack | March 2, 2022 – March 8, 2022 | US$19.99 |
|
|
| Builder Toadette Pack | March 2, 2022 – March 8, 2022 | US$39.99 |
|
|
Challenges[edit]
| Tour Challenges 1 | Tour Challenges 2 | Gold Challenges | ||||||||
|---|---|---|---|---|---|---|---|---|---|---|
| Completion reward: |
Completion reward: |
Completion reward: | ||||||||
 |
 |
 |
 |
 |
 |
 |
 |
 | ||
| Land 3 hits with Green Shells. | Use 10 Mushrooms. | Get a Fantastic combo a total of 5 times. | Land 5 hits with Red Shells. | Land 5 hits with Bananas. | Drive a distance of 20,000 or more. | Do a total of 5 Slipstream boosts. | Land 10 hits with Red Shells. | Cause opponents to crash 3 times while gliding. | ||
 |
 |
 |
 |
 |
 |
 |
 |
 | ||
| Use point-boost tickets 3 times. | Get 3rd place or higher in a race 30 times. | Cause an opponent to crash while gliding. | Get 1 item from the Daily Selects section of the Shop. | Do 20 Mini-Turbo boosts using a driver with a hat. | Earn a score of 7,000 or higher on 3 T or R/T courses. | Use a level-boost ticket. | Activate Frenzy mode 5 times using a driver with a hat. | Cause opponents to crash using a Mega Mushroom. | ||
 |
 |
 |
 |
 |
 |
 |
 |
 | ||
| Do 100 Jump Boosts. | Glide a total distance of 5,000. | Race in every course of every cup, including bonus challenges. | Cause opponents to crash a total of 3 times using a driver wearing gloves. | Earn a total score of 25,000 or higher in the Wario Cup. | Race in auto mode. | Get an item from the Tier Shop. | Earn a total score of 25,000 or higher in the Dry Bowser Cup. | Take out 10 snowpeople. | ||
| Premium Challenges | ||
|---|---|---|
| Cost: US$4.99 | ||
| Three in a row reward: | ||
| Completion reward: | ||

|
||
| Wario ×1 | Egg 1 ×1 | Shell Parachute ×1 |
| Land 5 hits with Green Shells. | Land 10 hits with Bananas. | Land 10 hits with Bob-ombs. |
| Coins ×3,000 | Rubies ×10 | Glider point-boost ticket ×3 |
| Do 50 Jump Boosts. | Participate in a race. | Do 100 Mini-Turbo boosts. |
| Normal glider level-boost ticket ×1 | Super glider level-boost ticket ×1 | High-End glider level-boost ticket ×1 |
| Get 1st place in a race 10 times. | Get 1st place in a race 15 times. | Get 1st place in a race 20 times. |
| Tour Multiplayer Challenges | ||
|---|---|---|
| Three in a row reward: | ||
| Completion reward: | ||
 |
 |
 |
| Land 3 hits with Bob-ombs in multiplayer. | Do 30 Mini-Turbo boosts in multiplayer. | Cause opponents to crash 5 times in multiplayer. |
 |
 |
 |
| Join 3 multiplayer races. | Join 5 multiplayer races. | Join 10 multiplayer races. |
 |
 |
 |
| Get 3rd place or higher in a multiplayer race. | Get 3rd place or higher 3 times in a multiplayer race. | Get 3rd place or higher 5 times in a multiplayer race. |
| Total Points Challenge 1 | |
|---|---|
| Points | Rewards |
| 350,000 |
|
| 300,000 |
|
| 250,000 |
|
| 200,000 |
|
| 150,000 | |
| 100,000 | |
| Total Points Challenge 2 | |
|---|---|
| Points | Rewards |
| 900,000 |
|
| 800,000 | |
| 700,000 | |
| 600,000 | |
| 500,000 | |
| 400,000 | |
2-Player Challenge[edit]
| Name | Courses | Opponents | ||||||||
|---|---|---|---|---|---|---|---|---|---|---|
| First | Second | Final | 6th | 5th | 4th | 3rd | 2nd | 1st | ||
 vs. Team Kamek |
3DS Rock Rock Mountain |
Wii Maple Treeway T |
GBA Sky Garden T |
Driver | ||||||
| Kart | ||||||||||
| Glider | ||||||||||
Initial pipe appearance rates[edit]
All-Clear Pipe[edit]
The All-Clear Pipe randomly shoots out one of the following regular High-End items. The appearance rate can be viewed via the "Pipe content" link on the Gold Pass purchase screen.
Sky Pipe 1[edit]
| Items obtained from a new Sky Pipe 1 | |||||||||||||||
|---|---|---|---|---|---|---|---|---|---|---|---|---|---|---|---|
| Item | Normal |
Super |
High-End |
Featured High-End | |||||||||||
| Driver | Kart | Glider | Driver | Kart | Glider | Driver | Kart | Glider | Driver | Kart | Glider | ||||
| Amount | 32 | 26 | 16 | 9 | 7 | 4 | 1 | 1 | 1 | 1 | 1 | 1 | |||
Sky Pipe 2[edit]
| Items obtained from a new Sky Pipe 2 | |||||||||||||||
|---|---|---|---|---|---|---|---|---|---|---|---|---|---|---|---|
| Item | Normal |
Super |
High-End |
Featured High-End | |||||||||||
| Driver | Kart | Glider | Driver | Kart | Glider | Driver | Kart | Glider | Driver | Kart | Glider | ||||
| Amount | 30 | 24 | 14 | 9 | 7 | 4 | 1 | 1 | 1 | 3 | 3 | 3 | |||
8-Bit Gliders Pipe[edit]
| Items obtained from a new 8-Bit Gliders Pipe | |||||||||||||||
|---|---|---|---|---|---|---|---|---|---|---|---|---|---|---|---|
| Item | Normal |
Super |
High-End |
Featured High-End | |||||||||||
| Driver | Kart | Glider | Driver | Kart | Glider | Driver | Kart | Glider | Driver | Kart | Glider | ||||
| Amount | 15 | 13 | 6 | 5 | 4 | 4 | 0 | 0 | 2 | 0 | 0 | 1 | |||
Token Shop[edit]
The limited-time event where event tokens appeared began on February 23, 2022 and ended on March 8, 2022. Event tokens could be earned by collecting them on courses.
| Token Shop (February 9, 2022 - February 22, 2022) | ||
|---|---|---|

|
||
| Red Yoshi Amount: 1 |
Light-blue Turbo Birdo Amount: 1 |
8-Bit Jumping Mario Amount: 1 |
| Ruby ×3 Amount: 5 |
Coin ×500 Amount: 10 |
Coin Rush ticket Amount: 1 |
| Point-boost ticket (driver) Amount: 5 |
Point-boost ticket (kart) Amount: 5 |
Point-boost ticket (glider) Amount: 5 |
| Item ticket Amount: 10 |
Level-boost ticket (Normal driver) Amount: 3 |
Level-boost ticket (Super driver) Amount: 1 |
| Star ticket Amount: 5 |
Points-cap ticket (Normal driver) Amount: 1 |
Points-cap ticket (Super driver) Amount: 1 |
Tier Shop[edit]
The shop features a variety of set and randomized items available for purchase. The item slots in the shop are unlocked based on the highest tier of players.
| Items available in Tier Shop (February 23, 2022 - March 1, 2022) | ||
|---|---|---|

|
||
| Yoshi Amount: 1 |
P-Wing Amount: 1 |
? Block Amount: 1 |
| Items available in Tier Shop (March 2, 2022 - March 8, 2022) | ||

|
||
| Boomerang Bro Amount: 1 |
Dozer Dasher Amount: 1 |
Waluigi Wing Amount: 1 |
| Items available in Tier Shop (February 23, 2022 - March 8, 2022) | ||
| Level-boost ticket (Normal) Amount: 3 per week |
Level-boost ticket (Normal) Amount: 3 per week |
Level-boost ticket (Normal) Amount: 3 per week |
OR |
OR |
OR |
| Level-boost ticket (Super) Amount: 2 per week OR Level-boost ticket (High-End) Amount: 1 per week |
Level-boost ticket (Super) Amount: 2 per week OR Level-boost ticket (High-End) Amount: 1 per week |
Level-boost ticket (Super) Amount: 2 per week OR Level-boost ticket (High-End) Amount: 1 per week |
OR OR |
OR OR |
OR OR |
| Points-cap ticket (Normal) Amount: 1 per week |
Points-cap ticket (Super) Amount: 1 per week |
Points-cap ticket (High-End) Amount: 1 per week |
Names in other languages[edit]
| Language | Name | Meaning | Notes |
|---|---|---|---|
| Japanese | スカイツアー[?] Sukai Tsuā |
Sky Tour | |
| Chinese (simplified) | 天空巡回赛[?] Tiānkōng xúnhuí sài |
Sky Tour | |
| Chinese (traditional) | 天空巡迴賽[?] Tiānkōng xúnhuí sài |
Sky Tour | |
| French | Saison Aérienne[?] | Aerial Season | |
| German | Himmels-Tour-Saison[?] | Sky Tour Season | |
| Italian | Tour volante[?] | Flying Tour | |
| Korean | 스카이 투어[?] Seukai Tueo |
Sky Tour | |
| Portuguese | Temporada Voadora[?] | Flying Season | |
| Spanish | Temporada cielo[?] | Sky Season |

