Night Tour: Difference between revisions
Tags: Reverted Mobile edit |
m (Text replacement - "([Cc])olor-link" to "$1olor link") |
||
| (37 intermediate revisions by 19 users not shown) | |||
| Line 1: | Line 1: | ||
{{tour infobox | {{tour infobox | ||
|title= | |title=Night Tour | ||
|image=[[File:MKT | |image=[[File:MKT Night Tour.png|200px]] | ||
|start= | |start= June 27, 2023<br>11:00 p.m. (PT)<br>June 25, 2024 (rerun)<br>11:00 p.m. (PT) | ||
|end= | |end=July 11, 2023<br>10:59 p.m. (PT)<br>July 9, 2024 (rerun)<br>10:59 p.m. (PT) | ||
|cups=15 | |cups=15 | ||
|rank=[[ | |rank=[[Donkey Kong Cup]] (week 1)<br>[[Funky Kong Cup]] (week 2) | ||
|coin=[[Tour | |coin=[[Tour New York Minute|New York Minute]] | ||
|before=[[Mario vs. Luigi Tour (2023)|<<]] | |before=[[Mario vs. Luigi Tour (2023)|<<]] | ||
|after=[[Pipe Tour|>>]] | |after=[[Pipe Tour|>>]] | ||
}} | }} | ||
The ''' | The '''Night Tour''' was the ninety-ninth tour of ''[[Mario Kart Tour]]'', which began on June 28, 2023 and ended on July 11, 2023. It was rerun from June 26, 2024 to July 9, 2024 as the game's hundred-and-twenty-fifth tour. | ||
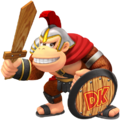
This was the first tour to introduce a driver with the [[Banana Barrels]] [[Special skill (Mario Kart Tour)|special skill]] since the introduction of [[Funky Kong]] in the [[Jungle Tour]] eighty-one tours prior, being the [[Mii|Light Green Mii Racing Suit]]. Additionally, all Shy Guy colors from ''[[Mario Kart 8]]'' | This tour introduced [[Rome Avanti]], a [[New course|new]] city course set in [[Rome]], {{wp|Italy}}, as well as [[Wii Moonview Highway|Moonview Highway]] from ''[[Mario Kart Wii]]'', marking its first appearance in the series as a [[classic course]]. Fitting with Rome Avanti's theme, [[Donkey Kong]] in a gladiator outfit was introduced as a new driver, the first and only variant of a [[Kong]] character. The tour also includes other city courses set at night (hence its name), namely [[Tour New York Minute|New York Minute]], [[Tour Vancouver Velocity|Vancouver Velocity]], and [[Tour Singapore Speedway|Singapore Speedway]]. The inclusion of Vancouver Velocity may also reference {{wp|Canada Day}}, which occurred during this tour on July 1, and New York Minute may also reference American {{wp|Independence Day (United States)|Independence Day}}, which also occurred during this tour on July 4. This was the first tour since the [[Paris Tour (2019)|2019 Paris Tour]] to introduce both a new city course and a classic course, and the second tour in a row to add three courses simultaneously. It was also the first tour to feature the normal variant of New York Minute since its debut in the [[New York Tour]] (the first tour of the game), the first tour to feature New York Minute 2R since its debut in the [[Holiday Tour (2019)|2019 Holiday Tour]] (the seventh tour of the game), and the first tour to feature New York Minute B since its debut in the [[Autumn Tour (2022)|2022 Autumn Tour]]. This tour saw [[GCN Waluigi Stadium]]'s first reappearance immediately following its debut in the [[Mario vs. Luigi Tour (2023)|previous tour]], making this the first tour to feature a course introduced in the previous tour since the second [[Peach vs. Bowser Tour (November–December 2022)|Peach vs. Bowser Tour]]. This tour marked the longest gap between appearances of a bonus challenge, as it marked the first appearance of the [[Vs. Mega]] Donkey Kong bonus challenge since the New York Tour. | ||
This was the first tour to introduce a driver with the [[Banana Barrels]] [[Special skill (Mario Kart Tour)|special skill]] since the introduction of [[Funky Kong]] in the [[Jungle Tour]] eighty-one tours prior, being the [[Mii|Light Green Mii Racing Suit]]. Additionally, all Shy Guy colors from ''[[Mario Kart 8]]'' had returned in ''Mario Kart Tour'' as of this tour. This was also the first tour since the [[Marine Tour]], the [[Holiday Tour (2019)|2019 Holiday Tour]], and the [[Peach vs. Daisy Tour]] to give [[Monty Mole]], [[Diddy Kong]], and [[Pink Gold Peach]], respectively, a new favorite course (being the normal variant of New York Minute, Rome Avanti R/T, and both the normal variant of New York Minute and Wii Moonview Highway R/T respectively). | |||
This tour's [[Coin Rush (Mario Kart Tour)|Coin Rush]] course was New York Minute, which was reused from the [[New York Tour]] and the [[Autumn Tour (2022)|2022 Autumn Tour]]. The menu's background featured the [[Colosseum]] as the tour's landmark. | This tour's [[Coin Rush (Mario Kart Tour)|Coin Rush]] course was New York Minute, which was reused from the [[New York Tour]] and the [[Autumn Tour (2022)|2022 Autumn Tour]]. The menu's background featured the [[Colosseum]] as the tour's landmark. | ||
The fourteenth set of [[List of challenge cards in Mario Kart Tour#Expert Challenges|Expert Challenges]] was introduced in this tour. This was the second set of Expert Challenges to last for seven tours instead of six; the first was from the [[New Year's Tour (2023)|2023 New Year's Tour]] to the [[Ninja Tour (2023)|2023 Ninja Tour]]. | The fourteenth set of [[List of challenge cards in Mario Kart Tour#Expert Challenges|Expert Challenges]] was introduced in this tour. This was the second set of Expert Challenges to last for seven tours instead of six (until the [[Anniversary Tour (2023)|2023 Anniversary Tour]]); the first was from the [[New Year's Tour (2023)|2023 New Year's Tour]] to the [[Ninja Tour (2023)|2023 Ninja Tour]]. | ||
This was the final tour to introduce a new Wii course. | |||
==Spotlight Shop== | ==Spotlight Shop== | ||
| Line 107: | Line 111: | ||
|2.3992% | |2.3992% | ||
|- | |- | ||
|[[Gold Glider]], [[Gold Crane]], [[Silver-and-Gold Hearts]], [[Gold Home-Field Glider]], [[Gold Tanooki Parafoil]], [[Gold Penguin Wingtip]], [[Gold Toe-Bean Balloons]], [[Gold Eggshell Glider]] ,[[Gold Cloud Balloons]], [[Gold Meteors]], [[Gold Umbrella]], [[Gold Candlelight Flight]], [[Gold Tulips]], [[Gold 8-Bit Glider]], [[Gold Swooper]], [[Golden Wings]], [[Gold Boo Masks]] | |[[Gold Glider]], [[Gold Crane]], [[Silver-and-Gold Hearts]], [[Gold Home-Field Glider]], [[Gold Tanooki Parafoil]], [[Gold Penguin Wingtip]], [[Gold Toe-Bean Balloons]], [[Gold Eggshell Glider]], [[Gold Cloud Balloons]], [[Gold Meteors]], [[Gold Umbrella]], [[Gold Candlelight Flight]], [[Gold Tulips]], [[Gold 8-Bit Glider]], [[Gold Swooper]], [[Golden Wings]], [[Gold Boo Masks]] | ||
|0.0960% | |0.0960% | ||
|} | |} | ||
| Line 326: | Line 330: | ||
==New content== | ==New content== | ||
The following content was introduced during the tour's debut in 2023. | |||
===Drivers=== | ===Drivers=== | ||
<gallery> | <gallery> | ||
MKT Artwork | MKT Artwork YellowShyGuy.png|[[Shy Guy|Yellow Shy Guy]] | ||
MKT Artwork | MKT Artwork DonkeyKongGladiator.png|[[Donkey Kong|Donkey Kong (Gladiator)]] | ||
</gallery> | </gallery> | ||
====Mii Racing Suits==== | ====Mii Racing Suits==== | ||
<gallery> | <gallery> | ||
MKT Artwork | MKT Artwork FishBoneMiiRacingSuit.png|[[Mii|Fish Bone Mii Racing Suit]] | ||
MKT Artwork LightGreenMiiRacingSuit.png|[[Mii|Light Green Mii Racing Suit]] | |||
</gallery> | </gallery> | ||
| Line 359: | Line 365: | ||
===Courses=== | ===Courses=== | ||
<gallery heights=50px> | <gallery heights=50px> | ||
MKT Icon Rome Avanti.png|[[Rome Avanti | MKT Icon Rome Avanti.png|[[Rome Avanti]] (N, R, T, R/T) | ||
MKT Icon | MKT Icon Rome Avanti 2.png|[[Rome Avanti|Rome Avanti 2]] (N, R, T, R/T) | ||
MKT Icon Wii | MKT Icon Wii Moonview Highway.png|[[Wii Moonview Highway]] (N, R, T, R/T) | ||
</gallery> | </gallery> | ||
| Line 415: | Line 420: | ||
|TCR1=[[File:MKT Icon CoinRushTicket.png|70px]] [[Coin Rush ticket]] ×1 | |TCR1=[[File:MKT Icon CoinRushTicket.png|70px]] [[Coin Rush ticket]] ×1 | ||
|T1.1=133 | |T1.1=133 | ||
|T1.1E=Do 50 {{Color | |T1.1E=Do 50 {{Color link|#A1A1FF|Jump Boost|Jump Boosts}}. | ||
|T1.1S=1 | |T1.1S=1 | ||
|T1.2=004 | |T1.2=004 | ||
|T1.2E=Land 3 hits with {{Color | |T1.2E=Land 3 hits with {{Color link|#A1A1FF|Bob-omb|Bob-ombs}}. | ||
|T1.2S=1 | |T1.2S=1 | ||
|T1.3=011 | |T1.3=011 | ||
| Line 436: | Line 441: | ||
|T1.7S=2 | |T1.7S=2 | ||
|T1.8=404 | |T1.8=404 | ||
|T1.8E=Cause opponents to crash using a {{Color | |T1.8E=Cause opponents to crash using a {{Color link|#A1A1FF|Mega Mushroom}}. | ||
|T1.8S=2 | |T1.8S=2 | ||
|T1.9=430 | |T1.9=430 | ||
| Line 443: | Line 448: | ||
|TCR2=[[File:MKT Icon QuickTicket.png|70px]] [[Quick ticket]] ×1 | |TCR2=[[File:MKT Icon QuickTicket.png|70px]] [[Quick ticket]] ×1 | ||
|T2.1=033 | |T2.1=033 | ||
|T2.1E=Land 5 hits with {{Color | |T2.1E=Land 5 hits with {{Color link|#A1A1FF|Red Shell|Red Shells}}. | ||
|T2.1S=1 | |T2.1S=1 | ||
|T2.2=068 | |T2.2=068 | ||
|T2.2E=Land 3 hits with {{Color | |T2.2E=Land 3 hits with {{Color link|#A1A1FF|Green Shell|Green Shells}}. | ||
|T2.2S=1 | |T2.2S=1 | ||
|T2.3=105 | |T2.3=105 | ||
| Line 452: | Line 457: | ||
|T2.3S=1 | |T2.3S=1 | ||
|T2.4=140 | |T2.4=140 | ||
|T2.4E=Use {{Color | |T2.4E=Use {{Color link|#A1A1FF|point-boost ticket|point-boost tickets}} 3 times. | ||
|T2.4S=2 | |T2.4S=2 | ||
|T2.5=161 | |T2.5=161 | ||
| Line 461: | Line 466: | ||
|T2.6S=2 | |T2.6S=2 | ||
|T2.7=400 | |T2.7=400 | ||
|T2.7E=Land a hit with a {{Color | |T2.7E=Land a hit with a {{Color link|#A1A1FF|Blooper}}. | ||
|T2.7S=2 | |T2.7S=2 | ||
|T2.8=183 | |T2.8=183 | ||
|T2.8E=Earn a total score of 15,000 or higher in the {{Color | |T2.8E=Earn a total score of 15,000 or higher in the {{Color link|#A1A1FF|Wario Cup}}. | ||
|T2.8S=2 | |T2.8S=2 | ||
|T2.9=031 | |T2.9=031 | ||
|T2.9E=Complete {{Color | |T2.9E=Complete {{Color link|#A1A1FF|Coin Rush (Mario Kart Tour)|Coin Rush}} 1 time. | ||
|T2.9S=2 | |T2.9S=2 | ||
|GCR=[[File:MKT Icon 1Ruby.png|70px]] [[Ruby|Rubies]] ×5 | |GCR=[[File:MKT Icon 1Ruby.png|70px]] [[Ruby|Rubies]] ×5 | ||
| Line 474: | Line 479: | ||
|G.1S=1 | |G.1S=1 | ||
|G.2=067 | |G.2=067 | ||
|G.2E=Land 15 hits with {{Color | |G.2E=Land 15 hits with {{Color link|#A1A1FF|Banana|Bananas}}. | ||
|G.2S=1 | |G.2S=1 | ||
|G.3=385 | |G.3=385 | ||
| Line 480: | Line 485: | ||
|G.3S=1 | |G.3S=1 | ||
|G.4=376 | |G.4=376 | ||
|G.4E=Use a {{Color | |G.4E=Use a {{Color link|#A1A1FF|points-cap ticket}}. | ||
|G.4S=2 | |G.4S=2 | ||
|G.5=185 | |G.5=185 | ||
| Line 489: | Line 494: | ||
|G.6S=2 | |G.6S=2 | ||
|G.7=399 | |G.7=399 | ||
|G.7E=Use {{Color | |G.7E=Use {{Color link|#A1A1FF|Lightning}}. | ||
|G.7S=2 | |G.7S=2 | ||
|G.8=158 | |G.8=158 | ||
|G.8E=Earn a total score of 20,000 or higher in the {{Color | |G.8E=Earn a total score of 20,000 or higher in the {{Color link|#A1A1FF|Birdo Cup}}. | ||
|G.8S=2 | |G.8S=2 | ||
|G.9=043 | |G.9=043 | ||
|G.9E=Send Greeting {{Color | |G.9E=Send Greeting {{Color link|#A1A1FF|Coin|Coins}} to a friend. | ||
|G.9S=2 | |G.9S=2 | ||
}} | }} | ||
| Line 559: | Line 564: | ||
|width=10% style="background:linear-gradient(#F2E18F,#B9800F)"|[[File:MKT Icon Level-boostticket9.png|70px]] | |width=10% style="background:linear-gradient(#F2E18F,#B9800F)"|[[File:MKT Icon Level-boostticket9.png|70px]] | ||
|-style="color: #FFF" | |-style="color: #FFF" | ||
|style="background:linear-gradient(#864D00,#A26000); border-top:1px solid #B9800F;"|{{Color | |style="background:linear-gradient(#864D00,#A26000); border-top:1px solid #B9800F;"|{{Color link|#A1A1FF|Coins}} ×3,000 | ||
|style="background:linear-gradient(#864D00,#A26000); border-top:1px solid #B9800F;"|{{Color | |style="background:linear-gradient(#864D00,#A26000); border-top:1px solid #B9800F;"|{{Color link|#A1A1FF|Ruby|Rubies}} ×10 | ||
|style="background:linear-gradient(#864D00,#A26000); border-top:1px solid #B9800F;"|{{Color | |style="background:linear-gradient(#864D00,#A26000); border-top:1px solid #B9800F;"|{{Color link|#A1A1FF|Point-boost ticket}} (Kart) ×3 | ||
|style="background:linear-gradient(#864D00,#A26000); border-top:1px solid #B9800F;"|Point-boost ticket (Kart) ×5 | |style="background:linear-gradient(#864D00,#A26000); border-top:1px solid #B9800F;"|Point-boost ticket (Kart) ×5 | ||
|style="background:linear-gradient(#864D00,#A26000); border-top:1px solid #B9800F;"|Rubies ×20 | |style="background:linear-gradient(#864D00,#A26000); border-top:1px solid #B9800F;"|Rubies ×20 | ||
|style="background:linear-gradient(#864D00,#A26000); border-top:1px solid #B9800F;"|{{Color | |style="background:linear-gradient(#864D00,#A26000); border-top:1px solid #B9800F;"|{{Color link|#A1A1FF|Points-cap ticket}} (High-end kart) ×1 | ||
|style="background:linear-gradient(#864D00,#A26000); border-top:1px solid #B9800F;"|Level-boost ticket (High-End driver) ×2 | |style="background:linear-gradient(#864D00,#A26000); border-top:1px solid #B9800F;"|Level-boost ticket (High-End driver) ×2 | ||
|style="background:linear-gradient(#864D00,#A26000); border-top:1px solid #B9800F;"|Level-boost ticket (High-End kart) ×2 | |style="background:linear-gradient(#864D00,#A26000); border-top:1px solid #B9800F;"|Level-boost ticket (High-End kart) ×2 | ||
| Line 589: | Line 594: | ||
|width=10% style="background:linear-gradient(#F2E18F,#B9800F)"|[[File:MKT Icon Points-capticket9.png|70px]] | |width=10% style="background:linear-gradient(#F2E18F,#B9800F)"|[[File:MKT Icon Points-capticket9.png|70px]] | ||
|-style="color: #FFF" | |-style="color: #FFF" | ||
|style="background:linear-gradient(#864D00,#A26000); border-top:1px solid #B9800F;"|{{Color | |style="background:linear-gradient(#864D00,#A26000); border-top:1px solid #B9800F;"|{{Color link|#A1A1FF|Level-boost ticket}} (Normal kart) ×1 | ||
|style="background:linear-gradient(#864D00,#A26000); border-top:1px solid #B9800F;"|Level-boost ticket (Super kart) ×1 | |style="background:linear-gradient(#864D00,#A26000); border-top:1px solid #B9800F;"|Level-boost ticket (Super kart) ×1 | ||
|style="background:linear-gradient(#864D00,#A26000); border-top:1px solid #B9800F;"|Level-boost ticket (High-End kart) ×1 | |style="background:linear-gradient(#864D00,#A26000); border-top:1px solid #B9800F;"|Level-boost ticket (High-End kart) ×1 | ||
| Line 644: | Line 649: | ||
<br> | <br> | ||
{|class="wikitable" style="margin:auto; text-align:center" width=65% | {|class="wikitable" style="margin:auto; text-align:center" width=65% | ||
!colspan=2 width=30%|Total Points Challenge 1 | !colspan=2 width=30%|Total Points Challenge 1 (2023) | ||
|rowspan=8 style="border-top:1px solid #FFF; border-bottom:1px solid #FFF;" width=5%| | |rowspan=8 style="border-top:1px solid #FFF; border-bottom:1px solid #FFF;" width=5%| | ||
!colspan=2 width=30%|Total Points Challenge 2 | !colspan=2 width=30%|Total Points Challenge 2 (2023) | ||
|- | |- | ||
!Points | !Points | ||
| Line 698: | Line 703: | ||
|[[File:MKT Icon Coins 3.png|30px]] Coins ×1,000<br> | |[[File:MKT Icon Coins 3.png|30px]] Coins ×1,000<br> | ||
[[File:MKT Icon Level-boostticket4.png|30px]] Level-boost ticket (Super driver) ×1 | [[File:MKT Icon Level-boostticket4.png|30px]] Level-boost ticket (Super driver) ×1 | ||
|} | |||
<br> | |||
{|class="wikitable" style="margin:auto; text-align:center" width=65% | |||
!colspan=2 width=30%|Total Points Challenge 1 (2024) | |||
|rowspan=8 style="border-top:1px solid #FFF; border-bottom:1px solid #FFF;" width=5%| | |||
!colspan=2 width=30%|Total Points Challenge 2 (2024) | |||
|- | |||
!Points | |||
!Rewards | |||
!Points | |||
!Rewards | |||
|- | |||
!400,000 | |||
|[[File:MKT Icon 1Ruby.png|20px]] [[Ruby|Rubies]] ×3<br> | |||
[[File:MKT Icon Point-boostticket1.png|30px]] [[Point-boost ticket]]s (driver) ×5<br> | |||
[[File:MKT Icon Point-boostticket2.png|30px]] Point-boost tickets (kart) ×5<br> | |||
[[File:MKT Icon Point-boostticket3.png|30px]] Point-boost tickets (glider) ×5 | |||
!999,999 | |||
|[[File:MKT Icon 1Ruby.png|20px]] [[Ruby|Rubies]] ×3<br> | |||
[[File:MKT Icon Point-boostticket1.png|30px]] Point-boost tickets (driver) ×5<br> | |||
[[File:MKT Icon Point-boostticket2.png|30px]] Point-boost tickets (kart) ×5<br> | |||
[[File:MKT Icon Point-boostticket3.png|30px]] Point-boost tickets (glider) ×5 | |||
|- | |||
!300,000 | |||
|[[File:MKT Icon Coins 2.png|30px]] [[Coin]]s ×500<br> | |||
[[File:MKT Icon ItemTicket.png|30px]] [[Item ticket]]s ×10<br> | |||
[[File:MKT Icon StarTicket.png|30px]] [[Star ticket]]s ×3 | |||
!900,000 | |||
|[[File:MKT Icon Coins 2.png|30px]] Coins ×500<br> | |||
[[File:MKT Icon ItemTicket.png|30px]] Item tickets ×10<br> | |||
[[File:MKT Icon QuickTicket.png|30px]] Quick ticket ×1 | |||
|- | |||
!250,000 | |||
|[[File:MKT Icon Coins 2.png|30px]] Coins ×500<br> | |||
[[File:MKT Icon Points-capticket4.png|30px]] Points-cap ticket (Super driver) ×1<br> | |||
[[File:MKT Icon ItemTicket.png|30px]] Item tickets ×2 | |||
!800,000 | |||
|[[File:MKT Icon Coins 2.png|30px]] Coins ×500<br> | |||
[[File:MKT Icon Points-capticket7.png|30px]] Points-cap ticket (High-End driver) ×1<br> | |||
[[File:MKT Icon QuickTicket.png|30px]] Quick ticket ×1 | |||
|- | |||
!200,000 | |||
|[[File:MKT Icon Coins 2.png|30px]] Coins ×500<br> | |||
[[File:MKT Icon Level-boostticket4.png|30px]] Level-boost ticket (Super driver) ×1<br> | |||
[[File:MKT Icon ItemTicket.png|30px]] Item tickets ×2 | |||
!700,000 | |||
|[[File:MKT Icon Coins 2.png|30px]] Coins ×500<br> | |||
[[File:MKT Icon Level-boostticket7.png|30px]] Level-boost ticket (High-End driver) ×1<br> | |||
[[File:MKT Icon QuickTicket.png|30px]] Quick ticket ×1 | |||
|- | |||
!150,000 | |||
|[[File:MKT Icon Coins 2.png|30px]] Coins ×500<br> | |||
[[File:MKT Icon Points-capticket1.png|30px]] [[Points-cap ticket]] (Normal driver) ×1<br> | |||
[[File:MKT Icon ItemTicket.png|30px]] Item tickets ×2 | |||
!600,000 | |||
|[[File:MKT Icon Coins 2.png|30px]] Coins ×500<br> | |||
[[File:MKT Icon Points-capticket4.png|30px]] Points-cap ticket (Super driver) ×1<br> | |||
[[File:MKT Icon ItemTicket.png|30px]] Item tickets ×3 | |||
|- | |||
!100,000 | |||
|[[File:MKT Icon Coins 2.png|30px]] Coins ×500<br> | |||
[[File:MKT Icon Level-boostticket1.png|30px]] [[Level-boost ticket]] (Normal driver) ×1<br> | |||
[[File:MKT Icon ItemTicket.png|30px]] Item tickets ×2 | |||
!500,000 | |||
|[[File:MKT Icon Coins 2.png|30px]] Coins ×500<br> | |||
[[File:MKT Icon Level-boostticket4.png|30px]] Level-boost ticket (Super driver) ×1<br> | |||
[[File:MKT Icon ItemTicket.png|30px]] Item tickets ×3 | |||
|} | |} | ||
| Line 717: | Line 789: | ||
!1st | !1st | ||
|- | |- | ||
|rowspan=3|[[File:MKT Vs. | |rowspan=3|[[File:MKT Vs. Donkey Kong Team.png|200px]]<br>'''Vs. Donkey Kong Team''' | ||
|rowspan=3|[[File:MKT Icon Rome Avanti.png|150px]]<br>[[Rome Avanti | |rowspan=3|[[File:MKT Icon Rome Avanti.png|150px]]<br>[[Rome Avanti]] | ||
|rowspan=3|[[File:MKT Icon Wii | |rowspan=3|[[File:MKT Icon Wii Moonview Highway.png|150px]]<br>[[Wii Moonview Highway]] | ||
|rowspan=3|[[File:MKT Icon | |rowspan=3|[[File:MKT Icon Rome Avanti 2T.png|150px]]<br>Rome Avanti 2T | ||
!Driver | !Driver | ||
|[[File:MKT Icon Birdo.png|37px|link=Birdo]] | |[[File:MKT Icon Birdo.png|37px|link=Birdo]] | ||
| Line 805: | Line 877: | ||
![[Mii|Yoshi Mii Racing Suit]]<br>[[File:MKT Icon 1Ruby.png|20px]] 100<br>Amount: 3 | ![[Mii|Yoshi Mii Racing Suit]]<br>[[File:MKT Icon 1Ruby.png|20px]] 100<br>Amount: 3 | ||
![[Mii|Nabbit Mii Racing Suit]]<br>[[File:MKT Icon 1Ruby.png|20px]] 100<br>Amount: 3 | ![[Mii|Nabbit Mii Racing Suit]]<br>[[File:MKT Icon 1Ruby.png|20px]] 100<br>Amount: 3 | ||
|} | |||
{| class="wikitable" style="margin:auto; text-align:center" width=50% | |||
!colspan=3|Items available in Mii Racing Suit Shop (June 26, 2024 - July 9, 2024) | |||
|- | |||
|width=33%|[[File:MKT Artwork DryBonesMiiRacingSuit.png|80x80px]] | |||
|width=34%|[[File:MKT Artwork DryBowserMiiRacingSuit.png|80x80px]] | |||
|width=33%|[[File:MKT Artwork PiranhaPlantMiiRacingSuit.png|80x80px]] | |||
|- | |||
![[Mii|Dry Bones Mii Racing Suit]]<br>70 [[File:MKT Icon 1Ruby.png|20px]] [[ruby|rubies]] for 1st purchase;<br>100 rubies for 2nd and 3rd purchases respectively | |||
![[Mii|Dry Bowser Mii Racing Suit]]<br>[[File:MKT Icon 1Ruby.png|20px]] 100<br>Amount: 3 | |||
![[Mii|Piranha Plant Mii Racing Suit]]<br>[[File:MKT Icon 1Ruby.png|20px]] 100<br>Amount: 3 | |||
|- | |||
|[[File:MKT Artwork ParaBiddybudMiiRacingSuit.png|80x80px]] | |||
|[[File:MKT Artwork YoshiMiiRacingSuit.png|80x80px]] | |||
|[[File:MKT Artwork NabbitMiiRacingSuit.png|80x80px]] | |||
|- | |||
![[Mii|Para-Biddybud Mii Racing Suit]]<br>70 [[File:MKT Icon 1Ruby.png|20px]] [[ruby|rubies]] for 1st purchase;<br>100 rubies for 2nd and 3rd purchases respectively | |||
![[Mii|Yoshi Mii Racing Suit]]<br>[[File:MKT Icon 1Ruby.png|20px]] 100<br>Amount: 3 | |||
![[Mii|Nabbit Mii Racing Suit]]<br>[[File:MKT Icon 1Ruby.png|20px]] 100<br>Amount: 3 | |||
|- | |||
|[[File:MKT Artwork SpikeMiiRacingSuit.png|80x80px]] | |||
|[[File:MKT Artwork CheepCheepMiiRacingSuit.png|80x80px]] | |||
|[[File:MKT Artwork LightBlueMiiRacingSuit.png|80x80px]] | |||
|- | |||
![[Mii|Spike Mii Racing Suit]]<br>[[File:MKT Icon 1Ruby.png|20px]] 100<br>Amount: 3 | |||
![[Mii|Cheep Cheep Mii Racing Suit]]<br>[[File:MKT Icon 1Ruby.png|20px]] 100<br>Amount: 3 | |||
![[Mii|Light Blue Mii Racing Suit]]<br>[[File:MKT Icon 1Ruby.png|20px]] 100<br>Amount: 3 | |||
|} | |} | ||
==Token Shop== | ==Token Shop== | ||
The limited-time event where [[event token]]s appear began on June 28, 2023 and ended on July 11, 2023. Event tokens could be earned by causing opponents to crash. | The limited-time event where [[event token]]s appear began on June 28, 2023 and ended on July 11, 2023; and started on June 26, 2024 and ended on July 9, 2024 for the rerun. Event tokens could be earned by causing opponents to crash. | ||
{| class="wikitable" style="margin:auto; text-align:center" width=50% | {| class="wikitable" style="margin:auto; text-align:center" width=50% | ||
!colspan=3|'''Token Shop''' (June 28, 2023 - July 11, 2023) | !colspan=3|'''Token Shop''' (June 28, 2023 - July 11, 2023; June 26, 2024 - July 9, 2024) | ||
|- | |- | ||
|width=33%|[[File:MKT Icon Launch Pipe Green.png|70px]] | |width=33%|[[File:MKT Icon Launch Pipe Green.png|70px]] | ||
| Line 832: | Line 932: | ||
The shop features a variety of set and randomized items available for purchase. The item slots in the shop are unlocked based on the highest tier of players. | The shop features a variety of set and randomized items available for purchase. The item slots in the shop are unlocked based on the highest tier of players. | ||
{| class="wikitable" style="margin:auto; text-align:center" width=50% | {| class="wikitable" style="margin:auto; text-align:center" width=50% | ||
!colspan=3|Items available in Tier Shop (June 28, 2023 - July 11, 2023) | !colspan=3|Items available in Tier Shop (June 28, 2023 - July 11, 2023; June 26, 2024 - July 9, 2024) | ||
|- | |- | ||
|[[File:MKT Icon Level-boostticket1.png|80px]] | |[[File:MKT Icon Level-boostticket1.png|80px]] | ||
| Line 870: | Line 970: | ||
<gallery> | <gallery> | ||
MKT Rome Tour artwork.png|Promotional artwork for the tour | MKT Rome Tour artwork.png|Promotional artwork for the tour | ||
MKT Night Tour Landscape. | MKT Night Tour Landscape.png|Landscape version of the loading screen | ||
</gallery> | </gallery> | ||
| Line 898: | Line 998: | ||
|SpaM=Nocturnal Season | |SpaM=Nocturnal Season | ||
}} | }} | ||
==Trivia== | |||
*GCN Waluigi Stadium reappears in this tour, despite being set at sunset. Ironically, the version in the ''[[Mario Kart 8 Deluxe – Booster Course Pass]]'', based on its appearance in ''Mario Kart Tour'', was changed to be set at night. | |||
{{MKT}} | {{MKT}} | ||
[[Category:Mario Kart Tour tours]] | [[Category:Mario Kart Tour tours]] | ||
[[it:Tour notturno]] | [[it:Tour notturno]] | ||
Latest revision as of 17:43, December 31, 2024
| Night Tour | |
|---|---|
| |
| Start date | June 27, 2023 11:00 p.m. (PT) June 25, 2024 (rerun) 11:00 p.m. (PT)[?] |
| End date | July 11, 2023 10:59 p.m. (PT) July 9, 2024 (rerun) 10:59 p.m. (PT)[?] |
| Number of cups | 15 |
| Ranked cups | Donkey Kong Cup (week 1) Funky Kong Cup (week 2) |
| Coin Rush course | New York Minute |
| << List of tours >> | |
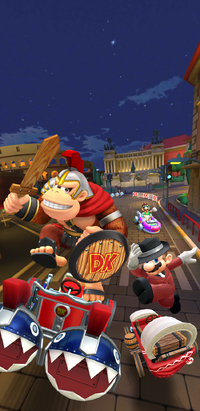
The Night Tour was the ninety-ninth tour of Mario Kart Tour, which began on June 28, 2023 and ended on July 11, 2023. It was rerun from June 26, 2024 to July 9, 2024 as the game's hundred-and-twenty-fifth tour.
This tour introduced Rome Avanti, a new city course set in Rome, Italy, as well as Moonview Highway from Mario Kart Wii, marking its first appearance in the series as a classic course. Fitting with Rome Avanti's theme, Donkey Kong in a gladiator outfit was introduced as a new driver, the first and only variant of a Kong character. The tour also includes other city courses set at night (hence its name), namely New York Minute, Vancouver Velocity, and Singapore Speedway. The inclusion of Vancouver Velocity may also reference Canada Day, which occurred during this tour on July 1, and New York Minute may also reference American Independence Day, which also occurred during this tour on July 4. This was the first tour since the 2019 Paris Tour to introduce both a new city course and a classic course, and the second tour in a row to add three courses simultaneously. It was also the first tour to feature the normal variant of New York Minute since its debut in the New York Tour (the first tour of the game), the first tour to feature New York Minute 2R since its debut in the 2019 Holiday Tour (the seventh tour of the game), and the first tour to feature New York Minute B since its debut in the 2022 Autumn Tour. This tour saw GCN Waluigi Stadium's first reappearance immediately following its debut in the previous tour, making this the first tour to feature a course introduced in the previous tour since the second Peach vs. Bowser Tour. This tour marked the longest gap between appearances of a bonus challenge, as it marked the first appearance of the Vs. Mega Donkey Kong bonus challenge since the New York Tour.
This was the first tour to introduce a driver with the Banana Barrels special skill since the introduction of Funky Kong in the Jungle Tour eighty-one tours prior, being the Light Green Mii Racing Suit. Additionally, all Shy Guy colors from Mario Kart 8 had returned in Mario Kart Tour as of this tour. This was also the first tour since the Marine Tour, the 2019 Holiday Tour, and the Peach vs. Daisy Tour to give Monty Mole, Diddy Kong, and Pink Gold Peach, respectively, a new favorite course (being the normal variant of New York Minute, Rome Avanti R/T, and both the normal variant of New York Minute and Wii Moonview Highway R/T respectively).
This tour's Coin Rush course was New York Minute, which was reused from the New York Tour and the 2022 Autumn Tour. The menu's background featured the Colosseum as the tour's landmark.
The fourteenth set of Expert Challenges was introduced in this tour. This was the second set of Expert Challenges to last for seven tours instead of six (until the 2023 Anniversary Tour); the first was from the 2023 New Year's Tour to the 2023 Ninja Tour.
This was the final tour to introduce a new Wii course.
Spotlight Shop[edit]
| Week 1 banner items June 27, 2023, 11:00 p.m. (PT) – July 4, 2023, 10:59 p.m. (PT) | ||||
| Item type | Name | Cost | Contents | Banner image |
|---|---|---|---|---|
| Driver | Donkey Kong (Gladiator) | 105 150 rubies for 2nd and 3rd purchases respectively |
 Donkey Kong (Gladiator) ×1 |
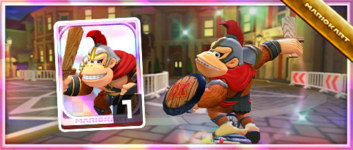
|
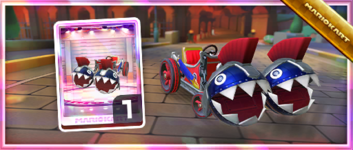
| Kart | Chain Chomp Chariot | 70 100 rubies for 2nd and 3rd purchases respectively |
Chain Chomp Chariot ×1 |
|
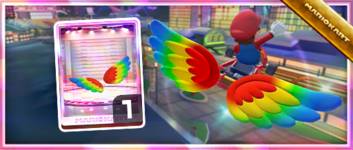
| Glider | Rainbow Flappy Wings | 70 100 rubies for 2nd and 3rd purchases respectively |
Rainbow Flappy Wings ×1 |
|
| Week 2 banner items July 4, 2023, 11:00 p.m. (PT) – July 11, 2023, 10:59 p.m. (PT) | ||||
| Item type | Name | Cost | Contents | Banner image |
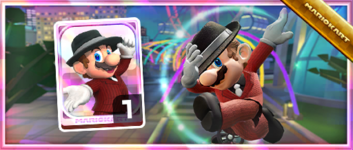
| Driver | Mario (Musician) | 105 150 rubies for 2nd and 3rd purchases respectively |
 Mario (Musician) ×1 |
|
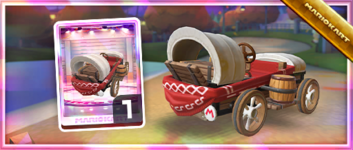
| Kart | Yeehaw Wagon | 70 100 rubies for 2nd and 3rd purchases respectively |
Yeehaw Wagon ×1 |
|
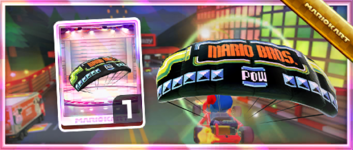
| Glider | Mario Bros. Parafoil | 70 100 rubies for 2nd and 3rd purchases respectively |
Mario Bros. Parafoil ×1 |
|
Daily Spotlight[edit]
The Daily Spotlight contains a mixture of items themed around the tour, items that have ranked tracks as favorites, and gold items. The rates listed are specific for that type of item; drivers, karts, and gliders are selected separately. Items marked with an asterisk (*) do not appear in the Daily Spotlight during the week they are available as Spotlight Shop banner items.
Cups[edit]
Donkey Kong Cup Ranked cup (week 1) |
Rome Avanti |
Rome Avanti 2R |
Wii Moonview Highway |
Glider Challenge | ||||
 Vancouver Velocity 2 |
Waluigi | |||||||
Mii Cup |
DS Twilight House (Balloon Battle) |
New York Minute R |
Vancouver Velocity T |
Time Trial | ||||
 Singapore Speedway |
Luigi | |||||||
Funky Kong Cup Ranked cup (week 2) |
Wii Moonview Highway R |
Rome Avanti 2T |
Rome Avanti R/T |
Goomba Takedown | ||||
 Vancouver Velocity |
Donkey Kong | |||||||
King Boo Cup |
Singapore Speedway 2 |
Vancouver Velocity 2 |
New York Minute T |
Ring Race | ||||
 New York Minute 2 |
Rosalina | |||||||
Ice Bro Cup |
Vancouver Velocity R |
Wii Moonview Highway R/T |
Rome Avanti 2 |
Big Reverse Race vs. 100 | ||||
 Rome Avanti |
Funky Kong | |||||||
Pauline Cup |
New York Minute 2R |
GCN Waluigi Stadium R |
Singapore Speedway R |
Time Trial | ||||
 Singapore Speedway 2R |
Peachette | |||||||
Baby Rosalina Cup |
Rome Avanti R |
Singapore Speedway 2T |
Vancouver Velocity 2R |
Steer Clear of Obstacles | ||||
 Wii Moonview Highway |
Bowser Jr. | |||||||
Luigi Cup |
New York Minute |
Wii Moonview Highway T |
GCN Waluigi Stadium T |
Combo Attack | ||||
 Vancouver Velocity T |
Koopa Troopa | |||||||
Cat Peach Cup |
Rome Avanti 2R/T |
Vancouver Velocity 2T |
Singapore Speedway T |
Goomba Takedown | ||||
 New York Minute 2 |
Diddy Kong | |||||||
Peach Cup |
Singapore Speedway |
New York Minute 2R/T |
Vancouver Velocity R/T |
Vs. Mega Donkey Kong | ||||
 New York Minute |
Any character | |||||||
Fire Rosalina Cup |
GCN Waluigi Stadium |
Singapore Speedway 2R |
Rome Avanti T |
Time Trial | ||||
 Rome Avanti 2 |
Birdo (Yellow) | |||||||
Birdo Cup |
Vancouver Velocity |
Rome Avanti R/T |
New York Minute R/T |
Smash Small Dry Bones | ||||
 GCN Waluigi Stadium |
Pauline | |||||||
Diddy Kong Cup |
New York Minute 2 |
GCN Waluigi Stadium R/T |
Singapore Speedway 2R/T |
Do Jump Boosts | ||||
 New York Minute |
Yoshi | |||||||
Bowser Jr. Cup |
Vancouver Velocity 2R/T |
New York Minute B (Balloon Battle) |
Rome Avanti 2R/T |
Break Item Boxes | ||||
 Rome Avanti |
Lakitu | |||||||
Wario Cup |
New York Minute 2T |
Singapore Speedway R/T |
Wii Moonview Highway R/T |
Big Reverse Race | ||||
 Singapore Speedway 2 |
Any character | |||||||
Today's Challenge[edit]
Players' most recently used kart and glider are chosen, and favorite and favored ones have extra priority. Opponents are arranged randomly. On day 1 of this tour, players finish a balloon battle in DS Twilight House in the Mii Cup using the Light Green Mii Racing Suit for a free pipe launch. Starting from day 2, players have to finish a race in the earliest incomplete course that is not in any of the ranked cups using the driver shown on the course's thumbnail every day to obtain the corresponding reward in the table below. Once all of the courses are completed, the courses are selected at random.
| Day(s) | Reward |
| 1-13 | Free pipe launch |
|---|---|
| 14 |  Badge |
| Today's Challenge Pipe | |

| |
| Pipe contents | |
| Rubies, coins, driver (Normal/Super/High-End), kart (Normal/Super/High-End), glider (Normal/Super/High-End), item tickets | |
Rewards[edit]
Gold cells indicate rewards that are exclusive to Gold Pass members.
| Gold Fish Bone Ferry |
| Grand Stars | 15 | 20 | 25 | 30 | 35 | 40 | 45 | 50 | 55 | 60 | 65 | 70 | 80 | 90 | 100 | 110 | 120 | 130 | 140 | 150 | 160 | 170 | 180 | 190 | 200 | 210 | 220 | 230 | 240 | 250 | 260 | 270 | 280 | 290 | 300 | 310 | 320 | Total | Grand total | |
|---|---|---|---|---|---|---|---|---|---|---|---|---|---|---|---|---|---|---|---|---|---|---|---|---|---|---|---|---|---|---|---|---|---|---|---|---|---|---|---|---|
| Pipes | 10 | 26 | ||||||||||||||||||||||||||||||||||||||
| 16 | ||||||||||||||||||||||||||||||||||||||||
| Coins | 500 | 500 | 500 | 500 | 500 | 500 | 500 | 500 | 500 | 500 | 5000 | 15000 | ||||||||||||||||||||||||||||
| 5000 | 5000 | 10000 | ||||||||||||||||||||||||||||||||||||||
| Rubies | 10 | 5 | 3 | 3 | 21 | 56 | ||||||||||||||||||||||||||||||||||
| 15 | 10 | 10 | 35 | |||||||||||||||||||||||||||||||||||||
| Item tickets | 5 | 5 | 10 | 30 | ||||||||||||||||||||||||||||||||||||
| 10 | 10 | 20 | ||||||||||||||||||||||||||||||||||||||
| Star tickets | 2 | 3 | 5 | 5 | ||||||||||||||||||||||||||||||||||||
| 0 | ||||||||||||||||||||||||||||||||||||||||
| Quick tickets | 1 | 1 | 4 | |||||||||||||||||||||||||||||||||||||
| 3 | 3 | |||||||||||||||||||||||||||||||||||||||
| Point-boost tickets | 1 | 1 | 1 | 3 | 8 | |||||||||||||||||||||||||||||||||||
| 5 | 5 | |||||||||||||||||||||||||||||||||||||||
| 1 | 1 | 1 | 3 | 8 | ||||||||||||||||||||||||||||||||||||
| 5 | 5 | |||||||||||||||||||||||||||||||||||||||
| 1 | 1 | 1 | 3 | 8 | ||||||||||||||||||||||||||||||||||||
| 5 | 5 | |||||||||||||||||||||||||||||||||||||||
| Level-boost tickets | 3 | 22 | ||||||||||||||||||||||||||||||||||||||
(3) |
(3) |
(3) |
(2) |
(2) |
(2) |
19 | ||||||||||||||||||||||||||||||||||
New content[edit]
The following content was introduced during the tour's debut in 2023.
Drivers[edit]
Mii Racing Suits[edit]
Karts[edit]
Gliders[edit]
Balloon designs[edit]
Banana Balloon
Courses[edit]
Rome Avanti (N, R, T, R/T)
Rome Avanti 2 (N, R, T, R/T)
Wii Moonview Highway (N, R, T, R/T)
Paid banners[edit]
| Name | Availability | Cost | Contents | Banner image |
|---|---|---|---|---|
| Value Pack | June 27, 2023 – July 11, 2023 | US$1.99 |
|

|
| Driver Point-Boost Tickets 10 Ticket Set | June 27, 2023 – July 11, 2023 | US$3.99 | 
| |
| Celebrate the Night Tour with the Fish Bone Ferry! | June 27, 2023 – July 11, 2023 | US$3.99 | 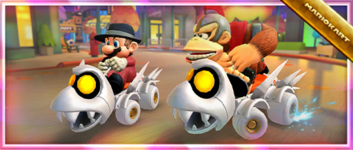
| |
| 70 Rubies and Ticket Pack | June 27, 2023 – July 11, 2023 | US$19.99 | 
| |
| 150 Rubies and Ticket Pack | June 27, 2023 – July 11, 2023 | US$39.99 |
|

|
Challenges[edit]
| Tour Challenges 1 | Tour Challenges 2 | Gold Challenges | ||||||||
|---|---|---|---|---|---|---|---|---|---|---|
| Completion reward: |
Completion reward: |
Completion reward: | ||||||||
 |
 |
 |
 |
 |
 |
 |
 |
 | ||
| Do 50 Jump Boosts. | Land 3 hits with Bob-ombs. | Get a Fantastic combo a total of 5 times. | Land 5 hits with Red Shells. | Land 3 hits with Green Shells. | Get 1st place 2 times in a row in 100cc or above. | Get a combo count of ×30 or higher. | Land 15 hits with Bananas. | Get 1st place 3 times in a row in 100cc or above. | ||
 |
 |
 |
 |
 |
 |
 |
 |
 | ||
| Get 1 item from the Daily Selects section of the Shop. | Get 3rd place or higher 30 times. | Cause an opponent to crash while gliding. | Use point-boost tickets 3 times. | Do 20 Jump Boosts using a driver wearing a tie. | Earn a score of 7,000 or higher on 3 T or R/T courses. | Use a points-cap ticket. | Earn a score of 7,000 or higher using a driver with a mustache. | Cause opponents to crash 3 times while gliding. | ||
 |
 |
 |
 |
 |
 |
 |
 |
 | ||
| Glide a total distance of 5,000. | Cause opponents to crash using a Mega Mushroom. | Finish every course of every cup, including bonus challenges. | Land a hit with a Blooper. | Earn a total score of 15,000 or higher in the Wario Cup. | Complete Coin Rush 1 time. | Use Lightning. | Earn a total score of 20,000 or higher in the Birdo Cup. | Send Greeting Coins to a friend. | ||
| Premium Challenges | Premium Challenges+ | Premium Challenges++ | ||||||||
|---|---|---|---|---|---|---|---|---|---|---|
| Cost: US$4.99 | Cost: US$9.99 | Cost: US$19.99 | ||||||||
| Three in a row reward: |
Three in a row reward: |
Three in a row reward: | ||||||||
| Completion reward: |
Completion reward: |
Completion reward: | ||||||||
| Pipe ×1 | Pipe ×1 | Pipe ×1 | Pipe ×1 | Gold Pipe ×1 | Coins ×5,000 | Gold Pipe ×1 | Rubies ×30 | Coins ×10,000 | ||
| Land 5 hits with Green Shells. | Land 5 hits with Bananas. | Land 3 hits with Bob-ombs. | Land 10 hits with Green Shells. | Land 10 hits with Bananas. | Use 10 Mushrooms. | Land 10 hits with Red Shells. | Start a new tour. | Land 20 hits with Bananas. | ||
| Coins ×3,000 | Rubies ×10 | Point-boost ticket (Kart) ×3 | Point-boost ticket (Kart) ×5 | Rubies ×20 | Points-cap ticket (High-end kart) ×1 | Level-boost ticket (High-End driver) ×2 | Level-boost ticket (High-End kart) ×2 | Level-boost ticket (High-End glider) ×2 | ||
| Do 20 Jump Boosts. | Start a new tour. | Do 50 Mini-Turbo boosts. | Do 50 Jump Boosts. | Start a new tour. | Do 100 Mini-Turbo boosts. | Land 5 hits with Bob-ombs. | Do 100 Jump Boosts. | Do 150 Mini-Turbo boosts. | ||
| Level-boost ticket (Normal kart) ×1 | Level-boost ticket (Super kart) ×1 | Level-boost ticket (High-End kart) ×1 | Level-boost ticket (High-End driver) ×1 | Level-boost ticket (High-End kart) ×1 | Level-boost ticket (High-End glider) ×1 | Points-cap ticket (High-end driver) ×2 | Points-cap ticket (High-end kart) ×2 | Points-cap ticket (High-end glider) ×2 | ||
| Get 1st place 3 times. | Get 1st place 5 times. | Get 1st place 10 times. | Get 1st place 5 times. | Get 1st place 10 times. | Get 1st place 15 times. | Get 1st place 10 times. | Get 1st place 15 times. | Get 1st place 20 times. | ||
| Tour Multiplayer Challenges | ||
|---|---|---|
| Three in a row reward: | ||
| Completion reward: | ||
 |
 |
 |
| Do 10 Jump Boosts in multiplayer. | Do 3 Rocket Starts in multiplayer[sic] | Land 3 hits with Green Shells in multiplayer. |
 |
 |
 |
| Play multiplayer 3 times. | Play multiplayer 5 times. | Play multiplayer 10 times. |
 |
 |
 |
| Get 3rd place or higher in multiplayer. | Get 3rd place or higher 3 times in multiplayer. | Get 3rd place or higher 5 times in multiplayer. |
| Total Points Challenge 1 (2023) | Total Points Challenge 2 (2023) | |||
|---|---|---|---|---|
| Points | Rewards | Points | Rewards | |
| 400,000 |
|
999,999 |
| |
| 300,000 |
|
900,000 | ||
| 250,000 | 800,000 | |||
| 200,000 | 700,000 | |||
| 150,000 |
|
600,000 | ||
| 100,000 |
|
500,000 | ||
| Total Points Challenge 1 (2024) | Total Points Challenge 2 (2024) | |||
|---|---|---|---|---|
| Points | Rewards | Points | Rewards | |
| 400,000 |
|
999,999 |
| |
| 300,000 |
|
900,000 | ||
| 250,000 | 800,000 | |||
| 200,000 | 700,000 | |||
| 150,000 |
|
600,000 | ||
| 100,000 |
|
500,000 | ||
2-Player Challenge[edit]
| Name | Courses | Opponents | ||||||||
|---|---|---|---|---|---|---|---|---|---|---|
| First | Second | Final | 6th | 5th | 4th | 3rd | 2nd | 1st | ||
 Vs. Donkey Kong Team |
Rome Avanti |
Wii Moonview Highway |
Rome Avanti 2T |
Driver | ||||||
| Kart | ||||||||||
| Glider | ||||||||||
Gold Pipe[edit]
The Gold Pipe, including the All-Clear Pipe, randomly shoots out one of the following regular High-End items. The appearance rate can be viewed via the "Pipe content" link on the Gold Pass purchase screen.
Mii Racing Suit Shop[edit]
Banner items[edit]
| Name | Cost | Contents | Banner image |
|---|---|---|---|
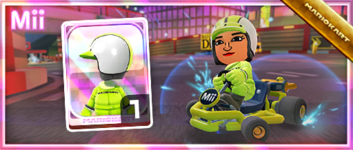
| Light Green Mii Racing Suit | 70 100 rubies for 2nd and 3rd purchases respectively |
Light Green Mii Racing Suit ×1 |
|
Other items[edit]
| Items available in Mii Racing Suit Shop (June 28, 2023 - July 11, 2023) | ||
|---|---|---|
| Rocky Wrench Mii Racing Suit 70 100 rubies for 2nd and 3rd purchases respectively |
Monty Mole Mii Racing Suit Amount: 3 |
Dry Bones Mii Racing Suit Amount: 3 |
| Rosalina Mii Racing Suit Amount: 3 |
Roaring Racer Mii Racing Suit Amount: 3 |
White Mii Racing Suit Amount: 3 |
| Wario Mii Racing Suit Amount: 3 |
Yoshi Mii Racing Suit Amount: 3 |
Nabbit Mii Racing Suit Amount: 3 |
| Items available in Mii Racing Suit Shop (June 26, 2024 - July 9, 2024) | ||
|---|---|---|
| Dry Bones Mii Racing Suit 70 100 rubies for 2nd and 3rd purchases respectively |
Dry Bowser Mii Racing Suit Amount: 3 |
Piranha Plant Mii Racing Suit Amount: 3 |
| Para-Biddybud Mii Racing Suit 70 100 rubies for 2nd and 3rd purchases respectively |
Yoshi Mii Racing Suit Amount: 3 |
Nabbit Mii Racing Suit Amount: 3 |
| Spike Mii Racing Suit Amount: 3 |
Cheep Cheep Mii Racing Suit Amount: 3 |
Light Blue Mii Racing Suit Amount: 3 |
Token Shop[edit]
The limited-time event where event tokens appear began on June 28, 2023 and ended on July 11, 2023; and started on June 26, 2024 and ended on July 9, 2024 for the rerun. Event tokens could be earned by causing opponents to crash.
| Token Shop (June 28, 2023 - July 11, 2023; June 26, 2024 - July 9, 2024) | ||
|---|---|---|
| Pipe Amount: 34 |
Ruby ×3 Amount: 5 |
Coin ×500 Amount: 5 |
| Banana Balloon Amount: 1 |
Level-boost ticket (Normal) Amount: 3 |
Level-boost ticket (Super) Amount: 2 |
Tier Shop[edit]
The shop features a variety of set and randomized items available for purchase. The item slots in the shop are unlocked based on the highest tier of players.
| Items available in Tier Shop (June 28, 2023 - July 11, 2023; June 26, 2024 - July 9, 2024) | ||
|---|---|---|
| Level-boost ticket (Normal) Amount: 3 per week |
Level-boost ticket (Normal) Amount: 3 per week |
Level-boost ticket (Normal) Amount: 3 per week |
OR |
OR |
OR |
| Level-boost ticket (Super) Amount: 2 per week OR Level-boost ticket (High-End) Amount: 1 per week |
Level-boost ticket (Super) Amount: 2 per week OR Level-boost ticket (High-End) Amount: 1 per week |
Level-boost ticket (Super) Amount: 2 per week OR Level-boost ticket (High-End) Amount: 1 per week |
OR OR |
OR OR |
OR OR |
| Points-cap ticket (Normal) Amount: 1 per week |
Points-cap ticket (Super) Amount: 1 per week |
Points-cap ticket (High-End) Amount: 1 per week |
| Level-boost ticket (High-End) Amount: 1 per week |
Level-boost ticket (High-End) Amount: 1 per week |
Level-boost ticket (High-End) Amount: 1 per week |
Gallery[edit]
Names in other languages[edit]
| Language | Name | Meaning | Notes |
|---|---|---|---|
| Japanese | ナイトツアー[?] Naito Tsuā |
Night Tour | |
| Chinese (simplified) | 夜间巡回赛[?] Yèjiān Xúnhuísài |
Night Tour | |
| Chinese (traditional) | 夜間巡迴賽[?] Yèjiān Xúnhuísài |
Night Tour | |
| French | Saison nocturne[?] | Nocturnal Season | |
| German | Nacht-Tour-Saison[?] | Night Tour Season | |
| Italian | Tour notturno[?] | Nocturnal Tour | |
| Korean | 나이트 투어[?] Naiteu Tueo |
Night Tour | |
| Portuguese | Temporada noturna[?] | Nocturnal Season | |
| Spanish | Temporada nocturna[?] | Nocturnal Season |
Trivia[edit]
- GCN Waluigi Stadium reappears in this tour, despite being set at sunset. Ironically, the version in the Mario Kart 8 Deluxe – Booster Course Pass, based on its appearance in Mario Kart Tour, was changed to be set at night.

