Pipe Tour: Difference between revisions
VulpixTails (talk | contribs) No edit summary |
m (Text replacement - "(\| *)Jap([RMCN\d]* *=)" to "$1Jpn$2") |
||
| (137 intermediate revisions by 43 users not shown) | |||
| Line 1: | Line 1: | ||
{{tour infobox | {{tour infobox | ||
|title=Pipe Tour | |title=Pipe Tour | ||
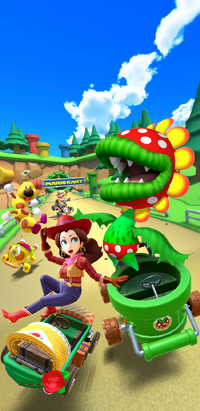
|image=[[File:MKT Pipe Tour.png|200px]] | |image=[[File:MKT Pipe Tour.png|200px]] | ||
|start=July 11, 2023<br>11:00 p.m. (PT) | |start=July 11, 2023<br>11:00 p.m. (PT)<br>July 9, 2024 (rerun)<br>11:00 p.m. (PT) | ||
|end=July 25, 2023<br>10:59 p.m. (PT) | |end=July 25, 2023<br>10:59 p.m. (PT)<br>July 23, 2024 (rerun)<br>10:59 p.m. (PT) | ||
|cups=15 | |cups=15 | ||
|coin=[[ | |rank=[[Pauline Cup]] (week 1)<br>[[Poochy Cup]] (week 2) | ||
|coin=[[Piranha Plant Pipeline]] | |||
|before=[[Night Tour|<<]] | |before=[[Night Tour|<<]] | ||
|after=[[ | |after=[[Sunshine Tour|>>]] | ||
}} | }} | ||
The '''Pipe Tour''' | The '''Pipe Tour''' was the one-hundredth tour of ''[[Mario Kart Tour]]'', which began on July 12, 2023 and ended on July 25, 2023. It was rerun from July 10, 2024 to July 23, 2024 as the game's hundred-and-twenty-sixth tour. | ||
This tour introduced a brand new [[Warp Pipe|pipe]]-themed course named [[Piranha Plant Pipeline]],<ref name="MKT Twitter 2023-07-07">@mariokarttourEN (July 7, 2023). "[https://twitter.com/mariokarttourEN/status/1677204488590102528 The Night Tour is wrapping up in #MarioKartTour. Next up is the Pipe Tour, full of mountains, valleys, and of course pipes! It features the new course Piranha Plant Pipeline!]" ''Twitter''. Retrieved July 7, 2023. ([https://web.archive.org/web/20230707181253/https://twitter.com/mariokarttourEN/status/1677204488590102528 Archived] July 7, 2023, 18:12:53 UTC via Wayback Machine.)</ref> reflecting the theme of the tour, while also adding two pipe-based karts - one being the [[Boo Pipes]] from ''[[Mario Kart: Double Dash!!]]'', and the other being the new [[Gold Pipes]] kart. [[Wiggler]] was introduced as a new driver after its series debut in ''[[Mario Kart 7]]'' along with a themed [[Mii|Mii Racing Suit]], coinciding with Wiggler's inclusion in Wave 5 of the ''[[Mario Kart 8 Deluxe – Booster Course Pass]]'' (which released on the same day as this tour). In addition, a variant of [[Pauline]] in a cowgirl outfit was introduced as a new driver, making this the first tour since the [[Peach vs. Daisy Tour]] to introduce a variant of Pauline. The tour also saw the first reappearances of [[Wii Dry Dry Ruins]] since its debut in the [[Ninja Tour (2023)|2023 Ninja Tour]], [[GBA Yoshi Desert]] since its debut in the [[Yoshi Tour (2023)|2023 Yoshi Tour]], and [[Piranha Plant Cove]] and Piranha Plant Cove 2 since their debut in the [[Exploration Tour (2023)|2023 Exploration Tour]], as well as the first reappearances of [[N64 Kalimari Desert]], [[GBA Sunset Wilds]] and [[3DS Piranha Plant Slide]] since the 2023 Exploration Tour, and the first reappearance of [[GCN Dino Dino Jungle]] since the [[Animal Tour]]. Counting re-routes as separate courses, this was the first tour since the 2023 Ninja Tour to introduce only a single course to the game. | |||
This was the first tour since the [[Tokyo Tour]] to give the [[Cheep Charger]] a new favorite course, the first since the [[New Year's 2021 Tour]] to give the [[Oilpaper Umbrella]] a new favorite course, and the first since the [[Halloween Tour (2021)|2021 Halloween Tour]] to give [[Waluigi|Waluigi (Bus Driver)]] a new favorite course. | |||
Similarly to the [[Sydney Tour (April–May 2021)|April-May 2021 Sydney Tour]], [[New Year's 2022 Tour]], and [[Spring Tour]], the trailer<ref>Nintendo Mobile (July 7, 2023). [https://youtu.be/ymOqRlr-7Bk Mario Kart Tour - Pipe Tour Trailer]. ''YouTube''. Retrieved July 8, 2023.</ref> and social media announcement<ref name="MKT Twitter 2023-07-07"/><ref>mariokarttour (July 7, 2023). "[https://www.facebook.com/mariokarttour/videos/1962108350807226/ The Night Tour is wrapping up in #MarioKartTour. Next up is the Pipe Tour, full of mountains, valleys, and of course pipes! It features the new course Piranha Plant Pipeline!]" ''Facebook''. Retrieved July 8, 2023.</ref> were publicly released later than the usual time. | |||
The [[Coin Rush (Mario Kart Tour)|Coin Rush]] course for this tour was Piranha Plant Pipeline. The menu background featured the mountain from the starting area of Piranha Plant Pipeline as the tour's landmark. | |||
This was the final tour to introduce a new, non-alternate costume character to ''Tour'', in the form of [[Wiggler]]. | |||
{{br|toc=1}} | |||
==Spotlight Shop== | |||
{| align=center width=85% cellspacing=0 border=1 cellpadding=3 style="border-collapse:collapse; font-family:Arial; text-align:center" | |||
|-style="background: #89A" | |||
|colspan=5|'''Week 1/2 banner items'''<br>July 11, 2023, 11:00 p.m. (PT) – July 25, 2023, 10:59 p.m. (PT) | |||
|-style="background: #ABC" | |||
! style="width: 8%;"|Item type | |||
! style="width: 15%;"|Name | |||
! style="width: 17%;"|Cost | |||
! style="width: 20%;"|Contents | |||
! style="width: 40%;"|Banner image | |||
|- | |||
!style="background: #ABC"|Driver | |||
!Petey Piranha (Gold) | |||
|105 [[File:MKT Icon 1Ruby.png|20px]] [[ruby|rubies]] for 1st purchase;<br>150 rubies for 2nd and 3rd purchases respectively | |||
|[[File:MKT Artwork PeteyPiranhaGold.png|x100px]]<br> [[Petey Piranha|Petey Piranha (Gold)]] ×1 | |||
|[[File:MKT Tour100 PeteyPiranhaGold.png|x150px]] | |||
|- | |||
!style="background: #ABC"|Kart | |||
!Gold Pipes | |||
|70 [[File:MKT Icon 1Ruby.png|20px]] [[ruby|rubies]] for 1st purchase;<br>100 rubies for 2nd and 3rd purchases respectively | |||
|[[File:MKT Icon GoldPipes.png|x100px]]<br> [[Gold Pipes]] ×1 | |||
|[[File:MKT Tour100 GoldPipes.png|x150px]] | |||
|-style="background: #89A" | |||
|colspan=5|'''Week 1 banner items'''<br>July 11, 2023, 11:00 p.m. (PT) – July 18, 2023, 10:59 p.m. (PT) | |||
|-style="background: #ABC" | |||
!Item type | |||
!Name | |||
!Cost | |||
!Contents | |||
!Banner image | |||
|- | |||
!style="background: #ABC"|Driver | |||
!Pauline (Cowgirl) | |||
|105 [[File:MKT Icon 1Ruby.png|20px]] [[ruby|rubies]] for 1st purchase;<br>150 rubies for 2nd and 3rd purchases respectively | |||
|[[File:MKT Artwork PaulineCowgirl.png|x100px]]<br> [[Pauline|Pauline (Cowgirl)]] ×1 | |||
|[[File:MKT Tour100 PaulineCowgirl.png|x150px]] | |||
|- | |||
!style="background: #ABC"|Kart | |||
!Desert Rose Wagon | |||
|70 [[File:MKT Icon 1Ruby.png|20px]] [[ruby|rubies]] for 1st purchase;<br>100 rubies for 2nd and 3rd purchases respectively | |||
|[[File:MKT Icon DesertRoseWagon.png|x100px]]<br> [[Desert Rose Wagon]] ×1 | |||
|[[File:MKT Tour100 DesertRoseWagon.png|x150px]] | |||
|- | |||
!style="background: #ABC"|Glider | |||
!Mosaic Starchute | |||
|70 [[File:MKT Icon 1Ruby.png|20px]] [[ruby|rubies]] for 1st purchase;<br>100 rubies for 2nd and 3rd purchases respectively | |||
|[[File:MKT Icon MosaicStarchute.png|x100px]]<br> [[Mosaic Starchute]] ×1 | |||
|[[File:MKT Tour100 MosaicStarchute.png|x150px]] | |||
|-style="background: #89A" | |||
|colspan=5|'''Week 2 banner items'''<br>July 18, 2023, 11:00 p.m. (PT) – July 25, 2023, 10:59 p.m. (PT) | |||
|-style="background: #ABC" | |||
!Item type | |||
!Name | |||
!Cost | |||
!Contents | |||
!Banner image | |||
|- | |||
!style="background: #ABC"|Driver | |||
!Petey Piranha | |||
|105 [[File:MKT Icon 1Ruby.png|20px]] [[ruby|rubies]] for 1st purchase;<br>150 rubies for 2nd and 3rd purchases respectively | |||
|[[File:PeteySluggers.png|x100px]]<br> [[Petey Piranha]] ×1 | |||
|[[File:MKT Tour100 PeteyPiranha.png|x150px]] | |||
|- | |||
!style="background: #ABC"|Kart | |||
!Piranha Pipes | |||
|70 [[File:MKT Icon 1Ruby.png|20px]] [[ruby|rubies]] for 1st purchase;<br>100 rubies for 2nd and 3rd purchases respectively | |||
|[[File:MKT Icon PiranhaPipes.png|x100px]]<br> [[Piranha Pipes]] ×1 | |||
|[[File:MKT Tour100 PiranhaPipes.png|x150px]] | |||
|- | |||
!style="background: #ABC"|Glider | |||
!Piranha Plant Balloons | |||
|70 [[File:MKT Icon 1Ruby.png|20px]] [[ruby|rubies]] for 1st purchase;<br>100 rubies for 2nd and 3rd purchases respectively | |||
|[[File:MKT Icon PiranhaPlantBalloons.png|x100px]]<br> [[Piranha Plant Balloons]] ×1 | |||
|[[File:MKT Tour100 PiranhaPlantBalloons.png|x150px]] | |||
|} | |||
===Daily Spotlight=== | |||
The Daily Spotlight contains a mixture of items themed around the tour, items that have ranked tracks as favorites, and gold items. The rates listed are specific for that type of item; drivers, karts, and gliders are selected separately. Items marked with an asterisk (*) do not appear in the Daily Spotlight during the week they are available as Spotlight Shop banner items. | |||
{|class="wikitable" style="margin:auto; text-align:center" | |||
!colspan=2|High-End items obtainable from Daily Spotlight during the Pipe Tour | |||
!Rate (each) | |||
|- | |||
!rowspan=3|High-End drivers | |||
|[[Pauline]], [[Poochy]], [[Wario|Wario (Cowboy)]] | |||
|6.5732% | |||
|- | |||
|[[Penguin Mario|Penguin Luigi]], [[Pauline|Pauline (Rose)]], [[Penguin Mario|Penguin Toad]], [[Builder Mario|Builder Toadette]], [[Penguin Mario]], [[Tanooki Mario|Tanooki Rosalina]], [[Penguin Mario|Penguin Toadette]], [[Dr. Mario]], [[Luigi#Dr. Mario (series)|Dr. Luigi]], [[White Tanooki Mario]], [[Luigi|Luigi (Knight)]], [[Tanooki Mario|Kitsune Luigi]], [[Toad (species)|Toad (Astronaut)]], [[Pauline|Pauline (Cowgirl)]]*, [[Donkey Kong Jr.|Donkey Kong Jr. (SNES)]], [[Shy Guy|Pink Shy Guy (Ninja)]], [[Birdo|Birdo (White)]], [[Exploring Shy Guy|Light-blue Shy Guy (Explorer)]] | |||
|4.3821% | |||
|- | |||
|[[Yoshi (species)|Yoshi (Gold Egg)]], [[Roving Racers|Gold Koopa (Freerunning)]], [[Dry Bones|Dry Bones (Gold)]], [[Dry Bowser|Dry Bowser (Gold)]], [[Shy Guy|Shy Guy (Gold)]], [[King Boo|King Boo (Gold)]], [[King Bob-omb|King Bob-omb (Gold)]], [[Chargin' Chuck|Chargin' Chuck (Gold)]] | |||
|0.1753% | |||
|- | |||
!rowspan=3|High-End karts | |||
|[[Taiko Drum Dasher]], [[Brown Offroader]], [[Yellow Offroader]] | |||
|4.0000% | |||
|- | |||
|[[Glam Bruiser]], [[Orange Streamliner]], [[Pink B Dasher Mk. 2]], [[Classic B Dasher Mk. 2]], [[Metal B Dasher Mk. 2]], [[Sports Coupe 2022]], [[Yellow 8-Bit Pipe Frame]], [[Armored Rider]], [[Lightning Streamliner]], [[Black Carriage]], [[Flaming Speeder]], [[Swift Talon]], [[Blazing Eagle]], [[Camo Tanooki Kart]], [[Pink Sneeker]], [[Rainbow Taxi]], [[Blooper Shuttle]], [[Rainbow Streetle]], [[Sakura Sports Coupe]], [[Jumbo Jetter]], [[Silver Flower Kart]], [[Bronze Cucumber]], [[Cream Classic]], [[Desert Rose Wagon]]*, [[DK Maximum]], [[Sushi Racer]], [[Sakura Hop Rod]], [[Goo-Goo Black]], [[Cact-B]], [[Black Sneeker]], [[Blue Crawly Kart]], [[Black Jingle Bell]] | |||
|2.6667% | |||
|- | |||
|[[Gold Egg]], [[Gold Clanky Kart]], [[Gold Pipe Frame]], [[Gold Snow Skimmer]], [[Gold Bunny]], [[Gold Kiddie Kart]], [[Gold Zucchini]], [[Gold Standard]], [[Gold Double-Decker]], [[Gold Sweet Ride]], [[Gold Eagle]], [[Gold Rambi Rider]], [[Gold Jingle Bell]], [[Wild Gold]], [[Gold Quickshaw]], [[Gold Capsule Kart]], [[Gold Paintster]], [[Gold Comet]], [[Gold Cupid's Arrow]], [[Gold Train]], [[Gold Cheep Snorkel]], [[Gold Cheep Charger]], [[Gold Bullet Blaster]], [[Gold Bruiser]], [[Gold Sushi Racer]] | |||
|0.1067% | |||
|- | |||
!rowspan=3|High-End gliders | |||
|[[8-Bit Super Mushroom]], [[8-Bit 1-Up Mushroom]], [[Wonderful Garnet]], [[Wonderful Diamond]], [[Wario's Mustache]] | |||
|4.0258% | |||
|- | |||
|[[New Year's 2020]], [[Ship's Wheel (glider)|Ship's Wheel]], [[Pink Gold Meteors]], [[Cat Parafoil]], [[Mario's Mustache]], [[Luigi's Mustache]], [[Sakura Origami Glider]], [[Magniflying Glass]], [[Flybrary Book]], [[Pink Magniflying Glass]], [[Fire Manta Glider]], [[Icy Mario's Mustache]], [[Flying Flappers]], [[White Waves Origami Glider]], [[Para-Panini]], [[Calico Toe-Bean Balloons]], [[Yellow Hard Hat Balloon]], [[Fuzzy Kite]], [[Rainbow Fare Flier]], [[8-Bit Super Glider]], [[8-Bit Goomba]], [[Yoshi's Cookies]], [[Smiley Flower Glider]], [[Mosaic Starchute]]*, [[Nabbit Oilpaper Umbrella]], [[Waluigi's Mustache]], [[Secret Scroll]], [[Lava Rocks]], [[Boo Masks]] | |||
|2.6838% | |||
|- | |||
|[[Gold Glider]], [[Gold Crane]], [[Silver-and-Gold Hearts]], [[Gold Home-Field Glider]], [[Gold Tanooki Parafoil]], [[Gold Penguin Wingtip]], [[Gold Toe-Bean Balloons]], [[Gold Eggshell Glider]], [[Gold Cloud Balloons]], [[Gold Meteors]], [[Gold Umbrella]], [[Gold Candlelight Flight]], [[Golden Glider]], [[Gold Tulips]], [[Gold Checkered Glider]], [[Gold Bells]], [[Gold Swooper]], [[Golden Wings]], [[Gold Boo Masks]] | |||
|0.1074% | |||
|} | |||
==Cups== | |||
{| align=center width=90% cellspacing=0 border=1 cellpadding=3 style="border-collapse:collapse; font-family:Arial; text-align:center" | |||
{{MKT cup table row | |||
|C=Pauline||Ra=1 | |||
|R1=[[Piranha Plant Pipeline]]||R1.I=PiranhaPlantPipeline PaulineCowgirl||R1.1=1,500||R1.2=2,300||R1.3=2,600||R1.4=3,000||R1.5=3,400 | |||
|R2=[[GBA Yoshi Desert|GBA Yoshi Desert R]]||R2.I=YoshiDesertRGBA Poochy||R2.1=1,400||R2.2=2,000||R2.3=2,400||R2.4=2,700||R2.5=3,100 | |||
|R3=[[Piranha Plant Cove|Piranha Plant Cove 2T]]||R3.I=PiranhaPlantCove2T BirdoWhite||R3.1=1,500||R3.2=2,300||R3.3=2,700||R3.4=3,100||R3.5=3,500 | |||
|CN=[[Do Jump Boosts]]||C.I=Tour89 NabbitCupChallenge||CC=[[Larry]]||CT=Piranha Plant Cove||C.1=10||C.2=14||C.3=18 | |||
}} | |||
{{MKT cup table row | |||
|C=Mii||Ra= | |||
|R1=[[N64 Kalimari Desert 2]]||R1.I=KalimariDesert2N64 WigglerMiiRacingSuit||R1.1=1,200||R1.2=1,900||R1.3=2,200||R1.4=2,600||R1.5=3,000 | |||
|R2=[[GCN Dino Dino Jungle|GCN Dino Dino Jungle R]]||R2.I=DinoDinoJungleRGCN DrLuigi||R2.1=1,200||R2.2=1,800||R2.3=2,100||R2.4=2,400||R2.5=2,900 | |||
|R3=[[GBA Sunset Wilds|GBA Sunset Wilds T]]||R3.I=SunsetWildsTGBA ToadAstronaut||R3.1=1,500||R3.2=2,400||R3.3=2,700||R3.4=3,200||R3.5=3,700 | |||
|CN=[[Time Trial (Mario Kart Tour)|Time Trial]]||C.I=Tour100 MiiCupChallenge||CC=[[Monty Mole]]||CT=[[Wii Dry Dry Ruins]]||C.1=2:00.00||C.2=1:50.00||C.3=1:40.00 | |||
}} | |||
{{MKT cup table row | |||
|C=Poochy||Ra=2 | |||
|R1=Piranha Plant Pipeline R/T||R1.I=PiranhaPlantPipelineRT PenguinLuigi||R1.1=1,900||R1.2=3,000||R1.3=3,400||R1.4=4,000||R1.5=4,900 | |||
|R2=Piranha Plant Cove R||R2.I=PiranhaPlantCoveR PeteyPiranha||R2.1=1,500||R2.2=2,400||R2.3=2,800||R2.4=3,200||R2.5=4,000 | |||
|R3=Wii Dry Dry Ruins R/T||R3.I=DryDryRuinsRTWii PinkShyGuyNinja||R3.1=1,500||R3.2=2,400||R3.3=2,800||R3.4=3,300||R3.5=4,000 | |||
|CN=[[Steer Clear of Obstacles]]||C.I=Tour1 DryBonesCupChallenge||CC=[[Dry Bones]]||CT=GCN Dino Dino Jungle||C.1=1||C.2=2||C.3=3 | |||
}} | |||
{{MKT cup table row | |||
|C=Tanooki Mario||Ra= | |||
|R1=[[GBA Battle Course 1]]<br>(Balloon Battle)||R1.I=BattleCourse1GBA LuigiClassic||R1.1=1,700||R1.2=2,800||R1.3=3,200||R1.4=3,800||R1.5=4,800 | |||
|R2=[[N64 Kalimari Desert|N64 Kalimari Desert R]]||R2.I=KalimariDesertRN64 TanookiMario||R2.1=1,100||R2.2=1,800||R2.3=2,100||R2.4=2,500||R2.5=3,200 | |||
|R3=[[3DS Piranha Plant Slide|3DS Piranha Plant Slide T]]||R3.I=PiranhaPlantSlideT3DS PeteyPiranhaMiiRacingSuit||R3.1=2,200||R3.2=3,700||R3.3=4,300||R3.4=5,000||R3.5=6,400 | |||
|CN=[[Smash Small Dry Bones]]||C.I=Tour100 TanookiMarioCupChallenge||CC=[[Roy]]||CT=Piranha Plant Cove||C.1=6||C.2=9||C.3=12 | |||
}} | |||
{{MKT cup table row | |||
|C=Wario||Ra= | |||
|R1=Piranha Plant Cove 2R||R1.I=PiranhaPlantCove2R LuigiKnight||R1.1=1,500||R1.2=2,500||R1.3=2,900||R1.4=3,500||R1.5=4,500 | |||
|R2=Wii Dry Dry Ruins||R2.I=DryDryRuinsWii Poochy||R2.1=1,500||R2.2=2,600||R2.3=3,000||R2.4=3,500||R2.5=4,600 | |||
|R3=GBA Yoshi Desert T||R3.I=YoshiDesertTGBA Wario||R3.1=1,500||R3.2=2,500||R3.3=2,900||R3.4=3,500||R3.5=4,500 | |||
|CN=[[Ring Race]]||C.I=Tour100 WarioCupChallenge||CC=[[Pauline]]||CT=Piranha Plant Pipeline||C.1=35||C.2=40||C.3=45 | |||
}} | |||
{{MKT cup table row | |||
|C=Donkey Kong||Ra= | |||
|R1=GCN Dino Dino Jungle||R1.I=DinoDinoJungleGCN DonkeyKong||R1.1=1,400||R1.2=2,400||R1.3=2,800||R1.4=3,300||R1.5=4,500 | |||
|R2=N64 Kalimari Desert 2T||R2.I=KalimariDesert2TN64 WarioCowboy||R2.1=1,100||R2.2=2,000||R2.3=2,200||R2.4=2,700||R2.5=3,600 | |||
|R3=[[DS Twilight House]]<br>(Balloon Battle)||R3.I=TwilightHouseDS PaulineCowgirl||R3.1=1,700||R3.2=2,900||R3.3=3,400||R3.4=4,000||R3.5=5,400 | |||
|CN=[[Break Item Boxes]]||C.I=Tour74 ToadetteCupChallenge||CC=[[Hammer Bro]]||CT=3DS Piranha Plant Slide||C.1=12||C.2=18||C.3=26 | |||
}} | |||
{{MKT cup table row | |||
|C=King Bob-omb||Ra= | |||
|R1=GBA Sunset Wilds||R1.I=SunsetWildsGBA KingBobomb||R1.1=1,300||R1.2=2,300||R1.3=2,600||R1.4=3,100||R1.5=4,300 | |||
|R2=Piranha Plant Pipeline T||R2.I=PiranhaPlantPipelineT KitsuneLuigi||R2.1=2,100||R2.2=3,700||R2.3=4,200||R2.4=5,000||R2.5=7,000 | |||
|R3=Piranha Plant Cove||R3.I=PiranhaPlantCove PeachExplorer||R3.1=1,800||R3.2=3,300||R3.3=3,800||R3.4=4,500||R3.5=6,300 | |||
|CN=[[Combo Attack]]||C.I=Tour100 KingBobombCupChallenge||CC=[[Baby Daisy]]||CT=GBA Yoshi Desert T||C.1=5||C.2=7||C.3=10 | |||
}} | |||
{{MKT cup table row | |||
|C=Ludwig||Ra= | |||
|R1=N64 Kalimari Desert||R1.I=KalimariDesertN64 Ludwig||R1.1=1,200||R1.2=2,200||R1.3=2,500||R1.4=3,000||R1.5=4,300 | |||
|R2=Wii Dry Dry Ruins T||R2.I=DryDryRuinsTWii LightblueShyGuyExplorer||R2.1=1,800||R2.2=3,300||R2.3=3,700||R2.4=4,500||R2.5=6,400 | |||
|R3=GBA Yoshi Desert||R3.I=YoshiDesertGBA HammerBroMiiRacingSuit||R3.1=1,900||R3.2=3,500||R3.3=3,900||R3.4=4,700||R3.5=6,800 | |||
|CN=[[Big Reverse Race]]||C.I=Tour100 LudwigCupChallenge||CC=Any character||CT=Piranha Plant Pipeline||C.1=50cc||C.2=100cc||C.3=150cc | |||
}} | |||
{{MKT cup table row | |||
|C=Dixie Kong||Ra= | |||
|R1=3DS Piranha Plant Slide||R1.I=PiranhaPlantSlide3DS PeteyPiranhaGold||R1.1=1,900||R1.2=3,600||R1.3=4,100||R1.4=5,000||R1.5=7,300 | |||
|R2=Piranha Plant Cove 2R/T||R2.I=PiranhaPlantCove2RT WhiteTanookiMario||R2.1=1,800||R2.2=3,500||R2.3=4,000||R2.4=4,800||R2.5=7,000 | |||
|R3=GCN Dino Dino Jungle T||R3.I=DinoDinoJungleTGCN DixieKong||R3.1=1,400||R3.2=2,600||R3.3=3,000||R3.4=3,600||R3.5=5,300 | |||
|CN=Do Jump Boosts||C.I=Tour13 MarioCupChallenge||CC=[[Mario]]||CT=N64 Kalimari Desert||C.1=5||C.2=10||C.3=14 | |||
}} | |||
{{MKT cup table row | |||
|C=Chargin' Chuck||Ra= | |||
|R1=GBA Sunset Wilds R||R1.I=SunsetWildsRGBA MarioClassic||R1.1=1,400||R1.2=2,800||R1.3=3,100||R1.4=3,800||R1.5=5,700 | |||
|R2=GBA Battle Course 1<br>(Balloon Battle)||R2.I=BattleCourse1GBA CharginChuck||R2.1=1,800||R2.2=3,600||R2.3=4,000||R2.4=4,900||R2.5=7,400 | |||
|R3=N64 Kalimari Desert 2R/T||R3.I=KalimariDesert2RTN64 DonkeyKongJrSNES||R3.1=1,300||R3.2=2,500||R3.3=2,800||R3.4=3,400||R3.5=5,100 | |||
|CN=Smash Small Dry Bones||C.I=Tour34 KoopaTroopaCupChallenge||CC=[[Metal Mario]]||CT=GBA Sunset Wilds||C.1=4||C.2=8||C.3=12 | |||
}} | |||
{{MKT cup table row | |||
|C=Iggy||Ra= | |||
|R1=Piranha Plant Cove T||R1.I=PiranhaPlantCoveT WarioCowboy||R1.1=1,800||R1.2=3,600||R1.3=4,100||R1.4=5,000||R1.5=7,600 | |||
|R2=Piranha Plant Pipeline R||R2.I=PiranhaPlantPipelineR Iggy||R2.1=2,100||R2.2=4,200||R2.3=4,700||R2.4=5,700||R2.5=8,700 | |||
|R3=Wii Dry Dry Ruins R||R3.I=DryDryRuinsRWii MarioAviator||R3.1=1,700||R3.2=3,400||R3.3=3,900||R3.4=4,700||R3.5=7,200 | |||
|CN=Time Trial||C.I=Tour100 IggyCupChallenge||CC=[[Shy Guy|Pink Shy Guy]]||CT=Piranha Plant Cove 2R||C.1=2:00.00||C.2=1:55.00||C.3=1:50.00 | |||
}} | |||
{{MKT cup table row | |||
|C=Toad||Ra= | |||
|R1=GBA Yoshi Desert R/T||R1.I=YoshiDesertRTGBA CastleMiiRacingSuit||R1.1=1,600||R1.2=3,300||R1.3=3,700||R1.4=4,600||R1.5=7,100 | |||
|R2=N64 Kalimari Desert R/T||R2.I=KalimariDesertRTN64 Kamek||R2.1=1,200||R2.2=2,400||R2.3=2,700||R2.4=3,300||R2.5=5,200 | |||
|R3=3DS Piranha Plant Slide R||R3.I=PiranhaPlantSlideR3DS Toad||R3.1=1,800||R3.2=3,600||R3.3=4,100||R3.4=5,000||R3.5=7,800 | |||
|CN=Combo Attack||C.I=Tour30 HammerBroCupChallenge||CC=[[Lemmy]]||CT=N64 Kalimari Desert 2T||C.1=4||C.2=8||C.3=12 | |||
}} | |||
{{MKT cup table row | |||
|C=Nabbit||Ra= | |||
|R1=GCN Dino Dino Jungle R/T||R1.I=DinoDinoJungleRTGCN FunkyKong||R1.1=1,400||R1.2=2,900||R1.3=3,200||R1.4=3,900||R1.5=6,200 | |||
|R2=GBA Sunset Wilds R/T||R2.I=SunsetWildsRTGBA Nabbit||R2.1=1,800||R2.2=3,700||R2.3=4,100||R2.4=5,100||R2.5=8,100 | |||
|R3=Piranha Plant Cove 2||R3.I=PiranhaPlantCove2 PeteyPiranha||R3.1=1,900||R3.2=4,000||R3.3=4,500||R3.4=5,600||R3.5=8,800 | |||
|CN=[[Vs. Mega]] [[Dry Bowser]]||C.I=Tour2 DryBowserCupChallenge||CC=Any character||CT=N64 Kalimari Desert||C.1=50cc||C.2=100cc||C.3=150cc | |||
}} | |||
{{MKT cup table row | |||
|C=Fire Rosalina||Ra= | |||
|R1=DS Twilight House<br>(Balloon Battle)||R1.I=TwilightHouseDS FireRosalina||R1.1=1,700||R1.2=3,600||R1.3=4,000||R1.4=4,900||R1.5=7,900 | |||
|R2=3DS Piranha Plant Slide R/T||R2.I=PiranhaPlantSlideRT3DS PeteyPiranhaGold||R2.1=1,700||R2.2=3,700||R2.3=4,200||R2.4=5,200||R2.5=8,300 | |||
|R3=N64 Kalimari Desert 2R||R3.I=KalimariDesert2RN64 DaisyFarmer||R3.1=1,500||R3.2=3,200||R3.3=3,600||R3.4=4,500||R3.5=7,200 | |||
|CN=[[Goomba Takedown]]||C.I=Tour9 RosalinaCupChallenge||CC=[[Yoshi]]||CT=GCN Dino Dino Jungle||C.1=20||C.2=30||C.3=50 | |||
}} | |||
{{MKT cup table row | |||
|C=Ice Bro||Ra= | |||
|R1=N64 Kalimari Desert T||R1.I=KalimariDesertTN64 IceBro||R1.1=1,500||R1.2=3,200||R1.3=3,600||R1.4=4,500||R1.5=7,300 | |||
|R2=Piranha Plant Cove R/T||R2.I=PiranhaPlantCoveRT GoombaMiiRacingSuit||R2.1=1,800||R2.2=3,900||R2.3=4,300||R2.4=5,400||R2.5=8,800 | |||
|R3=Piranha Plant Pipeline R/T||R3.I=PiranhaPlantPipelineRT PenguinToad||R3.1=2,100||R3.2=4,700||R3.3=5,200||R3.4=6,500||R3.5=10,700 | |||
|CN=[[Take them out quick!]]||C.I=Tour80 BirdoCupChallenge||CC=[[Wario]]||CT=GBA Sunset Wilds||C.1=0:00.00||C.2=0:05.00||C.3=0:10.00 | |||
}} | |||
|} | |||
==Today's Challenge== | |||
Players' most recently used kart and glider are chosen, and favorite and favored ones have extra priority. Opponents are arranged randomly. On day 1 of this tour, players finish a race in [[N64 Kalimari Desert|Kalimari Desert 2]] in the [[Mii Cup]] using [[Mii|Wiggler Mii Racing Suit]] for a free pipe launch. Starting from day 2, players have to finish a race in the earliest incomplete course that is not in any of the ranked cups using the driver shown on the course's thumbnail every day to obtain the corresponding reward in the table below. Once all of the courses are completed, the courses are selected at random. | |||
{| align=center width=40% cellspacing=0 border=1 cellpadding=3 style="border-collapse:collapse; font-family:Arial; text-align:center" | |||
|-style="background: #89A" | |||
|'''Day(s)''' | |||
|'''Reward''' | |||
|- | |||
!1-13 | |||
|[[File:MKT Icon Launch Pipe Green.png|50px]]<br>Free pipe launch | |||
|- | |||
!14 | |||
|[[File:MKT 304QB.png|50px]]<br>Badge | |||
|-style="background: #89A" | |||
|colspan=2|'''Today's Challenge Pipe''' | |||
|- | |||
|colspan=2|[[File:MKT Tour45 TodaysChallengePipe.png|x150px]] | |||
|-style="background: #ABC" | |||
|colspan=2|'''Pipe contents''' | |||
|- | |||
|colspan=2|[[Ruby|Rubies]], [[coin]]s, driver (Normal/Super/High-End), kart (Normal/Super/High-End), glider (Normal/Super/High-End), [[item ticket]]s | |||
|} | |||
==Rewards== | |||
Gold cells indicate rewards that are exclusive to Gold Pass members. | |||
{|class="wikitable" style="margin:auto; text-align:center" | |||
|- | |||
![[File:MKT Icon GrandStar.png|20x20px]] 30 | |||
|- | |||
|[[File:MKT Icon GoldPiranhaPlantBalloons.png|75x75px]] | |||
|- | |||
|style=background:gold|[[Gold Piranha Plant Balloons]] | |||
|} | |||
<br> | |||
{|class="wikitable scrollable" style="margin:auto; text-align:center; font-size:90%" | |||
|- | |||
!Grand Stars!![[File:MKT Icon GrandStar.png|20x20px]]!!15!!20!!25!!30!!35!!40!!45!!50!!55!!60!!65!!70!!80!!90!!100!!110!!120!!130!!140!!150!!160!!170!!180!!190!!200!!210!!220!!230!!240!!250!!260!!270!!280!!290!!300!!310!!320!!Total!!Grand total | |||
|- | |||
!rowspan=2 colspan=2|[[Pipe Cannon|Pipes]] | |||
|||[[File:MKT Icon Launch Pipe Green.png|20px]]||||[[File:MKT Icon Launch Pipe Green.png|20px]]||||[[File:MKT Icon Launch Pipe Green.png|20px]]||||||||||||||[[File:MKT Icon Launch Pipe Green.png|20px]]||||||||||[[File:MKT Icon Launch Pipe Green.png|20px]]||||||[[File:MKT Icon Launch Pipe Green.png|20px]]||||||||[[File:MKT Icon Launch Pipe Green.png|20px]]||||||||[[File:MKT Icon Launch Pipe Green.png|20px]]||||[[File:MKT Icon Launch Pipe Green.png|20px]]||||[[File:MKT Icon Launch Pipe Green.png|20px]]||||||||||10 | |||
!rowspan=2|26 | |||
|-style=background:gold | |||
|||[[File:MKT Icon Launch Pipe Green.png|20px]]||[[File:MKT Icon Launch Pipe Green.png|20px]]||[[File:MKT Icon Launch Pipe Green.png|20px]]||[[File:MKT Icon Launch Pipe Green.png|20px]]||[[File:MKT Icon Launch Pipe Green.png|20px]]||||||||||||[[File:MKT Icon Launch Pipe Gold.png|20px]]||[[File:MKT Icon Launch Pipe Green.png|20px]]||||||||[[File:MKT Icon Launch Pipe Gold.png|20px]]||[[File:MKT Icon Launch Pipe Green.png|20px]]||||||[[File:MKT Icon Launch Pipe Green.png|20px]]||||||||[[File:MKT Icon Launch Pipe Green.png|20px]]||||||||[[File:MKT Icon Launch Pipe Green.png|20px]]||[[File:MKT Icon Launch Pipe Green.png|20px]]||[[File:MKT Icon Launch Pipe Green.png|20px]]||[[File:MKT Icon Launch Pipe Green.png|20px]]||[[File:MKT Icon Launch Pipe Green.png|20px]]||||||||||16 | |||
|- | |||
!rowspan=2|[[Coin]]s | |||
!rowspan=2|[[File:MKT Icon Coins 2.png|50x50px]] | |||
|500||||500||||500||||500||||||500||||500||||||||||||||||500||||||||||||||||||||500||||500||||500||||||||5000 | |||
!rowspan=2|15000 | |||
|-style=background:gold | |||
|5000||||||||||||5000||||||||||||||||||||||||||||||||||||||||||||||||||||||||||||||10000 | |||
|- | |||
!rowspan=2|[[Ruby|Rubies]] | |||
!rowspan=2|[[File:MKT Icon 1Ruby.png|50x50px]] | |||
|10||||||||||||5||||||||||3||||||||||||||||3||||||||||||||||||||||||||||||||||||21 | |||
!rowspan=2|56 | |||
|-style=background:gold | |||
|15||||||||||||10||||||||||10||||||||||||||||||||||||||||||||||||||||||||||||||||35 | |||
|- | |||
!rowspan=2|[[Item ticket]]s | |||
!rowspan=2|[[File:MKT Icon ItemTicket.png|50x50px]] | |||
|||||||||||||||5||||||||||||||||||||||5||||||||||||||||||||||||||||||||||||||10 | |||
!rowspan=2|30 | |||
|-style=background:gold | |||
|||||||||||||||10||||||||||||||||||||||10||||||||||||||||||||||||||||||||||||||20 | |||
|- | |||
!rowspan=2|[[Star ticket]]s | |||
!rowspan=2|[[File:MKT Icon StarTicket.png|50x50px]] | |||
|||||||||||||||||||||2||||||||||||3||||||||||||||||||||||||||||||||||||||||||5 | |||
!rowspan=2|5 | |||
|-style=background:gold | |||
|||||||||||||||||||||||||||||||||||||||||||||||||||||||||||||||||||||||||||0 | |||
|- | |||
!rowspan=2|[[Quick ticket]]s | |||
!rowspan=2|[[File:MKT Icon QuickTicket.png|50x50px]] | |||
|||||||||||||||||1||||||||||||||||||||||||||||||||||||||||||||||||||||||||||1 | |||
!rowspan=2|4 | |||
|-style=background:gold | |||
|||||||||||||||||||||||||||||||||||||||3||||||||||||||||||||||||||||||||||||3 | |||
|- | |||
!rowspan=6|[[Point-boost ticket]]s | |||
!rowspan=2|[[File:MKT Icon Point-boostticket1.png|50x50px]] | |||
|||||||||||||||||||||||||||||||1||||||||||||||||1||||||||1||||||||||||||||||||3 | |||
!rowspan=2|8 | |||
|-style=background:gold | |||
|||||||||||||||||||||||||||||||||||||||||||||||||||||||5||||||||||||||||||||5 | |||
|- | |||
!rowspan=2|[[File:MKT Icon Point-boostticket2.png|50x50px]] | |||
|||||||||||||||||||||||||||||1||||||||||||||||1||||||||1||||||||||||||||||||||3 | |||
!rowspan=2|8 | |||
|-style=background:gold | |||
|||||||||||||||||||||||||||||||||||||||||||||||||||||5||||||||||||||||||||||5 | |||
|- | |||
!rowspan=2|[[File:MKT Icon Point-boostticket3.png|50x50px]] | |||
|||||||||||||||||||||||||||1||||||||||||||||1||||||||1||||||||||||||||||||||||3 | |||
!rowspan=2|8 | |||
|-style=background:gold | |||
|||||||||||||||||||||||||||||||||||||||||||||||||||5||||||||||||||||||||||||5 | |||
|- | |||
!rowspan=2 colspan=2|[[Level-boost ticket]]s | |||
|||||||||||||||||||||||||||||||||||||||||||||||||||||||||||||||||||||[[File:MKT Icon Level-boostticket3.png|30px]]||[[File:MKT Icon Level-boostticket6.png|30px]]||[[File:MKT Icon Level-boostticket9.png|30px]]||3 | |||
!rowspan=2|22 | |||
|-style=background:gold | |||
|||||||||||||||||[[File:MKT Icon Level-boostticket3.png|30px]]<br>(3)||[[File:MKT Icon Level-boostticket2.png|30px]]<br>(3)||[[File:MKT Icon Level-boostticket1.png|30px]]<br>(3)||||||[[File:MKT Icon Level-boostticket6.png|30px]]<br>(2)||[[File:MKT Icon Level-boostticket5.png|30px]]<br>(2)||[[File:MKT Icon Level-boostticket4.png|30px]]<br>(2)||||||||||||[[File:MKT Icon Level-boostticket9.png|30px]]||[[File:MKT Icon Level-boostticket8.png|30px]]||[[File:MKT Icon Level-boostticket7.png|30px]]||||||||||||||||||||[[File:MKT Icon Level-boostticket9.png|30px]]||||||||19 | |||
|} | |||
==New content== | ==New content== | ||
The following content was introduced during the tour's debut in 2023. | |||
===Drivers=== | ===Drivers=== | ||
<gallery> | <gallery> | ||
MKT Artwork PaulineCowgirl.png|[[Pauline|Pauline (Cowgirl)]] | |||
WigglerMK7Solo.png|[[Wiggler]] | WigglerMK7Solo.png|[[Wiggler]] | ||
</gallery> | </gallery> | ||
====Mii Racing Suits==== | ====Mii Racing Suits==== | ||
<gallery> | |||
MKT Artwork WigglerMiiRacingSuit.png|[[Mii|Wiggler Mii Racing Suit]] | |||
</gallery> | |||
===Karts=== | ===Karts=== | ||
<gallery> | |||
MKT Icon DesertRoseWagon.png|[[Desert Rose Wagon]] | |||
MKT Icon WigglerEgg.png|[[Wiggler Egg]] | |||
MKT Icon BooPipes.png|[[Boo Pipes]] | |||
MKT Icon GoldPipes.png|[[Gold Pipes]] | |||
</gallery> | |||
===Gliders=== | ===Gliders=== | ||
<gallery> | |||
MKT Icon MosaicStarchute.png|[[Mosaic Starchute]] | |||
MKT Icon WigglerParachute.png|[[Wiggler Parachute]] | |||
MKT Icon GoldPiranhaPlantBalloons.png|[[Gold Piranha Plant Balloons]] | |||
</gallery> | |||
===Balloon designs=== | |||
<gallery> | |||
MKT Icon BalloonCirclePiranhaPlant.png|[[Piranha Plant]] Balloon | |||
</gallery> | |||
===Courses=== | ===Courses=== | ||
<gallery heights=50px> | |||
MKT Icon Piranha Plant Pipeline.png|[[Piranha Plant Pipeline]] (N, R, T, R/T) | |||
</gallery> | |||
==Paid banners== | |||
{| align=center width=960px cellspacing=0 border=1 cellpadding=3 style="border-collapse:collapse; font-family:Arial; text-align:center" | |||
|-style="background: #ABC" | |||
!Name | |||
!Availability | |||
!Cost | |||
!Contents | |||
!Banner image | |||
|- | |||
|'''Value Pack''' | |||
|July 12, 2023 – July 25, 2023 | |||
|US$1.99 | |||
|[[File:MKT Icon Ruby.png|30px]] [[Ruby|Rubies]] ×6<br> | |||
[[File:MKT Icon StarTicket.png|30px]] [[Star ticket]] ×2<br> | |||
[[File:MKT Icon ItemTicket.png|30px]] [[Item ticket]] ×3 | |||
|[[File:MKT ValuePack2.png|x150px]] | |||
|- | |||
|'''Driver Point-Boost Tickets 10 Ticket Set''' | |||
|July 12, 2023 – July 25, 2023 | |||
|US$3.99 | |||
|[[File:MKT Icon Point-boostticket1.png|30px]] [[Point-boost ticket|Driver point-boost ticket]] ×10 | |||
|[[File:MKT Tour69 DriverPointBoostTickets10TicketSet.png|x150px]] | |||
|- | |||
|'''Celebrate the Pipe Tour with the Boo Pipes kart!''' | |||
|July 12, 2023 – July 25, 2023 | |||
|US$3.99 | |||
|[[File:MKT Icon BooPipes.png|30px]] [[Boo Pipes]] ×1 | |||
|[[File:MKT Tour100 BooPipesPack.png|x150px]] | |||
|- | |||
|'''Celebrate the Pipe Tour with the Wiggler Parachute!''' | |||
|July 12, 2023 – July 25, 2023 | |||
|US$3.99 | |||
|[[File:MKT Icon WigglerParachute.png|30px]] [[Wiggler Parachute]] ×1 | |||
|[[File:MKT Tour100 WigglerParachutePack.png|x150px]] | |||
|- | |||
|'''70 Rubies and Ticket Pack''' | |||
|July 12, 2023 – July 25, 2023 | |||
|US$19.99 | |||
|[[File:MKT Icon Ruby 4.png|30px]] [[Ruby|Rubies]] ×70<br> | |||
[[File:MKT Icon Point-boostticket1.png|30px]] [[Point-boost ticket|Driver point-boost ticket]] ×5<br> | |||
[[File:MKT Icon StarTicket.png|30px]] [[Star ticket]] ×5<br> | |||
|[[File:MKT Tour80 70RubiesandTicketPack.png|x150px]] | |||
|- | |||
|'''150 Rubies and Ticket Pack''' | |||
|July 12, 2023 – July 25, 2023 | |||
|US$39.99 | |||
|[[File:MKT Icon Ruby 5.png|30px]] [[Ruby|Rubies]] ×150<br> | |||
[[File:MKT Icon Point-boostticket1.png|30px]] [[Point-boost ticket|Driver point-boost ticket]] ×10<br> | |||
[[File:MKT Icon StarTicket.png|30px]] [[Star ticket]] ×10<br> | |||
|[[File:MKT Tour80 150RubiesandTicketPack.png|x150px]] | |||
|} | |||
==Challenges== | |||
{{MKT challenge table | |||
|TCR1=[[File:MKT Icon CoinRushTicket.png|70px]] [[Coin Rush ticket]] ×1 | |||
|T1.1=097 | |||
|T1.1E=Do 5 {{Color link|#A1A1FF|Rocket Start|Rocket Starts}}. | |||
|T1.1S=1 | |||
|T1.2=018 | |||
|T1.2E=Land 3 hits with {{Color link|#A1A1FF|Green Shell|Green Shells}}. | |||
|T1.2S=1 | |||
|T1.3=145 | |||
|T1.3E=Get a Fantastic combo a total of 5 times. | |||
|T1.3S=1 | |||
|T1.4=376 | |||
|T1.4E=Use {{Color link|#A1A1FF|point-boost ticket|point-boost tickets}} 3 times. | |||
|T1.4S=2 | |||
|T1.5=100 | |||
|T1.5E=Get 3rd place or higher 30 times. | |||
|T1.5S=2 | |||
|T1.6=242 | |||
|T1.6E=Do 50 {{Color link|#A1A1FF|Mini-Turbo}} boosts. | |||
|T1.6S=2 | |||
|T1.7=057 | |||
|T1.7E=Drive a distance of 20,000 or more. | |||
|T1.7S=2 | |||
|T1.8=087 | |||
|T1.8E=Land a hit with a {{Color link|#A1A1FF|Blooper}}. | |||
|T1.8S=2 | |||
|T1.9=304 | |||
|T1.9E=Finish every course of every cup, including bonus challenges. | |||
|T1.9S=2 | |||
|TCR2=[[File:MKT Icon QuickTicket.png|70px]] [[Quick ticket]] ×1 | |||
|T2.1=117 | |||
|T2.1E=Do a total of 5 {{Color link|#A1A1FF|Slipstream}} boosts. | |||
|T2.1S=1 | |||
|T2.2=002 | |||
|T2.2E=Land 5 hits with {{Color link|#A1A1FF|Banana|Bananas}}. | |||
|T2.2S=1 | |||
|T2.3=241 | |||
|T2.3E=Get 1st place 2 times in a row in 100cc or above. | |||
|T2.3S=1 | |||
|T2.4=231 | |||
|T2.4E=Get 1 item from the Daily Selects section of the Shop. | |||
|T2.4S=2 | |||
|T2.5=163 | |||
|T2.5E=Cause opponents to crash a total of 3 times using a driver wearing gloves. | |||
|T2.5S=2 | |||
|T2.6=357 | |||
|T2.6E=Earn a score of 7,000 or higher on 3 T or R/T courses. | |||
|T2.6S=2 | |||
|T2.7=063 | |||
|T2.7E=Glide a total distance of 5,000. | |||
|T2.7S=2 | |||
|T2.8=170 | |||
|T2.8E=Earn a total score of 15,000 or higher in the {{Color link|#A1A1FF|Toad Cup}}. | |||
|T2.8S=2 | |||
|T2.9=149 | |||
|T2.9E=Race in auto mode. | |||
|T2.9S=2 | |||
|GCR=[[File:MKT Icon 1Ruby.png|70px]] [[Ruby|Rubies]] ×5 | |||
|G.1=011 | |||
|G.1E=Get a combo count of ×30 or higher. | |||
|G.1S=1 | |||
|G.2=041 | |||
|G.2E=Land 10 hits with {{Color link|#A1A1FF|Red Shell|Red Shells}}. | |||
|G.2S=1 | |||
|G.3=105 | |||
|G.3E=Get 1st place 3 times in a row in 100cc or above. | |||
|G.3S=1 | |||
|G.4=016 | |||
|G.4E=Use a {{Color link|#A1A1FF|level-boost ticket}}. | |||
|G.4S=2 | |||
|G.5=200 | |||
|G.5E=Do 20 Mini-Turbo boosts using a driver with a hat. | |||
|G.5S=2 | |||
|G.6=386 | |||
|G.6E=Earn a score of 10,000 or higher on 5 courses. | |||
|G.6S=2 | |||
|G.7=428 | |||
|G.7E=Cause opponents to crash in {{Color link|#A1A1FF|Frenzy (Mario Kart Tour)|Frenzy}} mode. | |||
|G.7S=2 | |||
|G.8=191 | |||
|G.8E=Earn a total score of 20,000 or higher in the {{Color link|#A1A1FF|Iggy Cup}}. | |||
|G.8S=2 | |||
|G.9=046 | |||
|G.9E=Complete {{Color link|#A1A1FF|Coin Rush (Mario Kart Tour)|Coin Rush}} 1 time. | |||
|G.9S=2 | |||
}} | |||
<br> | |||
{| align=center width=100% cellspacing=0 border=1 cellpadding=3 style="border-collapse:collapse; font-family:Arial; text-align:center" | |||
|- | |||
!colspan=3 style="background: #EEEEFF"|'''Premium Challenges''' | |||
|rowspan=13 style="border-top:1px solid #FFF; border-bottom:1px solid #FFF;" width=5%| | |||
!colspan=3 style="background: #EEEEFF"|'''Premium Challenges+''' | |||
|rowspan=13 style="border-top:1px solid #FFF; border-bottom:1px solid #FFF;" width=5%| | |||
!colspan=3 style="background: #EEEEFF"|'''Premium Challenges++''' | |||
|- | |||
|colspan=3 style="background: #EEEEFF"|'''Cost:''' US$4.99 | |||
|colspan=3 style="background: #EEEEFF"|'''Cost:''' US$9.99 | |||
|colspan=3 style="background: #EEEEFF"|'''Cost:''' US$19.99 | |||
|- | |||
|colspan=3 style="background: #EEEEFF"|'''Three in a row reward:''' [[File:MKT Icon Coins 2.png|70px]] [[Coin|Coins]] ×300 | |||
|colspan=3 style="background: #EEEEFF"|'''Three in a row reward:''' [[File:MKT Icon Coins 2.png|70px]] [[Coin|Coins]] ×300 | |||
|colspan=3 style="background: #EEEEFF"|'''Three in a row reward:''' [[File:MKT Icon Coins 2.png|70px]] [[Coin|Coins]] ×300 | |||
|- | |||
|colspan=3 style="background: #EEEEFF"|'''Completion reward:''' [[File:MKT Icon Launch Pipe Gold.png|70px]] Gold Pipe ×1 | |||
|colspan=3 style="background: #EEEEFF"|'''Completion reward:''' [[File:MKT Icon Launch Pipe Gold.png|70px]] Gold Pipe ×1 | |||
|colspan=3 style="background: #EEEEFF"|'''Completion reward:''' [[File:MKT Icon Launch Pipe Gold.png|70px]] Gold Pipe ×1 | |||
|-style="height: 80px" | |||
|width=10% style="background:linear-gradient(#F2E18F,#B9800F)"|[[File:MKT Icon Launch Pipe Green.png|70px]] | |||
|width=10% style="background:linear-gradient(#F2E18F,#B9800F)"|[[File:MKT Icon Launch Pipe Green.png|70px]] | |||
|width=10% style="background:linear-gradient(#F2E18F,#B9800F)"|[[File:MKT Icon Launch Pipe Green.png|70px]] | |||
|width=10% style="background:linear-gradient(#F2E18F,#B9800F)"|[[File:MKT Icon Launch Pipe Green.png|70px]] | |||
|width=10% style="background:linear-gradient(#F2E18F,#B9800F)"|[[File:MKT Icon Launch Pipe Gold.png|70px]] | |||
|width=10% style="background:linear-gradient(#F2E18F,#B9800F)"|[[File:MKT Icon Coins 3.png|70px]] | |||
|width=10% style="background:linear-gradient(#F2E18F,#B9800F)"|[[File:MKT Icon Launch Pipe Gold.png|70px]] | |||
|width=10% style="background:linear-gradient(#F2E18F,#B9800F)"|[[File:MKT Icon Ruby 2.png|70px]] | |||
|width=10% style="background:linear-gradient(#F2E18F,#B9800F)"|[[File:MKT Icon Coins 3.png|70px]] | |||
|-style="color: #FFF" | |||
|style="background:linear-gradient(#864D00,#A26000); border-top:1px solid #B9800F;"|Pipe ×1 | |||
|style="background:linear-gradient(#864D00,#A26000); border-top:1px solid #B9800F;"|Pipe ×1 | |||
|style="background:linear-gradient(#864D00,#A26000); border-top:1px solid #B9800F;"|Pipe ×1 | |||
|style="background:linear-gradient(#864D00,#A26000); border-top:1px solid #B9800F;"|Pipe ×1 | |||
|style="background:linear-gradient(#864D00,#A26000); border-top:1px solid #B9800F;"|Gold Pipe ×1 | |||
|style="background:linear-gradient(#864D00,#A26000); border-top:1px solid #B9800F;"|Coins ×5,000 | |||
|style="background:linear-gradient(#864D00,#A26000); border-top:1px solid #B9800F;"|Gold Pipe ×1 | |||
|style="background:linear-gradient(#864D00,#A26000); border-top:1px solid #B9800F;"|Rubies ×30 | |||
|style="background:linear-gradient(#864D00,#A26000); border-top:1px solid #B9800F;"|Coins ×10,000 | |||
|-style="color: #FFF" | |||
|style="background:linear-gradient(#A26000,#C88512); border-top:1px solid #A26000;"|''Land 5 hits with Green Shells.'' | |||
|style="background:linear-gradient(#A26000,#C88512); border-top:1px solid #A26000;"|''Land 5 hits with Bananas.'' | |||
|style="background:linear-gradient(#A26000,#C88512); border-top:1px solid #A26000;"|''Land 3 hits with Bob-ombs.'' | |||
|style="background:linear-gradient(#A26000,#C88512); border-top:1px solid #A26000;"|''Land 10 hits with Green Shells.'' | |||
|style="background:linear-gradient(#A26000,#C88512); border-top:1px solid #A26000;"|''Land 10 hits with Bananas.'' | |||
|style="background:linear-gradient(#A26000,#C88512); border-top:1px solid #A26000;"|''Use 10 Mushrooms.'' | |||
|style="background:linear-gradient(#A26000,#C88512); border-top:1px solid #A26000;"|''Land 10 hits with Red Shells.'' | |||
|style="background:linear-gradient(#A26000,#C88512); border-top:1px solid #A26000;"|''Start a new tour.'' | |||
|style="background:linear-gradient(#A26000,#C88512); border-top:1px solid #A26000;"|''Land 20 hits with Bananas.'' | |||
|-style="height: 80px" | |||
|width=10% style="background:linear-gradient(#F2E18F,#B9800F)"|[[File:MKT Icon Coins 3.png|70px]] | |||
|width=10% style="background:linear-gradient(#F2E18F,#B9800F)"|[[File:MKT Icon Ruby.png|70px]] | |||
|width=10% style="background:linear-gradient(#F2E18F,#B9800F)"|[[File:MKT Icon Point-boostticket3.png|70px]] | |||
|width=10% style="background:linear-gradient(#F2E18F,#B9800F)"|[[File:MKT Icon Point-boostticket3.png|70px]] | |||
|width=10% style="background:linear-gradient(#F2E18F,#B9800F)"|[[File:MKT Icon Ruby 2.png|70px]] | |||
|width=10% style="background:linear-gradient(#F2E18F,#B9800F)"|[[File:MKT Icon Points-capticket9.png|70px]] | |||
|width=10% style="background:linear-gradient(#F2E18F,#B9800F)"|[[File:MKT Icon Level-boostticket7.png|70px]] | |||
|width=10% style="background:linear-gradient(#F2E18F,#B9800F)"|[[File:MKT Icon Level-boostticket8.png|70px]] | |||
|width=10% style="background:linear-gradient(#F2E18F,#B9800F)"|[[File:MKT Icon Level-boostticket9.png|70px]] | |||
|-style="color: #FFF" | |||
|style="background:linear-gradient(#864D00,#A26000); border-top:1px solid #B9800F;"|{{Color link|#A1A1FF|Coins}} ×3,000 | |||
|style="background:linear-gradient(#864D00,#A26000); border-top:1px solid #B9800F;"|{{Color link|#A1A1FF|Ruby|Rubies}} ×10 | |||
|style="background:linear-gradient(#864D00,#A26000); border-top:1px solid #B9800F;"|{{Color link|#A1A1FF|Point-boost ticket}} (Glider) ×3 | |||
|style="background:linear-gradient(#864D00,#A26000); border-top:1px solid #B9800F;"|Point-boost ticket (Glider) ×5 | |||
|style="background:linear-gradient(#864D00,#A26000); border-top:1px solid #B9800F;"|Rubies ×20 | |||
|style="background:linear-gradient(#864D00,#A26000); border-top:1px solid #B9800F;"|{{Color link|#A1A1FF|Points-cap ticket}} (High-end glider) ×1 | |||
|style="background:linear-gradient(#864D00,#A26000); border-top:1px solid #B9800F;"|Level-boost ticket (High-End driver) ×2 | |||
|style="background:linear-gradient(#864D00,#A26000); border-top:1px solid #B9800F;"|Level-boost ticket (High-End kart) ×2 | |||
|style="background:linear-gradient(#864D00,#A26000); border-top:1px solid #B9800F;"|Level-boost ticket (High-End glider) ×2 | |||
|-style="color: #FFF" | |||
|style="background:linear-gradient(#A26000,#C88512); border-top:1px solid #A26000;"|''Do 20 Jump Boosts.'' | |||
|style="background:linear-gradient(#A26000,#C88512); border-top:1px solid #A26000;"|''Start a new tour.'' | |||
|style="background:linear-gradient(#A26000,#C88512); border-top:1px solid #A26000;"|''Do 50 Mini-Turbo boosts.'' | |||
|style="background:linear-gradient(#A26000,#C88512); border-top:1px solid #A26000;"|''Do 50 Jump Boosts.'' | |||
|style="background:linear-gradient(#A26000,#C88512); border-top:1px solid #A26000;"|''Start a new tour.'' | |||
|style="background:linear-gradient(#A26000,#C88512); border-top:1px solid #A26000;"|''Do 100 Mini-Turbo boosts.'' | |||
|style="background:linear-gradient(#A26000,#C88512); border-top:1px solid #A26000;"|''Land 5 hits with Bob-ombs.'' | |||
|style="background:linear-gradient(#A26000,#C88512); border-top:1px solid #A26000;"|''Do 100 Jump Boosts.'' | |||
|style="background:linear-gradient(#A26000,#C88512); border-top:1px solid #A26000;"|''Do 150 Mini-Turbo boosts.'' | |||
|-style="height: 80px" | |||
|width=10% style="background:linear-gradient(#F2E18F,#B9800F)"|[[File:MKT Icon Level-boostticket3.png|70px]] | |||
|width=10% style="background:linear-gradient(#F2E18F,#B9800F)"|[[File:MKT Icon Level-boostticket6.png|70px]] | |||
|width=10% style="background:linear-gradient(#F2E18F,#B9800F)"|[[File:MKT Icon Level-boostticket9.png|70px]] | |||
|width=10% style="background:linear-gradient(#F2E18F,#B9800F)"|[[File:MKT Icon Level-boostticket7.png|70px]] | |||
|width=10% style="background:linear-gradient(#F2E18F,#B9800F)"|[[File:MKT Icon Level-boostticket8.png|70px]] | |||
|width=10% style="background:linear-gradient(#F2E18F,#B9800F)"|[[File:MKT Icon Level-boostticket9.png|70px]] | |||
|width=10% style="background:linear-gradient(#F2E18F,#B9800F)"|[[File:MKT Icon Points-capticket7.png|70px]] | |||
|width=10% style="background:linear-gradient(#F2E18F,#B9800F)"|[[File:MKT Icon Points-capticket8.png|70px]] | |||
|width=10% style="background:linear-gradient(#F2E18F,#B9800F)"|[[File:MKT Icon Points-capticket9.png|70px]] | |||
|-style="color: #FFF" | |||
|style="background:linear-gradient(#864D00,#A26000); border-top:1px solid #B9800F;"|{{Color link|#A1A1FF|Level-boost ticket}} (Normal glider) ×1 | |||
|style="background:linear-gradient(#864D00,#A26000); border-top:1px solid #B9800F;"|Level-boost ticket (Super glider) ×1 | |||
|style="background:linear-gradient(#864D00,#A26000); border-top:1px solid #B9800F;"|Level-boost ticket (High-End glider) ×1 | |||
|style="background:linear-gradient(#864D00,#A26000); border-top:1px solid #B9800F;"|Level-boost ticket (High-End driver) ×1 | |||
|style="background:linear-gradient(#864D00,#A26000); border-top:1px solid #B9800F;"|Level-boost ticket (High-End kart) ×1 | |||
|style="background:linear-gradient(#864D00,#A26000); border-top:1px solid #B9800F;"|Level-boost ticket (High-End glider) ×1 | |||
|style="background:linear-gradient(#864D00,#A26000); border-top:1px solid #B9800F;"|Points-cap ticket (High-end driver) ×2 | |||
|style="background:linear-gradient(#864D00,#A26000); border-top:1px solid #B9800F;"|Points-cap ticket (High-end kart) ×2 | |||
|style="background:linear-gradient(#864D00,#A26000); border-top:1px solid #B9800F;"|Points-cap ticket (High-end glider) ×2 | |||
|-style="color: #FFF" | |||
|style="background:linear-gradient(#A26000,#C88512); border-top:1px solid #A26000;"|''Get 1st place 3 times.'' | |||
|style="background:linear-gradient(#A26000,#C88512); border-top:1px solid #A26000;"|''Get 1st place 5 times.'' | |||
|style="background:linear-gradient(#A26000,#C88512); border-top:1px solid #A26000;"|''Get 1st place 10 times.'' | |||
|style="background:linear-gradient(#A26000,#C88512); border-top:1px solid #A26000;"|''Get 1st place 5 times.'' | |||
|style="background:linear-gradient(#A26000,#C88512); border-top:1px solid #A26000;"|''Get 1st place 10 times.'' | |||
|style="background:linear-gradient(#A26000,#C88512); border-top:1px solid #A26000;"|''Get 1st place 15 times.'' | |||
|style="background:linear-gradient(#A26000,#C88512); border-top:1px solid #A26000;"|''Get 1st place 10 times.'' | |||
|style="background:linear-gradient(#A26000,#C88512); border-top:1px solid #A26000;"|''Get 1st place 15 times.'' | |||
|style="background:linear-gradient(#A26000,#C88512); border-top:1px solid #A26000;"|''Get 1st place 20 times.'' | |||
|} | |||
<br> | |||
{| align=center width=65% cellspacing=0 border=1 cellpadding=3 style="border-collapse:collapse; font-family:Arial; text-align:center" | |||
|- | |||
!colspan=3 style="background: #C3F84E"|'''Kart Pro Challenges''' | |||
|rowspan=9 style="border-top:1px solid #FFF; border-bottom:1px solid #FFF;" width=5%| | |||
!colspan=3 style="background: #C3F84E"|'''Tour Multiplayer Challenges''' | |||
|-style="color: #000" | |||
|colspan=3 style="background: #C3F84E"|'''Three in a row reward:''' [[File:MKT Icon Coins 2.png|60px]] [[Coin|Coins]] ×500 | |||
|colspan=3 style="background: #C3F84E"|'''Three in a row reward:''' [[File:MKT Icon Coins 2.png|60px]] Coins ×300 | |||
|-style="color: #000" | |||
|colspan=3 style="background: #C3F84E"|'''Completion reward:''' [[File:MKT Icon Ruby 2.png|70px]] [[Ruby|Rubies]] (depending on player's multiplayer grade) | |||
|colspan=3 style="background: #C3F84E"|'''Completion reward:''' [[File:MKT Icon 1Ruby.png|60px]] [[Ruby|Rubies]] ×5 | |||
|-style="color: #FFF" | |||
|width=10% style="background: #2F5D1C"|[[File:MKT 006PB.png|70px]]<br>[[File:MKT Icon 1Ruby.png|15px]] | |||
|width=10% style="background: #2F5D1C"|[[File:MKT 007PB.png|70px]]<br>[[File:MKT Icon 1Ruby.png|15px]] | |||
|width=10% style="background: #2F5D1C"|[[File:MKT 008PB.png|70px]]<br>[[File:MKT Icon 1Ruby.png|15px]] | |||
|width=10% style="background: #2F5D1C"|[[File:MKT 127CB.png|70px]]<br>[[File:MKT Icon GrandStar.png|15px]] | |||
|width=10% style="background: #2F5D1C"|[[File:MKT 049CB.png|70px]]<br>[[File:MKT Icon GrandStar.png|15px]] | |||
|width=10% style="background: #2F5D1C"|[[File:MKT 146CB.png|70px]]<br>[[File:MKT Icon GrandStar.png|15px]] | |||
|-style="color: #FFF" | |||
|style="background: #2F5D1C; border-top:1px solid #2F5D1C;"|''Play multiplayer.'' | |||
|style="background: #2F5D1C; border-top:1px solid #2F5D1C;"|''Play multiplayer 3 times.'' | |||
|style="background: #2F5D1C; border-top:1px solid #2F5D1C;"|''Play multiplayer 5 times.'' | |||
|style="background: #2F5D1C; border-top:1px solid #2F5D1C;"|''Land 3 hits with Green Shells in multiplayer.'' | |||
|style="background: #2F5D1C; border-top:1px solid #2F5D1C;"|''Land 3 hits with Bananas in multiplayer.'' | |||
|style="background: #2F5D1C; border-top:1px solid #2F5D1C;"|''Do 3 Rocket Starts in multiplayer{{sic}}'' | |||
|-style="color: #FFF" | |||
|width=10% style="background: #2F5D1C"|[[File:MKT 011PB.png|70px]]<br>[[File:MKT Icon 1Ruby.png|15px]] | |||
|width=10% style="background: #2F5D1C"|[[File:MKT 013PB.png|70px]]<br>[[File:MKT Icon 1Ruby.png|15px]] [[File:MKT Icon 1Ruby.png|15px]] [[File:MKT Icon 1Ruby.png|15px]] | |||
|width=10% style="background: #2F5D1C"|[[File:MKT 012PB.png|70px]]<br>[[File:MKT Icon 1Ruby.png|15px]] [[File:MKT Icon 1Ruby.png|15px]] | |||
|width=10% style="background: #2F5D1C"|[[File:MKT 041CB.png|70px]]<br>[[File:MKT Icon GrandStar.png|15px]] [[File:MKT Icon GrandStar.png|15px]] | |||
|width=10% style="background: #2F5D1C"|[[File:MKT 138CB.png|70px]]<br>[[File:MKT Icon GrandStar.png|15px]] [[File:MKT Icon GrandStar.png|15px]] | |||
|width=10% style="background: #2F5D1C"|[[File:MKT 210CB.png|70px]]<br>[[File:MKT Icon GrandStar.png|15px]] [[File:MKT Icon GrandStar.png|15px]] | |||
|-style="color: #FFF" | |||
|style="background: #2F5D1C; border-top:1px solid #2F5D1C;"|''Get 1 win in Kart Pro.'' | |||
|style="background: #2F5D1C; border-top:1px solid #2F5D1C;"|''Achieve a winning streak that includes 3 1st-place wins.'' | |||
|style="background: #2F5D1C; border-top:1px solid #2F5D1C;"|''Achieve a winning streak that includes 2 1st-place wins.'' | |||
|style="background: #2F5D1C; border-top:1px solid #2F5D1C;"|''Land 3 hits with Red Shells in multiplayer.'' | |||
|style="background: #2F5D1C; border-top:1px solid #2F5D1C;"|''Play multiplayer.'' | |||
|style="background: #2F5D1C; border-top:1px solid #2F5D1C;"|''Use the Bullet Bill item in multiplayer.'' | |||
|-style="color: #FFF" | |||
|width=10% style="background: #2F5D1C"|[[File:MKT 005PB.png|70px]]<br>[[File:MKT Icon 1Ruby.png|15px]] | |||
|width=10% style="background: #2F5D1C"|[[File:MKT 009PB.png|70px]]<br>[[File:MKT Icon 1Ruby.png|15px]] | |||
|width=10% style="background: #2F5D1C"|[[File:MKT 010PB.png|70px]]<br>[[File:MKT Icon 1Ruby.png|15px]] | |||
|width=10% style="background: #2F5D1C"|[[File:MKT 133CB.png|70px]]<br>[[File:MKT Icon GrandStar.png|15px]] [[File:MKT Icon GrandStar.png|15px]] | |||
|width=10% style="background: #2F5D1C"|[[File:MKT 119-2CB.png|70px]]<br>[[File:MKT Icon GrandStar.png|15px]] [[File:MKT Icon GrandStar.png|15px]] | |||
|width=10% style="background: #2F5D1C"|[[File:MKT 147CB.png|70px]]<br>[[File:MKT Icon GrandStar.png|15px]] [[File:MKT Icon GrandStar.png|15px]] | |||
|-style="color: #FFF" | |||
|style="background: #2F5D1C; border-top:1px solid #2F5D1C;"|''Play multiplayer 10 times.'' | |||
|style="background: #2F5D1C; border-top:1px solid #2F5D1C;"|''Get 3rd place or higher 3 times in multiplayer.'' | |||
|style="background: #2F5D1C; border-top:1px solid #2F5D1C;"|''Get 3rd place or higher 5 times in multiplayer.'' | |||
|style="background: #2F5D1C; border-top:1px solid #2F5D1C;"|''Do 50 Jump Boosts in multiplayer.'' | |||
|style="background: #2F5D1C; border-top:1px solid #2F5D1C;"|''Do 50 Mini-Turbo boosts in multiplayer.'' | |||
|style="background: #2F5D1C; border-top:1px solid #2F5D1C;"|''Cause opponents to crash 30 times in multiplayer.'' | |||
|} | |||
<br> | |||
{|class="wikitable" style="margin:auto; text-align:center" width=65% | |||
!colspan=2 width=30%|Total Points Challenge 1 (2023) | |||
|rowspan=8 style="border-top:1px solid #FFF; border-bottom:1px solid #FFF;" width=5%| | |||
!colspan=2 width=30%|Total Points Challenge 2 (2023) | |||
|- | |||
!Points | |||
!Rewards | |||
!Points | |||
!Rewards | |||
|- | |||
!400,000 | |||
|[[File:MKT Icon 1Ruby.png|20px]] [[Ruby|Rubies]] ×3<br> | |||
[[File:MKT Icon Point-boostticket1.png|30px]] [[Point-boost ticket]]s (driver) ×5<br> | |||
[[File:MKT Icon Point-boostticket2.png|30px]] Point-boost tickets (kart) ×5<br> | |||
[[File:MKT Icon Point-boostticket3.png|30px]] Point-boost tickets (glider) ×5 | |||
!999,999 | |||
|[[File:MKT Icon 1Ruby.png|20px]] [[Ruby|Rubies]] ×3<br> | |||
[[File:MKT Icon Point-boostticket1.png|30px]] Point-boost tickets (driver) ×5<br> | |||
[[File:MKT Icon Point-boostticket2.png|30px]] Point-boost tickets (kart) ×5<br> | |||
[[File:MKT Icon Point-boostticket3.png|30px]] Point-boost tickets (glider) ×5 | |||
|- | |||
!300,000 | |||
|[[File:MKT Icon Coins 3.png|30px]] [[Coin]]s ×1,000<br> | |||
[[File:MKT Icon ItemTicket.png|30px]] [[Item ticket]]s ×10<br> | |||
!900,000 | |||
|[[File:MKT Icon Coins 3.png|30px]] Coins ×1,000<br> | |||
[[File:MKT Icon ItemTicket.png|30px]] Item tickets ×10<br> | |||
|- | |||
!250,000 | |||
|[[File:MKT Icon Coins 3.png|30px]] Coins ×1,000<br> | |||
[[File:MKT Icon Points-capticket5.png|30px]] Points-cap ticket (Super kart) ×1 | |||
!800,000 | |||
|[[File:MKT Icon Coins 3.png|30px]] Coins ×1,000<br> | |||
[[File:MKT Icon Points-capticket8.png|30px]] Points-cap ticket (High-End kart) ×1 | |||
|- | |||
!200,000 | |||
|[[File:MKT Icon Coins 3.png|30px]] Coins ×1,000<br> | |||
[[File:MKT Icon Level-boostticket5.png|30px]] Level-boost ticket (Super kart) ×1 | |||
!700,000 | |||
|[[File:MKT Icon Coins 3.png|30px]] Coins ×1,000<br> | |||
[[File:MKT Icon Level-boostticket8.png|30px]] Level-boost ticket (High-End kart) ×1 | |||
|- | |||
!150,000 | |||
|[[File:MKT Icon Coins 3.png|30px]] Coins ×1,000<br> | |||
[[File:MKT Icon Points-capticket2.png|30px]] [[Points-cap ticket]] (Normal kart) ×1 | |||
!600,000 | |||
|[[File:MKT Icon Coins 3.png|30px]] Coins ×1,000<br> | |||
[[File:MKT Icon Points-capticket5.png|30px]] Points-cap ticket (Super kart) ×1 | |||
|- | |||
!100,000 | |||
|[[File:MKT Icon Coins 3.png|30px]] Coins ×1,000<br> | |||
[[File:MKT Icon Level-boostticket2.png|30px]] [[Level-boost ticket]] (Normal kart) ×1 | |||
!500,000 | |||
|[[File:MKT Icon Coins 3.png|30px]] Coins ×1,000<br> | |||
[[File:MKT Icon Level-boostticket5.png|30px]] Level-boost ticket (Super kart) ×1 | |||
|} | |||
<br> | |||
{|class="wikitable" style="margin:auto; text-align:center" width=65% | |||
!colspan=2 width=30%|Total Points Challenge 1 (2024) | |||
|rowspan=8 style="border-top:1px solid #FFF; border-bottom:1px solid #FFF;" width=5%| | |||
!colspan=2 width=30%|Total Points Challenge 2 (2024) | |||
|- | |||
!Points | |||
!Rewards | |||
!Points | |||
!Rewards | |||
|- | |||
!400,000 | |||
|[[File:MKT Icon 1Ruby.png|20px]] [[Ruby|Rubies]] ×3<br> | |||
[[File:MKT Icon Point-boostticket1.png|30px]] [[Point-boost ticket]]s (driver) ×5<br> | |||
[[File:MKT Icon Point-boostticket2.png|30px]] Point-boost tickets (kart) ×5<br> | |||
[[File:MKT Icon Point-boostticket3.png|30px]] Point-boost tickets (glider) ×5 | |||
!999,999 | |||
|[[File:MKT Icon 1Ruby.png|20px]] [[Ruby|Rubies]] ×3<br> | |||
[[File:MKT Icon Point-boostticket1.png|30px]] Point-boost tickets (driver) ×5<br> | |||
[[File:MKT Icon Point-boostticket2.png|30px]] Point-boost tickets (kart) ×5<br> | |||
[[File:MKT Icon Point-boostticket3.png|30px]] Point-boost tickets (glider) ×5 | |||
|- | |||
!300,000 | |||
|[[File:MKT Icon Coins 2.png|30px]] [[Coin]]s ×500<br> | |||
[[File:MKT Icon ItemTicket.png|30px]] [[Item ticket]]s ×10<br> | |||
[[File:MKT Icon StarTicket.png|30px]] [[Star ticket]]s ×3 | |||
!900,000 | |||
|[[File:MKT Icon Coins 2.png|30px]] Coins ×500<br> | |||
[[File:MKT Icon ItemTicket.png|30px]] Item tickets ×10<br> | |||
[[File:MKT Icon QuickTicket.png|30px]] Quick ticket ×1 | |||
|- | |||
!250,000 | |||
|[[File:MKT Icon Coins 2.png|30px]] Coins ×500<br> | |||
[[File:MKT Icon Points-capticket5.png|30px]] Points-cap ticket (Super kart) ×1<br> | |||
[[File:MKT Icon ItemTicket.png|30px]] Item tickets ×2 | |||
!800,000 | |||
|[[File:MKT Icon Coins 2.png|30px]] Coins ×500<br> | |||
[[File:MKT Icon Points-capticket8.png|30px]] Points-cap ticket (High-End kart) ×1<br> | |||
[[File:MKT Icon QuickTicket.png|30px]] Quick ticket ×1 | |||
|- | |||
!200,000 | |||
|[[File:MKT Icon Coins 2.png|30px]] Coins ×500<br> | |||
[[File:MKT Icon Level-boostticket5.png|30px]] Level-boost ticket (Super kart) ×1<br> | |||
[[File:MKT Icon ItemTicket.png|30px]] Item tickets ×2 | |||
!700,000 | |||
|[[File:MKT Icon Coins 2.png|30px]] Coins ×500<br> | |||
[[File:MKT Icon Level-boostticket8.png|30px]] Level-boost ticket (High-End kart) ×1<br> | |||
[[File:MKT Icon QuickTicket.png|30px]] Quick ticket ×1 | |||
|- | |||
!150,000 | |||
|[[File:MKT Icon Coins 2.png|30px]] Coins ×500<br> | |||
[[File:MKT Icon Points-capticket2.png|30px]] [[Points-cap ticket]] (Normal kart) ×1<br> | |||
[[File:MKT Icon ItemTicket.png|30px]] Item tickets ×2 | |||
!600,000 | |||
|[[File:MKT Icon Coins 2.png|30px]] Coins ×500<br> | |||
[[File:MKT Icon Points-capticket5.png|30px]] Points-cap ticket (Super kart) ×1<br> | |||
[[File:MKT Icon ItemTicket.png|30px]] Item tickets ×3 | |||
|- | |||
!100,000 | |||
|[[File:MKT Icon Coins 2.png|30px]] Coins ×500<br> | |||
[[File:MKT Icon Level-boostticket2.png|30px]] [[Level-boost ticket]] (Normal kart) ×1<br> | |||
[[File:MKT Icon ItemTicket.png|30px]] Item tickets ×2 | |||
!500,000 | |||
|[[File:MKT Icon Coins 2.png|30px]] Coins ×500<br> | |||
[[File:MKT Icon Level-boostticket5.png|30px]] Level-boost ticket (Super kart) ×1<br> | |||
[[File:MKT Icon ItemTicket.png|30px]] Item tickets ×3 | |||
|} | |||
==Gold Pipe== | |||
The Gold Pipe, including the All-Clear Pipe, randomly shoots out one of the following regular High-End items. The appearance rate can be viewed via the "Pipe content" link on the Gold Pass purchase screen. | |||
{|class="wikitable" style="margin:auto; text-align:center" | |||
!colspan=2|High-End items obtainable from Gold Pipes during the Pipe Tour | |||
!Rate (each) | |||
|- | |||
!High-End drivers | |||
|[[Dry Bowser]], [[Metal Mario]], [[Pink Gold Peach]], [[Cat Mario|Cat Peach]], [[Tanooki Mario]], [[Pauline]], [[Princess Peach|Peach (Explorer)]], [[Nabbit]], [[Captain Toad]], [[King Bob-omb]], [[Fire Mario|Fire Rosalina]], [[Tanooki Mario|Tanooki Rosalina]], [[Kamek]], [[Peachette]], [[Yoshi (species)|Black Yoshi]], [[Yoshi (species)|White Yoshi]], [[Princess Peach|Peach (Wintertime)]], [[Cat Mario|Cat Rosalina]], [[Chargin' Chuck]], [[Toadette|Toadette (Explorer)]], [[Cat Mario|Cat Toad]], [[Wario|Wario (Cowboy)]], [[Birdo|Birdo (Black)]], [[Birdo|Birdo (White)]], [[Roving Racers|Gold Koopa (Freerunning)]], [[Penguin Mario|Penguin Luigi]], [[Shy Guy|Shy Guy (Pastry Chef)]], [[Dixie Kong]], [[Funky Kong]], [[Mario|Mario (Aviator)]], [[Toad|Toad (Party Time)]], [[Pauline|Pauline (Party Time)]], [[Bowser Jr.|Bowser Jr. (Pirate)]], [[Mario|Mario (Classic)]], [[Baby Peach|Baby Peach (Cherub)]], [[Princess Daisy|Daisy (Swimwear)]], [[Luigi|Luigi (Classic)]], [[Ice Mario (Super Mario Galaxy)|Ice Mario]], [[Princess Daisy|Daisy (Farmer)]], [[Mario|Mario (Racing)]], [[Lakitu|Lakitu (Party Time)]], [[Pauline|Pauline (Rose)]] | |||
|rowspan=3|0.5319% | |||
|- | |||
!High-End karts | |||
|[[B Dasher]], [[Badwagon]], [[Carrot Kart]], [[Cat Cruiser]], [[Prancer]], [[Sneeker]], [[Sports Coupe]], [[Circuit Special]], [[Bruiser]], [[Wild Wing]], [[Bumble V]], [[Steel Driver]], [[Goo-Goo Buggy]], [[Macharon]], [[Black B Dasher]], [[Black Circuit]], [[Queen Bee]], [[Gold Train]], [[Black Turbo Yoshi]], [[White Turbo Yoshi]], [[Radish Rider]], [[Inferno Flyer]], [[Wildfire Flyer]], [[Red B Dasher]], [[Platinum Taxi]], [[Glam Bruiser]], [[Wild Black]], [[Wild Pink]], [[Apple Kart]], [[Gilded Prancer]], [[Choco Macharon]], [[P-Wing (kart)|P-Wing]], [[Black Turbo Birdo]], [[White Turbo Birdo]], [[Snow Skimmer]], [[Green Apple Kart]], [[Poison Apple Kart]], [[Dragonfly]], [[Firefly]], [[Dozer Dasher]], [[Clanky Kart]], [[Rose Queen]], [[Banana Master]], [[Offroader]], [[Dreamy Egg]], [[Head Honcho]], [[Pink Wing]], [[Red Taxi]], [[Blue Soda]], [[Dark Buggy]], [[Koopa King]], [[Cact-X]], [[Sushi Racer]], [[Pirate Sushi Racer]], [[Silver Bullet Blaster]], [[Green Circuit]], [[Gilded King]], [[Crawly Kart]], [[Black Dozer]], [[Sunset Cloud]], [[Iron Cucumber]], [[Rose Taxi]], [[Cact-Ice]], [[B Dasher Mk. 2]], [[Sakura Quickshaw]], [[Jet Cruiser]], [[Pink Dozer]], [[Grand Badwagon]], [[Lime Tea Coupe]], [[Sunny Surf Sailer]], [[Kamek's Zoom Broom]], [[Black Cat Cruiser]], [[Cream Cat Cruiser]], [[Vampire Flyer]], [[White Snow Skimmer]], [[Gray Cat Cruiser]], [[Jukebox Buggy]], [[Green Lightning]], [[Cupid's Arrow]], [[Prop Kart]], [[Tropical Truck]] | |||
|- | |||
!High-End gliders | |||
|[[Swooper (glider)|Swooper]], [[Cloud Glider]], [[Gold Glider]], [[Pink Gold Paper Glider]], [[Bullet Bill Parachute]], [[Royal Parachute]], [[Dry Bowser Umbrella]], [[Rainy Balloons]], [[Blizzard Balloons]], [[Sunset Balloons]], [[Chocolate Banana Crêpe]], [[Strawberry Crêpe]], [[Wicked Wings]], [[Wonderful Wings]], [[Starchute]], [[Rainbow Starchute]], [[Silver Starchute]], [[Daisy Glider]], [[Butterfly Wings]], [[Butterfly Sunset]], [[Butterfly Prism]], [[Banana Wingtip]], [[Blooper Wingtip]], [[Meteor Balloons]], [[Crimson Crane]], [[Springtime Crane]], [[Pink Gold Meteors]], [[Chocolate Donut]], [[Strawberry Donut]], [[Heart Balloons]], [[Fireworks Parachute]], [[Great Sail]], [[Blizzard Parasol]], [[Black Great Sail]], [[Planet Glider]], [[Dragon Wings]], [[Black Toe-Bean Balloons]], [[Toe-Bean Balloons]], [[Ship's Wheel (glider)|Ship's Wheel]], [[Tropical Glider]], [[8-Bit Star]], [[Manta Glider]], [[Silver Bells]], [[Treasure Map]], [[Flybrary Book]], [[Cheep Cheep Masks]], [[Pretzel Glider]], [[Vampire Wings]], [[Dream Glider]], [[Silver Manta Glider]], [[Calico Parafoil]], [[Cat Parafoil]], [[Rose Parasol]], [[Black Cat Parafoil]], [[Snow Crystals]], [[Surf Master]], [[Silver Surf Master]], [[Starry Great Sail]], [[Tanooki Parafoil]], [[Candlelight Flight (glider)|Candlelight Flight]], [[Piranha Plant Balloons]], [[Candlelight Flight Cake]], [[Luigi Parafoil]], [[Sky-High Flyer]], [[Wicked Topaz]] | |||
|} | |||
==Mii Racing Suit Shop== | |||
===Banner items=== | |||
{| align=center width=960px cellspacing=0 border=1 cellpadding=3 style="border-collapse:collapse; font-family:Arial; text-align:center" | |||
|-style="background: #ABC" | |||
!Name | |||
!Cost | |||
!Contents | |||
!Banner image | |||
|- | |||
|'''Wiggler Mii Racing Suit''' | |||
|70 [[File:MKT Icon 1Ruby.png|20px]] [[ruby|rubies]] for 1st purchase;<br>100 rubies for 2nd and 3rd purchases respectively | |||
|[[File:MKT Icon WigglerMiiRacingSuit.png|30px]]<br> [[Mii|Wiggler Mii Racing Suit]] ×1 | |||
|[[File:MKT Tour100 WigglerMiiRacingSuit.png|x150px]] | |||
|} | |||
===Other items=== | |||
{| class="wikitable" style="margin:auto; text-align:center" width=50% | |||
!colspan=3|Items available in Mii Racing Suit Shop (July 12, 2023 - July 25, 2023) | |||
|- | |||
|width=33%|[[File:MKT Artwork PinkMiiRacingSuit.png|80x80px]] | |||
|width=34%|[[File:MKT Artwork LightGreenMiiRacingSuit.png|80x80px]] | |||
|width=33%|[[File:MKT Artwork BrownMiiRacingSuit.png|80x80px]] | |||
|- | |||
![[Mii|Pink Mii Racing Suit]]<br>70 [[File:MKT Icon 1Ruby.png|20px]] [[ruby|rubies]] for 1st purchase;<br>100 rubies for 2nd and 3rd purchases respectively | |||
![[Mii|Light Green Mii Racing Suit]]<br>[[File:MKT Icon 1Ruby.png|20px]] 100<br>Amount: 3 | |||
![[Mii|Brown Mii Racing Suit]]<br>[[File:MKT Icon 1Ruby.png|20px]] 100<br>Amount: 3 | |||
|- | |||
|[[File:MKT Artwork PeteyPiranhaMiiRacingSuit.png|80x80px]] | |||
|[[File:MKT Artwork DryBonesMiiRacingSuit.png|80x80px]] | |||
|[[File:MKT Artwork ChainChompMiiRacingSuit.png|80x80px]] | |||
|- | |||
![[Mii|Petey Piranha Mii Racing Suit]]<br>[[File:MKT Icon 1Ruby.png|20px]] 100<br>Amount: 3 | |||
![[Mii|Dry Bones Mii Racing Suit]]<br>[[File:MKT Icon 1Ruby.png|20px]] 100<br>Amount: 3 | |||
![[Mii|Chain Chomp Mii Racing Suit]]<br>[[File:MKT Icon 1Ruby.png|20px]] 100<br>Amount: 3 | |||
|- | |||
|[[File:MKT Artwork CastleMiiRacingSuit.png|80x80px]] | |||
|[[File:MKT Artwork HammerBroMiiRacingSuit.png|80x80px]] | |||
|[[File:MKT Artwork GoombaMiiRacingSuit.png|80x80px]] | |||
|- | |||
![[Mii|Castle Mii Racing Suit]]<br>[[File:MKT Icon 1Ruby.png|20px]] 100<br>Amount: 3 | |||
![[Mii|Hammer Bro Mii Racing Suit]]<br>[[File:MKT Icon 1Ruby.png|20px]] 100<br>Amount: 3 | |||
![[Mii|Goomba Mii Racing Suit]]<br>[[File:MKT Icon 1Ruby.png|20px]] 100<br>Amount: 3 | |||
|} | |||
{| class="wikitable" style="margin:auto; text-align:center" width=50% | |||
!colspan=3|Items available in Mii Racing Suit Shop (July 10, 2024 - July 23, 2024) | |||
|- | |||
|width=33%|[[File:MKT Artwork CastleMiiRacingSuit.png|80x80px]] | |||
|width=34%|[[File:MKT Artwork KoopaClownMiiRacingSuit.png|80x80px]] | |||
|width=33%|[[File:MKT Artwork KingBooMiiRacingSuit.png|80x80px]] | |||
|- | |||
![[Mii|Castle Mii Racing Suit]]<br>70 [[File:MKT Icon 1Ruby.png|20px]] [[ruby|rubies]] for 1st purchase;<br>100 rubies for 2nd and 3rd purchases respectively | |||
![[Mii|Koopa Clown Mii Racing Suit]]<br>[[File:MKT Icon 1Ruby.png|20px]] 100<br>Amount: 3 | |||
![[Mii|King Boo Mii Racing Suit]]<br>[[File:MKT Icon 1Ruby.png|20px]] 100<br>Amount: 3 | |||
|- | |||
|[[File:MKT Artwork KingBobombMiiRacingSuit.png|80x80px]] | |||
|[[File:MKT Artwork BrownMiiRacingSuit.png|80x80px]] | |||
|[[File:MKT Artwork RoaringRacerMiiRacingSuit.png|80x80px]] | |||
|- | |||
![[Mii|King Bob-omb Mii Racing Suit]]<br>70 [[File:MKT Icon 1Ruby.png|20px]] [[ruby|rubies]] for 1st purchase;<br>100 rubies for 2nd and 3rd purchases respectively | |||
![[Mii|Brown Mii Racing Suit]]<br>[[File:MKT Icon 1Ruby.png|20px]] 100<br>Amount: 3 | |||
![[Mii|Roaring Racer Mii Racing Suit]]<br>[[File:MKT Icon 1Ruby.png|20px]] 100<br>Amount: 3 | |||
|- | |||
|[[File:MKT Artwork IggyMiiRacingSuit.png|80x80px]] | |||
|[[File:MKT Artwork LudwigMiiRacingSuit.png|80x80px]] | |||
|[[File:MKT Artwork ChainChompMiiRacingSuit.png|80x80px]] | |||
|- | |||
![[Mii|Iggy Mii Racing Suit]]<br>[[File:MKT Icon 1Ruby.png|20px]] 100<br>Amount: 3 | |||
![[Mii|Ludwig Mii Racing Suit]]<br>[[File:MKT Icon 1Ruby.png|20px]] 100<br>Amount: 3 | |||
![[Mii|Chain Chomp Mii Racing Suit]]<br>[[File:MKT Icon 1Ruby.png|20px]] 100<br>Amount: 3 | |||
|} | |||
==Token Shop== | |||
The limited-time event where [[event token]]s appear began on July 12, 2023 and ended on July 25, 2023; and started on July 10, 2024 and ended on July 23, 2024 for the rerun. Event tokens could be earned by collecting them on courses. | |||
{| class="wikitable" style="margin:auto; text-align:center" width=50% | |||
!colspan=3|'''Token Shop''' (July 12, 2023 - July 25, 2023; July 10, 2024 - July 23, 2024) | |||
|- | |||
|width=33%|[[File:MKT Icon Launch Pipe Gold.png|70px]] | |||
|width=33%|[[File:MKT Icon Launch Pipe Gold.png|70px]] | |||
|width=33%|[[File:MKT Icon Launch Pipe Gold.png|70px]] | |||
|- | |||
!Gold Pipe<br>[[File:MKT Icon Eventtoken.png|20px]] 200<br>Amount: 1 | |||
!Gold Pipe<br>[[File:MKT Icon Eventtoken.png|20px]] 200<br>Amount: 1 | |||
!Gold Pipe<br>[[File:MKT Icon Eventtoken.png|20px]] 200<br>Amount: 1 | |||
|- | |||
|width=33%|[[File:MKT Icon Launch Pipe Green.png|70px]] | |||
|width=34%|[[File:MKT Icon 1Ruby.png|55px]] | |||
|width=33%|[[File:MKT Icon Coins 2.png|80px]] | |||
|- | |||
!Pipe<br>[[File:MKT Icon Eventtoken.png|20px]] 20-500<br>Amount: 34 | |||
![[Ruby]] ×3<br>[[File:MKT Icon Eventtoken.png|20px]] 15<br>Amount: 5 | |||
![[Coin]] ×500<br>[[File:MKT Icon Eventtoken.png|20px]] 15<br>Amount: 5 | |||
|- | |||
|width=33%|[[File:MKT Icon BalloonCirclePiranhaPlant.png|60px]] | |||
|width=33%|[[File:MKT Icon Level-boostticket1.png|70px]] | |||
|width=33%|[[File:MKT Icon Level-boostticket4.png|70px]] | |||
|- | |||
![[Piranha Plant]] Balloon<br>[[File:MKT Icon Eventtoken.png|20px]] 100<br>Amount: 1 | |||
![[Level-boost ticket]] (Normal)<br>[[File:MKT Icon Eventtoken.png|20px]] 25<br>Amount: 3 | |||
![[Level-boost ticket]] (Super)<br>[[File:MKT Icon Eventtoken.png|20px]] 50<br>Amount: 2 | |||
|} | |||
==Tier Shop== | |||
The shop features a variety of set and randomized items available for purchase. The item slots in the shop are unlocked based on the highest tier of players. | |||
{| class="wikitable" style="margin:auto; text-align:center" width=50% | |||
!colspan=3|Items available in Tier Shop (July 12, 2023 - July 25, 2023; July 10, 2024 - July 23, 2024) | |||
|- | |||
|[[File:MKT Icon Level-boostticket1.png|80px]] | |||
|[[File:MKT Icon Level-boostticket2.png|80px]] | |||
|[[File:MKT Icon Level-boostticket3.png|80px]] | |||
|- | |||
![[Level-boost ticket]] (Normal)<br>[[File:MKT Icon Coin.png|20px]] 1,000<br>Amount: 3 per week | |||
!Level-boost ticket (Normal)<br>[[File:MKT Icon Coin.png|20px]] 800<br>Amount: 3 per week | |||
!Level-boost ticket (Normal)<br>[[File:MKT Icon Coin.png|20px]] 800<br>Amount: 3 per week | |||
|- | |||
|[[File:MKT Icon Level-boostticket4.png|80px]]<br>OR<br>[[File:MKT Icon Level-boostticket7.png|80px]] | |||
|[[File:MKT Icon Level-boostticket5.png|80px]]<br>OR<br>[[File:MKT Icon Level-boostticket8.png|80px]] | |||
|[[File:MKT Icon Level-boostticket6.png|80px]]<br>OR<br>[[File:MKT Icon Level-boostticket9.png|80px]] | |||
|- | |||
!Level-boost ticket (Super)<br>[[File:MKT Icon Coin.png|20px]] 4,000<br>Amount: 2 per week<br>OR<br>Level-boost ticket (High-End)<br>[[File:MKT Icon Coin.png|20px]] 15,000<br>Amount: 1 per week | |||
!Level-boost ticket (Super)<br>[[File:MKT Icon Coin.png|20px]] 3,000<br>Amount: 2 per week<br>OR<br>Level-boost ticket (High-End)<br>[[File:MKT Icon Coin.png|20px]] 13,000<br>Amount: 1 per week | |||
!Level-boost ticket (Super)<br>[[File:MKT Icon Coin.png|20px]] 3,000<br>Amount: 2 per week<br>OR<br>Level-boost ticket (High-End)<br>[[File:MKT Icon Coin.png|20px]] 13,000<br>Amount: 1 per week | |||
|- | |||
|[[File:MKT Icon Points-capticket1.png|80px]]<br>OR<br>[[File:MKT Icon Points-capticket2.png|80px]]<br>OR<br>[[File:MKT Icon Points-capticket3.png|80px]] | |||
|[[File:MKT Icon Points-capticket4.png|80px]]<br>OR<br>[[File:MKT Icon Points-capticket5.png|80px]]<br>OR<br>[[File:MKT Icon Points-capticket6.png|80px]] | |||
|[[File:MKT Icon Points-capticket7.png|80px]]<br>OR<br>[[File:MKT Icon Points-capticket8.png|80px]]<br>OR<br>[[File:MKT Icon Points-capticket9.png|80px]] | |||
|- | |||
![[Points-cap ticket]] (Normal)<br>[[File:MKT Icon Coin.png|20px]] 2,000<br>Amount: 1 per week | |||
!Points-cap ticket (Super)<br>[[File:MKT Icon Coin.png|20px]] 5,000<br>Amount: 1 per week | |||
!Points-cap ticket (High-End)<br>[[File:MKT Icon Coin.png|20px]] 20,000<br>Amount: 1 per week | |||
|- | |||
|[[File:MKT Icon Level-boostticket9.png|80px]] | |||
|[[File:MKT Icon Level-boostticket8.png|80px]] | |||
|[[File:MKT Icon Level-boostticket7.png|80px]] | |||
|- | |||
!Level-boost ticket (High-End)<br>[[File:MKT Icon Coin.png|20px]] 13,000<br>Amount: 1 per week | |||
!Level-boost ticket (High-End)<br>[[File:MKT Icon Coin.png|20px]] 13,000<br>Amount: 1 per week | |||
!Level-boost ticket (High-End)<br>[[File:MKT Icon Coin.png|20px]] 15,000<br>Amount: 1 per week | |||
|} | |||
==Gallery== | |||
<gallery> | |||
MKT Pipe Tour Landscape.png|Landscape version of the loading screen | |||
</gallery> | |||
==Names in other languages== | |||
{{foreign names | |||
|Jpn=ドカンツアー | |||
|JpnR=Dokan Tsuā | |||
|JpnM=Pipe Tour | |||
|ChiS=水管巡回赛 | |||
|ChiSR=Shuǐguǎn Xúnhuísài | |||
|ChiSM=Pipe Tour | |||
|ChiT=水管巡迴賽 | |||
|ChiTR=Shuǐguǎn Xúnhuísài | |||
|ChiTM=Pipe Tour | |||
|Fre=Saison des tuyaux | |||
|FreM=Season of pipes | |||
|Ger=Röhren-Tour-Saison | |||
|GerM=Pipe Tour Season | |||
|Ita=Tour dei tubi | |||
|ItaM=Tour of pipes | |||
|Kor=토관 투어 | |||
|KorR=Togwan Tueo | |||
|KorM=Pipe Tour | |||
|Por=Temporada dos Canos | |||
|PorM=Season of Pipes | |||
|Spa=Temporada de tuberías | |||
|SpaM=Season of pipes | |||
}} | |||
==References== | |||
<references/> | |||
{{MKT}} | {{MKT}} | ||
[[Category:Mario Kart Tour tours]] | [[Category:Mario Kart Tour tours]] | ||
[[it:Tour dei tubi]] | |||
Latest revision as of 14:46, January 7, 2025
| Pipe Tour | |
|---|---|
| |
| Start date | July 11, 2023 11:00 p.m. (PT) July 9, 2024 (rerun) 11:00 p.m. (PT)[?] |
| End date | July 25, 2023 10:59 p.m. (PT) July 23, 2024 (rerun) 10:59 p.m. (PT)[?] |
| Number of cups | 15 |
| Ranked cups | Pauline Cup (week 1) Poochy Cup (week 2) |
| Coin Rush course | Piranha Plant Pipeline |
| << List of tours >> | |
The Pipe Tour was the one-hundredth tour of Mario Kart Tour, which began on July 12, 2023 and ended on July 25, 2023. It was rerun from July 10, 2024 to July 23, 2024 as the game's hundred-and-twenty-sixth tour.
This tour introduced a brand new pipe-themed course named Piranha Plant Pipeline,[1] reflecting the theme of the tour, while also adding two pipe-based karts - one being the Boo Pipes from Mario Kart: Double Dash!!, and the other being the new Gold Pipes kart. Wiggler was introduced as a new driver after its series debut in Mario Kart 7 along with a themed Mii Racing Suit, coinciding with Wiggler's inclusion in Wave 5 of the Mario Kart 8 Deluxe – Booster Course Pass (which released on the same day as this tour). In addition, a variant of Pauline in a cowgirl outfit was introduced as a new driver, making this the first tour since the Peach vs. Daisy Tour to introduce a variant of Pauline. The tour also saw the first reappearances of Wii Dry Dry Ruins since its debut in the 2023 Ninja Tour, GBA Yoshi Desert since its debut in the 2023 Yoshi Tour, and Piranha Plant Cove and Piranha Plant Cove 2 since their debut in the 2023 Exploration Tour, as well as the first reappearances of N64 Kalimari Desert, GBA Sunset Wilds and 3DS Piranha Plant Slide since the 2023 Exploration Tour, and the first reappearance of GCN Dino Dino Jungle since the Animal Tour. Counting re-routes as separate courses, this was the first tour since the 2023 Ninja Tour to introduce only a single course to the game.
This was the first tour since the Tokyo Tour to give the Cheep Charger a new favorite course, the first since the New Year's 2021 Tour to give the Oilpaper Umbrella a new favorite course, and the first since the 2021 Halloween Tour to give Waluigi (Bus Driver) a new favorite course.
Similarly to the April-May 2021 Sydney Tour, New Year's 2022 Tour, and Spring Tour, the trailer[2] and social media announcement[1][3] were publicly released later than the usual time.
The Coin Rush course for this tour was Piranha Plant Pipeline. The menu background featured the mountain from the starting area of Piranha Plant Pipeline as the tour's landmark.
This was the final tour to introduce a new, non-alternate costume character to Tour, in the form of Wiggler.
Spotlight Shop[edit]
| Week 1/2 banner items July 11, 2023, 11:00 p.m. (PT) – July 25, 2023, 10:59 p.m. (PT) | ||||
| Item type | Name | Cost | Contents | Banner image |
|---|---|---|---|---|
| Driver | Petey Piranha (Gold) | 105 150 rubies for 2nd and 3rd purchases respectively |
 Petey Piranha (Gold) ×1 |
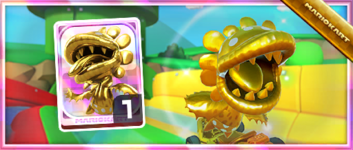
|
| Kart | Gold Pipes | 70 100 rubies for 2nd and 3rd purchases respectively |
Gold Pipes ×1 |
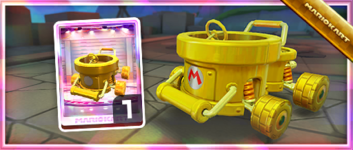
|
| Week 1 banner items July 11, 2023, 11:00 p.m. (PT) – July 18, 2023, 10:59 p.m. (PT) | ||||
| Item type | Name | Cost | Contents | Banner image |
| Driver | Pauline (Cowgirl) | 105 150 rubies for 2nd and 3rd purchases respectively |
Pauline (Cowgirl) ×1 |
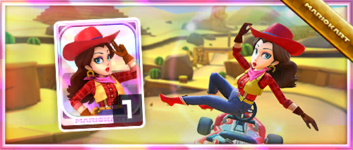
|
| Kart | Desert Rose Wagon | 70 100 rubies for 2nd and 3rd purchases respectively |
Desert Rose Wagon ×1 |
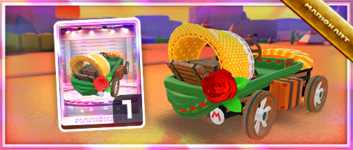
|
| Glider | Mosaic Starchute | 70 100 rubies for 2nd and 3rd purchases respectively |
Mosaic Starchute ×1 |
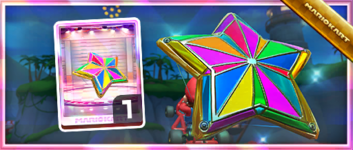
|
| Week 2 banner items July 18, 2023, 11:00 p.m. (PT) – July 25, 2023, 10:59 p.m. (PT) | ||||
| Item type | Name | Cost | Contents | Banner image |
| Driver | Petey Piranha | 105 150 rubies for 2nd and 3rd purchases respectively |
 Petey Piranha ×1 |
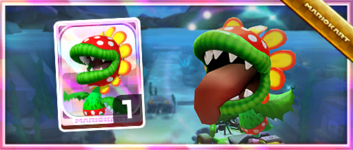
|
| Kart | Piranha Pipes | 70 100 rubies for 2nd and 3rd purchases respectively |
Piranha Pipes ×1 |
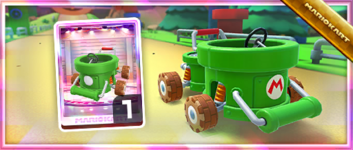
|
| Glider | Piranha Plant Balloons | 70 100 rubies for 2nd and 3rd purchases respectively |
Piranha Plant Balloons ×1 |
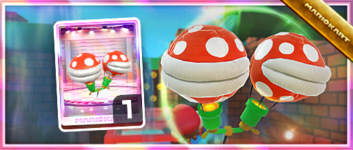
|
Daily Spotlight[edit]
The Daily Spotlight contains a mixture of items themed around the tour, items that have ranked tracks as favorites, and gold items. The rates listed are specific for that type of item; drivers, karts, and gliders are selected separately. Items marked with an asterisk (*) do not appear in the Daily Spotlight during the week they are available as Spotlight Shop banner items.
Cups[edit]
Pauline Cup Ranked cup (week 1) |
Piranha Plant Pipeline |
GBA Yoshi Desert R |
Piranha Plant Cove 2T |
Do Jump Boosts | ||||
 Piranha Plant Cove |
Larry | |||||||
Mii Cup |
N64 Kalimari Desert 2 |
GCN Dino Dino Jungle R |
GBA Sunset Wilds T |
Time Trial | ||||
 Wii Dry Dry Ruins |
Monty Mole | |||||||
Poochy Cup Ranked cup (week 2) |
Piranha Plant Pipeline R/T |
Piranha Plant Cove R |
Wii Dry Dry Ruins R/T |
Steer Clear of Obstacles | ||||
 GCN Dino Dino Jungle |
Dry Bones | |||||||
Tanooki Mario Cup |
GBA Battle Course 1 (Balloon Battle) |
N64 Kalimari Desert R |
3DS Piranha Plant Slide T |
Smash Small Dry Bones | ||||
 Piranha Plant Cove |
Roy | |||||||
Wario Cup |
Piranha Plant Cove 2R |
Wii Dry Dry Ruins |
GBA Yoshi Desert T |
Ring Race | ||||
 Piranha Plant Pipeline |
Pauline | |||||||
Donkey Kong Cup |
GCN Dino Dino Jungle |
N64 Kalimari Desert 2T |
DS Twilight House (Balloon Battle) |
Break Item Boxes | ||||
 3DS Piranha Plant Slide |
Hammer Bro | |||||||
King Bob-omb Cup |
GBA Sunset Wilds |
Piranha Plant Pipeline T |
Piranha Plant Cove |
Combo Attack | ||||
 GBA Yoshi Desert T |
Baby Daisy | |||||||
Ludwig Cup |
N64 Kalimari Desert |
Wii Dry Dry Ruins T |
GBA Yoshi Desert |
Big Reverse Race | ||||
 Piranha Plant Pipeline |
Any character | |||||||
Dixie Kong Cup |
3DS Piranha Plant Slide |
Piranha Plant Cove 2R/T |
GCN Dino Dino Jungle T |
Do Jump Boosts | ||||
 N64 Kalimari Desert |
Mario | |||||||
Chargin' Chuck Cup |
GBA Sunset Wilds R |
GBA Battle Course 1 (Balloon Battle) |
N64 Kalimari Desert 2R/T |
Smash Small Dry Bones | ||||
 GBA Sunset Wilds |
Metal Mario | |||||||
Iggy Cup |
Piranha Plant Cove T |
Piranha Plant Pipeline R |
Wii Dry Dry Ruins R |
Time Trial | ||||
 Piranha Plant Cove 2R |
Pink Shy Guy | |||||||
Toad Cup |
GBA Yoshi Desert R/T |
N64 Kalimari Desert R/T |
3DS Piranha Plant Slide R |
Combo Attack | ||||
 N64 Kalimari Desert 2T |
Lemmy | |||||||
Nabbit Cup |
GCN Dino Dino Jungle R/T |
GBA Sunset Wilds R/T |
Piranha Plant Cove 2 |
Vs. Mega Dry Bowser | ||||
 N64 Kalimari Desert |
Any character | |||||||
Fire Rosalina Cup |
DS Twilight House (Balloon Battle) |
3DS Piranha Plant Slide R/T |
N64 Kalimari Desert 2R |
Goomba Takedown | ||||
 GCN Dino Dino Jungle |
Yoshi | |||||||
Ice Bro Cup |
N64 Kalimari Desert T |
Piranha Plant Cove R/T |
Piranha Plant Pipeline R/T |
Take them out quick! | ||||
 GBA Sunset Wilds |
Wario | |||||||
Today's Challenge[edit]
Players' most recently used kart and glider are chosen, and favorite and favored ones have extra priority. Opponents are arranged randomly. On day 1 of this tour, players finish a race in Kalimari Desert 2 in the Mii Cup using Wiggler Mii Racing Suit for a free pipe launch. Starting from day 2, players have to finish a race in the earliest incomplete course that is not in any of the ranked cups using the driver shown on the course's thumbnail every day to obtain the corresponding reward in the table below. Once all of the courses are completed, the courses are selected at random.
| Day(s) | Reward |
| 1-13 | Free pipe launch |
|---|---|
| 14 |  Badge |
| Today's Challenge Pipe | |

| |
| Pipe contents | |
| Rubies, coins, driver (Normal/Super/High-End), kart (Normal/Super/High-End), glider (Normal/Super/High-End), item tickets | |
Rewards[edit]
Gold cells indicate rewards that are exclusive to Gold Pass members.
| Gold Piranha Plant Balloons |
| Grand Stars | 15 | 20 | 25 | 30 | 35 | 40 | 45 | 50 | 55 | 60 | 65 | 70 | 80 | 90 | 100 | 110 | 120 | 130 | 140 | 150 | 160 | 170 | 180 | 190 | 200 | 210 | 220 | 230 | 240 | 250 | 260 | 270 | 280 | 290 | 300 | 310 | 320 | Total | Grand total | |
|---|---|---|---|---|---|---|---|---|---|---|---|---|---|---|---|---|---|---|---|---|---|---|---|---|---|---|---|---|---|---|---|---|---|---|---|---|---|---|---|---|
| Pipes | 10 | 26 | ||||||||||||||||||||||||||||||||||||||
| 16 | ||||||||||||||||||||||||||||||||||||||||
| Coins | 500 | 500 | 500 | 500 | 500 | 500 | 500 | 500 | 500 | 500 | 5000 | 15000 | ||||||||||||||||||||||||||||
| 5000 | 5000 | 10000 | ||||||||||||||||||||||||||||||||||||||
| Rubies | 10 | 5 | 3 | 3 | 21 | 56 | ||||||||||||||||||||||||||||||||||
| 15 | 10 | 10 | 35 | |||||||||||||||||||||||||||||||||||||
| Item tickets | 5 | 5 | 10 | 30 | ||||||||||||||||||||||||||||||||||||
| 10 | 10 | 20 | ||||||||||||||||||||||||||||||||||||||
| Star tickets | 2 | 3 | 5 | 5 | ||||||||||||||||||||||||||||||||||||
| 0 | ||||||||||||||||||||||||||||||||||||||||
| Quick tickets | 1 | 1 | 4 | |||||||||||||||||||||||||||||||||||||
| 3 | 3 | |||||||||||||||||||||||||||||||||||||||
| Point-boost tickets | 1 | 1 | 1 | 3 | 8 | |||||||||||||||||||||||||||||||||||
| 5 | 5 | |||||||||||||||||||||||||||||||||||||||
| 1 | 1 | 1 | 3 | 8 | ||||||||||||||||||||||||||||||||||||
| 5 | 5 | |||||||||||||||||||||||||||||||||||||||
| 1 | 1 | 1 | 3 | 8 | ||||||||||||||||||||||||||||||||||||
| 5 | 5 | |||||||||||||||||||||||||||||||||||||||
| Level-boost tickets | 3 | 22 | ||||||||||||||||||||||||||||||||||||||
(3) |
(3) |
(3) |
(2) |
(2) |
(2) |
19 | ||||||||||||||||||||||||||||||||||
New content[edit]
The following content was introduced during the tour's debut in 2023.
Drivers[edit]
Mii Racing Suits[edit]
Karts[edit]
Gliders[edit]
Balloon designs[edit]
Piranha Plant Balloon
Courses[edit]
Piranha Plant Pipeline (N, R, T, R/T)
Paid banners[edit]
| Name | Availability | Cost | Contents | Banner image |
|---|---|---|---|---|
| Value Pack | July 12, 2023 – July 25, 2023 | US$1.99 |
|

|
| Driver Point-Boost Tickets 10 Ticket Set | July 12, 2023 – July 25, 2023 | US$3.99 | 
| |
| Celebrate the Pipe Tour with the Boo Pipes kart! | July 12, 2023 – July 25, 2023 | US$3.99 | 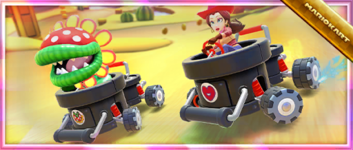
| |
| Celebrate the Pipe Tour with the Wiggler Parachute! | July 12, 2023 – July 25, 2023 | US$3.99 | 
| |
| 70 Rubies and Ticket Pack | July 12, 2023 – July 25, 2023 | US$19.99 | 
| |
| 150 Rubies and Ticket Pack | July 12, 2023 – July 25, 2023 | US$39.99 |
|

|
Challenges[edit]
| Tour Challenges 1 | Tour Challenges 2 | Gold Challenges | ||||||||
|---|---|---|---|---|---|---|---|---|---|---|
| Completion reward: |
Completion reward: |
Completion reward: | ||||||||
 |
 |
 |
 |
 |
 |
 |
 |
 | ||
| Do 5 Rocket Starts. | Land 3 hits with Green Shells. | Get a Fantastic combo a total of 5 times. | Do a total of 5 Slipstream boosts. | Land 5 hits with Bananas. | Get 1st place 2 times in a row in 100cc or above. | Get a combo count of ×30 or higher. | Land 10 hits with Red Shells. | Get 1st place 3 times in a row in 100cc or above. | ||
 |
 |
 |
 |
 |
 |
 |
 |
 | ||
| Use point-boost tickets 3 times. | Get 3rd place or higher 30 times. | Do 50 Mini-Turbo boosts. | Get 1 item from the Daily Selects section of the Shop. | Cause opponents to crash a total of 3 times using a driver wearing gloves. | Earn a score of 7,000 or higher on 3 T or R/T courses. | Use a level-boost ticket. | Do 20 Mini-Turbo boosts using a driver with a hat. | Earn a score of 10,000 or higher on 5 courses. | ||
 |
 |
 |
 |
 |
 |
 |
 |
 | ||
| Drive a distance of 20,000 or more. | Land a hit with a Blooper. | Finish every course of every cup, including bonus challenges. | Glide a total distance of 5,000. | Earn a total score of 15,000 or higher in the Toad Cup. | Race in auto mode. | Cause opponents to crash in Frenzy mode. | Earn a total score of 20,000 or higher in the Iggy Cup. | Complete Coin Rush 1 time. | ||
| Premium Challenges | Premium Challenges+ | Premium Challenges++ | ||||||||
|---|---|---|---|---|---|---|---|---|---|---|
| Cost: US$4.99 | Cost: US$9.99 | Cost: US$19.99 | ||||||||
| Three in a row reward: |
Three in a row reward: |
Three in a row reward: | ||||||||
| Completion reward: |
Completion reward: |
Completion reward: | ||||||||
| Pipe ×1 | Pipe ×1 | Pipe ×1 | Pipe ×1 | Gold Pipe ×1 | Coins ×5,000 | Gold Pipe ×1 | Rubies ×30 | Coins ×10,000 | ||
| Land 5 hits with Green Shells. | Land 5 hits with Bananas. | Land 3 hits with Bob-ombs. | Land 10 hits with Green Shells. | Land 10 hits with Bananas. | Use 10 Mushrooms. | Land 10 hits with Red Shells. | Start a new tour. | Land 20 hits with Bananas. | ||
| Coins ×3,000 | Rubies ×10 | Point-boost ticket (Glider) ×3 | Point-boost ticket (Glider) ×5 | Rubies ×20 | Points-cap ticket (High-end glider) ×1 | Level-boost ticket (High-End driver) ×2 | Level-boost ticket (High-End kart) ×2 | Level-boost ticket (High-End glider) ×2 | ||
| Do 20 Jump Boosts. | Start a new tour. | Do 50 Mini-Turbo boosts. | Do 50 Jump Boosts. | Start a new tour. | Do 100 Mini-Turbo boosts. | Land 5 hits with Bob-ombs. | Do 100 Jump Boosts. | Do 150 Mini-Turbo boosts. | ||
| Level-boost ticket (Normal glider) ×1 | Level-boost ticket (Super glider) ×1 | Level-boost ticket (High-End glider) ×1 | Level-boost ticket (High-End driver) ×1 | Level-boost ticket (High-End kart) ×1 | Level-boost ticket (High-End glider) ×1 | Points-cap ticket (High-end driver) ×2 | Points-cap ticket (High-end kart) ×2 | Points-cap ticket (High-end glider) ×2 | ||
| Get 1st place 3 times. | Get 1st place 5 times. | Get 1st place 10 times. | Get 1st place 5 times. | Get 1st place 10 times. | Get 1st place 15 times. | Get 1st place 10 times. | Get 1st place 15 times. | Get 1st place 20 times. | ||
| Kart Pro Challenges | Tour Multiplayer Challenges | |||||
|---|---|---|---|---|---|---|
| Three in a row reward: |
Three in a row reward: | |||||
| Completion reward: |
Completion reward: | |||||
 |
 |
 |
 |
 |
 | |
| Play multiplayer. | Play multiplayer 3 times. | Play multiplayer 5 times. | Land 3 hits with Green Shells in multiplayer. | Land 3 hits with Bananas in multiplayer. | Do 3 Rocket Starts in multiplayer[sic] | |
 |
 |
 |
 |
 |
 | |
| Get 1 win in Kart Pro. | Achieve a winning streak that includes 3 1st-place wins. | Achieve a winning streak that includes 2 1st-place wins. | Land 3 hits with Red Shells in multiplayer. | Play multiplayer. | Use the Bullet Bill item in multiplayer. | |
 |
 |
 |
 |
 |
 | |
| Play multiplayer 10 times. | Get 3rd place or higher 3 times in multiplayer. | Get 3rd place or higher 5 times in multiplayer. | Do 50 Jump Boosts in multiplayer. | Do 50 Mini-Turbo boosts in multiplayer. | Cause opponents to crash 30 times in multiplayer. | |
| Total Points Challenge 1 (2023) | Total Points Challenge 2 (2023) | |||
|---|---|---|---|---|
| Points | Rewards | Points | Rewards | |
| 400,000 |
|
999,999 |
| |
| 300,000 |
|
900,000 | ||
| 250,000 | 800,000 | |||
| 200,000 | 700,000 | |||
| 150,000 |
|
600,000 | ||
| 100,000 |
|
500,000 | ||
| Total Points Challenge 1 (2024) | Total Points Challenge 2 (2024) | |||
|---|---|---|---|---|
| Points | Rewards | Points | Rewards | |
| 400,000 |
|
999,999 |
| |
| 300,000 |
|
900,000 | ||
| 250,000 | 800,000 | |||
| 200,000 | 700,000 | |||
| 150,000 |
|
600,000 | ||
| 100,000 |
|
500,000 | ||
Gold Pipe[edit]
The Gold Pipe, including the All-Clear Pipe, randomly shoots out one of the following regular High-End items. The appearance rate can be viewed via the "Pipe content" link on the Gold Pass purchase screen.
Mii Racing Suit Shop[edit]
Banner items[edit]
| Name | Cost | Contents | Banner image |
|---|---|---|---|
| Wiggler Mii Racing Suit | 70 100 rubies for 2nd and 3rd purchases respectively |
Wiggler Mii Racing Suit ×1 |
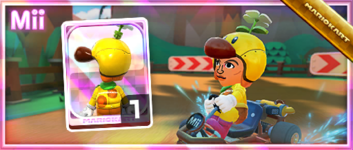
|
Other items[edit]
| Items available in Mii Racing Suit Shop (July 12, 2023 - July 25, 2023) | ||
|---|---|---|
| Pink Mii Racing Suit 70 100 rubies for 2nd and 3rd purchases respectively |
Light Green Mii Racing Suit Amount: 3 |
Brown Mii Racing Suit Amount: 3 |
| Petey Piranha Mii Racing Suit Amount: 3 |
Dry Bones Mii Racing Suit Amount: 3 |
Chain Chomp Mii Racing Suit Amount: 3 |
| Castle Mii Racing Suit Amount: 3 |
Hammer Bro Mii Racing Suit Amount: 3 |
Goomba Mii Racing Suit Amount: 3 |
| Items available in Mii Racing Suit Shop (July 10, 2024 - July 23, 2024) | ||
|---|---|---|
| Castle Mii Racing Suit 70 100 rubies for 2nd and 3rd purchases respectively |
Koopa Clown Mii Racing Suit Amount: 3 |
King Boo Mii Racing Suit Amount: 3 |
| King Bob-omb Mii Racing Suit 70 100 rubies for 2nd and 3rd purchases respectively |
Brown Mii Racing Suit Amount: 3 |
Roaring Racer Mii Racing Suit Amount: 3 |
| Iggy Mii Racing Suit Amount: 3 |
Ludwig Mii Racing Suit Amount: 3 |
Chain Chomp Mii Racing Suit Amount: 3 |
Token Shop[edit]
The limited-time event where event tokens appear began on July 12, 2023 and ended on July 25, 2023; and started on July 10, 2024 and ended on July 23, 2024 for the rerun. Event tokens could be earned by collecting them on courses.
| Token Shop (July 12, 2023 - July 25, 2023; July 10, 2024 - July 23, 2024) | ||
|---|---|---|
| Gold Pipe Amount: 1 |
Gold Pipe Amount: 1 |
Gold Pipe Amount: 1 |
| Pipe Amount: 34 |
Ruby ×3 Amount: 5 |
Coin ×500 Amount: 5 |
| Piranha Plant Balloon Amount: 1 |
Level-boost ticket (Normal) Amount: 3 |
Level-boost ticket (Super) Amount: 2 |
Tier Shop[edit]
The shop features a variety of set and randomized items available for purchase. The item slots in the shop are unlocked based on the highest tier of players.
| Items available in Tier Shop (July 12, 2023 - July 25, 2023; July 10, 2024 - July 23, 2024) | ||
|---|---|---|
| Level-boost ticket (Normal) Amount: 3 per week |
Level-boost ticket (Normal) Amount: 3 per week |
Level-boost ticket (Normal) Amount: 3 per week |
OR |
OR |
OR |
| Level-boost ticket (Super) Amount: 2 per week OR Level-boost ticket (High-End) Amount: 1 per week |
Level-boost ticket (Super) Amount: 2 per week OR Level-boost ticket (High-End) Amount: 1 per week |
Level-boost ticket (Super) Amount: 2 per week OR Level-boost ticket (High-End) Amount: 1 per week |
OR OR |
OR OR |
OR OR |
| Points-cap ticket (Normal) Amount: 1 per week |
Points-cap ticket (Super) Amount: 1 per week |
Points-cap ticket (High-End) Amount: 1 per week |
| Level-boost ticket (High-End) Amount: 1 per week |
Level-boost ticket (High-End) Amount: 1 per week |
Level-boost ticket (High-End) Amount: 1 per week |
Gallery[edit]
Names in other languages[edit]
| Language | Name | Meaning | Notes |
|---|---|---|---|
| Japanese | ドカンツアー[?] Dokan Tsuā |
Pipe Tour | |
| Chinese (simplified) | 水管巡回赛[?] Shuǐguǎn Xúnhuísài |
Pipe Tour | |
| Chinese (traditional) | 水管巡迴賽[?] Shuǐguǎn Xúnhuísài |
Pipe Tour | |
| French | Saison des tuyaux[?] | Season of pipes | |
| German | Röhren-Tour-Saison[?] | Pipe Tour Season | |
| Italian | Tour dei tubi[?] | Tour of pipes | |
| Korean | 토관 투어[?] Togwan Tueo |
Pipe Tour | |
| Portuguese | Temporada dos Canos[?] | Season of Pipes | |
| Spanish | Temporada de tuberías[?] | Season of pipes |
References[edit]
- ^ a b @mariokarttourEN (July 7, 2023). "The Night Tour is wrapping up in #MarioKartTour. Next up is the Pipe Tour, full of mountains, valleys, and of course pipes! It features the new course Piranha Plant Pipeline!" Twitter. Retrieved July 7, 2023. (Archived July 7, 2023, 18:12:53 UTC via Wayback Machine.)
- ^ Nintendo Mobile (July 7, 2023). Mario Kart Tour - Pipe Tour Trailer. YouTube. Retrieved July 8, 2023.
- ^ mariokarttour (July 7, 2023). "The Night Tour is wrapping up in #MarioKartTour. Next up is the Pipe Tour, full of mountains, valleys, and of course pipes! It features the new course Piranha Plant Pipeline!" Facebook. Retrieved July 8, 2023.


