Sydney Tour (April–May 2021): Difference between revisions
mNo edit summary |
m (Text replacement - "(\| *)Jap([RMCN\d]* *=)" to "$1Jpn$2") |
||
| (6 intermediate revisions by 4 users not shown) | |||
| Line 9: | Line 9: | ||
|after=[[Bowser vs. DK Tour|>>]] | |after=[[Bowser vs. DK Tour|>>]] | ||
}} | }} | ||
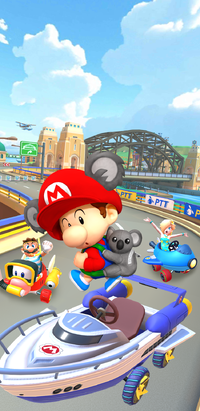
The '''Sydney Tour''' was the forty-second tour of ''[[Mario Kart Tour]]'', which began on April 21, 2021 and ended on May 4, 2021. True to its name, the tour introduced a new course based in [[Sydney]], [[Australia]] called [[Tour Sydney Sprint|Sydney Sprint]], which was hinted at in two previous tours, the [[Marine Tour]] (twenty-one tours prior) and the [[Ninja Tour (2021)|2021 Ninja Tour]] (the previous tour), through the [[SNES Koopa Troopa Beach 2]] [[Glider Challenge]], which featured a boat designed like one of Sydney's famous {{wp|Sydney Ferries|ferries}}. It also introduced a koala-themed variant of [[Baby Mario]] for the first week's spotlight while [[Mario|Mario (Swimwear)]] and [[Rosalina|Rosalina (Swimwear)]] returned as part of the spotlight for the second week. The menu's background featured the {{wp|Sydney Harbour Bridge}} as the landmark for this tour. This | The '''Sydney Tour''' was the forty-second tour of ''[[Mario Kart Tour]]'', which began on April 21, 2021 and ended on May 4, 2021. True to its name, the tour introduced a new course based in [[Sydney]], [[Australia]] called [[Tour Sydney Sprint|Sydney Sprint]], which was hinted at in two previous tours, the [[Marine Tour]] (twenty-one tours prior) and the [[Ninja Tour (2021)|2021 Ninja Tour]] (the previous tour), through the [[SNES Koopa Troopa Beach 2]] [[Glider Challenge]], which featured a boat designed like one of Sydney's famous {{wp|Sydney Ferries|ferries}}. It also introduced a koala-themed variant of [[Baby Mario]] for the first week's spotlight while [[Mario|Mario (Swimwear)]] and [[Rosalina|Rosalina (Swimwear)]] returned as part of the spotlight for the second week. The menu's background featured the {{wp|Sydney Harbour Bridge}} as the landmark for this tour. This was the first and only tour to have its trailer be released during the tour instead of before or at the start of the tour. | ||
This was the last tour to feature the fourth set of [[List of challenge cards in Mario Kart Tour#Expert Challenges|Expert Challenges]], which started in the [[Peach vs. Daisy Tour]]. | This was the last tour to feature the fourth set of [[List of challenge cards in Mario Kart Tour#Expert Challenges|Expert Challenges]], which started in the [[Peach vs. Daisy Tour]]. | ||
| Line 15: | Line 15: | ||
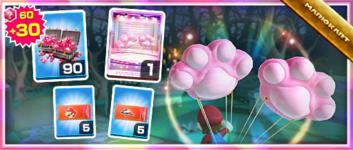
Starting with this tour, the [[Toe-Bean Balloons]] glider became available in regular tour pipes. | Starting with this tour, the [[Toe-Bean Balloons]] glider became available in regular tour pipes. | ||
This tour also brings back the [[Vs. Mega#vs. Mega Wendy 3DS Mario Circuit|vs. Mega]] [[ | This tour also brings back the [[Vs. Mega#vs. Mega Wendy 3DS Mario Circuit|vs. Mega]] [[Wendy]] bonus challenge from the [[London Tour]] (which was also used in the [[Peach Tour]]), making it the first Vs. Mega bonus challenge to appear in three tours. | ||
==Spotlights== | ==Spotlights== | ||
{| align=center width=75% cellspacing=0 border=1 cellpadding=3 style="border-collapse:collapse; font-family:Arial; text-align:center" | {|align=center width=75% cellspacing=0 border=1 cellpadding=3 style="border-collapse:collapse;font-family:Arial;text-align:center" | ||
|-style="background: #89A" | |-style="background: #89A" | ||
|colspan=3|'''Sydney Pipe 1'''<br>April 20, 2021, 11:00 p.m. (PT) – <br>May 4, 2021 10:59 p.m. (PT) | |colspan=3|'''Sydney Pipe 1'''<br>April 20, 2021, 11:00 p.m. (PT) – <br>May 4, 2021 10:59 p.m. (PT) | ||
| Line 26: | Line 25: | ||
|colspan=3|[[File:MKT Tour42 SydneyPipe2.png|x150px]] | |colspan=3|[[File:MKT Tour42 SydneyPipe2.png|x150px]] | ||
|-style="background: #ABC" | |-style="background: #ABC" | ||
! style="width: 15%;"|Driver | !style="width:15%;"|Driver | ||
! style="width: 15%;"|Kart | !style="width:15%;"|Kart | ||
! style="width: 15%;"|Glider | !style="width:15%;"|Glider | ||
! style="width: 15%;"|Drivers | !style="width:15%;"|Drivers | ||
! style="width: 15%;"|Karts | !style="width:15%;"|Karts | ||
! style="width: 15%;"|Gliders | !style="width:15%;"|Gliders | ||
|- | |- | ||
|[[File:MKT Artwork BabyMarioKoala.png|100x100px]] | |[[File:MKT Artwork BabyMarioKoala.png|100x100px]] | ||
| Line 49: | Line 48: | ||
==Special pipe== | ==Special pipe== | ||
{| align=center width=65% cellspacing=0 border=1 cellpadding=3 style="border-collapse:collapse; font-family:Arial; text-align:center" | {|align=center width=65% cellspacing=0 border=1 cellpadding=3 style="border-collapse:collapse;font-family:Arial;text-align:center" | ||
|-style="background: #89A" | |-style="background:#89A" | ||
|colspan=3|'''Ocean Pipe'''<br>April 24, 2021, 11:00 p.m. (PT) – <br>April 29, 2021, 10:59 p.m. (PT) | |colspan=3|'''Ocean Pipe'''<br>April 24, 2021, 11:00 p.m. (PT) – <br>April 29, 2021, 10:59 p.m. (PT) | ||
|- | |- | ||
|colspan=3|[[File:MKT Tour42 OceanPipe.png|x150px]] | |colspan=3|[[File:MKT Tour42 OceanPipe.png|x150px]] | ||
|-style="background: #ABC" | |-style="background:#ABC" | ||
! style="width: 50%;"|High-End karts | !style="width:50%;"|High-End karts | ||
! style="width: 50%;"|High-End gliders | !style="width:50%;"|High-End gliders | ||
|- | |- | ||
|[[File:MKT Icon GoldCheepCharger.png|100x100px]][[File:MKT Icon GoldCheepSnorkel.png|100x100px]][[File:MKT Icon SushiRacer.png|100x100px]][[File:MKT Icon PirateSushiRacer.png|100x100px]] | |[[File:MKT Icon GoldCheepCharger.png|100x100px]][[File:MKT Icon GoldCheepSnorkel.png|100x100px]][[File:MKT Icon SushiRacer.png|100x100px]][[File:MKT Icon PirateSushiRacer.png|100x100px]] | ||
| Line 64: | Line 63: | ||
|[[Silver Manta Glider]], [[Manta Glider]], [[Great Sail]], and [[Black Great Sail]] | |[[Silver Manta Glider]], [[Manta Glider]], [[Great Sail]], and [[Black Great Sail]] | ||
|} | |} | ||
;Names in other languages | ;Names in other languages | ||
{{foreign names | {{foreign names | ||
| | |Jpn=オーシャンドカン | ||
| | |JpnR=Ōshan Dokan | ||
| | |JpnM=Ocean Pipe | ||
|Ger=Ozean-Röhre | |Ger=Ozean-Röhre | ||
|GerM=Ocean Pipe | |GerM=Ocean Pipe | ||
| Line 75: | Line 73: | ||
==Cups== | ==Cups== | ||
{| align=center width=90% cellspacing=0 border=1 cellpadding=3 style="border-collapse:collapse; font-family:Arial; text-align:center" | {|align=center width=90% cellspacing=0 border=1 cellpadding=3 style="border-collapse:collapse;font-family:Arial;text-align:center" | ||
{{MKT cup table row | {{MKT cup table row | ||
|C=Toadette||Ra=1 | |C=Toadette||Ra=1 | ||
| Line 161: | Line 159: | ||
}} | }} | ||
|} | |} | ||
===Signature kart sets=== | ===Signature kart sets=== | ||
Drivers with a corresponding cup were bumped one rank up in every course of their cup. | Drivers with a corresponding cup were bumped one rank up in every course of their cup. | ||
{| class="wikitable" style="text-align: center" width=50% | {|class="wikitable"style="text-align:center"width=50% | ||
!width=10%|Cup | !width=10%|Cup | ||
!width=20%|Driver | !width=20%|Driver | ||
| Line 243: | Line 240: | ||
==Rewards== | ==Rewards== | ||
Gold cells indicate rewards that are exclusive to Gold Pass members. | Gold cells indicate rewards that are exclusive to Gold Pass members. | ||
{|class="wikitable" style="margin:auto; text-align:center" | {|class="wikitable"style="margin:auto;text-align:center" | ||
|- | |- | ||
![[File:MKT Icon GrandStar.png|20x20px]] 15 | ![[File:MKT Icon GrandStar.png|20x20px]] 15 | ||
| Line 269: | Line 266: | ||
|} | |} | ||
<br> | <br> | ||
{|class="wikitable" style="margin:auto; text-align:center" | {|class="wikitable"style="margin:auto;text-align:center" | ||
|- | |- | ||
!Grand Stars!![[File:MKT Icon GrandStar.png|20x20px]]!!15!!30!!45!!60!!80!!100!!120!!130!!140!!150!!160!!170!!180!!190!!200!!210!!215!!220!!225!!230!!235!!240!!245!!250!!255!!Total!!Grand total | !Grand Stars!![[File:MKT Icon GrandStar.png|20x20px]]!!15!!30!!45!!60!!80!!100!!120!!130!!140!!150!!160!!170!!180!!190!!200!!210!!215!!220!!225!!230!!235!!240!!245!!250!!255!!Total!!Grand total | ||
| Line 356: | Line 353: | ||
==Paid banners== | ==Paid banners== | ||
{| align=center width=960px cellspacing=0 border=1 cellpadding=3 style="border-collapse:collapse; font-family:Arial; text-align:center" | {|align=center width=960px cellspacing=0 border=1 cellpadding=3 style="border-collapse:collapse;font-family:Arial;text-align:center" | ||
|-style="background: #ABC" | |-style="background: #ABC" | ||
!Name | !Name | ||
| Line 417: | Line 414: | ||
|TCR1=[[File:MKT Icon QuickTicket.png|70px]] [[Quick ticket]] ×1 | |TCR1=[[File:MKT Icon QuickTicket.png|70px]] [[Quick ticket]] ×1 | ||
|T1.1=115 | |T1.1=115 | ||
|T1.1E=Do 5 {{Color | |T1.1E=Do 5 {{Color link|#A1A1FF|Rocket Start|Rocket Starts}}. | ||
|T1.1S=1 | |T1.1S=1 | ||
|T1.2=086 | |T1.2=086 | ||
|T1.2E=Land 5 hits with {{Color | |T1.2E=Land 5 hits with {{Color link|#A1A1FF|Banana|Bananas}}. | ||
|T1.2S=1 | |T1.2S=1 | ||
|T1.3=077 | |T1.3=077 | ||
| Line 426: | Line 423: | ||
|T1.3S=1 | |T1.3S=1 | ||
|T1.4=073 | |T1.4=073 | ||
|T1.4E=Land a hit with a {{Color | |T1.4E=Land a hit with a {{Color link|#A1A1FF|Blooper}}. | ||
|T1.4S=2 | |T1.4S=2 | ||
|T1.5=043 | |T1.5=043 | ||
|T1.5E=Activate {{Color | |T1.5E=Activate {{Color link|#A1A1FF|Frenzy}} mode 5 times using a driver with a hat. | ||
|T1.5S=2 | |T1.5S=2 | ||
|T1.6=006 | |T1.6=006 | ||
|T1.6E=Get 1st place a total of 5 times on a {{Color | |T1.6E=Get 1st place a total of 5 times on a {{Color link|#A1A1FF|Sydney}} course. | ||
|T1.6S=2 | |T1.6S=2 | ||
|T1.7=221 | |T1.7=221 | ||
|T1.7E=Do 5 Ultra {{Color | |T1.7E=Do 5 Ultra {{Color link|#A1A1FF|Mini-Turbo}} boosts using a driver wearing earrings. | ||
|T1.7S=2 | |T1.7S=2 | ||
|T1.8=169 | |T1.8=169 | ||
|T1.8E=Earn a total score of 20,000 or higher in the {{Color | |T1.8E=Earn a total score of 20,000 or higher in the {{Color link|#A1A1FF|Toadette Cup}}. | ||
|T1.8S=2 | |T1.8S=2 | ||
|T1.9=214 | |T1.9=214 | ||
|T1.9E=Take out 3 {{Color | |T1.9E=Take out 3 {{Color link|#A1A1FF|Goomba|Goombas}}. | ||
|T1.9S=2 | |T1.9S=2 | ||
|TCR2=[[File:MKT Icon CoinRushTicket.png|70px]] [[Coin Rush ticket]] ×1 | |TCR2=[[File:MKT Icon CoinRushTicket.png|70px]] [[Coin Rush ticket]] ×1 | ||
|T2.1=133 | |T2.1=133 | ||
|T2.1E=Do 20 {{Color | |T2.1E=Do 20 {{Color link|#A1A1FF|Trick|Jump Boosts}}. | ||
|T2.1S=1 | |T2.1S=1 | ||
|T2.2=041 | |T2.2=041 | ||
|T2.2E=Land 5 hits with {{Color | |T2.2E=Land 5 hits with {{Color link|#A1A1FF|Red Shell|Red Shells}}. | ||
|T2.2S=1 | |T2.2S=1 | ||
|T2.3=101 | |T2.3=101 | ||
| Line 454: | Line 451: | ||
|T2.3S=1 | |T2.3S=1 | ||
|T2.4=126 | |T2.4=126 | ||
|T2.4E=Use {{Color | |T2.4E=Use {{Color link|#A1A1FF|point-boost ticket|point-boost tickets}} 3 times. | ||
|T2.4S=2 | |T2.4S=2 | ||
|T2.5=087 | |T2.5=087 | ||
| Line 466: | Line 463: | ||
|T2.7S=2 | |T2.7S=2 | ||
|T2.8=173 | |T2.8=173 | ||
|T2.8E=Earn a total score of 20,000 or higher in the {{Color | |T2.8E=Earn a total score of 20,000 or higher in the {{Color link|#A1A1FF|Luigi Cup}}. | ||
|T2.8S=2 | |T2.8S=2 | ||
|T2.9=082 | |T2.9=082 | ||
| Line 473: | Line 470: | ||
|GCR=[[File:MKT Icon 1Ruby.png|70px]] [[Ruby|Rubies]] ×5 | |GCR=[[File:MKT Icon 1Ruby.png|70px]] [[Ruby|Rubies]] ×5 | ||
|G.1=117 | |G.1=117 | ||
|G.1E=Do a total of 5 {{Color | |G.1E=Do a total of 5 {{Color link|#A1A1FF|Slipstream}} boosts. | ||
|G.1S=1 | |G.1S=1 | ||
|G.2=104 | |G.2=104 | ||
|G.2E=Use 15 {{Color | |G.2E=Use 15 {{Color link|#A1A1FF|Mushroom|Mushrooms}}. | ||
|G.2S=1 | |G.2S=1 | ||
|G.3=099 | |G.3=099 | ||
| Line 482: | Line 479: | ||
|G.3S=1 | |G.3S=1 | ||
|G.4=051 | |G.4=051 | ||
|G.4E=Use a {{Color | |G.4E=Use a {{Color link|#A1A1FF|level-boost ticket}}. | ||
|G.4S=2 | |G.4S=2 | ||
|G.5=083 | |G.5=083 | ||
| Line 491: | Line 488: | ||
|G.6S=2 | |G.6S=2 | ||
|G.7=134 | |G.7=134 | ||
|G.7E=Do 100 {{Color | |G.7E=Do 100 {{Color link|#A1A1FF|Trick|Jump Boosts}} on a Sydney course. | ||
|G.7S=2 | |G.7S=2 | ||
|G.8=149 | |G.8=149 | ||
| Line 497: | Line 494: | ||
|G.8S=2 | |G.8S=2 | ||
|G.9=027 | |G.9=027 | ||
|G.9E=Send Greeting {{Color | |G.9E=Send Greeting {{Color link|#A1A1FF|Coin|Coins}} to a friend. | ||
|G.9S=2 | |G.9S=2 | ||
}} | }} | ||
<br> | <br> | ||
{| align=center width=30% cellspacing=0 border=1 cellpadding=3 style="border-collapse:collapse; font-family:Arial; text-align:center" | {|align=center width=30% cellspacing=0 border=1 cellpadding=3 style="border-collapse:collapse;font-family:Arial;text-align:center" | ||
|- | |- | ||
!colspan=3 style="background: #EEEEFF"|'''Premium Challenges''' | !colspan=3 style="background:#EEEEFF"|'''Premium Challenges''' | ||
|- | |- | ||
|colspan=3 style="background: #EEEEFF"|'''Cost:''' US$4.99 | |colspan=3 style="background:#EEEEFF"|'''Cost:''' US$4.99 | ||
|- | |- | ||
|colspan=3 style="background: #EEEEFF"|'''Three in a row reward:''' [[File:MKT Icon Coins 2.png|70px]] [[Coin|Coins]] ×300 | |colspan=3 style="background:#EEEEFF"|'''Three in a row reward:''' [[File:MKT Icon Coins 2.png|70px]] [[Coin|Coins]] ×300 | ||
|- | |- | ||
|colspan=3 style="background: #EEEEFF"|'''Completion reward:''' [[File:MKT Icon SurfMaster.png|50x80px]] [[Surf Master]] ×1 | |colspan=3 style="background:#EEEEFF"|'''Completion reward:''' [[File:MKT Icon SurfMaster.png|50x80px]] [[Surf Master]] ×1 | ||
|-style="height: 80px" | |-style="height:80px" | ||
|width=10% style="background:linear-gradient(#F2E18F,#B9800F)"|[[File:MK7 RedLakitu Artwork.png|50x80px]] | |width=10% style="background:linear-gradient(#F2E18F,#B9800F)"|[[File:MK7 RedLakitu Artwork.png|50x80px]] | ||
|width=10% style="background:linear-gradient(#F2E18F,#B9800F)"|[[File:MKT Icon RedStreamliner.png|50x80px]] | |width=10% style="background:linear-gradient(#F2E18F,#B9800F)"|[[File:MKT Icon RedStreamliner.png|50x80px]] | ||
|width=10% style="background:linear-gradient(#F2E18F,#B9800F)"|[[File:MKT Icon DropletGlider.png|50x80px]] | |width=10% style="background:linear-gradient(#F2E18F,#B9800F)"|[[File:MKT Icon DropletGlider.png|50x80px]] | ||
|-style="color: #FFF" | |-style="color:#FFF" | ||
|style="background:linear-gradient(#864D00,#A26000); border-top:1px solid #B9800F;"|{{Color | |style="background:linear-gradient(#864D00,#A26000); border-top:1px solid #B9800F;"|{{Color link|#A1A1FF|Lakitu}} ×1 | ||
|style="background:linear-gradient(#864D00,#A26000); border-top:1px solid #B9800F;"|{{Color | |style="background:linear-gradient(#864D00,#A26000); border-top:1px solid #B9800F;"|{{Color link|#A1A1FF|Red Streamliner}} ×1 | ||
|style="background:linear-gradient(#864D00,#A26000); border-top:1px solid #B9800F;"|{{Color | |style="background:linear-gradient(#864D00,#A26000); border-top:1px solid #B9800F;"|{{Color link|#A1A1FF|Droplet Glider}} ×1 | ||
|-style="color: #FFF" | |-style="color:#FFF" | ||
|style="background:linear-gradient(#A26000,#C88512); border-top:1px solid #A26000;"|''Land 5 hits with Green Shells.'' | |style="background:linear-gradient(#A26000,#C88512); border-top:1px solid #A26000;"|''Land 5 hits with Green Shells.'' | ||
|style="background:linear-gradient(#A26000,#C88512); border-top:1px solid #A26000;"|''Land 10 hits with Bananas.'' | |style="background:linear-gradient(#A26000,#C88512); border-top:1px solid #A26000;"|''Land 10 hits with Bananas.'' | ||
|style="background:linear-gradient(#A26000,#C88512); border-top:1px solid #A26000;"|''Land 10 hits with Bob-ombs.'' | |style="background:linear-gradient(#A26000,#C88512); border-top:1px solid #A26000;"|''Land 10 hits with Bob-ombs.'' | ||
|-style="height: 80px" | |-style="height:80px" | ||
|width=10% style="background:linear-gradient(#F2E18F,#B9800F)"|[[File:MKT Icon Coins 3.png|70px]] | |width=10% style="background:linear-gradient(#F2E18F,#B9800F)"|[[File:MKT Icon Coins 3.png|70px]] | ||
|width=10% style="background:linear-gradient(#F2E18F,#B9800F)"|[[File:MKT Icon Ruby.png|70px]] | |width=10% style="background:linear-gradient(#F2E18F,#B9800F)"|[[File:MKT Icon Ruby.png|70px]] | ||
|width=10% style="background:linear-gradient(#F2E18F,#B9800F)"|[[File:MKT Icon Point-boostticket2.png|70px]] | |width=10% style="background:linear-gradient(#F2E18F,#B9800F)"|[[File:MKT Icon Point-boostticket2.png|70px]] | ||
|-style="color: #FFF" | |-style="color:#FFF" | ||
|style="background:linear-gradient(#864D00,#A26000); border-top:1px solid #B9800F;"|{{Color | |style="background:linear-gradient(#864D00,#A26000); border-top:1px solid #B9800F;"|{{Color link|#A1A1FF|Coins}} ×3,000 | ||
|style="background:linear-gradient(#864D00,#A26000); border-top:1px solid #B9800F;"|{{Color | |style="background:linear-gradient(#864D00,#A26000); border-top:1px solid #B9800F;"|{{Color link|#A1A1FF|Ruby|Rubies}} ×10 | ||
|style="background:linear-gradient(#864D00,#A26000); border-top:1px solid #B9800F;"|Kart {{Color | |style="background:linear-gradient(#864D00,#A26000); border-top:1px solid #B9800F;"|Kart {{Color link|#A1A1FF|point-boost ticket}} ×3 | ||
|-style="color: #FFF" | |-style="color: #FFF" | ||
|style="background:linear-gradient(#A26000,#C88512); border-top:1px solid #A26000;"|''Do 50 Jump Boosts.'' | |style="background:linear-gradient(#A26000,#C88512); border-top:1px solid #A26000;"|''Do 50 Jump Boosts.'' | ||
|style="background:linear-gradient(#A26000,#C88512); border-top:1px solid #A26000;"|''Participate in a race.'' | |style="background:linear-gradient(#A26000,#C88512); border-top:1px solid #A26000;"|''Participate in a race.'' | ||
|style="background:linear-gradient(#A26000,#C88512); border-top:1px solid #A26000;"|''Do 100 Mini-Turbo boosts.'' | |style="background:linear-gradient(#A26000,#C88512); border-top:1px solid #A26000;"|''Do 100 Mini-Turbo boosts.'' | ||
|-style="height: 80px" | |-style="height:80px" | ||
|width=10% style="background:linear-gradient(#F2E18F,#B9800F)"|[[File:MKT Icon Level-boostticket2.png|70px]] | |width=10% style="background:linear-gradient(#F2E18F,#B9800F)"|[[File:MKT Icon Level-boostticket2.png|70px]] | ||
|width=10% style="background:linear-gradient(#F2E18F,#B9800F)"|[[File:MKT Icon Level-boostticket5.png|70px]] | |width=10% style="background:linear-gradient(#F2E18F,#B9800F)"|[[File:MKT Icon Level-boostticket5.png|70px]] | ||
|width=10% style="background:linear-gradient(#F2E18F,#B9800F)"|[[File:MKT Icon Level-boostticket8.png|70px]] | |width=10% style="background:linear-gradient(#F2E18F,#B9800F)"|[[File:MKT Icon Level-boostticket8.png|70px]] | ||
|-style="color: #FFF" | |-style="color:#FFF" | ||
|style="background:linear-gradient(#864D00,#A26000); border-top:1px solid #B9800F;"|Normal kart {{Color | |style="background:linear-gradient(#864D00,#A26000); border-top:1px solid #B9800F;"|Normal kart {{Color link|#A1A1FF|level-boost ticket}} ×1 | ||
|style="background:linear-gradient(#864D00,#A26000); border-top:1px solid #B9800F;"|Super kart level-boost ticket ×1 | |style="background:linear-gradient(#864D00,#A26000); border-top:1px solid #B9800F;"|Super kart level-boost ticket ×1 | ||
|style="background:linear-gradient(#864D00,#A26000); border-top:1px solid #B9800F;"|High-End kart level-boost ticket ×1 | |style="background:linear-gradient(#864D00,#A26000); border-top:1px solid #B9800F;"|High-End kart level-boost ticket ×1 | ||
|-style="color: #FFF" | |-style="color:#FFF" | ||
|style="background:linear-gradient(#A26000,#C88512); border-top:1px solid #A26000;"|''Get 1st place in a race 10 times.'' | |style="background:linear-gradient(#A26000,#C88512); border-top:1px solid #A26000;"|''Get 1st place in a race 10 times.'' | ||
|style="background:linear-gradient(#A26000,#C88512); border-top:1px solid #A26000;"|''Get 1st place in a race 15 times.'' | |style="background:linear-gradient(#A26000,#C88512); border-top:1px solid #A26000;"|''Get 1st place in a race 15 times.'' | ||
| Line 548: | Line 545: | ||
|} | |} | ||
<br> | <br> | ||
{| align=center width=30% cellspacing=0 border=1 cellpadding=3 style="border-collapse:collapse; font-family:Arial; text-align:center" | {|align=center width=30% cellspacing=0 border=1 cellpadding=3 style="border-collapse:collapse;font-family:Arial;text-align:center" | ||
|- | |- | ||
!colspan=3 style="background: #C3F84E"|'''Kart Pro Challenges''' | !colspan=3 style="background:#C3F84E"|'''Kart Pro Challenges''' | ||
|-style="color: #000" | |-style="color:#000" | ||
|colspan=3 style="background: #C3F84E"|'''Three in a row reward:''' [[File:MKT Icon Coins 2.png|60px]] [[Coin|Coins]] ×500 | |colspan=3 style="background:#C3F84E"|'''Three in a row reward:''' [[File:MKT Icon Coins 2.png|60px]] [[Coin|Coins]] ×500 | ||
|-style="color: #000" | |-style="color:#000" | ||
|colspan=3 style="background: #C3F84E"|'''Completion reward:''' [[File:MKT Icon Ruby 2.png|70px]] [[Ruby|Rubies]] (depending on player's multiplayer grade) | |colspan=3 style="background:#C3F84E"|'''Completion reward:''' [[File:MKT Icon Ruby 2.png|70px]] [[Ruby|Rubies]] (depending on player's multiplayer grade) | ||
|-style="color:#FFF" | |||
|width=10% style="background:#2F5D1C"|[[File:MKT 006PB.png|70px]]<br>[[File:MKT Icon 1Ruby.png|15px]] | |||
|width=10% style="background:#2F5D1C"|[[File:MKT 007PB.png|70px]]<br>[[File:MKT Icon 1Ruby.png|15px]] | |||
|width=10% style="background:#2F5D1C"|[[File:MKT 008PB.png|70px]]<br>[[File:MKT Icon 1Ruby.png|15px]] | |||
|-style="color:#FFF" | |||
|style="background:#2F5D1C;border-top:1px solid #2F5D1C;"|''Join a multiplayer race.'' | |||
|style="background:#2F5D1C;border-top:1px solid #2F5D1C;"|''Join 3 multiplayer races.'' | |||
|style="background:#2F5D1C;border-top:1px solid #2F5D1C;"|''Join 5 multiplayer races.'' | |||
|-style="color:#FFF" | |||
|width=10% style="background:#2F5D1C"|[[File:MKT 011PB.png|70px]]<br>[[File:MKT Icon 1Ruby.png|15px]] | |||
|width=10% style="background:#2F5D1C"|[[File:MKT 013PB.png|70px]]<br>[[File:MKT Icon 1Ruby.png|15px]] [[File:MKT Icon 1Ruby.png|15px]] [[File:MKT Icon 1Ruby.png|15px]] | |||
|width=10% style="background:#2F5D1C"|[[File:MKT 012PB.png|70px]]<br>[[File:MKT Icon 1Ruby.png|15px]] [[File:MKT Icon 1Ruby.png|15px]] | |||
|-style="color: #FFF" | |-style="color: #FFF" | ||
| | |style="background:#2F5D1C;border-top:1px solid #2F5D1C;"|''Get 1 win in Kart Pro.'' | ||
| | |style="background:#2F5D1C;border-top:1px solid #2F5D1C;"|''Get 3 wins in a row in Kart Pro.'' | ||
| | |style="background:#2F5D1C;border-top:1px solid #2F5D1C;"|''Get 2 wins in a row in Kart Pro.'' | ||
|-style="color: #FFF" | |-style="color: #FFF" | ||
|style="background: #2F5D1C | |width=10% style="background:#2F5D1C"|[[File:MKT 005PB.png|70px]]<br>[[File:MKT Icon 1Ruby.png|15px]] | ||
|style="background: #2F5D1C | |width=10% style="background:#2F5D1C"|[[File:MKT 009PB.png|70px]]<br>[[File:MKT Icon 1Ruby.png|15px]] | ||
|style="background: #2F5D1C | |width=10% style="background:#2F5D1C"|[[File:MKT 010PB.png|70px]]<br>[[File:MKT Icon 1Ruby.png|15px]] | ||
|-style="color: #FFF" | |-style="color: #FFF" | ||
|style="background:#2F5D1C;border-top:1px solid #2F5D1C;"|''Join 10 multiplayer races.'' | |||
|style="background:#2F5D1C;border-top:1px solid #2F5D1C;"|''Get 3rd place or higher 3 times in a multiplayer race.'' | |||
|style="background:#2F5D1C;border-top:1px solid #2F5D1C;"|''Get 3rd place or higher 5 times in a multiplayer race.'' | |||
|style="background: #2F5D1C; border-top:1px solid #2F5D1C;"|''Join 10 multiplayer races.'' | |||
|style="background: #2F5D1C; border-top:1px solid #2F5D1C;"|''Get 3rd place or higher 3 times in a multiplayer race.'' | |||
|style="background: #2F5D1C; border-top:1px solid #2F5D1C;"|''Get 3rd place or higher 5 times in a multiplayer race.'' | |||
|} | |} | ||
<br> | <br> | ||
{|class="wikitable" style="margin:auto; text-align:center" width=30% | {|class="wikitable"style="margin:auto; text-align:center"width=30% | ||
!colspan=2|Total Points Challenge | !colspan=2|Total Points Challenge | ||
|- | |- | ||
| Line 621: | Line 618: | ||
===All-Clear Pipe=== | ===All-Clear Pipe=== | ||
The All-Clear Pipe randomly shot out one of the following regular High-End items. | The All-Clear Pipe randomly shot out one of the following regular High-End items. | ||
{|class="wikitable" style="margin:auto; text-align:center" | {|class="wikitable"style="margin:auto; text-align:center" | ||
!colspan=2|High-End items obtainable from the All-Clear Pipe during the Sydney Tour | !colspan=2|High-End items obtainable from the All-Clear Pipe during the Sydney Tour | ||
|- | |- | ||
| Line 636: | Line 633: | ||
===Sydney Pipe 1=== | ===Sydney Pipe 1=== | ||
{|class="wikitable" style="margin:auto; text-align:center" | {|class="wikitable"style="margin:auto;text-align:center" | ||
!colspan=16|Items obtained from a new Sydney Pipe 1 | !colspan=16|Items obtained from a new Sydney Pipe 1 | ||
|- | |- | ||
| Line 673: | Line 670: | ||
|} | |} | ||
<br> | <br> | ||
{|class="wikitable"style="margin:auto;text-align:center" | |||
{|class="wikitable" style="margin:auto; text-align:center" | |||
!Class | !Class | ||
!Parts | !Parts | ||
| Line 704: | Line 700: | ||
|- | |- | ||
!Super drivers | !Super drivers | ||
|[[Donkey Kong]], [[Toad]], [[Bowser]], [[Luigi]], [[Mario]], [[Princess Peach|Peach]], [[Yoshi]], [[Princess Daisy|Daisy]], [[Lakitu]], [[King Boo]], [[Toadette]], [[Bowser Jr.]], [[Waluigi]], [[Wario]], [[Rosalina]], [[Birdo]], [[Diddy Kong]], [[Hammer Bro]], [[Boomerang Bro]], [[Fire Bro]], [[Ice Bro]], [[Red Yoshi]], [[Black Shy Guy]], [[Pink Shy Guy]], [[Toad|Toad (Pit Crew)]], [[Monty Mole]], [[Birdo | |[[Donkey Kong]], [[Toad]], [[Bowser]], [[Luigi]], [[Mario]], [[Princess Peach|Peach]], [[Yoshi]], [[Princess Daisy|Daisy]], [[Lakitu]], [[King Boo]], [[Toadette]], [[Bowser Jr.]], [[Waluigi]], [[Wario]], [[Rosalina]], [[Birdo]], [[Diddy Kong]], [[Hammer Bro]], [[Boomerang Bro]], [[Fire Bro]], [[Ice Bro]], [[Red Yoshi]], [[Black Shy Guy]], [[Pink Shy Guy]], [[Toad|Toad (Pit Crew)]], [[Monty Mole]], [[Birdo|Birdo (Light Blue)]], [[Birdo|Birdo (Yellow)]], [[Roving Racers|Red Koopa (Freerunning)]] | ||
|0.3103% | |0.3103% | ||
|- | |- | ||
| Line 730: | Line 726: | ||
===Sydney Pipe 2=== | ===Sydney Pipe 2=== | ||
{|class="wikitable" style="margin:auto; text-align:center" | {|class="wikitable"style="margin:auto;text-align:center" | ||
!colspan=16|Items obtained from a new Sydney Pipe 2 | !colspan=16|Items obtained from a new Sydney Pipe 2 | ||
|- | |- | ||
| Line 767: | Line 763: | ||
|} | |} | ||
<br> | <br> | ||
{|class="wikitable"style="margin:auto;text-align:center" | |||
{|class="wikitable" style="margin:auto; text-align:center" | |||
!Class | !Class | ||
!Parts | !Parts | ||
| Line 798: | Line 793: | ||
|- | |- | ||
!Super drivers | !Super drivers | ||
|[[Donkey Kong]], [[Toad]], [[Bowser]], [[Luigi]], [[Mario]], [[Princess Peach|Peach]], [[Yoshi]], [[Princess Daisy|Daisy]], [[Lakitu]], [[King Boo]], [[Toadette]], [[Bowser Jr.]], [[Waluigi]], [[Wario]], [[Rosalina]], [[Birdo]], [[Diddy Kong]], [[Hammer Bro]], [[Boomerang Bro]], [[Fire Bro]], [[Ice Bro]], [[Red Yoshi]], [[Black Shy Guy]], [[Pink Shy Guy]], [[Toad|Toad (Pit Crew)]], [[Monty Mole]], [[Birdo | |[[Donkey Kong]], [[Toad]], [[Bowser]], [[Luigi]], [[Mario]], [[Princess Peach|Peach]], [[Yoshi]], [[Princess Daisy|Daisy]], [[Lakitu]], [[King Boo]], [[Toadette]], [[Bowser Jr.]], [[Waluigi]], [[Wario]], [[Rosalina]], [[Birdo]], [[Diddy Kong]], [[Hammer Bro]], [[Boomerang Bro]], [[Fire Bro]], [[Ice Bro]], [[Red Yoshi]], [[Black Shy Guy]], [[Pink Shy Guy]], [[Toad|Toad (Pit Crew)]], [[Monty Mole]], [[Birdo|Birdo (Light Blue)]], [[Birdo|Birdo (Yellow)]], [[Roving Racers|Red Koopa (Freerunning)]] | ||
|0.3103% | |0.3103% | ||
|- | |- | ||
| Line 824: | Line 819: | ||
===Ocean Pipe=== | ===Ocean Pipe=== | ||
{|class="wikitable" style="margin:auto; text-align:center" | {|class="wikitable"style="margin:auto;text-align:center" | ||
!colspan=16|Items obtained from a new Ocean Pipe | !colspan=16|Items obtained from a new Ocean Pipe | ||
|- | |- | ||
| Line 854: | Line 849: | ||
|} | |} | ||
<br> | <br> | ||
{|class="wikitable"style="margin:auto;text-align:center" | |||
{|class="wikitable" style="margin:auto; text-align:center" | |||
!Class | !Class | ||
!Parts | !Parts | ||
| Line 888: | Line 882: | ||
==Token Shop== | ==Token Shop== | ||
The limited-time event where [[event token]]s appeared began on April 21, 2021 and ended on May 4, 2021. In this tour, event tokens could be obtained by hitting other players with shells and eggs. | The limited-time event where [[event token]]s appeared began on April 21, 2021 and ended on May 4, 2021. In this tour, event tokens could be obtained by hitting other players with shells and eggs. | ||
{|class="wikitable"style="margin:auto;text-align:center"width=50% | |||
{|class="wikitable" style="margin:auto; text-align:center" width=50% | |||
!colspan=3|'''Token Shop''' (April 21, 2021 - May 4, 2021) | !colspan=3|'''Token Shop''' (April 21, 2021 - May 4, 2021) | ||
|- | |- | ||
| Line 935: | Line 928: | ||
==Tier Shop== | ==Tier Shop== | ||
The shop featured a variety of set and randomized items available for purchase. The item slots in the shop are unlocked based on the highest tier of players. | The shop featured a variety of set and randomized items available for purchase. The item slots in the shop are unlocked based on the highest tier of players. | ||
{|class="wikitable"style="margin:auto;text-align:center"width=50% | |||
{| class="wikitable" style="margin:auto; text-align:center" width=50% | |||
!colspan=3|Items available in Tier Shop (April 21, 2021 - April 27, 2021) | !colspan=3|Items available in Tier Shop (April 21, 2021 - April 27, 2021) | ||
|- | |- | ||
| Line 986: | Line 978: | ||
==Profiles== | ==Profiles== | ||
*'''''Mario Kart Tour'' Twitter:''' | *'''''Mario Kart Tour'' Twitter:''' | ||
**''"The Ninja Tour is wrapping up in {{color|#MarioKartTour | **''"The Ninja Tour is wrapping up in {{color|blue|#MarioKartTour}}. Next up is the Sydney Tour, featuring a brand-new city course! Looks like we received a photo from Sydney... Is that Baby Mario touring the city with Rosalina?''<ref>mariokarttourEN (April 16, 2021). [https://twitter.com/mariokarttourEN/status/1382941712172134401 ''Twitter'']. Retrieved April 16, 2021.</ref> | ||
**''"The sun shines on a beautiful bay in {{color|#MarioKartTour | **''"The sun shines on a beautiful bay in {{color|blue|#MarioKartTour}}... The new Sydney Sprint city course takes center stage in the Sydney Tour!"''<ref>mariokarttourEN (April 23, 2021). [https://twitter.com/mariokarttourEN/status/1385481060213919745 ''Twitter'']. Retrieved August 22, 2021.</ref> | ||
*'''Nintendo of Europe Twitter:''' | *'''Nintendo of Europe Twitter:''' | ||
**''"{{color|#MarioKartTour | **''"{{color|blue|#MarioKartTour}} is going down under! | ||
::''Strap in because the Sydney Tour is now on"''<ref>NintendoEurope (April 22, 2021). [https://twitter.com/NintendoEurope/status/1385186619200843776?s=19 ''Twitter'']. Retrieved April 22, 2021.</ref> | ::''Strap in because the Sydney Tour is now on"''<ref>NintendoEurope (April 22, 2021). [https://twitter.com/NintendoEurope/status/1385186619200843776?s=19 ''Twitter'']. Retrieved April 22, 2021.</ref> | ||
==Gallery== | |||
<gallery> | |||
MKT Sydney Tour artwork.jpg|Promotional artwork for the tour | |||
</gallery> | |||
==Names in other languages== | ==Names in other languages== | ||
{{foreign names | {{foreign names | ||
| | |Jpn=シドニーツアー | ||
| | |JpnR=Shidonī Tsuā | ||
| | |JpnM=Sydney Tour | ||
|Spa=Temporada de Sídney | |Spa=Temporada de Sídney | ||
|SpaM=Sydney Season | |SpaM=Sydney Season | ||
Latest revision as of 17:03, January 7, 2025
| Sydney Tour | |
|---|---|
| |
| Start date | April 20, 2021 11:00 p.m. (PT)[?] |
| End date | May 4, 2021 10:59 p.m. (PT)[?] |
| Number of cups | 12 |
| Ranked cups | Toadette Cup (week 1) Larry Cup (week 2) |
| Coin Rush course | Sydney Sprint |
| << List of tours >> | |
The Sydney Tour was the forty-second tour of Mario Kart Tour, which began on April 21, 2021 and ended on May 4, 2021. True to its name, the tour introduced a new course based in Sydney, Australia called Sydney Sprint, which was hinted at in two previous tours, the Marine Tour (twenty-one tours prior) and the 2021 Ninja Tour (the previous tour), through the SNES Koopa Troopa Beach 2 Glider Challenge, which featured a boat designed like one of Sydney's famous ferries. It also introduced a koala-themed variant of Baby Mario for the first week's spotlight while Mario (Swimwear) and Rosalina (Swimwear) returned as part of the spotlight for the second week. The menu's background featured the Sydney Harbour Bridge as the landmark for this tour. This was the first and only tour to have its trailer be released during the tour instead of before or at the start of the tour.
This was the last tour to feature the fourth set of Expert Challenges, which started in the Peach vs. Daisy Tour.
Starting with this tour, the Toe-Bean Balloons glider became available in regular tour pipes.
This tour also brings back the vs. Mega Wendy bonus challenge from the London Tour (which was also used in the Peach Tour), making it the first Vs. Mega bonus challenge to appear in three tours.
Spotlights[edit]
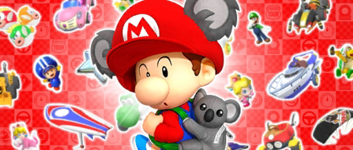
| Sydney Pipe 1 April 20, 2021, 11:00 p.m. (PT) – May 4, 2021 10:59 p.m. (PT) |
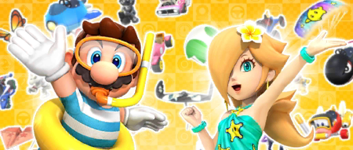
Sydney Pipe 2 April 27, 2021, 11:00 p.m. (PT) – May 4, 2021, 10:59 p.m. (PT) | ||||
|
| ||||
| Driver | Kart | Glider | Drivers | Karts | Gliders |
|---|---|---|---|---|---|

|
 
|
||||
| Baby Mario (Koala) | Jet Cruiser | Surf Master | Rosalina (Swimwear) and Mario (Swimwear) | Blue Soda and Cheep Snorkel | Luma Parafoil and Blooper Wingtip |
Special pipe[edit]
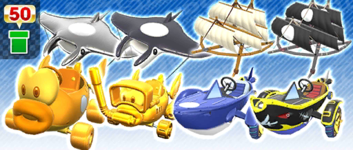
| Ocean Pipe April 24, 2021, 11:00 p.m. (PT) – April 29, 2021, 10:59 p.m. (PT) | ||
| ||
| High-End karts | High-End gliders | |
|---|---|---|
| Gold Cheep Charger, Gold Cheep Snorkel, Sushi Racer, and Pirate Sushi Racer | Silver Manta Glider, Manta Glider, Great Sail, and Black Great Sail | |
- Names in other languages
| Language | Name | Meaning | Notes |
|---|---|---|---|
| Japanese | オーシャンドカン[?] Ōshan Dokan |
Ocean Pipe | |
| German | Ozean-Röhre[?] | Ocean Pipe |
Cups[edit]
Toadette Cup Ranked cup (week 1) |
Sydney Sprint |
SNES Mario Circuit 3 |
SNES Koopa Troopa Beach 2T |
Goomba Takedown | ||||
 3DS Cheep Cheep Lagoon |
Luigi | |||||||
Baby Mario Cup |
N64 Koopa Troopa Beach |
RMX Choco Island 2R |
3DS Mario Circuit |
Ring Race | ||||
 Sydney Sprint |
Baby Mario | |||||||
Larry Cup Ranked cup (week 2) |
3DS Rosalina's Ice World T |
Sydney Sprint T |
3DS Cheep Cheep Lagoon R/T |
Glider Challenge | ||||
 SNES Choco Island 2 |
Daisy | |||||||
Lakitu Cup |
SNES Mario Circuit 3T |
3DS Mario Circuit R |
Wii DK Summit R |
Time Trial | ||||
 3DS Neo Bowser City R |
Ludwig | |||||||
Diddy Kong Cup |
N64 Koopa Troopa Beach T |
Sydney Sprint R |
DS Luigi's Mansion |
Steer Clear of Obstacles | ||||
 SNES Mario Circuit 3 |
Larry | |||||||
Bowser Jr. Cup |
3DS Neo Bowser City T |
SNES Choco Island 2R/T |
3DS Rosalina's Ice World R |
Snap a Photo | ||||
 Sydney Sprint T |
Baby Mario (Koala) | |||||||
Monty Mole Cup |
SNES Koopa Troopa Beach 2 |
RMX Choco Island 2T |
Sydney Sprint |
Break Item Boxes | ||||
 N64 Koopa Troopa Beach |
Rosalina | |||||||
Baby Peach Cup |
Wii DK Summit T |
DS Luigi's Mansion T |
N64 Koopa Troopa Beach R |
Smash Small Dry Bones | ||||
 3DS Cheep Cheep Lagoon |
Ludwig | |||||||
Waluigi Cup |
3DS Neo Bowser City R |
SNES Mario Circuit 3R |
Sydney Sprint T |
Combo Attack | ||||
 DS Luigi's Mansion T |
Luigi | |||||||
Wario Cup |
SNES Koopa Troopa Beach 2R |
3DS Rosalina's Ice World |
3DS Mario Circuit T |
Time Trial | ||||
 RMX Choco Island 2 |
Donkey Kong | |||||||
Pauline Cup |
Sydney Sprint R |
Wii DK Summit |
3DS Neo Bowser City |
Do Jump Boosts | ||||
 SNES Koopa Troopa Beach 2 |
Roy | |||||||
Luigi Cup |
DS Luigi's Mansion R |
RMX Choco Island 2 |
Sydney Sprint R/T |
Vs. Mega Wendy | ||||
 3DS Mario Circuit |
Any Character | |||||||
Signature kart sets[edit]
Drivers with a corresponding cup were bumped one rank up in every course of their cup.
| Cup | Driver | Kart | Glider |
|---|---|---|---|
| Second course of every cup | |||
| Third course of every cup | |||
| — | — | ||
| — | — | ||
| — | — | ||
| — | — | ||
| — | — | ||
| — | — | ||
| — | — | ||
| — | — | ||
| — | — | ||
| — | — | ||
| — | — | ||
| — | — |
Rewards[edit]
Gold cells indicate rewards that are exclusive to Gold Pass members.
| Piranha Plant Parafoil | BBIA Parafoil | Biddybuggy | Rosalina | Baby Mario | Blue Royale | Cloud Glider |
| Grand Stars | 15 | 30 | 45 | 60 | 80 | 100 | 120 | 130 | 140 | 150 | 160 | 170 | 180 | 190 | 200 | 210 | 215 | 220 | 225 | 230 | 235 | 240 | 245 | 250 | 255 | Total | Grand total | |
|---|---|---|---|---|---|---|---|---|---|---|---|---|---|---|---|---|---|---|---|---|---|---|---|---|---|---|---|---|
| Free pipe launch | 1 | 1 | 1 | 1 | 4 | |||||||||||||||||||||||
| Coin | 100 | 100 | 100 | 100 | 100 | 100 | 100 | 700 | 1800 | |||||||||||||||||||
| 300 | 300 | 500 | 1100 | |||||||||||||||||||||||||
| Rubies | 5 | 3 | 3 | 3 | 3 | 3 | 20 | 50 | ||||||||||||||||||||
| 5 | 5 | 5 | 5 | 5 | 5 | 30 | ||||||||||||||||||||||
| Item tickets | 2 | 2 | 2 | 2 | 2 | 10 | 25 | |||||||||||||||||||||
| 2 | 2 | 2 | 3 | 3 | 3 | 15 | ||||||||||||||||||||||
| Star tickets | 1 | 1 | 2 | 3 | ||||||||||||||||||||||||
| 1 | 1 | |||||||||||||||||||||||||||
| Point-boost tickets | 1 | 1 | 1 | 3 | 5 | |||||||||||||||||||||||
| 1 | 1 | 2 | ||||||||||||||||||||||||||
| 1 | 1 | 1 | 3 | 5 | ||||||||||||||||||||||||
| 1 | 1 | 2 | ||||||||||||||||||||||||||
| 1 | 1 | 1 | 3 | 5 | ||||||||||||||||||||||||
| 1 | 1 | 2 | ||||||||||||||||||||||||||
| Level-boost ticket | 3 | 12 | ||||||||||||||||||||||||||
| 9 | ||||||||||||||||||||||||||||
New content[edit]
Drivers[edit]
Karts[edit]
Gliders[edit]
Courses[edit]
Sydney Sprint (N, R, T, R/T)
Paid banners[edit]
| Name | Availability | Cost | Contents | Banner image |
|---|---|---|---|---|
| Value Pack | April 21, 2021 – May 4, 2021 | US$1.99 |
|

|
| Toe-Bean Balloons Pack | April 21, 2021 – May 4, 2021 | US$39.99 |
|
|
| Starry Great Sail Pack | April 21, 2021 – May 4, 2021 | US$19.99 |
|
|
| Pink Wing Pack | April 21, 2021 – May 4, 2021 | US$39.99 | 
| |
| Steel Driver Pack | April 28, 2021 – May 4, 2021 | US$19.99 |
|
|
| Blizzard Balloons Pack | April 28, 2021 – May 4, 2021 | US$39.99 |
|
|
Challenges[edit]
| Tour Challenges 1 | Tour Challenges 2 | Gold Challenges | ||||||||
|---|---|---|---|---|---|---|---|---|---|---|
| Completion reward: |
Completion reward: |
Completion reward: | ||||||||
 |
 |
 |
 |
 |
 |
 |
 |
 | ||
| Do 5 Rocket Starts. | Land 5 hits with Bananas. | Get a Fantastic combo a total of 5 times. | Do 20 Jump Boosts. | Land 5 hits with Red Shells. | Race in auto mode. | Do a total of 5 Slipstream boosts. | Use 15 Mushrooms. | Get 1st place in a 200cc race 3 times. | ||
 |
 |
 |
 |
 |
 |
 |
 |
 | ||
| Land a hit with a Blooper. | Activate Frenzy mode 5 times using a driver with a hat. | Get 1st place a total of 5 times on a Sydney course. | Use point-boost tickets 3 times. | Cause opponents to crash a total of 10 times on a Sydney course. | Get an item from the Tier Shop. | Use a level-boost ticket. | Activate Frenzy mode 5 times on a Sydney course. | Cause opponents to crash 3 times while gliding. | ||
 |
 |
 |
 |
 |
 |
 |
 |
 | ||
| Do 5 Ultra Mini-Turbo boosts using a driver wearing earrings. | Earn a total score of 20,000 or higher in the Toadette Cup. | Take out 3 Goombas. | Earn a score of 9,000 or higher using a driver wearing gloves. | Earn a total score of 20,000 or higher in the Luigi Cup. | Race in every course of every cup, including bonus challenges. | Do 100 Jump Boosts on a Sydney course. | Earn a score of 10,000 or higher on 5 courses. | Send Greeting Coins to a friend. | ||
| Premium Challenges | ||
|---|---|---|
| Cost: US$4.99 | ||
| Three in a row reward: | ||
| Completion reward: | ||

|
||
| Lakitu ×1 | Red Streamliner ×1 | Droplet Glider ×1 |
| Land 5 hits with Green Shells. | Land 10 hits with Bananas. | Land 10 hits with Bob-ombs. |
| Coins ×3,000 | Rubies ×10 | Kart point-boost ticket ×3 |
| Do 50 Jump Boosts. | Participate in a race. | Do 100 Mini-Turbo boosts. |
| Normal kart level-boost ticket ×1 | Super kart level-boost ticket ×1 | High-End kart level-boost ticket ×1 |
| Get 1st place in a race 10 times. | Get 1st place in a race 15 times. | Get 1st place in a race 20 times. |
| Kart Pro Challenges | ||
|---|---|---|
| Three in a row reward: | ||
| Completion reward: | ||
 |
 |
 |
| Join a multiplayer race. | Join 3 multiplayer races. | Join 5 multiplayer races. |
 |
 |
 |
| Get 1 win in Kart Pro. | Get 3 wins in a row in Kart Pro. | Get 2 wins in a row in Kart Pro. |
 |
 |
 |
| Join 10 multiplayer races. | Get 3rd place or higher 3 times in a multiplayer race. | Get 3rd place or higher 5 times in a multiplayer race. |
| Total Points Challenge | |
|---|---|
| Points | Rewards |
| 600,000 |
|
| 550,000 |
|
| 500,000 |
|
| 400,000 |
|
| 300,000 | |
| 150,000 | |
Initial pipe appearance rates[edit]
All-Clear Pipe[edit]
The All-Clear Pipe randomly shot out one of the following regular High-End items.
| High-End items obtainable from the All-Clear Pipe during the Sydney Tour | |
|---|---|
| High-End drivers | Dry Bowser, Metal Mario, Pink Gold Peach, Cat Peach, Pauline, King Bob-omb, Peachette, Black Yoshi, Funky Kong, Ice Mario |
| High-End karts | B Dasher, Badwagon, Cat Cruiser, Sports Coupe, Circuit Special, Bruiser, Wild Wing, Bumble V, Steel Driver, Macharon, Wildfire Flyer, Red B Dasher, P-Wing, Green Apple Kart, Poison Apple Kart, Dozer Dasher, Banana Master, Offroader, Head Honcho, Pink Wing, Koopa King, Cact-X, Sushi Racer, Green Circuit, Crawly Kart, Cact-Ice |
| High-End gliders | Swooper, Cloud Glider, Gold Glider, Pink Gold Paper Glider, Dry Bowser Umbrella, Blizzard Balloons, Starchute, Silver Starchute, Butterfly Wings, Butterfly Sunset, Crimson Crane, Strawberry Donut, Heart Balloons, Great Sail, Toe-Bean Balloons, Tropical Glider, 8-Bit Star, Silver Bells, Cheep Cheep Masks |
Sydney Pipe 1[edit]
| Items obtained from a new Sydney Pipe 1 | |||||||||||||||
|---|---|---|---|---|---|---|---|---|---|---|---|---|---|---|---|
| Item | Normal |
Super |
High-End |
Featured High-End | |||||||||||
| Driver | Kart | Glider | Driver | Kart | Glider | Driver | Kart | Glider | Driver | Kart | Glider | ||||
| Amount | 32 | 26 | 16 | 9 | 7 | 4 | 1 | 1 | 1 | 1 | 1 | 1 | |||
Sydney Pipe 2[edit]
| Items obtained from a new Sydney Pipe 2 | |||||||||||||||
|---|---|---|---|---|---|---|---|---|---|---|---|---|---|---|---|
| Item | Normal |
Super |
High-End |
Featured High-End | |||||||||||
| Driver | Kart | Glider | Driver | Kart | Glider | Driver | Kart | Glider | Driver | Kart | Glider | ||||
| Amount | 31 | 25 | 15 | 9 | 7 | 4 | 1 | 1 | 1 | 2 | 2 | 2 | |||
Ocean Pipe[edit]
| Items obtained from a new Ocean Pipe | |||||||||||||||
|---|---|---|---|---|---|---|---|---|---|---|---|---|---|---|---|
| Item | Normal |
Super |
High-End | ||||||||||||
| Driver | Kart | Glider | Driver | Kart | Glider | Driver | Kart | Glider | |||||||
| Amount | 0 | 20 | 15 | 0 | 7 | 4 | 0 | 2 | 2 | ||||||
Token Shop[edit]
The limited-time event where event tokens appeared began on April 21, 2021 and ended on May 4, 2021. In this tour, event tokens could be obtained by hitting other players with shells and eggs.
| Token Shop (April 21, 2021 - May 4, 2021) | ||
|---|---|---|

|
||
| Bowser Jr. Amount: 1 |
Koopa Clown Amount: 1 |
Bob-omb Parafoil Amount: 1 |
| Ruby ×3 Amount: 5 |
Coin ×500 Amount: 10 |
Coin Rush ticket Amount: 1 |
| Point-boost ticket (driver) Amount: 5 |
Point-boost ticket (kart) Amount: 5 |
Point-boost ticket (glider) Amount: 5 |
| Item ticket Amount: 10 |
Level-boost ticket (Normal kart) Amount: 3 |
Level-boost ticket (Super kart) Amount: 1 |
| Star ticket Amount: 5 |
Points-cap ticket (Normal kart) Amount: 1 |
Points-cap ticket (Super kart) Amount: 1 |
Tier Shop[edit]
The shop featured a variety of set and randomized items available for purchase. The item slots in the shop are unlocked based on the highest tier of players.
| Items available in Tier Shop (April 21, 2021 - April 27, 2021) | ||
|---|---|---|

|
||
| Toadette Amount: 1 |
Streamliner Amount: 1 |
Butterfly Sunset Amount: 1 |
| Items available in Tier Shop (April 28, 2021 - May 4, 2021) | ||

|
||
| Koopa Troopa Amount: 1 |
Poison Apple Kart Amount: 1 |
Blue Flower Glider Amount: 1 |
| Items available in Tier Shop (April 21, 2021 - May 4, 2021) | ||
| Level-boost ticket (Normal) Amount: 3 per week |
Level-boost ticket (Normal) Amount: 3 per week |
Level-boost ticket (Normal) Amount: 3 per week |
OR |
OR |
OR |
| Level-boost ticket (Super) Amount: 2 per week OR Level-boost ticket (High-End) Amount: 1 per week |
Level-boost ticket (Super) Amount: 2 per week OR Level-boost ticket (High-End) Amount: 1 per week |
Level-boost ticket (Super) Amount: 2 per week OR Level-boost ticket (High-End) Amount: 1 per week |
OR OR |
OR OR |
OR OR |
| Points-cap ticket (Normal) Amount: 1 per week |
Points-cap ticket (Super) Amount: 1 per week |
Points-cap ticket (High-End) Amount: 1 per week |
Profiles[edit]
- Mario Kart Tour Twitter:
- "The Ninja Tour is wrapping up in #MarioKartTour. Next up is the Sydney Tour, featuring a brand-new city course! Looks like we received a photo from Sydney... Is that Baby Mario touring the city with Rosalina?[1]
- "The sun shines on a beautiful bay in #MarioKartTour... The new Sydney Sprint city course takes center stage in the Sydney Tour!"[2]
- Nintendo of Europe Twitter:
- "#MarioKartTour is going down under!
- Strap in because the Sydney Tour is now on"[3]
Gallery[edit]
Names in other languages[edit]
| Language | Name | Meaning | Notes |
|---|---|---|---|
| Japanese | シドニーツアー[?] Shidonī Tsuā |
Sydney Tour | |
| Chinese (simplified) | 悉尼巡回赛[?] Xīní Xúnhuísài |
Sydney Tour | |
| Chinese (traditional) | 雪梨巡迴賽[?] Xuělí Xúnhuísài |
Sydney Tour | |
| French | Saison de Sydney[?] | Sydney Season | |
| German | Sydney-Tour-Saison[?] | Sydney Tour Season | |
| Italian | Tour di Sydney[?] | Sydney Tour | |
| Korean | 시드니 투어[?] Sideuni Tueo |
Sydney Tour | |
| Portuguese | Temporada de Sydney[?] | Sydney Season | |
| Spanish | Temporada de Sídney[?] | Sydney Season |
Trivia[edit]
- In the Monty Mole Cup and Pauline Cup, Sydney Sprint depicted Rosalina (Swimwear) and Sydney Sprint R depicted Mario (Swimwear) on the thumbnails, although they are only treated as favored courses.

