Anniversary Tour (2022): Difference between revisions
No edit summary |
m (Text replacement - "(\| *)Jap([RMCN\d]* *=)" to "$1Jpn$2") |
||
| (89 intermediate revisions by 29 users not shown) | |||
| Line 1: | Line 1: | ||
{{tour infobox | {{tour infobox | ||
|title=Anniversary Tour | |title=Anniversary Tour | ||
| Line 7: | Line 5: | ||
|end=October 4, 2022<br>10:59 p.m. (PT) | |end=October 4, 2022<br>10:59 p.m. (PT) | ||
|cups=12 | |cups=12 | ||
|rank=[[Dixie Kong Cup]] (week 1) | |rank=[[Dixie Kong Cup]] (week 1)<br>[[Metal Mario Cup]] (week 2) | ||
|coin=[[Tour Tokyo Blur|Tokyo Blur]] | |coin=[[Tour Tokyo Blur|Tokyo Blur]] | ||
|before=[[Mario vs. Luigi Tour (2022)|<<]] | |before=[[Mario vs. Luigi Tour (2022)|<<]] | ||
|after= | |after=[[Battle Tour|>>]] | ||
}} | }} | ||
The '''Anniversary Tour''' | The '''Anniversary Tour''' was the seventy-ninth tour of ''[[Mario Kart Tour]]'', which began on September 21, 2022 and ended on October 4, 2022. This tour celebrated three years since the release of ''Mario Kart Tour'' on September 25, 2019; however, unlike the [[1st Anniversary Tour|1st]] and [[2nd Anniversary Tour]]s, this tour's name did not contain a number representing the anniversary it celebrated. | ||
This tour | This tour marked the end of the two-tour event celebrating the third anniversary of ''Mario Kart Tour'' that started in the [[Mario vs. Luigi Tour (2022)|previous tour]]. This tour featured an upgraded [[#Token Shop|Token Shop]] that included items like [[Metal Mario]], [[Pink Gold Peach]], the [[Wild Wing]], and three golden pipes. This tour also introduced the second set of two [[List of challenge cards in Mario Kart Tour#3rd Anniversary Challenges|3rd Anniversary Challenges]] cards in addition to continuing the [[#3 Year Anniv. Log-In Bonus|3 Year Anniv. Log-In Bonus]] and the 3rd Anniversary Challenges 1 card from the previous tour.<ref>@mariokarttourEN (September 7, 2022). [https://twitter.com/mariokarttourEN/status/1567438522092486657 "''#MarioKartTour will soon reach its 3rd anniversary since release! Some events to express our gratitude to everyone and to celebrate the 3rd anniversary have now begun and will go on for two tours in a row! Check the image for details!''"] ''Twitter''. Retrieved September 12, 2022.</ref> | ||
Like the 2nd Anniversary Tour and [[Metropolitan Tour]], only [[New course|city courses]] | Like the 2nd Anniversary Tour and [[Metropolitan Tour]], only [[New course|city courses]] appeared in the tour. This tour also introduced new routes for both [[Tour Sydney Sprint|Sydney Sprint]] and [[Tour Berlin Byways|Berlin Byways]], named Sydney Sprint 3 and Berlin Byways 3 respectively, the former of which was previously seen in the course's appearance in the ''[[Mario Kart 8 Deluxe – Booster Course Pass|Booster Course Pass]]'' for ''[[Mario Kart 8 Deluxe]]''. It also introduced the R/T variants of both [[Tour Amsterdam Drift|Amsterdam Drift 2]] and [[Tour Singapore Speedway|Singapore Speedway 2]], which debuted in the Metropolitan Tour and [[Ocean Tour]], respectively. With the introduction of these courses, this was the first tour since the [[Samurai Tour]] thirteen tours prior to introduce new R/T variants, the first tour in the game to introduce the R/T variants of multiple city courses, and the first tour since the [[Ice Tour]] seventy tours prior to introduce both multiple new courses and multiple R/T variants simultaneously. It also features the return of [[Tour Tokyo Blur|Tokyo Blur]], Berlin Byways 2, [[Tour Los Angeles Laps|Los Angeles Laps 3]], and Sydney Sprint 2. This was also the only tour to feature the T variants of Berlin Byways 3 and Sydney Sprint 3. | ||
Despite the new courses not being related to [[London]] or Britain, and the tour not including returning [[London Loop]] tracks, the new vehicles are a variant of the [[Double-Decker]] and a kart based on a {{wp|Hackney carriage}}, in addition to a new variant of [[Mario]], where he is in his [[Crazy Cap#King's Crown|King's Crown]] and [[Crazy Cap#King's Outfit|King's Outfit]] from ''[[Super Mario Odyssey]]''. | Despite the new courses not being related to [[London]] or Britain, and the tour not including returning [[Tour London Loop|London Loop]] tracks, the new vehicles are a variant of the [[Double-Decker]] and a kart based on a {{wp|Hackney carriage}}, in addition to a new variant of [[Mario]], where he is in his [[Crazy Cap#King's Crown|King's Crown]] and [[Crazy Cap#King's Outfit|King's Outfit]] from ''[[Super Mario Odyssey]]''. | ||
This | This was the last tour to feature the regular week pipes which would be fired with [[Ruby|rubies]] and contain spotlight items, as they were removed after this tour in favor of a Spotlight Shop that was implemented in the [[Battle Tour|following tour]]. In addition to the removal of ruby pipes, this was the last tour where commemorative items and the spotlight items from the first and second week were raised to a higher shelf on the first, second, and third course of every cup, respectively, restricting shelf boosts after this tour to driver cups and the first course in a cup for [[Mii|Mii Racing Suits]]. This was also the last tour to have only twelve cups as the next tour would have fifteen. | ||
This tour's [[Coin Rush (Mario Kart Tour)|Coin Rush]] course | This tour's [[Coin Rush (Mario Kart Tour)|Coin Rush]] course was Tokyo Blur, and the menu's background featured the {{wp|Sydney Harbour Bridge}} as the landmark for this tour, which was reused from the [[Sydney Tour (April–May 2021)|April–May 2021]] and [[Sydney Tour (September 2021)|September 2021 Sydney Tours]]. | ||
Despite the tenth set of [[List of challenge cards in Mario Kart Tour#Expert Challenges|Expert Challenges]] ending in the last tour, the eleventh set was not made available at the start of this tour | Despite the tenth set of [[List of challenge cards in Mario Kart Tour#Expert Challenges|Expert Challenges]] ending in the last tour, the eleventh set was not made available at the start of this tour and was instead made available at the start of the Battle Tour. | ||
Starting from this tour, the [[Platinum Taxi]] and [[Clanky Kart]] are available in regular tour pipes, including the All-Clear Pipe. | Starting from this tour, the [[Platinum Taxi]] and [[Clanky Kart]] are available in regular tour pipes, including the All-Clear Pipe. | ||
| Line 32: | Line 30: | ||
{| align=center width=75% cellspacing=0 border=1 cellpadding=3 style="border-collapse:collapse; font-family:Arial; text-align:center" | {| align=center width=75% cellspacing=0 border=1 cellpadding=3 style="border-collapse:collapse; font-family:Arial; text-align:center" | ||
|-style="background: #89A" | |-style="background: #89A" | ||
|colspan=3|'''Anniversary Pipe 1'''<br>September 20, 2022, 11:00 p.m. (PT) – <br>October | |colspan=3|'''Anniversary Pipe 1'''<br>September 20, 2022, 11:00 p.m. (PT) – <br>October 4, 2022, 10:59 p.m. (PT) | ||
|colspan=3|'''Anniversary Pipe 2'''<br>September 27, 2022, 11:00 p.m. (PT) – <br>October | |colspan=3|'''Anniversary Pipe 2'''<br>September 27, 2022, 11:00 p.m. (PT) – <br>October 4, 2022, 10:59 p.m. (PT) | ||
|- | |- | ||
|colspan=3|[[File:MKT Tour79 AnniversaryPipe1.png|x150px]] | |colspan=3|[[File:MKT Tour79 AnniversaryPipe1.png|x150px]] | ||
| Line 45: | Line 43: | ||
! style="width: 16.7%;"|Gliders | ! style="width: 16.7%;"|Gliders | ||
|- | |- | ||
|[[File:MKT Artwork | |[[File:MKT Artwork MarioHakama.png|120x120px]][[File:MKT Artwork YoshiKangaroo.png|120x120px]][[File:MKT Artwork LuigiVacation.png|120x120px]] | ||
|[[File:MKT Icon GoldDoubleDecker.png|110x110px]][[File:MKT Icon KabukiDasher.png|110x110px]][[File:MKT Icon TropicalTruck.png|110x110px]] | |[[File:MKT Icon GoldDoubleDecker.png|110x110px]][[File:MKT Icon KabukiDasher.png|110x110px]][[File:MKT Icon TropicalTruck.png|110x110px]] | ||
|[[File:MKT Icon GoldCloudBalloons.png|110x110px]][[File:MKT Icon WhiteWavesOrigamiGlider.png|110x110px]][[File:MKT Icon SilverSurfMaster.png|110x110px]] | |[[File:MKT Icon GoldCloudBalloons.png|110x110px]][[File:MKT Icon WhiteWavesOrigamiGlider.png|110x110px]][[File:MKT Icon SilverSurfMaster.png|110x110px]] | ||
|[[File:MKT Artwork | |[[File:MKT Artwork RosalinaVolendam.png|110x110px]][[File:MKT Artwork LuigiLederhosen.png|110x110px]][[File:MKT Artwork MarioBaseball.png|110x110px]] | ||
|[[File:MKT Icon BlackCarriage.png|110x110px]][[File:MKT Icon PinchHitter.png|110x110px]][[File:MKT Icon FlowerKart.png|110x110px]] | |[[File:MKT Icon BlackCarriage.png|110x110px]][[File:MKT Icon PinchHitter.png|110x110px]][[File:MKT Icon FlowerKart.png|110x110px]] | ||
|[[File:MKT Icon PretzelGlider.png|110x110px]][[File:MKT Icon HomeFieldGlider.png|110x110px]][[File:MKT Icon TulipCorsage.png|110x110px]] | |[[File:MKT Icon PretzelGlider.png|110x110px]][[File:MKT Icon HomeFieldGlider.png|110x110px]][[File:MKT Icon TulipCorsage.png|110x110px]] | ||
|- | |- | ||
|[[ | |[[Mario|Mario (Hakama)]], [[Yoshi|Yoshi (Kangaroo)]] and [[Luigi|Luigi (Vacation)]] | ||
|[[Gold Double-Decker]], [[Kabuki Dasher]], and [[Tropical Truck]] | |[[Gold Double-Decker]], [[Kabuki Dasher]], and [[Tropical Truck]] | ||
|[[Gold Cloud Balloons]], [[White Waves Origami Glider]], and [[Silver Surf Master]] | |[[Gold Cloud Balloons]], [[White Waves Origami Glider]], and [[Silver Surf Master]] | ||
|[[ | |[[Rosalina|Rosalina (Volendam)]], [[Luigi|Luigi (Lederhosen)]] and [[Mario|Mario (Baseball)]] | ||
|[[Black Carriage]], [[Pinch Hitter]], and [[Flower Kart]] | |[[Black Carriage]], [[Pinch Hitter]], and [[Flower Kart]] | ||
|[[Pretzel Glider]], [[Home-Field Glider]], and [[Tulip Corsage]] | |[[Pretzel Glider]], [[Home-Field Glider]], and [[Tulip Corsage]] | ||
| Line 63: | Line 61: | ||
{| align=center width=80% cellspacing=0 border=1 cellpadding=3 style="border-collapse:collapse; font-family:Arial; text-align:center" | {| align=center width=80% cellspacing=0 border=1 cellpadding=3 style="border-collapse:collapse; font-family:Arial; text-align:center" | ||
|-style="background: #89A" | |-style="background: #89A" | ||
|'''Mario Pipe'''<br> | |'''Mario Pipe'''<br>September 24, 2022, 11:00 p.m. (PT) – <br>October 4, 2022, 10:59 p.m. (PT) | ||
|'''Peach & Daisy Pipe'''<br> | |'''Peach & Daisy Pipe'''<br>September 24, 2022, 11:00 p.m. (PT) – <br>October 4, 2022, 10:59 p.m. (PT) | ||
|- | |- | ||
|[[File:MKT Tour79 MarioPipe.png|x150px]] | |[[File:MKT Tour79 MarioPipe.png|x150px]] | ||
| Line 76: | Line 74: | ||
|- | |- | ||
|[[Mario|Mario (Swimwear)]], [[Mario|Mario (Musician)]], [[Mario|Mario (Chef)]], [[Mario|Mario (King)]], [[Mario|Mario (SNES)]], [[Mario|Mario (Aviator)]], [[Mario|Mario (Satellaview)]], [[Mario|Mario (Sunshine)]], [[Penguin Mario]], [[Mario|Mario (Racing)]], [[Tanooki Mario]], [[Mario|Mario (Happi)]], [[Mario|Mario (Golf)]], [[Mario|Mario (Tuxedo)]], and [[Cat Mario]] | |[[Mario|Mario (Swimwear)]], [[Mario|Mario (Musician)]], [[Mario|Mario (Chef)]], [[Mario|Mario (King)]], [[Mario|Mario (SNES)]], [[Mario|Mario (Aviator)]], [[Mario|Mario (Satellaview)]], [[Mario|Mario (Sunshine)]], [[Penguin Mario]], [[Mario|Mario (Racing)]], [[Tanooki Mario]], [[Mario|Mario (Happi)]], [[Mario|Mario (Golf)]], [[Mario|Mario (Tuxedo)]], and [[Cat Mario]] | ||
|[[Princess Peach|Peach (Wintertime)]], [[Princess Peach|Peach (Wedding)]], [[Princess Peach|Peach (Explorer)]], [[Princess Peach|Dr. Peach]], [[Princess Peach|Peach (Yukata)]], [[Princess Peach|Peach (Vacation)]], [[Princess Peach|Peach (Kimono)]], [[Princess Peach|Peach (Happi)]], [[Princess Daisy|Daisy (Holiday Cheer)]], [[Princess Daisy|Daisy (Swimwear)]], [[Princess Daisy|Daisy (Farmer)]], [[Princess Daisy|Daisy (Thai Dress)]], [[Princess Daisy|Daisy (Sailor)]], [[Princess Daisy|Daisy (Yukata)]] | |[[Princess Peach|Peach (Wintertime)]], [[Princess Peach|Peach (Wedding)]], [[Princess Peach|Peach (Explorer)]], [[Princess Peach|Dr. Peach]], [[Princess Peach|Peach (Yukata)]], [[Princess Peach|Peach (Vacation)]], [[Princess Peach|Peach (Kimono)]], [[Princess Peach|Peach (Happi)]], [[Princess Daisy|Daisy (Holiday Cheer)]], [[Princess Daisy|Daisy (Swimwear)]], [[Princess Daisy|Daisy (Farmer)]], [[Princess Daisy|Daisy (Thai Dress)]], [[Princess Daisy|Daisy (Sailor)]], [[Princess Daisy|Daisy (Yukata)]] and [[Princess Daisy|Daisy (Fairy)]] | ||
|} | |} | ||
;Names in other languages | |||
;;Mario Pipe | |||
{{foreign names | |||
|Jpn=マリオドカン | |||
|JpnR=Mario Dokan | |||
|JpnM=Mario Pipe | |||
|ChiS=马力欧水管 | |||
|ChiSR=Mǎlìōu Shuǐguǎn | |||
|ChiSM=Mario Pipe | |||
|ChiT=瑪利歐水管 | |||
|ChiTR=Mǎlìōu Shuǐguǎn | |||
|ChiTM=Mario Pipe | |||
|Fre=Tuyau de Mario | |||
|FreM=Mario Pipe | |||
|Ger=Mario-Röhre | |||
|GerM=Mario Pipe | |||
|Ita=Tubo di Mario | |||
|ItaM=Mario Pipe | |||
|Kor=마리오 토관 | |||
|KorR=Mario Togwan | |||
|KorM=Mario Pipe | |||
|Por=Cano Mario | |||
|PorM=Mario Pipe | |||
|Spa=Tubería de Mario | |||
|SpaM=Mario Pipe | |||
}} | |||
;;Peach & Daisy Pipe | |||
{{foreign names | |||
|Jpn=ビーチ&デイジードカン | |||
|JpnR=Pīchi & Deijī Dokan | |||
|JpnM=Peach & Daisy Pipe | |||
|ChiS=桃花公主&菊花公主水管 | |||
|ChiSR=Táohuā Gōngzhǔ & Júhuā Gōngzhǔ Shuǐguǎn | |||
|ChiSM=Princess Peach & Princess Daisy Pipe | |||
|ChiT=碧姬公主&黛西公主水管 | |||
|ChiTR=Bìjī Gōngzhǔ & Dàixī Gōngzhǔ Shuǐguǎn | |||
|ChiTM=Princess Peach & Princess Daisy Pipe | |||
|Fre=Tuyau de Peach et Daisy | |||
|FreM=Peach and Daisy Pipe | |||
|Ger=Peach-&-Daisy-Röhre | |||
|GerM=Peach & Daisy Pipe | |||
|Ita=Tubo di Peach e Daisy | |||
|ItaM=Peach and Daisy Pipe | |||
|Kor=피치&데이지 토관 | |||
|KorR=Pichi & Deiji Togwan | |||
|KorM=Peach & Daisy Pipe | |||
|Por=Cano Peach e Daisy | |||
|PorM=Peach and Daisy Pipe | |||
|Spa=Tubería de Peach y Daisy | |||
|SpaM=Peach and Daisy Pipe | |||
}} | |||
==Cups== | |||
{| align=center width=90% cellspacing=0 border=1 cellpadding=3 style="border-collapse:collapse; font-family:Arial; text-align:center" | |||
{{MKT cup table row | |||
|C=Dixie Kong||Ra=1 | |||
|R1=[[Tour Sydney Sprint|Sydney Sprint 3]]||R1.I=SydneySprint3||R1.1=1,200||R1.2=1,800||R1.3=2,100||R1.4=2,400||R1.5=6,100 | |||
|R2=[[Tour Tokyo Blur|Tokyo Blur R/T]]||R2.I=TokyoBlurRT MarioHakama||R2.1=1,200||R2.2=1,800||R2.3=2,100||R2.4=2,400||R2.5=6,100 | |||
|R3=[[Tour Singapore Speedway|Singapore Speedway 2R/T]]||R3.I=SingaporeSpeedway2RT||R3.1=2,300||R3.2=3,400||R3.3=4,000||R3.4=4,500||R3.5=11,300 | |||
|CN=[[Ring Race]]||C.I=Tour35 BirdoCupChallenge||CC=[[Shy Guy|Pink Shy Guy]]||CT=[[Tour Berlin Byways|Berlin Byways 2]]||C.1=12||C.2=20||C.3=26 | |||
}} | |||
{{MKT cup table row | |||
|C=Mii||Ra= | |||
|R1=[[Tour Los Angeles Laps|Los Angeles Laps 3T]]||R1.I=LosAngelesLaps3T BirdoBlack||R1.1=2,000||R1.2=3,100||R1.3=3,600||R1.4=4,200||R1.5=10,100 | |||
|R2=Berlin Byways 3||R2.I=BerlinByways3||R2.1=1,100||R2.2=1,700||R2.3=2,000||R2.4=2,300||R2.5=5,500 | |||
|R3=Sydney Sprint 2R||R3.I=SydneySprint2R WarioCowboy||R3.1=1,400||R3.2=2,200||R3.3=2,600||R3.4=3,000||R3.5=7,200 | |||
|CN=[[Glider Challenge]]||C.I=Tour79 MiiCupChallenge||CC=[[Baby Rosalina]]||CT=Sydney Sprint 3||C.1=300||C.2=600||C.3=800 | |||
}} | |||
{{MKT cup table row | |||
|C=Metal Mario||Ra=2 | |||
|R1=Berlin Byways 3T||R1.I=BerlinByways3T||R1.1=1,800||R1.2=2,900||R1.3=3,300||R1.4=3,900||R1.5=9,000 | |||
|R2=[[Tour Amsterdam Drift|Amsterdam Drift 2R/T]]||R2.I=AmsterdamDrift2RT||R2.1=1,800||R2.2=2,900||R2.3=3,400||R2.4=3,900||R2.5=9,100 | |||
|R3=Los Angeles Laps 3R/T||R3.I=LosAngelesLaps3RT MarioBaseball||R3.1=2,200||R3.2=3,500||R3.3=4,000||R3.4=4,600||R3.5=10,800 | |||
|CN=[[Time Trial (Mario Kart Tour)|Time Trial]]||C.I=Tour79 MetalMarioCupChallenge||CC=[[Koopa Troopa]]||CT=Singapore Speedway 2||C.1=1:47.00||C.2=1:42.00||C.3=1:37.00 | |||
}} | |||
{{MKT cup table row | |||
|C=Cat Peach||Ra= | |||
|R1=Sydney Sprint 2||R1.I=SydneySprint2 HammerBroMiiRacingSuit||R1.1=1,500||R1.2=2,400||R1.3=2,800||R1.4=3,200||R1.5=7,300 | |||
|R2=Berlin Byways 2||R2.I=BerlinByways2 KingBobomb||R2.1=1,800||R2.2=3,000||R2.3=3,500||R2.4=4,100||R2.5=9,200 | |||
|R3=Los Angeles Laps 3R||R3.I=LosAngelesLaps3R||R3.1=1,400||R3.2=2,400||R3.3=2,700||R3.4=3,200||R3.5=7,200 | |||
|CN=[[Smash Small Dry Bones]]||C.I=Tour79 CatPeachCupChallenge||CC=[[Mario]]||CT=Amsterdam Drift 2||C.1=4||C.2=6||C.3=8 | |||
}} | |||
{{MKT cup table row | |||
|C=Donkey Kong||Ra= | |||
|R1=Berlin Byways 3R||R1.I=BerlinByways3R||R1.1=1,300||R1.2=2,200||R1.3=2,500||R1.4=3,000||R1.5=6,500 | |||
|R2=Sydney Sprint 3T||R2.I=SydneySprint3T||R2.1=2,100||R2.2=3,600||R2.3=4,200||R2.4=4,900||R2.5=10,700 | |||
|R3=Tokyo Blur R||R3.I=TokyoBlurR DonkeyKong||R3.1=1,200||R3.2=2,000||R3.3=2,300||R3.4=2,700||R3.5=5,800 | |||
|CN=[[Do Jump Boosts]]||C.I=Tour63 FunkyKongCupChallenge||CC=[[Baby Peach]]||CT=Los Angeles Laps 3||C.1=10||C.2=14||C.3=17 | |||
}} | |||
{{MKT cup table row | |||
|C=Kamek||Ra= | |||
|R1=Sydney Sprint 2T||R1.I=SydneySprint2T YoshiKangaroo||R1.1=2,200||R1.2=3,800||R1.3=4,400||R1.4=5,200||R1.5=10,900 | |||
|R2=Singapore Speedway 2R||R2.I=SingaporeSpeedway2R LuigiVacation||R2.1=1,900||R2.2=3,400||R2.3=3,900||R2.4=4,600||R2.5=9,700 | |||
|R3=Los Angeles Laps 3||R3.I=LosAngelesLaps3 PaulineRose||R3.1=1,500||R3.2=2,600||R3.3=2,900||R3.4=3,500||R3.5=7,300 | |||
|CN=[[Steer Clear of Obstacles]]||C.I=Tour79 KamekCupChallenge||CC=[[Wario]]||CT=Sydney Sprint 3||C.1=1||C.2=2||C.3=3 | |||
}} | |||
{{MKT cup table row | |||
|C=Pink Gold Peach||Ra= | |||
|R1=Amsterdam Drift 2||R1.I=AmsterdamDrift2||R1.1=1,500||R1.2=2,700||R1.3=3,000||R1.4=3,600||R1.5=7,400 | |||
|R2=Sydney Sprint 3||R2.I=SydneySprint3 DaisySwimwear||R2.1=1,400||R2.2=2,500||R2.3=2,900||R2.4=3,400||R2.5=7,000 | |||
|R3=Berlin Byways 2T||R3.I=BerlinByways2T PinkGoldPeach||R3.1=2,300||R3.2=4,100||R3.3=4,600||R3.4=5,500||R3.5=11,300 | |||
|CN=[[Goomba Takedown]]||C.I=Tour52 WaluigiCupChallenge||CC=[[Birdo|Birdo (Yellow)]]||CT=Sydney Sprint 2||C.1=30||C.2=50||C.3=70 | |||
}} | |||
{{MKT cup table row | |||
|C=Mario||Ra= | |||
|R1=Sydney Sprint 3R||R1.I=SydneySprint3R Mario||R1.1=1,400||R1.2=2,700||R1.3=3,000||R1.4=3,600||R1.5=7,200 | |||
|R2=Singapore Speedway 2||R2.I=SingaporeSpeedway2||R2.1=1,900||R2.2=3,600||R2.3=4,100||R2.4=4,900||R2.5=9,700 | |||
|R3=Berlin Byways 3||R3.I=BerlinByways3 LuigiLederhosen||R3.1=1,300||R3.2=2,400||R3.3=2,700||R3.4=3,300||R3.5=6,500 | |||
|CN=Ring Race||C.I=Tour2 LakituCupChallenge||CC=[[Lakitu]]||CT=Tokyo Blur||C.1=15||C.2=25||C.3=30 | |||
}} | |||
{{MKT cup table row | |||
|C=Luigi||Ra= | |||
|R1=Sydney Sprint 2R||R1.I=SydneySprint2R WhiteYoshi||R1.1=1,600||R1.2=3,000||R1.3=3,400||R1.4=4,100||R1.5=7,900 | |||
|R2=Berlin Byways 2R||R2.I=BerlinByways2R PenguinLuigi||R2.1=2,000||R2.2=3,900||R2.3=4,400||R2.4=5,300||R2.5=10,200 | |||
|R3=Amsterdam Drift 2R||R3.I=AmsterdamDrift2R Luigi||R3.1=1,600||R3.2=3,100||R3.3=3,500||R3.4=4,300||R3.5=8,200 | |||
|CN=Time Trial||C.I=Tour79 LuigiCupChallenge||CC=[[Luigi]]||CT=Berlin Byways 3||C.1=1:40.00||C.2=1:34.00||C.3=1:27.00 | |||
}} | |||
{{MKT cup table row | |||
|C=Toadette||Ra= | |||
|R1=Singapore Speedway 2T||R1.I=SingaporeSpeedway2T MarioSwimwear||R1.1=2,600||R1.2=5,100||R1.3=5,800||R1.4=7,000||R1.5=13,100 | |||
|R2=Sydney Sprint 3R||R2.I=SydneySprint3R CatToad||R2.1=1,600||R2.2=3,100||R2.3=3,500||R2.4=4,300||R2.5=8,000 | |||
|R3=Berlin Byways 3T||R3.I=BerlinByways3T Toadette||R3.1=2,100||R3.2=4,200||R3.3=4,700||R3.4=5,700||R3.5=10,700 | |||
|CN=[[Combo Attack]]||C.I=Tour79 ToadetteCupChallenge||CC=[[Boomerang Bro]]||CT=Sydney Sprint 2T||C.1=10||C.2=15||C.3=20 | |||
}} | |||
{{MKT cup table row | |||
|C=Peach||Ra= | |||
|R1=Tokyo Blur||R1.I=TokyoBlur MarioHakama||R1.1=1,700||R1.2=3,400||R1.3=3,900||R1.4=4,700||R1.5=8,600 | |||
|R2=Berlin Byways 3R||R2.I=BerlinByways3R Peach||R2.1=1,700||R2.2=3,300||R2.3=3,700||R2.4=4,600||R2.5=8,300 | |||
|R3=Sydney Sprint 2T||R3.I=SydneySprint2T PeachHappi||R3.1=2,600||R3.2=5,100||R3.3=5,800||R3.4=7,000||R3.5=12,800 | |||
|CN=[[Break Item Boxes]]||C.I=Tour48 LemmyCupChallenge||CC=[[Yoshi]]||CT=Los Angeles Laps 3||C.1=10||C.2=15||C.3=20 | |||
}} | |||
{{MKT cup table row | |||
|C=Toad||Ra= | |||
|R1=Amsterdam Drift 2T||R1.I=AmsterdamDrift2T DaisyFarmer||R1.1=2,500||R1.2=5,200||R1.3=5,800||R1.4=7,200||R1.5=12,700 | |||
|R2=Los Angeles Laps 3T||R2.I=LosAngelesLaps3T MarioBaseball||R2.1=2,600||R2.2=5,400||R2.3=6,100||R2.4=7,500||R2.5=13,200 | |||
|R3=Sydney Sprint 3T||R3.I=SydneySprint3T Toad||R3.1=2,700||R3.2=5,500||R3.3=6,200||R3.4=7,600||R3.5=13,500 | |||
|CN=[[Big Reverse Race]]||C.I=Tour79 ToadCupChallenge||CC=Any character||CT=Singapore Speedway 2||C.1=50cc||C.2=100cc||C.3=150cc | |||
}} | |||
|} | |||
===Signature kart sets=== | |||
Drivers with a corresponding cup are bumped one rank up in every course of their cup. | |||
{| class="wikitable" style="text-align: center" width=50% | |||
!width=10%|Cup | |||
!width=20%|Driver | |||
!width=20%|Kart | |||
!width=20%|Glider | |||
|- | |||
|First course of every cup | |||
|[[File:MKT Icon Mii Emblem.png|x50px|link=Mii]] | |||
|[[File:MKT Icon DaikonRocket.png|x50px|link=Daikon Rocket]] | |||
| | |||
|- | |||
|Second course of every cup | |||
|[[File:MKT Icon YoshiKangaroo.png|x50px|link=Yoshi|Yoshi (Kangaroo)]][[File:MKT Icon MarioHakama.png|x50px|link=Mario|Mario (Hakama)]][[File:MKT Icon LuigiVacation.png|x50px|link=Luigi|Luigi (Vacation)]] | |||
|[[File:MKT Icon GoldDoubleDecker.png|x50px|link=Gold Double-Decker]][[File:MKT Icon KabukiDasher.png|x50px|link=Kabuki Dasher]][[File:MKT Icon TropicalTruck.png|x40px|link=Tropical Truck]] | |||
|[[File:MKT Icon GoldCloudBalloons.png|x50px|link=Gold Cloud Balloons]][[File:MKT Icon WhiteWavesOrigamiGlider.png|x50px|link=White Waves Origami Glider]][[File:MKT Icon SilverSurfMaster.png|x50px|link=Silver Surf Master]] | |||
|- | |||
|Third course of every cup | |||
|[[File:MKT Icon LuigiLederhosen.png|x50px|link=Luigi|Luigi (Lederhosen)]][[File:MKT Icon RosalinaVolendam.png|x50px|link=Rosalina|Rosalina (Volendam)]][[File:MKT Icon MarioBaseball.png|x50px|link=Mario|Mario (Baseball)]] | |||
|[[File:MKT Icon BlackCarriage.png|x50px|link=Black Carriage]][[File:MKT Icon FlowerKart.png|x50px|link=Flower Kart]][[File:MKT Icon PinchHitter.png|x50px|link=Pinch Hitter]] | |||
|[[File:MKT Icon PretzelGlider.png|x50px|link=Pretzel Glider]][[File:MKT Icon TulipCorsage.png|x50px|link=Tulip Corsage]][[File:MKT Icon HomeFieldGlider.png|x50px|link=Home-Field Glider]] | |||
|- | |||
|[[File:MKT Icon Dixie Kong Cup.png|50px|link=Dixie Kong Cup]] | |||
|[[File:MKT Icon DixieKong.png|x50px|link=Dixie Kong]] | |||
|— | |||
|— | |||
|- | |||
|[[File:MKT Icon Mii Cup.png|50px|link=Mii Cup]] | |||
|[[File:MKT Icon Mii Emblem.png|x50px|link=Mii]] | |||
|— | |||
|— | |||
|- | |||
|[[File:MKT Icon Metal Mario Cup.png|50px|link=Metal Mario Cup]] | |||
|[[File:MKT Icon MetalMario.png|x50px|link=Metal Mario]] | |||
|— | |||
|— | |||
|- | |||
|[[File:MKT Icon Cat Peach Cup.png|50px|link=Cat Peach Cup]] | |||
|[[File:MKT Icon CatPeach.png|x50px|link=Cat Mario|Cat Peach]] | |||
|— | |||
|— | |||
|- | |||
|[[File:MKT Icon Donkey Kong Cup.png|50px|link=Donkey Kong Cup]] | |||
|[[File:MKT Icon DonkeyKong.png|x50px|link=Donkey Kong]] | |||
|— | |||
|— | |||
|- | |||
|[[File:MKT Icon Kamek Cup.png|50px|link=Kamek Cup]] | |||
|[[File:MKT Icon Kamek.png|x50px|link=Kamek]] | |||
|— | |||
|— | |||
|- | |||
|[[File:MKT Icon Pink Gold Peach Cup.png|50px|link=Pink Gold Peach Cup]] | |||
|[[File:MKT Icon PinkGoldPeach.png|x50px|link=Pink Gold Peach]] | |||
|— | |||
|— | |||
|- | |||
|[[File:MKT Icon Mario Cup.png|50px|link=Mario Cup]] | |||
|[[File:MKT Icon Mario.png|x50px|link=Mario]] | |||
|— | |||
|— | |||
|- | |||
|[[File:MKT Icon Luigi Cup.png|50px|link=Luigi Cup]] | |||
|[[File:MKT Icon Luigi.png|x50px|link=Luigi]] | |||
|— | |||
|— | |||
|- | |||
|[[File:MKT Icon Toadette Cup.png|50px|link=Toadette Cup]] | |||
|[[File:MKT Icon Toadette.png|x50px|link=Toadette]] | |||
|— | |||
|— | |||
|- | |||
|[[File:MKT Icon Peach Cup.png|50px|link=Peach Cup]] | |||
|[[File:MKT Icon Peach.png|x50px|link=Princess Peach|Peach]] | |||
|— | |||
|— | |||
|- | |||
|[[File:MKT Icon Toad Cup.png|50px|link=Toad Cup]] | |||
|[[File:MKT Icon Toad.png|x50px|link=Toad]] | |||
|— | |||
|— | |||
|} | |||
==Today's Challenge== | ==Today's Challenge== | ||
| Line 197: | Line 418: | ||
<br> | <br> | ||
===3 Year Anniv. Log-In Bonus=== | ===3 Year Anniv. Log-In Bonus=== | ||
A 14-day "3 Year Anniv. Log-In Bonus" | A 14-day "3 Year Anniv. Log-In Bonus" continued from [[Mario vs. Luigi Tour (2022)|the previous tour]] and served as the log-in bonus for the 3rd anniversary event from September 7, 2022 to October 4, 2022. | ||
{|class="wikitable" style="margin:auto; text-align:center" width=25% | {|class="wikitable" style="margin:auto; text-align:center" width=25% | ||
|- | |- | ||
| Line 271: | Line 492: | ||
===Courses=== | ===Courses=== | ||
<gallery> | <gallery heights=50px> | ||
MKT Icon Berlin Byways 3.png|[[Tour Berlin Byways|Berlin Byways 3]] (N, R, T) | |||
MKT Icon Sydney Sprint 3.png|[[Tour Sydney Sprint|Sydney Sprint 3]] (N, R, T) | MKT Icon Sydney Sprint 3.png|[[Tour Sydney Sprint|Sydney Sprint 3]] (N, R, T) | ||
MKT Icon | MKT Icon Amsterdam Drift 2RT.png|[[Amsterdam Drift|Amsterdam Drift 2]] (R/T) | ||
MKT Icon Singapore Speedway 2RT.png|[[Singapore Speedway|Singapore Speedway 2]] (R/T) | MKT Icon Singapore Speedway 2RT.png|[[Singapore Speedway|Singapore Speedway 2]] (R/T) | ||
</gallery> | </gallery> | ||
==Paid banners== | |||
{| align=center width=960px cellspacing=0 border=1 cellpadding=3 style="border-collapse:collapse; font-family:Arial; text-align:center" | |||
|-style="background: #ABC" | |||
!Name | |||
!Availability | |||
!Cost | |||
!Contents | |||
!Banner image | |||
|- | |||
|'''Value Pack''' | |||
|September 21, 2022 – October 4, 2022 | |||
|US$1.99 | |||
|[[File:MKT Icon Ruby.png|30px]] [[Ruby|Rubies]] ×5<br> | |||
[[File:MKT Icon StarTicket.png|30px]] [[Star ticket]] ×2<br> | |||
[[File:MKT Icon ItemTicket.png|30px]] [[Item ticket]] ×3 | |||
|[[File:MKT ValuePack.png|x150px]] | |||
|- | |||
|'''Driver Point-Boost Tickets 10 Ticket Set''' | |||
|September 21, 2022 – October 4, 2022 | |||
|US$3.99 | |||
|[[File:MKT Icon Point-boostticket1.png|30px]] [[Point-boost ticket|Driver point-boost ticket]] ×10 | |||
|[[File:MKT Tour69 DriverPointBoostTickets10TicketSet.png|x150px]] | |||
|- | |||
|'''Celebrate the Anniversary Tour with the Daikon Rocket!''' | |||
|September 21, 2022 – October 4, 2022 | |||
|US$3.99 | |||
|[[File:MKT Icon DaikonRocket.png|30px]] [[Daikon Rocket]] ×1 | |||
|[[File:MKT Tour79 DaikonRocketPack.png|x150px]] | |||
|- | |||
|'''Cat Parafoil Pack''' | |||
|September 21, 2022 – October 4, 2022 | |||
|US$19.99 | |||
|[[File:MKT Icon CatParafoil.png|30px]] [[Cat Parafoil]] ×1<br> | |||
[[File:MKT Icon Point-boostticket3.png|30px]] [[Point-boost ticket|Glider point-boost ticket]] ×1 | |||
[[File:MKT Icon Ruby.png|30px]] [[Ruby|Rubies]] ×45 | |||
|[[File:MKT Tour79 CatParafoilPack.png|x150px]] | |||
|- | |||
|'''Builder Toadette Pack''' | |||
|September 21, 2022 – October 4, 2022 | |||
|US$39.99 | |||
|[[File:MKT Icon BuilderToadette.png|30px]] [[Builder Mario|Builder Toadette]] ×1<br> | |||
[[File:MKT Icon PinkDozer.png|30px]] [[Pink Dozer]] ×1<br> | |||
[[File:MKT Icon Ruby.png|30px]] [[Ruby|Rubies]] ×90 | |||
|[[File:MKT Tour79 BuilderToadettePack.png|x150px]] | |||
|- | |||
|'''Mario's Mustache Pack''' | |||
|September 21, 2022 – October 4, 2022 | |||
|US$39.99 | |||
|[[File:MKT Icon MariosMustache.png|30px]] [[Mario's Mustache]] ×1<br> | |||
[[File:MKT Icon Point-boostticket1.png|30px]] [[Point-boost ticket|Driver point-boost ticket]] ×5<br> | |||
[[File:MKT Icon Point-boostticket3.png|30px]] [[Point-boost ticket|Glider point-boost ticket]] ×5<br> | |||
[[File:MKT Icon Ruby.png|30px]] [[Ruby|Rubies]] ×90 | |||
|[[File:MKT Tour79 MariosMustachePack.png|x150px]] | |||
|- | |||
|'''Cat Toad Pack''' | |||
|September 28, 2022 – October 4, 2022 | |||
|US$19.99 | |||
|[[File:MKT Icon CatToad.png|30px]] [[Cat Mario|Cat Toad]] ×1<br> | |||
[[File:MKT Icon Point-boostticket1.png|30px]] [[Point-boost ticket|Driver point-boost ticket]] ×1<br> | |||
[[File:MKT Icon Ruby.png|30px]] [[Ruby|Rubies]] ×45 | |||
|[[File:MKT Tour79 CatToadPack.png|x150px]] | |||
|- | |||
|'''Pauline (Rose) Pack''' | |||
|September 28, 2022 – October 4, 2022 | |||
|US$39.99 | |||
|[[File:MKT Icon PaulineRose.png|30px]] [[Pauline|Pauline (Rose)]] ×1<br> | |||
[[File:MKT Icon CupidsArrow.png|30px]] [[Cupid's Arrow]] ×1<br> | |||
[[File:MKT Icon Ruby.png|30px]] [[Ruby|Rubies]] ×90 | |||
|[[File:MKT Tour79 PaulineRosePack.png|x150px]] | |||
|} | |||
==Challenges== | ==Challenges== | ||
{{MKT challenge table | {{MKT challenge table | ||
|TCR1=[[File:MKT Icon CoinRushTicket.png|70px]] [[Coin Rush ticket]] ×1 | |TCR1=[[File:MKT Icon CoinRushTicket.png|70px]] [[Coin Rush ticket]] ×1 | ||
|T1.1=175- | |T1.1=175-1 | ||
|T1.1E=Land 5 hits with {{Color | |T1.1E=Land 5 hits with {{Color link|#A1A1FF|Red Shell|Red Shells}}. | ||
|T1.1S=1 | |T1.1S=1 | ||
|T1.2=018 | |T1.2=018 | ||
|T1.2E=Land 3 hits with {{Color | |T1.2E=Land 3 hits with {{Color link|#A1A1FF|Green Shell|Green Shells}}. | ||
|T1.2S=1 | |T1.2S=1 | ||
|T1.3=327 | |T1.3=327 | ||
| Line 300: | Line 592: | ||
|T1.6S=2 | |T1.6S=2 | ||
|T1.7=119-1 | |T1.7=119-1 | ||
|T1.7E=Do 50 {{Color | |T1.7E=Do 50 {{Color link|#A1A1FF|Mini-Turbo}} boosts. | ||
|T1.7S=2 | |T1.7S=2 | ||
|T1.8=404 | |T1.8=404 | ||
|T1.8E=Cause opponents to crash using a {{Color | |T1.8E=Cause opponents to crash using a {{Color link|#A1A1FF|Mega Mushroom}}. | ||
|T1.8S=2 | |T1.8S=2 | ||
|T1.9=5001 | |T1.9=5001 | ||
| Line 309: | Line 601: | ||
|T1.9S=2 | |T1.9S=2 | ||
|TCR2=[[File:MKT Icon QuickTicket.png|70px]] [[Quick ticket]] ×1 | |TCR2=[[File:MKT Icon QuickTicket.png|70px]] [[Quick ticket]] ×1 | ||
|T2.1= | |T2.1=392 | ||
|T2.1E= | |T2.1E=Use 10 {{Color link|#A1A1FF|Mushroom|Mushrooms}}. | ||
|T2.1S=1 | |T2.1S=1 | ||
|T2.2= | |T2.2=069 | ||
|T2.2E= | |T2.2E=Land 3 hits with {{Color link|#A1A1FF|Bob-omb|Bob-ombs}}. | ||
|T2.2S=1 | |T2.2S=1 | ||
|T2.3= | |T2.3=101 | ||
|T2.3E= | |T2.3E=Get a Fantastic combo a total of 5 times. | ||
|T2.3S=1 | |T2.3S=1 | ||
|T2.4= | |T2.4=372 | ||
|T2.4E= | |T2.4E=Get 1 item from the Daily Selects section of the Shop. | ||
|T2.4S=2 | |T2.4S=2 | ||
|T2.5= | |T2.5=215 | ||
|T2.5E= | |T2.5E=Cause opponents to crash a total of 3 times using a driver wearing gloves. | ||
|T2.5S=2 | |T2.5S=2 | ||
|T2.6= | |T2.6=367 | ||
|T2.6E= | |T2.6E=Earn a score of 7,000 or higher on 3 T or R/T courses. | ||
|T2.6S=2 | |T2.6S=2 | ||
|T2.7= | |T2.7=083 | ||
|T2.7E= | |T2.7E=Drive a distance of 20,000 or more on a city course. | ||
|T2.7S=2 | |T2.7S=2 | ||
|T2.8= | |T2.8=178 | ||
|T2.8E= | |T2.8E=Earn a total score of 20,000 or higher in the {{Color link|#A1A1FF|Peach Cup}}. | ||
|T2.8S=2 | |T2.8S=2 | ||
|T2.9= | |T2.9=057 | ||
|T2.9E= | |T2.9E=Use {{Color link|#A1A1FF|point-boost ticket|point-boost tickets}} 3 times. | ||
|T2.9S=2 | |T2.9S=2 | ||
|GCR=[[File:MKT Icon 1Ruby.png|70px]] [[Ruby|Rubies]] ×5 | |GCR=[[File:MKT Icon 1Ruby.png|70px]] [[Ruby|Rubies]] ×5 | ||
|G.1=117 | |G.1=117 | ||
|G.1E=Do a total of 5 {{Color | |G.1E=Do a total of 5 {{Color link|#A1A1FF|Slipstream}} boosts. | ||
|G.1S=1 | |G.1S=1 | ||
|G.2=067 | |G.2=067 | ||
|G.2E=Land 15 hits with {{Color | |G.2E=Land 15 hits with {{Color link|#A1A1FF|Banana|Bananas}}. | ||
|G.2S=1 | |G.2S=1 | ||
|G.3=5001 | |G.3=5001 | ||
|G.3E=Activate {{Color | |G.3E=Activate {{Color link|#A1A1FF|Frenzy}} mode 3 times. | ||
|G.3S=1 | |G.3S=1 | ||
|G.4=372 | |G.4=372 | ||
|G.4E=Use a {{Color | |G.4E=Use a {{Color link|#A1A1FF|points-cap ticket}}. | ||
|G.4S=2 | |G.4S=2 | ||
|G.5=216 | |G.5=216 | ||
| Line 356: | Line 648: | ||
|G.6S=2 | |G.6S=2 | ||
|G.7=111 | |G.7=111 | ||
|G.7E=Use {{Color | |G.7E=Use {{Color link|#A1A1FF|Lightning}}. | ||
|G.7S=2 | |G.7S=2 | ||
|G.8=161 | |G.8=161 | ||
|G.8E=Earn a total score of 15,000 or higher in the {{Color | |G.8E=Earn a total score of 15,000 or higher in the {{Color link|#A1A1FF|Donkey Kong Cup}}. | ||
|G.8S=2 | |G.8S=2 | ||
|G.9=121 | |G.9=121 | ||
|G.9E=Complete {{Color | |G.9E=Complete {{Color link|#A1A1FF|Coin Rush (Mario Kart Tour)|Coin Rush}} 1 time. | ||
|G.9S=2 | |G.9S=2 | ||
}} | }} | ||
| Line 388: | Line 680: | ||
|width=10% style="background:linear-gradient(#F2E18F,#B9800F)"|[[File:MKT Icon Point-boostticket3.png|70px]] | |width=10% style="background:linear-gradient(#F2E18F,#B9800F)"|[[File:MKT Icon Point-boostticket3.png|70px]] | ||
|-style="color: #FFF" | |-style="color: #FFF" | ||
|style="background:linear-gradient(#864D00,#A26000); border-top:1px solid #B9800F;"|{{Color | |style="background:linear-gradient(#864D00,#A26000); border-top:1px solid #B9800F;"|{{Color link|#A1A1FF|Toad (species)|Toad (Pit Crew)}} ×1 | ||
|style="background:linear-gradient(#864D00,#A26000); border-top:1px solid #B9800F;"|{{Color | |style="background:linear-gradient(#864D00,#A26000); border-top:1px solid #B9800F;"|{{Color link|#A1A1FF|Blue Royale}} ×1 | ||
|style="background:linear-gradient(#864D00,#A26000); border-top:1px solid #B9800F;"|{{Color | |style="background:linear-gradient(#864D00,#A26000); border-top:1px solid #B9800F;"|{{Color link|#A1A1FF|Lightning Oilpaper}} ×1 | ||
|style="background:linear-gradient(#864D00,#A26000); border-top:1px solid #B9800F;"|Point-boost ticket (Driver) ×5 | |style="background:linear-gradient(#864D00,#A26000); border-top:1px solid #B9800F;"|Point-boost ticket (Driver) ×5 | ||
|style="background:linear-gradient(#864D00,#A26000); border-top:1px solid #B9800F;"|Point-boost ticket (Kart) ×5 | |style="background:linear-gradient(#864D00,#A26000); border-top:1px solid #B9800F;"|Point-boost ticket (Kart) ×5 | ||
| Line 409: | Line 701: | ||
|width=10% style="background:linear-gradient(#F2E18F,#B9800F)"|[[File:MKT Icon Level-boostticket9.png|70px]] | |width=10% style="background:linear-gradient(#F2E18F,#B9800F)"|[[File:MKT Icon Level-boostticket9.png|70px]] | ||
|-style="color: #FFF" | |-style="color: #FFF" | ||
|style="background:linear-gradient(#864D00,#A26000); border-top:1px solid #B9800F;"|{{Color | |style="background:linear-gradient(#864D00,#A26000); border-top:1px solid #B9800F;"|{{Color link|#A1A1FF|Coins}} ×3,000 | ||
|style="background:linear-gradient(#864D00,#A26000); border-top:1px solid #B9800F;"|{{Color | |style="background:linear-gradient(#864D00,#A26000); border-top:1px solid #B9800F;"|{{Color link|#A1A1FF|Ruby|Rubies}} ×10 | ||
|style="background:linear-gradient(#864D00,#A26000); border-top:1px solid #B9800F;"|{{Color | |style="background:linear-gradient(#864D00,#A26000); border-top:1px solid #B9800F;"|{{Color link|#A1A1FF|Point-boost ticket}} (Glider) ×3 | ||
|style="background:linear-gradient(#864D00,#A26000); border-top:1px solid #B9800F;"|Level-boost ticket (High-End driver) ×1 | |style="background:linear-gradient(#864D00,#A26000); border-top:1px solid #B9800F;"|Level-boost ticket (High-End driver) ×1 | ||
|style="background:linear-gradient(#864D00,#A26000); border-top:1px solid #B9800F;"|Level-boost ticket (High-End kart) ×1 | |style="background:linear-gradient(#864D00,#A26000); border-top:1px solid #B9800F;"|Level-boost ticket (High-End kart) ×1 | ||
| Line 430: | Line 722: | ||
|width=10% style="background:linear-gradient(#F2E18F,#B9800F)"|[[File:MKT Icon Points-capticket9.png|70px]] | |width=10% style="background:linear-gradient(#F2E18F,#B9800F)"|[[File:MKT Icon Points-capticket9.png|70px]] | ||
|-style="color: #FFF" | |-style="color: #FFF" | ||
|style="background:linear-gradient(#864D00,#A26000); border-top:1px solid #B9800F;"|{{Color | |style="background:linear-gradient(#864D00,#A26000); border-top:1px solid #B9800F;"|{{Color link|#A1A1FF|Level-boost ticket}} (Normal glider) ×1 | ||
|style="background:linear-gradient(#864D00,#A26000); border-top:1px solid #B9800F;"|Level-boost ticket (Super glider) ×1 | |style="background:linear-gradient(#864D00,#A26000); border-top:1px solid #B9800F;"|Level-boost ticket (Super glider) ×1 | ||
|style="background:linear-gradient(#864D00,#A26000); border-top:1px solid #B9800F;"|Level-boost ticket (High-End glider) ×1 | |style="background:linear-gradient(#864D00,#A26000); border-top:1px solid #B9800F;"|Level-boost ticket (High-End glider) ×1 | ||
| Line 628: | Line 920: | ||
|- | |- | ||
!High-End gliders | !High-End gliders | ||
|[[Swooper (glider)|Swooper]], [[Cloud Glider]], [[Gold Glider]], [[Pink Gold Paper Glider]], [[Royal Parachute]], [[Dry Bowser Umbrella]], [[Blizzard Balloons]], [[Sunset Balloons]], [[Strawberry Crêpe]], [[Wonderful Wings]], [[Starchute]], [[Silver Starchute]], [[Daisy Glider]], [[Butterfly Wings]], [[Butterfly Sunset]], [[Butterfly Prism]], [[Meteor Balloons]], [[Crimson Crane]], [[Strawberry Donut]], [[Heart Balloons]], [[Great Sail]], [[Black Great Sail]], [[Dragon Wings]], [[Black Toe-Bean Balloons]], [[Toe-Bean Balloons]], [[Tropical Glider]], [[8-Bit Star]], [[Manta Glider]], [[Silver Bells]], [[Treasure Map]], [[Cheep Cheep Masks]], [[Pretzel Glider]], [[Calico Parafoil]], [[Snow Crystals]], [[Silver | |[[Swooper (glider)|Swooper]], [[Cloud Glider]], [[Gold Glider]], [[Pink Gold Paper Glider]], [[Royal Parachute]], [[Dry Bowser Umbrella]], [[Blizzard Balloons]], [[Sunset Balloons]], [[Strawberry Crêpe]], [[Wonderful Wings]], [[Starchute]], [[Silver Starchute]], [[Daisy Glider]], [[Butterfly Wings]], [[Butterfly Sunset]], [[Butterfly Prism]], [[Meteor Balloons]], [[Crimson Crane]], [[Strawberry Donut]], [[Heart Balloons]], [[Great Sail]], [[Black Great Sail]], [[Dragon Wings]], [[Black Toe-Bean Balloons]], [[Toe-Bean Balloons]], [[Tropical Glider]], [[8-Bit Star]], [[Manta Glider]], [[Silver Bells]], [[Treasure Map]], [[Cheep Cheep Masks]], [[Pretzel Glider]], [[Calico Parafoil]], [[Snow Crystals]], [[Starry Great Sail]], [[Home-Field Glider]], [[Candlelight Flight (glider)|Candlelight Flight]], [[Tulip Corsage]] | ||
|0.0256% | |||
|- | |||
!Super drivers | |||
|[[Donkey Kong]], [[Toad]], [[Bowser]], [[Luigi]], [[Mario]], [[Princess Peach|Peach]], [[Yoshi]], [[Princess Daisy|Daisy]], [[Lakitu]], [[King Boo]], [[Toadette]], [[Bowser Jr.]], [[Waluigi]], [[Wario]], [[Rosalina]], [[Birdo]], [[Diddy Kong]], [[Hammer Bro]], [[Boomerang Bro]], [[Fire Bro]], [[Ice Bro]], [[Yoshi (species)|Red Yoshi]], [[Black Shy Guy]], [[Pink Shy Guy]], [[Toad (species)|Toad (Pit Crew)]], [[Monty Mole]], [[Birdo|Birdo (Light Blue)]], [[Birdo|Birdo (Yellow)]], [[Roving Racers|Red Koopa (Freerunning)]] | |||
|0.3103% | |||
|- | |||
!Super karts | |||
|[[Cucumber]], [[Zucchini]], [[Egg 1]], [[Daytripper]], [[Mach 8]], [[Cloud 9]], [[Soda Jet]], [[Koopa Clown]], [[Poltergust 4000]], [[Royale]], [[Barrel Train]], [[Turbo Yoshi]], [[Blue Seven]], [[Flame Flyer]], [[Para-Wing]], [[Super Blooper (kart)|Super Blooper]], [[Turbo Birdo]], [[Streamliner]], [[DK Jumbo]], [[Red Turbo Yoshi]], [[Light-blue Turbo Birdo]], [[Yellow Turbo Birdo]] | |||
|0.3182% | |||
|- | |||
!Super gliders | |||
|[[Flower Glider]], [[Peach Parasol (glider)|Peach Parasol]], [[BaNaNa Parafoil]], [[Bob-omb Parafoil]], [[Wario Wing]], [[Oilpaper Umbrella]], [[Mushroom Glider]], [[Shell Parachute]], [[Lightning Oilpaper]], [[Blue Flower Glider]], [[Pink Flower Glider]], [[Waluigi Wing]], [[? Block (glider)|? Block]], [[8-Bit Jumping Mario]], [[Eggshell Glider]] | |||
|0.2667% | |||
|- | |||
!Normal drivers | |||
|[[Koopa Troopa]], [[Shy Guy]], [[Dry Bones]], [[Baby Daisy]], [[Baby Luigi]], [[Baby Mario]], [[Baby Peach]], [[Baby Rosalina]], [[Iggy]], [[Larry]], [[Lemmy]], [[Ludwig]], [[Morton]], [[Roy]], [[Wendy]] | |||
|2.0000% | |||
|- | |||
!Normal karts | |||
|[[Birthday Girl]], [[Landship]], [[Bullet Blaster]], [[Mushmellow]], [[Biddybuggy]], [[Pipe Frame]], [[Pipe Buggy]], [[Cheep Charger]], [[Red Kiddie Kart]], [[Koopa Dasher]], [[Green Kiddie Kart]] | |||
|2.1818% | |||
|- | |||
!Normal gliders | |||
|[[Super Glider]], [[Paper Glider]], [[Parachute (glider)|Parachute]], [[Parafoil]], [[Piston Glider]], [[Droplet Glider]], [[BBIA Parafoil]], [[Piranha Plant Parafoil]], [[Minion Paper Glider]] | |||
|1.5556% | |||
|} | |||
<br> | |||
===Anniversary Pipe 2=== | |||
{|class="wikitable" style="margin:auto; text-align:center" | |||
!colspan=16|Items obtained from a new Anniversary Pipe 2 | |||
|- | |||
!rowspan=2|Item | |||
!colspan=3|[[File:MKT Icon Normal.png|50px]]<br>Normal | |||
!colspan=3|[[File:MKT Icon Rare.png|50px]]<br>Super | |||
!colspan=3|[[File:MKT Icon HighEnd.png|50px]]<br>High-End | |||
!colspan=3|[[File:MKT Icon HighEnd.png|50px]]<br>Featured High-End | |||
|- | |||
!Driver | |||
!Kart | |||
!Glider | |||
!Driver | |||
!Kart | |||
!Glider | |||
!Driver | |||
!Kart | |||
!Glider | |||
!Driver | |||
!Kart | |||
!Glider | |||
|- | |||
!Amount | |||
|30 | |||
|24 | |||
|14 | |||
|9 | |||
|7 | |||
|4 | |||
|1 | |||
|1 | |||
|1 | |||
|3 | |||
|3 | |||
|3 | |||
|} | |||
<br> | |||
{|class="wikitable" style="margin:auto; text-align:center" | |||
!Class | |||
!Parts | |||
!Rate (each) | |||
|- | |||
!High-End Spotlight Drivers | |||
|[[Luigi|Luigi (Lederhosen)]], [[Rosalina|Rosalina (Volendam)]], [[Mario|Mario (Baseball)]] | |||
|1.0000% | |||
|- | |||
!High-End Spotlight Karts | |||
|[[Black Carriage]], [[Flower Kart]], [[Pinch Hitter]] | |||
|1.0000% | |||
|- | |||
!High-End Spotlight Gliders | |||
|[[Pretzel Glider]], [[Tulip Corsage]], [[Home-Field Glider]] | |||
|1.0000% | |||
|- | |||
!High-End drivers | |||
|[[Dry Bowser]], [[Metal Mario]], [[Pink Gold Peach]], [[Cat Mario|Cat Peach]], [[Pauline]], [[Princess Peach|Peach (Explorer)]], [[Mario|Mario (Hakama)]], [[Nabbit]], [[Captain Toad]], [[King Bob-omb]], [[Peachette]], [[Yoshi (species)|Black Yoshi]], [[Yoshi (species)|White Yoshi]], [[Princess Peach|Peach (Wintertime)]], [[Chargin' Chuck]], [[Cat Mario|Cat Toad]], [[Wario|Wario (Cowboy)]], [[Birdo|Birdo (Black)]], [[Yoshi|Yoshi (Kangaroo)]], [[Penguin Mario|Penguin Luigi]],[[Dixie Kong]], [[Funky Kong]], [[Bowser Jr.|Bowser Jr. (Pirate)]], [[Princess Daisy|Daisy (Swimwear)]], [[Luigi|Luigi (Lederhosen)]], [[Ice Mario (Super Mario Galaxy)|Ice Mario]], [[Luigi|Luigi (Vacation)]] | |||
|0.0385% | |||
|- | |||
!High-End karts | |||
|[[B Dasher]], [[Badwagon]], [[Carrot Kart]], [[Cat Cruiser]], [[Sneeker]], [[Sports Coupe]], [[Circuit Special]], [[Bruiser]], [[Kabuki Dasher]], [[Wild Wing]], [[Bumble V]], [[Steel Driver]], [[Macharon]], [[Wildfire Flyer]], [[Red B Dasher]], [[Platinum Taxi]], [[Wild Pink]], [[Choco Macharon]], [[P-Wing (kart)|P-Wing]], [[Black Turbo Birdo]], [[Green Apple Kart]], [[Poison Apple Kart]], [[Dozer Dasher]], [[Clanky Kart]], [[Banana Master]], [[Offroader]], [[Dreamy Egg]], [[Head Honcho]], [[Pink Wing]], [[Koopa King]], [[Cact-X]], [[Sushi Racer]], [[Green Circuit]], [[Crawly Kart]], [[Black Dozer]], [[Iron Cucumber]], [[Cact-Ice]], [[Pink Dozer]], [[Lime Tea Coupe]], [[Sunny Surf Sailer]], [[Kamek's Zoom Broom]], [[Gold Double-Decker]], [[Black Cat Cruiser]], [[Vampire Flyer]], [[White Snow Skimmer]], [[Gray Cat Cruiser]], [[Tropical Truck]] | |||
|0.0213% | |||
|- | |||
!High-End gliders | |||
|[[Swooper (glider)|Swooper]], [[Cloud Glider]], [[Gold Glider]], [[Pink Gold Paper Glider]], [[Royal Parachute]], [[Dry Bowser Umbrella]], [[Blizzard Balloons]], [[Sunset Balloons]], [[Strawberry Crêpe]], [[Wonderful Wings]], [[Starchute]], [[Silver Starchute]], [[Daisy Glider]], [[Butterfly Wings]], [[Butterfly Sunset]], [[Butterfly Prism]], [[Meteor Balloons]], [[Crimson Crane]], [[Strawberry Donut]], [[Heart Balloons]], [[Great Sail]], [[Black Great Sail]], [[Dragon Wings]], [[Black Toe-Bean Balloons]], [[Toe-Bean Balloons]], [[Tropical Glider]], [[8-Bit Star]], [[Manta Glider]], [[Silver Bells]], [[Treasure Map]], [[Cheep Cheep Masks]], [[White Waves Origami Glider]], [[Calico Parafoil]], [[Snow Crystals]], [[Silver Surf Master]], [[Starry Great Sail]], [[Candlelight Flight (glider)|Candlelight Flight]], [[Gold Cloud Balloons]] | |||
|0.0256% | |0.0256% | ||
|- | |- | ||
| Line 656: | Line 1,042: | ||
|} | |} | ||
<br> | <br> | ||
===Mario Pipe=== | |||
{|class="wikitable" style="margin:auto; text-align:center" | |||
!colspan=13|Items obtained from a new Mario Pipe | |||
|- | |||
!rowspan=2|Item | |||
!colspan=3|[[File:MKT Icon Normal.png|50px]]<br>Normal | |||
!colspan=3|[[File:MKT Icon Rare.png|50px]]<br>Super | |||
!colspan=3|[[File:MKT Icon HighEnd.png|50px]]<br>High-End | |||
|- | |||
!Driver | |||
!Kart | |||
!Glider | |||
!Driver | |||
!Kart | |||
!Glider | |||
!Driver | |||
!Kart | |||
!Glider | |||
|- | |||
!Amount | |||
|9 | |||
|13 | |||
|9 | |||
|5 | |||
|4 | |||
|4 | |||
|6 | |||
|0 | |||
|0 | |||
|} | |||
<br> | |||
{|class="wikitable" style="margin:auto; text-align:center" | |||
!Class | |||
!Parts | |||
!Rate (each) | |||
|- | |||
!High-End drivers | |||
|[[Tanooki Mario]], [[Mario|Mario (Musician)]], [[Mario|Mario (Swimwear)]], [[Mario|Mario (Happi]], [[Mario|Mario (Sunshine]], [[Mario|Mario (Tuxedo)]], [[Mario|Mario (Chef)]], [[Mario|Mario (Aviator)]], [[Mario|Mario (SNES)]], [[Mario|Mario (Satellaview)]], [[Cat Mario]], [[Mario|Mario (Racing)]], [[Penguin Mario]], [[Mario|Mario (Golf)]], [[Mario|Mario (King)]] | |||
|0.8000% | |||
|- | |||
!Super drivers | |||
|[[Donkey Kong]], [[Toad]], [[Bowser]], [[Luigi]], [[Mario]], [[Princess Peach|Peach]], [[Yoshi]], [[Princess Daisy|Daisy]], [[Lakitu]], [[King Boo]], [[Toadette]], [[Bowser Jr.]], [[Waluigi]], [[Wario]], [[Rosalina]], [[Birdo]], [[Diddy Kong]], [[Hammer Bro]], [[Boomerang Bro]], [[Fire Bro]], [[Ice Bro]], [[Yoshi (species)|Red Yoshi]], [[Black Shy Guy]], [[Pink Shy Guy]], [[Toad (species)|Toad (Pit Crew)]], [[Monty Mole]], [[Birdo|Birdo (Light Blue)]], [[Birdo|Birdo (Yellow)]], [[Roving Racers|Red Koopa (Freerunning)]] | |||
|0.3448% | |||
|- | |||
!Super karts | |||
|[[Cucumber]], [[Zucchini]], [[Egg 1]], [[Daytripper]], [[Mach 8]], [[Cloud 9]], [[Soda Jet]], [[Koopa Clown]], [[Poltergust 4000]], [[Royale]], [[Barrel Train]], [[Turbo Yoshi]], [[Blue Seven]], [[Flame Flyer]], [[Para-Wing]], [[Super Blooper (kart)|Super Blooper]], [[Turbo Birdo]], [[Streamliner]], [[DK Jumbo]], [[Red Turbo Yoshi]], [[Light-blue Turbo Birdo]], [[Yellow Turbo Birdo]] | |||
|0.3636% | |||
|- | |||
!Super gliders | |||
|[[Flower Glider]], [[Peach Parasol (glider)|Peach Parasol]], [[BaNaNa Parafoil]], [[Bob-omb Parafoil]], [[Wario Wing]], [[Oilpaper Umbrella]], [[Mushroom Glider]], [[Shell Parachute]], [[Lightning Oilpaper]], [[Blue Flower Glider]], [[Pink Flower Glider]], [[Waluigi Wing]], [[? Block (glider)|? Block]], [[8-Bit Jumping Mario]], [[Eggshell Glider]] | |||
|0.5333% | |||
|- | |||
!Normal drivers | |||
|[[Koopa Troopa]], [[Shy Guy]], [[Dry Bones]], [[Baby Daisy]], [[Baby Luigi]], [[Baby Mario]], [[Baby Peach]], [[Baby Rosalina]], [[Iggy]], [[Larry]], [[Lemmy]], [[Ludwig]], [[Morton]], [[Roy]], [[Wendy]] | |||
|1.2000% | |||
|- | |||
!Normal karts | |||
|[[Birthday Girl]], [[Landship]], [[Bullet Blaster]], [[Mushmellow]], [[Biddybuggy]], [[Pipe Frame]], [[Pipe Buggy]], [[Cheep Charger]], [[Red Kiddie Kart]], [[Koopa Dasher]], [[Green Kiddie Kart]] | |||
|2.3636% | |||
|- | |||
!Normal gliders | |||
|[[Super Glider]], [[Paper Glider]], [[Parachute (glider)|Parachute]], [[Parafoil]], [[Piston Glider]], [[Droplet Glider]], [[BBIA Parafoil]], [[Piranha Plant Parafoil]], [[Minion Paper Glider]] | |||
|2.0000% | |||
|} | |||
<br> | |||
===Peach & Daisy Pipe=== | |||
{|class="wikitable" style="margin:auto; text-align:center" | |||
!colspan=13|Items obtained from a new Peach & Daisy Pipe | |||
|- | |||
!rowspan=2|Item | |||
!colspan=3|[[File:MKT Icon Normal.png|50px]]<br>Normal | |||
!colspan=3|[[File:MKT Icon Rare.png|50px]]<br>Super | |||
!colspan=3|[[File:MKT Icon HighEnd.png|50px]]<br>High-End | |||
|- | |||
!Driver | |||
!Kart | |||
!Glider | |||
!Driver | |||
!Kart | |||
!Glider | |||
!Driver | |||
!Kart | |||
!Glider | |||
|- | |||
!Amount | |||
|9 | |||
|13 | |||
|9 | |||
|5 | |||
|4 | |||
|4 | |||
|6 | |||
|0 | |||
|0 | |||
|} | |||
<br> | |||
{|class="wikitable" style="margin:auto; text-align:center" | |||
!Class | |||
!Parts | |||
!Rate (each) | |||
|- | |||
!High-End drivers | |||
|[[Princess Peach|Peach (Explorer)]], [[Princess Peach|Peach (Kimono)]], [[Princess Peach|Peach (Vacation)]], [[Princess Peach|Peach (Wintertime)]], [[Princess Daisy|Daisy (Holiday Cheer)]], [[Princess Daisy|Daisy (Sailor)]], [[Princess Daisy|Daisy (Swimwear)]], [[Princess Peach#Dr. Mario World|Dr. Peach]], [[Princess Daisy|Daisy (Fairy)]], [[Princess Daisy|Daisy (Farmer)]], [[Princess Peach|Peach (Wedding)]], [[Princess Daisy|Daisy (Yukata)]], [[Princess Peach|Peach (Yukata)]], [[Princess Daisy|Daisy (Thai Dress)]], [[Princess Peach|Peach (Happi)]] | |||
|0.8000% | |||
|- | |||
!Super drivers | |||
|[[Donkey Kong]], [[Toad]], [[Bowser]], [[Luigi]], [[Mario]], [[Princess Peach|Peach]], [[Yoshi]], [[Princess Daisy|Daisy]], [[Lakitu]], [[King Boo]], [[Toadette]], [[Bowser Jr.]], [[Waluigi]], [[Wario]], [[Rosalina]], [[Birdo]], [[Diddy Kong]], [[Hammer Bro]], [[Boomerang Bro]], [[Fire Bro]], [[Ice Bro]], [[Yoshi (species)|Red Yoshi]], [[Black Shy Guy]], [[Pink Shy Guy]], [[Toad (species)|Toad (Pit Crew)]], [[Monty Mole]], [[Birdo|Birdo (Light Blue)]], [[Birdo|Birdo (Yellow)]], [[Roving Racers|Red Koopa (Freerunning)]] | |||
|0.3448% | |||
|- | |||
!Super karts | |||
|[[Cucumber]], [[Zucchini]], [[Egg 1]], [[Daytripper]], [[Mach 8]], [[Cloud 9]], [[Soda Jet]], [[Koopa Clown]], [[Poltergust 4000]], [[Royale]], [[Barrel Train]], [[Turbo Yoshi]], [[Blue Seven]], [[Flame Flyer]], [[Para-Wing]], [[Super Blooper (kart)|Super Blooper]], [[Turbo Birdo]], [[Streamliner]], [[DK Jumbo]], [[Red Turbo Yoshi]], [[Light-blue Turbo Birdo]], [[Yellow Turbo Birdo]] | |||
|0.3636% | |||
|- | |||
!Super gliders | |||
|[[Flower Glider]], [[Peach Parasol (glider)|Peach Parasol]], [[BaNaNa Parafoil]], [[Bob-omb Parafoil]], [[Wario Wing]], [[Oilpaper Umbrella]], [[Mushroom Glider]], [[Shell Parachute]], [[Lightning Oilpaper]], [[Blue Flower Glider]], [[Pink Flower Glider]], [[Waluigi Wing]], [[? Block (glider)|? Block]], [[8-Bit Jumping Mario]], [[Eggshell Glider]] | |||
|0.5333% | |||
|- | |||
!Normal drivers | |||
|[[Koopa Troopa]], [[Shy Guy]], [[Dry Bones]], [[Baby Daisy]], [[Baby Luigi]], [[Baby Mario]], [[Baby Peach]], [[Baby Rosalina]], [[Iggy]], [[Larry]], [[Lemmy]], [[Ludwig]], [[Morton]], [[Roy]], [[Wendy]] | |||
|1.2000% | |||
|- | |||
!Normal karts | |||
|[[Birthday Girl]], [[Landship]], [[Bullet Blaster]], [[Mushmellow]], [[Biddybuggy]], [[Pipe Frame]], [[Pipe Buggy]], [[Cheep Charger]], [[Red Kiddie Kart]], [[Koopa Dasher]], [[Green Kiddie Kart]] | |||
|2.3636% | |||
|- | |||
!Normal gliders | |||
|[[Super Glider]], [[Paper Glider]], [[Parachute (glider)|Parachute]], [[Parafoil]], [[Piston Glider]], [[Droplet Glider]], [[BBIA Parafoil]], [[Piranha Plant Parafoil]], [[Minion Paper Glider]] | |||
|2.0000% | |||
|} | |||
<br> | |||
==Mii Racing Suit Shop== | ==Mii Racing Suit Shop== | ||
===Banner items=== | ===Banner items=== | ||
| Line 703: | Line 1,224: | ||
==Token Shop== | ==Token Shop== | ||
The limited-time event where [[event token]]s appear began on September 21, 2022 and | The limited-time event where [[event token]]s appear began on September 21, 2022 and ended on October 4, 2022. Event tokens could be earned by causing opponents to crash. | ||
{| class="wikitable" style="margin:auto; text-align:center" width=50% | {| class="wikitable" style="margin:auto; text-align:center" width=50% | ||
!colspan=3|'''Token Shop''' (September 21, 2022 - October 4, 2022) | !colspan=3|'''Token Shop''' (September 21, 2022 - October 4, 2022) | ||
| Line 767: | Line 1,288: | ||
The shop features a variety of set and randomized items available for purchase. The item slots in the shop are unlocked based on the highest tier of players. | The shop features a variety of set and randomized items available for purchase. The item slots in the shop are unlocked based on the highest tier of players. | ||
{| class="wikitable" style="margin:auto; text-align:center" width=50% | {| class="wikitable" style="margin:auto; text-align:center" width=50% | ||
!colspan=3|Items available in Tier Shop (September 21, 2022 - | !colspan=3|Items available in Tier Shop (September 21, 2022 - September 27, 2022) | ||
|- | |- | ||
|[[File:Dixie Kong - Donkey Kong Country Tropical Freeze.png|80x80px]] | |[[File:Dixie Kong - Donkey Kong Country Tropical Freeze.png|80x80px]] | ||
| Line 779: | Line 1,300: | ||
!colspan=3|Items available in Tier Shop (September 28, 2022 - October 4, 2022) | !colspan=3|Items available in Tier Shop (September 28, 2022 - October 4, 2022) | ||
|- | |- | ||
| | |[[File:Metal Mario Artwork - Mario Kart 7.png|60px]] | ||
| | |[[File:MKT Icon CactIce.png|80px]] | ||
| | |[[File:MKT Icon StarSpangledGlider.png|80px]] | ||
|- | |- | ||
! | ![[Metal Mario]]<br>[[File:MKT Icon Coin.png|20px]] 12,000<br>Amount: 1 | ||
! | ![[Cact-Ice]]<br>[[File:MKT Icon Coin.png|20px]] 10,000<br>Amount: 1 | ||
! | ![[Star-Spangled Glider]]<br>[[File:MKT Icon Coin.png|20px]] 10,000<br>Amount: 1 | ||
|- | |- | ||
!colspan=3|Items available in Tier Shop (September 21, 2022 - October 4, 2022) | !colspan=3|Items available in Tier Shop (September 21, 2022 - October 4, 2022) | ||
| Line 824: | Line 1,345: | ||
==Names in other languages== | ==Names in other languages== | ||
{{Foreign names | {{Foreign names | ||
| | |Jpn=アニバーサリーツアー | ||
| | |JpnR=Anibāsarī Tsuā | ||
| | |JpnM=Anniversary Tour | ||
|ChiS=周年巡回赛 | |ChiS=周年巡回赛 | ||
|ChiSR=Zhōunián Xúnhuí sài | |ChiSR=Zhōunián Xúnhuí sài | ||
| Line 849: | Line 1,370: | ||
==Trivia== | ==Trivia== | ||
*This | *This was the first tour since the [[Valentine's Tour]] sixty-nine tours prior to feature an addition to the list of favorite courses for a Normal driver, as well as the first since the [[Marine Tour]] fifty-eight tours prior to feature an addition to the list of favorite courses for any Normal item, with [[Koopa Troopa]] getting Sydney Sprint 3R as a favorite course. | ||
*This | *This was the first tour to include the normal and R variants, but not the T variant, of a track (namely Tokyo Blur). To accommodate this, [[Los Angeles Laps|Los Angeles Laps 3T]] repeats. | ||
**It was also the first normal tour to exclude one of the three aforementioned variants of any track. | |||
*Including R, T, and R/T variants, this tour featured eight courses, the least out of any tour. | |||
==External links== | |||
*[https://mario.nintendo.com/news/mobilenews-celebrate-three-years-of-mario-kart-tour-with-the-globe-trotting-anniversary-tour ''Celebrate three years of Mario Kart Tour with the globe-trotting Anniversary Tour'']. ''mario.nintendo.com''. Retrieved September 30, 2022. ([https://web.archive.org/web/20220930195739/https://mario.nintendo.com/news/mobilenews-celebrate-three-years-of-mario-kart-tour-with-the-globe-trotting-anniversary-tour/ Archived] September 30, 2022, 19:57:39 UTC via Wayback Machine) | |||
==References== | ==References== | ||
Latest revision as of 12:19, January 7, 2025
| Anniversary Tour | |
|---|---|
| |
| Start date | September 20, 2022 11:00 p.m. (PT)[?] |
| End date | October 4, 2022 10:59 p.m. (PT)[?] |
| Number of cups | 12 |
| Ranked cups | Dixie Kong Cup (week 1) Metal Mario Cup (week 2) |
| Coin Rush course | Tokyo Blur |
| << List of tours >> | |
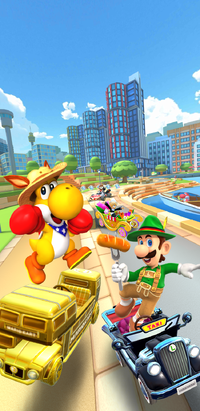
The Anniversary Tour was the seventy-ninth tour of Mario Kart Tour, which began on September 21, 2022 and ended on October 4, 2022. This tour celebrated three years since the release of Mario Kart Tour on September 25, 2019; however, unlike the 1st and 2nd Anniversary Tours, this tour's name did not contain a number representing the anniversary it celebrated.
This tour marked the end of the two-tour event celebrating the third anniversary of Mario Kart Tour that started in the previous tour. This tour featured an upgraded Token Shop that included items like Metal Mario, Pink Gold Peach, the Wild Wing, and three golden pipes. This tour also introduced the second set of two 3rd Anniversary Challenges cards in addition to continuing the 3 Year Anniv. Log-In Bonus and the 3rd Anniversary Challenges 1 card from the previous tour.[1]
Like the 2nd Anniversary Tour and Metropolitan Tour, only city courses appeared in the tour. This tour also introduced new routes for both Sydney Sprint and Berlin Byways, named Sydney Sprint 3 and Berlin Byways 3 respectively, the former of which was previously seen in the course's appearance in the Booster Course Pass for Mario Kart 8 Deluxe. It also introduced the R/T variants of both Amsterdam Drift 2 and Singapore Speedway 2, which debuted in the Metropolitan Tour and Ocean Tour, respectively. With the introduction of these courses, this was the first tour since the Samurai Tour thirteen tours prior to introduce new R/T variants, the first tour in the game to introduce the R/T variants of multiple city courses, and the first tour since the Ice Tour seventy tours prior to introduce both multiple new courses and multiple R/T variants simultaneously. It also features the return of Tokyo Blur, Berlin Byways 2, Los Angeles Laps 3, and Sydney Sprint 2. This was also the only tour to feature the T variants of Berlin Byways 3 and Sydney Sprint 3.
Despite the new courses not being related to London or Britain, and the tour not including returning London Loop tracks, the new vehicles are a variant of the Double-Decker and a kart based on a Hackney carriage, in addition to a new variant of Mario, where he is in his King's Crown and King's Outfit from Super Mario Odyssey.
This was the last tour to feature the regular week pipes which would be fired with rubies and contain spotlight items, as they were removed after this tour in favor of a Spotlight Shop that was implemented in the following tour. In addition to the removal of ruby pipes, this was the last tour where commemorative items and the spotlight items from the first and second week were raised to a higher shelf on the first, second, and third course of every cup, respectively, restricting shelf boosts after this tour to driver cups and the first course in a cup for Mii Racing Suits. This was also the last tour to have only twelve cups as the next tour would have fifteen.
This tour's Coin Rush course was Tokyo Blur, and the menu's background featured the Sydney Harbour Bridge as the landmark for this tour, which was reused from the April–May 2021 and September 2021 Sydney Tours.
Despite the tenth set of Expert Challenges ending in the last tour, the eleventh set was not made available at the start of this tour and was instead made available at the start of the Battle Tour.
Starting from this tour, the Platinum Taxi and Clanky Kart are available in regular tour pipes, including the All-Clear Pipe.
Spotlights[edit]
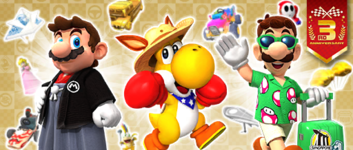
| Anniversary Pipe 1 September 20, 2022, 11:00 p.m. (PT) – October 4, 2022, 10:59 p.m. (PT) |
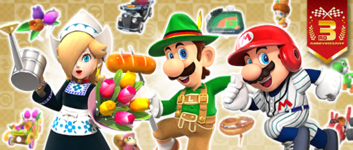
Anniversary Pipe 2 September 27, 2022, 11:00 p.m. (PT) – October 4, 2022, 10:59 p.m. (PT) | ||||
|
| ||||
| Drivers | Karts | Gliders | Drivers | Karts | Gliders |
|---|---|---|---|---|---|
  
|
  
|
||||
| Mario (Hakama), Yoshi (Kangaroo) and Luigi (Vacation) | Gold Double-Decker, Kabuki Dasher, and Tropical Truck | Gold Cloud Balloons, White Waves Origami Glider, and Silver Surf Master | Rosalina (Volendam), Luigi (Lederhosen) and Mario (Baseball) | Black Carriage, Pinch Hitter, and Flower Kart | Pretzel Glider, Home-Field Glider, and Tulip Corsage |
Special pipes[edit]
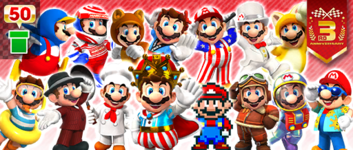
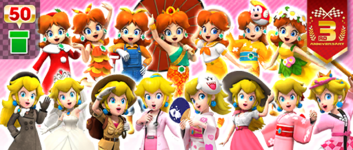
| Mario Pipe September 24, 2022, 11:00 p.m. (PT) – October 4, 2022, 10:59 p.m. (PT) |
Peach & Daisy Pipe September 24, 2022, 11:00 p.m. (PT) – October 4, 2022, 10:59 p.m. (PT) |
|
|
| Drivers | Drivers |
|---|---|
              
|
      
|
| Mario (Swimwear), Mario (Musician), Mario (Chef), Mario (King), Mario (SNES), Mario (Aviator), Mario (Satellaview), Mario (Sunshine), Penguin Mario, Mario (Racing), Tanooki Mario, Mario (Happi), Mario (Golf), Mario (Tuxedo), and Cat Mario | Peach (Wintertime), Peach (Wedding), Peach (Explorer), Dr. Peach, Peach (Yukata), Peach (Vacation), Peach (Kimono), Peach (Happi), Daisy (Holiday Cheer), Daisy (Swimwear), Daisy (Farmer), Daisy (Thai Dress), Daisy (Sailor), Daisy (Yukata) and Daisy (Fairy) |
- Names in other languages
- Mario Pipe
| Language | Name | Meaning | Notes |
|---|---|---|---|
| Japanese | マリオドカン[?] Mario Dokan |
Mario Pipe | |
| Chinese (simplified) | 马力欧水管[?] Mǎlìōu Shuǐguǎn |
Mario Pipe | |
| Chinese (traditional) | 瑪利歐水管[?] Mǎlìōu Shuǐguǎn |
Mario Pipe | |
| French | Tuyau de Mario[?] | Mario Pipe | |
| German | Mario-Röhre[?] | Mario Pipe | |
| Italian | Tubo di Mario[?] | Mario Pipe | |
| Korean | 마리오 토관[?] Mario Togwan |
Mario Pipe | |
| Portuguese | Cano Mario[?] | Mario Pipe | |
| Spanish | Tubería de Mario[?] | Mario Pipe |
- Peach & Daisy Pipe
| Language | Name | Meaning | Notes |
|---|---|---|---|
| Japanese | ビーチ&デイジードカン[?] Pīchi & Deijī Dokan |
Peach & Daisy Pipe | |
| Chinese (simplified) | 桃花公主&菊花公主水管[?] Táohuā Gōngzhǔ & Júhuā Gōngzhǔ Shuǐguǎn |
Princess Peach & Princess Daisy Pipe | |
| Chinese (traditional) | 碧姬公主&黛西公主水管[?] Bìjī Gōngzhǔ & Dàixī Gōngzhǔ Shuǐguǎn |
Princess Peach & Princess Daisy Pipe | |
| French | Tuyau de Peach et Daisy[?] | Peach and Daisy Pipe | |
| German | Peach-&-Daisy-Röhre[?] | Peach & Daisy Pipe | |
| Italian | Tubo di Peach e Daisy[?] | Peach and Daisy Pipe | |
| Korean | 피치&데이지 토관[?] Pichi & Deiji Togwan |
Peach & Daisy Pipe | |
| Portuguese | Cano Peach e Daisy[?] | Peach and Daisy Pipe | |
| Spanish | Tubería de Peach y Daisy[?] | Peach and Daisy Pipe |
Cups[edit]
Dixie Kong Cup Ranked cup (week 1) |
Sydney Sprint 3 |
Tokyo Blur R/T |
Singapore Speedway 2R/T |
Ring Race | ||||
 Berlin Byways 2 |
Pink Shy Guy | |||||||
Mii Cup |
Los Angeles Laps 3T |
Berlin Byways 3 |
Sydney Sprint 2R |
Glider Challenge | ||||
 Sydney Sprint 3 |
Baby Rosalina | |||||||
Metal Mario Cup Ranked cup (week 2) |
Berlin Byways 3T |
Amsterdam Drift 2R/T |
Los Angeles Laps 3R/T |
Time Trial | ||||
 Singapore Speedway 2 |
Koopa Troopa | |||||||
Cat Peach Cup |
Sydney Sprint 2 |
Berlin Byways 2 |
Los Angeles Laps 3R |
Smash Small Dry Bones | ||||
 Amsterdam Drift 2 |
Mario | |||||||
Donkey Kong Cup |
Berlin Byways 3R |
Sydney Sprint 3T |
Tokyo Blur R |
Do Jump Boosts | ||||
 Los Angeles Laps 3 |
Baby Peach | |||||||
Kamek Cup |
Sydney Sprint 2T |
Singapore Speedway 2R |
Los Angeles Laps 3 |
Steer Clear of Obstacles | ||||
 Sydney Sprint 3 |
Wario | |||||||
Pink Gold Peach Cup |
Amsterdam Drift 2 |
Sydney Sprint 3 |
Berlin Byways 2T |
Goomba Takedown | ||||
 Sydney Sprint 2 |
Birdo (Yellow) | |||||||
Mario Cup |
Sydney Sprint 3R |
Singapore Speedway 2 |
Berlin Byways 3 |
Ring Race | ||||
 Tokyo Blur |
Lakitu | |||||||
Luigi Cup |
Sydney Sprint 2R |
Berlin Byways 2R |
Amsterdam Drift 2R |
Time Trial | ||||
 Berlin Byways 3 |
Luigi | |||||||
Toadette Cup |
Singapore Speedway 2T |
Sydney Sprint 3R |
Berlin Byways 3T |
Combo Attack | ||||
 Sydney Sprint 2T |
Boomerang Bro | |||||||
Peach Cup |
Tokyo Blur |
Berlin Byways 3R |
Sydney Sprint 2T |
Break Item Boxes | ||||
 Los Angeles Laps 3 |
Yoshi | |||||||
Toad Cup |
Amsterdam Drift 2T |
Los Angeles Laps 3T |
Sydney Sprint 3T |
Big Reverse Race | ||||
 Singapore Speedway 2 |
Any character | |||||||
Signature kart sets[edit]
Drivers with a corresponding cup are bumped one rank up in every course of their cup.
| Cup | Driver | Kart | Glider |
|---|---|---|---|
| First course of every cup | |||
| Second course of every cup | |||
| Third course of every cup | |||
| — | — | ||
| — | — | ||
| — | — | ||
| — | — | ||
| — | — | ||
| — | — | ||
| — | — | ||
| — | — | ||
| — | — | ||
| — | — | ||
| — | — | ||
| — | — |
Today's Challenge[edit]
Players' most recently used kart and glider are chosen, and favorite and favored ones have extra priority. Opponents are arranged randomly. On day 1 of this tour, players finish a race in Los Angeles Laps 3T in the Mii Cup using Birdo (Black) for a free pipe launch. Starting from day 2, players have to finish a race in the earliest incomplete course that is not in any of the ranked cups using the driver shown on the course's thumbnail every day to obtain the corresponding reward in the table below. Once all of the courses are completed, the courses are selected at random.
| Day(s) | Reward |
| 1-4, 6-9, 11-13 | Free pipe launch |
|---|---|
| 5, 10 | Rubies ×5 |
| 14 |  Badge |
| Today's Challenge Pipe | |

| |
| Pipe contents | |
| Rubies, coins, driver (Normal/Super/High-End), kart (Normal/Super/High-End), glider (Normal/Super/High-End), item tickets | |
Rewards[edit]
Gold cells indicate rewards that are exclusive to Gold Pass members.

|
||||||
| BBIA Parafoil | Red Streamliner | Biddybuggy | Red B Dasher | Koopa Troopa | Gold Koopa (Freerunning) | Surf Master |
| Grand Stars | 15 | 20 | 25 | 30 | 35 | 40 | 42 | 50 | 60 | 70 | 75 | 80 | 85 | 90 | 100 | 110 | 115 | 125 | 145 | 165 | 185 | 205 | 225 | 245 | 255 | 265 | Total | Grand total | |
|---|---|---|---|---|---|---|---|---|---|---|---|---|---|---|---|---|---|---|---|---|---|---|---|---|---|---|---|---|---|
| Free pipe launch | 1 | 1 | 1 | 1 | 1 | 1 | 6 | ||||||||||||||||||||||
| Coins | 500 | 500 | 1000 | 1000 | 1000 | 1000 | 5000 | 15000 | |||||||||||||||||||||
| 5000 | 5000 | 10000 | |||||||||||||||||||||||||||
| Rubies | 10 | 5 | 3 | 3 | 21 | 56 | |||||||||||||||||||||||
| 15 | 10 | 10 | 35 | ||||||||||||||||||||||||||
| Item tickets | 5 | 5 | 10 | 30 | |||||||||||||||||||||||||
| 10 | 10 | 20 | |||||||||||||||||||||||||||
| Star tickets | 4 | 4 | 4 | ||||||||||||||||||||||||||
| 0 | |||||||||||||||||||||||||||||
| Point-boost tickets | 1 | 1 | 1 | 3 | 8 | ||||||||||||||||||||||||
| 5 | 5 | ||||||||||||||||||||||||||||
| 1 | 1 | 1 | 3 | 8 | |||||||||||||||||||||||||
| 5 | 5 | ||||||||||||||||||||||||||||
| 1 | 1 | 1 | 3 | 8 | |||||||||||||||||||||||||
| 5 | 5 | ||||||||||||||||||||||||||||
| Level-boost tickets | 3 | 19 | |||||||||||||||||||||||||||
(3) |
(3) |
(3) |
16 | ||||||||||||||||||||||||||
3 Year Anniv. Log-In Bonus[edit]
A 14-day "3 Year Anniv. Log-In Bonus" continued from the previous tour and served as the log-in bonus for the 3rd anniversary event from September 7, 2022 to October 4, 2022.
| Day | Reward |
|---|---|
| 1 | Rubies ×5 |
| 2 | Coins ×3,000 |
| 3 | Coins ×3,000 |
| 4 | Coins ×3,000 |
| 5 | Rubies ×5 |
| 6 | Coins ×3,000 |
| 7 | Coins ×3,000 |
| 8 | Coins ×3,000 |
| 9 | Coins ×3,000 |
| 10 | Rubies ×10 |
| 11 | Coins ×3,000 |
| 12 | Coins ×3,000 |
| 13 | Coins ×3,000 |
| 14 | Rubies ×10 |
New content[edit]
Drivers[edit]
Mii Racing Suits[edit]
Karts[edit]
Gliders[edit]
Courses[edit]
Berlin Byways 3 (N, R, T)
Sydney Sprint 3 (N, R, T)
Amsterdam Drift 2 (R/T)
Singapore Speedway 2 (R/T)
Paid banners[edit]
| Name | Availability | Cost | Contents | Banner image |
|---|---|---|---|---|
| Value Pack | September 21, 2022 – October 4, 2022 | US$1.99 |
|

|
| Driver Point-Boost Tickets 10 Ticket Set | September 21, 2022 – October 4, 2022 | US$3.99 | 
| |
| Celebrate the Anniversary Tour with the Daikon Rocket! | September 21, 2022 – October 4, 2022 | US$3.99 | 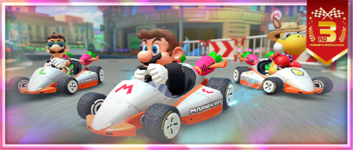
| |
| Cat Parafoil Pack | September 21, 2022 – October 4, 2022 | US$19.99 |
|
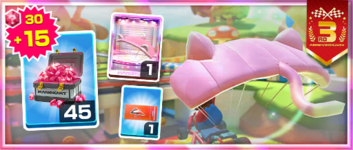
|
| Builder Toadette Pack | September 21, 2022 – October 4, 2022 | US$39.99 |
|
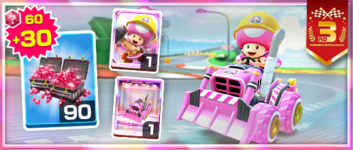
|
| Mario's Mustache Pack | September 21, 2022 – October 4, 2022 | US$39.99 |
|
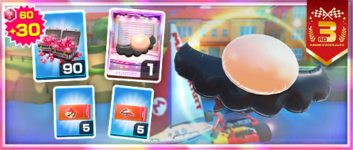
|
| Cat Toad Pack | September 28, 2022 – October 4, 2022 | US$19.99 |
|
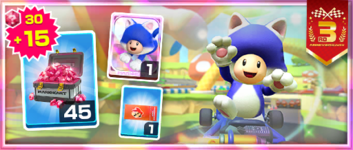
|
| Pauline (Rose) Pack | September 28, 2022 – October 4, 2022 | US$39.99 |
|
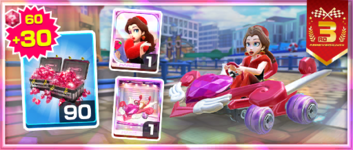
|
Challenges[edit]
| Tour Challenges 1 | Tour Challenges 2 | Gold Challenges | ||||||||
|---|---|---|---|---|---|---|---|---|---|---|
| Completion reward: |
Completion reward: |
Completion reward: | ||||||||
 |
 |
 |
 |
 |
 |
 |
 |
 | ||
| Land 5 hits with Red Shells. | Land 3 hits with Green Shells. | Get 1st place in a 100cc or higher race 2 times in a row. | Use 10 Mushrooms. | Land 3 hits with Bob-ombs. | Get a Fantastic combo a total of 5 times. | Do a total of 5 Slipstream boosts. | Land 15 hits with Bananas. | Activate Frenzy mode 3 times. | ||
 |
 |
 |
 |
 |
 |
 |
 |
 | ||
| Get an item from the Tier Shop. | Get 3rd place or higher 30 times. | Cause an opponent to crash while gliding. | Get 1 item from the Daily Selects section of the Shop. | Cause opponents to crash a total of 3 times using a driver wearing gloves. | Earn a score of 7,000 or higher on 3 T or R/T courses. | Use a points-cap ticket. | Cause opponents to crash 5 times in a single race using a driver with a hat. | Earn a score of 10,000 or higher on 5 courses. | ||
 |
 |
 |
 |
 |
 |
 |
 |
 | ||
| Do 50 Mini-Turbo boosts. | Cause opponents to crash using a Mega Mushroom. | Race in every course of every cup, including bonus challenges. | Drive a distance of 20,000 or more on a city course. | Earn a total score of 20,000 or higher in the Peach Cup. | Use point-boost tickets 3 times. | Use Lightning. | Earn a total score of 15,000 or higher in the Donkey Kong Cup. | Complete Coin Rush 1 time. | ||
| Premium Challenges | Premium Challenges+ | |||||
|---|---|---|---|---|---|---|
| Cost: US$4.99 | Cost: US$14.99 | |||||
| Three in a row reward: |
Three in a row reward: | |||||
Completion reward:  Penguin Luigi ×1 Penguin Luigi ×1
|
Completion reward: | |||||

|
||||||
| Toad (Pit Crew) ×1 | Blue Royale ×1 | Lightning Oilpaper ×1 | Point-boost ticket (Driver) ×5 | Point-boost ticket (Kart) ×5 | Point-boost ticket (Glider) ×5 | |
| Land 5 hits with Green Shells. | Land 10 hits with Bananas. | Land 10 hits with Bob-ombs. | Land 10 hits with Green Shells. | Land 20 hits with Bananas. | Use 30 Mushrooms. | |
| Coins ×3,000 | Rubies ×10 | Point-boost ticket (Glider) ×3 | Level-boost ticket (High-End driver) ×1 | Level-boost ticket (High-End kart) ×1 | Level-boost ticket (High-End glider) ×1 | |
| Do 50 Jump Boosts. | Participate in a race. | Do 100 Mini-Turbo boosts. | Do 100 Jump Boosts. | Do 150 Mini-Turbo boosts. | Collect a total of 300 coins in races. | |
| Level-boost ticket (Normal glider) ×1 | Level-boost ticket (Super glider) ×1 | Level-boost ticket (High-End glider) ×1 | Points-cap ticket (High-end driver) ×1 | Points-cap ticket (High-end kart) ×1 | Points-cap ticket (High-end glider) ×1 | |
| Get 1st place in a race 10 times. | Get 1st place in a race 15 times. | Get 1st place in a race 20 times. | Get 1st place in a race 15 times. | Get 1st place in a race 20 times. | Get 1st place in a race 30 times. | |
| Tour Multiplayer Challenges | ||
|---|---|---|
| Three in a row reward: | ||
| Completion reward: | ||
 |
 |
 |
| Do 10 Jump Boosts in multiplayer. | Land 3 hits with Red Shells in multiplayer. | Land 3 hits with Bananas in multiplayer. |
 |
 |
 |
| Join 3 multiplayer races. | Join 5 multiplayer races. | Join 10 multiplayer races. |
 |
 |
 |
| Get 3rd place or higher in a multiplayer race. | Get 3rd place or higher 3 times in a multiplayer race. | Get 3rd place or higher 5 times in a multiplayer race. |
| Total Points Challenge 1 | |
|---|---|
| Points | Rewards |
| 350,000 |
|
| 300,000 |
|
| 250,000 | |
| 200,000 | |
| 150,000 |
|
| 100,000 |
|
| Total Points Challenge 2 | |
|---|---|
| Points | Rewards |
| 900,000 |
|
| 800,000 | |
| 700,000 | |
| 600,000 | |
| 500,000 | |
| 400,000 | |
Initial pipe appearance rates[edit]
All-Clear Pipe[edit]
The All-Clear Pipe randomly shoots out one of the following regular High-End items. The appearance rate can be viewed via the "Pipe content" link on the Gold Pass purchase screen.
Anniversary Pipe 1[edit]
| Items obtained from a new Anniversary Pipe 1 | |||||||||||||||
|---|---|---|---|---|---|---|---|---|---|---|---|---|---|---|---|
| Item | Normal |
Super |
High-End |
Featured High-End | |||||||||||
| Driver | Kart | Glider | Driver | Kart | Glider | Driver | Kart | Glider | Driver | Kart | Glider | ||||
| Amount | 30 | 24 | 14 | 9 | 7 | 4 | 1 | 1 | 1 | 3 | 3 | 3 | |||
Anniversary Pipe 2[edit]
| Items obtained from a new Anniversary Pipe 2 | |||||||||||||||
|---|---|---|---|---|---|---|---|---|---|---|---|---|---|---|---|
| Item | Normal |
Super |
High-End |
Featured High-End | |||||||||||
| Driver | Kart | Glider | Driver | Kart | Glider | Driver | Kart | Glider | Driver | Kart | Glider | ||||
| Amount | 30 | 24 | 14 | 9 | 7 | 4 | 1 | 1 | 1 | 3 | 3 | 3 | |||
Mario Pipe[edit]
| Items obtained from a new Mario Pipe | ||||||||||||
|---|---|---|---|---|---|---|---|---|---|---|---|---|
| Item | Normal |
Super |
High-End | |||||||||
| Driver | Kart | Glider | Driver | Kart | Glider | Driver | Kart | Glider | ||||
| Amount | 9 | 13 | 9 | 5 | 4 | 4 | 6 | 0 | 0 | |||
Peach & Daisy Pipe[edit]
| Items obtained from a new Peach & Daisy Pipe | ||||||||||||
|---|---|---|---|---|---|---|---|---|---|---|---|---|
| Item | Normal |
Super |
High-End | |||||||||
| Driver | Kart | Glider | Driver | Kart | Glider | Driver | Kart | Glider | ||||
| Amount | 9 | 13 | 9 | 5 | 4 | 4 | 6 | 0 | 0 | |||
Mii Racing Suit Shop[edit]
Banner items[edit]
| Name | Starting date | Cost | Contents | Banner image |
|---|---|---|---|---|
| Castle Mii Racing Suit | September 21, 2022 | 70 100 rubies for 2nd and 3rd purchases respectively |
Castle Mii Racing Suit ×1 |
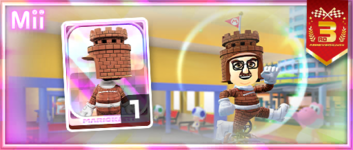
|
Other items[edit]
| Items available in Mii Racing Suit Shop (September 21, 2022 - October 4, 2022) | ||
|---|---|---|
| Goomba Mii Racing Suit Amount: 3 |
Hammer Bro Mii Racing Suit Amount: 3 |
Bowser Mii Racing Suit Amount: 3 |
| Dolphin Mii Racing Suit Amount: 3 |
Petey Piranha Mii Racing Suit Amount: 3 |
Pastry Chef Mii Racing Suit Amount: 3 |
| Cat Mii Racing Suit Amount: 3 |
King Boo Mii Racing Suit Amount: 3 |
King Bob-omb Mii Racing Suit Amount: 3 |
Token Shop[edit]
The limited-time event where event tokens appear began on September 21, 2022 and ended on October 4, 2022. Event tokens could be earned by causing opponents to crash.
| Token Shop (September 21, 2022 - October 4, 2022) | ||
|---|---|---|

|

|
|
| Metal Mario Amount: 1 |
Pink Gold Peach Amount: 1 |
Wild Wing Amount: 1 |
| Gold Pipe Amount: 1 |
Gold Pipe Amount: 1 |
Gold Pipe Amount: 1 |
| Pipe Amount: 31 |
Ruby ×3 Amount: 5 |
Coin ×500 Amount: 5 |
| Level-boost ticket (Normal) Amount: 3 |
Level-boost ticket (Normal) Amount: 3 |
Level-boost ticket (Normal) Amount: 3 |
| Level-boost ticket (Super) Amount: 2 |
Level-boost ticket (Super) Amount: 2 |
Level-boost ticket (Super) Amount: 2 |
| Level-boost ticket (High-End) Amount: 1 |
Level-boost ticket (High-End) Amount: 1 |
Level-boost ticket (High-End) Amount: 1 |
| Points-cap ticket (Normal) Amount: 1 |
Points-cap ticket (Super) Amount: 1 |
Points-cap ticket (High-End) Amount: 1 |
Tier Shop[edit]
The shop features a variety of set and randomized items available for purchase. The item slots in the shop are unlocked based on the highest tier of players.
| Items available in Tier Shop (September 21, 2022 - September 27, 2022) | ||
|---|---|---|

|
||
| Dixie Kong Amount: 1 |
Bolt Buggy Amount: 1 |
Crimson Crane Amount: 1 |
| Items available in Tier Shop (September 28, 2022 - October 4, 2022) | ||

|
||
| Metal Mario Amount: 1 |
Cact-Ice Amount: 1 |
Star-Spangled Glider Amount: 1 |
| Items available in Tier Shop (September 21, 2022 - October 4, 2022) | ||
| Level-boost ticket (Normal) Amount: 3 per week |
Level-boost ticket (Normal) Amount: 3 per week |
Level-boost ticket (Normal) Amount: 3 per week |
OR |
OR |
OR |
| Level-boost ticket (Super) Amount: 2 per week OR Level-boost ticket (High-End) Amount: 1 per week |
Level-boost ticket (Super) Amount: 2 per week OR Level-boost ticket (High-End) Amount: 1 per week |
Level-boost ticket (Super) Amount: 2 per week OR Level-boost ticket (High-End) Amount: 1 per week |
OR OR |
OR OR |
OR OR |
| Points-cap ticket (Normal) Amount: 1 per week |
Points-cap ticket (Super) Amount: 1 per week |
Points-cap ticket (High-End) Amount: 1 per week |
| Level-boost ticket (High-End) Amount: 1 per week |
Level-boost ticket (High-End) Amount: 1 per week |
Level-boost ticket (High-End) Amount: 1 per week |
Names in other languages[edit]
| Language | Name | Meaning | Notes |
|---|---|---|---|
| Japanese | アニバーサリーツアー[?] Anibāsarī Tsuā |
Anniversary Tour | |
| Chinese (simplified) | 周年巡回赛[?] Zhōunián Xúnhuí sài |
Anniversary Tour | |
| Chinese (traditional) | 週年巡迴賽[?] Zhōunián Xúnhuí sài |
Anniversary Tour | |
| French | Saison anniversaire[?] | Anniversary Season | |
| German | Jubiläums-Tour-Saison[?] | Anniversary Tour Season | |
| Italian | Tour anniversario[?] | Anniversary Tour | |
| Korean | 주년 기념 투어[?] Junyeon Ginyeom Tueo |
Anniversary Tour | |
| Portuguese | Temporada de aniversário[?] | Anniversary Season | |
| Spanish | Temporada de aniversario[?] | Anniversary Season |
Trivia[edit]
- This was the first tour since the Valentine's Tour sixty-nine tours prior to feature an addition to the list of favorite courses for a Normal driver, as well as the first since the Marine Tour fifty-eight tours prior to feature an addition to the list of favorite courses for any Normal item, with Koopa Troopa getting Sydney Sprint 3R as a favorite course.
- This was the first tour to include the normal and R variants, but not the T variant, of a track (namely Tokyo Blur). To accommodate this, Los Angeles Laps 3T repeats.
- It was also the first normal tour to exclude one of the three aforementioned variants of any track.
- Including R, T, and R/T variants, this tour featured eight courses, the least out of any tour.
External links[edit]
- Celebrate three years of Mario Kart Tour with the globe-trotting Anniversary Tour. mario.nintendo.com. Retrieved September 30, 2022. (Archived September 30, 2022, 19:57:39 UTC via Wayback Machine)
References[edit]
- ^ @mariokarttourEN (September 7, 2022). "#MarioKartTour will soon reach its 3rd anniversary since release! Some events to express our gratitude to everyone and to celebrate the 3rd anniversary have now begun and will go on for two tours in a row! Check the image for details!" Twitter. Retrieved September 12, 2022.


