Ocean Tour: Difference between revisions
m (Undo revision 3718776 by 100.36.38.244 (talk)) Tag: Undo |
m (Text replacement - "== *Trivia *==" to "==Notes==") |
||
| (43 intermediate revisions by 21 users not shown) | |||
| Line 1: | Line 1: | ||
{{tour infobox | {{tour infobox | ||
|image=[[File:MKT Ocean Tour.png|200px]] | |image=[[File:MKT Ocean Tour.png|200px]] | ||
| Line 5: | Line 4: | ||
|end=August 9, 2022<br>10:59 p.m. (PT) | |end=August 9, 2022<br>10:59 p.m. (PT) | ||
|cups=12 | |cups=12 | ||
|rank=[[Daisy Cup]] (week 1) | |rank=[[Daisy Cup]] (week 1)<br>[[Bowser Jr. Cup]] (week 2) | ||
|coin=[[RMX Vanilla Lake 1]] | |coin=[[RMX Vanilla Lake 1]] | ||
|before=[[Piranha Plant Tour|<<]] | |before=[[Piranha Plant Tour|<<]] | ||
|after=>> | |after=[[Sundae Tour (2022)|>>]] | ||
}} | }} | ||
The '''Ocean Tour''' | The '''Ocean Tour''' was the seventy-fifth tour of ''[[Mario Kart Tour]]'', which began on July 27, 2022 and ended on August 9, 2022. The tour introduced variants of [[Princess Daisy|Daisy]] and [[Toadette]] in sailor outfits, as well as [[GCN Daisy Cruiser|Daisy Cruiser]] from ''[[Mario Kart: Double Dash!!]]'' as a new [[classic course]]. The tour also introduced [[Tour Singapore Speedway|Singapore Speedway 2]], a new layout of the Singapore Speedway course featuring the {{wp|Gardens by the Bay}}, making this the first tour since the [[Holiday Tour (2019)|2019 Holiday Tour]] sixty-eight tours prior to introduce both a classic course and a [[New course|city course]]. Two new [[Mii|Mii Racing Suits]] based on a [[Cheep Cheep]] and a [[Dolphin]] were introduced in this tour as part of Mii Racing Suits Wave 11, the latter of which was obtainable from the tour's [[#Token Shop|Token Shop]], which also featured [[Princess Peach|Peach (Vacation)]] and a gold pipe. The Cheep Cheep Mii Racing Suit has the [[Bubble]] as its [[Special skill (Mario Kart Tour)|special skill]], making it the first non-Normal and non-lightweight driver with the skill and the first time any driver with this skill has been introduced since the [[Tokyo Tour]], the second tour of the game. | ||
The Summertime Celebration event | The Summertime Celebration event began in this tour and runs until the end of the following tour, the [[Sundae Tour (2022)|2022 Sundae Tour]]. A special [[#Summer Log-In Bonus|log-in bonus]] lasts throughout the entire celebration with 14 days of rewards, including coins, rubies, point-boost tickets, and High-End level up tickets. The celebration also features the [[List of challenge cards in Mario Kart Tour#Summer Challenges|Summer Challenges]] card, which awards players with a total of 48 rubies; each individual challenge on the card awards between one to three rubies, and completing all nine challenges gives a prize of 30 rubies. | ||
This course's [[Coin Rush (Mario Kart Tour)|Coin Rush]] course | This course's [[Coin Rush (Mario Kart Tour)|Coin Rush]] course was [[RMX Vanilla Lake 1]], which was reused from the [[Frost Tour]]. The menu's background featured the [[Daisy Cruiser]] as the landmark for this tour. | ||
Starting from this tour, [[Princess Daisy|Daisy (Swimwear)]] and the [[Vampire Flyer]] are available in regular tour pipes, including the All-Clear Pipe. | Starting from this tour, [[Princess Daisy|Daisy (Swimwear)]] and the [[Vampire Flyer]] are available in regular tour pipes, including the All-Clear Pipe. | ||
| Line 22: | Line 21: | ||
|-style="background: #89A" | |-style="background: #89A" | ||
|colspan=3|'''Ocean Pipe 1'''<br>July 26, 2022, 11:00 p.m. (PT) – <br>August 9, 2022, 10:59 p.m. (PT) | |colspan=3|'''Ocean Pipe 1'''<br>July 26, 2022, 11:00 p.m. (PT) – <br>August 9, 2022, 10:59 p.m. (PT) | ||
|colspan=3|'''Ocean Pipe 2'''<br> | |colspan=3|'''Ocean Pipe 2'''<br>August 2, 2022, 11:00 p.m. (PT) – <br>August 9, 2022, 10:59 p.m. (PT) | ||
|- | |- | ||
|colspan=3|[[File:MKT Tour75 OceanPipe1.png|x150px]] | |colspan=3|[[File:MKT Tour75 OceanPipe1.png|x150px]] | ||
| Line 68: | Line 67: | ||
|[[Polka-Dot Manta Glider]], [[Silver Manta Glider]] and [[Manta Glider]] | |[[Polka-Dot Manta Glider]], [[Silver Manta Glider]] and [[Manta Glider]] | ||
|} | |} | ||
;;Names in other languages | |||
{{foreign names | |||
|Jpn=オーシャンマンタドカン | |||
|JpnR=Ōshan Manta Dokan | |||
|JpnM=Ocean Manta Pipe | |||
|ChiS=汪洋魔鬼鱼水管 | |||
|ChiSR=Wāngyáng Móguǐyú Shuǐguǎn | |||
|ChiSM=Ocean Manta Pipe | |||
|ChiT=汪洋魔鬼魚水管 | |||
|ChiTR=Wāngyáng Móguǐyú Shuǐguǎn | |||
|ChiTM=Ocean Manta Pipe | |||
|Fre=Tuyau des mantas | |||
|FreM=Mantas Pipe | |||
|Ger=Meeresmanta-Röhre | |||
|GerM=Sea Manta Pipe | |||
|Ita=Tubo dei Mantaplani | |||
|ItaM=Manta Gliders Pipe | |||
|Kor=오션 쥐가오리 토관 | |||
|KorR=Osyeon Jwigaori Togwan | |||
|KorM=Ocean Manta Ray Pipe | |||
|Por=Cano Arraias | |||
|PorM=Manta Rays Pipe | |||
|SpaA=Tubería de mantas | |||
|SpaAM=Mantas Pipe | |||
|SpaE=Tubería marina | |||
|SpaEM=Marine Pipe | |||
}} | |||
==Cups== | ==Cups== | ||
| Line 75: | Line 102: | ||
|R1=[[GCN Daisy Cruiser]]||R1.I=DaisyCruiserGCN||R1.1=1,200||R1.2=1,800||R1.3=2,100||R1.4=2,400||R1.5=6,100 | |R1=[[GCN Daisy Cruiser]]||R1.I=DaisyCruiserGCN||R1.1=1,200||R1.2=1,800||R1.3=2,100||R1.4=2,400||R1.5=6,100 | ||
|R2=[[Wii Koopa Cape|Wii Koopa Cape R]]||R2.I=KoopaCapeRWii MarioSwimwear||R2.1=1,700||R2.2=2,600||R2.3=3,000||R2.4=3,400||R2.5=8,600 | |R2=[[Wii Koopa Cape|Wii Koopa Cape R]]||R2.I=KoopaCapeRWii MarioSwimwear||R2.1=1,700||R2.2=2,600||R2.3=3,000||R2.4=3,400||R2.5=8,600 | ||
|R3=[[Singapore Speedway | |R3=[[Tour Singapore Speedway|Singapore Speedway 2R]]||R3.I=SingaporeSpeedway2R||R3.1=1,900||R3.2=2,800||R3.3=3,300||R3.4=3,800||R3.5=9,400 | ||
|CN=[[Ring Race]]||C.I=Tour60 FunkyKongCupChallenge||CC=[[Bowser]]||CT=[[3DS Bowser's Castle]]||C.1=15||C.2=25||C.3=35 | |CN=[[Ring Race]]||C.I=Tour60 FunkyKongCupChallenge||CC=[[Bowser]]||CT=[[3DS Bowser's Castle]]||C.1=15||C.2=25||C.3=35 | ||
}} | }} | ||
| Line 86: | Line 113: | ||
}} | }} | ||
{{MKT cup table row | {{MKT cup table row | ||
|C=Bowser Jr.||Ra= | |C=Bowser Jr.||Ra=2 | ||
|R1=[[GCN Baby Park|GCN Baby Park R]]||R1.I=BabyParkRGCN BowserJr||R1.1=2,100||R1.2=3,300||R1.3=3,800||R1.4=4,400||R1.5=10,300 | |R1=[[GCN Baby Park|GCN Baby Park R]]||R1.I=BabyParkRGCN BowserJr||R1.1=2,100||R1.2=3,300||R1.3=3,800||R1.4=4,400||R1.5=10,300 | ||
|R2=Singapore Speedway 2T||R2.I=SingaporeSpeedway2T||R2.1=2,400||R2.2=3,800||R2.3=4,400||R2.4=5,200||R2.5=12,000 | |R2=Singapore Speedway 2T||R2.I=SingaporeSpeedway2T||R2.1=2,400||R2.2=3,800||R2.3=4,400||R2.4=5,200||R2.5=12,000 | ||
|R3=GCN Daisy Cruiser T||R3.I=DaisyCruiserTGCN||R3.1=2,100||R3.2=3,300||R3.3=3,800||R3.4=4,400||R3.5=10,300 | |R3=GCN Daisy Cruiser T||R3.I=DaisyCruiserTGCN||R3.1=2,100||R3.2=3,300||R3.3=3,800||R3.4=4,400||R3.5=10,300 | ||
|CN=[[Time Trial (Mario Kart Tour)|Time Trial]]||C.I=Tour57 PinkGoldPeachCupChallenge||CC=Rosalina||CT=[[RMX Rainbow Road 2|RMX Rainbow Road 2R]]||C.1=2: | |CN=[[Time Trial (Mario Kart Tour)|Time Trial]]||C.I=Tour57 PinkGoldPeachCupChallenge||CC=Rosalina||CT=[[RMX Rainbow Road 2|RMX Rainbow Road 2R]]||C.1=2:00.00||C.2=1:45.00||C.3=1:36.00 | ||
}} | }} | ||
{{MKT cup table row | {{MKT cup table row | ||
| Line 153: | Line 180: | ||
|R2=Wii Coconut Mall||R2.I=CoconutMallWii CharginChuck||R2.1=2,400||R2.2=4,800||R2.3=5,400||R2.4=6,700||R2.5=11,800 | |R2=Wii Coconut Mall||R2.I=CoconutMallWii CharginChuck||R2.1=2,400||R2.2=4,800||R2.3=5,400||R2.4=6,700||R2.5=11,800 | ||
|R3=SNES Mario Circuit 2R/T||R3.I=MarioCircuit2RTSNES PenguinLuigi||R3.1=2,200||R3.2=4,500||R3.3=5,100||R3.4=6,200||R3.5=11,000 | |R3=SNES Mario Circuit 2R/T||R3.I=MarioCircuit2RTSNES PenguinLuigi||R3.1=2,200||R3.2=4,500||R3.3=5,100||R3.4=6,200||R3.5=11,000 | ||
|CN=[[Take them out quick!]]||C.I=Tour75 NabbitCupChallenge||CC=[[Mario|Mario (Swimwear)]]||CT=3DS Cheep Cheep Lagoon||C.1=0||C.2= | |CN=[[Take them out quick!]]||C.I=Tour75 NabbitCupChallenge||CC=[[Mario|Mario (Swimwear)]]||CT=3DS Cheep Cheep Lagoon||C.1=0:00.00||C.2=0:05.00||C.3=0:15.00 | ||
}} | }} | ||
|} | |} | ||
| Line 172: | Line 199: | ||
|Second course of every cup | |Second course of every cup | ||
|[[File:MKT Icon DaisySailor.png|x50px|link=Princess Daisy|Daisy (Sailor)]][[File:MKT Icon MarioSwimwear.png|x50px|link=Mario|Mario (Swimwear)]] | |[[File:MKT Icon DaisySailor.png|x50px|link=Princess Daisy|Daisy (Sailor)]][[File:MKT Icon MarioSwimwear.png|x50px|link=Mario|Mario (Swimwear)]] | ||
|[[File:MKT Icon FloweryBadwagon.png| | |[[File:MKT Icon FloweryBadwagon.png|x45px|link=Flowery Badwagon]][[File:MKT Icon CheepSnorkel.png|x50px|link=Cheep Snorkel]] | ||
|[[File:MKT Icon TropicalBalloons.png|x50px|link=Tropical Balloons]][[File:MKT Icon BlackGreatSail.png|x50px|link=Black Great Sail]] | |[[File:MKT Icon TropicalBalloons.png|x50px|link=Tropical Balloons]][[File:MKT Icon BlackGreatSail.png|x50px|link=Black Great Sail]] | ||
|- | |- | ||
|Third course of every cup | |Third course of every cup | ||
|[[File:MKT Icon ToadetteSailor.png|x50px|link=Toadette|Toadette (Sailor)]][[File:MKT Icon RosalinaSwimwear.png|x50px|link=Rosalina|Rosalina (Swimwear)]] | |[[File:MKT Icon ToadetteSailor.png|x50px|link=Toadette|Toadette (Sailor)]][[File:MKT Icon RosalinaSwimwear.png|x50px|link=Rosalina|Rosalina (Swimwear)]] | ||
|[[File:MKT Icon CoralJetCruiser.png| | |[[File:MKT Icon CoralJetCruiser.png|x40px|link=Coral Jet Cruiser]][[File:MKT Icon SurfSailer.png|x50px|link=Surf Sailer]] | ||
|[[File:MKT Icon ShipsWheel.png|x50px|link=Ship's Wheel]][[File:MKT Icon SilverSurfMaster.png|x50px|link=Silver Surf Master]] | |[[File:MKT Icon ShipsWheel.png|x50px|link=Ship's Wheel (glider)|Ship's Wheel]][[File:MKT Icon SilverSurfMaster.png|x50px|link=Silver Surf Master]] | ||
|- | |- | ||
|[[File:MKT Icon Daisy Cup.png|50px|link=Daisy Cup]] | |[[File:MKT Icon Daisy Cup.png|50px|link=Daisy Cup]] | ||
| Line 354: | Line 381: | ||
|-style=background:gold | |-style=background:gold | ||
|||||[[File:MKT Icon Level-boostticket3.png|30px]]<br>(3)||[[File:MKT Icon Level-boostticket2.png|30px]]<br>(3)||[[File:MKT Icon Level-boostticket1.png|30px]]<br>(3)||||||||[[File:MKT Icon Level-boostticket6.png|30px]]||[[File:MKT Icon Level-boostticket5.png|30px]]||[[File:MKT Icon Level-boostticket4.png|30px]]||||[[File:MKT Icon Level-boostticket9.png|30px]]||[[File:MKT Icon Level-boostticket8.png|30px]]||[[File:MKT Icon Level-boostticket7.png|30px]]||||||||||||[[File:MKT Icon Level-boostticket8.png|30px]]||||||||16 | |||||[[File:MKT Icon Level-boostticket3.png|30px]]<br>(3)||[[File:MKT Icon Level-boostticket2.png|30px]]<br>(3)||[[File:MKT Icon Level-boostticket1.png|30px]]<br>(3)||||||||[[File:MKT Icon Level-boostticket6.png|30px]]||[[File:MKT Icon Level-boostticket5.png|30px]]||[[File:MKT Icon Level-boostticket4.png|30px]]||||[[File:MKT Icon Level-boostticket9.png|30px]]||[[File:MKT Icon Level-boostticket8.png|30px]]||[[File:MKT Icon Level-boostticket7.png|30px]]||||||||||||[[File:MKT Icon Level-boostticket8.png|30px]]||||||||16 | ||
|} | |||
<br> | |||
===Summer Log-In Bonus=== | |||
A 14-day "Summer Log-In Bonus" served as the log-in bonus for the Summertime Celebration of the game from July 26, 2022 to August 23, 2022. | |||
{|class="wikitable" style="margin:auto; text-align:center" width=25% | |||
|- | |||
!Day | |||
!Reward | |||
|- | |||
!1 | |||
|[[Ruby|Rubies]] ×5 | |||
|- | |||
!2 | |||
|[[Coin]]s ×2, 500 | |||
|- | |||
!3 | |||
|Coins ×2, 500 | |||
|- | |||
!4 | |||
|Coins ×2, 500 | |||
|- | |||
!5 | |||
|Rubies ×5 | |||
|- | |||
!6 | |||
|[[Point-boost ticket]] (Driver) ×5 | |||
|- | |||
!7 | |||
|Point-boost ticket (Kart) ×5 | |||
|- | |||
!8 | |||
|Point-boost ticket (Glider) ×5 | |||
|- | |||
!9 | |||
|Coins ×2, 500 | |||
|- | |||
!10 | |||
|Rubies ×5 | |||
|- | |||
!11 | |||
|[[Level-boost ticket]] (High-End driver) ×1 | |||
|- | |||
!12 | |||
|Level-boost ticket (High-End kart) ×1 | |||
|- | |||
!13 | |||
|Level-boost ticket (High-End glider) ×1 | |||
|- | |||
!14 | |||
|Rubies ×5 | |||
|} | |} | ||
| Line 365: | Line 443: | ||
====Mii Racing Suits==== | ====Mii Racing Suits==== | ||
<gallery> | <gallery> | ||
MKT Artwork DolphinMiiRacingSuit.png|[[Mii|Dolphin Mii Racing Suit]] | |||
MKT Artwork CheepCheepMiiRacingSuit.png|[[Mii|Cheep Cheep Mii Racing Suit]] | MKT Artwork CheepCheepMiiRacingSuit.png|[[Mii|Cheep Cheep Mii Racing Suit]] | ||
</gallery> | </gallery> | ||
| Line 383: | Line 461: | ||
===Courses=== | ===Courses=== | ||
<gallery> | <gallery heights=50px> | ||
MKT Icon Singapore Speedway 2.png|[[Singapore Speedway|Singapore Speedway 2]] (N, R, T) | |||
MKT Icon Daisy Cruiser.png|[[GCN Daisy Cruiser]] (N, R, T) | MKT Icon Daisy Cruiser.png|[[GCN Daisy Cruiser]] (N, R, T) | ||
</gallery> | </gallery> | ||
| Line 448: | Line 526: | ||
|US$39.99 | |US$39.99 | ||
|[[File:MKT Icon LakituPartyTime.png|30px]] [[Lakitu|Lakitu (Party Time)]] ×1<br> | |[[File:MKT Icon LakituPartyTime.png|30px]] [[Lakitu|Lakitu (Party Time)]] ×1<br> | ||
[[File:MKT Icon CandlelightFlight.png|30px]] [[Candlelight Flight]] ×1<br> | [[File:MKT Icon CandlelightFlight.png|30px]] [[Candlelight Flight (glider)|Candlelight Flight]] ×1<br> | ||
[[File:MKT Icon Ruby.png|30px]] [[Ruby|Rubies]] ×90 | [[File:MKT Icon Ruby.png|30px]] [[Ruby|Rubies]] ×90 | ||
|[[File:MKT Tour75 LakituPartyTimePack.png|x150px]] | |[[File:MKT Tour75 LakituPartyTimePack.png|x150px]] | ||
| Line 456: | Line 534: | ||
{{MKT challenge table | {{MKT challenge table | ||
|TCR1=[[File:MKT Icon CoinRushTicket.png|70px]] [[Coin Rush ticket]] ×1 | |TCR1=[[File:MKT Icon CoinRushTicket.png|70px]] [[Coin Rush ticket]] ×1 | ||
|T1.1= | |T1.1=018 | ||
|T1.1E=Land 3 hits with Green Shells. | |T1.1E=Land 3 hits with {{Color link|#A1A1FF|Green Shell|Green Shells}}. | ||
|T1.1S=1 | |T1.1S=1 | ||
|T1.2= | |T1.2=392 | ||
|T1.2E=Use 10 Mushrooms. | |T1.2E=Use 10 {{Color link|#A1A1FF|Mushroom|Mushrooms}}. | ||
|T1.2S=1 | |T1.2S=1 | ||
|T1.3= | |T1.3=007 | ||
|T1.3E=Get a Fantastic combo a total of 5 times. | |T1.3E=Get a Fantastic combo a total of 5 times. | ||
|T1.3S=1 | |T1.3S=1 | ||
|T1.4= | |T1.4=053 | ||
|T1.4E=Use point-boost tickets 3 times. | |T1.4E=Use {{Color link|#A1A1FF|point-boost ticket|point-boost tickets}} 3 times. | ||
|T1.4S=2 | |T1.4S=2 | ||
|T1.5= | |T1.5=232 | ||
|T1.5E=Get 3rd place or higher in a race 30 times. | |T1.5E=Get 3rd place or higher in a race 30 times. | ||
|T1.5S=2 | |T1.5S=2 | ||
|T1.6= | |T1.6=023 | ||
|T1.6E=Cause an opponent to crash while gliding. | |T1.6E=Cause an opponent to crash while gliding. | ||
|T1.6S=2 | |T1.6S=2 | ||
|T1.7= | |T1.7=028 | ||
|T1.7E=Do 50 Mini-Turbo boosts. | |T1.7E=Do 50 {{Color link|#A1A1FF|Mini-Turbo}} boosts. | ||
|T1.7S=2 | |T1.7S=2 | ||
|T1.8= | |T1.8=009 | ||
|T1.8E=Glide a total distance of 5,000. | |T1.8E=Glide a total distance of 5,000. | ||
|T1.8S=2 | |T1.8S=2 | ||
|T1.9= | |T1.9=202 | ||
|T1.9E=Race in every course of every cup, including bonus challenges. | |T1.9E=Race in every course of every cup, including bonus challenges. | ||
|T1.9S=2 | |T1.9S=2 | ||
|TCR2=[[File:MKT Icon QuickTicket.png|70px]] [[Quick ticket]] ×1 | |TCR2=[[File:MKT Icon QuickTicket.png|70px]] [[Quick ticket]] ×1 | ||
|T2.1= | |T2.1=145 | ||
|T2.1E= | |T2.1E=Do 5 {{Color link|#A1A1FF|Rocket Start|Rocket Starts}}. | ||
|T2.1S=1 | |T2.1S=1 | ||
|T2.2= | |T2.2=086 | ||
|T2.2E= | |T2.2E=Land 5 hits with {{Color link|#A1A1FF|Banana|Bananas}}. | ||
|T2.2S=1 | |T2.2S=1 | ||
|T2.3= | |T2.3=042 | ||
|T2.3E= | |T2.3E=Drive a distance of 20,000 or more. | ||
|T2.3S=1 | |T2.3S=1 | ||
|T2.4= | |T2.4=375 | ||
|T2.4E= | |T2.4E=Get an item from the Tier Shop. | ||
|T2.4S=2 | |T2.4S=2 | ||
|T2.5= | |T2.5=039 | ||
|T2.5E= | |T2.5E=Do 10 {{Color link|#A1A1FF|Mini-Turbo}} boosts in a single race using a driver with a ribbon. | ||
|T2.5S=2 | |T2.5S=2 | ||
|T2.6= | |T2.6=024 | ||
|T2.6E= | |T2.6E=Earn a score of 7,000 or higher on 3 T or R/T courses. | ||
|T2.6S=2 | |T2.6S=2 | ||
|T2.7= | |T2.7=073 | ||
|T2.7E= | |T2.7E=Land a hit with a {{Color link|#A1A1FF|Blooper}}. | ||
|T2.7S=2 | |T2.7S=2 | ||
|T2.8= | |T2.8=161 | ||
|T2.8E= | |T2.8E=Earn a total score of 15,000 or higher in the {{Color link|#A1A1FF|Donkey Kong Cup}}. | ||
|T2.8S=2 | |T2.8S=2 | ||
|T2.9= | |T2.9=029 | ||
|T2.9E= | |T2.9E=Send Greeting {{Color link|#A1A1FF|Coin|Coins}} to a friend. | ||
|T2.9S=2 | |T2.9S=2 | ||
|GCR=[[File:MKT Icon 1Ruby.png|70px]] [[Ruby|Rubies]] ×5 | |GCR=[[File:MKT Icon 1Ruby.png|70px]] [[Ruby|Rubies]] ×5 | ||
|G.1= | |G.1=117 | ||
|G.1E= | |G.1E=Do a total of 5 {{Color link|#A1A1FF|Slipstream}} boosts. | ||
|G.1S=1 | |G.1S=1 | ||
|G.2= | |G.2=041 | ||
|G.2E= | |G.2E=Land 10 hits with {{Color link|#A1A1FF|Red Shell|Red Shells}}. | ||
|G.2S=1 | |G.2S=1 | ||
|G.3= | |G.3=148 | ||
|G.3E= | |G.3E=Get 1st place 3 times in a row in races 100cc or above. | ||
|G.3S=1 | |G.3S=1 | ||
|G.4= | |G.4=040 | ||
|G.4E= | |G.4E=Use a {{Color link|#A1A1FF|points-cap ticket}}. | ||
|G.4S=2 | |G.4S=2 | ||
|G.5= | |G.5=028 | ||
|G.5E= | |G.5E=Get 1st place 5 times. | ||
|G.5S=2 | |G.5S=2 | ||
|G.6= | |G.6=020 | ||
|G.6E= | |G.6E=Earn a score of 10,000 or higher on 5 courses. | ||
|G.6S=2 | |G.6S=2 | ||
|G.7= | |G.7=021 | ||
|G.7E= | |G.7E=Cause opponents to crash in {{Color link|#A1A1FF|Frenzy}} mode. | ||
|G.7S=2 | |G.7S=2 | ||
|G.8= | |G.8=167 | ||
|G.8E= | |G.8E=Earn a total score of 25,000 or higher in the {{Color link|#A1A1FF|Kamek Cup}}. | ||
|G.8S=2 | |G.8S=2 | ||
|G.9= | |G.9=029 | ||
|G.9E= | |G.9E=Cause opponents to crash 3 times while underwater. | ||
|G.9S=2 | |G.9S=2 | ||
}} | }} | ||
<br> | |||
{| align=center width=65% cellspacing=0 border=1 cellpadding=3 style="border-collapse:collapse; font-family:Arial; text-align:center" | |||
|- | |||
!colspan=3 style="background: #EEEEFF"|'''Premium Challenges''' | |||
|rowspan=13 style="border-top:1px solid #FFF; border-bottom:1px solid #FFF;" width=5%| | |||
!colspan=3 style="background: #EEEEFF"|'''Premium Challenges+''' | |||
|- | |||
|colspan=3 style="background: #EEEEFF"|'''Cost:''' US$4.99 | |||
|colspan=3 style="background: #EEEEFF"|'''Cost:''' US$14.99 | |||
|- | |||
|colspan=3 style="background: #EEEEFF"|'''Three in a row reward:''' [[File:MKT Icon Coins 2.png|70px]] [[Coin|Coins]] ×300 | |||
|colspan=3 style="background: #EEEEFF"|'''Three in a row reward:''' [[File:MKT Icon Coins 2.png|70px]] [[Coin|Coins]] ×300 | |||
|- | |||
|colspan=3 style="background: #EEEEFF"|'''Completion reward:''' [[File:MKT Icon StarryGreatSail.png|50x80px]] [[Starry Great Sail]] ×1 | |||
|colspan=3 style="background: #EEEEFF"|'''Completion reward:''' [[File:MKT Icon Ruby 2.png|50x80px]] [[Ruby|Rubies]] ×20 | |||
|-style="height: 80px" | |||
|width=10% style="background:linear-gradient(#F2E18F,#B9800F)"|[[File:MKT Artwork ToadPitCrew.png|50x80px]] | |||
|width=10% style="background:linear-gradient(#F2E18F,#B9800F)"|[[File:MKT Icon SuperBlooper.png|50x80px]] | |||
|width=10% style="background:linear-gradient(#F2E18F,#B9800F)"|[[File:MKT Icon PeachParasol.png|50x80px]] | |||
|width=10% style="background:linear-gradient(#F2E18F,#B9800F)"|[[File:MKT Icon Point-boostticket1.png|70px]] | |||
|width=10% style="background:linear-gradient(#F2E18F,#B9800F)"|[[File:MKT Icon Point-boostticket2.png|70px]] | |||
|width=10% style="background:linear-gradient(#F2E18F,#B9800F)"|[[File:MKT Icon Point-boostticket3.png|70px]] | |||
|-style="color: #FFF" | |||
|style="background:linear-gradient(#864D00,#A26000); border-top:1px solid #B9800F;"|{{Color link|#A1A1FF|Toad|Toad (Pit Crew)}} ×1 | |||
|style="background:linear-gradient(#864D00,#A26000); border-top:1px solid #B9800F;"|{{Color link|#A1A1FF|Super Blooper (kart)|Super Blooper}} ×1 | |||
|style="background:linear-gradient(#864D00,#A26000); border-top:1px solid #B9800F;"|{{Color link|#A1A1FF|Peach Parasol (glider)|Peach Parasol}} ×1 | |||
|style="background:linear-gradient(#864D00,#A26000); border-top:1px solid #B9800F;"|Point-boost ticket (Driver) ×5 | |||
|style="background:linear-gradient(#864D00,#A26000); border-top:1px solid #B9800F;"|Point-boost ticket (Kart) ×5 | |||
|style="background:linear-gradient(#864D00,#A26000); border-top:1px solid #B9800F;"|Point-boost ticket (Glider) ×5 | |||
|-style="color: #FFF" | |||
|style="background:linear-gradient(#A26000,#C88512); border-top:1px solid #A26000;"|''Land 5 hits with Green Shells.'' | |||
|style="background:linear-gradient(#A26000,#C88512); border-top:1px solid #A26000;"|''Land 10 hits with Bananas.'' | |||
|style="background:linear-gradient(#A26000,#C88512); border-top:1px solid #A26000;"|''Land 10 hits with Bob-ombs.'' | |||
|style="background:linear-gradient(#A26000,#C88512); border-top:1px solid #A26000;"|''Land 10 hits with Green Shells.'' | |||
|style="background:linear-gradient(#A26000,#C88512); border-top:1px solid #A26000;"|''Land 20 hits with Bananas.'' | |||
|style="background:linear-gradient(#A26000,#C88512); border-top:1px solid #A26000;"|''Use 30 Mushrooms.'' | |||
|-style="height: 80px" | |||
|width=10% style="background:linear-gradient(#F2E18F,#B9800F)"|[[File:MKT Icon Coins 3.png|70px]] | |||
|width=10% style="background:linear-gradient(#F2E18F,#B9800F)"|[[File:MKT Icon Ruby.png|70px]] | |||
|width=10% style="background:linear-gradient(#F2E18F,#B9800F)"|[[File:MKT Icon Point-boostticket2.png|70px]] | |||
|width=10% style="background:linear-gradient(#F2E18F,#B9800F)"|[[File:MKT Icon Level-boostticket7.png|70px]] | |||
|width=10% style="background:linear-gradient(#F2E18F,#B9800F)"|[[File:MKT Icon Level-boostticket8.png|70px]] | |||
|width=10% style="background:linear-gradient(#F2E18F,#B9800F)"|[[File:MKT Icon Level-boostticket9.png|70px]] | |||
|-style="color: #FFF" | |||
|style="background:linear-gradient(#864D00,#A26000); border-top:1px solid #B9800F;"|{{Color link|#A1A1FF|Coins}} ×3,000 | |||
|style="background:linear-gradient(#864D00,#A26000); border-top:1px solid #B9800F;"|{{Color link|#A1A1FF|Ruby|Rubies}} ×10 | |||
|style="background:linear-gradient(#864D00,#A26000); border-top:1px solid #B9800F;"|{{Color link|#A1A1FF|Point-boost ticket}} (Kart) ×3 | |||
|style="background:linear-gradient(#864D00,#A26000); border-top:1px solid #B9800F;"|Level-boost ticket (High-End driver) ×1 | |||
|style="background:linear-gradient(#864D00,#A26000); border-top:1px solid #B9800F;"|Level-boost ticket (High-End kart) ×1 | |||
|style="background:linear-gradient(#864D00,#A26000); border-top:1px solid #B9800F;"|Level-boost ticket (High-End glider) ×1 | |||
|-style="color: #FFF" | |||
|style="background:linear-gradient(#A26000,#C88512); border-top:1px solid #A26000;"|''Do 50 Jump Boosts.'' | |||
|style="background:linear-gradient(#A26000,#C88512); border-top:1px solid #A26000;"|''Participate in a race.'' | |||
|style="background:linear-gradient(#A26000,#C88512); border-top:1px solid #A26000;"|''Do 100 Mini-Turbo boosts.'' | |||
|style="background:linear-gradient(#A26000,#C88512); border-top:1px solid #A26000;"|''Do 100 Jump Boosts.'' | |||
|style="background:linear-gradient(#A26000,#C88512); border-top:1px solid #A26000;"|''Do 150 Mini-Turbo boosts.'' | |||
|style="background:linear-gradient(#A26000,#C88512); border-top:1px solid #A26000;"|''Collect a total of 300 coins in races.'' | |||
|-style="height: 80px" | |||
|width=10% style="background:linear-gradient(#F2E18F,#B9800F)"|[[File:MKT Icon Level-boostticket2.png|70px]] | |||
|width=10% style="background:linear-gradient(#F2E18F,#B9800F)"|[[File:MKT Icon Level-boostticket5.png|70px]] | |||
|width=10% style="background:linear-gradient(#F2E18F,#B9800F)"|[[File:MKT Icon Level-boostticket8.png|70px]] | |||
|width=10% style="background:linear-gradient(#F2E18F,#B9800F)"|[[File:MKT Icon Points-capticket7.png|70px]] | |||
|width=10% style="background:linear-gradient(#F2E18F,#B9800F)"|[[File:MKT Icon Points-capticket8.png|70px]] | |||
|width=10% style="background:linear-gradient(#F2E18F,#B9800F)"|[[File:MKT Icon Points-capticket9.png|70px]] | |||
|-style="color: #FFF" | |||
|style="background:linear-gradient(#864D00,#A26000); border-top:1px solid #B9800F;"|{{Color link|#A1A1FF|Level-boost ticket}} (Normal kart) ×1 | |||
|style="background:linear-gradient(#864D00,#A26000); border-top:1px solid #B9800F;"|Level-boost ticket (Super kart) ×1 | |||
|style="background:linear-gradient(#864D00,#A26000); border-top:1px solid #B9800F;"|Level-boost ticket (High-End kart) ×1 | |||
|style="background:linear-gradient(#864D00,#A26000); border-top:1px solid #B9800F;"|Points-cap ticket (High-end driver) ×1 | |||
|style="background:linear-gradient(#864D00,#A26000); border-top:1px solid #B9800F;"|Points-cap ticket (High-end kart) ×1 | |||
|style="background:linear-gradient(#864D00,#A26000); border-top:1px solid #B9800F;"|Points-cap ticket (High-end glider) ×1 | |||
|-style="color: #FFF" | |||
|style="background:linear-gradient(#A26000,#C88512); border-top:1px solid #A26000;"|''Get 1st place in a race 10 times.'' | |||
|style="background:linear-gradient(#A26000,#C88512); border-top:1px solid #A26000;"|''Get 1st place in a race 15 times.'' | |||
|style="background:linear-gradient(#A26000,#C88512); border-top:1px solid #A26000;"|''Get 1st place in a race 20 times.'' | |||
|style="background:linear-gradient(#A26000,#C88512); border-top:1px solid #A26000;"|''Get 1st place in a race 15 times.'' | |||
|style="background:linear-gradient(#A26000,#C88512); border-top:1px solid #A26000;"|''Get 1st place in a race 20 times.'' | |||
|style="background:linear-gradient(#A26000,#C88512); border-top:1px solid #A26000;"|''Get 1st place in a race 30 times.'' | |||
|} | |||
<br> | |||
{| align=center width=30% cellspacing=0 border=1 cellpadding=3 style="border-collapse:collapse; font-family:Arial; text-align:center" | |||
|- | |||
!colspan=3 style="background: #C3F84E"|'''Tour Multiplayer Challenges''' | |||
|-style="color: #000" | |||
|colspan=3 style="background: #C3F84E"|'''Three in a row reward:''' [[File:MKT Icon Coins 2.png|60px]] [[Coin|Coins]] ×300 | |||
|-style="color: #000" | |||
|colspan=3 style="background: #C3F84E"|'''Completion reward:''' [[File:MKT Icon 1Ruby.png|60px]] Rubies ×5 | |||
|-style="color: #FFF" | |||
|width=10% style="background: #2F5D1C"|[[File:MKT 134CB.png|70px]]<br>[[File:MKT Icon GrandStar.png|15px]] | |||
|width=10% style="background: #2F5D1C"|[[File:MKT 146CB.png|70px]]<br>[[File:MKT Icon GrandStar.png|15px]] | |||
|width=10% style="background: #2F5D1C"|[[File:MKT 127CB.png|70px]]<br>[[File:MKT Icon GrandStar.png|15px]] | |||
|-style="color: #FFF" | |||
|style="background: #2F5D1C; border-top:1px solid #2F5D1C;"|''Do 10 Jump Boosts in multiplayer.'' | |||
|style="background: #2F5D1C; border-top:1px solid #2F5D1C;"|''Do 3 Rocket Starts in multiplayer{{sic}}'' | |||
|style="background: #2F5D1C; border-top:1px solid #2F5D1C;"|''Land 3 hits with Green Shells in multiplayer.'' | |||
|-style="color: #FFF" | |||
|width=10% style="background: #2F5D1C"|[[File:MKT 112-3CB.png|70px]]<br>[[File:MKT Icon GrandStar.png|15px]] [[File:MKT Icon GrandStar.png|15px]] | |||
|width=10% style="background: #2F5D1C"|[[File:MKT 112-1CB.png|70px]]<br>[[File:MKT Icon GrandStar.png|15px]] [[File:MKT Icon GrandStar.png|15px]] | |||
|width=10% style="background: #2F5D1C"|[[File:MKT 112CB.png|70px]]<br>[[File:MKT Icon GrandStar.png|15px]] [[File:MKT Icon GrandStar.png|15px]] | |||
|-style="color: #FFF" | |||
|style="background: #2F5D1C; border-top:1px solid #2F5D1C;"|''Join 3 multiplayer races.'' | |||
|style="background: #2F5D1C; border-top:1px solid #2F5D1C;"|''Join 5 multiplayer races.'' | |||
|style="background: #2F5D1C; border-top:1px solid #2F5D1C;"|''Join 10 multiplayer races.'' | |||
|-style="color: #FFF" | |||
|width=10% style="background: #2F5D1C"|[[File:MKT 130CB.png|70px]]<br>[[File:MKT Icon GrandStar.png|15px]] [[File:MKT Icon GrandStar.png|15px]] | |||
|width=10% style="background: #2F5D1C"|[[File:MKT 131CB.png|70px]]<br>[[File:MKT Icon GrandStar.png|15px]] [[File:MKT Icon GrandStar.png|15px]] | |||
|width=10% style="background: #2F5D1C"|[[File:MKT 129CB.png|70px]]<br>[[File:MKT Icon GrandStar.png|15px]] [[File:MKT Icon GrandStar.png|15px]] | |||
|-style="color: #FFF" | |||
|style="background: #2F5D1C; border-top:1px solid #2F5D1C;"|''Get 3rd place or higher in a multiplayer race.'' | |||
|style="background: #2F5D1C; border-top:1px solid #2F5D1C;"|''Get 3rd place or higher 3 times in a multiplayer race.'' | |||
|style="background: #2F5D1C; border-top:1px solid #2F5D1C;"|''Get 3rd place or higher 5 times in a multiplayer race.'' | |||
|} | |||
<br> | |||
{|class="wikitable" style="margin:auto; text-align:center" width=30% | |||
!colspan=2|Total Points Challenge 1 | |||
|- | |||
!Points | |||
!Rewards | |||
|- | |||
!350,000 | |||
|[[File:MKT Icon 1Ruby.png|20px]] [[Ruby|Rubies]] ×3<br> | |||
[[File:MKT Icon Point-boostticket1.png|30px]] [[Point-boost ticket]]s (driver) ×5<br> | |||
[[File:MKT Icon Point-boostticket2.png|30px]] Point-boost tickets (kart) ×5<br> | |||
[[File:MKT Icon Point-boostticket3.png|30px]] Point-boost tickets (glider) ×5 | |||
|- | |||
!300,000 | |||
|[[File:MKT Icon Coins 3.png|30px]] [[Coin]]s ×1,000<br> | |||
[[File:MKT Icon ItemTicket.png|30px]] [[Item ticket]]s ×10<br> | |||
|- | |||
!250,000 | |||
|[[File:MKT Icon 1Ruby.png|20px]] Rubies ×3<br> | |||
[[File:MKT Icon Points-capticket4.png|30px]] Points-cap ticket (Super driver) ×1 | |||
|- | |||
!200,000 | |||
|[[File:MKT Icon Coins 3.png|30px]] Coins ×1,000<br> | |||
[[File:MKT Icon Level-boostticket4.png|30px]] Level-boost ticket (Super driver) ×1 | |||
|- | |||
!150,000 | |||
|[[File:MKT Icon 1Ruby.png|20px]] Rubies ×3<br> | |||
[[File:MKT Icon Points-capticket1.png|30px]] [[Points-cap ticket]] (Normal driver) ×1 | |||
|- | |||
!100,000 | |||
|[[File:MKT Icon Coins 3.png|30px]] Coins ×1,000<br> | |||
[[File:MKT Icon Level-boostticket1.png|30px]] [[Level-boost ticket]] (Normal driver) ×1 | |||
|} | |||
<br> | |||
{|class="wikitable" style="margin:auto; text-align:center" width=30% | |||
!colspan=2|Total Points Challenge 2 | |||
|- | |||
!Points | |||
!Rewards | |||
|- | |||
!900,000 | |||
|[[File:MKT Icon 1Ruby.png|20px]] [[Ruby|Rubies]] ×3<br> | |||
[[File:MKT Icon Point-boostticket1.png|30px]] Point-boost tickets (driver) ×5<br> | |||
[[File:MKT Icon Point-boostticket2.png|30px]] Point-boost tickets (kart) ×5<br> | |||
[[File:MKT Icon Point-boostticket3.png|30px]] Point-boost tickets (glider) ×5 | |||
|- | |||
!800,000 | |||
|[[File:MKT Icon Coins 3.png|30px]] Coins ×1,000<br> | |||
[[File:MKT Icon ItemTicket.png|30px]] Item tickets ×10<br> | |||
|- | |||
!700,000 | |||
|[[File:MKT Icon 1Ruby.png|20px]] Rubies ×3<br> | |||
[[File:MKT Icon Points-capticket7.png|30px]] Points-cap ticket (High-End driver) ×1 | |||
|- | |||
!600,000 | |||
|[[File:MKT Icon Coins 3.png|30px]] Coins ×1,000<br> | |||
[[File:MKT Icon Level-boostticket7.png|30px]] Level-boost ticket (High-End driver) ×1 | |||
|- | |||
!500,000 | |||
|[[File:MKT Icon 1Ruby.png|20px]] Rubies ×3<br> | |||
[[File:MKT Icon Points-capticket4.png|30px]] Points-cap ticket (Super driver) ×1 | |||
|- | |||
!400,000 | |||
|[[File:MKT Icon Coins 3.png|30px]] Coins ×1,000<br> | |||
[[File:MKT Icon Level-boostticket4.png|30px]] Level-boost ticket (Super driver) ×1 | |||
|} | |||
==Initial pipe appearance rates== | ==Initial pipe appearance rates== | ||
| Line 651: | Line 907: | ||
|[[Super Glider]], [[Paper Glider]], [[Parachute (glider)|Parachute]], [[Parafoil]], [[Piston Glider]], [[Droplet Glider]], [[BBIA Parafoil]], [[Piranha Plant Parafoil]], [[Minion Paper Glider]] | |[[Super Glider]], [[Paper Glider]], [[Parachute (glider)|Parachute]], [[Parafoil]], [[Piston Glider]], [[Droplet Glider]], [[BBIA Parafoil]], [[Piranha Plant Parafoil]], [[Minion Paper Glider]] | ||
|1.6667% | |1.6667% | ||
|} | |||
<br> | |||
===Ocean Pipe 2=== | |||
{|class="wikitable" style="margin:auto; text-align:center" | |||
!colspan=16|Items obtained from a new Ocean Pipe 2 | |||
|- | |||
!rowspan=2|Item | |||
!colspan=3|[[File:MKT Icon Normal.png|50px]]<br>Normal | |||
!colspan=3|[[File:MKT Icon Rare.png|50px]]<br>Super | |||
!colspan=3|[[File:MKT Icon HighEnd.png|50px]]<br>High-End | |||
!colspan=3|[[File:MKT Icon HighEnd.png|50px]]<br>Featured High-End | |||
|- | |||
!Driver | |||
!Kart | |||
!Glider | |||
!Driver | |||
!Kart | |||
!Glider | |||
!Driver | |||
!Kart | |||
!Glider | |||
!Driver | |||
!Kart | |||
!Glider | |||
|- | |||
!Amount | |||
|31 | |||
|25 | |||
|15 | |||
|9 | |||
|7 | |||
|4 | |||
|1 | |||
|1 | |||
|1 | |||
|2 | |||
|2 | |||
|2 | |||
|} | |||
<br> | |||
{|class="wikitable" style="margin:auto; text-align:center" | |||
!Class | |||
!Parts | |||
!Rate (each) | |||
|- | |||
!High-End Spotlight Drivers | |||
|[[Toadette|Toadette (Sailor)]], [[Rosalina|Rosalina (Swimwear)]] | |||
|1.0000% | |||
|- | |||
!High-End Spotlight Karts | |||
|[[Coral Jet Cruiser]], [[Surf Sailer]] | |||
|1.0000% | |||
|- | |||
!High-End Spotlight Gliders | |||
|[[Ship's Wheel (glider)|Ship's Wheel]], [[Silver Surf Master]] | |||
|1.0000% | |||
|- | |||
!High-End drivers | |||
|[[Dry Bowser]], [[Metal Mario]], [[Pink Gold Peach]], [[Cat Mario|Cat Peach]], [[Pauline]], [[Princess Peach|Peach (Explorer)]], [[Nabbit]], [[Captain Toad]], [[King Bob-omb]], [[Peachette]], [[Yoshi (species)|Black Yoshi]], [[Yoshi (species)|White Yoshi]], [[Princess Peach|Peach (Wintertime)]], [[Chargin' Chuck]], [[Cat Mario|Cat Toad]], [[Wario|Wario (Cowboy)]], [[Mario|Mario (Swimwear)]], [[Birdo|Birdo (Black)]], [[Penguin Mario|Penguin Luigi]], [[Toadette|Toadette (Sailor)]], [[Dixie Kong]], [[Funky Kong]], [[Bowser Jr.|Bowser Jr. (Pirate)]], [[Princess Daisy|Daisy (Sailor)]], [[Princess Daisy|Daisy (Swimwear)]], [[Ice Mario (Super Mario Galaxy)|Ice Mario]] | |||
|0.0400% | |||
|- | |||
!High-End karts | |||
|[[B Dasher]], [[Badwagon]], [[Carrot Kart]], [[Cat Cruiser]], [[Sports Coupe]], [[Circuit Special]], [[Bruiser]], [[Wild Wing]], [[Bumble V]], [[Steel Driver]], [[Macharon]], [[Wildfire Flyer]], [[Red B Dasher]], [[Wild Pink]], [[Choco Macharon]], [[P-Wing (kart)|P-Wing]], [[Black Turbo Birdo]], [[Green Apple Kart]], [[Poison Apple Kart]], [[Dozer Dasher]], [[Banana Master]], [[Offroader]], [[Dreamy Egg]], [[Head Honcho]], [[Pink Wing]], [[Cheep Snorkel]], [[Koopa King]], [[Cact-X]], [[Sushi Racer]], [[Green Circuit]], [[Crawly Kart]], [[Black Dozer]], [[Iron Cucumber]], [[Cact-Ice]], [[Pink Dozer]], [[Lime Tea Coupe]], [[Sunny Surf Sailer]], [[Kamek's Zoom Broom]], [[Black Cat Cruiser]], [[Vampire Flyer]], [[Gray Cat Cruiser]], [[Flowery Badwagon]] | |||
|0.0238% | |||
|- | |||
!High-End gliders | |||
|[[Swooper (glider)|Swooper]], [[Cloud Glider]], [[Gold Glider]], [[Pink Gold Paper Glider]], [[Royal Parachute]], [[Dry Bowser Umbrella]], [[Blizzard Balloons]], [[Sunset Balloons]], [[Strawberry Crêpe]], [[Wonderful Wings]], [[Starchute]], [[Silver Starchute]], [[Daisy Glider]], [[Butterfly Wings]], [[Butterfly Sunset]], [[Butterfly Prism]], [[Meteor Balloons]], [[Crimson Crane]], [[Strawberry Donut]], [[Heart Balloons]], [[Great Sail]], [[Black Great Sail]], [[Dragon Wings]], [[Black Toe-Bean Balloons]], [[Toe-Bean Balloons]], [[Tropical Glider]], [[8-Bit Star]], [[Manta Glider]], [[Silver Bells]], [[Treasure Map]], [[Cheep Cheep Masks]], [[Snow Crystals]], [[Starry Great Sail]], [[Candlelight Flight (glider)|Candlelight Flight]], [[Tropical Balloons]] | |||
|0.0278% | |||
|- | |||
!Super drivers | |||
|[[Donkey Kong]], [[Toad]], [[Bowser]], [[Luigi]], [[Mario]], [[Princess Peach|Peach]], [[Yoshi]], [[Princess Daisy|Daisy]], [[Lakitu]], [[King Boo]], [[Toadette]], [[Bowser Jr.]], [[Waluigi]], [[Wario]], [[Rosalina]], [[Birdo]], [[Diddy Kong]], [[Hammer Bro]], [[Boomerang Bro]], [[Fire Bro]], [[Ice Bro]], [[Yoshi (species)|Red Yoshi]], [[Black Shy Guy]], [[Pink Shy Guy]], [[Toad (species)|Toad (Pit Crew)]], [[Monty Mole]], [[Birdo|Birdo (Light Blue)]], [[Birdo|Birdo (Yellow)]], [[Roving Racers|Red Koopa (Freerunning)]] | |||
|0.3103% | |||
|- | |||
!Super karts | |||
|[[Cucumber]], [[Zucchini]], [[Egg 1]], [[Daytripper]], [[Mach 8]], [[Cloud 9]], [[Soda Jet]], [[Koopa Clown]], [[Poltergust 4000]], [[Royale]], [[Barrel Train]], [[Turbo Yoshi]], [[Blue Seven]], [[Flame Flyer]], [[Para-Wing]], [[Super Blooper (kart)|Super Blooper]], [[Turbo Birdo]], [[Streamliner]], [[DK Jumbo]], [[Red Turbo Yoshi]], [[Light-blue Turbo Birdo]], [[Yellow Turbo Birdo]] | |||
|0.3182% | |||
|- | |||
!Super gliders | |||
|[[Flower Glider]], [[Peach Parasol (glider)|Peach Parasol]], [[BaNaNa Parafoil]], [[Bob-omb Parafoil]], [[Wario Wing]], [[Oilpaper Umbrella]], [[Mushroom Glider]], [[Shell Parachute]], [[Lightning Oilpaper]], [[Blue Flower Glider]], [[Pink Flower Glider]], [[Waluigi Wing]], [[? Block (glider)|? Block]], [[8-Bit Jumping Mario]], [[Eggshell Glider]] | |||
|0.2667% | |||
|- | |||
!Normal drivers | |||
|[[Koopa Troopa]], [[Shy Guy]], [[Dry Bones]], [[Baby Daisy]], [[Baby Luigi]], [[Baby Mario]], [[Baby Peach]], [[Baby Rosalina]], [[Iggy]], [[Larry]], [[Lemmy]], [[Ludwig]], [[Morton]], [[Roy]], [[Wendy]] | |||
|2.0667% | |||
|- | |||
!Normal karts | |||
|[[Birthday Girl]], [[Landship]], [[Bullet Blaster]], [[Mushmellow]], [[Biddybuggy]], [[Pipe Frame]], [[Pipe Buggy]], [[Cheep Charger]], [[Red Kiddie Kart]], [[Koopa Dasher]], [[Green Kiddie Kart]] | |||
|2.2727% | |||
|- | |||
!Normal gliders | |||
|[[Super Glider]], [[Paper Glider]], [[Parachute (glider)|Parachute]], [[Parafoil]], [[Piston Glider]], [[Droplet Glider]], [[BBIA Parafoil]], [[Piranha Plant Parafoil]], [[Minion Paper Glider]] | |||
|1.6667% | |||
|} | |||
<br> | |||
===Ocean Manta Pipe=== | |||
{|class="wikitable" style="margin:auto; text-align:center" | |||
!colspan=16|Items obtained from a new Ocean Manta Pipe | |||
|- | |||
!rowspan=2|Item | |||
!colspan=3|[[File:MKT Icon Normal.png|50px]]<br>Normal | |||
!colspan=3|[[File:MKT Icon Rare.png|50px]]<br>Super | |||
!colspan=3|[[File:MKT Icon HighEnd.png|50px]]<br>High-End | |||
!colspan=3|[[File:MKT Icon HighEnd.png|50px]]<br>Featured High-End | |||
|- | |||
!Driver | |||
!Kart | |||
!Glider | |||
!Driver | |||
!Kart | |||
!Glider | |||
!Driver | |||
!Kart | |||
!Glider | |||
!Driver | |||
!Kart | |||
!Glider | |||
|- | |||
!Amount | |||
|13 | |||
|13 | |||
|7 | |||
|5 | |||
|4 | |||
|4 | |||
|2 | |||
|0 | |||
|1 | |||
|0 | |||
|0 | |||
|1 | |||
|} | |||
<br> | |||
{|class="wikitable" style="margin:auto; text-align:center" | |||
!Class | |||
!Parts | |||
!Rate (each) | |||
|- | |||
!High-End Spotlight Glider | |||
|[[Fire Manta Glider]] | |||
|2.0000% | |||
|- | |||
!High-End drivers | |||
|[[Chargin' Chuck]], [[Funky Kong]], [[Princess Daisy|Daisy (Swimwear)]], [[Luigi|Luigi (Vacation)]] | |||
|1.0000% | |||
|- | |||
!High-End gliders | |||
|[[Manta Glider]], [[Silver Manta Glider]], [[Polka-Dot Manta Glider]] | |||
|0.6667% | |||
|- | |||
!Super drivers | |||
|[[Donkey Kong]], [[Toad]], [[Bowser]], [[Luigi]], [[Mario]], [[Princess Peach|Peach]], [[Yoshi]], [[Princess Daisy|Daisy]], [[Lakitu]], [[King Boo]], [[Toadette]], [[Bowser Jr.]], [[Waluigi]], [[Wario]], [[Rosalina]], [[Birdo]], [[Diddy Kong]], [[Hammer Bro]], [[Boomerang Bro]], [[Fire Bro]], [[Ice Bro]], [[Yoshi (species)|Red Yoshi]], [[Black Shy Guy]], [[Pink Shy Guy]], [[Toad (species)|Toad (Pit Crew)]], [[Monty Mole]], [[Birdo|Birdo (Light Blue)]], [[Birdo|Birdo (Yellow)]], [[Roving Racers|Red Koopa (Freerunning)]] | |||
|0.3448% | |||
|- | |||
!Super karts | |||
|[[Cucumber]], [[Zucchini]], [[Egg 1]], [[Daytripper]], [[Mach 8]], [[Cloud 9]], [[Soda Jet]], [[Koopa Clown]], [[Poltergust 4000]], [[Royale]], [[Barrel Train]], [[Turbo Yoshi]], [[Blue Seven]], [[Flame Flyer]], [[Para-Wing]], [[Super Blooper (kart)|Super Blooper]], [[Turbo Birdo]], [[Streamliner]], [[DK Jumbo]], [[Red Turbo Yoshi]], [[Light-blue Turbo Birdo]], [[Yellow Turbo Birdo]] | |||
|0.3636% | |||
|- | |||
!Super gliders | |||
|[[Flower Glider]], [[Peach Parasol (glider)|Peach Parasol]], [[BaNaNa Parafoil]], [[Bob-omb Parafoil]], [[Wario Wing]], [[Oilpaper Umbrella]], [[Mushroom Glider]], [[Shell Parachute]], [[Lightning Oilpaper]], [[Blue Flower Glider]], [[Pink Flower Glider]], [[Waluigi Wing]], [[? Block (glider)|? Block]], [[8-Bit Jumping Mario]], [[Eggshell Glider]] | |||
|0.5333% | |||
|- | |||
!Normal drivers | |||
|[[Koopa Troopa]], [[Shy Guy]], [[Dry Bones]], [[Baby Daisy]], [[Baby Luigi]], [[Baby Mario]], [[Baby Peach]], [[Baby Rosalina]], [[Iggy]], [[Larry]], [[Lemmy]], [[Ludwig]], [[Morton]], [[Roy]], [[Wendy]] | |||
|1.7333% | |||
|- | |||
!Normal karts | |||
|[[Birthday Girl]], [[Landship]], [[Bullet Blaster]], [[Mushmellow]], [[Biddybuggy]], [[Pipe Frame]], [[Pipe Buggy]], [[Cheep Charger]], [[Red Kiddie Kart]], [[Koopa Dasher]], [[Green Kiddie Kart]] | |||
|2.3636% | |||
|- | |||
!Normal gliders | |||
|[[Super Glider]], [[Paper Glider]], [[Parachute (glider)|Parachute]], [[Parafoil]], [[Piston Glider]], [[Droplet Glider]], [[BBIA Parafoil]], [[Piranha Plant Parafoil]], [[Minion Paper Glider]] | |||
|1.5556% | |||
|} | |} | ||
<br> | <br> | ||
| Line 701: | Line 1,133: | ||
==Token Shop== | ==Token Shop== | ||
The limited-time event where [[event token]]s appear began on July 27, 2022 and | The limited-time event where [[event token]]s appear began on July 27, 2022 and ended on August 9, 2022. Event tokens could be earned by causing opponents to crash. | ||
{| class="wikitable" style="margin:auto; text-align:center" width=50% | {| class="wikitable" style="margin:auto; text-align:center" width=50% | ||
!colspan=3|'''Token Shop''' (July 27, 2022 - August 9, 2022) | !colspan=3|'''Token Shop''' (July 27, 2022 - August 9, 2022) | ||
| Line 775: | Line 1,207: | ||
![[Cheep Cheep Masks]]<br>[[File:MKT Icon Coin.png|20px]] 10,000<br>Amount: 1 | ![[Cheep Cheep Masks]]<br>[[File:MKT Icon Coin.png|20px]] 10,000<br>Amount: 1 | ||
|- | |- | ||
!colspan=3|Items available in Tier Shop (August 3, 2022 - August 9, 2022) | !colspan=3|Items available in Tier Shop (August 3, 2022 - August 9, 2022) | ||
|- | |- | ||
|[[File:SMG BowserJr.png|80x80px]] | |[[File:SMG BowserJr.png|80x80px]] | ||
| Line 819: | Line 1,251: | ||
!Level-boost ticket (High-End)<br>[[File:MKT Icon Coin.png|20px]] 15000<br>Amount: 1 per week | !Level-boost ticket (High-End)<br>[[File:MKT Icon Coin.png|20px]] 15000<br>Amount: 1 per week | ||
|} | |} | ||
==Notes== | |||
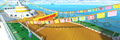
*On the splash screen for the Ocean Tour, there are two spectator Yoshis standing near the pool on Daisy Cruiser. Neither appear on the actual track itself. | |||
==Names in other languages== | ==Names in other languages== | ||
{{foreign names | {{foreign names | ||
| | |Jpn=オーシャンツアー | ||
| | |JpnR=Ōshan Tsuā | ||
| | |JpnM=Ocean Tour | ||
|ChiS=汪洋巡回赛 | |ChiS=汪洋巡回赛 | ||
|ChiSR=Wāngyáng Xúnhuí sài | |ChiSR=Wāngyáng Xúnhuí sài | ||
| Line 845: | Line 1,280: | ||
|SpaM=Marine Season | |SpaM=Marine Season | ||
}} | }} | ||
{{MKT}} | {{MKT}} | ||
[[it:Tour oceanico]] | [[it:Tour oceanico]] | ||
[[Category:Mario Kart Tour tours]] | [[Category:Mario Kart Tour tours]] | ||
Latest revision as of 14:11, February 2, 2025
| Ocean Tour | |
|---|---|

| |
| Start date | July 26, 2022 11:00 p.m. (PT)[?] |
| End date | August 9, 2022 10:59 p.m. (PT)[?] |
| Number of cups | 12 |
| Ranked cups | Daisy Cup (week 1) Bowser Jr. Cup (week 2) |
| Coin Rush course | RMX Vanilla Lake 1 |
| << List of tours >> | |
The Ocean Tour was the seventy-fifth tour of Mario Kart Tour, which began on July 27, 2022 and ended on August 9, 2022. The tour introduced variants of Daisy and Toadette in sailor outfits, as well as Daisy Cruiser from Mario Kart: Double Dash!! as a new classic course. The tour also introduced Singapore Speedway 2, a new layout of the Singapore Speedway course featuring the Gardens by the Bay, making this the first tour since the 2019 Holiday Tour sixty-eight tours prior to introduce both a classic course and a city course. Two new Mii Racing Suits based on a Cheep Cheep and a Dolphin were introduced in this tour as part of Mii Racing Suits Wave 11, the latter of which was obtainable from the tour's Token Shop, which also featured Peach (Vacation) and a gold pipe. The Cheep Cheep Mii Racing Suit has the Bubble as its special skill, making it the first non-Normal and non-lightweight driver with the skill and the first time any driver with this skill has been introduced since the Tokyo Tour, the second tour of the game.
The Summertime Celebration event began in this tour and runs until the end of the following tour, the 2022 Sundae Tour. A special log-in bonus lasts throughout the entire celebration with 14 days of rewards, including coins, rubies, point-boost tickets, and High-End level up tickets. The celebration also features the Summer Challenges card, which awards players with a total of 48 rubies; each individual challenge on the card awards between one to three rubies, and completing all nine challenges gives a prize of 30 rubies.
This course's Coin Rush course was RMX Vanilla Lake 1, which was reused from the Frost Tour. The menu's background featured the Daisy Cruiser as the landmark for this tour.
Starting from this tour, Daisy (Swimwear) and the Vampire Flyer are available in regular tour pipes, including the All-Clear Pipe.
Spotlights[edit]
| Ocean Pipe 1 July 26, 2022, 11:00 p.m. (PT) – August 9, 2022, 10:59 p.m. (PT) |
Ocean Pipe 2 August 2, 2022, 11:00 p.m. (PT) – August 9, 2022, 10:59 p.m. (PT) | ||||

|

| ||||
| Drivers | Karts | Gliders | Drivers | Karts | Gliders |
|---|---|---|---|---|---|
 
|
 
|
||||
| Daisy (Sailor) and Mario (Swimwear) | Flowery Badwagon and Cheep Snorkel | Tropical Balloons and Black Great Sail | Toadette (Sailor) and Rosalina (Swimwear) | Coral Jet Cruiser and Surf Sailer | Ship's Wheel and Silver Surf Master |
Special pipe[edit]
| Ocean Manta Pipe July 30, 2022, 11:00 p.m. (PT) – August 4, 2022, 10:59 p.m. (PT) | |||

| |||
| Spotlight Glider | Drivers | Gliders | |
|---|---|---|---|
  
|
|||
| Fire Manta Glider | Luigi (Vacation), Daisy (Swimwear), Chargin' Chuck and Funky Kong | Polka-Dot Manta Glider, Silver Manta Glider and Manta Glider | |
- Names in other languages
| Language | Name | Meaning | Notes |
|---|---|---|---|
| Japanese | オーシャンマンタドカン[?] Ōshan Manta Dokan |
Ocean Manta Pipe | |
| Chinese (simplified) | 汪洋魔鬼鱼水管[?] Wāngyáng Móguǐyú Shuǐguǎn |
Ocean Manta Pipe | |
| Chinese (traditional) | 汪洋魔鬼魚水管[?] Wāngyáng Móguǐyú Shuǐguǎn |
Ocean Manta Pipe | |
| French | Tuyau des mantas[?] | Mantas Pipe | |
| German | Meeresmanta-Röhre[?] | Sea Manta Pipe | |
| Italian | Tubo dei Mantaplani[?] | Manta Gliders Pipe | |
| Korean | 오션 쥐가오리 토관[?] Osyeon Jwigaori Togwan |
Ocean Manta Ray Pipe | |
| Portuguese | Cano Arraias[?] | Manta Rays Pipe | |
| Spanish (NOA) | Tubería de mantas[?] | Mantas Pipe | |
| Spanish (NOE) | Tubería marina[?] | Marine Pipe |
Cups[edit]
Daisy Cup Ranked cup (week 1) |
GCN Daisy Cruiser |
Wii Koopa Cape R |
Singapore Speedway 2R |
Ring Race | ||||
 3DS Bowser's Castle |
Bowser | |||||||
Mii Cup |
3DS Cheep Cheep Lagoon |
Wii Coconut Mall R |
3DS Wario Shipyard |
Goomba Takedown | ||||
 RMX Vanilla Lake 1 |
Rosalina | |||||||
Bowser Jr. Cup Ranked cup (week 2) |
GCN Baby Park R |
Singapore Speedway 2T |
GCN Daisy Cruiser T |
Time Trial | ||||
 RMX Rainbow Road 2R |
Rosalina | |||||||
Cat Peach Cup |
N64 Kalimari Desert 2R/T |
3DS Wario Shipyard R |
RMX Vanilla Lake 1R |
Snap a Photo | ||||
 GCN Daisy Cruiser T |
Daisy (Sailor) | |||||||
Kamek Cup |
GCN Baby Park T |
GCN Daisy Cruiser R |
3DS Bowser's Castle |
Smash Small Dry Bones | ||||
 Singapore Speedway 2 |
Red Koopa (Freerunning) | |||||||
Peach Cup |
N64 Yoshi Valley T |
RMX Rainbow Road 2R/T |
3DS Cheep Cheep Lagoon T |
Ring Race | ||||
 Wii Koopa Cape |
Birdo (Light Blue) | |||||||
Toad Cup |
GCN Baby Park |
Wii Coconut Mall T |
GCN Daisy Cruiser |
Steer Clear of Obstacles | ||||
 3DS Cheep Cheep Lagoon |
Baby Peach | |||||||
Iggy Cup |
RMX Vanilla Lake 1T |
3DS Bowser's Castle T |
Wii Koopa Cape T |
Do Jump Boosts | ||||
 GCN Daisy Cruiser |
Daisy | |||||||
Donkey Kong Cup |
N64 Yoshi Valley R |
Singapore Speedway 2 |
GCN Daisy Cruiser R |
Glider Challenge | ||||
 3DS Cheep Cheep Lagoon |
Toadette | |||||||
Lemmy Cup |
3DS Cheep Cheep Lagoon R |
Wii Koopa Cape |
3DS Wario Shipyard T |
Break Item Boxes | ||||
 SNES Mario Circuit 2 |
Donkey Kong | |||||||
Toadette Cup |
GCN Daisy Cruiser T |
RMX Vanilla Lake 1 |
N64 Yoshi Valley |
Combo Attack | ||||
 Wii Coconut Mall T |
Hammer Bro | |||||||
Nabbit Cup |
3DS Bowser's Castle R |
Wii Coconut Mall |
SNES Mario Circuit 2R/T |
Take them out quick! | ||||
 3DS Cheep Cheep Lagoon |
Mario (Swimwear) | |||||||
Signature kart sets[edit]
Drivers with a corresponding cup are bumped one rank up in every course of their cup.
| Cup | Driver | Kart | Glider |
|---|---|---|---|
| First course of every cup | — | — | |
| Second course of every cup | |||
| Third course of every cup | |||
| — | — | ||
| — | — | ||
| — | — | ||
| — | — | ||
| — | — | ||
| — | — | ||
| — | — | ||
| — | — | ||
| — | — | ||
| — | — | ||
| — | — | ||
| — | — |
Today's Challenge[edit]
Players' most recently used kart and glider are chosen, and favorite and favored ones have extra priority. Opponents are arranged randomly. On day 1 of this tour, players finish a race in 3DS Cheep Cheep Lagoon in the Mii Cup using Dixie Kong for a free pipe launch. Starting from day 2, players have to finish a race in the earliest incomplete course that is not in any of the ranked cups using the driver shown on the course's thumbnail every day to obtain the corresponding reward in the table below. Once all of the courses are completed, the courses are selected at random.
| Day(s) | Reward |
| 1-4, 6-9, 11-13 | Free pipe launch |
|---|---|
| 5, 10 | Rubies ×5 |
| 14 |  Badge |
| Today's Challenge Pipe | |

| |
| Pipe contents | |
| Rubies, coins, driver (Normal/Super/High-End), kart (Normal/Super/High-End), glider (Normal/Super/High-End), item tickets | |
Rewards[edit]
Gold cells indicate rewards that are exclusive to Gold Pass members.

|
||||||
| Parafoil | Koopa Troopa | Cheep Charger | Soda Jet | Baby Peach | Rosalina | Surf Master |
| Grand Stars | 15 | 20 | 25 | 30 | 35 | 40 | 50 | 60 | 70 | 75 | 80 | 85 | 90 | 100 | 110 | 125 | 145 | 165 | 185 | 205 | 225 | 245 | 255 | 265 | Total | Grand total | |
|---|---|---|---|---|---|---|---|---|---|---|---|---|---|---|---|---|---|---|---|---|---|---|---|---|---|---|---|
| Free pipe launch | 1 | 1 | 1 | 1 | 4 | ||||||||||||||||||||||
| Coins | 500 | 500 | 1000 | 1000 | 1000 | 1000 | 5000 | 15000 | |||||||||||||||||||
| 5000 | 5000 | 10000 | |||||||||||||||||||||||||
| Rubies | 10 | 5 | 3 | 3 | 21 | 56 | |||||||||||||||||||||
| 15 | 10 | 10 | 35 | ||||||||||||||||||||||||
| Item tickets | 5 | 5 | 10 | 30 | |||||||||||||||||||||||
| 10 | 10 | 20 | |||||||||||||||||||||||||
| Star tickets | 4 | 4 | 4 | ||||||||||||||||||||||||
| 0 | |||||||||||||||||||||||||||
| Point-boost tickets | 1 | 1 | 1 | 3 | 8 | ||||||||||||||||||||||
| 5 | 5 | ||||||||||||||||||||||||||
| 1 | 1 | 1 | 3 | 8 | |||||||||||||||||||||||
| 5 | 5 | ||||||||||||||||||||||||||
| 1 | 1 | 1 | 3 | 8 | |||||||||||||||||||||||
| 5 | 5 | ||||||||||||||||||||||||||
| Level-boost tickets | 3 | 19 | |||||||||||||||||||||||||
(3) |
(3) |
(3) |
16 | ||||||||||||||||||||||||
Summer Log-In Bonus[edit]
A 14-day "Summer Log-In Bonus" served as the log-in bonus for the Summertime Celebration of the game from July 26, 2022 to August 23, 2022.
| Day | Reward |
|---|---|
| 1 | Rubies ×5 |
| 2 | Coins ×2, 500 |
| 3 | Coins ×2, 500 |
| 4 | Coins ×2, 500 |
| 5 | Rubies ×5 |
| 6 | Point-boost ticket (Driver) ×5 |
| 7 | Point-boost ticket (Kart) ×5 |
| 8 | Point-boost ticket (Glider) ×5 |
| 9 | Coins ×2, 500 |
| 10 | Rubies ×5 |
| 11 | Level-boost ticket (High-End driver) ×1 |
| 12 | Level-boost ticket (High-End kart) ×1 |
| 13 | Level-boost ticket (High-End glider) ×1 |
| 14 | Rubies ×5 |
New content[edit]
Drivers[edit]
Mii Racing Suits[edit]

Karts[edit]
Gliders[edit]
Courses[edit]

Singapore Speedway 2 (N, R, T)
GCN Daisy Cruiser (N, R, T)
Paid banners[edit]
| Name | Availability | Cost | Contents | Banner image |
|---|---|---|---|---|
| Value Pack | July 27, 2022 – August 9, 2022 | US$1.99 |
|

|
| Driver Point-Boost Tickets 10 Ticket Set | July 27, 2022 – August 9, 2022 | US$3.99 | 
| |
| Glittering Parasol Pack | July 27, 2022 – August 9, 2022 | US$19.99 |
|

|
| Birdo (White) Pack | July 27, 2022 – August 9, 2022 | US$39.99 |
|

|
| Jukebox Buggy Pack | July 27, 2022 – August 9, 2022 | US$39.99 |
|

|
| Orange Streamliner Pack | August 3, 2022 – August 9, 2022 | US$19.99 |
|

|
| Lakitu (Party Time) Pack | August 3, 2022 – August 9, 2022 | US$39.99 |
|

|
Challenges[edit]
| Tour Challenges 1 | Tour Challenges 2 | Gold Challenges | ||||||||
|---|---|---|---|---|---|---|---|---|---|---|
| Completion reward: |
Completion reward: |
Completion reward: | ||||||||
 |
 |
 |
 |
 |
 |
 |
 |
 | ||
| Land 3 hits with Green Shells. | Use 10 Mushrooms. | Get a Fantastic combo a total of 5 times. | Do 5 Rocket Starts. | Land 5 hits with Bananas. | Drive a distance of 20,000 or more. | Do a total of 5 Slipstream boosts. | Land 10 hits with Red Shells. | Get 1st place 3 times in a row in races 100cc or above. | ||
 |
 |
 |
 |
 |
 |
 |
 |
 | ||
| Use point-boost tickets 3 times. | Get 3rd place or higher in a race 30 times. | Cause an opponent to crash while gliding. | Get an item from the Tier Shop. | Do 10 Mini-Turbo boosts in a single race using a driver with a ribbon. | Earn a score of 7,000 or higher on 3 T or R/T courses. | Use a points-cap ticket. | Get 1st place 5 times. | Earn a score of 10,000 or higher on 5 courses. | ||
 |
 |
 |
 |
 |
 |
 |
 |
 | ||
| Do 50 Mini-Turbo boosts. | Glide a total distance of 5,000. | Race in every course of every cup, including bonus challenges. | Land a hit with a Blooper. | Earn a total score of 15,000 or higher in the Donkey Kong Cup. | Send Greeting Coins to a friend. | Cause opponents to crash in Frenzy mode. | Earn a total score of 25,000 or higher in the Kamek Cup. | Cause opponents to crash 3 times while underwater. | ||
| Premium Challenges | Premium Challenges+ | |||||
|---|---|---|---|---|---|---|
| Cost: US$4.99 | Cost: US$14.99 | |||||
| Three in a row reward: |
Three in a row reward: | |||||
| Completion reward: |
Completion reward: | |||||

|
||||||
| Toad (Pit Crew) ×1 | Super Blooper ×1 | Peach Parasol ×1 | Point-boost ticket (Driver) ×5 | Point-boost ticket (Kart) ×5 | Point-boost ticket (Glider) ×5 | |
| Land 5 hits with Green Shells. | Land 10 hits with Bananas. | Land 10 hits with Bob-ombs. | Land 10 hits with Green Shells. | Land 20 hits with Bananas. | Use 30 Mushrooms. | |
| Coins ×3,000 | Rubies ×10 | Point-boost ticket (Kart) ×3 | Level-boost ticket (High-End driver) ×1 | Level-boost ticket (High-End kart) ×1 | Level-boost ticket (High-End glider) ×1 | |
| Do 50 Jump Boosts. | Participate in a race. | Do 100 Mini-Turbo boosts. | Do 100 Jump Boosts. | Do 150 Mini-Turbo boosts. | Collect a total of 300 coins in races. | |
| Level-boost ticket (Normal kart) ×1 | Level-boost ticket (Super kart) ×1 | Level-boost ticket (High-End kart) ×1 | Points-cap ticket (High-end driver) ×1 | Points-cap ticket (High-end kart) ×1 | Points-cap ticket (High-end glider) ×1 | |
| Get 1st place in a race 10 times. | Get 1st place in a race 15 times. | Get 1st place in a race 20 times. | Get 1st place in a race 15 times. | Get 1st place in a race 20 times. | Get 1st place in a race 30 times. | |
| Tour Multiplayer Challenges | ||
|---|---|---|
| Three in a row reward: | ||
| Completion reward: | ||
 |
 |
 |
| Do 10 Jump Boosts in multiplayer. | Do 3 Rocket Starts in multiplayer[sic] | Land 3 hits with Green Shells in multiplayer. |
 |
 |
 |
| Join 3 multiplayer races. | Join 5 multiplayer races. | Join 10 multiplayer races. |
 |
 |
 |
| Get 3rd place or higher in a multiplayer race. | Get 3rd place or higher 3 times in a multiplayer race. | Get 3rd place or higher 5 times in a multiplayer race. |
| Total Points Challenge 1 | |
|---|---|
| Points | Rewards |
| 350,000 |
|
| 300,000 |
|
| 250,000 |
|
| 200,000 |
|
| 150,000 |
|
| 100,000 |
|
| Total Points Challenge 2 | |
|---|---|
| Points | Rewards |
| 900,000 |
|
| 800,000 |
|
| 700,000 |
|
| 600,000 |
|
| 500,000 |
|
| 400,000 |
|
Initial pipe appearance rates[edit]
All-Clear Pipe[edit]
The All-Clear Pipe randomly shoots out one of the following regular High-End items. The appearance rate can be viewed via the "Pipe content" link on the Gold Pass purchase screen.
Ocean Pipe 1[edit]
| Items obtained from a new Ocean Pipe 1 | |||||||||||||||
|---|---|---|---|---|---|---|---|---|---|---|---|---|---|---|---|
| Item | Normal |
Super |
High-End |
Featured High-End | |||||||||||
| Driver | Kart | Glider | Driver | Kart | Glider | Driver | Kart | Glider | Driver | Kart | Glider | ||||
| Amount | 31 | 25 | 15 | 9 | 7 | 4 | 1 | 1 | 1 | 2 | 2 | 2 | |||
Ocean Pipe 2[edit]
| Items obtained from a new Ocean Pipe 2 | |||||||||||||||
|---|---|---|---|---|---|---|---|---|---|---|---|---|---|---|---|
| Item | Normal |
Super |
High-End |
Featured High-End | |||||||||||
| Driver | Kart | Glider | Driver | Kart | Glider | Driver | Kart | Glider | Driver | Kart | Glider | ||||
| Amount | 31 | 25 | 15 | 9 | 7 | 4 | 1 | 1 | 1 | 2 | 2 | 2 | |||
Ocean Manta Pipe[edit]
| Items obtained from a new Ocean Manta Pipe | |||||||||||||||
|---|---|---|---|---|---|---|---|---|---|---|---|---|---|---|---|
| Item | Normal |
Super |
High-End |
Featured High-End | |||||||||||
| Driver | Kart | Glider | Driver | Kart | Glider | Driver | Kart | Glider | Driver | Kart | Glider | ||||
| Amount | 13 | 13 | 7 | 5 | 4 | 4 | 2 | 0 | 1 | 0 | 0 | 1 | |||
Mii Racing Suit Shop[edit]
Banner items[edit]
| Name | Starting date | Cost | Contents | Banner image |
|---|---|---|---|---|
| Cheep Cheep Mii Racing Suit | July 27, 2022 | 70 100 rubies for 2nd and 3rd purchases respectively |
Cheep Cheep Mii Racing Suit ×1 |

|
Other items[edit]
| Items available in Mii Racing Suit Shop (July 26, 2022 - August 9, 2022) | ||
|---|---|---|
| Chain Chomp Mii Racing Suit Amount: 3 |
Pastry Chef Mii Racing Suit Amount: 3 |
Cat Mii Racing Suit Amount: 3 |
| Wario Mii Racing Suit Amount: 3 |
Birdo Mii Racing Suit Amount: 3 |
King Boo Mii Racing Suit Amount: 3 |
| King Bob-omb Mii Racing Suit Amount: 3 |
Mario Mii Racing Suit Amount: 3 |
Peach Mii Racing Suit Amount: 3 |
Token Shop[edit]
The limited-time event where event tokens appear began on July 27, 2022 and ended on August 9, 2022. Event tokens could be earned by causing opponents to crash.
| Token Shop (July 27, 2022 - August 9, 2022) | ||
|---|---|---|

|

|
|
| Dolphin Mii Racing Suit Amount: 1 |
Peach (Vacation) Amount: 1 |
Gold Pipe Amount: 1 |
| Pipe Amount: 31 |
Ruby ×3 Amount: 5 |
Coin ×500 Amount: 5 |
| Coin Rush ticket ×1 Amount: 1 |
Level-boost ticket (Normal) Amount: 3 |
Level-boost ticket (Normal) Amount: 3 |
| Level-boost ticket (Normal) Amount: 3 |
Level-boost ticket (Super) Amount: 2 |
Level-boost ticket (Super) Amount: 2 |
| Level-boost ticket (Super) Amount: 2 |
Level-boost ticket (High-End) Amount: 1 |
Level-boost ticket (High-End) Amount: 1 |
| Level-boost ticket (High-End) Amount: 1 |
Points-cap ticket (Normal) Amount: 1 |
Points-cap ticket (Super) Amount: 1 |
| Points-cap ticket (High-End) Amount: 1 |
||
Tier Shop[edit]
The shop features a variety of set and randomized items available for purchase. The item slots in the shop are unlocked based on the highest tier of players.
| Items available in Tier Shop (July 27, 2022 - August 2, 2022) | ||
|---|---|---|
| Daisy Amount: 1 |
Wild Pink Amount: 1 |
Cheep Cheep Masks Amount: 1 |
| Items available in Tier Shop (August 3, 2022 - August 9, 2022) | ||

|
||
| Bowser Jr. Amount: 1 |
Platinum Taxi Amount: 1 |
8-Bit Jumping Luigi Amount: 1 |
| Items available in Tier Shop (July 27, 2022 - August 9, 2022) | ||
| Level-boost ticket (Normal) Amount: 3 per week |
Level-boost ticket (Normal) Amount: 3 per week |
Level-boost ticket (Normal) Amount: 3 per week |
OR |
OR |
OR |
| Level-boost ticket (Super) Amount: 2 per week OR Level-boost ticket (High-End) Amount: 1 per week |
Level-boost ticket (Super) Amount: 2 per week OR Level-boost ticket (High-End) Amount: 1 per week |
Level-boost ticket (Super) Amount: 2 per week OR Level-boost ticket (High-End) Amount: 1 per week |
OR OR |
OR OR |
OR OR |
| Points-cap ticket (Normal) Amount: 1 per week |
Points-cap ticket (Super) Amount: 1 per week |
Points-cap ticket (High-End) Amount: 1 per week |
| Level-boost ticket (High-End) Amount: 1 per week |
Level-boost ticket (High-End) Amount: 1 per week |
Level-boost ticket (High-End) Amount: 1 per week |
Notes[edit]
- On the splash screen for the Ocean Tour, there are two spectator Yoshis standing near the pool on Daisy Cruiser. Neither appear on the actual track itself.
Names in other languages[edit]
| Language | Name | Meaning | Notes |
|---|---|---|---|
| Japanese | オーシャンツアー[?] Ōshan Tsuā |
Ocean Tour | |
| Chinese (simplified) | 汪洋巡回赛[?] Wāngyáng Xúnhuí sài |
Ocean Tour | |
| Chinese (traditional) | 汪洋巡迴賽[?] Wāngyáng Xúnhuí sài |
Ocean Tour | |
| French | Saison de l'océan[?] | Ocean Season | |
| German | Ozean-Tour-Saison[?] | Ocean Tour Season | |
| Italian | Tour oceanico[?] | Oceanic Tour | |
| Korean | 오션 투어[?] Osyeon Tueo |
Ocean Tour | |
| Portuguese | Temporada Oceânica[?] | Oceanic Season | |
| Spanish | Temporada marina[?] | Marine Season |