Samurai Tour: Difference between revisions
No edit summary |
m (Text replacement - "(\| *)Jap([RMCN\d]* *=)" to "$1Jpn$2") |
||
| (41 intermediate revisions by 23 users not shown) | |||
| Line 1: | Line 1: | ||
{{ | {{tour infobox | ||
|title=Samurai Tour | |title=Samurai Tour | ||
|image=[[File:MKT Samurai Tour.png|200px]] | |image=[[File:MKT Samurai Tour.png|200px]] | ||
| Line 7: | Line 7: | ||
|rank=[[Dry Bowser Cup]] (week 1)<br>[[Mii Cup]] (week 2) | |rank=[[Dry Bowser Cup]] (week 1)<br>[[Mii Cup]] (week 2) | ||
|coin=[[SNES Ghost Valley 1]] | |coin=[[SNES Ghost Valley 1]] | ||
|before=[[Mii Tour|<<]] | |before=[[Mii Tour (2022)|<<]] | ||
|after=[[Yoshi Tour (2022)|>>]] | |after=[[Yoshi Tour (2022)|>>]] | ||
}} | }} | ||
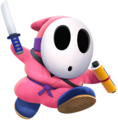
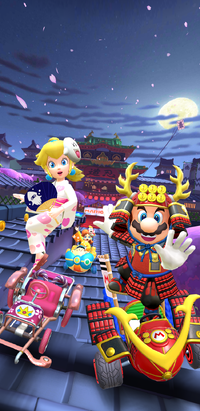
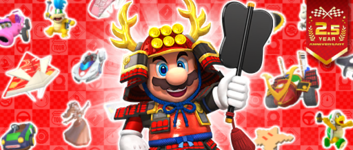
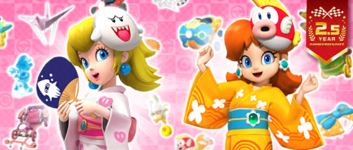
The '''Samurai Tour''' | The '''Samurai Tour''' was the sixty-sixth tour of ''[[Mario Kart Tour]]'' which began on March 23, 2022, and ended on April 5, 2022. Fitting the theme, the tour added [[Mario]] wearing the [[Crazy Cap#Samurai Helmet|Samurai Helmet]] and [[Crazy Cap#Samurai Armor|Samurai Armor]] from ''[[Super Mario Odyssey]]'' as a playable character, as well as introducing [[Princess Peach|Peach]] in a heart-themed yukata (her overall appearance being based on her appearance in [[Bowser's Kingdom]] in ''Super Mario Odyssey''), a pink-colored [[Shy Guy|Shy Guy (Ninja)]], and Wave 2 of Mii Racing Suits. The tour also introduced many other Japanese-based items like the [[Warrior Wagon]] and the [[Origami Glider]]. [[Ninja Hideaway]] also returned as the signature course of the tour, in line with the course's inclusion in Wave 1 of the ''[[Mario Kart 8 Deluxe – Booster Course Pass|Booster Course Pass]]'' DLC for ''[[Mario Kart 8 Deluxe]]''. Although this tour did not introduce any new courses — the first to do so since the [[Space Tour (2021)|2021 Space Tour]] nine tours prior - it featured the debut of [[3DS Wario Shipyard]] and [[3DS Bowser's Castle]]'s R/T variants. This makes the tour the first of two tours in 2022 to not introduce a new course, with the second being the [[New Year's Tour (2023)|2023 New Year's Tour]]. This tour's [[Coin Rush (Mario Kart Tour)|Coin Rush]] course was [[SNES Ghost Valley 1]], which was reused from the [[Halloween Tour (2020)|2020 Halloween Tour]]. The menu's background featured Ninja Manor as the landmark for this tour, which was reused from the [[Ninja Tour (2021)|2021 Ninja Tour]]. This would be the last appearance of [[SNES Koopa Troopa Beach 2]] until the [[Sunshine Tour]], thirty-five tours later in 2023. This tour's trailer featured falling cherry blossom petals during its opening splash screen. | ||
This was the last tour to feature the eighth set of [[List of challenge cards in Mario Kart Tour#Expert Challenges|Expert Challenges]], which started in the [[Singapore Tour]]. | This was the last tour to feature the eighth set of [[List of challenge cards in Mario Kart Tour#Expert Challenges|Expert Challenges]], which started in the [[Singapore Tour]]. | ||
The 2.5 Year Anniversary Celebration started in this tour, which includes a new set of challenges. A pipe containing tickets, [[coin]]s, and [[Ruby|rubies]], as well as drivers, karts, and gliders, has also been added to the Token Shop, and can be pulled a total of | The 2.5 Year Anniversary Celebration started in this tour, which includes a new set of challenges. A pipe containing tickets, [[coin]]s, and [[Ruby|rubies]], as well as drivers, karts, and gliders, has also been added to the Token Shop, and can be pulled a total of thirty-one times; the cost for the initial pull is 50 [[event token]]s, increasing with 10 tokens for every subsequent pull until the sixteenth, then with 50 tokens between the seventeenth and the twenty-first pulls. From the twenty-second pull onwards, the pipe costs 500 tokens per pull. | ||
Starting from this tour, the [[Royal Parachute]] glider is available in regular tour pipes, including the All-Clear Pipe. | Starting from this tour, the [[Royal Parachute]] glider is available in regular tour pipes, including the All-Clear Pipe. | ||
==Spotlights== | ==Spotlights== | ||
{| align=center width=75% cellspacing=0 border=1 cellpadding=3 style="border-collapse:collapse; font-family:Arial; text-align:center" | {|align=center width=75% cellspacing=0 border=1 cellpadding=3 style="border-collapse:collapse;font-family:Arial;text-align:center" | ||
|-style="background: #89A" | |-style="background:#89A" | ||
|colspan=3|'''Samurai Pipe 1'''<br>March 22, 2022, 11:00 p.m. (PT) – <br>April 5, 2022, 10:59 p.m. (PT) | |colspan=3|'''Samurai Pipe 1'''<br>March 22, 2022, 11:00 p.m. (PT) – <br>April 5, 2022, 10:59 p.m. (PT) | ||
|colspan=3|'''Samurai Pipe 2'''<br>March 29, 2022, 11:00 p.m. (PT) – <br>April 5, 2022, 10:59 p.m. (PT) | |colspan=3|'''Samurai Pipe 2'''<br>March 29, 2022, 11:00 p.m. (PT) – <br>April 5, 2022, 10:59 p.m. (PT) | ||
| Line 25: | Line 25: | ||
|colspan=3|[[File:MKT Tour66 SamuraiPipe1.png|x150px]] | |colspan=3|[[File:MKT Tour66 SamuraiPipe1.png|x150px]] | ||
|colspan=3|[[File:MKT Tour66 SamuraiPipe2.png|x150px]] | |colspan=3|[[File:MKT Tour66 SamuraiPipe2.png|x150px]] | ||
|-style="background: #ABC" | |-style="background:#ABC" | ||
! style="width: 15%;"|Drivers | !style="width:15%;"|Drivers | ||
! style="width: 15%;"|Karts | !style="width:15%;"|Karts | ||
! style="width: 15%;"|Gliders | !style="width:15%;"|Gliders | ||
! style="width: 15%;"|Drivers | !style="width:15%;"|Drivers | ||
! style="width: 15%;"|Karts | !style="width:15%;"|Karts | ||
! style="width: 15%;"|Gliders | !style="width:15%;"|Gliders | ||
|- | |- | ||
|[[File:MKT Artwork MarioSamurai.png|100x100px]] | |[[File:MKT Artwork MarioSamurai.png|100x100px]] | ||
| Line 48: | Line 48: | ||
|} | |} | ||
==Special | ==Special pipe== | ||
{| align=center width=50% cellspacing=0 border=1 cellpadding=3 style="border-collapse:collapse; font-family:Arial; text-align:center" | {|align=center width=50% cellspacing=0 border=1 cellpadding=3 style="border-collapse:collapse;font-family:Arial;text-align:center" | ||
|-style="background: #89A" | |-style="background:#89A" | ||
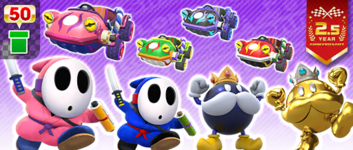
|colspan=3|'''Shinobi Pipe'''<br>March 26, 2022, 11:00 p.m. (PT) – <br>March 31, 2022, 10:59 p.m. (PT) | |colspan=3|'''Shinobi Pipe'''<br>March 26, 2022, 11:00 p.m. (PT) – <br>March 31, 2022, 10:59 p.m. (PT) | ||
|- | |- | ||
|colspan=3|[[File:MKT Tour66 ShinobiPipe.png|x150px]] | |colspan=3|[[File:MKT Tour66 ShinobiPipe.png|x150px]] | ||
|-style="background: #ABC" | |-style="background:#ABC" | ||
! style="width: 20%;"|High-End Spotlight Driver | !style="width:20%;"|High-End Spotlight Driver | ||
! style="width: 20%;"|High-End Drivers | !style="width:20%;"|High-End Drivers | ||
! style="width: 20%;"|High-End Karts | !style="width:20%;"|High-End Karts | ||
|- | |- | ||
|[[File:MKT Artwork PinkShyGuyNinja.png|100x100px]] | |[[File:MKT Artwork PinkShyGuyNinja.png|100x100px]] | ||
| Line 67: | Line 67: | ||
|[[Jade Hop Rod]], [[Crimson Hop Rod]], [[Dark Hop Rod]], and [[Sakura Hop Rod]] | |[[Jade Hop Rod]], [[Crimson Hop Rod]], [[Dark Hop Rod]], and [[Sakura Hop Rod]] | ||
|} | |} | ||
;Names in other languages | ;Names in other languages | ||
{{foreign names | {{foreign names | ||
| | |Jpn= | ||
| | |JpnR= | ||
| | |JpnM= | ||
|Chi=忍者水管 | |Chi=忍者水管 | ||
|ChiR=Rěnzhě Shuǐguǎn | |ChiR=Rěnzhě Shuǐguǎn | ||
| Line 96: | Line 95: | ||
==Cups== | ==Cups== | ||
{| align=center width=90% cellspacing=0 border=1 cellpadding=3 style="border-collapse:collapse; font-family:Arial; text-align:center" | {|align=center width=90% cellspacing=0 border=1 cellpadding=3 style="border-collapse:collapse;font-family:Arial;text-align:center" | ||
{{ | {{MKT cup table row | ||
|C=Dry Bowser||Ra=1 | |C=Dry Bowser||Ra=1 | ||
|R1=[[Ninja Hideaway|Ninja Hideaway R]]||R1.I=NinjaHideawayR MarioSamurai||R1.1=1,900||R1.2=2,900||R1.3=3,300||R1.4=3,800||R1.5=9,500 | |R1=[[Ninja Hideaway|Ninja Hideaway R]]||R1.I=NinjaHideawayR MarioSamurai||R1.1=1,900||R1.2=2,900||R1.3=3,300||R1.4=3,800||R1.5=9,500 | ||
| Line 104: | Line 103: | ||
|CN=[[Glider Challenge]]||C.I=Tour21 DryBonesCupChallenge||CC=[[Koopa Troopa]]||CT=[[SNES Koopa Troopa Beach 2]]||C.1=400||C.2=600||C.3=800 | |CN=[[Glider Challenge]]||C.I=Tour21 DryBonesCupChallenge||CC=[[Koopa Troopa]]||CT=[[SNES Koopa Troopa Beach 2]]||C.1=400||C.2=600||C.3=800 | ||
}} | }} | ||
{{ | {{MKT cup table row | ||
|C=Toad||Ra= | |C=Toad||Ra= | ||
|R1=[[Wii Mushroom Gorge|Wii Mushroom Gorge R]]||R1.I=MushroomGorgeRWii CaptainToad||R1.1=1,700||R1.2=2,700||R1.3=3,100||R1.4=3,600||R1.5=8,600 | |R1=[[Wii Mushroom Gorge|Wii Mushroom Gorge R]]||R1.I=MushroomGorgeRWii CaptainToad||R1.1=1,700||R1.2=2,700||R1.3=3,100||R1.4=3,600||R1.5=8,600 | ||
| Line 111: | Line 110: | ||
|CN=[[Time Trial (Mario Kart Tour)|Time Trial]]||C.I=Tour51 MarioCupChallenge||CC=[[Birdo|Birdo (Light Blue)]]||CT=[[RMX Vanilla Lake 1]]||C.1=1:45.00||C.2=1:33.00||C.3=1:25.00 | |CN=[[Time Trial (Mario Kart Tour)|Time Trial]]||C.I=Tour51 MarioCupChallenge||CC=[[Birdo|Birdo (Light Blue)]]||CT=[[RMX Vanilla Lake 1]]||C.1=1:45.00||C.2=1:33.00||C.3=1:25.00 | ||
}} | }} | ||
{{ | {{MKT cup table row | ||
|C=Mii||Ra=2 | |C=Mii||Ra=2 | ||
|R1=Ninja Hideaway R/T||R1.I=NinjaHideawayRT PeachMiiRacingSuit||R1.1=2,100||R1.2=3,300||R1.3=3,800||R1.4=4,400||R1.5=10,300 | |R1=Ninja Hideaway R/T||R1.I=NinjaHideawayRT PeachMiiRacingSuit||R1.1=2,100||R1.2=3,300||R1.3=3,800||R1.4=4,400||R1.5=10,300 | ||
|R2=[[DS Waluigi Pinball|DS Waluigi Pinball R]]|R2.I=WaluigiPinballRDS DaisyYukata||R2.1=1,300||R2.2=2,100||R2.3=2,400||R2.4=2,800||R2.5=6,500 | |R2=[[DS Waluigi Pinball|DS Waluigi Pinball R]]|R2.I=WaluigiPinballRDS DaisyYukata||R2.1=1,300||R2.2=2,100||R2.3=2,400||R2.4=2,800||R2.5=6,500 | ||
|R3= | |R3=3DS Wario Shipyard R/T|R3.I=WarioShipyardRT3DS||R3.1=2,300||R3.2=3,700||R3.3=4,300||R3.4=5,000||R3.5=11,600 | ||
|CN=[[Goomba Takedown]]||C.I=Tour66 MiiCupChallenge||CC=[[Yoshi (species)|Red Yoshi]]||CT=RMX Choco Island 2||C.1=10||C.2=18||C.3=24 | |CN=[[Goomba Takedown]]||C.I=Tour66 MiiCupChallenge||CC=[[Yoshi (species)|Red Yoshi]]||CT=RMX Choco Island 2||C.1=10||C.2=18||C.3=24 | ||
}} | }} | ||
{{ | {{MKT cup table row | ||
|C=Toadette||Ra= | |C=Toadette||Ra= | ||
|R1=Wii Mushroom Gorge||R1.I=MushroomGorgeWii Toadette||R1.1=2,000||R1.2=3,200||R1.3=3,700||R1.4=4,400||R1.5=9,800 | |R1=Wii Mushroom Gorge||R1.I=MushroomGorgeWii Toadette||R1.1=2,000||R1.2=3,200||R1.3=3,700||R1.4=4,400||R1.5=9,800 | ||
| Line 125: | Line 124: | ||
|CN=[[Snap a Photo]]||C.I=Tour66 ToadetteCupChallenge||CC=[[Mario|Mario (Samurai)]]||CT=Ninja Hideaway T||C.1=1||C.2=2||C.3=3 | |CN=[[Snap a Photo]]||C.I=Tour66 ToadetteCupChallenge||CC=[[Mario|Mario (Samurai)]]||CT=Ninja Hideaway T||C.1=1||C.2=2||C.3=3 | ||
}} | }} | ||
{{ | {{MKT cup table row | ||
|C=Fire Bro||Ra= | |C=Fire Bro||Ra= | ||
|R1=SNES Koopa Troopa Beach 2||R1.I=KoopaTroopaBeach2SNES CaptainToad||R1.1=1,300||R1.2=2,100||R1.3=2,500||R1.4=2,900||R1.5=6,300 | |R1=SNES Koopa Troopa Beach 2||R1.I=KoopaTroopaBeach2SNES CaptainToad||R1.1=1,300||R1.2=2,100||R1.3=2,500||R1.4=2,900||R1.5=6,300 | ||
| Line 132: | Line 131: | ||
|CN=[[Steer Clear of Obstacles]]|C.I=Tour11 ToadetteCupChallenge||CC=[[Baby Mario]]||CT=SNES Ghost Valley 1||C.1=1||C.2=2||C.3=3 | |CN=[[Steer Clear of Obstacles]]|C.I=Tour11 ToadetteCupChallenge||CC=[[Baby Mario]]||CT=SNES Ghost Valley 1||C.1=1||C.2=2||C.3=3 | ||
}} | }} | ||
{{ | {{MKT cup table row | ||
|C=King Boo||Ra= | |C=King Boo||Ra= | ||
|R1=RMX Choco Island 2T||R1.I=RMXChocoIsland2T BirdoBlack||R1.1=2,200||R1.2=3,900||R1.3=4,400||R1.4=5,300||R1.5=11,100 | |R1=RMX Choco Island 2T||R1.I=RMXChocoIsland2T BirdoBlack||R1.1=2,200||R1.2=3,900||R1.3=4,400||R1.4=5,300||R1.5=11,100 | ||
| Line 139: | Line 138: | ||
|CN=[[Combo Attack]]||C.I=Tour66 KingBooCupChallenge||CC=[[Monty Mole]]||CT=3DS Bowser's Castle T||C.1=8||C.2=12||C.3=16 | |CN=[[Combo Attack]]||C.I=Tour66 KingBooCupChallenge||CC=[[Monty Mole]]||CT=3DS Bowser's Castle T||C.1=8||C.2=12||C.3=16 | ||
}} | }} | ||
{{ | {{MKT cup table row | ||
|C=Cat Peach||Ra= | |C=Cat Peach||Ra= | ||
|R1=RMX Vanilla Lake 1T||R1.I=RMXVanillaLake1T CatPeach||R1.1=2,200||R1.2=3,900||R1.3=4,500||R1.4=5,300||R1.5=10,900 | |R1=RMX Vanilla Lake 1T||R1.I=RMXVanillaLake1T CatPeach||R1.1=2,200||R1.2=3,900||R1.3=4,500||R1.4=5,300||R1.5=10,900 | ||
|R2=SNES Ghost Valley 1T||R2.I=GhostValley1TSNES Lakitu||R2.1=1,600||R2.2=2,900||R2.3=3,300||R2.4=4,000||R2.5=8,100 | |R2=SNES Ghost Valley 1T||R2.I=GhostValley1TSNES Lakitu||R2.1=1,600||R2.2=2,900||R2.3=3,300||R2.4=4,000||R2.5=8,100 | ||
|R3=Ninja Hideaway||R3.I=NinjaHideaway Nabbit||R3.1=1,900||R3.2=3,300||R3.3=3,800||R3.4=4,600||R3.5=9,300 | |R3=Ninja Hideaway||R3.I=NinjaHideaway Nabbit||R3.1=1,900||R3.2=3,300||R3.3=3,800||R3.4=4,600||R3.5=9,300 | ||
|CN=Time Trial||C.I=Tour66 CatPeachCupChallenge||CC=[[Hammer Bro]]||CT=3DS Wario Shipyard||C.1=2:12.00||C.2=2:05.00||C.3=1:58.00 | |CN=Time Trial||C.I=Tour66 CatPeachCupChallenge||CC=[[Hammer Bro]]||CT=3DS Wario Shipyard R||C.1=2:12.00||C.2=2:05.00||C.3=1:58.00 | ||
}} | }} | ||
{{ | {{MKT cup table row | ||
|C=Peach||Ra= | |C=Peach||Ra= | ||
|R1=N64 Kalimari Desert 2T||R1.I=KalimariDesert2TN64 Peach||R1.1=1,600||R1.2=3,000||R1.3=3,400||R1.4=4,100||R1.5=8,100 | |R1=N64 Kalimari Desert 2T||R1.I=KalimariDesert2TN64 Peach||R1.1=1,600||R1.2=3,000||R1.3=3,400||R1.4=4,100||R1.5=8,100 | ||
| Line 153: | Line 152: | ||
|CN=[[Ring Race]]||C.I=Tour49 BowserJrCupChallenge||CC=[[Shy Guy]]|CT=Ninja Hideaway||C.1=15||C.2=25||C.3=32 | |CN=[[Ring Race]]||C.I=Tour49 BowserJrCupChallenge||CC=[[Shy Guy]]|CT=Ninja Hideaway||C.1=15||C.2=25||C.3=32 | ||
}} | }} | ||
{{ | {{MKT cup table row | ||
|C=Wario||Ra= | |C=Wario||Ra= | ||
|R1=DS Waluigi Pinball T||R1.I=WaluigiPinballTDS | |R1=DS Waluigi Pinball T||R1.I=WaluigiPinballTDS Old2||R1.1=1,700||R1.2=3,200||R1.3=3,700||R1.4=4,400||R1.5=8,500 | ||
|R2=Ninja Hideaway T||R2.I=NinjaHideawayT KingBobomb||R2.1=2,500||R2.2=4,700||R2.3=5,300||R2.4=6,400||R2.5=12,300 | |R2=Ninja Hideaway T||R2.I=NinjaHideawayT KingBobomb||R2.1=2,500||R2.2=4,700||R2.3=5,300||R2.4=6,400||R2.5=12,300 | ||
|R3=3DS Wario Shipyard T||R3.I=WarioShipyardT3DS Wario||R3.1=2,300||R3.2=4,400||R3.3=5,000||R3.4=6,100||R3.5=11,700 | |R3=3DS Wario Shipyard T||R3.I=WarioShipyardT3DS Wario||R3.1=2,300||R3.2=4,400||R3.3=5,000||R3.4=6,100||R3.5=11,700 | ||
|CN=[[Break Item Boxes]]||C.I=Tour47 MetalMarioCupChallenge||CC=Mario||CT=RMX Choco Island 2||C.1=8||C.2=14||C.3=20 | |CN=[[Break Item Boxes]]||C.I=Tour47 MetalMarioCupChallenge||CC=Mario||CT=RMX Choco Island 2||C.1=8||C.2=14||C.3=20 | ||
}} | }} | ||
{{ | {{MKT cup table row | ||
|C=Pink Gold Peach||Ra= | |C=Pink Gold Peach||Ra= | ||
|R1=RMX Vanilla Lake 1||R1.I=RMXVanillaLake1 MarioSamurai||R1.1=1,900||R1.2=3,800||R1.3=4,300||R1.4=5,200||R1.5=9,700 | |R1=RMX Vanilla Lake 1||R1.I=RMXVanillaLake1 MarioSamurai||R1.1=1,900||R1.2=3,800||R1.3=4,300||R1.4=5,200||R1.5=9,700 | ||
| Line 167: | Line 166: | ||
|CN=[[Do Jump Boosts]]||C.I=Tour66 PinkGoldPeachCupChallenge||CC=[[Dry Bones]]||CT=Wii Mushroom Gorge||C.1=12||C.2=18||C.3=22 | |CN=[[Do Jump Boosts]]||C.I=Tour66 PinkGoldPeachCupChallenge||CC=[[Dry Bones]]||CT=Wii Mushroom Gorge||C.1=12||C.2=18||C.3=22 | ||
}} | }} | ||
{{ | {{MKT cup table row | ||
|C=Bowser||Ra= | |C=Bowser||Ra= | ||
|R1=Ninja Hideaway||R1.I=NinjaHideaway||R1.1=2,000||R1.2=4,100||R1.3=4,600||R1.4=5,600||R1.5=10,200 | |R1=Ninja Hideaway||R1.I=NinjaHideaway||R1.1=2,000||R1.2=4,100||R1.3=4,600||R1.4=5,600||R1.5=10,200 | ||
|R2=Wii Mushroom Gorge T||R2.I=MushroomGorgeTWii Bowser||R2.1=2,700||R2.2=5,400||R2.3=6,100||R2.4=7,500||R2.5=13,600 | |R2=Wii Mushroom Gorge T||R2.I=MushroomGorgeTWii Bowser||R2.1=2,700||R2.2=5,400||R2.3=6,100||R2.4=7,500||R2.5=13,600 | ||
|R3=3DS Wario Shipyard||R3.I=WarioShipyard3DS PeachYukata||R3.1=2,100||R3.2=4,200||R3.3=4,700||R3.4=5,800||R3.5=10,500 | |R3=3DS Wario Shipyard||R3.I=WarioShipyard3DS PeachYukata||R3.1=2,100||R3.2=4,200||R3.3=4,700||R3.4=5,800||R3.5=10,500 | ||
|CN=[[Smash Small Dry Bones]]||C.I=Tour11 MortonCupChallenge||CC=[[ | |CN=[[Smash Small Dry Bones]]||C.I=Tour11 MortonCupChallenge||CC=[[Morton]]||CT=DS Waluigi Pinball||C.1=8||C.2=14||C.3=18 | ||
}} | }} | ||
{{ | {{MKT cup table row | ||
|C=Daisy||Ra= | |C=Daisy||Ra= | ||
|R1=3DS Bowser's Castle R||R1.I=BowsersCastleR3DS DonkeyKongMiiRacingSuit||R1.1=2,300||R1.2=4,800||R1.3=5,400||R1.4=6,600||R1.5=11,700 | |R1=3DS Bowser's Castle R||R1.I=BowsersCastleR3DS DonkeyKongMiiRacingSuit||R1.1=2,300||R1.2=4,800||R1.3=5,400||R1.4=6,600||R1.5=11,700 | ||
| Line 185: | Line 184: | ||
===Signature kart sets=== | ===Signature kart sets=== | ||
Drivers with a corresponding cup are bumped one rank up in every course of their cup. | Drivers with a corresponding cup are bumped one rank up in every course of their cup. | ||
{| class="wikitable" style="text-align: center" width=50% | {|class="wikitable"style="text-align:center"width=50% | ||
!width=10%|Cup | !width=10%|Cup | ||
!width=20%|Driver | !width=20%|Driver | ||
| Line 192: | Line 191: | ||
|- | |- | ||
|First course of every cup | |First course of every cup | ||
|[[File:MKT Icon | |[[File:MKT Icon Mii Emblem.png|x50px|link=Mii]] | ||
|— | |— | ||
|— | |— | ||
| Line 217: | Line 216: | ||
|- | |- | ||
|[[File:MKT Icon Mii Cup.png|50px|link=Mii Cup]] | |[[File:MKT Icon Mii Cup.png|50px|link=Mii Cup]] | ||
|[[File:MKT Icon | |[[File:MKT Icon Mii Emblem.png|x50px|link=Mii]] | ||
|— | |— | ||
|— | |— | ||
| Line 270: | Line 269: | ||
==Today's Challenge== | ==Today's Challenge== | ||
Players' most recently used kart and glider are chosen, and favorite and favored ones have extra priority. Opponents are arranged randomly. On day 1 of this tour, players finish a race in [[Wii Mushroom Gorge|Wii Mushroom Gorge R]] in the [[Toad Cup]] using [[Captain Toad]] for a free pipe launch. Starting from day 2, players have to finish a race in the earliest incomplete course that is not in any of the ranked cups using the driver shown on the course's thumbnail every day to obtain the corresponding reward in the table below. Once all of the courses are completed, the courses are selected at random. | Players' most recently used kart and glider are chosen, and favorite and favored ones have extra priority. Opponents are arranged randomly. On day 1 of this tour, players finish a race in [[Wii Mushroom Gorge|Wii Mushroom Gorge R]] in the [[Toad Cup]] using [[Captain Toad]] for a free pipe launch. Starting from day 2, players have to finish a race in the earliest incomplete course that is not in any of the ranked cups using the driver shown on the course's thumbnail every day to obtain the corresponding reward in the table below. Once all of the courses are completed, the courses are selected at random. | ||
{|align=center width=40% cellspacing=0 border=1 cellpadding=3 style="border-collapse:collapse;font-family:Arial;text-align:center" | |||
{| align=center width=40% cellspacing=0 border=1 cellpadding=3 style="border-collapse:collapse; font-family:Arial; text-align:center" | |||
|-style="background: #89A" | |-style="background: #89A" | ||
|'''Day(s)''' | |'''Day(s)''' | ||
| Line 284: | Line 282: | ||
!14 | !14 | ||
|[[File:MKT 387QB.png|60px]]<br>Badge | |[[File:MKT 387QB.png|60px]]<br>Badge | ||
|-style="background: #89A" | |-style="background:#89A" | ||
|colspan=2|'''Today's Challenge Pipe''' | |colspan=2|'''Today's Challenge Pipe''' | ||
|- | |- | ||
|colspan=2|[[File:MKT Tour45 TodaysChallengePipe.png|x150px]] | |colspan=2|[[File:MKT Tour45 TodaysChallengePipe.png|x150px]] | ||
|-style="background: #ABC" | |-style="background:#ABC" | ||
|colspan=2|'''Pipe contents''' | |colspan=2|'''Pipe contents''' | ||
|- | |- | ||
| Line 296: | Line 294: | ||
==Rewards== | ==Rewards== | ||
Gold cells indicate rewards that are exclusive to Gold Pass members. | Gold cells indicate rewards that are exclusive to Gold Pass members. | ||
{|class="wikitable" style="margin:auto; text-align:center" | {|class="wikitable"style="margin:auto;text-align:center" | ||
|- | |- | ||
!colspan=2|[[File:MKT Icon GrandStar.png|20x20px]] 15 | !colspan=2|[[File:MKT Icon GrandStar.png|20x20px]] 15 | ||
| Line 320: | Line 318: | ||
|} | |} | ||
<br> | <br> | ||
{|class="wikitable" style="margin:auto; text-align:center" | {|class="wikitable"style="margin:auto;text-align:center" | ||
|- | |- | ||
!Grand Stars!![[File:MKT Icon GrandStar.png|20x20px]]!!15!!20!!25!!30!!35!!40!!50!!60!!70!!85!!100!!115!!130!!145!!160!!180!!200!!215!!230!!240!!250!!255!!260!!265!!Total!!Grand total | !Grand Stars!![[File:MKT Icon GrandStar.png|20x20px]]!!15!!20!!25!!30!!35!!40!!50!!60!!70!!85!!100!!115!!130!!145!!160!!180!!200!!215!!230!!240!!250!!255!!260!!265!!Total!!Grand total | ||
| Line 411: | Line 409: | ||
===Courses=== | ===Courses=== | ||
<gallery> | <gallery heights=50px> | ||
MKT Icon Wario Shipyard RT.png|[[3DS Wario Shipyard]] (R/T) | |||
MKT Icon 3DS Bowser's Castle RT.png|[[3DS Bowser's Castle]] (R/T) | MKT Icon 3DS Bowser's Castle RT.png|[[3DS Bowser's Castle]] (R/T) | ||
</gallery> | </gallery> | ||
==Paid banners== | ==Paid banners== | ||
{| align=center width=960px cellspacing=0 border=1 cellpadding=3 style="border-collapse:collapse; font-family:Arial; text-align:center" | {|align=center width=960px cellspacing=0 border=1 cellpadding=3 style="border-collapse:collapse;font-family:Arial;text-align:center" | ||
|-style="background: #ABC" | |-style="background:#ABC" | ||
!Name | !Name | ||
!Availability | !Availability | ||
| Line 482: | Line 480: | ||
==Challenges== | ==Challenges== | ||
{{ | {{MKT challenge table | ||
|TCR1=[[File:MKT Icon CoinRushTicket.png|70px]] [[Coin Rush ticket]] ×1 | |TCR1=[[File:MKT Icon CoinRushTicket.png|70px]] [[Coin Rush ticket]] ×1 | ||
|T1.1=119 | |T1.1=119 | ||
|T1.1E=Do 50 {{Color | |T1.1E=Do 50 {{Color link|#A1A1FF|Mini-Turbo}} boosts. | ||
|T1.1S=1 | |T1.1S=1 | ||
|T1.2=067 | |T1.2=067 | ||
|T1.2E=Land 5 hits with {{Color | |T1.2E=Land 5 hits with {{Color link|#A1A1FF|Banana|Bananas}}. | ||
|T1.2S=1 | |T1.2S=1 | ||
|T1.3=099 | |T1.3=099 | ||
| Line 494: | Line 492: | ||
|T1.3S=1 | |T1.3S=1 | ||
|T1.4=035 | |T1.4=035 | ||
|T1.4E=Use {{Color | |T1.4E=Use {{Color link|#A1A1FF|point-boost ticket|point-boost tickets}} 3 times. | ||
|T1.4S=2 | |T1.4S=2 | ||
|T1.5=239 | |T1.5=239 | ||
| Line 500: | Line 498: | ||
|T1.5S=2 | |T1.5S=2 | ||
|T1.6=040 | |T1.6=040 | ||
|T1.6E=Cause opponents to crash using a {{Color | |T1.6E=Cause opponents to crash using a {{Color link|#A1A1FF|Mega Mushroom}}. | ||
|T1.6S=2 | |T1.6S=2 | ||
|T1.7=101 | |T1.7=101 | ||
| Line 513: | Line 511: | ||
|TCR2=[[File:MKT Icon QuickTicket.png|70px]] [[Quick ticket]] ×1 | |TCR2=[[File:MKT Icon QuickTicket.png|70px]] [[Quick ticket]] ×1 | ||
|T2.1=145 | |T2.1=145 | ||
|T2.1E=Do 5 {{Color | |T2.1E=Do 5 {{Color link|#A1A1FF|Rocket Start|Rocket Starts}}. | ||
|T2.1S=1 | |T2.1S=1 | ||
|T2.2=018 | |T2.2=018 | ||
|T2.2E=Land 3 hits with {{Color | |T2.2E=Land 3 hits with {{Color link|#A1A1FF|Green Shell|Green Shells}}. | ||
|T2.2S=1 | |T2.2S=1 | ||
|T2.3=077 | |T2.3=077 | ||
| Line 525: | Line 523: | ||
|T2.4S=2 | |T2.4S=2 | ||
|T2.5=084 | |T2.5=084 | ||
|T2.5E=Do 10 {{Color | |T2.5E=Do 10 {{Color link|#A1A1FF|Mini-Turbo|Mini-Turbos}} in a single race using a driver wearing earrings. | ||
|T2.5S=2 | |T2.5S=2 | ||
|T2.6=005 | |T2.6=005 | ||
| Line 534: | Line 532: | ||
|T2.7S=2 | |T2.7S=2 | ||
|T2.8=171 | |T2.8=171 | ||
|T2.8E=Earn a total score of 20,000 or higher in the {{Color | |T2.8E=Earn a total score of 20,000 or higher in the {{Color link|#A1A1FF|Bowser Cup}}. | ||
|T2.8S=2 | |T2.8S=2 | ||
|T2.9=375 | |T2.9=375 | ||
| Line 541: | Line 539: | ||
|GCR=[[File:MKT Icon 1Ruby.png|70px]] [[Ruby|Rubies]] ×5 | |GCR=[[File:MKT Icon 1Ruby.png|70px]] [[Ruby|Rubies]] ×5 | ||
|G.1=117 | |G.1=117 | ||
|G.1E=Do a total of 5 {{Color | |G.1E=Do a total of 5 {{Color link|#A1A1FF|Slipstream}} boosts. | ||
|G.1S=1 | |G.1S=1 | ||
|G.2=004 | |G.2=004 | ||
|G.2E=Land 5 hits with {{Color | |G.2E=Land 5 hits with {{Color link|#A1A1FF|Bob-omb|Bob-ombs}}. | ||
|G.2S=1 | |G.2S=1 | ||
|G.3=059 | |G.3=059 | ||
| Line 550: | Line 548: | ||
|G.3S=1 | |G.3S=1 | ||
|G.4=052 | |G.4=052 | ||
|G.4E=Use a {{Color | |G.4E=Use a {{Color link|#A1A1FF|level-boost ticket}}. | ||
|G.4S=2 | |G.4S=2 | ||
|G.5=074 | |G.5=074 | ||
|G.5E=Activate {{Color | |G.5E=Activate {{Color link|#A1A1FF|Frenzy}} mode 5 times using a driver with a mustache. | ||
|G.5S=2 | |G.5S=2 | ||
|G.6=134 | |G.6=134 | ||
|G.6E=Do 100 {{Color | |G.6E=Do 100 {{Color link|#A1A1FF|Jump Boost|Jump Boosts}}. | ||
|G.6S=2 | |G.6S=2 | ||
|G.7=147 | |G.7=147 | ||
| Line 562: | Line 560: | ||
|G.7S=2 | |G.7S=2 | ||
|G.8=183 | |G.8=183 | ||
|G.8E=Earn a total score of 25,000 or higher in the {{Color | |G.8E=Earn a total score of 25,000 or higher in the {{Color link|#A1A1FF|Wario Cup}}. | ||
|G.8S=2 | |G.8S=2 | ||
|G.9=246 | |G.9=246 | ||
|G.9E=Complete {{Color | |G.9E=Complete {{Color link|#A1A1FF|Coin Rush (Mario Kart Tour)|Coin Rush}} 1 time. | ||
|G.9S=2 | |G.9S=2 | ||
}} | }} | ||
<br> | <br> | ||
{| align=center width=30% cellspacing=0 border=1 cellpadding=3 style="border-collapse:collapse; font-family:Arial; text-align:center" | {|align=center width=30% cellspacing=0 border=1 cellpadding=3 style="border-collapse:collapse;font-family:Arial;text-align:center" | ||
|- | |- | ||
!colspan=3 style="background: #EEEEFF"|'''Premium Challenges''' | !colspan=3 style="background:#EEEEFF"|'''Premium Challenges''' | ||
|- | |- | ||
|colspan=3 style="background: #EEEEFF"|'''Cost:''' US$4.99 | |colspan=3 style="background:#EEEEFF"|'''Cost:''' US$4.99 | ||
|- | |- | ||
|colspan=3 style="background: #EEEEFF"|'''Three in a row reward:''' [[File:MKT Icon Coins 2.png|60px]] [[Coin|Coins]] ×100 | |colspan=3 style="background:#EEEEFF"|'''Three in a row reward:''' [[File:MKT Icon Coins 2.png|60px]] [[Coin|Coins]] ×100 | ||
|- | |- | ||
|colspan=3 style="background: #EEEEFF"|'''Completion reward:''' [[File:MKT Icon HeadHoncho.png|70px]] [[Head Honcho]] ×1 | |colspan=3 style="background:#EEEEFF"|'''Completion reward:''' [[File:MKT Icon HeadHoncho.png|70px]] [[Head Honcho]] ×1 | ||
|-style="height: 80px" | |-style="height:80px" | ||
|width=10% style="background:linear-gradient(#F2E18F,#B9800F)"|[[File:MK7 RedLakitu Artwork.png|50x75px]] | |width=10% style="background:linear-gradient(#F2E18F,#B9800F)"|[[File:MK7 RedLakitu Artwork.png|50x75px]] | ||
|width=10% style="background:linear-gradient(#F2E18F,#B9800F)"|[[File:MKT Icon KoopaClown.png|50x75px]] | |width=10% style="background:linear-gradient(#F2E18F,#B9800F)"|[[File:MKT Icon KoopaClown.png|50x75px]] | ||
|width=10% style="background:linear-gradient(#F2E18F,#B9800F)"|[[File:MKT Icon WarioWing.png|50x75px]] | |width=10% style="background:linear-gradient(#F2E18F,#B9800F)"|[[File:MKT Icon WarioWing.png|50x75px]] | ||
|-style="color: #FFF" | |-style="color:#FFF" | ||
|style="background:linear-gradient(#864D00,#A26000); border-top:1px solid #B9800F;"|{{Color | |style="background:linear-gradient(#864D00,#A26000);border-top:1px solid #B9800F;"|{{Color link|#A1A1FF|Lakitu}} ×1 | ||
|style="background:linear-gradient(#864D00,#A26000); border-top:1px solid #B9800F;"|{{Color | |style="background:linear-gradient(#864D00,#A26000);border-top:1px solid #B9800F;"|{{Color link|#A1A1FF|Koopa Clown}} ×1 | ||
|style="background:linear-gradient(#864D00,#A26000); border-top:1px solid #B9800F;"|{{Color | |style="background:linear-gradient(#864D00,#A26000);border-top:1px solid #B9800F;"|{{Color link|#A1A1FF|Wario Wing}} ×1 | ||
|-style="color: #FFF" | |-style="color:#FFF" | ||
|style="background:linear-gradient(#A26000,#C88512); border-top:1px solid #A26000;"|''Land 5 hits with Green Shells.'' | |style="background:linear-gradient(#A26000,#C88512);border-top:1px solid #A26000;"|''Land 5 hits with Green Shells.'' | ||
|style="background:linear-gradient(#A26000,#C88512); border-top:1px solid #A26000;"|''Land 10 hits with Bananas.'' | |style="background:linear-gradient(#A26000,#C88512);border-top:1px solid #A26000;"|''Land 10 hits with Bananas.'' | ||
|style="background:linear-gradient(#A26000,#C88512); border-top:1px solid #A26000;"|''Land 10 hits with Bob-ombs.'' | |style="background:linear-gradient(#A26000,#C88512);border-top:1px solid #A26000;"|''Land 10 hits with Bob-ombs.'' | ||
|-style="height: 80px" | |-style="height:80px" | ||
|width=10% style="background:linear-gradient(#F2E18F,#B9800F)"|[[File:MKT Icon Coins 3.png|70px]] | |width=10% style="background:linear-gradient(#F2E18F,#B9800F)"|[[File:MKT Icon Coins 3.png|70px]] | ||
|width=10% style="background:linear-gradient(#F2E18F,#B9800F)"|[[File:MKT Icon Ruby.png|70px]] | |width=10% style="background:linear-gradient(#F2E18F,#B9800F)"|[[File:MKT Icon Ruby.png|70px]] | ||
|width=10% style="background:linear-gradient(#F2E18F,#B9800F)"|[[File:MKT Icon Point-boostticket2.png|70px]] | |width=10% style="background:linear-gradient(#F2E18F,#B9800F)"|[[File:MKT Icon Point-boostticket2.png|70px]] | ||
|-style="color: #FFF" | |-style="color:#FFF" | ||
|style="background:linear-gradient(#864D00,#A26000); border-top:1px solid #B9800F;"|{{Color | |style="background:linear-gradient(#864D00,#A26000);border-top:1px solid #B9800F;"|{{Color link|#A1A1FF|Coin|Coins}} ×3,000 | ||
|style="background:linear-gradient(#864D00,#A26000); border-top:1px solid #B9800F;"|{{Color | |style="background:linear-gradient(#864D00,#A26000);border-top:1px solid #B9800F;"|{{Color link|#A1A1FF|Ruby|Rubies}} ×10 | ||
|style="background:linear-gradient(#864D00,#A26000); border-top:1px solid #B9800F;"|Kart {{Color | |style="background:linear-gradient(#864D00,#A26000);border-top:1px solid #B9800F;"|Kart {{Color link|#A1A1FF|point-boost ticket}} ×3 | ||
|-style="color: #FFF" | |-style="color:#FFF" | ||
|style="background:linear-gradient(#A26000,#C88512); border-top:1px solid #A26000;"|''Do 50 Jump Boosts.'' | |style="background:linear-gradient(#A26000,#C88512);border-top:1px solid #A26000;"|''Do 50 Jump Boosts.'' | ||
|style="background:linear-gradient(#A26000,#C88512); border-top:1px solid #A26000;"|''Participate in a race.'' | |style="background:linear-gradient(#A26000,#C88512);border-top:1px solid #A26000;"|''Participate in a race.'' | ||
|style="background:linear-gradient(#A26000,#C88512); border-top:1px solid #A26000;"|''Do 100 Mini-Turbo boosts.'' | |style="background:linear-gradient(#A26000,#C88512);border-top:1px solid #A26000;"|''Do 100 Mini-Turbo boosts.'' | ||
|-style="height: 80px" | |-style="height:80px" | ||
|width=10% style="background:linear-gradient(#F2E18F,#B9800F)"|[[File:MKT Icon Level-boostticket2.png|70px]] | |width=10% style="background:linear-gradient(#F2E18F,#B9800F)"|[[File:MKT Icon Level-boostticket2.png|70px]] | ||
|width=10% style="background:linear-gradient(#F2E18F,#B9800F)"|[[File:MKT Icon Level-boostticket5.png|70px]] | |width=10% style="background:linear-gradient(#F2E18F,#B9800F)"|[[File:MKT Icon Level-boostticket5.png|70px]] | ||
|width=10% style="background:linear-gradient(#F2E18F,#B9800F)"|[[File:MKT Icon Level-boostticket8.png|70px]] | |width=10% style="background:linear-gradient(#F2E18F,#B9800F)"|[[File:MKT Icon Level-boostticket8.png|70px]] | ||
|-style="color: #FFF" | |-style="color:#FFF" | ||
|style="background:linear-gradient(#864D00,#A26000); border-top:1px solid #B9800F;"|Normal kart {{Color | |style="background:linear-gradient(#864D00,#A26000);border-top:1px solid #B9800F;"|Normal kart {{Color link|#A1A1FF|level-boost ticket}} ×1 | ||
|style="background:linear-gradient(#864D00,#A26000); border-top:1px solid #B9800F;"|Super kart level-boost ticket ×1 | |style="background:linear-gradient(#864D00,#A26000);border-top:1px solid #B9800F;"|Super kart level-boost ticket ×1 | ||
|style="background:linear-gradient(#864D00,#A26000); border-top:1px solid #B9800F;"|High-End kart level-boost ticket ×1 | |style="background:linear-gradient(#864D00,#A26000);border-top:1px solid #B9800F;"|High-End kart level-boost ticket ×1 | ||
|-style="color: #FFF" | |-style="color:#FFF" | ||
|style="background:linear-gradient(#A26000,#C88512); border-top:1px solid #A26000;"|''Get 1st place in a race 10 times.'' | |style="background:linear-gradient(#A26000,#C88512);border-top:1px solid #A26000;"|''Get 1st place in a race 10 times.'' | ||
|style="background:linear-gradient(#A26000,#C88512); border-top:1px solid #A26000;"|''Get 1st place in a race 15 times.'' | |style="background:linear-gradient(#A26000,#C88512);border-top:1px solid #A26000;"|''Get 1st place in a race 15 times.'' | ||
|style="background:linear-gradient(#A26000,#C88512); border-top:1px solid #A26000;"|''Get 1st place in a race 20 times.'' | |style="background:linear-gradient(#A26000,#C88512);border-top:1px solid #A26000;"|''Get 1st place in a race 20 times.'' | ||
|} | |} | ||
<br> | <br> | ||
{| align=center width=65% cellspacing=0 border=1 cellpadding=3 style="border-collapse:collapse; font-family:Arial; text-align:center" | {|align=center width=65% cellspacing=0 border=1 cellpadding=3 style="border-collapse:collapse;font-family:Arial;text-align:center" | ||
|- | |- | ||
!colspan=3 style="background: #C3F84E"|'''Kart Pro Challenges''' | !colspan=3 style="background:#C3F84E"|'''Kart Pro Challenges''' | ||
|rowspan=9 style="border-top:1px solid #FFF; border-bottom:1px solid #FFF;" width=5%| | |rowspan=9 style="border-top:1px solid #FFF; border-bottom:1px solid #FFF;"width=5%| | ||
!colspan=3 style="background: #C3F84E"|'''Tour Multiplayer Challenges''' | !colspan=3 style="background:#C3F84E"|'''Tour Multiplayer Challenges''' | ||
|-style="color: #000" | |-style="color:#000" | ||
|colspan=3 style="background: #C3F84E"|'''Three in a row reward:''' [[File:MKT Icon Coins 2.png|60px]] [[Coin|Coins]] ×500 | |colspan=3 style="background:#C3F84E"|'''Three in a row reward:''' [[File:MKT Icon Coins 2.png|60px]] [[Coin|Coins]] ×500 | ||
|colspan=3 style="background: #C3F84E"|'''Three in a row reward:''' [[File:MKT Icon Coins 2.png|60px]] Coins ×300 | |colspan=3 style="background:#C3F84E"|'''Three in a row reward:''' [[File:MKT Icon Coins 2.png|60px]] Coins ×300 | ||
|-style="color: #000" | |-style="color:#000" | ||
|colspan=3 style="background: #C3F84E"|'''Completion reward:''' [[File:MKT Icon Ruby 2.png|70px]] [[Ruby|Rubies]] (depending on player's multiplayer grade) | |colspan=3 style="background:#C3F84E"|'''Completion reward:''' [[File:MKT Icon Ruby 2.png|70px]] [[Ruby|Rubies]] (depending on player's multiplayer grade) | ||
|colspan=3 style="background: #C3F84E"|'''Completion reward:''' [[File:MKT Icon 1Ruby.png|60px]] [[Ruby|Rubies]] ×5 | |colspan=3 style="background:#C3F84E"|'''Completion reward:''' [[File:MKT Icon 1Ruby.png|60px]] [[Ruby|Rubies]] ×5 | ||
|-style="color: #FFF" | |-style="color:#FFF" | ||
|width=10% style="background: #2F5D1C"|[[File:MKT 006PB.png|70px]]<br>[[File:MKT Icon 1Ruby.png|15px]] | |width=10% style="background:#2F5D1C"|[[File:MKT 006PB.png|70px]]<br>[[File:MKT Icon 1Ruby.png|15px]] | ||
|width=10% style="background: #2F5D1C"|[[File:MKT 007PB.png|70px]]<br>[[File:MKT Icon 1Ruby.png|15px]] | |width=10% style="background:#2F5D1C"|[[File:MKT 007PB.png|70px]]<br>[[File:MKT Icon 1Ruby.png|15px]] | ||
|width=10% style="background: #2F5D1C"|[[File:MKT 008PB.png|70px]]<br>[[File:MKT Icon 1Ruby.png|15px]] | |width=10% style="background:#2F5D1C"|[[File:MKT 008PB.png|70px]]<br>[[File:MKT Icon 1Ruby.png|15px]] | ||
|width=10% style="background: #2F5D1C"|[[File:MKT 127CB.png|70px]]<br>[[File:MKT Icon GrandStar.png|15px]] | |width=10% style="background:#2F5D1C"|[[File:MKT 127CB.png|70px]]<br>[[File:MKT Icon GrandStar.png|15px]] | ||
|width=10% style="background: #2F5D1C"|[[File:MKT 049CB.png|70px]]<br>[[File:MKT Icon GrandStar.png|15px]] | |width=10% style="background:#2F5D1C"|[[File:MKT 049CB.png|70px]]<br>[[File:MKT Icon GrandStar.png|15px]] | ||
|width=10% style="background: #2F5D1C"|[[File:MKT 146CB.png|70px]]<br>[[File:MKT Icon GrandStar.png|15px]] | |width=10% style="background:#2F5D1C"|[[File:MKT 146CB.png|70px]]<br>[[File:MKT Icon GrandStar.png|15px]] | ||
|-style="color: #FFF" | |-style="color:#FFF" | ||
|style="background: #2F5D1C; border-top:1px solid #2F5D1C;"|''Join a multiplayer race.'' | |style="background:#2F5D1C;border-top:1px solid #2F5D1C;"|''Join a multiplayer race.'' | ||
|style="background: #2F5D1C; border-top:1px solid #2F5D1C;"|''Join 3 multiplayer races.'' | |style="background:#2F5D1C;border-top:1px solid #2F5D1C;"|''Join 3 multiplayer races.'' | ||
|style="background: #2F5D1C; border-top:1px solid #2F5D1C;"|''Join 5 multiplayer races.'' | |style="background:#2F5D1C;border-top:1px solid #2F5D1C;"|''Join 5 multiplayer races.'' | ||
|style="background: #2F5D1C; border-top:1px solid #2F5D1C;"|''Land 3 hits with Green Shells in multiplayer.'' | |style="background:#2F5D1C;border-top:1px solid #2F5D1C;"|''Land 3 hits with Green Shells in multiplayer.'' | ||
|style="background: #2F5D1C; border-top:1px solid #2F5D1C;"|''Land 3 hits with Bananas in multiplayer.'' | |style="background:#2F5D1C;border-top:1px solid #2F5D1C;"|''Land 3 hits with Bananas in multiplayer.'' | ||
|style="background: #2F5D1C; border-top:1px solid #2F5D1C;"|''Do 3 Rocket Starts in multiplayer.'' | |style="background:#2F5D1C;border-top:1px solid #2F5D1C;"|''Do 3 Rocket Starts in multiplayer.'' | ||
|-style="color: #FFF" | |-style="color:#FFF" | ||
|width=10% style="background: #2F5D1C"|[[File:MKT 011PB.png|70px]]<br>[[File:MKT Icon 1Ruby.png|15px]] | |width=10% style="background:#2F5D1C"|[[File:MKT 011PB.png|70px]]<br>[[File:MKT Icon 1Ruby.png|15px]] | ||
|width=10% style="background: #2F5D1C"|[[File:MKT 013PB.png|70px]]<br>[[File:MKT Icon 1Ruby.png|15px]] [[File:MKT Icon 1Ruby.png|15px]] [[File:MKT Icon 1Ruby.png|15px]] | |width=10% style="background:#2F5D1C"|[[File:MKT 013PB.png|70px]]<br>[[File:MKT Icon 1Ruby.png|15px]] [[File:MKT Icon 1Ruby.png|15px]] [[File:MKT Icon 1Ruby.png|15px]] | ||
|width=10% style="background: #2F5D1C"|[[File:MKT 012PB.png|70px]]<br>[[File:MKT Icon 1Ruby.png|15px]] [[File:MKT Icon 1Ruby.png|15px]] | |width=10% style="background:#2F5D1C"|[[File:MKT 012PB.png|70px]]<br>[[File:MKT Icon 1Ruby.png|15px]] [[File:MKT Icon 1Ruby.png|15px]] | ||
|width=10% style="background: #2F5D1C"|[[File:MKT 041CB.png|70px]]<br>[[File:MKT Icon GrandStar.png|15px]] [[File:MKT Icon GrandStar.png|15px]] | |width=10% style="background:#2F5D1C"|[[File:MKT 041CB.png|70px]]<br>[[File:MKT Icon GrandStar.png|15px]] [[File:MKT Icon GrandStar.png|15px]] | ||
|width=10% style="background: #2F5D1C"|[[File:MKT 138CB.png|70px]]<br>[[File:MKT Icon GrandStar.png|15px]] [[File:MKT Icon GrandStar.png|15px]] | |width=10% style="background:#2F5D1C"|[[File:MKT 138CB.png|70px]]<br>[[File:MKT Icon GrandStar.png|15px]] [[File:MKT Icon GrandStar.png|15px]] | ||
|width=10% style="background: #2F5D1C"|[[File:MKT 210CB.png|70px]]<br>[[File:MKT Icon GrandStar.png|15px]] [[File:MKT Icon GrandStar.png|15px]] | |width=10% style="background:#2F5D1C"|[[File:MKT 210CB.png|70px]]<br>[[File:MKT Icon GrandStar.png|15px]] [[File:MKT Icon GrandStar.png|15px]] | ||
|-style="color: #FFF" | |-style="color:#FFF" | ||
|style="background: #2F5D1C; border-top:1px solid #2F5D1C;"|''Get 1 win in Kart Pro.'' | |style="background: #2F5D1C;border-top:1px solid #2F5D1C;"|''Get 1 win in Kart Pro.'' | ||
|style="background: #2F5D1C; border-top:1px solid #2F5D1C;"|''Achieve a winning streak that includes 3 1st-place wins.'' | |style="background: #2F5D1C;border-top:1px solid #2F5D1C;"|''Achieve a winning streak that includes 3 1st-place wins.'' | ||
|style="background: #2F5D1C; border-top:1px solid #2F5D1C;"|''Achieve a winning streak that includes 2 1st-place wins.'' | |style="background: #2F5D1C;border-top:1px solid #2F5D1C;"|''Achieve a winning streak that includes 2 1st-place wins.'' | ||
|style="background: #2F5D1C; border-top:1px solid #2F5D1C;"|''Land 3 hits with Red Shells in multiplayer.'' | |style="background: #2F5D1C;border-top:1px solid #2F5D1C;"|''Land 3 hits with Red Shells in multiplayer.'' | ||
|style="background: #2F5D1C; border-top:1px solid #2F5D1C;"|''Join a multiplayer race.'' | |style="background: #2F5D1C;border-top:1px solid #2F5D1C;"|''Join a multiplayer race.'' | ||
|style="background: #2F5D1C; border-top:1px solid #2F5D1C;"|''Use the Bullet Bill item in multiplayer.'' | |style="background: #2F5D1C;border-top:1px solid #2F5D1C;"|''Use the Bullet Bill item in multiplayer.'' | ||
|-style="color: #FFF" | |-style="color:#FFF" | ||
|width=10% style="background: #2F5D1C"|[[File:MKT 005PB.png|70px]]<br>[[File:MKT Icon 1Ruby.png|15px]] | |width=10% style="background:#2F5D1C"|[[File:MKT 005PB.png|70px]]<br>[[File:MKT Icon 1Ruby.png|15px]] | ||
|width=10% style="background: #2F5D1C"|[[File:MKT 009PB.png|70px]]<br>[[File:MKT Icon 1Ruby.png|15px]] | |width=10% style="background:#2F5D1C"|[[File:MKT 009PB.png|70px]]<br>[[File:MKT Icon 1Ruby.png|15px]] | ||
|width=10% style="background: #2F5D1C"|[[File:MKT 010PB.png|70px]]<br>[[File:MKT Icon 1Ruby.png|15px]] | |width=10% style="background:#2F5D1C"|[[File:MKT 010PB.png|70px]]<br>[[File:MKT Icon 1Ruby.png|15px]] | ||
|width=10% style="background: #2F5D1C"|[[File:MKT 133CB.png|70px]]<br>[[File:MKT Icon GrandStar.png|15px]] [[File:MKT Icon GrandStar.png|15px]] | |width=10% style="background:#2F5D1C"|[[File:MKT 133CB.png|70px]]<br>[[File:MKT Icon GrandStar.png|15px]] [[File:MKT Icon GrandStar.png|15px]] | ||
|width=10% style="background: #2F5D1C"|[[File:MKT 119-2CB.png|70px]]<br>[[File:MKT Icon GrandStar.png|15px]] [[File:MKT Icon GrandStar.png|15px]] | |width=10% style="background:#2F5D1C"|[[File:MKT 119-2CB.png|70px]]<br>[[File:MKT Icon GrandStar.png|15px]] [[File:MKT Icon GrandStar.png|15px]] | ||
|width=10% style="background: #2F5D1C"|[[File:MKT 147CB.png|70px]]<br>[[File:MKT Icon GrandStar.png|15px]] [[File:MKT Icon GrandStar.png|15px]] | |width=10% style="background:#2F5D1C"|[[File:MKT 147CB.png|70px]]<br>[[File:MKT Icon GrandStar.png|15px]] [[File:MKT Icon GrandStar.png|15px]] | ||
|-style="color: #FFF" | |-style="color:#FFF" | ||
|style="background: #2F5D1C; border-top:1px solid #2F5D1C;"|''Join 10 multiplayer races.'' | |style="background:#2F5D1C;border-top:1px solid #2F5D1C;"|''Join 10 multiplayer races.'' | ||
|style="background: #2F5D1C; border-top:1px solid #2F5D1C;"|''Get 3rd place or higher 3 times in a multiplayer race.'' | |style="background:#2F5D1C;border-top:1px solid #2F5D1C;"|''Get 3rd place or higher 3 times in a multiplayer race.'' | ||
|style="background: #2F5D1C; border-top:1px solid #2F5D1C;"|''Get 3rd place or higher 5 times in a multiplayer race.'' | |style="background:#2F5D1C;border-top:1px solid #2F5D1C;"|''Get 3rd place or higher 5 times in a multiplayer race.'' | ||
|style="background: #2F5D1C; border-top:1px solid #2F5D1C;"|''Do 50 Jump Boosts in multiplayer.'' | |style="background:#2F5D1C;border-top:1px solid #2F5D1C;"|''Do 50 Jump Boosts in multiplayer.'' | ||
|style="background: #2F5D1C; border-top:1px solid #2F5D1C;"|''Do 50 Mini-Turbo boosts in multiplayer.'' | |style="background:#2F5D1C;border-top:1px solid #2F5D1C;"|''Do 50 Mini-Turbo boosts in multiplayer.'' | ||
|style="background: #2F5D1C; border-top:1px solid #2F5D1C;"|''Cause opponents to crash 30 times in multiplayer.'' | |style="background:#2F5D1C;border-top:1px solid #2F5D1C;"|''Cause opponents to crash 30 times in multiplayer.'' | ||
|} | |} | ||
<br> | <br> | ||
{|class="wikitable" style="margin:auto; text-align:center" width=30% | {|class="wikitable"style="margin:auto;text-align:center"width=30% | ||
!colspan=2|Total Points Challenge 1 | !colspan=2|Total Points Challenge 1 | ||
|- | |- | ||
| Line 704: | Line 702: | ||
|} | |} | ||
<br> | <br> | ||
{|class="wikitable" style="margin:auto; text-align:center" width=30% | {|class="wikitable"style="margin:auto; text-align:center"width=30% | ||
!colspan=2|Total Points Challenge 2 | !colspan=2|Total Points Challenge 2 | ||
|- | |- | ||
| Line 745: | Line 743: | ||
|- | |- | ||
!High-End drivers | !High-End drivers | ||
|[[Dry Bowser]], [[ | |[[Dry Bowser]], [[Metal Mario]], [[Pink Gold Peach]], [[Cat Mario|Cat Peach]], [[Pauline]], [[Princess Peach|Peach (Explorer)]], [[Nabbit]], [[Captain Toad]], [[King Bob-omb]], [[Peachette]], [[Yoshi (species)|Black Yoshi]], [[Yoshi (species)|White Yoshi]], [[Princess Peach|Peach (Wintertime)]], [[Birdo|Birdo (Black)]], [[Penguin Mario|Penguin Luigi]], [[Dixie Kong]], [[Funky Kong]], [[Bowser Jr.|Bowser Jr. (Pirate)]], [[Ice Mario (Super Mario Galaxy)|Ice Mario]] | ||
|rowspan=3|1.1628% | |rowspan=3|1.1628% | ||
|- | |- | ||
| Line 757: | Line 755: | ||
===Samurai Pipe 1=== | ===Samurai Pipe 1=== | ||
{|class="wikitable" style="margin:auto; text-align:center" | {|class="wikitable"style="margin:auto;text-align:center" | ||
!colspan=16|Items obtained from a new Samurai Pipe 1 | !colspan=16|Items obtained from a new Samurai Pipe 1 | ||
|- | |- | ||
| Line 794: | Line 792: | ||
|} | |} | ||
<br> | <br> | ||
{|class="wikitable"style="margin:auto;text-align:center" | |||
{|class="wikitable" style="margin:auto; text-align:center" | |||
!Class | !Class | ||
!Parts | !Parts | ||
| Line 813: | Line 810: | ||
|- | |- | ||
!High-End drivers | !High-End drivers | ||
|[[Dry Bowser]], [[ | |[[Dry Bowser]], [[Metal Mario]], [[Pink Gold Peach]], [[Cat Mario|Cat Peach]], [[Pauline]], [[Princess Peach|Peach (Explorer)]], [[Nabbit]], [[Captain Toad]], [[King Bob-omb]], [[Peachette]], [[Yoshi (species)|Black Yoshi]], [[Yoshi (species)|White Yoshi]], [[Princess Peach|Peach (Wintertime)]], [[Birdo|Birdo (Black)]], [[Penguin Mario|Penguin Luigi]], [[Dixie Kong]], [[Funky Kong]], [[Bowser Jr.|Bowser Jr. (Pirate)]], [[Ice Mario (Super Mario Galaxy)|Ice Mario]], [[Princess Daisy|Daisy (Yukata)]], [[Princess Peach|Peach (Yukata)]] | ||
|0.0476% | |0.0476% | ||
|- | |- | ||
| Line 825: | Line 822: | ||
|- | |- | ||
!Super drivers | !Super drivers | ||
|[[Donkey Kong]], [[Toad]], [[Bowser]], [[Luigi]], [[Mario]], [[Princess Peach|Peach]], [[Yoshi]], [[Princess Daisy|Daisy]], [[Lakitu]], [[King Boo]], [[Toadette]], [[Bowser Jr.]], [[Waluigi]], [[Wario]], [[Rosalina]], [[Birdo]], [[Diddy Kong]], [[Hammer Bro]], [[Boomerang Bro]], [[Fire Bro]], [[Ice Bro]], [[Red Yoshi]], [[Black Shy Guy]], [[Pink Shy Guy]], [[Toad (species)|Toad (Pit Crew)]], [[Monty Mole]], [[Birdo | |[[Donkey Kong]], [[Toad]], [[Bowser]], [[Luigi]], [[Mario]], [[Princess Peach|Peach]], [[Yoshi]], [[Princess Daisy|Daisy]], [[Lakitu]], [[King Boo]], [[Toadette]], [[Bowser Jr.]], [[Waluigi]], [[Wario]], [[Rosalina]], [[Birdo]], [[Diddy Kong]], [[Hammer Bro]], [[Boomerang Bro]], [[Fire Bro]], [[Ice Bro]], [[Red Yoshi]], [[Black Shy Guy]], [[Pink Shy Guy]], [[Toad (species)|Toad (Pit Crew)]], [[Monty Mole]], [[Birdo|Birdo (Light Blue)]], [[Birdo|Birdo (Yellow)]], [[Roving Racers|Red Koopa (Freerunning)]] | ||
|0.3103% | |0.3103% | ||
|- | |- | ||
| Line 851: | Line 848: | ||
===Samurai Pipe 2=== | ===Samurai Pipe 2=== | ||
{|class="wikitable" style="margin:auto; text-align:center" | {|class="wikitable"style="margin:auto;text-align:center" | ||
!colspan=16|Items obtained from a new Samurai Pipe 2 | !colspan=16|Items obtained from a new Samurai Pipe 2 | ||
|- | |- | ||
| Line 888: | Line 885: | ||
|} | |} | ||
<br> | <br> | ||
{|class="wikitable"style="margin:auto;text-align:center" | |||
{|class="wikitable" style="margin:auto; text-align:center" | |||
!Class | !Class | ||
!Parts | !Parts | ||
| Line 907: | Line 903: | ||
|- | |- | ||
!High-End drivers | !High-End drivers | ||
|[[Dry Bowser]], [[ | |[[Dry Bowser]], [[Metal Mario]], [[Pink Gold Peach]], [[Cat Mario|Cat Peach]], [[Pauline]], [[Princess Peach|Peach (Explorer)]], [[Nabbit]], [[Captain Toad]], [[King Bob-omb]], [[Peachette]], [[Yoshi (species)|Black Yoshi]], [[Yoshi (species)|White Yoshi]], [[Princess Peach|Peach (Wintertime)]], [[Birdo|Birdo (Black)]], [[Penguin Mario|Penguin Luigi]], [[Dixie Kong]], [[Funky Kong]], [[Mario|Mario (Samurai)]], [[Bowser Jr.|Bowser Jr. (Pirate)]], [[Ice Mario (Super Mario Galaxy)|Ice Mario]] | ||
|0.0500% | |0.0500% | ||
|- | |- | ||
| Line 919: | Line 915: | ||
|- | |- | ||
!Super drivers | !Super drivers | ||
|[[Donkey Kong]], [[Toad]], [[Bowser]], [[Luigi]], [[Mario]], [[Princess Peach|Peach]], [[Yoshi]], [[Princess Daisy|Daisy]], [[Lakitu]], [[King Boo]], [[Toadette]], [[Bowser Jr.]], [[Waluigi]], [[Wario]], [[Rosalina]], [[Birdo]], [[Diddy Kong]], [[Hammer Bro]], [[Boomerang Bro]], [[Fire Bro]], [[Ice Bro]], [[Red Yoshi]], [[Black Shy Guy]], [[Pink Shy Guy]], [[Toad (species)|Toad (Pit Crew)]], [[Monty Mole]], [[Birdo | |[[Donkey Kong]], [[Toad]], [[Bowser]], [[Luigi]], [[Mario]], [[Princess Peach|Peach]], [[Yoshi]], [[Princess Daisy|Daisy]], [[Lakitu]], [[King Boo]], [[Toadette]], [[Bowser Jr.]], [[Waluigi]], [[Wario]], [[Rosalina]], [[Birdo]], [[Diddy Kong]], [[Hammer Bro]], [[Boomerang Bro]], [[Fire Bro]], [[Ice Bro]], [[Red Yoshi]], [[Black Shy Guy]], [[Pink Shy Guy]], [[Toad (species)|Toad (Pit Crew)]], [[Monty Mole]], [[Birdo|Birdo (Light Blue)]], [[Birdo|Birdo (Yellow)]], [[Roving Racers|Red Koopa (Freerunning)]] | ||
|0.3103% | |0.3103% | ||
|- | |- | ||
| Line 945: | Line 941: | ||
===Shinobi Pipe=== | ===Shinobi Pipe=== | ||
{|class="wikitable" style="margin:auto; text-align:center" | {|class="wikitable"style="margin:auto;text-align:center" | ||
!colspan=16|Items obtained from a new Shinobi Pipe | !colspan=16|Items obtained from a new Shinobi Pipe | ||
|- | |- | ||
| Line 982: | Line 978: | ||
|} | |} | ||
<br> | <br> | ||
{|class="wikitable"style="margin:auto;text-align:center" | |||
{|class="wikitable" style="margin:auto; text-align:center" | |||
!Class | !Class | ||
!Parts | !Parts | ||
| Line 1,001: | Line 996: | ||
|- | |- | ||
!Super drivers | !Super drivers | ||
|[[Donkey Kong]], [[Toad]], [[Bowser]], [[Luigi]], [[Mario]], [[Princess Peach|Peach]], [[Yoshi]], [[Princess Daisy|Daisy]], [[Lakitu]], [[King Boo]], [[Toadette]], [[Bowser Jr.]], [[Waluigi]], [[Wario]], [[Rosalina]], [[Birdo]], [[Diddy Kong]], [[Hammer Bro]], [[Boomerang Bro]], [[Fire Bro]], [[Ice Bro]], [[Red Yoshi]], [[Black Shy Guy]], [[Pink Shy Guy]], [[Toad (species)|Toad (Pit Crew)]], [[Monty Mole]], [[Birdo | |[[Donkey Kong]], [[Toad]], [[Bowser]], [[Luigi]], [[Mario]], [[Princess Peach|Peach]], [[Yoshi]], [[Princess Daisy|Daisy]], [[Lakitu]], [[King Boo]], [[Toadette]], [[Bowser Jr.]], [[Waluigi]], [[Wario]], [[Rosalina]], [[Birdo]], [[Diddy Kong]], [[Hammer Bro]], [[Boomerang Bro]], [[Fire Bro]], [[Ice Bro]], [[Red Yoshi]], [[Black Shy Guy]], [[Pink Shy Guy]], [[Toad (species)|Toad (Pit Crew)]], [[Monty Mole]], [[Birdo|Birdo (Light Blue)]], [[Birdo|Birdo (Yellow)]], [[Roving Racers|Red Koopa (Freerunning)]] | ||
|0.3448% | |0.3448% | ||
|- | |- | ||
| Line 1,027: | Line 1,022: | ||
==Mii Racing Suit Shop== | ==Mii Racing Suit Shop== | ||
{| align=center width=960px cellspacing=0 border=1 cellpadding=3 style="border-collapse:collapse; font-family:Arial; text-align:center" | ===Banner items=== | ||
|-style="background: #ABC" | {|align=center width=960px cellspacing=0 border=1 cellpadding=3 style="border-collapse:collapse;font-family:Arial;text-align:center" | ||
|-style="background:#ABC" | |||
!Name | !Name | ||
!Starting date | !Starting date | ||
| Line 1,040: | Line 1,036: | ||
|[[File:MKT Icon KingBobombMiiRacingSuit.png|30px]]<br> [[Mii|King Bob-omb Mii Racing Suit]] ×1 | |[[File:MKT Icon KingBobombMiiRacingSuit.png|30px]]<br> [[Mii|King Bob-omb Mii Racing Suit]] ×1 | ||
|[[File:MKT Tour66 KingBobombMiiRacingSuit.png|x150px]] | |[[File:MKT Tour66 KingBobombMiiRacingSuit.png|x150px]] | ||
|} | |||
===Other items=== | |||
{|class="wikitable"style="margin:auto;text-align:center"width=50% | |||
!colspan=3|Items available in Mii Racing Suit Shop (March 23, 2022 - April 5, 2022) | |||
|- | |||
|[[File:MKT Artwork MarioMiiRacingSuit.png|80x80px]] | |||
|[[File:MKT Artwork PeachMiiRacingSuit.png|80x80px]] | |||
|[[File:MKT Artwork DonkeyKongMiiRacingSuit.png|80x80px]] | |||
|- | |||
![[Mii|Mario Mii Racing Suit]]<br>[[File:MKT Icon 1Ruby.png|20px]] 100<br>Amount: 3 | |||
![[Mii|Peach Mii Racing Suit]]<br>[[File:MKT Icon 1Ruby.png|20px]] 100<br>Amount: 3 | |||
![[Mii|Donkey Kong Mii Racing Suit]]<br>[[File:MKT Icon 1Ruby.png|20px]] 100<br>Amount: 3 | |||
|} | |} | ||
==Token Shop== | ==Token Shop== | ||
The limited-time event where [[event token]]s appeared began on March 23, 2022 and ended on April 5, 2022. Event tokens could be earned by causing opponents to crash. | The limited-time event where [[event token]]s appeared began on March 23, 2022 and ended on April 5, 2022. Event tokens could be earned by causing opponents to crash. | ||
{| class="wikitable" style="margin:auto; text-align:center" width=50% | {|class="wikitable"style="margin:auto;text-align:center"width=50% | ||
!colspan=3|'''Token Shop''' (March 23, 2022 - April 5, 2022) | !colspan=3|'''Token Shop''' (March 23, 2022 - April 5, 2022) | ||
|- | |- | ||
| Line 1,090: | Line 1,099: | ||
==Tier Shop== | ==Tier Shop== | ||
The shop features a variety of set and randomized items available for purchase. The item slots in the shop are unlocked based on the highest tier of players. | The shop features a variety of set and randomized items available for purchase. The item slots in the shop are unlocked based on the highest tier of players. | ||
{|class="wikitable"style="margin:auto;text-align:center"width=50% | |||
{| class="wikitable" style="margin:auto; text-align:center" width=50% | |||
!colspan=3|Items available in Tier Shop (March 23, 2022 - April 5, 2022) | !colspan=3|Items available in Tier Shop (March 23, 2022 - April 5, 2022) | ||
|- | |- | ||
| Line 1,149: | Line 1,157: | ||
==Names in other languages== | ==Names in other languages== | ||
{{Foreign names | {{Foreign names | ||
| | |Jpn=武者ツアー | ||
| | |JpnR=Musha Tsuā | ||
| | |JpnM=Warrior Tour | ||
|ChiS=武士巡回赛 | |ChiS=武士巡回赛 | ||
|ChiSR=Wǔshì Xúnhuí sài | |ChiSR=Wǔshì Xúnhuí sài | ||
| Line 1,172: | Line 1,180: | ||
|SpaM=Samurai Season | |SpaM=Samurai Season | ||
}} | }} | ||
{{MKT}} | {{MKT}} | ||
[[Category:Mario Kart Tour tours]] | [[Category:Mario Kart Tour tours]] | ||
[[it:Tour dei samurai]] | [[it:Tour dei samurai]] | ||
Latest revision as of 15:52, January 7, 2025
| Samurai Tour | |
|---|---|
| |
| Start date | March 22, 2022 11:00 p.m. (PT)[?] |
| End date | April 5, 2022 10:59 p.m. (PT)[?] |
| Number of cups | 12 |
| Ranked cups | Dry Bowser Cup (week 1) Mii Cup (week 2) |
| Coin Rush course | SNES Ghost Valley 1 |
| << List of tours >> | |
The Samurai Tour was the sixty-sixth tour of Mario Kart Tour which began on March 23, 2022, and ended on April 5, 2022. Fitting the theme, the tour added Mario wearing the Samurai Helmet and Samurai Armor from Super Mario Odyssey as a playable character, as well as introducing Peach in a heart-themed yukata (her overall appearance being based on her appearance in Bowser's Kingdom in Super Mario Odyssey), a pink-colored Shy Guy (Ninja), and Wave 2 of Mii Racing Suits. The tour also introduced many other Japanese-based items like the Warrior Wagon and the Origami Glider. Ninja Hideaway also returned as the signature course of the tour, in line with the course's inclusion in Wave 1 of the Booster Course Pass DLC for Mario Kart 8 Deluxe. Although this tour did not introduce any new courses — the first to do so since the 2021 Space Tour nine tours prior - it featured the debut of 3DS Wario Shipyard and 3DS Bowser's Castle's R/T variants. This makes the tour the first of two tours in 2022 to not introduce a new course, with the second being the 2023 New Year's Tour. This tour's Coin Rush course was SNES Ghost Valley 1, which was reused from the 2020 Halloween Tour. The menu's background featured Ninja Manor as the landmark for this tour, which was reused from the 2021 Ninja Tour. This would be the last appearance of SNES Koopa Troopa Beach 2 until the Sunshine Tour, thirty-five tours later in 2023. This tour's trailer featured falling cherry blossom petals during its opening splash screen.
This was the last tour to feature the eighth set of Expert Challenges, which started in the Singapore Tour.
The 2.5 Year Anniversary Celebration started in this tour, which includes a new set of challenges. A pipe containing tickets, coins, and rubies, as well as drivers, karts, and gliders, has also been added to the Token Shop, and can be pulled a total of thirty-one times; the cost for the initial pull is 50 event tokens, increasing with 10 tokens for every subsequent pull until the sixteenth, then with 50 tokens between the seventeenth and the twenty-first pulls. From the twenty-second pull onwards, the pipe costs 500 tokens per pull.
Starting from this tour, the Royal Parachute glider is available in regular tour pipes, including the All-Clear Pipe.
Spotlights[edit]
| Samurai Pipe 1 March 22, 2022, 11:00 p.m. (PT) – April 5, 2022, 10:59 p.m. (PT) |
Samurai Pipe 2 March 29, 2022, 11:00 p.m. (PT) – April 5, 2022, 10:59 p.m. (PT) | ||||
|
| ||||
| Drivers | Karts | Gliders | Drivers | Karts | Gliders |
|---|---|---|---|---|---|

|
|||||
| Mario (Samurai) | Warrior Wagon | Origami Glider | Peach (Yukata) and Daisy (Yukata) | Sakura Quickshaw and Festival Girl | Springtime Crane and Yukata Ribbon |
Special pipe[edit]
| Shinobi Pipe March 26, 2022, 11:00 p.m. (PT) – March 31, 2022, 10:59 p.m. (PT) | ||
| ||
| High-End Spotlight Driver | High-End Drivers | High-End Karts |
|---|---|---|

|
  
|
|
| Pink Shy Guy (Ninja) | Shy Guy (Ninja), King Bob-omb, and King Bob-omb (Gold) | Jade Hop Rod, Crimson Hop Rod, Dark Hop Rod, and Sakura Hop Rod |
- Names in other languages
| Language | Name | Meaning | Notes |
|---|---|---|---|
| Chinese | 忍者水管[?] Rěnzhě Shuǐguǎn |
Ninja Pipe | |
| German | Shinobi-Röhre[?] | Shinobi Pipe | |
| Italian | Tubo shinobi[?] | Shinobi pipe |
Cups[edit]
Dry Bowser Cup Ranked cup (week 1) |
Ninja Hideaway R |
3DS Wario Shipyard R |
3DS Bowser's Castle R/T |
Glider Challenge | ||||
 SNES Koopa Troopa Beach 2 |
Koopa Troopa | |||||||
Toad Cup |
Wii Mushroom Gorge R |
RMX Choco Island 2R |
SNES Koopa Troopa Beach 2T |
Time Trial | ||||
 RMX Vanilla Lake 1 |
Birdo (Light Blue) | |||||||
Mii Cup Ranked cup (week 2) |
Ninja Hideaway R/T |
DS Waluigi Pinball R |
3DS Wario Shipyard R/T |
Goomba Takedown | ||||
 RMX Choco Island 2 |
Red Yoshi | |||||||
Toadette Cup |
Wii Mushroom Gorge |
RMX Vanilla Lake 1R |
SNES Ghost Valley 1R |
Snap a Photo | ||||
 Ninja Hideaway T |
Mario (Samurai) | |||||||
Fire Bro Cup |
SNES Koopa Troopa Beach 2 |
Ninja Hideaway R |
3DS Bowser's Castle |
Steer Clear of Obstacles | ||||
 SNES Ghost Valley 1 |
Baby Mario | |||||||
King Boo Cup |
RMX Choco Island 2T |
DS Waluigi Pinball |
N64 Kalimari Desert 2R |
Combo Attack | ||||
 3DS Bowser's Castle T |
Monty Mole | |||||||
Cat Peach Cup |
RMX Vanilla Lake 1T |
SNES Ghost Valley 1T |
Ninja Hideaway |
Time Trial | ||||
 3DS Wario Shipyard R |
Hammer Bro | |||||||
Peach Cup |
N64 Kalimari Desert 2T |
3DS Bowser's Castle T |
SNES Koopa Troopa Beach 2R |
Ring Race | ||||
 Ninja Hideaway |
Shy Guy | |||||||
Wario Cup |
DS Waluigi Pinball T |
Ninja Hideaway T |
3DS Wario Shipyard T |
Break Item Boxes | ||||
 RMX Choco Island 2 |
Mario | |||||||
Pink Gold Peach Cup |
RMX Vanilla Lake 1 |
RMX Choco Island 2 |
SNES Ghost Valley 1 |
Do Jump Boosts | ||||
 Wii Mushroom Gorge |
Dry Bones | |||||||
Bowser Cup |
Ninja Hideaway |
Wii Mushroom Gorge T |
3DS Wario Shipyard |
Smash Small Dry Bones | ||||
 DS Waluigi Pinball |
Morton | |||||||
Daisy Cup |
3DS Bowser's Castle R |
N64 Kalimari Desert 2 |
Ninja Hideaway T |
Vs. Mega King Boo | ||||
 SNES Ghost Valley 1 |
Any character | |||||||
Signature kart sets[edit]
Drivers with a corresponding cup are bumped one rank up in every course of their cup.
| Cup | Driver | Kart | Glider |
|---|---|---|---|
| First course of every cup | — | — | |
| Second course of every cup | |||
| Third course of every cup | |||
| — | — | ||
| — | — | ||
| — | — | ||
| — | — | ||
| — | — | ||
| — | — | ||
| — | — | ||
| — | — | ||
| — | — | ||
| — | — | ||
| — | — | ||
| — | — |
Today's Challenge[edit]
Players' most recently used kart and glider are chosen, and favorite and favored ones have extra priority. Opponents are arranged randomly. On day 1 of this tour, players finish a race in Wii Mushroom Gorge R in the Toad Cup using Captain Toad for a free pipe launch. Starting from day 2, players have to finish a race in the earliest incomplete course that is not in any of the ranked cups using the driver shown on the course's thumbnail every day to obtain the corresponding reward in the table below. Once all of the courses are completed, the courses are selected at random.
| Day(s) | Reward |
| 1-4, 6-9, 11-13 | Free pipe launch |
|---|---|
| 5, 10 | Rubies ×5 |
| 14 |  Badge |
| Today's Challenge Pipe | |

| |
| Pipe contents | |
| Rubies, coins, driver (Normal/Super/High-End), kart (Normal/Super/High-End), glider (Normal/Super/High-End), item tickets | |
Rewards[edit]
Gold cells indicate rewards that are exclusive to Gold Pass members.

|

|
|||||
| Droplet Glider | Shy Guy | Green Kiddie Kart | Pink Shy Guy | Baby Mario | Poltergust 4000 | Wicked Wings |
| Grand Stars | 15 | 20 | 25 | 30 | 35 | 40 | 50 | 60 | 70 | 85 | 100 | 115 | 130 | 145 | 160 | 180 | 200 | 215 | 230 | 240 | 250 | 255 | 260 | 265 | Total | Grand total | |
|---|---|---|---|---|---|---|---|---|---|---|---|---|---|---|---|---|---|---|---|---|---|---|---|---|---|---|---|
| Free pipe launch | 1 | 1 | 1 | 1 | 4 | ||||||||||||||||||||||
| Coin | 300 | 300 | 300 | 300 | 300 | 500 | 1000 | 3000 | 7600 | ||||||||||||||||||
| 1000 | 600 | 1000 | 2000 | 4600 | |||||||||||||||||||||||
| Rubies | 3 | 3 | 5 | 5 | 5 | 21 | 46 | ||||||||||||||||||||
| 5 | 5 | 5 | 5 | 5 | 25 | ||||||||||||||||||||||
| Item tickets | 10 | 10 | 25 | ||||||||||||||||||||||||
| 15 | 15 | ||||||||||||||||||||||||||
| Star tickets | 4 | 4 | 4 | ||||||||||||||||||||||||
| 0 | |||||||||||||||||||||||||||
| Point-boost tickets | 1 | 1 | 1 | 3 | 6 | ||||||||||||||||||||||
| 3 | 3 | ||||||||||||||||||||||||||
| 1 | 1 | 1 | 3 | 6 | |||||||||||||||||||||||
| 3 | 3 | ||||||||||||||||||||||||||
| 1 | 1 | 1 | 3 | 6 | |||||||||||||||||||||||
| 3 | 3 | ||||||||||||||||||||||||||
| Level-boost ticket | 3 | 12 | |||||||||||||||||||||||||
| 9 | |||||||||||||||||||||||||||
New content[edit]
Drivers[edit]
Mii Racing Suits[edit]
Karts[edit]
Gliders[edit]
Courses[edit]
3DS Wario Shipyard (R/T)
3DS Bowser's Castle (R/T)
Paid banners[edit]
| Name | Availability | Cost | Contents | Banner image |
|---|---|---|---|---|
| Value Pack | March 23, 2022 – April 5, 2022 | US$1.99 |
|

|
| Driver Point-Boost Tickets 10 Ticket Set | March 23, 2022 – April 5, 2022 | US$3.99 | 
| |
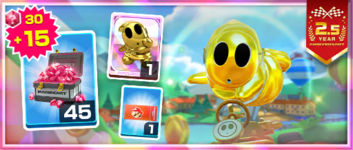
| Shy Guy (Gold) Pack | March 23, 2022 – April 5, 2022 | US$19.99 |
|
|
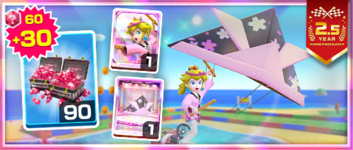
| Peach (Happi) Pack | March 23, 2022 – April 5, 2022 | US$39.99 |
|
|
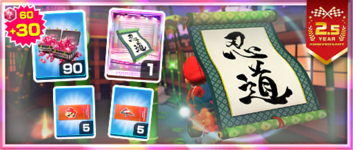
| Ninja Scroll Pack | March 23, 2022 – April 5, 2022 | US$39.99 |
|
|
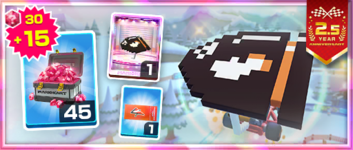
| 8-Bit Bullet Bill Pack | March 30, 2022 – April 5, 2022 | US$19.99 |
|
|
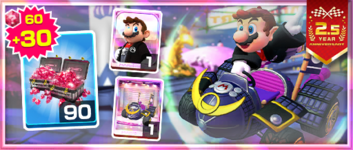
| Mario (Hakama) Pack | March 30, 2022 – April 5, 2022 | US$39.99 |
|
|
Challenges[edit]
| Tour Challenges 1 | Tour Challenges 2 | Gold Challenges | ||||||||
|---|---|---|---|---|---|---|---|---|---|---|
| Completion reward: |
Completion reward: |
Completion reward: | ||||||||
 |
 |
 |
 |
 |
 |
 |
 |
 | ||
| Do 50 Mini-Turbo boosts. | Land 5 hits with Bananas. | Get 1st place in a 100cc or higher race 2 times in a row. | Do 5 Rocket Starts. | Land 3 hits with Green Shells. | Drive a distance of 20,000 or more. | Do a total of 5 Slipstream boosts. | Land 5 hits with Bob-ombs. | Race in auto mode. | ||
 |
 |
 |
 |
 |
 |
 |
 |
 | ||
| Use point-boost tickets 3 times. | Get 3rd place or higher in a race 30 times. | Cause opponents to crash using a Mega Mushroom. | Get 1 item from the Daily Selects section of the Shop. | Do 10 Mini-Turbos in a single race using a driver wearing earrings. | Earn a score of 7,000 or higher on 3 T or R/T courses. | Use a level-boost ticket. | Activate Frenzy mode 5 times using a driver with a mustache. | Do 100 Jump Boosts. | ||
 |
 |
 |
 |
 |
 |
 |
 |
 | ||
| Get a Fantastic combo a total of 5 times. | Glide a total distance of 5,000. | Race in every course of every cup, including bonus challenges. | Cause an opponent to crash while gliding. | Earn a total score of 20,000 or higher in the Bowser Cup. | Get an item from the Tier Shop. | Cause opponents to crash in Frenzy mode. | Earn a total score of 25,000 or higher in the Wario Cup. | Complete Coin Rush 1 time. | ||
| Premium Challenges | ||
|---|---|---|
| Cost: US$4.99 | ||
| Three in a row reward: | ||
| Completion reward: | ||

|
||
| Lakitu ×1 | Koopa Clown ×1 | Wario Wing ×1 |
| Land 5 hits with Green Shells. | Land 10 hits with Bananas. | Land 10 hits with Bob-ombs. |
| Coins ×3,000 | Rubies ×10 | Kart point-boost ticket ×3 |
| Do 50 Jump Boosts. | Participate in a race. | Do 100 Mini-Turbo boosts. |
| Normal kart level-boost ticket ×1 | Super kart level-boost ticket ×1 | High-End kart level-boost ticket ×1 |
| Get 1st place in a race 10 times. | Get 1st place in a race 15 times. | Get 1st place in a race 20 times. |
| Kart Pro Challenges | Tour Multiplayer Challenges | |||||
|---|---|---|---|---|---|---|
| Three in a row reward: |
Three in a row reward: | |||||
| Completion reward: |
Completion reward: | |||||
 |
 |
 |
 |
 |
 | |
| Join a multiplayer race. | Join 3 multiplayer races. | Join 5 multiplayer races. | Land 3 hits with Green Shells in multiplayer. | Land 3 hits with Bananas in multiplayer. | Do 3 Rocket Starts in multiplayer. | |
 |
 |
 |
 |
 |
 | |
| Get 1 win in Kart Pro. | Achieve a winning streak that includes 3 1st-place wins. | Achieve a winning streak that includes 2 1st-place wins. | Land 3 hits with Red Shells in multiplayer. | Join a multiplayer race. | Use the Bullet Bill item in multiplayer. | |
 |
 |
 |
 |
 |
 | |
| Join 10 multiplayer races. | Get 3rd place or higher 3 times in a multiplayer race. | Get 3rd place or higher 5 times in a multiplayer race. | Do 50 Jump Boosts in multiplayer. | Do 50 Mini-Turbo boosts in multiplayer. | Cause opponents to crash 30 times in multiplayer. | |
| Total Points Challenge 1 | |
|---|---|
| Points | Rewards |
| 350,000 |
|
| 300,000 |
|
| 250,000 | |
| 200,000 | |
| 150,000 |
|
| 100,000 |
|
| Total Points Challenge 2 | |
|---|---|
| Points | Rewards |
| 900,000 |
|
| 800,000 | |
| 700,000 | |
| 600,000 | |
| 500,000 | |
| 400,000 | |
Initial pipe appearance rates[edit]
All-Clear Pipe[edit]
The All-Clear Pipe randomly shoots out one of the following regular High-End items. The appearance rate can be viewed via the "Pipe content" link on the Gold Pass purchase screen.
Samurai Pipe 1[edit]
| Items obtained from a new Samurai Pipe 1 | |||||||||||||||
|---|---|---|---|---|---|---|---|---|---|---|---|---|---|---|---|
| Item | Normal |
Super |
High-End |
Featured High-End | |||||||||||
| Driver | Kart | Glider | Driver | Kart | Glider | Driver | Kart | Glider | Driver | Kart | Glider | ||||
| Amount | 32 | 26 | 16 | 9 | 7 | 4 | 1 | 1 | 1 | 1 | 1 | 1 | |||
Samurai Pipe 2[edit]
| Items obtained from a new Samurai Pipe 2 | |||||||||||||||
|---|---|---|---|---|---|---|---|---|---|---|---|---|---|---|---|
| Item | Normal |
Super |
High-End |
Featured High-End | |||||||||||
| Driver | Kart | Glider | Driver | Kart | Glider | Driver | Kart | Glider | Driver | Kart | Glider | ||||
| Amount | 31 | 25 | 15 | 9 | 7 | 4 | 1 | 1 | 1 | 2 | 2 | 2 | |||
Shinobi Pipe[edit]
| Items obtained from a new Shinobi Pipe | |||||||||||||||
|---|---|---|---|---|---|---|---|---|---|---|---|---|---|---|---|
| Item | Normal |
Super |
High-End |
Featured High-End | |||||||||||
| Driver | Kart | Glider | Driver | Kart | Glider | Driver | Kart | Glider | Driver | Kart | Glider | ||||
| Amount | 12 | 11 | 9 | 5 | 4 | 4 | 2 | 2 | 0 | 1 | 0 | 0 | |||
Mii Racing Suit Shop[edit]
Banner items[edit]
| Name | Starting date | Cost | Contents | Banner image |
|---|---|---|---|---|
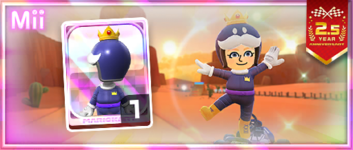
| King Bob-omb Mii Racing Suit | March 23, 2022 | 70 100 rubies for 2nd and 3rd purchases respectively |
King Bob-omb Mii Racing Suit ×1 |
|
Other items[edit]
| Items available in Mii Racing Suit Shop (March 23, 2022 - April 5, 2022) | ||
|---|---|---|
| Mario Mii Racing Suit Amount: 3 |
Peach Mii Racing Suit Amount: 3 |
Donkey Kong Mii Racing Suit Amount: 3 |
Token Shop[edit]
The limited-time event where event tokens appeared began on March 23, 2022 and ended on April 5, 2022. Event tokens could be earned by causing opponents to crash.
| Token Shop (March 23, 2022 - April 5, 2022) | ||
|---|---|---|

|
||
| King Boo Amount: 1 |
Dark Clown Amount: 1 |
Lightning Oilpaper Amount: 1 |
| Ruby ×3 Amount: 5 |
Coin ×500 Amount: 10 |
Coin Rush ticket Amount: 1 |
| Point-boost ticket (driver) Amount: 5 |
Point-boost ticket (kart) Amount: 5 |
Point-boost ticket (glider) Amount: 5 |
| Pipe Amount: 31 |
Level-boost ticket (Normal kart) Amount: 3 |
Level-boost ticket (Super kart) Amount: 1 |
| Star ticket Amount: 5 |
Points-cap ticket (Normal kart) Amount: 1 |
Points-cap ticket (Super kart) Amount: 1 |
Tier Shop[edit]
The shop features a variety of set and randomized items available for purchase. The item slots in the shop are unlocked based on the highest tier of players.
| Items available in Tier Shop (March 23, 2022 - April 5, 2022) | ||
|---|---|---|

|
||
| Black Shy Guy Amount: 1 |
Crawly Kart Amount: 1 |
Crimson Crane Amount: 1 |
| Items available in Tier Shop (March 23, 2022 - April 5, 2022) | ||
![Artwork of Donkey Kong in Super Mario Party (also used for Mario Kart Tour and the Nintendo Switch version of Mario vs. Donkey Kong[1])](https://mario.wiki.gallery/images/thumb/b/b5/SuperMarioParty_DonkeyKong.png/70px-SuperMarioParty_DonkeyKong.png)
|
||
| Donkey Kong Amount: 1 |
Green Circuit Amount: 1 |
Heart Balloons Amount: 1 |
| Items available in Tier Shop (March 23, 2022 - April 5, 2022) | ||
| Level-boost ticket (Normal) Amount: 3 per week |
Level-boost ticket (Normal) Amount: 3 per week |
Level-boost ticket (Normal) Amount: 3 per week |
OR |
OR |
OR |
| Level-boost ticket (Super) Amount: 2 per week OR Level-boost ticket (High-End) Amount: 1 per week |
Level-boost ticket (Super) Amount: 2 per week OR Level-boost ticket (High-End) Amount: 1 per week |
Level-boost ticket (Super) Amount: 2 per week OR Level-boost ticket (High-End) Amount: 1 per week |
OR OR |
OR OR |
OR OR |
| Points-cap ticket (Normal) Amount: 1 per week |
Points-cap ticket (Super) Amount: 1 per week |
Points-cap ticket (High-End) Amount: 1 per week |
| Level-boost ticket (High-End) Amount: 1 per week |
Level-boost ticket (High-End) Amount: 1 per week |
Level-boost ticket (High-End) Amount: 1 per week |
Names in other languages[edit]
| Language | Name | Meaning | Notes |
|---|---|---|---|
| Japanese | 武者ツアー[?] Musha Tsuā |
Warrior Tour | |
| Chinese (simplified) | 武士巡回赛[?] Wǔshì Xúnhuí sài |
Warrior Tour | |
| Chinese (traditional) | 武士巡迴賽[?] Wǔshì Xúnhuí sài |
Warrior Tour | |
| French | Saison des Samouraïs[?] | Samurai Season | |
| German | Samurai-Tour-Saison[?] | Samurai Tour Season | |
| Italian | Tour dei samurai[?] | Samurai Tour | |
| Korean | 무사 투어[?] Musa Tueo |
Warrior Tour | |
| Portuguese | Temporada Samurai[?] | Samurai Season | |
| Spanish | Temporada samurái[?] | Samurai Season |


