Marine Tour: Difference between revisions
m (Reverted edits by Muammar Axel (talk) to last revision by Drone 16Bit) Tag: Rollback |
m (Text replacement - "== *Trivia *==" to "==Notes==") |
||
| (31 intermediate revisions by 18 users not shown) | |||
| Line 1: | Line 1: | ||
{{ | {{tour infobox | ||
|image=[[File:MKT Marine Tour.png|200px]] | |image=[[File:MKT Marine Tour.png|200px]] | ||
|start=June 30, 2020<br>11:00 p.m. (PT) | |start=June 30, 2020<br>11:00 p.m. (PT) | ||
| Line 5: | Line 5: | ||
|cups=12 | |cups=12 | ||
|rank=[[Rosalina Cup]] (week 1)<br>[[Yoshi Cup]] (week 2) | |rank=[[Rosalina Cup]] (week 1)<br>[[Yoshi Cup]] (week 2) | ||
|coin=[[ | |coin=[[N64 Koopa Troopa Beach]] | ||
|before=[[Peach Tour|<<]] | |before=[[Peach Tour|<<]] | ||
|after=[[Exploration Tour|>>]] | |after=[[Exploration Tour (2020)|>>]] | ||
}} | }} | ||
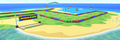
The '''Marine Tour''' was the twenty-first tour of ''[[Mario Kart Tour]]'', which began on July 1, 2020 and ended on July 14, 2020. Due to being aquatic-themed, the tour introduced [[Rosalina]] in a teal swimdress adorned with [[Grand Star]]s and [[Mario]] in his [[Crazy Cap#Swimwear|swimwear]] from ''[[Super Mario Odyssey]]'' as the new spotlight drivers of the tour, while also adding in fish-themed kart parts such as the [[Cheep Snorkel]] and the [[Manta Glider]]. Additionally, [[Koopa Beach 2|Koopa | The '''Marine Tour''' was the twenty-first tour of ''[[Mario Kart Tour]]'', which began on July 1, 2020 and ended on July 14, 2020. Due to being aquatic-themed, the tour introduced [[Rosalina]] in a teal swimdress adorned with [[Grand Star]]s and [[Mario]] in his [[Crazy Cap#Swimwear|swimwear]] from ''[[Super Mario Odyssey]]'' as the new spotlight drivers of the tour, while also adding in fish-themed kart parts such as the [[Cheep Snorkel]] and the [[Manta Glider]]. Additionally, [[SNES Koopa Troopa Beach 2|Koopa Beach 2]] from ''[[Super Mario Kart]]'' (now renamed to "Koopa Troopa Beach 2") was introduced as the signature course of this tour since its last appearance in ''[[Mario Kart DS]]''. The menu's background featured a few islands from Koopa Troopa Beach 2 as the landmark for this tour. | ||
Starting from this tour, [[Pink Gold Peach]] is available in all regular pipes. | |||
{{br|toc=1}} | |||
==Spotlights== | ==Spotlights== | ||
{| align=center width=66% cellspacing=0 border=1 cellpadding=3 style="border-collapse:collapse; font-family:Arial; text-align:center" | {|align=center width=66% cellspacing=0 border=1 cellpadding=3 style="border-collapse:collapse; font-family:Arial; text-align:center" | ||
|-style="background: #89A" | |-style="background: #89A" | ||
|colspan=3|'''Marine Pipe 1'''<br>June 30, 2020, 11:00 p.m. (PT) – <br>July 14, 2020, 10:59 p.m. (PT) | |colspan=3|'''Marine Pipe 1'''<br>June 30, 2020, 11:00 p.m. (PT) – <br>July 14, 2020, 10:59 p.m. (PT) | ||
| Line 20: | Line 22: | ||
|colspan=3|[[File:MKT Tour21 MarinePipe2.png|x150px]] | |colspan=3|[[File:MKT Tour21 MarinePipe2.png|x150px]] | ||
|-style="background: #ABC" | |-style="background: #ABC" | ||
! style="width: 16.6%;"|Driver | !style="width: 16.6%;"|Driver | ||
! style="width: 16.7%;"|Kart | !style="width: 16.7%;"|Kart | ||
! style="width: 16.7%;"|Glider | !style="width: 16.7%;"|Glider | ||
! style="width: 16.6%;"|Driver | !style="width: 16.6%;"|Driver | ||
! style="width: 16.7%;"|Kart | !style="width: 16.7%;"|Kart | ||
! style="width: 16.7%;"|Glider | !style="width: 16.7%;"|Glider | ||
|- | |- | ||
|[[File:MKT Artwork RosalinaSwimwear.png|80x80px]] | |[[File:MKT Artwork RosalinaSwimwear.png|80x80px]] | ||
| Line 43: | Line 45: | ||
==Special pipe== | ==Special pipe== | ||
{| align=center width=50% cellspacing=0 border=1 cellpadding=3 style="border-collapse:collapse; font-family:Arial; text-align:center" | {|align=center width=50% cellspacing=0 border=1 cellpadding=3 style="border-collapse:collapse; font-family:Arial; text-align:center" | ||
|-style="background: #89A" | |-style="background: #89A" | ||
|colspan=3|'''Undersea Pipe'''<br>July 4, 2020, 11:00 p.m. (PT) – <br>July 9, 2020, 10:59 p.m. (PT) | |colspan=3|'''Undersea Pipe'''<br>July 4, 2020, 11:00 p.m. (PT) – <br>July 9, 2020, 10:59 p.m. (PT) | ||
| Line 49: | Line 51: | ||
|colspan=3|[[File:MKT Tour21 UnderseaPipe.png|x150px]] | |colspan=3|[[File:MKT Tour21 UnderseaPipe.png|x150px]] | ||
|-style="background: #ABC" | |-style="background: #ABC" | ||
! style="width: 33.3%;"|Drivers | !style="width: 33.3%;"|Drivers | ||
! style="width: 33.4%;"|Karts | !style="width: 33.4%;"|Karts | ||
! style="width: 33.3%;"|Gliders | !style="width: 33.3%;"|Gliders | ||
|- | |- | ||
|[[File:NSMB Green Koopa Troopa Artwork.png|80x100px]][[File:MKT Artwork RedKoopaFreerunning.png|80x100px]][[File:MKT Artwork PenguinLuigi.png|80x100px]][[File:MKT Artwork GoldKoopaFreerunning.png|80x100px]] | |[[File:NSMB Green Koopa Troopa Artwork.png|80x100px]][[File:MKT Artwork RedKoopaFreerunning.png|80x100px]][[File:MKT Artwork PenguinLuigi.png|80x100px]][[File:MKT Artwork GoldKoopaFreerunning.png|80x100px]] | ||
| Line 58: | Line 60: | ||
|- | |- | ||
|[[Koopa Troopa]], [[Roving Racers|Red Koopa]] (Freerunning), [[Penguin Mario|Penguin Luigi]], and Gold Koopa (Freerunning) | |[[Koopa Troopa]], [[Roving Racers|Red Koopa]] (Freerunning), [[Penguin Mario|Penguin Luigi]], and Gold Koopa (Freerunning) | ||
|[[Cheep Charger]], [[Green Cheep Charger]], [[Super Blooper]], [[Gold Blooper]], and [[Gold Cheep Charger]] | |[[Cheep Charger]], [[Green Cheep Charger]], [[Super Blooper (kart)|Super Blooper]], [[Gold Blooper]], and [[Gold Cheep Charger]] | ||
|[[Lightning Oilpaper]], [[Cloud Glider]], [[Rainy Balloons]], and [[Starchute]] | |[[Lightning Oilpaper]], [[Cloud Glider]], [[Rainy Balloons]], and [[Starchute]] | ||
|} | |} | ||
====Names in other languages==== | ====Names in other languages==== | ||
{{foreign names | {{foreign names | ||
| Line 69: | Line 70: | ||
==Cups== | ==Cups== | ||
{| align=center width=90% cellspacing=0 border=1 cellpadding=3 style="border-collapse:collapse; font-family:Arial; text-align:center" | {|align=center width=90% cellspacing=0 border=1 cellpadding=3 style="border-collapse:collapse; font-family:Arial; text-align:center" | ||
{{ | {{MKT cup table row | ||
|C=Rosalina||Ra=1 | |C=Rosalina||Ra=1 | ||
|R1=[[ | |R1=[[SNES Koopa Troopa Beach 2]]||R1.I=KoopaTroopaBeach2SNES||R1.1=1,200||R1.2=1,800||R1.3=2,400||R1.4=3,000||R1.5=5,900 | ||
|R2=[[ | |R2=[[3DS Cheep Cheep Lagoon]]||R2.I=CheepCheepLagoon3DS||R2.1=1,000||R2.2=1,500||R2.3=2,000||R2.4=2,600||R2.5=5,100 | ||
|R3=[[Rainbow Road | |R3=[[3DS Rainbow Road|3DS Rainbow Road R]]||R3.I=RainbowRoadR3DS Waluigi||R3.1=1,800||R3.2=2,800||R3.3=3,700||R3.4=4,600||R3.5=9,200 | ||
|CN=Combo Attack||C.I=Tour21 RosalinaCupChallenge||CC=Toadette||CT=[[Donut Plains 1 | |CN=[[Combo Attack]]||C.I=Tour21 RosalinaCupChallenge||CC=Toadette||CT=[[SNES Donut Plains 1|SNES Donut Plains 1T]]||C.1=5||C.2=10||C.3=18 | ||
}} | }} | ||
{{ | {{MKT cup table row | ||
|C=Hammer Bro||Ra= | |C=Hammer Bro||Ra= | ||
|R1=[[Koopa Troopa Beach|N64 Koopa Troopa Beach R]]||R1.I=KoopaTroopaBeachRN64 HammerBro||R1.1=1,100||R1.2=1,700||R1.3=2,300||R1.4=2,900||R1.5=5,600 | |R1=[[N64 Koopa Troopa Beach|N64 Koopa Troopa Beach R]]||R1.I=KoopaTroopaBeachRN64 HammerBro||R1.1=1,100||R1.2=1,700||R1.3=2,300||R1.4=2,900||R1.5=5,600 | ||
|R2=[[RMX Choco Island 1|RMX Choco Island 1R]]||R2.I=RMXChocoIsland1R DixieKong||R2.1=1,200||R2.2=1,900||R2.3=2,500||R2.4=3,200||R2.5=6,100 | |R2=[[RMX Choco Island 1|RMX Choco Island 1R]]||R2.I=RMXChocoIsland1R DixieKong||R2.1=1,200||R2.2=1,900||R2.3=2,500||R2.4=3,200||R2.5=6,100 | ||
|R3=[[ | |R3=[[3DS Mario Circuit]]||R3.I=MarioCircuit3DS||R3.1=1,300||R3.2=2,000||R3.3=2,700||R3.4=3,300||R3.5=6,400 | ||
|CN=Ring Race||C.I=Tour21 HammerBroCupChallenge||CC=Pauline||CT=SNES Koopa Troopa Beach 2||C.1=5||C.2=10||C.3=22 | |CN=[[Ring Race]]||C.I=Tour21 HammerBroCupChallenge||CC=Pauline||CT=SNES Koopa Troopa Beach 2||C.1=5||C.2=10||C.3=22 | ||
}} | }} | ||
{{ | {{MKT cup table row | ||
|C=Yoshi||Ra=2 | |C=Yoshi||Ra=2 | ||
|R1=[[ | |R1=[[N64 Royal Raceway]]||R1.I=RoyalRacewayN64 Yoshi||R1.1=1,400||R1.2=2,300||R1.3=3,100||R1.4=3,900||R1.5=7,200 | ||
|R2=[[ | |R2=[[3DS Rainbow Road]]||R2.I=RainbowRoad3DS Lemmy||R2.1=1,700||R2.2=2,700||R2.3=3,700||R2.4=4,600||R2.5=8,500 | ||
|R3=SNES Koopa Troopa Beach 2T||R3.I=KoopaTroopaBeach2TSNES||R3.1=1,500||R3.2=2,300||R3.3=3,100||R3.4=3,900||R3.5=7,300 | |R3=SNES Koopa Troopa Beach 2T||R3.I=KoopaTroopaBeach2TSNES||R3.1=1,500||R3.2=2,300||R3.3=3,100||R3.4=3,900||R3.5=7,300 | ||
|CN=Steer Clear of Obstacles||C.I=Tour21 YoshiCupChallenge||CC=Ludwig||CT=RMX Choco Island 1||C.1=1||C.2=2||C.3=3 | |CN=[[Steer Clear of Obstacles]]||C.I=Tour21 YoshiCupChallenge||CC=Ludwig||CT=RMX Choco Island 1||C.1=1||C.2=2||C.3=3 | ||
}} | }} | ||
{{ | {{MKT cup table row | ||
|C=Wendy||Ra= | |C=Wendy||Ra= | ||
|R1=3DS Cheep Cheep Lagoon R||R1.I=CheepCheepLagoonR3DS Wendy||R1.1=1,100||R1.2=1,800||R1.3=2,400||R1.4=3,000||R1.5=5,400 | |R1=3DS Cheep Cheep Lagoon R||R1.I=CheepCheepLagoonR3DS Wendy||R1.1=1,100||R1.2=1,800||R1.3=2,400||R1.4=3,000||R1.5=5,400 | ||
|R2=[[Waluigi Pinball | |R2=[[DS Waluigi Pinball|DS Waluigi Pinball R]]||R2.I=WaluigiPinballRDS||R2.1=1,300||R2.2=2,200||R2.3=2,900||R2.4=3,700||R2.5=6,600 | ||
|R3=N64 Koopa Troopa Beach T||R3.I=KoopaTroopaBeachTN64||R3.1=1,500||R3.2=2,500||R3.3=3,400||R3.4=4,300||R3.5=7,600 | |R3=N64 Koopa Troopa Beach T||R3.I=KoopaTroopaBeachTN64||R3.1=1,500||R3.2=2,500||R3.3=3,400||R3.4=4,300||R3.5=7,600 | ||
|CN=Smash Small Dry Bones||C.I=Tour21 WendyCupChallenge||CC=Luigi||CT=N64 Royal Raceway||C.1=5||C.2=10||C.3=15 | |CN=[[Smash Small Dry Bones]]||C.I=Tour21 WendyCupChallenge||CC=Luigi||CT=N64 Royal Raceway||C.1=5||C.2=10||C.3=15 | ||
}} | }} | ||
{{ | {{MKT cup table row | ||
|C=Shy Guy||Ra= | |C=Shy Guy||Ra= | ||
|R1=DS Waluigi Pinball T||R1.I=WaluigiPinballTDS||R1.1=1,500||R1.2=2,600||R1.3=3,500||R1.4=4,500||R1.5=7,700 | |R1=DS Waluigi Pinball T||R1.I=WaluigiPinballTDS||R1.1=1,500||R1.2=2,600||R1.3=3,500||R1.4=4,500||R1.5=7,700 | ||
|R2=SNES Koopa Troopa Beach 2R||R2.I=KoopaTroopaBeach2RSNES||R2.1=1,300||R2.2=2,200||R2.3=3,000||R2.4=3,800||R2.5=6,500 | |R2=SNES Koopa Troopa Beach 2R||R2.I=KoopaTroopaBeach2RSNES||R2.1=1,300||R2.2=2,200||R2.3=3,000||R2.4=3,800||R2.5=6,500 | ||
|R3=[[ | |R3=[[3DS Shy Guy Bazaar]]||R3.I=ShyGuyBazaar3DS||R3.1=1,500||R3.2=2,500||R3.3=3,400||R3.4=4,200||R3.5=7,300 | ||
|CN=Time Trial||C.I=Tour21 ShyGuyCupChallenge||CC=Iggy||CT=3DS Mario Circuit||C.1=3:00.00||C.2=2:15.00||C.3=1:55.00 | |CN=[[Time Trial (Mario Kart Tour)|Time Trial]]||C.I=Tour21 ShyGuyCupChallenge||CC=Iggy||CT=3DS Mario Circuit||C.1=3:00.00||C.2=2:15.00||C.3=1:55.00 | ||
}} | }} | ||
{{ | {{MKT cup table row | ||
|C=Toad||Ra= | |C=Toad||Ra= | ||
|R1=[[Ghost Valley 1|SNES Ghost Valley 1R]]||R1.I=GhostValley1RSNES Toad||R1.1=1,100||R1.2=1,900||R1.3=2,600||R1.4=3,300||R1.5=5,500 | |R1=[[SNES Ghost Valley 1|SNES Ghost Valley 1R]]||R1.I=GhostValley1RSNES Toad||R1.1=1,100||R1.2=1,900||R1.3=2,600||R1.4=3,300||R1.5=5,500 | ||
|R2=3DS Mario Circuit T||R2.I=MarioCircuitT3DS Mario||R2.1=1,800||R2.2=3,100||R2.3=4,200||R2.4=5,300||R2.5=8,900 | |R2=3DS Mario Circuit T||R2.I=MarioCircuitT3DS Mario||R2.1=1,800||R2.2=3,100||R2.3=4,200||R2.4=5,300||R2.5=8,900 | ||
|R3=N64 Royal Raceway R||R3.I=RoyalRacewayRN64 DixieKong||R3.1=1,700||R3.2=3,000||R3.3=4,100||R3.4=5,200||R3.5=8,600 | |R3=N64 Royal Raceway R||R3.I=RoyalRacewayRN64 DixieKong||R3.1=1,700||R3.2=3,000||R3.3=4,100||R3.4=5,200||R3.5=8,600 | ||
|CN=Big Reverse Race||C.I=Tour21 ToadCupChallenge||CC=Any character||CT=3DS Rainbow Road||C.1=50cc||C.2=100cc||C.3=150cc | |CN=[[Big Reverse Race]]||C.I=Tour21 ToadCupChallenge||CC=Any character||CT=3DS Rainbow Road||C.1=50cc||C.2=100cc||C.3=150cc | ||
}} | }} | ||
{{ | {{MKT cup table row | ||
|C=Bowser||Ra= | |C=Bowser||Ra= | ||
|R1=RMX Choco Island 1T||R1.I=RMXChocoIsland1T Daisy||R1.1=1,900||R1.2=3,400||R1.3=4,600||R1.4=5,800||R1.5=9,400 | |R1=RMX Choco Island 1T||R1.I=RMXChocoIsland1T Daisy||R1.1=1,900||R1.2=3,400||R1.3=4,600||R1.4=5,800||R1.5=9,400 | ||
| Line 119: | Line 120: | ||
|CN=Ring Race||C.I=Tour4 DaisyCupChallenge||CC=Daisy||CT=3DS Cheep Cheep Lagoon||C.1=10||C.2=15||C.3=20 | |CN=Ring Race||C.I=Tour4 DaisyCupChallenge||CC=Daisy||CT=3DS Cheep Cheep Lagoon||C.1=10||C.2=15||C.3=20 | ||
}} | }} | ||
{{ | {{MKT cup table row | ||
|C=Dry Bones||Ra= | |C=Dry Bones||Ra= | ||
|R1=N64 Koopa Troopa Beach||R1.I=KoopaTroopaBeachN64||R1.1=1,200||R1.2=2,200||R1.3=3,000||R1.4=3,800||R1.5=6,000 | |R1=N64 Koopa Troopa Beach||R1.I=KoopaTroopaBeachN64||R1.1=1,200||R1.2=2,200||R1.3=3,000||R1.4=3,800||R1.5=6,000 | ||
|R2=3DS Shy Guy Bazaar T||R2.I=ShyGuyBazaarT3DS||R2.1=1,800||R2.2=3,400||R2.3=4,600||R2.4=5,800||R2.5=9,100 | |R2=3DS Shy Guy Bazaar T||R2.I=ShyGuyBazaarT3DS||R2.1=1,800||R2.2=3,400||R2.3=4,600||R2.4=5,800||R2.5=9,100 | ||
|R3=SNES Ghost Valley 1T||R3.I=GhostValley1TSNES BlackShyGuy||R3.1=1,700||R3.2=3,200||R3.3=4,300||R3.4=5,500||R3.5=8,600 | |R3=SNES Ghost Valley 1T||R3.I=GhostValley1TSNES BlackShyGuy||R3.1=1,700||R3.2=3,200||R3.3=4,300||R3.4=5,500||R3.5=8,600 | ||
|CN=Glider Challenge||C.I=Tour21 DryBonesCupChallenge||CC=Koopa Troopa||CT=SNES Koopa Troopa Beach 2||C.1=400||C.2=600||C.3=750 | |CN=[[Glider Challenge]]||C.I=Tour21 DryBonesCupChallenge||CC=Koopa Troopa||CT=SNES Koopa Troopa Beach 2||C.1=400||C.2=600||C.3=750 | ||
}} | }} | ||
{{ | {{MKT cup table row | ||
|C=Baby Peach||Ra= | |C=Baby Peach||Ra= | ||
|R1=3DS Mario Circuit R||R1.I=MarioCircuitR3DS Toad||R1.1=1,500||R1.2=2,900||R1.3=4,000||R1.4=5,100||R1.5=7,700 | |R1=3DS Mario Circuit R||R1.I=MarioCircuitR3DS Toad||R1.1=1,500||R1.2=2,900||R1.3=4,000||R1.4=5,100||R1.5=7,700 | ||
|R2=SNES Ghost Valley 1||R2.I=GhostValley1SNES BabyPeach||R2.1=1,400||R2.2=2,700||R2.3=3,700||R2.4=4,700||R2.5=7,100 | |R2=SNES Ghost Valley 1||R2.I=GhostValley1SNES BabyPeach||R2.1=1,400||R2.2=2,700||R2.3=3,700||R2.4=4,700||R2.5=7,100 | ||
|R3=3DS Cheep Cheep Lagoon T||R3.I=CheepCheepLagoonT3DS FunkyKong||R3.1=1,700||R3.2=3,200||R3.3=4,400||R3.4=5,600||R3.5=8,500 | |R3=3DS Cheep Cheep Lagoon T||R3.I=CheepCheepLagoonT3DS FunkyKong||R3.1=1,700||R3.2=3,200||R3.3=4,400||R3.4=5,600||R3.5=8,500 | ||
|CN=Break Item Boxes||C.I=Tour1 BabyPeachCupChallenge||CC=Shy Guy||CT=3DS Shy Guy Bazaar||C.1=15||C.2=20||C.3=25 | |CN=[[Break Item Boxes]]||C.I=Tour1 BabyPeachCupChallenge||CC=Shy Guy||CT=3DS Shy Guy Bazaar||C.1=15||C.2=20||C.3=25 | ||
}} | }} | ||
{{ | {{MKT cup table row | ||
|C=King Boo||Ra= | |C=King Boo||Ra= | ||
|R1=DS Waluigi Pinball||R1.I=WaluigiPinballDS KingBoo||R1.1=1,400||R1.2=2,800||R1.3=3,800||R1.4=4,800||R1.5=7,100 | |R1=DS Waluigi Pinball||R1.I=WaluigiPinballDS KingBoo||R1.1=1,400||R1.2=2,800||R1.3=3,800||R1.4=4,800||R1.5=7,100 | ||
|R2=SNES Koopa Troopa Beach 2T||R2.I=KoopaTroopaBeach2TSNES||R2.1=1,700||R2.2=3,300||R2.3=4,500||R2.4=5,700||R2.5=8,400 | |R2=SNES Koopa Troopa Beach 2T||R2.I=KoopaTroopaBeach2TSNES||R2.1=1,700||R2.2=3,300||R2.3=4,500||R2.4=5,700||R2.5=8,400 | ||
|R3=[[Frappe Snowland|N64 Frappe Snowland R/T]]||R3.I=FrappeSnowlandRTN64||R3.1=1,800||R3.2=3,400||R3.3=4,700||R3.4=6,000||R3.5=8,800 | |R3=[[N64 Frappe Snowland|N64 Frappe Snowland R/T]]||R3.I=FrappeSnowlandRTN64||R3.1=1,800||R3.2=3,400||R3.3=4,700||R3.4=6,000||R3.5=8,800 | ||
|CN=Goomba Takedown||C.I=Tour6 DryBonesCupChallenge||CC=Waluigi||CT=SNES Ghost Valley 1||C.1=10||C.2=16||C.3=28 | |CN=[[Goomba Takedown]]||C.I=Tour6 DryBonesCupChallenge||CC=Waluigi||CT=SNES Ghost Valley 1||C.1=10||C.2=16||C.3=28 | ||
}} | }} | ||
{{ | {{MKT cup table row | ||
|C=Baby Luigi||Ra= | |C=Baby Luigi||Ra= | ||
|R1=SNES Koopa Troopa Beach 2R||R1.I=KoopaTroopaBeach2RSNES||R1.1=1,600||R1.2=3,200||R1.3=4,300||R1.4=5,500||R1.5=7,900 | |R1=SNES Koopa Troopa Beach 2R||R1.I=KoopaTroopaBeach2RSNES||R1.1=1,600||R1.2=3,200||R1.3=4,300||R1.4=5,500||R1.5=7,900 | ||
| Line 147: | Line 148: | ||
|CN=Time Trial||C.I=Tour21 BabyLuigiCupChallenge||CC=Baby Daisy||CT=RMX Choco Island 1||C.1=2:00.00||C.2=1:38.00||C.3=1:25.00 | |CN=Time Trial||C.I=Tour21 BabyLuigiCupChallenge||CC=Baby Daisy||CT=RMX Choco Island 1||C.1=2:00.00||C.2=1:38.00||C.3=1:25.00 | ||
}} | }} | ||
{{ | {{MKT cup table row | ||
|C=Pauline||Ra= | |C=Pauline||Ra= | ||
|R1=3DS Shy Guy Bazaar R||R1.I=ShyGuyBazaarR3DS Pauline||R1.1=2,000||R1.2=4,100||R1.3=5,700||R1.4=7,300||R1.5=10,100 | |R1=3DS Shy Guy Bazaar R||R1.I=ShyGuyBazaarR3DS Pauline||R1.1=2,000||R1.2=4,100||R1.3=5,700||R1.4=7,300||R1.5=10,100 | ||
|R2=RMX Choco Island 1||R2.I=RMXChocoIsland1 BirdoYellow||R2.1=2,000||R2.2=4,200||R2.3=5,800||R2.4=7,300||R2.5=10,200 | |R2=RMX Choco Island 1||R2.I=RMXChocoIsland1 BirdoYellow||R2.1=2,000||R2.2=4,200||R2.3=5,800||R2.4=7,300||R2.5=10,200 | ||
|R3=[[RMX Mario Circuit 1|RMX Mario Circuit 1R/T]]||R3.I=RMXMarioCircuit1RT||R3.1=2,000||R3.2=4,000||R3.3=5,500||R3.4=7,100||R3.5=9,800 | |R3=[[RMX Mario Circuit 1|RMX Mario Circuit 1R/T]]||R3.I=RMXMarioCircuit1RT||R3.1=2,000||R3.2=4,000||R3.3=5,500||R3.4=7,100||R3.5=9,800 | ||
|CN=Vs. Mega Bowser||C.I=Tour21 PaulineCupChallenge||CC=Any character||CT=SNES Koopa Troopa Beach 2||C.1=50cc||C.2=100cc||C.3=150cc | |CN=[[Vs. Mega]] [[Bowser]]||C.I=Tour21 PaulineCupChallenge||CC=Any character||CT=SNES Koopa Troopa Beach 2||C.1=50cc||C.2=100cc||C.3=150cc | ||
}} | }} | ||
|} | |} | ||
===Signature kart sets=== | ===Signature kart sets=== | ||
Drivers with a corresponding cup in the tour were bumped one rank up in every course of their cup. | Drivers with a corresponding cup in the tour were bumped one rank up in every course of their cup. | ||
{| class="wikitable" style="text-align: center" width=40% | {|class="wikitable"style="text-align: center"width=40% | ||
!width=10%|Cup | !width=10%|Cup | ||
!width=10%|Character | !width=10%|Character | ||
| Line 240: | Line 237: | ||
==Rewards== | ==Rewards== | ||
Gold cells indicate rewards exclusive to Gold Pass members. | Gold cells indicate rewards exclusive to Gold Pass members. | ||
{|class="wikitable" style="margin:auto; text-align:center" | {|class="wikitable"style="margin:auto; text-align:center" | ||
|- | |- | ||
![[File:MKT Icon GrandStar.png|20x20px]] 30 | ![[File:MKT Icon GrandStar.png|20x20px]] 30 | ||
| Line 266: | Line 263: | ||
|} | |} | ||
<br> | <br> | ||
{|class="wikitable" style="margin:auto; text-align:center" | {|class="wikitable"style="margin:auto; text-align:center" | ||
|- | |- | ||
!Grand Stars!![[File:MKT Icon GrandStar.png|20x20px]]!!15!!30!!45!!60!!75!!90!!105!!120!!135!!150!!165!!180!!190!!200!!210!!220!!225!!230!!235!!240!!245!!250!!255!!260!!265!!270!!Total!!Grand total | !Grand Stars!![[File:MKT Icon GrandStar.png|20x20px]]!!15!!30!!45!!60!!75!!90!!105!!120!!135!!150!!165!!180!!190!!200!!210!!220!!225!!230!!235!!240!!245!!250!!255!!260!!265!!270!!Total!!Grand total | ||
| Line 352: | Line 349: | ||
===Courses=== | ===Courses=== | ||
<gallery> | <gallery heights=50px> | ||
MKT Icon Koopa Troopa Beach 2.png|[[ | MKT Icon Koopa Troopa Beach 2.png|[[SNES Koopa Troopa Beach 2]] (N, R, T) | ||
</gallery> | </gallery> | ||
==Paid banners== | ==Paid banners== | ||
{| align=center width=960px cellspacing=0 border=1 cellpadding=3 style="border-collapse:collapse; font-family:Arial; text-align:center" | {|align=center width=960px cellspacing=0 border=1 cellpadding=3 style="border-collapse:collapse; font-family:Arial; text-align:center" | ||
|-style="background: #ABC" | |-style="background: #ABC" | ||
!Name | !Name | ||
| Line 400: | Line 397: | ||
|July 7, 2020 – July 14, 2020 | |July 7, 2020 – July 14, 2020 | ||
|US$39.99 | |US$39.99 | ||
|[[File:MKT Icon BirdoLightBlue.png|30px]] [[Birdo | |[[File:MKT Icon BirdoLightBlue.png|30px]] [[Birdo|Birdo (Light Blue)]] ×1<br> | ||
[[File:MKT Icon LightblueTurboBirdo.png|30px]] [[Light-blue Turbo Birdo]] ×1<br> | [[File:MKT Icon LightblueTurboBirdo.png|30px]] [[Light-blue Turbo Birdo]] ×1<br> | ||
[[File:MKT Icon Ruby.png|30px]] [[Ruby|Rubies]] ×90 | [[File:MKT Icon Ruby.png|30px]] [[Ruby|Rubies]] ×90 | ||
| Line 407: | Line 404: | ||
==Challenges== | ==Challenges== | ||
{{ | {{MKT challenge table | ||
|TCR1=[[File:MKT Icon QuickTicket.png|70px]] [[Quick ticket]] ×1 | |TCR1=[[File:MKT Icon QuickTicket.png|70px]] [[Quick ticket]] ×1 | ||
|T1.1=115 | |T1.1=115 | ||
| Line 496: | Line 493: | ||
==Initial pipe appearance rates== | ==Initial pipe appearance rates== | ||
===Marine Pipe 1=== | ===Marine Pipe 1=== | ||
{|class="wikitable" style="margin:auto; text-align:center" | {|class="wikitable"style="margin:auto; text-align:center" | ||
!Class | !Class | ||
!Parts | !Parts | ||
| Line 514: | Line 511: | ||
|- | |- | ||
!High-End drivers | !High-End drivers | ||
|[[Dry Bowser]], [[ | |[[Dry Bowser]], [[Metal Mario]], [[Pink Gold Peach]], [[Pauline]], [[Peachette]], [[Mario]] (Swimwear), [[Ice Mario (Super Mario Galaxy)|Ice Mario]] | ||
|0.1429% | |0.1429% | ||
|- | |- | ||
| Line 526: | Line 523: | ||
|- | |- | ||
!Super drivers | !Super drivers | ||
|[[Donkey Kong]], [[Toad]], [[Bowser]], [[Luigi]], [[Mario]], [[Peach]], [[Yoshi]], [[Daisy]], [[Lakitu]], [[King Boo]], [[Toadette]], [[Bowser Jr.]], [[Waluigi]], [[Wario]], [[Rosalina]], [[Birdo]], [[Diddy Kong]], [[Hammer Bro]], [[Boomerang Bro]], [[Fire Bro]], [[Ice Bro]], [[Red Yoshi]], [[Black Shy Guy]], [[Pink Shy Guy]], [[Toad]] (Pit Crew), [[ | |[[Donkey Kong]], [[Toad]], [[Bowser]], [[Luigi]], [[Mario]], [[Peach]], [[Yoshi]], [[Daisy]], [[Lakitu]], [[King Boo]], [[Toadette]], [[Bowser Jr.]], [[Waluigi]], [[Wario]], [[Rosalina]], [[Birdo]], [[Diddy Kong]], [[Hammer Bro]], [[Boomerang Bro]], [[Fire Bro]], [[Ice Bro]], [[Red Yoshi]], [[Black Shy Guy]], [[Pink Shy Guy]], [[Toad]] (Pit Crew), [[Birdo]] (Light Blue), [[Birdo]] (Yellow), [[Roving Racers|Red Koopa]] (Freerunning) | ||
|0.3214% | |0.3214% | ||
|- | |- | ||
| Line 551: | Line 548: | ||
===Marine Pipe 2=== | ===Marine Pipe 2=== | ||
{|class="wikitable" style="margin:auto; text-align:center" | {|class="wikitable"style="margin:auto; text-align:center" | ||
!Class | !Class | ||
!Parts | !Parts | ||
| Line 569: | Line 566: | ||
|- | |- | ||
!High-End drivers | !High-End drivers | ||
|[[Dry Bowser]], [[ | |[[Dry Bowser]], [[Metal Mario]], [[Pink Gold Peach]], [[Pauline]], [[Peachette]], [[Rosalina]] (Swimwear), [[Ice Mario (Super Mario Galaxy)|Ice Mario]] | ||
|0.1429% | |0.1429% | ||
|- | |- | ||
| Line 581: | Line 578: | ||
|- | |- | ||
!Super drivers | !Super drivers | ||
|[[Donkey Kong]], [[Toad]], [[Bowser]], [[Luigi]], [[Mario]], [[Peach]], [[Yoshi]], [[Daisy]], [[Lakitu]], [[King Boo]], [[Toadette]], [[Bowser Jr.]], [[Waluigi]], [[Wario]], [[Rosalina]], [[Birdo]], [[Diddy Kong]], [[Hammer Bro]], [[Boomerang Bro]], [[Fire Bro]], [[Ice Bro]], [[Red Yoshi]], [[Black Shy Guy]], [[Pink Shy Guy]], [[Toad]] (Pit Crew), [[ | |[[Donkey Kong]], [[Toad]], [[Bowser]], [[Luigi]], [[Mario]], [[Peach]], [[Yoshi]], [[Daisy]], [[Lakitu]], [[King Boo]], [[Toadette]], [[Bowser Jr.]], [[Waluigi]], [[Wario]], [[Rosalina]], [[Birdo]], [[Diddy Kong]], [[Hammer Bro]], [[Boomerang Bro]], [[Fire Bro]], [[Ice Bro]], [[Red Yoshi]], [[Black Shy Guy]], [[Pink Shy Guy]], [[Toad]] (Pit Crew), [[Birdo]] (Light Blue), [[Birdo]] (Yellow), [[Roving Racers|Red Koopa]] (Freerunning) | ||
|0.3214% | |0.3214% | ||
|- | |- | ||
| Line 606: | Line 603: | ||
===Undersea Pipe=== | ===Undersea Pipe=== | ||
{|class="wikitable" style="margin:auto; text-align:center" | {|class="wikitable"style="margin:auto; text-align:center" | ||
!Class | !Class | ||
!Parts | !Parts | ||
| Line 624: | Line 621: | ||
|- | |- | ||
!rowspan=2|Super drivers | !rowspan=2|Super drivers | ||
|[[Donkey Kong]], [[Toad]], [[Bowser]], [[Luigi]], [[Mario]], [[Peach]], [[Yoshi]], [[Daisy]], [[Lakitu]], [[King Boo]], [[Toadette]], [[Bowser Jr.]], [[Waluigi]], [[Wario]], [[Rosalina]], [[Birdo]], [[Diddy Kong]], [[Hammer Bro]], [[Boomerang Bro]], [[Fire Bro]], [[Ice Bro]], [[Red Yoshi]], [[Black Shy Guy]], [[Pink Shy Guy]], [[Toad]] (Pit Crew), [[ | |[[Donkey Kong]], [[Toad]], [[Bowser]], [[Luigi]], [[Mario]], [[Peach]], [[Yoshi]], [[Daisy]], [[Lakitu]], [[King Boo]], [[Toadette]], [[Bowser Jr.]], [[Waluigi]], [[Wario]], [[Rosalina]], [[Birdo]], [[Diddy Kong]], [[Hammer Bro]], [[Boomerang Bro]], [[Fire Bro]], [[Ice Bro]], [[Red Yoshi]], [[Black Shy Guy]], [[Pink Shy Guy]], [[Toad]] (Pit Crew), [[Birdo]] (Light Blue), [[Birdo]] (Yellow) | ||
|0.2592% | |0.2592% | ||
|- | |- | ||
| Line 665: | Line 662: | ||
==Profiles== | ==Profiles== | ||
*'''''Mario Kart Tour'' Twitter:''' | *'''''Mario Kart Tour'' Twitter:''' | ||
**"''The Peach Tour is drawing to a close in {{color|#MarioKartTour | **"''The Peach Tour is drawing to a close in {{color|blue|#MarioKartTour}}. Can you take the summer heat? Starting Jun. 30, 11 PM PT, these two shaded swimmers will splash and dash their way onto the track. Get ready for the Marine Tour!''"<ref>mariokarttourEN (June 26, 2020). [https://twitter.com/mariokarttourEN/status/1276515564467499009 ''Twitter'']. Retrieved June 26, 2020.</ref> | ||
**"''It's time for the Marine Tour! Summer has come to {{color|#MarioKartTour | **"''It's time for the Marine Tour! Summer has come to {{color|blue|#MarioKartTour}}, and our drivers are ready to hit the Koopa Troopa Beach for some sizzling-hot races!''"<ref>mariokarttourEN (July 1, 2020). [https://twitter.com/mariokarttourEN/status/1278209218106003457 ''Twitter'']. Retrieved July 1, 2020.</ref> | ||
**"''The Marine Tour is almost over. Thanks for racing! Anyone up for some adventure? Next up in {{color|#MarioKartTour | **"''The Marine Tour is almost over. Thanks for racing! Anyone up for some adventure? Next up in {{color|blue|#MarioKartTour}} is the Exploration Tour!''"<ref>mariokarttourEN (July 14, 2020). [https://twitter.com/mariokarttourEN/status/1283038706560049158 ''Twitter'']. Retrieved July 14, 2020.</ref> | ||
==Names in other languages== | ==Names in other languages== | ||
{{Foreign names | {{Foreign names | ||
| | |Jpn=マリンツアー | ||
| | |JpnR=Marin Tsuā | ||
| | |JpnM=Marine Tour | ||
|Spa=Temporada oceánica | |Spa=Temporada oceánica | ||
|SpaM=Oceanic Season | |SpaM=Oceanic Season | ||
| Line 685: | Line 682: | ||
|PorM=Marine Season | |PorM=Marine Season | ||
|Kor=마린 투어 | |Kor=마린 투어 | ||
|KorR= | |KorR=Marin Tueo | ||
|KorM=Marine Tour | |KorM=Marine Tour | ||
|ChiS=海洋巡回赛 | |ChiS=海洋巡回赛 | ||
| Line 694: | Line 691: | ||
|ChiTM=Ocean Tour | |ChiTM=Ocean Tour | ||
}} | }} | ||
==Notes== | |||
*The Glider Challenge of this tour ended in a [[wikipedia:Sydney Ferries|Sydney Ferry]], hinting at an upcoming Sydney-based course, revealed to be [[Sydney Sprint]] several months later. | |||
*This was the first tour to lack a [[Do Jump Boosts]] bonus challenge. | |||
*Despite Funky Kong and Dixie Kong not being obtainable (with the former being obtainable in pipes starting from the [[Cat Tour (2021)|2021 Cat Tour]] and the latter being obtainable in pipes starting from the [[Bowser vs. DK Tour]]), they still appear on the course icons of this tour. | |||
==References== | ==References== | ||
| Line 699: | Line 701: | ||
{{MKT}} | {{MKT}} | ||
[[Category:Mario Kart Tour | [[Category:Mario Kart Tour tours]] | ||
[[it:Tour marino]] | [[it:Tour marino]] | ||
Latest revision as of 14:04, February 2, 2025
| Marine Tour | |
|---|---|

| |
| Start date | June 30, 2020 11:00 p.m. (PT)[?] |
| End date | July 14, 2020 10:59 p.m. (PT)[?] |
| Number of cups | 12 |
| Ranked cups | Rosalina Cup (week 1) Yoshi Cup (week 2) |
| Coin Rush course | N64 Koopa Troopa Beach |
| << List of tours >> | |
The Marine Tour was the twenty-first tour of Mario Kart Tour, which began on July 1, 2020 and ended on July 14, 2020. Due to being aquatic-themed, the tour introduced Rosalina in a teal swimdress adorned with Grand Stars and Mario in his swimwear from Super Mario Odyssey as the new spotlight drivers of the tour, while also adding in fish-themed kart parts such as the Cheep Snorkel and the Manta Glider. Additionally, Koopa Beach 2 from Super Mario Kart (now renamed to "Koopa Troopa Beach 2") was introduced as the signature course of this tour since its last appearance in Mario Kart DS. The menu's background featured a few islands from Koopa Troopa Beach 2 as the landmark for this tour.
Starting from this tour, Pink Gold Peach is available in all regular pipes.
Spotlights[edit]
| Marine Pipe 1 June 30, 2020, 11:00 p.m. (PT) – July 14, 2020, 10:59 p.m. (PT) |
Marine Pipe 2 July 7, 2020, 11:00 p.m. (PT) – July 14, 2020, 10:59 p.m. (PT) | ||||

|

| ||||
| Driver | Kart | Glider | Driver | Kart | Glider |
|---|---|---|---|---|---|

|
|||||
| Rosalina (Swimwear) | Blue Soda | Luma Parafoil | Mario (Swimwear) | Cheep Snorkel | Blooper Wingtip |
Special pipe[edit]
| Undersea Pipe July 4, 2020, 11:00 p.m. (PT) – July 9, 2020, 10:59 p.m. (PT) | ||

| ||
| Drivers | Karts | Gliders |
|---|---|---|
   
|
||
| Koopa Troopa, Red Koopa (Freerunning), Penguin Luigi, and Gold Koopa (Freerunning) | Cheep Charger, Green Cheep Charger, Super Blooper, Gold Blooper, and Gold Cheep Charger | Lightning Oilpaper, Cloud Glider, Rainy Balloons, and Starchute |
Names in other languages[edit]
| Language | Name | Meaning | Notes |
|---|---|---|---|
| Italian | Tubo sottomarino[?] | Undersea Pipe |
Cups[edit]
Rosalina Cup Ranked cup (week 1) |
SNES Koopa Troopa Beach 2 |
3DS Cheep Cheep Lagoon |
3DS Rainbow Road R |
Combo Attack | ||||
 SNES Donut Plains 1T |
Toadette | |||||||
Hammer Bro Cup |
N64 Koopa Troopa Beach R |
RMX Choco Island 1R |
3DS Mario Circuit |
Ring Race | ||||
 SNES Koopa Troopa Beach 2 |
Pauline | |||||||
Yoshi Cup Ranked cup (week 2) |
N64 Royal Raceway |
3DS Rainbow Road |
SNES Koopa Troopa Beach 2T |
Steer Clear of Obstacles | ||||
 RMX Choco Island 1 |
Ludwig | |||||||
Wendy Cup |
3DS Cheep Cheep Lagoon R |
DS Waluigi Pinball R |
N64 Koopa Troopa Beach T |
Smash Small Dry Bones | ||||
 N64 Royal Raceway |
Luigi | |||||||
Shy Guy Cup |
DS Waluigi Pinball T |
SNES Koopa Troopa Beach 2R |
3DS Shy Guy Bazaar |
Time Trial | ||||
 3DS Mario Circuit |
Iggy | |||||||
Toad Cup |
SNES Ghost Valley 1R |
3DS Mario Circuit T |
N64 Royal Raceway R |
Big Reverse Race | ||||
 3DS Rainbow Road |
Any character | |||||||
Bowser Cup |
RMX Choco Island 1T |
3DS Rainbow Road T |
SNES Koopa Troopa Beach 2 |
Ring Race | ||||
 3DS Cheep Cheep Lagoon |
Daisy | |||||||
Dry Bones Cup |
N64 Koopa Troopa Beach |
3DS Shy Guy Bazaar T |
SNES Ghost Valley 1T |
Glider Challenge | ||||
 SNES Koopa Troopa Beach 2 |
Koopa Troopa | |||||||
Baby Peach Cup |
3DS Mario Circuit R |
SNES Ghost Valley 1 |
3DS Cheep Cheep Lagoon T |
Break Item Boxes | ||||
 3DS Shy Guy Bazaar |
Shy Guy | |||||||
King Boo Cup |
DS Waluigi Pinball |
SNES Koopa Troopa Beach 2T |
N64 Frappe Snowland R/T |
Goomba Takedown | ||||
 SNES Ghost Valley 1 |
Waluigi | |||||||
Baby Luigi Cup |
SNES Koopa Troopa Beach 2R |
N64 Royal Raceway T |
SNES Donut Plains 1R/T |
Time Trial | ||||
 RMX Choco Island 1 |
Baby Daisy | |||||||
Pauline Cup |
3DS Shy Guy Bazaar R |
RMX Choco Island 1 |
RMX Mario Circuit 1R/T |
Vs. Mega Bowser | ||||
 SNES Koopa Troopa Beach 2 |
Any character | |||||||
Signature kart sets[edit]
Drivers with a corresponding cup in the tour were bumped one rank up in every course of their cup.
| Cup | Character | Kart | Glider |
|---|---|---|---|
| Second course of every cup | |||
| Third course of every cup | |||
| — | — | ||
| — | — | ||
| — | — | ||
| — | — | ||
| — | — | ||
| — | — | ||
| — | — | ||
| — | — | ||
| — | — | ||
| — | — | ||
| — | — | ||
| — | — |
Rewards[edit]
Gold cells indicate rewards exclusive to Gold Pass members.
| BBIA Parafoil | Droplet Glider | Biddybuggy | Soda Jet | Koopa Troopa | Rosalina | Gold Cheep Snorkel |
| Grand Stars | 15 | 30 | 45 | 60 | 75 | 90 | 105 | 120 | 135 | 150 | 165 | 180 | 190 | 200 | 210 | 220 | 225 | 230 | 235 | 240 | 245 | 250 | 255 | 260 | 265 | 270 | Total | Grand total | |
|---|---|---|---|---|---|---|---|---|---|---|---|---|---|---|---|---|---|---|---|---|---|---|---|---|---|---|---|---|---|
| Free pipe launch | 1 | 1 | 1 | 1 | 4 | ||||||||||||||||||||||||
| Coin | 100 | 100 | 100 | 100 | 100 | 100 | 100 | 100 | 100 | 100 | 1000 | 2100 | |||||||||||||||||
| 300 | 300 | 500 | 1100 | ||||||||||||||||||||||||||
| Rubies | 5 | 3 | 3 | 3 | 3 | 3 | 20 | 50 | |||||||||||||||||||||
| 5 | 5 | 5 | 5 | 5 | 5 | 30 | |||||||||||||||||||||||
| Item tickets | 3 | 3 | 3 | 2 | 3 | 14 | 44 | ||||||||||||||||||||||
| 5 | 5 | 5 | 5 | 5 | 5 | 30 | |||||||||||||||||||||||
| Star tickets | 1 | 1 | 2 | 3 | |||||||||||||||||||||||||
| 1 | 1 | ||||||||||||||||||||||||||||
| Point-boost tickets | 1 | 2 | 3 | 6 | 12 | ||||||||||||||||||||||||
| 3 | 3 | 6 | |||||||||||||||||||||||||||
| 1 | 1 | 2 | 4 | 8 | |||||||||||||||||||||||||
| 2 | 2 | 4 | |||||||||||||||||||||||||||
| 1 | 1 | 1 | 3 | 5 | |||||||||||||||||||||||||
| 1 | 1 | 2 | |||||||||||||||||||||||||||
| Level-boost ticket | 3 | 12 | |||||||||||||||||||||||||||
| 9 | |||||||||||||||||||||||||||||
New content[edit]
Drivers[edit]

Karts[edit]
Gliders[edit]
Courses[edit]
SNES Koopa Troopa Beach 2 (N, R, T)
Paid banners[edit]
| Name | Availability | Cost | Contents | Banner image |
|---|---|---|---|---|
| Value Pack | June 30, 2020 – July 14, 2020 | US$1.99 |
|

|
| Manta Glider Pack | June 30, 2020 – July 14, 2020 | US$19.99 |
|

|
| Blue Seven Pack | June 30, 2020 – July 14, 2020 | US$39.99 |
|

|
| Blizzard Balloons Pack | July 7, 2020 – July 14, 2020 | US$19.99 |
|

|
| Light-blue Turbo Birdo Pack | July 7, 2020 – July 14, 2020 | US$39.99 |
|

|
Challenges[edit]
| Tour Challenges 1 | Tour Challenges 2 | Gold Challenges | ||||||||
|---|---|---|---|---|---|---|---|---|---|---|
| Completion reward: |
Completion reward: |
Completion reward: | ||||||||
 |
 |
 |
 |
 |
 |
 |
 |
 | ||
| Do 3 Rocket Starts. | Activate Frenzy mode 3 times. | Land 3 hits with Red Shells in a single race. | Do 20 Jump Boosts. | Land 5 hits with Bob-ombs. | Land 3 hits with Bananas in a single race. | Do 100 Mini-Turbo boosts. | Land 10 hits with Bob-ombs. | Land a hit with a Super Horn. | ||
 |
 |
 |
 |
 |
 |
 |
 |
 | ||
| Earn a score of 7,000 or higher on an SNES course. | Do 20 Jump Boosts using a driver wearing a crown. | Break 5 jars. | Get 1st place without crashing. | Do 20 Mini-Turbo boosts using a driver with a hat. | Cause opponents to crash 5 times while underwater. | Glide a total distance of 5,000. | Activate Frenzy using a driver wearing a crown. | Land a hit with a Blooper. | ||
 |
 |
 |
 |
 |
 |
 |
 |
 | ||
| Do 50 Mini-Turbo boosts using a driver wearing a shell. | Earn a total score of 20,000 or higher in the Rosalina Cup. | Take out a Sidestepper. | Earn a score of 8,000 or higher using a driver wearing earrings. | Earn a total score of 20,000 or higher in the Baby Luigi Cup. | Race in every course of every cup, including bonus challenges. | Land 3 hits with Bob-ombs using a driver with a hat. | Earn a total score of 20,000 or higher in the Dry Bones Cup. | Earn a score of 10,000 or higher on a 3DS course. | ||
Initial pipe appearance rates[edit]
Marine Pipe 1[edit]
Marine Pipe 2[edit]
Undersea Pipe[edit]
Profiles[edit]
- Mario Kart Tour Twitter:
- "The Peach Tour is drawing to a close in #MarioKartTour. Can you take the summer heat? Starting Jun. 30, 11 PM PT, these two shaded swimmers will splash and dash their way onto the track. Get ready for the Marine Tour!"[1]
- "It's time for the Marine Tour! Summer has come to #MarioKartTour, and our drivers are ready to hit the Koopa Troopa Beach for some sizzling-hot races!"[2]
- "The Marine Tour is almost over. Thanks for racing! Anyone up for some adventure? Next up in #MarioKartTour is the Exploration Tour!"[3]
Names in other languages[edit]
| Language | Name | Meaning | Notes |
|---|---|---|---|
| Japanese | マリンツアー[?] Marin Tsuā |
Marine Tour | |
| Chinese (simplified) | 海洋巡回赛[?] Hǎiyáng Xúnhúisài |
Ocean Tour | |
| Chinese (traditional) | 海洋巡迴賽[?] Hǎiyáng Xúnhúisài |
Ocean Tour | |
| French | Saison océanique[?] | Oceanic Season | |
| German | Meeres-Tour-Saison[?] | Sea Tour Season | |
| Italian | Tour marino[?] | Marine Tour | |
| Korean | 마린 투어[?] Marin Tueo |
Marine Tour | |
| Portuguese | Temporada Marinha[?] | Marine Season | |
| Spanish | Temporada oceánica[?] | Oceanic Season |
Notes[edit]
- The Glider Challenge of this tour ended in a Sydney Ferry, hinting at an upcoming Sydney-based course, revealed to be Sydney Sprint several months later.
- This was the first tour to lack a Do Jump Boosts bonus challenge.
- Despite Funky Kong and Dixie Kong not being obtainable (with the former being obtainable in pipes starting from the 2021 Cat Tour and the latter being obtainable in pipes starting from the Bowser vs. DK Tour), they still appear on the course icons of this tour.