Vancouver Tour: Difference between revisions
mNo edit summary |
m (Text replacement - "== *Trivia *==" to "==Notes==") |
||
| (66 intermediate revisions by 32 users not shown) | |||
| Line 1: | Line 1: | ||
{{ | {{tour infobox | ||
|image=[[File:MKT Vancouver Tour.png|200px]] | |image=[[File:MKT Vancouver Tour.png|200px]] | ||
|start=February 11, 2020<br>10:00 p.m. (PT) | |start=February 11, 2020<br>10:00 p.m. (PT) | ||
| Line 5: | Line 5: | ||
|cups=18 | |cups=18 | ||
|rank=[[Baby Rosalina Cup]] (week 1)<br>[[King Boo Cup]] (week 2) | |rank=[[Baby Rosalina Cup]] (week 1)<br>[[King Boo Cup]] (week 2) | ||
|coin=[[Vancouver Velocity]] | |coin=[[Tour Vancouver Velocity|Vancouver Velocity]] | ||
|before=[[Valentine's Tour|<<]] | |before=[[Valentine's Tour|<<]] | ||
|after=[[Mario Bros. Tour|>>]] | |after=[[Mario Bros. Tour|>>]] | ||
}} | }} | ||
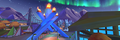
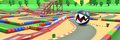
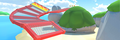
The '''Vancouver Tour''' was the eleventh tour of ''[[Mario Kart Tour]]'' | The '''Vancouver Tour''' was the eleventh tour of ''[[Mario Kart Tour]]'', which began on February 12, 2020 and ended on February 25, 2020. Reflecting its theme, it introduced a new course, [[Tour Vancouver Velocity|Vancouver Velocity]], as well as variants of [[Rosalina]] and [[Wario]] in a dress with colors based on the {{wp|Aurora|aurora borealis}} and a hiker's outfit respectively. This tour also introduced a [[Birdo|light blue Birdo]] as a new driver, as well as the R/T variants of [[SNES Mario Circuit 3]], [[N64 Koopa Troopa Beach]], and [[N64 Frappe Snowland]]. The start date of the Vancouver Tour also marked the 10th anniversary of the {{wp|2010 Winter Olympics}} held in [[Vancouver]]. The menu's background featured the {{wp|2010 Winter Olympics cauldron}} under the aurora borealis as the landmark for this tour. | ||
{{br|toc=1}} | |||
==Spotlights== | ==Spotlights== | ||
{ | {|align=center width=66% cellspacing=0 border=1 cellpadding=3 style="border-collapse:collapse; font-family:Arial; text-align:center" | ||
| | |-style="background: #89A" | ||
|colspan=3|'''Vancouver Pipe 1'''<br>February 11, 2020, 10:00 p.m. (PT) – <br>February 25, 2020, 9:59 p.m. (PT) | |||
| | |colspan=3|'''Vancouver Pipe 2'''<br>February 18, 2020, 10:00 p.m. (PT) – <br>February 25, 2020, 9:59 p.m. (PT) | ||
|- | |||
| | |colspan=3|[[File:MKT Tour11 VancouverPipe1.png|x150px]] | ||
| | |colspan=3|[[File:MKT Tour11 VancouverPipe2.png|x150px]] | ||
| | |-style="background: #ABC" | ||
| | !style="width: 16.6%;"|Driver | ||
| | !style="width: 16.7%;"|Kart | ||
| | !style="width: 16.7%;"|Glider | ||
| | !style="width: 16.6%;"|Driver | ||
| | !style="width: 16.7%;"|Kart | ||
!style="width: 16.7%;"|Glider | |||
| | |- | ||
|[[File:MKT Artwork RosalinaAurora.png|80x80px]] | |||
| | |[[File:MKT Icon CometTail.png|80x80px]] | ||
|[[File:MKT Icon LumaParafoil.png|80x80px]] | |||
|[[File:MKT Artwork WarioHiker.png|80x80px]] | |||
|[[File:MKT Icon SnowSkimmer.png|80x80px]] | |||
|[[File:MKT Icon RainbowStarchute.png|80x80px]] | |||
|- | |||
|[[Rosalina]] (Aurora) | |||
|[[Comet Tail]] | |||
|[[Luma Parafoil]] | |||
|[[Wario]] (Hiker) | |||
|[[Snow Skimmer]] | |||
|[[Rainbow Starchute]] | |||
|} | |||
==Cups== | ==Cups== | ||
{| align=center width=90% cellspacing=0 border=1 cellpadding=3 style="border-collapse:collapse; font-family:Arial; text-align:center" | {|align=center width=90% cellspacing=0 border=1 cellpadding=3 style="border-collapse:collapse; font-family:Arial; text-align:center" | ||
{{ | {{MKT cup table row | ||
|C=Rosalina||Ra= | |C=Rosalina||Ra= | ||
|R1=[[Vancouver Velocity]]||R1.I=VancouverVelocity||R1.1=1,300||R1.2=1,900||R1.3=2,300||R1.4=2,900||R1.5=6,500 | |R1=[[Tour Vancouver Velocity|Vancouver Velocity]]||R1.I=VancouverVelocity||R1.1=1,300||R1.2=1,900||R1.3=2,300||R1.4=2,900||R1.5=6,500 | ||
|R2=[[ | |R2=[[DS Waluigi Pinball]]||R2.I=WaluigiPinballDS||R2.1=1,200||R2.2=1,800||R2.3=2,300||R2.4=2,900||R2.5=5,800 | ||
|R3=[[ | |R3=[[SNES Mario Circuit 2]]||R3.I=MarioCircuit2SNES ToadPitCrew||R3.1=1,100||R3.2=1,700||R3.3=2,100||R3.4=2,600||R3.5=5,300 | ||
|CN=Time Trial||C.I=Tour11 RosalinaCupChallenge||CC=Lemmy||CT=[[ | |CN=[[Time Trial (Mario Kart Tour)|Time Trial]]||C.I=Tour11 RosalinaCupChallenge||CC=Lemmy||CT=[[SNES Rainbow Road]]||C.1=1:50.00||C.2=1:28.00||C.3=1:16.00 | ||
}} | }} | ||
{{ | {{MKT cup table row | ||
|C=Mario||Ra= | |C=Mario||Ra= | ||
|R1=[[ | |R1=[[3DS Rock Rock Mountain]]||R1.I=RockRockMountain3DS WarioHiker||R1.1=1,400||R1.2=2,300||R1.3=2,900||R1.4=3,700||R1.5=6,900 | ||
|R2=[[ | |R2=[[DS DK Pass]]||R2.I=DKPassDS Mario||R2.1=1,500||R2.2=2,300||R2.3=2,800||R2.4=3,700||R2.5=7,400 | ||
|R3=SNES Rainbow Road||R3.I=RainbowRoadSNES||R3.1=1,300||R3.2=2,300||R3.3=2,900||R3.4=3,700||R3.5=6,400 | |R3=SNES Rainbow Road||R3.I=RainbowRoadSNES||R3.1=1,300||R3.2=2,300||R3.3=2,900||R3.4=3,700||R3.5=6,400 | ||
|CN=Ring Race||C.I=Tour11 MarioCupChallenge||CC=Birdo||CT=Vancouver Velocity||C.1=10||C.2=25||C.3=35 | |CN=[[Ring Race]]||C.I=Tour11 MarioCupChallenge||CC=Birdo||CT=Vancouver Velocity||C.1=10||C.2=25||C.3=35 | ||
}} | }} | ||
{{ | {{MKT cup table row | ||
|C=Bowser Jr.||Ra= | |C=Bowser Jr.||Ra= | ||
|R1=[[ | |R1=[[SNES Ghost Valley 1]]||R1.I=GhostValley1SNES Luigi||R1.1=1,100||R1.2=2,100||R1.3=2,700||R1.4=3,400||R1.5=5,700 | ||
|R2=[[ | |R2=[[3DS Daisy Hills]]||R2.I=DaisyHills3DS||R2.1=1,200||R2.2=2,200||R2.3=2,900||R2.4=3,700||R2.5=5,900 | ||
|R3=[[ | |R3=[[3DS Neo Bowser City]]||R3.I=NeoBowserCity3DS BowserJr||R3.1=1,100||R3.2=2,200||R3.3=2,800||R3.4=3,600||R3.5=5,700 | ||
|CN=Combo Attack||C.I=Tour11 BowserJrCupChallenge||CC=Bowser Jr.||CT=SNES Mario Circuit 2T||C.1=5||C.2=15||C.3=22 | |CN=[[Combo Attack]]||C.I=Tour11 BowserJrCupChallenge||CC=Bowser Jr.||CT=SNES Mario Circuit 2T||C.1=5||C.2=15||C.3=22 | ||
}} | }} | ||
{{ | {{MKT cup table row | ||
|C=Baby Rosalina||Ra=1 | |C=Baby Rosalina||Ra=1 | ||
|R1=DS DK Pass||R1.I=DKPassDS BabyRosalina||R1.1=1,500||R1.2=2,600||R1.3=3,200||R1.4=4,300||R1.5=7,300 | |R1=DS DK Pass||R1.I=DKPassDS BabyRosalina||R1.1=1,500||R1.2=2,600||R1.3=3,200||R1.4=4,300||R1.5=7,300 | ||
|R2=Vancouver Velocity T||R2.I=VancouverVelocityT||R2.1=1,700||R2.2=2,900||R2.3=3,700||R2.4=4,900||||R2.5=8,300 | |R2=Vancouver Velocity T||R2.I=VancouverVelocityT||R2.1=1,700||R2.2=2,900||R2.3=3,700||R2.4=4,900||||R2.5=8,300 | ||
|R3=SNES Mario Circuit 2R||R3.I=MarioCircuit2RSNES||R3.1=1,100||R3.2=2,200||R3.3=2,900||R3.4=3,700||R3.5=5,500 | |R3=SNES Mario Circuit 2R||R3.I=MarioCircuit2RSNES||R3.1=1,100||R3.2=2,200||R3.3=2,900||R3.4=3,700||R3.5=5,500 | ||
|CN=Do Jump Boosts||C.I=Tour11 BabyRosalinaCupChallenge||CC=Baby Rosalina||CT=SNES Ghost Valley 1||C.1=5||C.2=10||C.3=19 | |CN=[[Do Jump Boosts]]||C.I=Tour11 BabyRosalinaCupChallenge||CC=Baby Rosalina||CT=SNES Ghost Valley 1||C.1=5||C.2=10||C.3=19 | ||
}} | }} | ||
{{ | {{MKT cup table row | ||
|C=Donkey Kong||Ra= | |C=Donkey Kong||Ra= | ||
|R1=[[ | |R1=[[SNES Choco Island 2]]||R1.I=ChocoIsland2SNES||R1.1=1,100||R1.2=2,100||R1.3=2,800||R1.4=3,600||R1.5=5,300 | ||
|R2=DS Waluigi Pinball R||R2.I=WaluigiPinballRDS||R2.1=1,300||R2.2=2,700||R2.3=3,500||R2.4=4,500||||R2.5=6,500 | |R2=DS Waluigi Pinball R||R2.I=WaluigiPinballRDS||R2.1=1,300||R2.2=2,700||R2.3=3,500||R2.4=4,500||||R2.5=6,500 | ||
|R3=3DS Daisy Hills T||R3.I=DaisyHillsT3DS||R3.1=1,600||R3.2=3,000||R3.3=3,800||R3.4=5,200||R3.5=8,200 | |R3=3DS Daisy Hills T||R3.I=DaisyHillsT3DS||R3.1=1,600||R3.2=3,000||R3.3=3,800||R3.4=5,200||R3.5=8,200 | ||
|CN=[[Goomba]] | |CN=[[Goomba Takedown]]||C.I=Tour11 DonkeyKongCupChallenge||CC=Donkey Kong||CT=Vancouver Velocity||C.1=10||C.2=25||C.3=45 | ||
}} | }} | ||
{{ | {{MKT cup table row | ||
|C=King Boo||Ra=2 | |C=King Boo||Ra=2 | ||
|R1=3DS Neo Bowser City||R1.I=NeoBowserCity3DS||R1.1=1,100||R1.2=2,300||R1.3=3,100||R1.4=4,000||R1.5=5,600 | |R1=3DS Neo Bowser City||R1.I=NeoBowserCity3DS||R1.1=1,100||R1.2=2,300||R1.3=3,100||R1.4=4,000||R1.5=5,600 | ||
|R2=SNES Ghost Valley 1R||R2.I=GhostValley1RSNES KingBoo||R2.1=1,100||R2.2=2,300||R2.3=3,100||R2.4=4,000||R2.5=5,500 | |R2=SNES Ghost Valley 1R||R2.I=GhostValley1RSNES KingBoo||R2.1=1,100||R2.2=2,300||R2.3=3,100||R2.4=4,000||R2.5=5,500 | ||
|R3=Vancouver Velocity R||R3.I=VancouverVelocityR||R3.1=1,500||R3.2=2,900||R3.3=3,700||R3.4=5,000||R3.5=7,600 | |R3=Vancouver Velocity R||R3.I=VancouverVelocityR||R3.1=1,500||R3.2=2,900||R3.3=3,700||R3.4=5,000||R3.5=7,600 | ||
|CN=Break Item Boxes||C.I=Tour11 KingBooCupChallenge||CC=King Boo||CT=[[ | |CN=[[Break Item Boxes]]||C.I=Tour11 KingBooCupChallenge||CC=King Boo||CT=[[N64 Frappe Snowland]]||C.1=5||C.2=10||C.3=15 | ||
}} | }} | ||
{{ | {{MKT cup table row | ||
|C=Lemmy||Ra= | |C=Lemmy||Ra= | ||
|R1=SNES Mario Circuit 2T||R1.I=MarioCircuit2TSNES Lemmy||R1.1=1,400||R1.2=3,000||R1.3=4,000||R1.4=5,100||R1.5=7,000 | |R1=SNES Mario Circuit 2T||R1.I=MarioCircuit2TSNES Lemmy||R1.1=1,400||R1.2=3,000||R1.3=4,000||R1.4=5,100||R1.5=7,000 | ||
| Line 82: | Line 93: | ||
|CN=Ring Race||C.I=Tour11 LemmyCupChallenge||CC=Rosalina||CT=SNES Ghost Valley 1||C.1=10||C.2=20||C.3=30 | |CN=Ring Race||C.I=Tour11 LemmyCupChallenge||CC=Rosalina||CT=SNES Ghost Valley 1||C.1=10||C.2=20||C.3=30 | ||
}} | }} | ||
{{ | {{MKT cup table row | ||
|C=Luigi||Ra= | |C=Luigi||Ra= | ||
|R1=DS DK Pass T||R1.I=DKPassTDS Luigi||R1.1=2,200||R1.2=4,300||R1.3=5,500||R1.4=7,400||R1.5=11,000 | |R1=DS DK Pass T||R1.I=DKPassTDS Luigi||R1.1=2,200||R1.2=4,300||R1.3=5,500||R1.4=7,400||R1.5=11,000 | ||
| Line 89: | Line 100: | ||
|CN=Time Trial||C.I=Tour11 LuigiCupChallenge||CC=Lakitu||CT=SNES Choco Island 2R||C.1=1:35.00||C.2=1:15.00||C.3=1:05.00 | |CN=Time Trial||C.I=Tour11 LuigiCupChallenge||CC=Lakitu||CT=SNES Choco Island 2R||C.1=1:35.00||C.2=1:15.00||C.3=1:05.00 | ||
}} | }} | ||
{{ | {{MKT cup table row | ||
|C=Diddy Kong||Ra= | |C=Diddy Kong||Ra= | ||
|R1=3DS Rock Rock Mountain R||R1.I=RockRockMountainR3DS DiddyKong||R1.1=1,300||R1.2=3,000||R1.3=4,000||R1.4=5,100||R1.5=6,700 | |R1=3DS Rock Rock Mountain R||R1.I=RockRockMountainR3DS DiddyKong||R1.1=1,300||R1.2=3,000||R1.3=4,000||R1.4=5,100||R1.5=6,700 | ||
|R2=SNES Choco Island 2||R2.I=ChocoIsland2SNES||R2.1=1,200||R2.2=2,600||R2.3=3,600||R2.4=4,600||R2.5=5,900 | |R2=SNES Choco Island 2||R2.I=ChocoIsland2SNES||R2.1=1,200||R2.2=2,600||R2.3=3,600||R2.4=4,600||R2.5=5,900 | ||
|R3=Vancouver Velocity T||R3.I=VancouverVelocityT||R3.1=1,800||R3.2=3,600||R3.3=4,700||R3.4=6,300||R3.5=9,000 | |R3=Vancouver Velocity T||R3.I=VancouverVelocityT||R3.1=1,800||R3.2=3,600||R3.3=4,700||R3.4=6,300||R3.5=9,000 | ||
|CN= | |CN=[[vs. Mega]] [[Lemmy]]||C.I=Tour11 DiddyKongCupChallenge||CC=Any character||CT=SNES Rainbow Road||C.1=50cc||C.2=100cc||C.3=150cc | ||
}} | }} | ||
{{ | {{MKT cup table row | ||
|C=Iggy||Ra= | |C=Iggy||Ra= | ||
|R1=DS Waluigi Pinball R||R1.I=WaluigiPinballRDS||R1.1=1,300||R1.2=3,000||R1.3=4,000||R1.4=5,100||R1.5=6,700 | |R1=DS Waluigi Pinball R||R1.I=WaluigiPinballRDS||R1.1=1,300||R1.2=3,000||R1.3=4,000||R1.4=5,100||R1.5=6,700 | ||
|R2=SNES Ghost Valley 1||R2.I=GhostValley1SNES PinkShyGuy||R2.1=1,300||R2.2=3,000||R2.3=4,100||R2.4=5,200||R2.5=6,600 | |R2=SNES Ghost Valley 1||R2.I=GhostValley1SNES PinkShyGuy||R2.1=1,300||R2.2=3,000||R2.3=4,100||R2.4=5,200||R2.5=6,600 | ||
|R3=DS DK Pass R||R3.I=DKPassRDS Iggy||R3.1=1,800||R3.2=3,700||R3.3=4,800||R3.4=6,500||R3.5=9,100 | |R3=DS DK Pass R||R3.I=DKPassRDS Iggy||R3.1=1,800||R3.2=3,700||R3.3=4,800||R3.4=6,500||R3.5=9,100 | ||
|CN=Do Jump Boosts||C.I=Tour11 IggyCupChallenge||CC=Baby Daisy||CT=[[ | |CN=Do Jump Boosts||C.I=Tour11 IggyCupChallenge||CC=Baby Daisy||CT=[[SNES Mario Circuit 3]]||C.1=5||C.2=10||C.3=15 | ||
}} | }} | ||
{{ | {{MKT cup table row | ||
|C=Wario||Ra= | |C=Wario||Ra= | ||
|R1=Vancouver Velocity R||R1.I=VancouverVelocityR RosalinaAurora||R1.1=1,500||R1.2=3,200||R1.3=4,100||R1.4=5,500||R1.5=7,700 | |R1=Vancouver Velocity R||R1.I=VancouverVelocityR RosalinaAurora||R1.1=1,500||R1.2=3,200||R1.3=4,100||R1.4=5,500||R1.5=7,700 | ||
| Line 110: | Line 121: | ||
|CN=Combo Attack||C.I=Tour11 WarioCupChallenge||CC=Wario||CT=N64 Frappe Snowland T||C.1=10||C.2=20||C.3=30 | |CN=Combo Attack||C.I=Tour11 WarioCupChallenge||CC=Wario||CT=N64 Frappe Snowland T||C.1=10||C.2=20||C.3=30 | ||
}} | }} | ||
{{ | {{MKT cup table row | ||
|C=Toadette||Ra= | |C=Toadette||Ra= | ||
|R1=SNES Rainbow Road||R1.I=RainbowRoadSNES MetalMario||R1.1=1,400||R1.2=3,200||R1.3=4,400||R1.4=5,600||R1.5=6,900 | |R1=SNES Rainbow Road||R1.I=RainbowRoadSNES MetalMario||R1.1=1,400||R1.2=3,200||R1.3=4,400||R1.4=5,600||R1.5=6,900 | ||
|R2=3DS Daisy Hills R||R2.I=DaisyHillsR3DS Toadette||R2.1=1,500||R2.2=3,100||R2.3=4,100||R2.4=5,500||R2.5=7,500 | |R2=3DS Daisy Hills R||R2.I=DaisyHillsR3DS Toadette||R2.1=1,500||R2.2=3,100||R2.3=4,100||R2.4=5,500||R2.5=7,500 | ||
|R3=DS Waluigi Pinball T||R3.I=WaluigiPinballTDS | |R3=DS Waluigi Pinball T||R3.I=WaluigiPinballTDS Old2||R3.1=1,700||R3.2=3,600||R3.3=4,700||R3.4=6,300||R3.5=8,600 | ||
|CN=Steer Clear of Obstacles||C.I=Tour11 ToadetteCupChallenge||CC=Baby Mario||CT=SNES Ghost Valley 1||C.1=1||C.2=2||C.3=3 | |CN=[[Steer Clear of Obstacles]]||C.I=Tour11 ToadetteCupChallenge||CC=Baby Mario||CT=SNES Ghost Valley 1||C.1=1||C.2=2||C.3=3 | ||
}} | }} | ||
{{ | {{MKT cup table row | ||
|C=Lakitu||Ra= | |C=Lakitu||Ra= | ||
|R1=SNES Mario Circuit 2||R1.I=MarioCircuit2SNES||R1.1=1,200||R1.2=2,800||R1.3=3,800||R1.4=4,800||R1.5=5,900 | |R1=SNES Mario Circuit 2||R1.I=MarioCircuit2SNES||R1.1=1,200||R1.2=2,800||R1.3=3,800||R1.4=4,800||R1.5=5,900 | ||
| Line 124: | Line 135: | ||
|CN=Goomba Takedown||C.I=Tour11 LakituCupChallenge||CC=Luigi||CT=3DS Daisy Hills||C.1=15||C.2=30||C.3=40 | |CN=Goomba Takedown||C.I=Tour11 LakituCupChallenge||CC=Luigi||CT=3DS Daisy Hills||C.1=15||C.2=30||C.3=40 | ||
}} | }} | ||
{{ | {{MKT cup table row | ||
|C=Pauline||Ra= | |C=Pauline||Ra= | ||
|R1=SNES Choco Island 2T||R1.I=ChocoIsland2TSNES BabyRosalina||R1.1=1,400||R1.2=3,300||R1.3=4,500||R1.4=5,800||R1.5=7,000 | |R1=SNES Choco Island 2T||R1.I=ChocoIsland2TSNES BabyRosalina||R1.1=1,400||R1.2=3,300||R1.3=4,500||R1.4=5,800||R1.5=7,000 | ||
|R2=[[Koopa Troopa Beach|N64 Koopa Troopa Beach R/T]]||R2.I=KoopaTroopaBeachRTN64||R2.1=1,600||R2.2=3,500||R2.3=4,500||R2.4=6,100||R2.5=8,200 | |R2=[[N64 Koopa Troopa Beach|N64 Koopa Troopa Beach R/T]]||R2.I=KoopaTroopaBeachRTN64||R2.1=1,600||R2.2=3,500||R2.3=4,500||R2.4=6,100||R2.5=8,200 | ||
|R3=DS Waluigi Pinball||R3.I=WaluigiPinballDS BabyMario||R3.1=1,400||R3.2=3,100||R3.3=4,000||R3.4=5,400||R3.5=7,200 | |R3=DS Waluigi Pinball||R3.I=WaluigiPinballDS BabyMario||R3.1=1,400||R3.2=3,100||R3.3=4,000||R3.4=5,400||R3.5=7,200 | ||
|CN=Big Reverse Race||C.I=Tour11 PaulineCupChallenge||CC=Any character||CT=Vancouver Velocity||C.1=50cc||C.2=100cc||C.3=150cc | |CN=[[Big Reverse Race]]||C.I=Tour11 PaulineCupChallenge||CC=Any character||CT=Vancouver Velocity||C.1=50cc||C.2=100cc||C.3=150cc | ||
}} | }} | ||
{{ | {{MKT cup table row | ||
|C=Morton||Ra= | |C=Morton||Ra= | ||
|R1=3DS Daisy Hills T||R1.I=DaisyHillsT3DS Daisy||R1.1=1,800||R1.2=3,900||R1.3=5,000||R1.4=6,800||R1.5=9,000 | |R1=3DS Daisy Hills T||R1.I=DaisyHillsT3DS Daisy||R1.1=1,800||R1.2=3,900||R1.3=5,000||R1.4=6,800||R1.5=9,000 | ||
|R2=SNES Mario Circuit 2R||R2.I=MarioCircuit2RSNES Morton||R2.1=1,300||R2.2=3,100||R2.3=4,300||R2.4=5,600||R2.5=6,600 | |R2=SNES Mario Circuit 2R||R2.I=MarioCircuit2RSNES Morton||R2.1=1,300||R2.2=3,100||R2.3=4,300||R2.4=5,600||R2.5=6,600 | ||
|R3= | |R3=N64 Frappe Snowland R/T||R3.I=FrappeSnowlandRTN64||R3.1=1,700||R3.2=3,700||R3.3=4,900||R3.4=6,600||R3.5=8,700 | ||
|CN=Smash Small Dry Bones||C.I=Tour11 MortonCupChallenge||CC=Morton||CT=DS Waluigi Pinball||C.1=5||C.2=10||C.3=15 | |CN=[[Smash Small Dry Bones]]||C.I=Tour11 MortonCupChallenge||CC=Morton||CT=DS Waluigi Pinball||C.1=5||C.2=10||C.3=15 | ||
}} | }} | ||
{{ | {{MKT cup table row | ||
|C=Dry Bowser||Ra= | |C=Dry Bowser||Ra= | ||
|R1=3DS Neo Bowser City T||R1.I=NeoBowserCityT3DS||R1.1=1,900||R1.2=4,100||R1.3=5,300||R1.4=7,200||R1.5=9,400 | |R1=3DS Neo Bowser City T||R1.I=NeoBowserCityT3DS||R1.1=1,900||R1.2=4,100||R1.3=5,300||R1.4=7,200||R1.5=9,400 | ||
|R2=Vancouver Velocity R/T||R2.I=VancouverVelocityRT||R2.1=2,100||R2.2=4,600||R2.3=6,000||R2.4=8,200||R2.5=10,700 | |R2=Vancouver Velocity R/T||R2.I=VancouverVelocityRT||R2.1=2,100||R2.2=4,600||R2.3=6,000||R2.4=8,200||R2.5=10,700 | ||
|R3= | |R3=SNES Mario Circuit 3R/T||R3.I=MarioCircuit3RTSNES||R3.1=1,800||R3.2=3,900||R3.3=5,200||R3.4=7,000||R3.5=9,100 | ||
|CN=Ring Race||C.I=Tour11 DryBowserCupChallenge||CC=Bowser||CT=SNES Mario Circuit 2||C.1=10||C.2=20||C.3=34 | |CN=Ring Race||C.I=Tour11 DryBowserCupChallenge||CC=Bowser||CT=SNES Mario Circuit 2||C.1=10||C.2=20||C.3=34 | ||
}} | }} | ||
{{ | {{MKT cup table row | ||
|C=Metal Mario||Ra= | |C=Metal Mario||Ra= | ||
|R1=SNES Ghost Valley 1T||R1.I=GhostValley1TSNES BlackShyGuy||R1.1=1,900||R1.2=4,000||R1.3=5,300||R1.4=7,200||R1.5=9,300 | |R1=SNES Ghost Valley 1T||R1.I=GhostValley1TSNES BlackShyGuy||R1.1=1,900||R1.2=4,000||R1.3=5,300||R1.4=7,200||R1.5=9,300 | ||
| Line 152: | Line 163: | ||
|CN=Break Item Boxes||C.I=Tour11 MetalMarioCupChallenge||CC=Mario||CT=DS DK Pass||C.1=10||C.2=20||C.3=30 | |CN=Break Item Boxes||C.I=Tour11 MetalMarioCupChallenge||CC=Mario||CT=DS DK Pass||C.1=10||C.2=20||C.3=30 | ||
}} | }} | ||
{{ | {{MKT cup table row | ||
|C=Peachette||Ra= | |C=Peachette||Ra= | ||
|R1=SNES Mario Circuit 3R/T||R1.I=MarioCircuit3RTSNES Mario||R1.1=2,000||R1.2=4,400||R1.3=5,700||R1.4=7,800||R1.5=10,000 | |R1=SNES Mario Circuit 3R/T||R1.I=MarioCircuit3RTSNES Mario||R1.1=2,000||R1.2=4,400||R1.3=5,700||R1.4=7,800||R1.5=10,000 | ||
|R2=N64 Frappe Snowland R/T||R2.I=FrappeSnowlandRTN64 RosalinaAurora||R2.1=2,000||R2.2=4,400||R2.3=5,800||R2.4=7,900||R2.5=10,100 | |R2=N64 Frappe Snowland R/T||R2.I=FrappeSnowlandRTN64 RosalinaAurora||R2.1=2,000||R2.2=4,400||R2.3=5,800||R2.4=7,900||R2.5=10,100 | ||
|R3=Vancouver Velocity R/T||R3.I=VancouverVelocityRT Peachette||R3.1=2,400||R3.2=5,400||R3.3=7,000||R3.4=9,500||R3.5=12,200 | |R3=Vancouver Velocity R/T||R3.I=VancouverVelocityRT Peachette||R3.1=2,400||R3.2=5,400||R3.3=7,000||R3.4=9,500||R3.5=12,200 | ||
|CN= | |CN=vs. Mega [[Wario]]||C.I=Tour11 PeachetteCupChallenge||CC=Any character||CT=Vancouver Velocity||C.1=50cc||C.2=100cc||C.3=150cc | ||
}} | }} | ||
|} | |} | ||
===Signature kart sets=== | ===Signature kart sets=== | ||
Drivers with a corresponding cup in the tour were bumped one rank up in every course of their cup. | |||
{| class="wikitable" style="text-align: center" width=40% | {|class="wikitable"style="text-align: center"width=40% | ||
!width=10%|Cup | !width=10%|Cup | ||
!width=10%|Character | !width=10%|Character | ||
| Line 170: | Line 181: | ||
|- | |- | ||
|Second course of every cup | |Second course of every cup | ||
|[[File:MKT Icon RosalinaAurora.png|50px]] | |[[File:MKT Icon RosalinaAurora.png|50px|Rosalina (Aurora)|link=Rosalina]] | ||
|[[File:MKT Icon CometTail.png|50px]] | |[[File:MKT Icon CometTail.png|50px|link=Comet Tail]] | ||
|[[File:MKT Icon LumaParafoil.png|50px]] | |[[File:MKT Icon LumaParafoil.png|50px|link=Luma Parafoil]] | ||
|- | |- | ||
|Third course of every cup | |Third course of every cup | ||
|[[File:MKT Icon WarioHiker.png|50px]] | |[[File:MKT Icon WarioHiker.png|50px|Wario (Hiker)|link=Wario]] | ||
|[[File:MKT Icon SnowSkimmer.png|50px]] | |[[File:MKT Icon SnowSkimmer.png|50px|link=Snow Skimmer]] | ||
|[[File:MKT Icon RainbowStarchute.png|50px]] | |[[File:MKT Icon RainbowStarchute.png|50px|link=Rainbow Starchute]] | ||
|- | |- | ||
|[[File:MKT Icon Rosalina Cup.png|50px]] | |[[File:MKT Icon Rosalina Cup.png|50px|link=Rosalina Cup]] | ||
|[[File:MKT Icon Rosalina.png|50px]] | |[[File:MKT Icon Rosalina.png|50px|link=Rosalina]] | ||
|— | |— | ||
|— | |— | ||
|- | |- | ||
|[[File:MKT Icon Mario Cup.png|50px]] | |[[File:MKT Icon Mario Cup.png|50px|link=Mario Cup]] | ||
|[[File:MKT Icon Mario.png|50px]] | |[[File:MKT Icon Mario.png|50px|link=Mario]] | ||
|— | |— | ||
|— | |— | ||
|- | |- | ||
|[[File:MKT Icon Bowser Jr Cup.png|50px]] | |[[File:MKT Icon Bowser Jr Cup.png|50px|link=Bowser Jr. Cup]] | ||
|[[File:MKT Icon BowserJr.png|50px]] | |[[File:MKT Icon BowserJr.png|50px|link=Bowser Jr.]] | ||
|— | |— | ||
|— | |— | ||
|- | |- | ||
|[[File:MKT Icon Baby Rosalina Cup.png|50px]] | |[[File:MKT Icon Baby Rosalina Cup.png|50px|link=Baby Rosalina Cup]] | ||
|[[File:MKT Icon BabyRosalina.png|50px]] | |[[File:MKT Icon BabyRosalina.png|50px|link=Baby Rosalina]] | ||
|— | |— | ||
|— | |— | ||
|- | |- | ||
|[[File:MKT Icon Donkey Kong Cup.png|50px]] | |[[File:MKT Icon Donkey Kong Cup.png|50px|link=Donkey Kong Cup]] | ||
|[[File:MKT Icon DonkeyKong.png|50px]] | |[[File:MKT Icon DonkeyKong.png|50px|link=Donkey Kong]] | ||
|— | |— | ||
|— | |— | ||
|- | |- | ||
|[[File:MKT Icon King Boo Cup.png|50px]] | |[[File:MKT Icon King Boo Cup.png|50px|link=King Boo Cup]] | ||
|[[File:MKT Icon KingBoo.png|50px]] | |[[File:MKT Icon KingBoo.png|50px|link=King Boo]] | ||
|— | |— | ||
|— | |— | ||
|- | |- | ||
|[[File:MKT Icon Lemmy Cup.png|50px]] | |[[File:MKT Icon Lemmy Cup.png|50px|link=Lemmy Cup]] | ||
|[[File:MKT Icon Lemmy.png|50px]] | |[[File:MKT Icon Lemmy.png|50px|Lemmy|link=Lemmy Koopa]] | ||
|— | |— | ||
|— | |— | ||
|- | |- | ||
|[[File:MKT Icon Luigi Cup.png|50px]] | |[[File:MKT Icon Luigi Cup.png|50px|link=Luigi Cup]] | ||
|[[File:MKT Icon Luigi.png|50px]] | |[[File:MKT Icon Luigi.png|50px|link=Luigi]] | ||
|— | |— | ||
|— | |— | ||
|- | |- | ||
|[[File:MKT Icon Diddy Kong Cup.png|50px]] | |[[File:MKT Icon Diddy Kong Cup.png|50px|link=Diddy Kong Cup]] | ||
|[[File:MKT Icon DiddyKong.png|50px]] | |[[File:MKT Icon DiddyKong.png|50px|link=Diddy Kong]] | ||
|— | |— | ||
|— | |— | ||
|- | |- | ||
|[[File:MKT Icon Iggy Cup.png|50px]] | |[[File:MKT Icon Iggy Cup.png|50px|link=Iggy Cup]] | ||
|[[File:MKT Icon Iggy.png|50px]] | |[[File:MKT Icon Iggy.png|50px|Iggy|link=Iggy Koopa]] | ||
|— | |— | ||
|— | |— | ||
|- | |- | ||
|[[File:MKT Icon Wario Cup.png|50px]] | |[[File:MKT Icon Wario Cup.png|50px|link=Wario Cup]] | ||
|[[File:MKT Icon Wario.png|50px]] | |[[File:MKT Icon Wario.png|50px|link=Wario]] | ||
|— | |— | ||
|— | |— | ||
|- | |- | ||
|[[File:MKT Icon Toadette Cup.png|50px]] | |[[File:MKT Icon Toadette Cup.png|50px|link=Toadette Cup]] | ||
|[[File:MKT Icon Toadette.png|50px]] | |[[File:MKT Icon Toadette.png|50px|link=Toadette]] | ||
|— | |— | ||
|— | |— | ||
|- | |- | ||
|[[File:MKT Icon Lakitu Cup.png|50px]] | |[[File:MKT Icon Lakitu Cup.png|50px|link=Lakitu Cup]] | ||
|[[File:MKT Icon Lakitu.png|50px]] | |[[File:MKT Icon Lakitu.png|50px|link=Lakitu]] | ||
|— | |— | ||
|— | |— | ||
|- | |- | ||
|[[File:MKT Icon Pauline Cup.png|50px]] | |[[File:MKT Icon Pauline Cup.png|50px|link=Pauline Cup]] | ||
|[[File:MKT Icon Pauline.png|50px]] | |[[File:MKT Icon Pauline.png|50px|link=Pauline]] | ||
|— | |— | ||
|— | |— | ||
|- | |- | ||
|[[File:MKT Icon Morton Cup.png|50px]] | |[[File:MKT Icon Morton Cup.png|50px|link=Morton Cup]] | ||
|[[File:MKT Icon Morton.png|50px]] | |[[File:MKT Icon Morton.png|50px|Morton|link=Morton Koopa Jr.]] | ||
|— | |— | ||
|— | |— | ||
|- | |- | ||
|[[File:MKT Icon Dry Bowser Cup.png|50px]] | |[[File:MKT Icon Dry Bowser Cup.png|50px|link=Dry Bowser Cup]] | ||
|[[File:MKT Icon DryBowser.png|50px]] | |[[File:MKT Icon DryBowser.png|50px|link=Dry Bowser]] | ||
|— | |— | ||
|— | |— | ||
|- | |- | ||
|[[File:MKT Icon Metal Mario Cup.png|50px]] | |[[File:MKT Icon Metal Mario Cup.png|50px|link=Metal Mario Cup]] | ||
|[[File:MKT Icon MetalMario.png|50px]] | |[[File:MKT Icon MetalMario.png|50px|link=Metal Mario]] | ||
|— | |— | ||
|— | |— | ||
|- | |- | ||
|[[File:MKT Icon Peachette Cup.png|50px]] | |[[File:MKT Icon Peachette Cup.png|50px|link=Peachette Cup]] | ||
|[[File:MKT Icon Peachette.png|50px]] | |[[File:MKT Icon Peachette.png|50px|link=Peachette]] | ||
|— | |— | ||
|— | |— | ||
| Line 272: | Line 283: | ||
==Rewards== | ==Rewards== | ||
Gold cells indicate rewards exclusive to Gold Pass members. | Gold cells indicate rewards exclusive to Gold Pass members. | ||
{|class="wikitable"style="margin:auto; text-align:center" | |||
{|class="wikitable" style="margin:auto; text-align:center" | |||
|- | |- | ||
![[File:MKT Icon GrandStar.png|20x20px]] 67!![[File:MKT Icon GrandStar.png|20x20px]] 84!![[File:MKT Icon GrandStar.png|20x20px]] 167!![[File:MKT Icon GrandStar.png|20x20px]] 200!![[File:MKT Icon GrandStar.png|20x20px]] 233!![[File:MKT Icon GrandStar.png|20x20px]] 288 | ![[File:MKT Icon GrandStar.png|20x20px]] 67!![[File:MKT Icon GrandStar.png|20x20px]] 84!![[File:MKT Icon GrandStar.png|20x20px]] 167!![[File:MKT Icon GrandStar.png|20x20px]] 200!![[File:MKT Icon GrandStar.png|20x20px]] 233!![[File:MKT Icon GrandStar.png|20x20px]] 288 | ||
|- | |- | ||
|[[File:MKT Icon DropletGlider.png|75x75px]] | |[[File:MKT Icon DropletGlider.png|75x75px]] | ||
|[[File:MKT Artwork | |[[File:MKT Artwork BabyRosalina.png|75x75px]] | ||
|[[File:MKT Icon PipeBuggy.png|75x75px]] | |[[File:MKT Icon PipeBuggy.png|75x75px]] | ||
|[[File:MKT Icon SnowSkimmer.png|75x75px]] | |[[File:MKT Icon SnowSkimmer.png|75x75px]] | ||
|[[File: | |[[File:MKT Artwork Morton.png|75x75px]] | ||
|[[File:MKT Icon YoshisEggHanafuda.png|75px]] | |[[File:MKT Icon YoshisEggHanafuda.png|75px]] | ||
|- | |- | ||
| Line 292: | Line 302: | ||
|} | |} | ||
<br> | <br> | ||
{|class="wikitable" style="margin:auto; text-align:center" | {|class="wikitable"style="margin:auto; text-align:center" | ||
|- | |- | ||
!Grand Stars!![[File:MKT Icon GrandStar.png|20x20px]]!!39!!52!!67!!84!!99!!108!!120!!135!!150!!167!!184!!200!!218!!233!!250!!262!!275!!288!!300!!313!!330!!340!!350!!360!!370!!Total!!Grand total | !Grand Stars!![[File:MKT Icon GrandStar.png|20x20px]]!!39!!52!!67!!84!!99!!108!!120!!135!!150!!167!!184!!200!!218!!233!!250!!262!!275!!288!!300!!313!!330!!340!!350!!360!!370!!Total!!Grand total | ||
| Line 355: | Line 365: | ||
|-style=background:gold | |-style=background:gold | ||
|||||||||||||||||||||||||||||||||[[File:MKT Icon Level-boostticket3.png|30px]]||[[File:MKT Icon Level-boostticket2.png|30px]]||[[File:MKT Icon Level-boostticket1.png|30px]]||[[File:MKT Icon Level-boostticket6.png|30px]]||[[File:MKT Icon Level-boostticket5.png|30px]]||[[File:MKT Icon Level-boostticket4.png|30px]]||[[File:MKT Icon Level-boostticket9.png|30px]]||[[File:MKT Icon Level-boostticket8.png|30px]]||[[File:MKT Icon Level-boostticket7.png|30px]]||9 | |||||||||||||||||||||||||||||||||[[File:MKT Icon Level-boostticket3.png|30px]]||[[File:MKT Icon Level-boostticket2.png|30px]]||[[File:MKT Icon Level-boostticket1.png|30px]]||[[File:MKT Icon Level-boostticket6.png|30px]]||[[File:MKT Icon Level-boostticket5.png|30px]]||[[File:MKT Icon Level-boostticket4.png|30px]]||[[File:MKT Icon Level-boostticket9.png|30px]]||[[File:MKT Icon Level-boostticket8.png|30px]]||[[File:MKT Icon Level-boostticket7.png|30px]]||9 | ||
|} | |||
==New content== | |||
===Drivers=== | |||
<gallery> | |||
MKT Artwork BirdoLightBlue.png|[[Birdo|Birdo (Light Blue)]] | |||
MKT Artwork RosalinaAurora.png|[[Rosalina|Rosalina (Aurora)]] | |||
MKT Artwork WarioHiker.png|[[Wario|Wario (Hiker)]] | |||
</gallery> | |||
===Karts=== | |||
<gallery> | |||
MKT Icon LightblueTurboBirdo.png|[[Light-blue Turbo Birdo]] | |||
MKT Icon CometTail.png|[[Comet Tail]] | |||
MKT Icon SnowSkimmer.png|[[Snow Skimmer]] | |||
</gallery> | |||
===Gliders=== | |||
<gallery> | |||
MKT Icon BlueFlowerGlider.png|[[Blue Flower Glider]] | |||
MKT Icon LumaParafoil.png|[[Luma Parafoil]] | |||
MKT Icon RainbowStarchute.png|[[Rainbow Starchute]] | |||
MKT Icon YoshisEggHanafuda.png|[[Yoshi's Egg Hanafuda]] | |||
</gallery> | |||
===Courses=== | |||
<gallery heights=50px> | |||
MKT Icon Vancouver Velocity.png|[[Vancouver Velocity]] (N, R, T, R/T) | |||
MKT Icon Mario Circuit 3RT.png|[[SNES Mario Circuit 3]] (R/T) | |||
MKT Icon Koopa Troopa Beach RT.png|[[N64 Koopa Troopa Beach]] (R/T) | |||
MKT Icon Frappe Snowland RT.png|[[N64 Frappe Snowland]] (R/T) | |||
</gallery> | |||
==Paid banners== | |||
{|align=center width=960px cellspacing=0 border=1 cellpadding=3 style="border-collapse:collapse; font-family:Arial; text-align:center" | |||
|-style="background: #ABC" | |||
!Name | |||
!Availability | |||
!Cost | |||
!Contents | |||
!Banner image | |||
|- | |||
|'''Value Pack''' | |||
|February 11, 2020 – February 18, 2020 (first pack)<br> | |||
February 18, 2020 – February 25, 2020 (second pack) | |||
|US$1.99 | |||
|[[File:MKT Icon Ruby.png|30px]] [[Ruby|Rubies]] ×5<br> | |||
[[File:MKT Icon StarTicket.png|30px]] [[Star ticket]] ×2<br> | |||
[[File:MKT Icon ItemTicket.png|30px]] [[Item ticket]] ×3 | |||
|[[File:MKT ValuePack.png|x150px]] | |||
|- | |||
|'''Donkey Kong Pack''' | |||
|February 11, 2020 – February 18, 2020 | |||
|US$19.99 | |||
|[[File:MKT Icon DonkeyKong.png|30px]] [[Donkey Kong]] ×1<br> | |||
[[File:MKT Icon Point-boostticket1.png|30px]] [[Point-boost ticket|Driver point-boost ticket]] ×1<br> | |||
[[File:MKT Icon Ruby.png|30px]] [[Ruby|Rubies]] ×45 | |||
|[[File:MKT Tour11 DonkeyKongPack.png|x150px]] | |||
|- | |||
|'''Circuit Special Pack''' | |||
|February 11, 2020 – February 18, 2020 | |||
|US$39.99 | |||
|[[File:MKT Icon CircuitSpecial.png|30px]] [[Circuit Special]] ×1<br> | |||
[[File:MKT Icon Point-boostticket2.png|30px]] [[Point-boost ticket|Kart point-boost ticket]] ×3<br> | |||
[[File:MKT Icon Ruby.png|30px]] [[Ruby|Rubies]] ×90 | |||
|[[File:MKT Tour11 CircuitSpecialPack.png|x150px]] | |||
|- | |||
|'''Birdo (Light Blue) Pack''' | |||
|February 18, 2020 – February 25, 2020 | |||
|US$19.99 | |||
|[[File:MKT Icon BirdoLightBlue.png|30px]] [[Birdo|Birdo (Light Blue)]] ×1<br> | |||
[[File:MKT Icon Point-boostticket1.png|30px]] [[Point-boost ticket|Driver point-boost ticket]] ×1<br> | |||
[[File:MKT Icon Ruby.png|30px]] [[Ruby|Rubies]] ×45 | |||
|[[File:MKT Tour11 BirdoLightBluePack.png|x150px]] | |||
|- | |||
|'''Light-blue Turbo Birdo Pack''' | |||
|February 18, 2020 – February 25, 2020 | |||
|US$39.99 | |||
|[[File:MKT Icon LightblueTurboBirdo.png|30px]] [[Light-blue Turbo Birdo]] ×1<br> | |||
[[File:MKT Icon BlueFlowerGlider.png|30px]] [[Blue Flower Glider]] ×1<br> | |||
[[File:MKT Icon Ruby.png|30px]] [[Ruby|Rubies]] ×90 | |||
|[[File:MKT Tour11 LightblueTurboBirdoPack.png|x150px]] | |||
|} | |} | ||
==Challenges== | ==Challenges== | ||
{{ | {{MKT challenge table | ||
|TCR1=[[File:MKT Icon QuickTicket.png|70px]] [[Quick ticket]] ×1 | |TCR1=[[File:MKT Icon QuickTicket.png|70px]] [[Quick ticket]] ×1 | ||
|T1.1=133 | |T1.1=133 | ||
|T1.1E=Do 20 | |T1.1E=Do 20 {{Color link|#A1A1FF|Trick|Jump Boosts}}. | ||
|T1.1S=1 | |T1.1S=1 | ||
|T1.2=068 | |T1.2=068 | ||
|T1.2E=Land 3 hits with | |T1.2E=Land 3 hits with {{Color link|#A1A1FF|Green Shell|Green Shells}}. | ||
|T1.2S=1 | |T1.2S=1 | ||
|T1.3=101 | |T1.3=101 | ||
| Line 370: | Line 462: | ||
|T1.3S=1 | |T1.3S=1 | ||
|T1.4=086 | |T1.4=086 | ||
|T1.4E=Land 3 hits with | |T1.4E=Land 3 hits with {{Color link|#A1A1FF|Banana|Bananas}} in a single race. | ||
|T1.4S=2 | |T1.4S=2 | ||
|T1.5=198 | |T1.5=198 | ||
| Line 376: | Line 468: | ||
|T1.5S=2 | |T1.5S=2 | ||
|T1.6=032 | |T1.6=032 | ||
|T1.6E=Take out 5 | |T1.6E=Take out 5 {{Color link|#A1A1FF|Snowman|snowpeople}}. | ||
|T1.6S=2 | |T1.6S=2 | ||
|T1.7=137 | |T1.7=137 | ||
|T1.7E=Pass through every ring in the Ring Race bonus challenge of the | |T1.7E=Pass through every ring in the {{Color link|#A1A1FF|Ring Race}} bonus challenge of the {{Color link|#A1A1FF|Mario Cup}}. | ||
|T1.7S=2 | |T1.7S=2 | ||
|T1.8=124 | |T1.8=124 | ||
| Line 389: | Line 481: | ||
|TCR2=[[File:MKT Icon CoinRushTicket.png|70px]] [[Coin Rush ticket]] ×1 | |TCR2=[[File:MKT Icon CoinRushTicket.png|70px]] [[Coin Rush ticket]] ×1 | ||
|T2.1=115 | |T2.1=115 | ||
|T2.1E=Do 5 | |T2.1E=Do 5 {{Color link|#A1A1FF|Rocket Start|Rocket Starts}}. | ||
|T2.1S=1 | |T2.1S=1 | ||
|T2.2=067 | |T2.2=067 | ||
|T2.2E=Land 5 hits with | |T2.2E=Land 5 hits with {{Color link|#A1A1FF|Banana|Bananas}}. | ||
|T2.2S=1 | |T2.2S=1 | ||
|T2.3=069 | |T2.3=069 | ||
|T2.3E=Land 10 hits with | |T2.3E=Land 10 hits with {{Color link|#A1A1FF|Bob-omb|Bob-ombs}}. | ||
|T2.3S=1 | |T2.3S=1 | ||
|T2.4=008 | |T2.4=008 | ||
|T2.4E=Take out 5 | |T2.4E=Take out 5 {{Color link|#A1A1FF|goat|goats}}. | ||
|T2.4S=2 | |T2.4S=2 | ||
|T2.5=226 | |T2.5=226 | ||
| Line 415: | Line 507: | ||
|T2.9E=Race in every course of every cup, including bonus challenges. | |T2.9E=Race in every course of every cup, including bonus challenges. | ||
|T2.9S=2 | |T2.9S=2 | ||
|GCR=[[File:MKT Icon | |GCR=[[File:MKT Icon 1Ruby.png|70px]] [[Ruby|Rubies]] ×5 | ||
|G.1=117 | |G.1=117 | ||
|G.1E=Do a total of 3 | |G.1E=Do a total of 3 {{Color link|#A1A1FF|Slipstream}} boosts. | ||
|G.1S=1 | |G.1S=1 | ||
|G.2=041 | |G.2=041 | ||
|G.2E=Land 5 hits with | |G.2E=Land 5 hits with {{Color link|#A1A1FF|Red Shell|Red Shells}}. | ||
|G.2S=1 | |G.2S=1 | ||
|G.3=040 | |G.3=040 | ||
| Line 426: | Line 518: | ||
|G.3S=1 | |G.3S=1 | ||
|G.4=021 | |G.4=021 | ||
|G.4E=Finish a race in | |G.4E=Finish a race in {{Color link|#A1A1FF|Frenzy}} mode. | ||
|G.4S=2 | |G.4S=2 | ||
|G.5=005 | |G.5=005 | ||
| Line 441: | Line 533: | ||
|G.8S=2 | |G.8S=2 | ||
|G.9=122 | |G.9=122 | ||
|G.9E=Get 1st place in a race in | |G.9E=Get 1st place in a race in {{Color link|#A1A1FF|Vancouver Velocity|Vancouver}} 5 times. | ||
|G.9S=2 | |G.9S=2 | ||
}} | }} | ||
| Line 447: | Line 539: | ||
==Initial pipe appearance rates== | ==Initial pipe appearance rates== | ||
===Vancouver Pipe 1=== | ===Vancouver Pipe 1=== | ||
{|class="wikitable" style="margin:auto; text-align:center" | {|class="wikitable"style="margin:auto; text-align:center" | ||
!Class | !Class | ||
!Parts | !Parts | ||
| Line 473: | Line 565: | ||
|- | |- | ||
!High-End gliders | !High-End gliders | ||
|[[Swooper]], [[Cloud Glider]], [[Gold Glider]], [[Rainbow Starchute]], [[Crimson Crane]], [[Heart Balloons]] | |[[Swooper (glider)|Swooper]], [[Cloud Glider]], [[Gold Glider]], [[Rainbow Starchute]], [[Crimson Crane]], [[Heart Balloons]] | ||
|0.1667% | |0.1667% | ||
|- | |- | ||
| Line 481: | Line 573: | ||
|- | |- | ||
!Super karts | !Super karts | ||
|[[Zucchini]], [[Daytripper]], [[Mach 8]], [[Cloud 9]], [[Soda Jet]], [[Koopa Clown]], [[Poltergust 4000]], [[Royale]], [[Barrel Train]], [[Turbo Yoshi]], [[Blue Seven]], [[Flame Flyer]], [[Para-Wing]], [[Super Blooper]], [[Turbo Birdo]], [[Streamliner]], [[DK Jumbo]], [[Red Turbo Yoshi]], [[Light-blue Turbo Birdo]] | |[[Zucchini]], [[Daytripper]], [[Mach 8]], [[Cloud 9]], [[Soda Jet]], [[Koopa Clown]], [[Poltergust 4000]], [[Royale]], [[Barrel Train]], [[Turbo Yoshi]], [[Blue Seven]], [[Flame Flyer]], [[Para-Wing]], [[Super Blooper (kart)|Super Blooper]], [[Turbo Birdo]], [[Streamliner]], [[DK Jumbo]], [[Red Turbo Yoshi]], [[Light-blue Turbo Birdo]] | ||
|0.3684% | |0.3684% | ||
|- | |- | ||
!Super gliders | !Super gliders | ||
|[[Flower Glider]], [[Peach Parasol]], [[BaNaNa Parafoil]], [[Bob-omb Parafoil]], [[Wario Wing]], [[Oilpaper Umbrella]], [[Shell Parachute]], [[Lightning Oilpaper]], [[Blue Flower Glider]], [[Pink Flower Glider]], [[Waluigi Wing]] | |[[Flower Glider]], [[Peach Parasol (glider)|Peach Parasol]], [[BaNaNa Parafoil]], [[Bob-omb Parafoil]], [[Wario Wing]], [[Oilpaper Umbrella]], [[Shell Parachute]], [[Lightning Oilpaper]], [[Blue Flower Glider]], [[Pink Flower Glider]], [[Waluigi Wing]] | ||
|0.3636% | |0.3636% | ||
|- | |- | ||
| Line 497: | Line 589: | ||
|- | |- | ||
!Normal gliders | !Normal gliders | ||
|[[Super Glider]], [[Paper Glider]], [[Parachute]], [[Parafoil]], [[Piston Glider]], [[Droplet Glider]], [[BBIA Parafoil]], [[Piranha Plant Parafoil]], [[Minion Paper Glider]] | |[[Super Glider]], [[Paper Glider]], [[Parachute (glider)|Parachute]], [[Parafoil]], [[Piston Glider]], [[Droplet Glider]], [[BBIA Parafoil]], [[Piranha Plant Parafoil]], [[Minion Paper Glider]] | ||
|1.7778% | |1.7778% | ||
|} | |} | ||
===Vancouver Pipe 2=== | ===Vancouver Pipe 2=== | ||
{|class="wikitable" style="margin:auto; text-align:center" | {|class="wikitable"style="margin:auto; text-align:center" | ||
!Class | !Class | ||
!Parts | !Parts | ||
| Line 528: | Line 620: | ||
|- | |- | ||
!High-End gliders | !High-End gliders | ||
|[[Swooper]], [[Cloud Glider]], [[Gold Glider]], [[Luma Parafoil]], [[Crimson Crane]], [[Heart Balloons]] | |[[Swooper (glider)|Swooper]], [[Cloud Glider]], [[Gold Glider]], [[Luma Parafoil]], [[Crimson Crane]], [[Heart Balloons]] | ||
|0.1667% | |0.1667% | ||
|- | |- | ||
| Line 536: | Line 628: | ||
|- | |- | ||
!Super karts | !Super karts | ||
|[[Zucchini]], [[Daytripper]], [[Mach 8]], [[Cloud 9]], [[Soda Jet]], [[Koopa Clown]], [[Poltergust 4000]], [[Royale]], [[Barrel Train]], [[Turbo Yoshi]], [[Blue Seven]], [[Flame Flyer]], [[Para-Wing]], [[Super Blooper]], [[Turbo Birdo]], [[Streamliner]], [[DK Jumbo]], [[Red Turbo Yoshi]], [[Light-blue Turbo Birdo]] | |[[Zucchini]], [[Daytripper]], [[Mach 8]], [[Cloud 9]], [[Soda Jet]], [[Koopa Clown]], [[Poltergust 4000]], [[Royale]], [[Barrel Train]], [[Turbo Yoshi]], [[Blue Seven]], [[Flame Flyer]], [[Para-Wing]], [[Super Blooper (kart)|Super Blooper]], [[Turbo Birdo]], [[Streamliner]], [[DK Jumbo]], [[Red Turbo Yoshi]], [[Light-blue Turbo Birdo]] | ||
|0.3684% | |0.3684% | ||
|- | |- | ||
!Super gliders | !Super gliders | ||
|[[Flower Glider]], [[Peach Parasol]], [[BaNaNa Parafoil]], [[Bob-omb Parafoil]], [[Wario Wing]], [[Oilpaper Umbrella]], [[Shell Parachute]], [[Lightning Oilpaper]], [[Blue Flower Glider]], [[Pink Flower Glider]], [[Waluigi Wing]] | |[[Flower Glider]], [[Peach Parasol (glider)|Peach Parasol]], [[BaNaNa Parafoil]], [[Bob-omb Parafoil]], [[Wario Wing]], [[Oilpaper Umbrella]], [[Shell Parachute]], [[Lightning Oilpaper]], [[Blue Flower Glider]], [[Pink Flower Glider]], [[Waluigi Wing]] | ||
|0.3636% | |0.3636% | ||
|- | |- | ||
| Line 552: | Line 644: | ||
|- | |- | ||
!Normal gliders | !Normal gliders | ||
|[[Super Glider]], [[Paper Glider]], [[Parachute]], [[Parafoil]], [[Piston Glider]], [[Droplet Glider]], [[BBIA Parafoil]], [[Piranha Plant Parafoil]], [[Minion Paper Glider]] | |[[Super Glider]], [[Paper Glider]], [[Parachute (glider)|Parachute]], [[Parafoil]], [[Piston Glider]], [[Droplet Glider]], [[BBIA Parafoil]], [[Piranha Plant Parafoil]], [[Minion Paper Glider]] | ||
|1.7778% | |1.7778% | ||
|} | |} | ||
| Line 558: | Line 650: | ||
==Profiles== | ==Profiles== | ||
*'''''Mario Kart Tour'' Twitter:''' | *'''''Mario Kart Tour'' Twitter:''' | ||
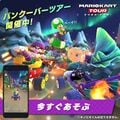
**"''Under the starry night, the sound of rumbling engines breaks the silence to kickoff the race... It's time for the Vancouver Tour!''"<ref>https://twitter.com/mariokarttourEN/status/1227475698933227520 '' | **"''Under the starry night, the sound of rumbling engines breaks the silence to kickoff the race... It's time for the Vancouver Tour!''"<ref>mariokarttourEN (February 12, 2020). [https://twitter.com/mariokarttourEN/status/1227475698933227520 ''Twitter'']. Retrieved March 29, 2020.</ref> | ||
**"''The Vancouver Tour is drawing to a close in {{color|#MarioKartTour | **"''The Vancouver Tour is drawing to a close in {{color|blue|#MarioKartTour}}. Did you get your fill of beautiful scenery? Starting Feb. 25, 10 PM PT, we will recognize a legendary pair of brothers who need no introduction. Get ready for the Mario Bros. Tour!''"<ref>mariokarttourEN (February 21, 2020). [https://twitter.com/mariokarttourEN/status/1230854692801937410 ''Twitter'']. Retrieved March 29, 2020.</ref> | ||
==Gallery== | |||
<gallery> | |||
MKT Vancouver Tour launch artwork.jpg|Launch artwork | |||
NL MKT Vancouver Tour Promotional Image.jpg|Promotional image from Nintendo Co., Ltd.'s [[LINE]] account | |||
</gallery> | |||
==Names in other languages== | ==Names in other languages== | ||
{{Foreign names | {{Foreign names | ||
| | |Jpn=バンクーバーツアー | ||
| | |JpnR=Bankūbā Tsuā | ||
| | |JpnM=Vancouver Tour | ||
|Spa=Temporada de Vancouver | |Spa=Temporada de Vancouver | ||
|SpaM=Vancouver Season | |SpaM=Vancouver Season | ||
|Fre=Saison de Vancouver | |||
|FreM=Vancouver Season | |||
|Ger=Tour-Saison Vancouver | |||
|GerM=Tour Season Vancouver | |||
|Ita=Tour di Vancouver | |Ita=Tour di Vancouver | ||
|ItaM=Vancouver's Tour | |ItaM=Vancouver's Tour | ||
| | |Por=Temporada de Vancouver | ||
| | |PorM=Vancouver Season | ||
|Kor=밴쿠버 투어 | |||
|KorR=Baenkubeo Tueo | |||
|KorM=Vancouver Tour | |||
|ChiS=温哥华巡回赛 | |ChiS=温哥华巡回赛 | ||
|ChiSR=Wēngēhuá Xúnhuísài | |ChiSR=Wēngēhuá Xúnhuísài | ||
| Line 578: | Line 683: | ||
|ChiTR=Wēngēhuá Xúnhuísài | |ChiTR=Wēngēhuá Xúnhuísài | ||
|ChiTM=Vancouver Tour | |ChiTM=Vancouver Tour | ||
}} | }} | ||
==Notes== | |||
*This was the first tour to lack a Glider Challenge bonus challenge. | |||
==References== | ==References== | ||
<references /> | <references/> | ||
{{MKT}} | {{MKT}} | ||
[[Category:Mario Kart Tour | [[Category:Mario Kart Tour tours]] | ||
[[it:Tour di Vancouver]] | [[it:Tour di Vancouver]] | ||
Latest revision as of 13:57, February 2, 2025
| Vancouver Tour | |
|---|---|

| |
| Start date | February 11, 2020 10:00 p.m. (PT)[?] |
| End date | February 25, 2020 9:59 p.m. (PT)[?] |
| Number of cups | 18 |
| Ranked cups | Baby Rosalina Cup (week 1) King Boo Cup (week 2) |
| Coin Rush course | Vancouver Velocity |
| << List of tours >> | |
The Vancouver Tour was the eleventh tour of Mario Kart Tour, which began on February 12, 2020 and ended on February 25, 2020. Reflecting its theme, it introduced a new course, Vancouver Velocity, as well as variants of Rosalina and Wario in a dress with colors based on the aurora borealis and a hiker's outfit respectively. This tour also introduced a light blue Birdo as a new driver, as well as the R/T variants of SNES Mario Circuit 3, N64 Koopa Troopa Beach, and N64 Frappe Snowland. The start date of the Vancouver Tour also marked the 10th anniversary of the 2010 Winter Olympics held in Vancouver. The menu's background featured the 2010 Winter Olympics cauldron under the aurora borealis as the landmark for this tour.
Spotlights[edit]
| Vancouver Pipe 1 February 11, 2020, 10:00 p.m. (PT) – February 25, 2020, 9:59 p.m. (PT) |
Vancouver Pipe 2 February 18, 2020, 10:00 p.m. (PT) – February 25, 2020, 9:59 p.m. (PT) | ||||

|

| ||||
| Driver | Kart | Glider | Driver | Kart | Glider |
|---|---|---|---|---|---|

|

|
||||
| Rosalina (Aurora) | Comet Tail | Luma Parafoil | Wario (Hiker) | Snow Skimmer | Rainbow Starchute |
Cups[edit]
Rosalina Cup |
Vancouver Velocity |
DS Waluigi Pinball |
SNES Mario Circuit 2 |
Time Trial | ||||
 SNES Rainbow Road |
Lemmy | |||||||
Mario Cup |
3DS Rock Rock Mountain |
DS DK Pass |
SNES Rainbow Road |
Ring Race | ||||
 Vancouver Velocity |
Birdo | |||||||
Bowser Jr. Cup |
SNES Ghost Valley 1 |
3DS Daisy Hills |
3DS Neo Bowser City |
Combo Attack | ||||
 SNES Mario Circuit 2T |
Bowser Jr. | |||||||
Baby Rosalina Cup Ranked cup (week 1) |
DS DK Pass |
Vancouver Velocity T |
SNES Mario Circuit 2R |
Do Jump Boosts | ||||
 SNES Ghost Valley 1 |
Baby Rosalina | |||||||
Donkey Kong Cup |
SNES Choco Island 2 |
DS Waluigi Pinball R |
3DS Daisy Hills T |
Goomba Takedown | ||||
 Vancouver Velocity |
Donkey Kong | |||||||
King Boo Cup Ranked cup (week 2) |
3DS Neo Bowser City |
SNES Ghost Valley 1R |
Vancouver Velocity R |
Break Item Boxes | ||||
 N64 Frappe Snowland |
King Boo | |||||||
Lemmy Cup |
SNES Mario Circuit 2T |
3DS Rock Rock Mountain |
3DS Daisy Hills |
Ring Race | ||||
 SNES Ghost Valley 1 |
Rosalina | |||||||
Luigi Cup |
DS DK Pass T |
3DS Neo Bowser City R |
SNES Rainbow Road R |
Time Trial | ||||
 SNES Choco Island 2R |
Lakitu | |||||||
Diddy Kong Cup |
3DS Rock Rock Mountain R |
SNES Choco Island 2 |
Vancouver Velocity T |
vs. Mega Lemmy | ||||
 SNES Rainbow Road |
Any character | |||||||
Iggy Cup |
DS Waluigi Pinball R |
SNES Ghost Valley 1 |
DS DK Pass R |
Do Jump Boosts | ||||
 SNES Mario Circuit 3 |
Baby Daisy | |||||||
Wario Cup |
Vancouver Velocity R |
SNES Choco Island 2R |
3DS Rock Rock Mountain T |
Combo Attack | ||||
 N64 Frappe Snowland T |
Wario | |||||||
Toadette Cup |
SNES Rainbow Road |
3DS Daisy Hills R |
DS Waluigi Pinball T |
Steer Clear of Obstacles | ||||
 SNES Ghost Valley 1 |
Baby Mario | |||||||
Lakitu Cup |
SNES Mario Circuit 2 |
Vancouver Velocity |
DS DK Pass T |
Goomba Takedown | ||||
 3DS Daisy Hills |
Luigi | |||||||
Pauline Cup |
SNES Choco Island 2T |
N64 Koopa Troopa Beach R/T |
DS Waluigi Pinball |
Big Reverse Race | ||||
 Vancouver Velocity |
Any character | |||||||
Morton Cup |
3DS Daisy Hills T |
SNES Mario Circuit 2R |
N64 Frappe Snowland R/T |
Smash Small Dry Bones | ||||
 DS Waluigi Pinball |
Morton | |||||||
Dry Bowser Cup |
3DS Neo Bowser City T |
Vancouver Velocity R/T |
SNES Mario Circuit 3R/T |
Ring Race | ||||
 SNES Mario Circuit 2 |
Bowser | |||||||
Metal Mario Cup |
SNES Ghost Valley 1T |
SNES Rainbow Road T |
N64 Koopa Troopa Beach R/T |
Break Item Boxes | ||||
 DS DK Pass |
Mario | |||||||
Peachette Cup |
SNES Mario Circuit 3R/T |
N64 Frappe Snowland R/T |
Vancouver Velocity R/T |
vs. Mega Wario | ||||
 Vancouver Velocity |
Any character | |||||||
Signature kart sets[edit]
Drivers with a corresponding cup in the tour were bumped one rank up in every course of their cup.
| Cup | Character | Kart | Glider |
|---|---|---|---|
| Second course of every cup | |||
| Third course of every cup | |||
| — | — | ||
| — | — | ||
| — | — | ||
| — | — | ||
| — | — | ||
| — | — | ||
| — | — | ||
| — | — | ||
| — | — | ||
| — | — | ||
| — | — | ||
| — | — | ||
| — | — | ||
| — | — | ||
| — | — | ||
| — | — | ||
| — | — | ||
| — | — |
Rewards[edit]
Gold cells indicate rewards exclusive to Gold Pass members.

|
|||||
| Droplet Glider | Baby Rosalina | Pipe Buggy | Snow Skimmer | Morton | Yoshi's Egg Hanafuda |
| Grand Stars | 39 | 52 | 67 | 84 | 99 | 108 | 120 | 135 | 150 | 167 | 184 | 200 | 218 | 233 | 250 | 262 | 275 | 288 | 300 | 313 | 330 | 340 | 350 | 360 | 370 | Total | Grand total | |
|---|---|---|---|---|---|---|---|---|---|---|---|---|---|---|---|---|---|---|---|---|---|---|---|---|---|---|---|---|
| Coin | 100 | 100 | 100 | 100 | 100 | 100 | 100 | 100 | 100 | 900 | 2400 | |||||||||||||||||
| 300 | 300 | 300 | 300 | 300 | 1500 | |||||||||||||||||||||||
| Rubies | 5 | 3 | 3 | 3 | 3 | 3 | 3 | 3 | 26 | 58 | ||||||||||||||||||
| 5 | 3 | 3 | 3 | 3 | 3 | 3 | 3 | 3 | 3 | 32 | ||||||||||||||||||
| Item tickets | 3 | 3 | 3 | 3 | 3 | 15 | 55 | |||||||||||||||||||||
| 5 | 5 | 10 | 10 | 10 | 40 | |||||||||||||||||||||||
| Star tickets | 2 | 2 | 5 | |||||||||||||||||||||||||
| 3 | 3 | |||||||||||||||||||||||||||
| Quick tickets | 0 | 2 | ||||||||||||||||||||||||||
| 1 | 1 | 2 | ||||||||||||||||||||||||||
| Point-boost tickets | 3 | 3 | 6 | 10 | ||||||||||||||||||||||||
| 1 | 3 | 4 | ||||||||||||||||||||||||||
| 2 | 2 | 4 | 8 | |||||||||||||||||||||||||
| 1 | 3 | 4 | ||||||||||||||||||||||||||
| 1 | 1 | 2 | 6 | |||||||||||||||||||||||||
| 1 | 3 | 4 | ||||||||||||||||||||||||||
| Level-boost ticket | 3 | 12 | ||||||||||||||||||||||||||
| 9 | ||||||||||||||||||||||||||||
New content[edit]
Drivers[edit]

Karts[edit]
Gliders[edit]
Courses[edit]
Vancouver Velocity (N, R, T, R/T)
SNES Mario Circuit 3 (R/T)
N64 Koopa Troopa Beach (R/T)

N64 Frappe Snowland (R/T)
Paid banners[edit]
| Name | Availability | Cost | Contents | Banner image |
|---|---|---|---|---|
| Value Pack | February 11, 2020 – February 18, 2020 (first pack) February 18, 2020 – February 25, 2020 (second pack) |
US$1.99 |
|

|
| Donkey Kong Pack | February 11, 2020 – February 18, 2020 | US$19.99 |
|

|
| Circuit Special Pack | February 11, 2020 – February 18, 2020 | US$39.99 |
|

|
| Birdo (Light Blue) Pack | February 18, 2020 – February 25, 2020 | US$19.99 |
|

|
| Light-blue Turbo Birdo Pack | February 18, 2020 – February 25, 2020 | US$39.99 |
|

|
Challenges[edit]
| Tour Challenges 1 | Tour Challenges 2 | Gold Challenges | ||||||||
|---|---|---|---|---|---|---|---|---|---|---|
| Completion reward: |
Completion reward: |
Completion reward: | ||||||||
 |
 |
 |
 |
 |
 |
 |
 |
 | ||
| Do 20 Jump Boosts. | Land 3 hits with Green Shells. | Get a Fantastic combo a total of 10 times. | Do 5 Rocket Starts. | Land 5 hits with Bananas. | Land 10 hits with Bob-ombs. | Do a total of 3 Slipstream boosts. | Land 5 hits with Red Shells. | Get 1st place in a race 5 times. | ||
 |
 |
 |
 |
 |
 |
 |
 |
 | ||
| Land 3 hits with Bananas in a single race. | Get 1st place 3 times using a driver wearing a dress. | Take out 5 snowpeople. | Take out 5 goats. | Earn a score of 7,000 or higher using a driver with a hat. | Get a combo count of ×20 or higher. | Finish a race in Frenzy mode. | Earn a score of 10,000 or higher on a T course. | Get 1st place in a 150cc or higher race 3 times in a row. | ||
 |
 |
 |
 |
 |
 |
 |
 |
 | ||
| Pass through every ring in the Ring Race bonus challenge of the Mario Cup. | Get 1st place without crashing. | Cause opponents to crash 3 times while gliding. | Earn a score of 8,000 or higher using a driver wearing a crown. | Earn a score of 10,000 or higher on 5 courses. | Race in every course of every cup, including bonus challenges. | Glide a distance of 2,000 or longer using a driver with a mustache. | Get 1st place in a 200cc race 3 times. | Get 1st place in a race in Vancouver 5 times. | ||
Initial pipe appearance rates[edit]
Vancouver Pipe 1[edit]
Vancouver Pipe 2[edit]
Profiles[edit]
- Mario Kart Tour Twitter:
- "Under the starry night, the sound of rumbling engines breaks the silence to kickoff the race... It's time for the Vancouver Tour!"[1]
- "The Vancouver Tour is drawing to a close in #MarioKartTour. Did you get your fill of beautiful scenery? Starting Feb. 25, 10 PM PT, we will recognize a legendary pair of brothers who need no introduction. Get ready for the Mario Bros. Tour!"[2]
Gallery[edit]

Launch artwork
Promotional image from Nintendo Co., Ltd.'s LINE account


Names in other languages[edit]
| Language | Name | Meaning | Notes |
|---|---|---|---|
| Japanese | バンクーバーツアー[?] Bankūbā Tsuā |
Vancouver Tour | |
| Chinese (simplified) | 温哥华巡回赛[?] Wēngēhuá Xúnhuísài |
Vancouver Tour | |
| Chinese (traditional) | 溫哥華巡迴賽[?] Wēngēhuá Xúnhuísài |
Vancouver Tour | |
| French | Saison de Vancouver[?] | Vancouver Season | |
| German | Tour-Saison Vancouver[?] | Tour Season Vancouver | |
| Italian | Tour di Vancouver[?] | Vancouver's Tour | |
| Korean | 밴쿠버 투어[?] Baenkubeo Tueo |
Vancouver Tour | |
| Portuguese | Temporada de Vancouver[?] | Vancouver Season | |
| Spanish | Temporada de Vancouver[?] | Vancouver Season |
Notes[edit]
- This was the first tour to lack a Glider Challenge bonus challenge.