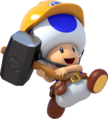
Trick Tour (2020): Difference between revisions
No edit summary Tag: Mobile edit |
m (Text replacement - "(\| *)Jap([RMCN\d]* *=)" to "$1Jpn$2") |
||
| (128 intermediate revisions by 50 users not shown) | |||
| Line 1: | Line 1: | ||
{{ | {{tour infobox | ||
|image=[[File:MKT Trick Tour.png|200px]] | |||
|start=April 21, 2020<br>11:00 p.m. (PT) | |start=April 21, 2020<br>11:00 p.m. (PT) | ||
|end=May 5, 2020<br>10:59 p.m. (PT) | |end=May 5, 2020<br>10:59 p.m. (PT) | ||
|before=[[Yoshi Tour|<<]] | |cups=12 | ||
|after=>> | |rank=[[Mario Cup]] (week 1)<br>[[Toad Cup]] (week 2) | ||
|coin=[[SNES Mario Circuit 1]] | |||
|before=[[Yoshi Tour (2020)|<<]] | |||
|after=[[Flower Tour|>>]] | |||
}} | }} | ||
The '''Trick Tour''' | The '''Trick Tour''' was the sixteenth tour of ''[[Mario Kart Tour]]'', which began on April 22, 2020, and ended on May 5, 2020. It was the first tour to be named directly after a [[Trick|mechanic]] in the ''Mario Kart'' series, the second tour in a row that did not introduce any new courses, and also the first to feature only a specific variant of courses, in this case R/T variants. The tour therefore included nearly every retro and RMX course in their R/T variations, only excluding [[3DS Rock Rock Mountain|Rock Rock Mountain]] (as it introduced the R/T variants of [[SNES Vanilla Lake 1]] and [[GBA Bowser's Castle 2]]). [[Builder Mario]] and Builder Toad were announced as the new characters for the Trick Tour to coincide with the final major update for ''[[Super Mario Maker 2]]''.<ref>mariokarttourEN (April 20, 2020). [https://twitter.com/mariokarttourEN/status/1252424127140356100 To celebrate a free update that adds new content and features to the #SuperMarioMaker2 game for the Nintendo Switch system, Builder Mario and Builder Toad from Super Mario Maker 2 are making an appearance in the Trick Tour starting Apr. 21, 11 PM PT! #MarioKartTour]. ''Twitter''. Retrieved April 20, 2020.</ref> The menu's background featured [[Peach's Castle]] from [[3DS Mario Circuit]] as the landmark for this tour. This was the first tour to reuse bonus challenges. | ||
{{br|toc=1}} | |||
==Spotlights== | |||
{|align=center width=66% cellspacing=0 border=1 cellpadding=3 style="border-collapse:collapse; font-family:Arial; text-align:center" | |||
|-style="background: #89A" | |||
|colspan=3|'''Trick Pipe 1'''<br>April 21, 2020, 11:00 p.m. (PT) – <br>May 5, 2020, 10:59 p.m. (PT) | |||
|colspan=3|'''Trick Pipe 2'''<br>April 28, 2020, 11:00 p.m. (PT) – <br>May 5, 2020, 10:59 p.m. (PT) | |||
|- | |||
|colspan=3|[[File:MKT Tour16 TrickPipe1.png|x150px]] | |||
|colspan=3|[[File:MKT Tour16 TrickPipe2.png|x150px]] | |||
|-style="background: #ABC" | |||
!style="width: 16.6%;"|Driver | |||
!style="width: 16.7%;"|Kart | |||
!style="width: 16.7%;"|Glider | |||
!style="width: 16.6%;"|Driver | |||
!style="width: 16.7%;"|Kart | |||
!style="width: 16.7%;"|Glider | |||
|- | |||
|[[File:Super Mario Maker - Artwork 06.png|80x80px]] | |||
|[[File:MKT Icon DozerDasher.png|80x80px]] | |||
|[[File:MKT Icon SafetyGlider.png|80x80px]] | |||
|[[File:Builder Toad.png|80x80px]] | |||
|[[File:MKT Icon ClankyKart.png|80x80px]] | |||
|[[File:MKT Icon Starchute.png|80x80px]] | |||
|- | |||
|[[Builder Mario]] | |||
|[[Dozer Dasher]] | |||
|[[Safety Glider]] | |||
|[[Builder Toad]] | |||
|[[Clanky Kart]] | |||
|[[Starchute]] | |||
|} | |||
==Cups== | |||
{|align=center width=90% cellspacing=0 border=1 cellpadding=3 style="border-collapse:collapse; font-family:Arial; text-align:center" | |||
{{MKT cup table row | |||
|C=Mario||Ra=1 | |||
|R1=[[3DS Mario Circuit|3DS Mario Circuit R/T]]||R1.I=MarioCircuitRT3DS BuilderMario||R1.1=2,000||R1.2=3,000||R1.3=4,000||R1.4=5,000||R1.5=10,000 | |||
|R2=[[GCN Yoshi Circuit|GCN Yoshi Circuit R/T]]||R2.I=YoshiCircuitRTGCN Mario||R2.1=1,300||R2.2=2,000||R2.3=2,600||R2.4=3,300||R2.5=6,500 | |||
|R3=[[GBA Bowser's Castle 2|GBA Bowser's Castle 2R/T]]||R3.I=BowsersCastle2RTGBA||R3.1=1,900||R3.2=2,800||R3.3=3,700||R3.4=4,700||R3.5=9,300 | |||
|CN=[[Do Jump Boosts]]||C.I=Tour2 BabyDaisyCupChallenge||CC=Baby Daisy||CT=[[3DS Toad Circuit]]||C.1=5||C.2=7||C.3=10 | |||
}} | |||
{{MKT cup table row | |||
|C=Koopa Troopa||Ra= | |||
|R1=[[3DS Cheep Cheep Lagoon|3DS Cheep Cheep Lagoon R/T]]||R1.I=CheepCheepLagoonRT3DS||R1.1=1,500||R1.2=2,400||R1.3=3,200||R1.4=4,000||R1.5=7,600 | |||
|R2=[[N64 Koopa Troopa Beach|N64 Koopa Troopa Beach R/T]]||R2.I=KoopaTroopaBeachRTN64 RedKoopaFreerunning||R2.1=1,400||R2.2=2,200||R2.3=2,900||R2.4=3,700||R2.5=7,100 | |||
|R3=[[SNES Rainbow Road|SNES Rainbow Road R/T]]||R3.I=RainbowRoadRTSNES BuilderToad||R3.1=2,100||R3.2=3,300||R3.3=4,400||R3.4=5,600||R3.5=10,700 | |||
|CN=[[Time Trial (Mario Kart Tour)|Time Trial]]||C.I=Tour16 KoopaTroopaCupChallenge||CC=Shy Guy||CT=[[SNES Vanilla Lake 1]]||C.1=1:00.00||C.2=0:52.00||C.3=0:43.00 | |||
}} | |||
{{MKT cup table row | |||
|C=Toad||Ra=2 | |||
|R1=3DS Toad Circuit R/T||R1.I=ToadCircuitRT3DS Toad||R1.1=1,400||R1.2=2,200||R1.3=2,900||R1.4=3,700||R1.5=6,800 | |||
|R2=[[3DS Daisy Hills|3DS Daisy Hills R/T]]||R2.I=DaisyHillsRT3DS BabyDaisy||R2.1=2,100||R2.2=3,300||R2.3=4,500||R2.4=5,600||R2.5=10,400 | |||
|R3=SNES Vanilla Lake 1R/T||R3.I=VanillaLake1RTSNES||R3.1=1,300||R3.2=2,000||R3.3=2,800||R3.4=3,500||R3.5=6,400 | |||
|CN=[[Ring Race]]||C.I=Tour16 ToadCupChallenge||CC=Yoshi||CT=N64 Koopa Troopa Beach||C.1=10||C.2=25||C.3=36 | |||
}} | |||
{{MKT cup table row | |||
|C=Larry||Ra= | |||
|R1=[[3DS Shy Guy Bazaar|3DS Shy Guy Bazaar R/T]]||R1.I=ShyGuyBazaarRT3DS||R1.1=1,400||R1.2=2,300||R1.3=3,200||R1.4=4,000||R1.5=7,100 | |||
|R2=[[GBA Bowser's Castle 1|GBA Bowser's Castle 1R/T]]||R2.I=BowsersCastle1RTGBA New||R2.1=1,500||R2.2=2,500||R2.3=3,400||R2.4=4,300||R2.5=7,700 | |||
|R3=[[N64 Kalimari Desert|N64 Kalimari Desert R/T]]||R3.I=KalimariDesertRTN64 Larry||R3.1=1,600||R3.2=2,600||R3.3=3,500||R3.4=4,400||R3.5=7,900 | |||
|CN=[[Goomba Takedown]]||C.I=Tour16 LarryCupChallenge||CC=Luigi||CT=[[SNES Mario Circuit 2]]||C.1=10||C.2=20||C.3=38 | |||
}} | |||
{{MKT cup table row | |||
|C=Diddy Kong||Ra= | |||
|R1=[[GCN Dino Dino Jungle|GCN Dino Dino Jungle R/T]]||R1.I=DinoDinoJungleRTGCN||R1.1=1,700||R1.2=3,000||R1.3=4,000||R1.4=5,000||R1.5=8,700 | |||
|R2=SNES Mario Circuit 2R/T||R2.I=MarioCircuit2RTSNES DiddyKong||R2.1=1,600||R2.2=2,800||R2.3=3,800||R2.4=4,800||R2.5=8,200 | |||
|R3=3DS Toad Circuit R/T||R3.I=ToadCircuitRT3DS BuilderToad||R3.1=1,500||R3.2=2,500||R3.3=3,400||R3.4=4,300||R3.5=7,400 | |||
|CN=[[Steer Clear of Obstacles]]||C.I=Tour16 DiddyKongCupChallenge||CC=Morton||CT=GBA Bowser's Castle 2||C.1=1||C.2=2||C.3=3 | |||
}} | |||
{{MKT cup table row | |||
|C=Yoshi||Ra= | |||
|R1=[[SNES Choco Island 2|SNES Choco Island 2R/T]]||R1.I=ChocoIsland2RTSNES||R1.1=1,300||R1.2=2,300||R1.3=3,100||R1.4=4,000||R1.5=6,600 | |||
|R2=[[DS DK Pass|DS DK Pass R/T]]||R2.I=DKPassRTDS IceBro||R2.1=1,400||R2.2=2,500||R2.3=3,400||R2.4=4,300||R2.5=7,200 | |||
|R3=[[N64 Frappe Snowland|N64 Frappe Snowland R/T]]||R3.I=FrappeSnowlandRTN64 Yoshi||R3.1=1,600||R3.2=2,700||R3.3=3,700||R3.4=4,700||R3.5=7,800 | |||
|CN=[[Break Item Boxes]]||C.I=Tour16 YoshiCupChallenge||CC=Wendy||CT=SNES Choco Island 2||C.1=5||C.2=10||C.3=16 | |||
}} | |||
{{MKT cup table row | |||
|C=Shy Guy||Ra= | |||
|R1=[[3DS Neo Bowser City|3DS Neo Bowser City R/T]]||R1.I=NeoBowserCityRT3DS||R1.1=1,500||R1.2=2,800||R1.3=3,800||R1.4=4,800||R1.5=7,700 | |||
|R2=[[SNES Ghost Valley 1|SNES Ghost Valley 1R/T]]||R2.I=GhostValley1RTSNES||R2.1=1,500||R2.2=2,800||R2.3=3,800||R2.4=4,800||R2.5=7,700 | |||
|R3=[[DS Waluigi Pinball|DS Waluigi Pinball R/T]]||R3.I=WaluigiPinballRTDS Pauline||R3.1=2,000||R3.2=3,600||R3.3=4,900||R3.4=6,100||R3.5=9,900 | |||
|CN=[[Combo Attack]]||C.I=Tour16 ShyGuyCupChallenge||CC=Peachette||CT=3DS Mario Circuit T||C.1=5||C.2=18||C.3=35 | |||
}} | |||
{{MKT cup table row | |||
|C=Luigi||Ra= | |||
|R1=[[DS Luigi's Mansion|DS Luigi's Mansion R/T]]||R1.I=LuigisMansionRTDS Luigi||R1.1=1,700||R1.2=3,100||R1.3=4,200||R1.4=5,300||R1.5=8,300 | |||
|R2=3DS Cheep Cheep Lagoon R/T||R2.I=CheepCheepLagoonRT3DS BoomerangBro||R2.1=1,700||R2.2=3,200||R2.3=4,300||R2.4=5,500||R2.5=8,600 | |||
|R3=[[SNES Mario Circuit 3|SNES Mario Circuit 3R/T]]||R3.I=MarioCircuit3RTSNES||R3.1=1,700||R3.2=3,100||R3.3=4,200||R3.4=5,300||R3.5=8,300 | |||
|CN=[[Big Reverse Race]]||C.I=Tour16 LuigiCupChallenge||CC=Any character||CT=N64 Frappe Snowland||C.1=50cc||C.2=100cc||C.3=150cc | |||
}} | |||
{{MKT cup table row | |||
|C=Wendy||Ra= | |||
|R1=[[RMX Mario Circuit 1|RMX Mario Circuit 1R/T]]||R1.I=RMXMarioCircuit1RT||R1.1=1,100||R1.2=2,000||R1.3=2,800||R1.4=3,500||R1.5=5,300 | |||
|R2=GCN Dino Dino Jungle R/T||R2.I=DinoDinoJungleRTGCN RedYoshi||R2.1=1,900||R2.2=3,700||R2.3=5,000||R2.4=6,400||R2.5=9,700 | |||
|R3=SNES Choco Island 2R/T||R3.I=ChocoIsland2RTSNES Wendy||R3.1=2,000||R3.2=3,600||R3.3=4,900||R3.4=6,100||R3.5=9,900 | |||
|CN=Steer Clear of Obstacles||C.I=Tour16 WendyCupChallenge||CC=Donkey Kong||CT=[[SNES Donut Plains 1]]||C.1=1||C.2=2||C.3=3 | |||
}} | |||
{{MKT cup table row | |||
|C=Waluigi||Ra= | |||
|R1=DS Waluigi Pinball R/T||R1.I=WaluigiPinballRTDS||R1.1=2,100||R1.2=4,000||R1.3=5,500||R1.4=7,000||R1.5=10,300 | |||
|R2=[[SNES Mario Circuit 1|SNES Mario Circuit 1R/T]]||R2.I=MarioCircuit1RTSNES IceMario||R2.1=1,600||R2.2=3,100||R2.3=4,300||R2.4=5,400||R2.5=8,000 | |||
|R3=[[3DS Rainbow Road|3DS Rainbow Road R/T]]||R3.I=RainbowRoadRT3DS DryBonesGold||R3.1=2,600||R3.2=5,100||R3.3=7,000||R3.4=8,900||R3.5=13,100 | |||
|CN=Time Trial||C.I=Tour16 WaluigiCupChallenge||CC=Ludwig||CT=3DS Neo Bowser City R||C.1=2:05.00||C.2=1:55.00||C.3=1:40.00 | |||
}} | |||
{{MKT cup table row | |||
|C=Rosalina||Ra= | |||
|R1=SNES Vanilla Lake 1R/T||R1.I=VanillaLake1RTSNES IceBro||R1.1=1,600||R1.2=3,100||R1.3=4,300||R1.4=5,500||R1.5=7,800 | |||
|R2=SNES Donut Plains 1R/T||R2.I=DonutPlains1RTSNES Rosalina||R2.1=1,200||R2.2=2,400||R2.3=3,200||R2.4=4,100||R2.5=5,900 | |||
|R3=3DS Mario Circuit R/T||R3.I=MarioCircuitRT3DS||R3.1=2,500||R3.2=5,000||R3.3=6,800||R3.4=8,700||R3.5=12,400 | |||
|CN=[[Smash Small Dry Bones]]||C.I=Tour16 RosalinaCupChallenge||CC=Rosalina||CT=3DS Rainbow Road ||C.1=5||C.2=8||C.3=12 | |||
}} | |||
{{MKT cup table row | |||
|C=Dry Bowser||Ra= | |||
|R1=DS DK Pass R/T||R1.I=DKPassRTDS DryBowser||R1.1=1,900||R1.2=3,900||R1.3=5,400||R1.4=6,800||R1.5=9,500 | |||
|R2=GBA Bowser's Castle 2R/T||R2.I=BowsersCastle2RTGBA Bowser||R2.1=2,400||R2.2=5,000||R2.3=6,800||R2.4=8,700||R2.5=12,100 | |||
|R3=3DS Shy Guy Bazaar R/T||R3.I=ShyGuyBazaarRT3DS PinkShyGuy||R3.1=2,000||R3.2=4,200||R3.3=5,800||R3.4=7,300||R3.5=10,200 | |||
|CN=[[Vs. Mega]] [[Bowser]]||C.I=Tour16 DryBowserCupChallenge||CC=Any character||CT=SNES Mario Circuit 3T ||C.1=50cc||C.2=100cc||C.3=150cc | |||
}} | |||
|} | |||
===Signature kart sets=== | |||
Drivers with a corresponding cup in the tour were bumped one rank up in every course of their cup. | |||
{|class="wikitable"style="text-align: center"width=40% | |||
!width=10%|Cup | |||
!width=10%|Character | |||
!width=10%|Kart | |||
!width=10%|Glider | |||
|- | |||
|Second course of every cup | |||
|[[File:MKT Icon BuilderMario.png|50px|link=Builder Mario]] | |||
|[[File:MKT Icon DozerDasher.png|50px|link=Dozer Dasher]] | |||
|[[File:MKT Icon SafetyGlider.png|50px|link=Safety Glider]] | |||
|- | |||
|Third course of every cup | |||
|[[File:MKT Icon BuilderToad.png|50px|Builder Toad|link=Builder Mario]] | |||
|[[File:MKT Icon ClankyKart.png|50px|link=Clanky Kart]] | |||
|[[File:MKT Icon Starchute.png|50px|link=Starchute]] | |||
|- | |||
|[[File:MKT Icon Mario Cup.png|50px|link=Mario Cup]] | |||
|[[File:MKT Icon Mario.png|50px|link=Mario]] | |||
|— | |||
|— | |||
|- | |||
|[[File:MKT Icon Koopa Troopa Cup.png|50px|link=Koopa Troopa Cup]] | |||
|[[File:MKT Icon KoopaTroopa.png|50px|link=Koopa Troopa]] | |||
|— | |||
|— | |||
|- | |||
|[[File:MKT Icon Toad Cup.png|50px|link=Toad Cup]] | |||
|[[File:MKT Icon Toad.png|50px|link=Toad]] | |||
|— | |||
|— | |||
|- | |||
|[[File:MKT Icon Larry Cup.png|50px|link=Larry Cup]] | |||
|[[File:MKT Icon Larry.png|50px|Larry|link=Larry Koopa]] | |||
|— | |||
|— | |||
|- | |||
|[[File:MKT Icon Diddy Kong Cup.png|50px|link=Diddy Kong Cup]] | |||
|[[File:MKT Icon DiddyKong.png|50px|link=Diddy Kong]] | |||
|— | |||
|— | |||
|- | |||
|[[File:MKT Icon Yoshi Cup.png|50px|link=Yoshi Cup]] | |||
|[[File:MKT Icon Yoshi.png|50px|link=Yoshi]] | |||
|— | |||
|— | |||
|- | |||
|[[File:MKT Icon Shy Guy Cup.png|50px|link=Shy Guy Cup]] | |||
|[[File:MKT Icon ShyGuy.png|50px|link=Shy Guy]] | |||
|— | |||
|— | |||
|- | |||
|[[File:MKT Icon Luigi Cup.png|50px|link=Luigi Cup]] | |||
|[[File:MKT Icon Luigi.png|50px|link=Luigi]] | |||
|— | |||
|— | |||
|- | |||
|[[File:MKT Icon Wendy Cup.png|50px|link=Wendy Cup]] | |||
|[[File:MKT Icon Wendy.png|50px|Wendy|link=Wendy O. Koopa]] | |||
|— | |||
|— | |||
|- | |||
|[[File:MKT Icon Waluigi Cup.png|50px|link=Waluigi Cup]] | |||
|[[File:MKT Icon Waluigi.png|50px|link=Waluigi]] | |||
|— | |||
|— | |||
|- | |||
|[[File:MKT Icon Rosalina Cup.png|50px|link=Rosalina Cup]] | |||
|[[File:MKT Icon Rosalina.png|50px|link=Rosalina]] | |||
|— | |||
|— | |||
|- | |||
|[[File:MKT Icon Dry Bowser Cup.png|50px|link=Dry Bowser Cup]] | |||
|[[File:MKT Icon DryBowser.png|50px|link=Dry Bowser]] | |||
|— | |||
|— | |||
|} | |||
==Rewards== | |||
Gold cells indicate rewards exclusive to Gold Pass members. | |||
{|class="wikitable"style="margin:auto; text-align:center" | |||
|- | |||
![[File:MKT Icon GrandStar.png|20x20px]] 30!![[File:MKT Icon GrandStar.png|20x20px]] 60!![[File:MKT Icon GrandStar.png|20x20px]] 75!![[File:MKT Icon GrandStar.png|20x20px]] 120!!colspan=2|[[File:MKT Icon GrandStar.png|20x20px]] 165!![[File:MKT Icon GrandStar.png|20x20px]] 195 | |||
|- | |||
|[[File:MKT Icon PistonGlider.png|75x75px]] | |||
|[[File:Babypeachsimple.png|75x75px]] | |||
|[[File:MKT Icon Landship.png|75x75px]] | |||
|[[File:MKT Icon WhiteRoyale.png|75x75px]] | |||
|[[File:MSS Red Shy Guy Artwork.png|75x75px]] | |||
|[[File:MKT Icon GoldTrain.png|75x75px]] | |||
|[[File:MKT Icon BarrelHanafuda.png|75x75px]] | |||
|- | |||
|style=background:silver|[[Piston Glider]] | |||
|style=background:gold|[[Baby Peach]] | |||
|style=background:silver|[[Landship]] | |||
|style=background:gold|[[White Royale]] | |||
|style=background:silver|[[Shy Guy]] | |||
|style=background:gold|[[Gold Train]] | |||
|style=background:gold|[[Barrel Hanafuda]] | |||
|} | |||
<br> | |||
{|class="wikitable"style="margin:auto; text-align:center" | |||
|- | |||
!Grand Stars!![[File:MKT Icon GrandStar.png|20x20px]]!!15!!30!!45!!60!!75!!90!!105!!120!!135!!150!!165!!180!!190!!195!!210!!225!!240!!255!!270!!Total!!Grand total | |||
|- | |||
!Free pipe launch | |||
![[File:MKT Icon Launch Pipe Green.png|50x50px]] | |||
|1||||||||||||||||1||||||||1|||||||||||| | |||
!colspan=2|3 | |||
|- | |||
!rowspan=2|[[Coin]] | |||
!rowspan=2|[[File:MKT Icon Coins 2.png|50x50px]] | |||
|||||100||||100||||100||||||100||||200||||||||||||||100||700 | |||
!rowspan=2|1800 | |||
|-style=background:gold | |||
|||300||||||||300||||||||||||||||||||500||||||||1100 | |||
|- | |||
!rowspan=2|[[Ruby|Rubies]] | |||
!rowspan=2|[[File:MKT Icon 1Ruby.png|50x50px]] | |||
|||5||||3||||3||||3||||||3||||||||||||3||3||||23 | |||
!rowspan=2|53 | |||
|-style=background:gold | |||
|||||5||||5||||5||||||5||||5||||||5||||||||||30 | |||
|- | |||
!rowspan=2|[[Item ticket]]s | |||
!rowspan=2|[[File:MKT Icon ItemTicket.png|50x50px]] | |||
|||||3||||||||||||||3||||||||||||||||||||6 | |||
!rowspan=2|51 | |||
|-style=background:gold | |||
|||5||5||5||||||||||||||||||||10||10||10||||||||45 | |||
|- | |||
!rowspan=2|[[Star ticket]]s | |||
!rowspan=2|[[File:MKT Icon StarTicket.png|50x50px]] | |||
|||||||1||||||||||||||||||||||||||||||||1 | |||
!rowspan=2|3 | |||
|-style=background:gold | |||
|||||||||||||||1||||||||1||||||||||||||||2 | |||
|- | |||
!rowspan=6|[[Point-boost ticket]]s | |||
!rowspan=2|[[File:MKT Icon Point-boostticket1.png|50x50px]] | |||
|||||||||||||||1||||||||||||||||3||||||||4 | |||
!rowspan=2|8 | |||
|-style=background:gold | |||
|||||||||||||1||||||||||3||||||||||||||||4 | |||
|- | |||
!rowspan=2|[[File:MKT Icon Point-boostticket2.png|50x50px]] | |||
|||||||||||||1||||||||||||||||3||||||||||4 | |||
!rowspan=2|8 | |||
|-style=background:gold | |||
|||||||||||1||||||||||3||||||||||||||||||4 | |||
|- | |||
!rowspan=2|[[File:MKT Icon Point-boostticket3.png|50x50px]] | |||
|||||||||||1||||||||||||||||3||||||||||||4 | |||
!rowspan=2|8 | |||
|-style=background:gold | |||
|||||||||1||||||||||3||||||||||||||||||||4 | |||
|- | |||
!rowspan=2 colspan=2|[[Level-boost ticket]] | |||
|||||||||||||||||||||||||||[[File:MKT Icon Level-boostticket3.png|30px]]||[[File:MKT Icon Level-boostticket2.png|30px]]||[[File:MKT Icon Level-boostticket1.png|30px]]||||||||3 | |||
!rowspan=2|12 | |||
|-style=background:gold | |||
|||||||||||||||||||||||||||||||||[[File:MKT Icon Level-boostticket1.png|30px]]<br>[[File:MKT Icon Level-boostticket2.png|30px]]<br>[[File:MKT Icon Level-boostticket3.png|30px]]||[[File:MKT Icon Level-boostticket4.png|30px]]<br>[[File:MKT Icon Level-boostticket5.png|30px]]<br>[[File:MKT Icon Level-boostticket6.png|30px]]||[[File:MKT Icon Level-boostticket7.png|30px]]<br>[[File:MKT Icon Level-boostticket8.png|30px]]<br>[[File:MKT Icon Level-boostticket9.png|30px]]||9 | |||
|} | |||
==New content== | |||
===Drivers=== | |||
<gallery> | |||
Super Mario Maker - Artwork 06.png|[[Builder Mario]] | |||
Builder Toad.png|[[Builder Mario|Builder Toad]] | |||
MKT Artwork DryBonesGold.png|[[Dry Bones|Dry Bones (Gold)]] | |||
</gallery> | |||
===Karts=== | |||
<gallery> | |||
MKT Icon DozerDasher.png|[[Dozer Dasher]] | |||
MKT Icon ClankyKart.png|[[Clanky Kart]] | |||
MKT Icon WildBlack.png|[[Wild Black]] | |||
MKT Icon KarpKart.png|[[Karp Kart]] | |||
</gallery> | |||
===Gliders=== | |||
<gallery> | |||
MKT Icon SafetyGlider.png|[[Safety Glider]] | |||
MKT Icon BarrelHanafuda.png|[[Barrel Hanafuda]] | |||
</gallery> | |||
===Courses=== | |||
<gallery heights=50px> | |||
MKT Icon Vanilla Lake 1RT.png|[[SNES Vanilla Lake 1]] (R/T) | |||
MKT Icon GBA Bowser's Castle 2RT.png|[[GBA Bowser's Castle 2]] (R/T) | |||
</gallery> | |||
==Paid banners== | |||
{|align=center width=960px cellspacing=0 border=1 cellpadding=3 style="border-collapse:collapse; font-family:Arial; text-align:center" | |||
|-style="background: #ABC" | |||
!Name | |||
!Availability | |||
!Cost | |||
!Contents | |||
!Banner image | |||
|- | |||
|'''Value Pack''' | |||
|April 21, 2020 – April 28, 2020 (first batch of 3)<br> | |||
April 28, 2020 – May 5, 2020 (second batch of 3) | |||
|US$1.99 | |||
|[[File:MKT Icon Ruby.png|30px]] [[Ruby|Rubies]] ×5<br> | |||
[[File:MKT Icon StarTicket.png|30px]] [[Star ticket]] ×2<br> | |||
[[File:MKT Icon ItemTicket.png|30px]] [[Item ticket]] ×3 | |||
|[[File:MKT ValuePack.png|x150px]] | |||
|- | |||
|'''Metal Mario Pack''' | |||
|April 21, 2020 – April 28, 2020 | |||
|US$19.99 | |||
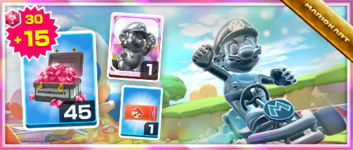
|[[File:MKT Icon MetalMario.png|30px]] [[Metal Mario]] ×1<br> | |||
[[File:MKT Icon Point-boostticket1.png|30px]] [[Point-boost ticket|Driver point-boost ticket]] ×1<br> | |||
[[File:MKT Icon Ruby.png|30px]] [[Ruby|Rubies]] ×45 | |||
|[[File:MKT Tour16 MetalMarioPack.png|x150px]] | |||
|- | |||
|'''Wild Black Pack''' | |||
|April 21, 2020 – April 28, 2020 | |||
|US$39.99 | |||
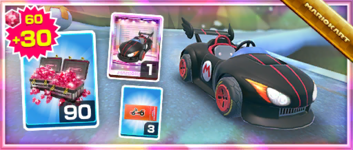
|[[File:MKT Icon WildBlack.png|30px]] [[Wild Black]] ×1<br> | |||
[[File:MKT Icon Point-boostticket2.png|30px]] [[Point-boost ticket|Kart point-boost ticket]] ×3<br> | |||
[[File:MKT Icon Ruby.png|30px]] [[Ruby|Rubies]] ×90 | |||
|[[File:MKT Tour16 WildBlackPack.png|x150px]] | |||
|- | |||
|'''Karp Kart Pack''' | |||
|April 28, 2020 – May 5, 2020 | |||
|US$19.99 | |||
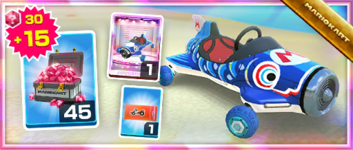
|[[File:MKT Icon KarpKart.png|30px]] [[Karp Kart]] ×1<br> | |||
[[File:MKT Icon Point-boostticket2.png|30px]] [[Point-boost ticket|Kart point-boost ticket]] ×1<br> | |||
[[File:MKT Icon Ruby.png|30px]] [[Ruby|Rubies]] ×45 | |||
|[[File:MKT Tour16 KarpKartPack.png|x150px]] | |||
|- | |||
|'''Dry Bones (Gold) Pack''' | |||
|April 28, 2020 – May 5, 2020 | |||
|US$39.99 | |||
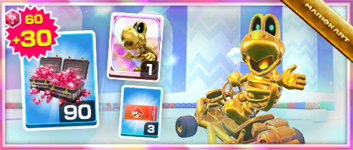
|[[File:MKT Icon DryBonesGold.png|30px]] [[Dry Bones|Dry Bones (Gold)]] ×1<br> | |||
[[File:MKT Icon Point-boostticket1.png|30px]] [[Point-boost ticket|Driver point-boost ticket]] ×3<br> | |||
[[File:MKT Icon Ruby.png|30px]] [[Ruby|Rubies]] ×90 | |||
|[[File:MKT Tour16 DryBonesGoldPack.png|x150px]] | |||
|} | |||
==Challenges== | |||
{{MKT challenge table | |||
|TCR1=[[File:MKT Icon QuickTicket.png|70px]] [[Quick ticket]] ×1 | |||
|T1.1=068 | |||
|T1.1E=Land 3 hits with [[Green Shell]]s. | |||
|T1.1S=1 | |||
|T1.2=117 | |||
|T1.2E=Do a total of 5 [[Slipstream]] boosts. | |||
|T1.2S=1 | |||
|T1.3=133 | |||
|T1.3E=Do 100 [[Trick|Jump Boosts]]. | |||
|T1.3S=1 | |||
|T1.4=104 | |||
|T1.4E=Pick up a dropped [[Mushroom]] for a speed boost 3 times. | |||
|T1.4S=2 | |||
|T1.5=206 | |||
|T1.5E=Earn a score of 9,000 or higher using a driver wearing a helmet. | |||
|T1.5S=2 | |||
|T1.6=009 | |||
|T1.6E=Perform a total of 3 Jump Boosts by bouncing off [[hot-air balloon]]s. | |||
|T1.6S=2 | |||
|T1.7=043 | |||
|T1.7E=Earn a score of 7,000 or higher using a baby driver. | |||
|T1.7S=2 | |||
|T1.8=039 | |||
|T1.8E=Use 1 [[point-boost ticket]]. | |||
|T1.8S=2 | |||
|T1.9=164 | |||
|T1.9E=Earn a total score of 20,000 or higher in the [[Shy Guy Cup]]. | |||
|T1.9S=2 | |||
|TCR2=[[File:MKT Icon CoinRushTicket.png|70px]] [[Coin Rush ticket]] ×1 | |||
|T2.1=086 | |||
|T2.1E=Land 5 hits with [[Banana]]s. | |||
|T2.1S=1 | |||
|T2.2=119 | |||
|T2.2E=Do 100 [[Mini-Turbo]] boosts. | |||
|T2.2S=1 | |||
|T2.3=021 | |||
|T2.3E=Activate [[Frenzy]] mode 5 times. | |||
|T2.3S=1 | |||
|T2.4=098 | |||
|T2.4E=Get 1st place in a race 2 times in a row. | |||
|T2.4S=2 | |||
|T2.5=160 | |||
|T2.5E=Earn a total score of 20,000 or higher in the [[Diddy Kong Cup]]. | |||
|T2.5S=2 | |||
|T2.6=024 | |||
|T2.6E=Get a combo count of ×20 or higher. | |||
|T2.6S=2 | |||
|T2.7=216 | |||
|T2.7E=Earn a score of 9,000 or higher using a driver with a mustache. | |||
|T2.7S=2 | |||
|T2.8=018 | |||
|T2.8E=Land a hit with a [[Green Shell]] in a Standard Race. | |||
|T2.8S=2 | |||
|T2.9=042 | |||
|T2.9E=Race in every course of every cup, including bonus challenges. | |||
|T2.9S=2 | |||
|GCR=[[File:MKT Icon 1Ruby.png|50px]] [[Ruby|Rubies]] ×5 | |||
|G.1=101 | |||
|G.1E=Get a Fantastic combo a total of 5 times. | |||
|G.1S=1 | |||
|G.2=041 | |||
|G.2E=Land 5 hits with [[Red Shell]]s. | |||
|G.2S=1 | |||
|G.3=099 | |||
|G.3E=Get 1st place in a 150cc or higher race 3 times. | |||
|G.3S=1 | |||
|G.4=209 | |||
|G.4E=Cause opponents to crash a total of 3 times using a driver wearing gloves. | |||
|G.4S=2 | |||
|G.5=022 | |||
|G.5E=Ride on air currents 5 times. | |||
|G.5S=2 | |||
|G.6=103 | |||
|G.6E=Take out a [[Metal ball|pinball]]. | |||
|G.6S=2 | |||
|G.7=040 | |||
|G.7E=Earn a score of 10,000 or higher on 3 courses. | |||
|G.7S=2 | |||
|G.8=165 | |||
|G.8E=Earn a total score of 25,000 or higher in the [[Dry Bowser Cup]]. | |||
|G.8S=2 | |||
|G.9=074 | |||
|G.9E=Get 1st place a total of 3 times in Standard Races or Gold Races. | |||
|G.9S=2 | |||
}} | |||
==Intial pipe appearance rates== | |||
===Trick Pipe 1=== | |||
{|class="wikitable"style="margin:auto; text-align:center" | |||
!Class | |||
!Parts | |||
!Rate (each) | |||
|- | |||
!High-End spotlight driver | |||
|[[Builder Mario]] | |||
|1.0000% | |||
|- | |||
!High-End spotlight kart | |||
|[[Dozer Dasher]] | |||
|1.0000% | |||
|- | |||
!High-End spotlight glider | |||
|[[Safety Glider]] | |||
|1.0000% | |||
|- | |||
!High-End drivers | |||
|[[Dry Bowser]], [[Metal Mario]], [[Pauline]], [[Peachette]], [[Builder Mario|Builder Toad]], [[Ice Mario (Super Mario Galaxy)|Ice Mario]] | |||
|0.1667% | |||
|- | |||
!High-End karts | |||
|[[B Dasher]], [[Badwagon]], [[Circuit Special]], [[Bruiser]], [[Wild Wing]], [[Bumble V]], [[Red B Dasher]], [[P-Wing (kart)|P-Wing]], [[Clanky Kart]] | |||
|0.1111% | |||
|- | |||
!High-End gliders | |||
|[[Swooper (glider)|Swooper]], [[Cloud Glider]], [[Gold Glider]], [[Starchute]], [[Crimson Crane]], [[Heart Balloons]] | |||
|0.1667% | |||
|- | |||
!Super drivers | |||
|[[Donkey Kong]], [[Toad]], [[Bowser]], [[Luigi]], [[Mario]], [[Peach]], [[Yoshi]], [[Daisy]], [[Lakitu]], [[King Boo]], [[Toadette]], [[Bowser Jr.]], [[Waluigi]], [[Wario]], [[Rosalina]], [[Birdo]], [[Diddy Kong]], [[Hammer Bro]], [[Boomerang Bro]], [[Fire Bro]], [[Ice Bro]], [[Red Yoshi]], [[Black Shy Guy]], [[Pink Shy Guy]], [[Toad]] (Pit Crew), [[Birdo]] (Light Blue), [[Birdo]] (Yellow), [[Roving Racers|Red Koopa]] (Freerunning) | |||
|0.3214% | |||
|- | |||
!Super karts | |||
|[[Zucchini]], [[Egg 1]], [[Daytripper]], [[Mach 8]], [[Cloud 9]], [[Soda Jet]], [[Koopa Clown]], [[Poltergust 4000]], [[Royale]], [[Barrel Train]], [[Turbo Yoshi]], [[Blue Seven]], [[Flame Flyer]], [[Para-Wing]], [[Super Blooper (kart)|Super Blooper]], [[Turbo Birdo]], [[Streamliner]], [[DK Jumbo]], [[Red Turbo Yoshi]], [[Light-blue Turbo Birdo]], [[Yellow Turbo Birdo]] | |||
|0.3333% | |||
|- | |||
!Super gliders | |||
|[[Flower Glider]], [[Peach Parasol (glider)|Peach Parasol]], [[BaNaNa Parafoil]], [[Bob-omb Parafoil]], [[Wario Wing]], [[Oilpaper Umbrella]], [[Shell Parachute]], [[Lightning Oilpaper]], [[Blue Flower Glider]], [[Pink Flower Glider]], [[Waluigi Wing]], [[? Block (glider)|? Block]], [[8-Bit Jumping Mario]], [[Eggshell Glider]] | |||
|0.2857% | |||
|- | |||
!Normal drivers | |||
|[[Koopa Troopa]], [[Shy Guy]], [[Dry Bones]], [[Baby Daisy]], [[Baby Luigi]], [[Baby Mario]], [[Baby Peach]], [[Baby Rosalina]], [[Iggy]], [[Larry]], [[Lemmy]], [[Ludwig]], [[Morton]], [[Roy]], [[Wendy]] | |||
|2.1333% | |||
|- | |||
!Normal karts | |||
|[[Birthday Girl]], [[Landship]], [[Bullet Blaster]], [[Mushmellow]], [[Biddybuggy]], [[Pipe Frame]], [[Pipe Buggy]], [[Cheep Charger]], [[Red Kiddie Kart]], [[Koopa Dasher]], [[Green Kiddie Kart]] | |||
|2.3636% | |||
|- | |||
!Normal gliders | |||
|[[Super Glider]], [[Paper Glider]], [[Parachute (glider)|Parachute]], [[Parafoil]], [[Piston Glider]], [[Droplet Glider]], [[BBIA Parafoil]], [[Piranha Plant Parafoil]], [[Minion Paper Glider]] | |||
|1.7778% | |||
|} | |||
===Trick Pipe 2=== | |||
{|class="wikitable"style="margin:auto; text-align:center" | |||
!Class | |||
!Parts | |||
!Rate (each) | |||
|- | |||
!High-End spotlight driver | |||
|[[Builder Toad]] | |||
|1.0000% | |||
|- | |||
!High-End spotlight kart | |||
|[[Clanky Kart]] | |||
|1.0000% | |||
|- | |||
!High-End spotlight glider | |||
|[[Starchute]] | |||
|1.0000% | |||
|- | |||
!High-End drivers | |||
|[[Dry Bowser]], [[Metal Mario]], [[Pauline]], [[Peachette]], [[Builder Mario]], [[Ice Mario (Super Mario Galaxy)|Ice Mario]] | |||
|0.1667% | |||
|- | |||
!High-End karts | |||
|[[B Dasher]], [[Badwagon]], [[Circuit Special]], [[Bruiser]], [[Wild Wing]], [[Bumble V]], [[Red B Dasher]], [[P-Wing (kart)|P-Wing]], [[Dozer Dasher]] | |||
|0.1111% | |||
|- | |||
!High-End gliders | |||
|[[Swooper (glider)|Swooper]], [[Cloud Glider]], [[Gold Glider]], [[Crimson Crane]], [[Heart Balloons]], [[Safety Glider]] | |||
|0.1667% | |||
|- | |||
!Super drivers | |||
|[[Donkey Kong]], [[Toad]], [[Bowser]], [[Luigi]], [[Mario]], [[Peach]], [[Yoshi]], [[Daisy]], [[Lakitu]], [[King Boo]], [[Toadette]], [[Bowser Jr.]], [[Waluigi]], [[Wario]], [[Rosalina]], [[Birdo]], [[Diddy Kong]], [[Hammer Bro]], [[Boomerang Bro]], [[Fire Bro]], [[Ice Bro]], [[Red Yoshi]], [[Black Shy Guy]], [[Pink Shy Guy]], [[Toad]] (Pit Crew), [[Birdo]] (Light Blue), [[Birdo]] (Yellow), [[Roving Racers|Red Koopa]] (Freerunning) | |||
|0.3214% | |||
|- | |||
!Super karts | |||
|[[Zucchini]], [[Egg 1]], [[Daytripper]], [[Mach 8]], [[Cloud 9]], [[Soda Jet]], [[Koopa Clown]], [[Poltergust 4000]], [[Royale]], [[Barrel Train]], [[Turbo Yoshi]], [[Blue Seven]], [[Flame Flyer]], [[Para-Wing]], [[Super Blooper (kart)|Super Blooper]], [[Turbo Birdo]], [[Streamliner]], [[DK Jumbo]], [[Red Turbo Yoshi]], [[Light-blue Turbo Birdo]], [[Yellow Turbo Birdo]] | |||
|0.3333% | |||
|- | |||
!Super gliders | |||
|[[Flower Glider]], [[Peach Parasol (glider)|Peach Parasol]], [[BaNaNa Parafoil]], [[Bob-omb Parafoil]], [[Wario Wing]], [[Oilpaper Umbrella]], [[Shell Parachute]], [[Lightning Oilpaper]], [[Blue Flower Glider]], [[Pink Flower Glider]], [[Waluigi Wing]], [[? Block (glider)|? Block]], [[8-Bit Jumping Mario]], [[Eggshell Glider]] | |||
|0.2857% | |||
|- | |||
!Normal drivers | |||
|[[Koopa Troopa]], [[Shy Guy]], [[Dry Bones]], [[Baby Daisy]], [[Baby Luigi]], [[Baby Mario]], [[Baby Peach]], [[Baby Rosalina]], [[Iggy]], [[Larry]], [[Lemmy]], [[Ludwig]], [[Morton]], [[Roy]], [[Wendy]] | |||
|2.1333% | |||
|- | |||
!Normal karts | |||
|[[Birthday Girl]], [[Landship]], [[Bullet Blaster]], [[Mushmellow]], [[Biddybuggy]], [[Pipe Frame]], [[Pipe Buggy]], [[Cheep Charger]], [[Red Kiddie Kart]], [[Koopa Dasher]], [[Green Kiddie Kart]] | |||
|2.3636% | |||
|- | |||
!Normal gliders | |||
|[[Super Glider]], [[Paper Glider]], [[Parachute (glider)|Parachute]], [[Parafoil]], [[Piston Glider]], [[Droplet Glider]], [[BBIA Parafoil]], [[Piranha Plant Parafoil]], [[Minion Paper Glider]] | |||
|1.7778% | |||
|} | |||
==Profiles== | ==Profiles== | ||
*'''''Mario Kart Tour'' Twitter:''' "''The Yoshi Tour is ending soon. But don't worry, there's another terrific tour on the way. Starting Apr. 21, 11 PM PT, the Trick Tour kicks off in {color|#MarioKartTour | *'''''Mario Kart Tour'' Twitter:''' | ||
**"''The Yoshi Tour is ending soon. But don't worry, there's another terrific tour on the way. Starting Apr. 21, 11 PM PT, the Trick Tour kicks off in {{color|blue|#MarioKartTour}}! Hope you're ready to rack up some points, because every course included will be the Trick variant!''"<ref>mariokarttourEN (April 17, 2020). [https://twitter.com/mariokarttourEN/status/1251148410285109248 ''Twitter'']. Retrieved April 17, 2020.</ref> | |||
**"''It's time for the Trick Tour! True to its name, this tour is as tricky as they come, since every single course is an R/T course. Make your way through 12 cups as you've never seen them before!''"<ref>mariokarttourEN (April 22, 2020). [https://twitter.com/mariokarttourEN/status/1252843325712822277 ''Twitter'']. Retrieved April 22, 2020.</ref> | |||
==Names in other languages== | ==Names in other languages== | ||
{{Foreign names | {{Foreign names | ||
| | |Jpn=エクストリームツアー | ||
| | |JpnR=Ekusutorīmu Tsuā | ||
|JpnM=Extreme Tour | |||
|ChiS=极限巡回赛 | |||
|ChiSR=Jíxiàn Xúnhuísài | |||
|ChiSM=Extreme Tour | |||
|ChiT=極限巡迴賽 | |||
|ChiTR=Jíxiàn Xúnhuísài | |||
|ChiTM=Extreme Tour | |||
|Fre=Saison Acrobatique | |||
|FreM=Acrobatic Season | |||
|Ger=Extrem-Tour-Saison | |||
|GerM=Extreme Tour Season | |||
|Ita=Tour X | |||
|ItaM=X Tour ("X" being the identifier for the T courses) | |||
|Kor=익스트림 투어 | |||
|KorR=Ikseuteurim Tueo | |||
|KorM=Extreme Tour | |||
|Por=Temporada acrobática | |||
|PorM=Acrobatic Season | |||
|Spa=Temporada X | |||
|SpaM=Season X ("X" being the identifier for the T courses) | |||
}} | }} | ||
==Trivia== | |||
*The Trick Tour was the first tour to host a [[Vs. Mega|Vs. Mega (opponent)]] race on a variation of a course, namely [[SNES Mario Circuit 3|SNES Mario Circuit 3T]]. | |||
==References== | ==References== | ||
<references /> | <references/> | ||
{{MKT}} | {{MKT}} | ||
[[Category:Mario Kart Tour | [[Category:Mario Kart Tour tours]] | ||
[[it:Tour X (2020)]] | |||
Latest revision as of 16:41, January 7, 2025
| Trick Tour | |
|---|---|
| |
| Start date | April 21, 2020 11:00 p.m. (PT)[?] |
| End date | May 5, 2020 10:59 p.m. (PT)[?] |
| Number of cups | 12 |
| Ranked cups | Mario Cup (week 1) Toad Cup (week 2) |
| Coin Rush course | SNES Mario Circuit 1 |
| << List of tours >> | |
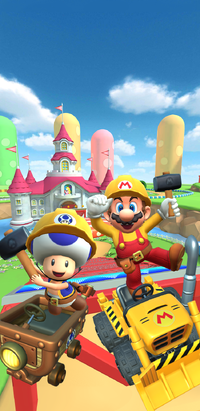
The Trick Tour was the sixteenth tour of Mario Kart Tour, which began on April 22, 2020, and ended on May 5, 2020. It was the first tour to be named directly after a mechanic in the Mario Kart series, the second tour in a row that did not introduce any new courses, and also the first to feature only a specific variant of courses, in this case R/T variants. The tour therefore included nearly every retro and RMX course in their R/T variations, only excluding Rock Rock Mountain (as it introduced the R/T variants of SNES Vanilla Lake 1 and GBA Bowser's Castle 2). Builder Mario and Builder Toad were announced as the new characters for the Trick Tour to coincide with the final major update for Super Mario Maker 2.[1] The menu's background featured Peach's Castle from 3DS Mario Circuit as the landmark for this tour. This was the first tour to reuse bonus challenges.
Spotlights[edit]
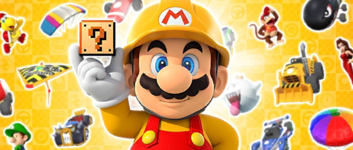
| Trick Pipe 1 April 21, 2020, 11:00 p.m. (PT) – May 5, 2020, 10:59 p.m. (PT) |
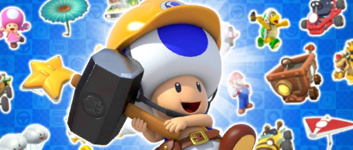
Trick Pipe 2 April 28, 2020, 11:00 p.m. (PT) – May 5, 2020, 10:59 p.m. (PT) | ||||
|
| ||||
| Driver | Kart | Glider | Driver | Kart | Glider |
|---|---|---|---|---|---|

|
|||||
| Builder Mario | Dozer Dasher | Safety Glider | Builder Toad | Clanky Kart | Starchute |
Cups[edit]
Mario Cup Ranked cup (week 1) |
3DS Mario Circuit R/T |
GCN Yoshi Circuit R/T |
GBA Bowser's Castle 2R/T |
Do Jump Boosts | ||||
 3DS Toad Circuit |
Baby Daisy | |||||||
Koopa Troopa Cup |
3DS Cheep Cheep Lagoon R/T |
N64 Koopa Troopa Beach R/T |
SNES Rainbow Road R/T |
Time Trial | ||||
 SNES Vanilla Lake 1 |
Shy Guy | |||||||
Toad Cup Ranked cup (week 2) |
3DS Toad Circuit R/T |
3DS Daisy Hills R/T |
SNES Vanilla Lake 1R/T |
Ring Race | ||||
 N64 Koopa Troopa Beach |
Yoshi | |||||||
Larry Cup |
3DS Shy Guy Bazaar R/T |
GBA Bowser's Castle 1R/T |
N64 Kalimari Desert R/T |
Goomba Takedown | ||||
 SNES Mario Circuit 2 |
Luigi | |||||||
Diddy Kong Cup |
GCN Dino Dino Jungle R/T |
SNES Mario Circuit 2R/T |
3DS Toad Circuit R/T |
Steer Clear of Obstacles | ||||
 GBA Bowser's Castle 2 |
Morton | |||||||
Yoshi Cup |
SNES Choco Island 2R/T |
DS DK Pass R/T |
N64 Frappe Snowland R/T |
Break Item Boxes | ||||
 SNES Choco Island 2 |
Wendy | |||||||
Shy Guy Cup |
3DS Neo Bowser City R/T |
SNES Ghost Valley 1R/T |
DS Waluigi Pinball R/T |
Combo Attack | ||||
 3DS Mario Circuit T |
Peachette | |||||||
Luigi Cup |
DS Luigi's Mansion R/T |
3DS Cheep Cheep Lagoon R/T |
SNES Mario Circuit 3R/T |
Big Reverse Race | ||||
 N64 Frappe Snowland |
Any character | |||||||
Wendy Cup |
RMX Mario Circuit 1R/T |
GCN Dino Dino Jungle R/T |
SNES Choco Island 2R/T |
Steer Clear of Obstacles | ||||
 SNES Donut Plains 1 |
Donkey Kong | |||||||
Waluigi Cup |
DS Waluigi Pinball R/T |
SNES Mario Circuit 1R/T |
3DS Rainbow Road R/T |
Time Trial | ||||
 3DS Neo Bowser City R |
Ludwig | |||||||
Rosalina Cup |
SNES Vanilla Lake 1R/T |
SNES Donut Plains 1R/T |
3DS Mario Circuit R/T |
Smash Small Dry Bones | ||||
 3DS Rainbow Road |
Rosalina | |||||||
Dry Bowser Cup |
DS DK Pass R/T |
GBA Bowser's Castle 2R/T |
3DS Shy Guy Bazaar R/T |
Vs. Mega Bowser | ||||
 SNES Mario Circuit 3T |
Any character | |||||||
Signature kart sets[edit]
Drivers with a corresponding cup in the tour were bumped one rank up in every course of their cup.
| Cup | Character | Kart | Glider |
|---|---|---|---|
| Second course of every cup | |||
| Third course of every cup | |||
| — | — | ||
| — | — | ||
| — | — | ||
| — | — | ||
| — | — | ||
| — | — | ||
| — | — | ||
| — | — | ||
| — | — | ||
| — | — | ||
| — | — | ||
| — | — |
Rewards[edit]
Gold cells indicate rewards exclusive to Gold Pass members.

|

|
|||||
| Piston Glider | Baby Peach | Landship | White Royale | Shy Guy | Gold Train | Barrel Hanafuda |
| Grand Stars | 15 | 30 | 45 | 60 | 75 | 90 | 105 | 120 | 135 | 150 | 165 | 180 | 190 | 195 | 210 | 225 | 240 | 255 | 270 | Total | Grand total | |
|---|---|---|---|---|---|---|---|---|---|---|---|---|---|---|---|---|---|---|---|---|---|---|
| Free pipe launch | 1 | 1 | 1 | 3 | ||||||||||||||||||
| Coin | 100 | 100 | 100 | 100 | 200 | 100 | 700 | 1800 | ||||||||||||||
| 300 | 300 | 500 | 1100 | |||||||||||||||||||
| Rubies | 5 | 3 | 3 | 3 | 3 | 3 | 3 | 23 | 53 | |||||||||||||
| 5 | 5 | 5 | 5 | 5 | 5 | 30 | ||||||||||||||||
| Item tickets | 3 | 3 | 6 | 51 | ||||||||||||||||||
| 5 | 5 | 5 | 10 | 10 | 10 | 45 | ||||||||||||||||
| Star tickets | 1 | 1 | 3 | |||||||||||||||||||
| 1 | 1 | 2 | ||||||||||||||||||||
| Point-boost tickets | 1 | 3 | 4 | 8 | ||||||||||||||||||
| 1 | 3 | 4 | ||||||||||||||||||||
| 1 | 3 | 4 | 8 | |||||||||||||||||||
| 1 | 3 | 4 | ||||||||||||||||||||
| 1 | 3 | 4 | 8 | |||||||||||||||||||
| 1 | 3 | 4 | ||||||||||||||||||||
| Level-boost ticket | 3 | 12 | ||||||||||||||||||||
| 9 | ||||||||||||||||||||||
New content[edit]
Drivers[edit]
Karts[edit]
Gliders[edit]
Courses[edit]
SNES Vanilla Lake 1 (R/T)
GBA Bowser's Castle 2 (R/T)
Paid banners[edit]
| Name | Availability | Cost | Contents | Banner image |
|---|---|---|---|---|
| Value Pack | April 21, 2020 – April 28, 2020 (first batch of 3) April 28, 2020 – May 5, 2020 (second batch of 3) |
US$1.99 |
|

|
| Metal Mario Pack | April 21, 2020 – April 28, 2020 | US$19.99 |
|
|
| Wild Black Pack | April 21, 2020 – April 28, 2020 | US$39.99 |
|
|
| Karp Kart Pack | April 28, 2020 – May 5, 2020 | US$19.99 |
|
|
| Dry Bones (Gold) Pack | April 28, 2020 – May 5, 2020 | US$39.99 |
|
|
Challenges[edit]
| Tour Challenges 1 | Tour Challenges 2 | Gold Challenges | ||||||||
|---|---|---|---|---|---|---|---|---|---|---|
| Completion reward: |
Completion reward: |
Completion reward: | ||||||||
 |
 |
 |
 |
 |
 |
 |
 |
 | ||
| Land 3 hits with Green Shells. | Do a total of 5 Slipstream boosts. | Do 100 Jump Boosts. | Land 5 hits with Bananas. | Do 100 Mini-Turbo boosts. | Activate Frenzy mode 5 times. | Get a Fantastic combo a total of 5 times. | Land 5 hits with Red Shells. | Get 1st place in a 150cc or higher race 3 times. | ||
 |
 |
 |
 |
 |
 |
 |
 |
 | ||
| Pick up a dropped Mushroom for a speed boost 3 times. | Earn a score of 9,000 or higher using a driver wearing a helmet. | Perform a total of 3 Jump Boosts by bouncing off hot-air balloons. | Get 1st place in a race 2 times in a row. | Earn a total score of 20,000 or higher in the Diddy Kong Cup. | Get a combo count of ×20 or higher. | Cause opponents to crash a total of 3 times using a driver wearing gloves. | Ride on air currents 5 times. | Take out a pinball. | ||
 |
 |
 |
 |
 |
 |
 |
 |
 | ||
| Earn a score of 7,000 or higher using a baby driver. | Use 1 point-boost ticket. | Earn a total score of 20,000 or higher in the Shy Guy Cup. | Earn a score of 9,000 or higher using a driver with a mustache. | Land a hit with a Green Shell in a Standard Race. | Race in every course of every cup, including bonus challenges. | Earn a score of 10,000 or higher on 3 courses. | Earn a total score of 25,000 or higher in the Dry Bowser Cup. | Get 1st place a total of 3 times in Standard Races or Gold Races. | ||
Intial pipe appearance rates[edit]
Trick Pipe 1[edit]
Trick Pipe 2[edit]
Profiles[edit]
- Mario Kart Tour Twitter:
- "The Yoshi Tour is ending soon. But don't worry, there's another terrific tour on the way. Starting Apr. 21, 11 PM PT, the Trick Tour kicks off in #MarioKartTour! Hope you're ready to rack up some points, because every course included will be the Trick variant!"[2]
- "It's time for the Trick Tour! True to its name, this tour is as tricky as they come, since every single course is an R/T course. Make your way through 12 cups as you've never seen them before!"[3]
Names in other languages[edit]
| Language | Name | Meaning | Notes |
|---|---|---|---|
| Japanese | エクストリームツアー[?] Ekusutorīmu Tsuā |
Extreme Tour | |
| Chinese (simplified) | 极限巡回赛[?] Jíxiàn Xúnhuísài |
Extreme Tour | |
| Chinese (traditional) | 極限巡迴賽[?] Jíxiàn Xúnhuísài |
Extreme Tour | |
| French | Saison Acrobatique[?] | Acrobatic Season | |
| German | Extrem-Tour-Saison[?] | Extreme Tour Season | |
| Italian | Tour X[?] | X Tour ("X" being the identifier for the T courses) | |
| Korean | 익스트림 투어[?] Ikseuteurim Tueo |
Extreme Tour | |
| Portuguese | Temporada acrobática[?] | Acrobatic Season | |
| Spanish | Temporada X[?] | Season X ("X" being the identifier for the T courses) |
Trivia[edit]
- The Trick Tour was the first tour to host a Vs. Mega (opponent) race on a variation of a course, namely SNES Mario Circuit 3T.
References[edit]
- ^ mariokarttourEN (April 20, 2020). To celebrate a free update that adds new content and features to the #SuperMarioMaker2 game for the Nintendo Switch system, Builder Mario and Builder Toad from Super Mario Maker 2 are making an appearance in the Trick Tour starting Apr. 21, 11 PM PT! #MarioKartTour. Twitter. Retrieved April 20, 2020.
- ^ mariokarttourEN (April 17, 2020). Twitter. Retrieved April 17, 2020.
- ^ mariokarttourEN (April 22, 2020). Twitter. Retrieved April 22, 2020.

