Fortune Street: Difference between revisions
(Removed erroneous information. There are only 128 venture cards.) |
(→Characters: - fix wording for S-rank toggle option) |
||
| (335 intermediate revisions by more than 100 users not shown) | |||
| Line 1: | Line 1: | ||
{{italic title}} | {{italic title}} | ||
{{ | {{rewrite-expand|include single player content such as the awards given at the end of matches and clothing available in the Costume Shop}} | ||
|image=[[File:FS boxcover.png|250px]]<br> | {{game infobox | ||
|developer=[[ | |image=[[File:FS boxcover.png|250px]]<br>North American box art | ||
|developer=[[Marvelous Inc.|Marvelous AQL]]<br>[[TOSE Software Co.]] | |||
|publisher=[[Nintendo]] (US, EU)<br>[[Square Enix]] (JP) | |publisher=[[Nintendo]] (US, EU)<br>[[Square Enix]] (JP) | ||
| | |release={{flag list|Japan|December 1, 2011<ref>{{cite|url=www.nintendo.co.jp/wii/software/st7j/index.html|title=いただきストリートWii|publisher=Nintendo Co., Ltd.|language=ja|accessdate=June 1, 2018}}</ref>|USA|December 5, 2011|Europe|December 23, 2011 (some countries)<ref name="Boom Street">{{cite|author=Vuckovic, Daniel|date=December 13, 2011|archive=web.archive.org/web/20120330002612/http://www.vooks.net/story-20611-Boom-Street-explodes-in-Australian-on-January-5th.html|title=Boom Street explodes in Australian on January 5th|publisher=Vooks}}</ref>|Australia|January 5, 2012<ref name="Boom Street"/>|Europe|January 6, 2012 (most other countries)<ref name="Boom Street"/>}} | ||
|languages={{languages|en_us=y|fr_fr=y|es_es=y|de=y|it=y|jp=y}} | |||
|genre= | |genre=[[Genre#Party|Party]] | ||
|modes=Single | |modes=Single-player, multiplayer (2–4 players) | ||
|ratings={{ratings|esrb=E|cero=A|pegi=3|usk=0|acb=PG}} | |ratings={{ratings|esrb=E|cero=A|pegi=3|usk=0|acb=PG}} | ||
|platforms=[[Wii]] | |platforms=[[Wii]] | ||
| | |format={{format|wii=1}} | ||
|input={{input|wiimote=1}} | |input={{input|wiimote=1}} | ||
|serials={{flag list|Japan|RVL-ST7J-JPN}} | |||
}} | }} | ||
'''''Fortune Street''''' ( | '''''Fortune Street''''' (known as '''''Boom Street''''' in Europe and Oceania) is a follow-up to the 2007 [[Nintendo DS]] game ''[[Itadaki Street DS]]''. It is a [[Wii]] game developed primarily by [[Marvelous Inc.|Marvelous AQL]]. It is a ''[[Super Mario (franchise)|Super Mario]]'' game within [[Square Enix]]'s ''{{wp|Itadaki Street}}'' series, and was the first ''Itadaki Street'' game in general to be released outside of Japan. | ||
This game was able to be played over [[Nintendo Wi-Fi Connection]]; however, the service was terminated on May 20, 2014, making this game no longer playable online. Also, mainly due to this game's Wi-Fi compatibilities, it is impossible to transfer the save data to an [[nwiki:SD Card|SD Card]]. | |||
==Gameplay== | ==Gameplay== | ||
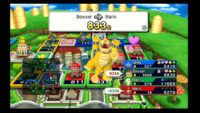
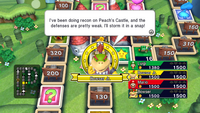
[[File:FortuneStscrn08E3.png|thumb|Bowser pays Mario upon landing on Mario's shop]] | |||
This game functions like a ''{{wp|Monopoly (game)|Monopoly}}'' style board game. It can be played with up to four players. If game data cannot be saved or will not be saved, only offline multiplayer is available (though Out to Lunch can be used to mimic a single player game. Every player can be COM players by doing this). When playing multiplayer offline, records are not saved. Also, when playing multiplayer offline, players can decide if each player should have their own [[Wii]] Remote, or that players share one Wii Remote. When using the latter option, players press one of the three buttons: {{button|wii|A}}, {{button|wii|1}}, and {{button|wii|2}} during an Auction to make a bid, and are ordered based on where characters appear in the Auction window. | |||
At the start of a game, all players use number machines to determine the turn order, with the highest number going first (note that it is possible for two numbers on the number machines to be the same, if so then the tying players use the number machines again). The only exceptions are the tutorial, where the human player always goes first; and in Custom Rules, should the Order of play be set to As picked, where it makes P1 goes first, then P2, then P3, then P4. | |||
Four players (excluding the play system in Tutorial mode, where only [[Mii|three]] [[Toad|characters]] [[Slime (Dragon Quest)|play]]) take turns by rolling [[Dice Block|dice]] to go around the board and buy shops. Some squares involve special attributes, such as Take-a-break squares (when a character lands there, all of their shops close until the player's next turn) and Venture squares (like a Chance space in Monopoly). Players also have the ability to invest money in their own shops when they land on them (a maximum of 999 per turn). Scattered around the board are four suits (Spade, Heart, Diamond, and Club); if the player collects all of them and returns to the Bank (also the starting square) they get a promotion. When a player gets a promotion, they get a fixed amount for their salary, plus a shop bonus which is based off 10% the sum of all the player's shop value, as well as a promotional bonus (extra money given to the player that increases as they level up). The player's level also goes up when they get a promotion. The maximum gold that can be held is 999,999. | |||
The main accounting currency is the [[dragonquest:gold|gold coin]] (abbreviated to G). The player wins by increasing their net worth to at least the target amount (usually determined by the game, if on Custom mode though, this can range between 6,000 and 999,000 in increments of 1,000) and returning to the bank first (in the Practice Boards, the target net worth for Easy Rules and Standard Rules are 5,000 G and 8,000 G respectively). Net worth is the total combined amount of ready cash and value in stocks and shops and can be increased by having other players land on their shops and buying multiple shops in an area or investing in stocks and owned shops to increase the stock price. If the player's ready cash drops below zero during their turn, they must sell either stocks or a shop to try and get out of debt; any shops sold for cash are auctioned (the winning bid gets paid to the bank). Note that the bank only offers 75% of the shop price to a player if they are in debt. Also, if a player auctions a shop from "Manage Shops" or gets [[Fortune Street#Venture Cards|Venture Card #74]], the highest bid is credited to the original owner. If the player's debt cannot be resolved at the end of their turn, then they go bankrupt; all their assets are sold off if any remain and they are automatically eliminated from the game. The player with the highest net worth automatically wins if the bankruptcy limit is met (although in a ''very'' rare case should two or more players have the ''same'' highest net worth, the player that goes later in the turn order wins). In Tour mode, the game ends once one player goes bankrupt, in Custom mode, this can be set to when two players go bankrupt or to have a last-man-standing rule. | |||
There are two different ways to play: the Easy rules and the Standard rules. | |||
===Standard Rules=== | ===Standard Rules=== | ||
In the Standard rules, | [[File:FS PC BowserJr.png|thumb|Vacant plots in Standard rules]] | ||
In the Standard rules, the board is divided into several color-coded districts and includes a stock market. If the player has more than one shop in a district, both shops expand, meaning the shop's value, prices, and max capital (the amount of money that can be invested into a shop) all increase. Owning all the shops in a district results in a domination, which greatly expands all the shops in that district. There are usually 4 shops in a district. | |||
Stocks can be purchased at the | Stocks can be purchased at the Bank or a Stockbroker square, but only 99 can be bought in one district at one given time. Despite that, stocks can be sold at any time before a player's turn. Stocks can increase or decrease in value at any time. An increase of shop values or a large purchase of stock at one time increases the stock value in that district. Conversely, a decrease of shop values or a large sale of stock at one time decreases the stock value in that district. Like shops, stocks are assets, and therefore, do not decrease net worth when purchased. When stocks increase or decrease in value, only the player's net worth is affected. This is dependent on two factors: how many stocks owned in that district, and by how much the stock value fluctuates. For example, if a district's stock value increases by 5G, a player who owns 200 stocks in that same district gains a 1000G bonus in net worth. | ||
Exclusive to Standard rules are vacant plots. These | Exclusive to Standard rules are vacant plots. These squares allow a player to build upon the land. A vacant plot can be changed, or 'renovated', at any time before the player rolls the dice block. The following buildings can be built on vacant plots: | ||
{|class="wikitable" | |||
|- | |||
!Type | |||
!Image | |||
!Description | |||
|- | |||
|align=center|Checkpoint | |||
|align=center|[[File:FS Checkpoint.png]] | |||
|Any opponent who passes or lands on this square has to pay the indicated toll; afterwards the toll increases by 10G per pass; if the player who owns the checkpoint lands on this square, they can invest in any other shop they own. | |||
|- | |||
|align=center|Circus | |||
|align=center|[[File:FS 1-Star Circus.png]] | |||
|Any opponent who lands on this square has to pay the indicated price; if the tent owner lands on this square, they can expand the circus like a shop (Starts with a price of 100G, and after expanding (3 times MAX) it goes to 500G, 1000G, and 2000G). | |||
|- | |||
|align=center|Balloonport | |||
|align=center|[[File:FS Balloonport.png]] | |||
|Any opponent who lands on this square has to pay the indicated price; if the port owner lands on this square, they can travel to any square at no charge. | |||
|- | |||
|align=center|Tax Office | |||
|align=center|[[File:FS Tax Office.png]] | |||
|Any opponent who lands on this square has to pay 10% of their net worth to the owner; if the office owner lands on this square, they gain a 5% net worth bonus. | |||
|- | |||
|align=center|Home | |||
|align=center|[[File:FS Home.png]] | |||
|Any opponent who lands on this square must pay 30 gold times the owner's level to the owner; if the homeowner lands on this square, every other player is forced to congregate at that square. | |||
|- | |||
|align=center|Estate Agency | |||
|align=center|[[File:FS Estate Agency.png]] | |||
|This acts like a Take-a-break square to any opponent who lands on this square. If the agency owner lands on this square, they can buy any unowned shop as long as at least one shop is unpurchased. | |||
|- | |||
|align=center|3-Star Shop | |||
|align=center|[[File:FS 3-Star Shop.png]] | |||
|The player can build a shop with a starting value of 1000G; this acts like any other shop square until it is renovated. If another player lands on this square they must pay for goods; if the owner lands there, they can invest in any shop they own. | |||
|} | |||
Three-Star Shops cost 1000G to build; everything else costs 200G. A surcharge of 150G is imposed to renovate an existing building. | |||
===Easy Rules=== | |||
In Easy rules, there are no stocks, vacant plots, or districts, making the game more accessible for new players. To expand shops further, players have to buy adjacent shops in a row. The row's maximum potential length depends on its location on the board since suit squares, venture squares, the arcade, and the bank divide certain sections of the board. | |||
=== | ===Salary Calculation=== | ||
A player's salary from a promotion is calculated as follows: | |||
====Formula==== | |||
{|class="wikitable" | |||
|- | |||
!Type!!Calculation | |||
|- | |||
|'''Base salary'''||'''B''' (usually 250) | |||
|- | |||
|'''Promotion bonus'''||'''150''' × '''L''' (level before promotion) | |||
|- | |||
|'''Shop bonus'''||'''S''' ÷ '''10''' ''(rounded down)'' | |||
|- | |||
|'''Total'''||Sum of the three values above | |||
|} | |||
== | ====Variables==== | ||
{|class="wikitable" | |||
|- | |||
!Variable!!Description | |||
|- | |||
|'''B'''||The fixed amount the player gets. | |||
|- | |||
|'''P'''||An amount that controls the amount the player gets corresponding to their level. | |||
|- | |||
|'''L'''||The player's level before promotion. | |||
|- | |||
|'''S'''||The sum of all the player's shop value. | |||
|} | |||
==Squares== | |||
{|class=wikitable style="text-align:center" | |||
!width=20% colspan=2|Square | |||
!width=30%|In-game description | |||
!width=50%|Notes | |||
|- | |||
|[[File:FS Bank Square.png]] | |||
|Bank | |||
|"''This is the finishing square. You'll also receive your salary each time you return here with all four suits, and you can buy stocks as you pass through.''" | |||
|align=left|Landing on the bank allows players to choose any direction to move on their next turn. | |||
|- | |||
|[[File:FS Shop Square.png|64px]] | |||
|Shop | |||
|N/A | |||
|align=left|The most common squares and the main focus of ''Fortune Street''. A shop can be purchased as long as a player has enough assets (sum of ready cash and stocks) in possession. Purchasing or investing in a shop does not decrease net worth, but it costs ready cash to do so. | |||
|- | |||
|[[File:FS Spade Square.png]][[File:FS Heart Square.png]]<br>[[File:FS Diamond Square.png]][[File:FS Club Square.png]] | |||
|Suit | |||
|"''When you pass this suit square, you pick up a [[File:FS Spade Suit.png|20px]]/[[File:FS Heart Suit.png|20px]]/[[File:FS Diamond Suit.png|20px]]/[[File:FS Club Suit.png|20px]]. Stop on it exactly for the chance to draw a venture card!''" | |||
||- | |||
|- | |||
|[[File:FS Change-of-suit Spade Square.png]] | |||
|Change-of-suit | |||
|"''You pick up a suit when you pass this square. After you take it, the suit on offer changes to another.''" | |||
|align=left|This is just like a Suit square, except it cycles through all four suits as players pass it. | |||
|- | |||
|[[File:FS Venture Square.png]] | |||
|Venture | |||
|"''Land on this square for a chance to draw a venture card.''" | |||
|align=left|Allows a player to choose a card from a random selection of 64 cards. | |||
|- | |||
|[[File:FS Take-a-break Square.png]] | |||
|Take-a-break | |||
|"''When you land on this square, all your shops shut until your next turn.''" | |||
||- | |||
|- | |||
|[[File:FS Vacant Lot Square.png]] | |||
|Vacant plot | |||
|"''You can build a variety of buildings and attractions.''" | |||
|align=left|Exclusive to Standard rules, these squares allow a player to build upon the land. They take the place of regular shops in districts. In Standard rules Free Play, the amount of vacant plots can be set in the custom rules. | |||
|- | |||
|[[File:FS Boon Square.png]] | |||
|Boon | |||
|"''Land on this square to receive a commission on everyone's profits until your next turn. (20% of all payments made)''" | |||
||- | |||
|- | |||
|[[File:FS Boom Square.png]] | |||
|Boom | |||
|"''Land on this square to receive a great big commission on everyone's profits until your next turn. (50% of all payments made)''" | |||
||- | |||
|- | |||
|[[File:FS Arcade Square.png]] | |||
|Arcade | |||
|"''Land on this square for some serious fun at the mini-game arcade!''" | |||
||- | |||
|- | |||
|[[File:FS Roll-on Square.png]] | |||
|Roll-on | |||
|"''When you land on this square, you roll the die and move again.''" | |||
||- | |||
|- | |||
|[[File:FS Backstreet Square.png]][[File:FS Backstreet Warp Square.png|64px]] | |||
|Backstreet | |||
|"''When you land on this square, you duck down a backstreet and come out on the other end.''" | |||
|align=left|Either a [[Warp Pipe]] or a warp square, these squares take the player to the connecting square of the same color. | |||
|- | |||
|[[File:FS Stockbroker Square.png|64px]] | |||
|Stockbroker | |||
|"''You have the opportunity to buy stocks when you land on this square.''" | |||
| | |||
|- | |||
|[[File:FS One-way-alley Square.png|64px]] | |||
|One-way alley | |||
|"''An alleyway to another part of the board. Dart down one and continue your turn when you come out the other end.''" | |||
|align=left|On Robbin' Hood Ruins and Bowser's Castle, these doors take the player to a different part of the board. On ''Super Mario'' series boards, they are based on the appearance of the [[Warp Door]] from ''New Super Mario Bros. Wii''. | |||
|- | |||
|[[File:FS Cannon Square.png|64px]] | |||
|Cannon | |||
|"''Land here to become a living cannon ball and blast your way to a square where another player is.''" | |||
|align=left|Blasting to another player's square does not activate the square's function, but blasting to a Suit square allows the suit to be collected, and blasting to the Bank allows the player to buy stocks and receive a promotion. | |||
|- | |||
|[[File:FS Switch Square.png]] | |||
|Switch | |||
|"''Landing on this square throws the switch and changes the layout of the board.''" | |||
|align=left|Causes large segments of the board to move around. | |||
|- | |||
|[[File:FS Lift Square.png]] | |||
|rowspan=2|Lift | |||
|"''You can take the lift to another location. Once you get off the lift, your turn ends.''" | |||
|align=left rowspan=2|Only found on Yoshi's Island, these squares act as a one-way path to a secluded spot of the board in standard rules and across the board in easy rules. | |||
|- | |||
|[[File:YS Lift End Square.png]] | |||
|"''This is the lift's destination. It's for getting off the lift only. (You can't take the lift from here.)''" | |||
|- | |||
|[[File:FS Magmalice Square.png|64px]] | |||
|rowspan=2|Magmalice | |||
|"''You can ride on the magnificent magmalice to another square, but then your turn ends.''" | |||
|align=left rowspan=2|Only found on Mt. Magmageddon, these squares cause a magmalice to bring players to other segments of the board when they are apart. | |||
|- | |||
|[[File:FS Magmalice End Square.png|64px]] | |||
|"''You can ride on the magnificent magmalice to another square. ...But it's not here at the moment!''" | |||
|} | |||
==Characters== | ==Characters== | ||
All | [[File:FS The Observatory 1.png|thumb|Characters have expansive dialogue and interact with each other]] | ||
All 22 characters from ''Itadaki Street DS'' return, with the addition of five new characters ([[Mii]], [[Diddy Kong]], [[Bowser Jr.]], [[Stella (Dragon Quest)|Stella]], and [[Patty (Dragon Quest)|Patty]]) for a grand total of 27. Players can customize their Miis in the game with a variety of clothing and animation options. | |||
Miis are the only playable characters in single-player mode | Miis are the only playable characters in single-player and online mode; in multiplayer offline, players can also choose between the ''Dragon Quest'' and ''Super Mario'' characters as well. Each computer character is ranked from S, A, B, C, D in terms of difficulty (S being the highest, and D being the lowest) which means each computer character has a predetermined difficulty. If the player beats either all the Easy Tour boards or all the Standard Tour boards, they have the ability to switch the computers' difficulty to S rank from their normal rank. | ||
Characters marked with an asterisk (*) are unlockable. | |||
===Playable in Multiplayer Mode=== | ===Playable in Multiplayer Mode=== | ||
====[[Mario ( | ====[[Super Mario (franchise)|''Super Mario'' franchise]]==== | ||
{| border= | {|class="wikitable" | ||
!Image!!Name and ranke!!Official description | |||
|- | |||
|[[File:FSMario.jpg]] | |||
|[[Mario]]<br>'''Rank A''' | |||
|''The universal hero who dashes and jumps his way around the world. His trademark outfit of a red shirt, overalls and an "M"-embroidered hat is known to all.'' | |||
|- | |||
|[[File:FSLuigi.jpg]] | |||
|[[Luigi]]<br>'''Rank C''' | |||
|''Mario's twin brother. Though normally quiet and unassuming, he's a shrewd and powerful man.'' | |||
|- | |||
|[[File:FSYoshi.jpg]] | |||
|[[Yoshi]]<br>'''Rank B''' | |||
|''Mario's trusty adventuring partner who carries Mario around on the shell on his back. His long tongue's perfect for slurping up fruit and giving his adversaries a good licking, too!'' | |||
|- | |||
|[[File:FSBowser.jpg]] | |||
|[[Bowser]]<br>'''Rank A''' | |||
|''Head of the Koopa Troop, whose sole aim seems to be disturbing the peace in the Mushroom Kingdom. He's a dangerous business rival, who won't hesitate to buy your property from under you.'' | |||
|- | |||
|[[File:FSToad.jpg]] | |||
|[[Toad]]<br>'''Rank C''' | |||
|''Never far from Princess Peach's side, Toad is here on <span title="American English" style="border-bottom:1px dotted">Fortune</span> / <span title="British English" style="border-bottom:1px dotted">Boom</span> Street too. He's a thoroughly nice 'stool who's rooting for everyone!'' | |||
|- | |||
|[[File:FSDK.jpg]] | |||
|[[Donkey Kong]]<br>'''Rank D''' | |||
|''A soft-hearted, yet hard as nails hero of the jungle. Is he only here on <span title="American English" style="border-bottom:1px dotted">Fortune</span> / <span title="British English" style="border-bottom:1px dotted">Boom</span> Street for the banana-selling fruit stalls!?'' | |||
|- | |||
|[[File:FSWario.jpg]] | |||
|[[Wario]]<br>'''Rank B''' | |||
|''A slightly vulgar miscreant who rivals Mario whether he wants it or not. He has no idea of value, but will do anything to make a quick buck!'' | |||
|- | |||
|[[File:FSWaluigi.jpg]] | |||
|[[Waluigi]]<br>'''Rank C''' | |||
|''A strange baddie who's fueled solely by the desire to oppose Luigi. His twisted ways are sure to upset everyone!'' | |||
|- | |||
|[[File:FSDaisy.jpg]] | |||
|[[Princess Daisy]]<br>'''Rank C''' | |||
|''The bright and lively, if slightly tomboyish, Princess of Sarasaland. Now she's bringing her bubbling enthusiasm to <span title="American English" style="border-bottom:1px dotted">Fortune</span> / <span title="British English" style="border-bottom:1px dotted">Boom</span> Street.'' | |||
|- | |- | ||
|[[File:FSBirdo.jpg]] | |||
|[[Birdo]]<br>'''Rank D''' | |||
|''A fluttery-eyed, pouting, pink creature with a very unusual mouth that spews eggs!'' | |||
! | |||
|- | |- | ||
|[[File:FSDiddy.jpg]] | |||
|[[Diddy Kong]] (newcomer)<br>'''Rank D''' | |||
|''The one and only, long-tailed, red-hatted partner to Donkey Kong. He swings deftly around <span title="American English" style="border-bottom:1px dotted">Fortune</span> / <span title="British English" style="border-bottom:1px dotted">Boom</span> Street as if it were his jungle home.'' | |||
|- | |- | ||
|[[File:FSBowserJr.jpg]] | |||
|[[Bowser Jr.]] (newcomer)<br>'''Rank A''' | |||
|''The mischievous, practical-joking son of Bowser. He's a chip off the old block and definitely not someone to be messed with!'' | |||
|- | |- | ||
|[[File:FSPeach.jpg]] | |||
|[[Princess Peach]]*<br>'''Rank S''' | |||
|''Princess of Mushroom Kingdom, often kidnapped by the wicked Bowser. Although she lives a sheltered life, she's not afraid of a battle on <span title="American English" style="border-bottom:1px dotted">Fortune</span> / <span title="British English" style="border-bottom:1px dotted">Boom</span> Street!'' | |||
|} | |} | ||
====[[dragonquest:Dragon Quest (series)|''Dragon Quest'' series]]==== | ====[[dragonquest:Dragon Quest (series)|''Dragon Quest'' series]]==== | ||
{| border= | {|class="wikitable" | ||
!Image!!Name and ranke!!Official description | |||
|- | |||
|[[File:FSSlime.jpg]] | |||
|[[Slime (Dragon Quest)|Slime]]<br>'''Rank D''' | |||
|''The quintessential quirky character of any Dragon Quest domain. Slimes are podgy and squishy and speak almost perfect "gooman".'' | |||
|- | |||
|[[File:FSPudding.jpg]] | |||
|[[Princessa]]<br>'''Rank C''' | |||
|''A noble princess dedicated to the restoration of her beloved Moonbroke after its ruinous fall at the hand of monsterkind. She's here to earn gold to fund the reconstruction work.'' | |||
|- | |||
|[[File:FSKiryl.jpg]] | |||
|[[Kiryl]]<br>'''Rank C''' | |||
|''A priest serving in Zamoksva who secretly covets Tsarevna Alena. He remains glued to her side, protecting her from harm with his magical mastery.'' | |||
|- | |||
|[[File:FSYangus.jpg]] | |||
|[[Yangus]]<br>'''Rank D''' | |||
|''A half-inching hoodlum from the sticky-fingered town of Pinkham who dreams of becoming a thief among thieves. This is young Yangus, but he's as cor-blimey as ever!'' | |||
|- | |||
|[[File:FSAngelo.jpg]] | |||
|[[Angelo]]<br>'''Rank A''' | |||
|''A Templar Knight from Maella Abbey whose cool character is just as adept at winning over the ladies as winning on <span title="American English" style="border-bottom:1px dotted">Fortune</span> / <span title="British English" style="border-bottom:1px dotted">Boom</span> Street.'' | |||
|- | |||
|[[File:FSPlatypunk.jpg]] | |||
|[[Platypunk]]<br>'''Rank C''' | |||
|''A duck-billed, dough-collecting Don's dogsbody. He and his Plob mob once attacked Slimenia, and the wound's still oozing now.'' | |||
|- | |||
|[[File:FSBianca.jpg]] | |||
|[[Bianca]]<br>'''Rank B''' | |||
|''A bit of a tomboy in her youth, Bianca has grown up to be a kind and gentle woman. But she stills makes the odd daring move here and there!'' | |||
|- | |||
|[[File:FSAlena.jpg]] | |||
|[[Alena]]<br>'''Rank B''' | |||
|''A tomboyish Tsarevna from Zamoksva who's snuck out to try her hand at <span title="American English" style="border-bottom:1px dotted">Fortune</span> / <span title="British English" style="border-bottom:1px dotted">Boom</span> Street! She's a little too impulsive to make a go of it, though.'' | |||
|- | |||
|[[File:FSHassan.jpg]] | |||
|[[Carver]]<br>'''Rank C''' | |||
|''Don't let this muscle-bound hulk's appearance deceive you. Carver is a gentle and feeling man. But can his carpentry skills build him a fortune on <span title="American English" style="border-bottom:1px dotted">Fortune</span> / <span title="British English" style="border-bottom:1px dotted">Boom</span> Street?'' | |||
|- | |- | ||
|[[File:FSStella.jpg]] | |||
|[[Stella (Dragon Quest)|Stella]] (newcomer)<br>'''Rank B''' | |||
|''A mysterious female who's all about appearances, devoted to fashion and definitely NOT a faer— She always does the first that enters her head, which might just win her the game!'' | |||
! | |||
|- | |- | ||
|[[File:FSJessica.jpg]] | |||
|[[Jessica]]*<br>'''Rank S''' | |||
|''A well-to-do young lady from Alexandria. She's headstrong and bold, and won't give you any quarter whatsoever. '' | |||
|- | |- | ||
|[[File:FSDragonlord.jpg]] | |||
|[[Dragonlord]]*<br>'''Rank S''' | |||
|''The kingpin of monsterkind who would see the world plunged into darkness. True to his dastardly disposition, his shops are powerhouses of impoverishment that lurk around every bend to bring you to your knees.'' | |||
|- | |- | ||
|[[File:FSPatty.jpg]] | |||
|[[Patty (Dragon Quest)|Patty]]* (newcomer)<br>'''Rank S''' | |||
|''A networking pundit who the lonely adventurer can rely on to be behind the counter of her Party Planning Place whenever needed. When it comes to running a business, is there anyone better? '' | |||
|} | |} | ||
====Unlocking | ====Unlocking criteria==== | ||
{| | {|class="wikitable"style="text-align:center" | ||
!Character | !Character | ||
!Unlock | !Unlock method | ||
|- | |- | ||
| | |Princess Peach | ||
| | |Beat the Peach's Castle board in second or first in Tour mode. | ||
|- | |- | ||
| | |Jessica | ||
| | |Beat the Robbin' Hood Ruins board in second or first on Tour mode. | ||
|- | |- | ||
| | |Dragonlord | ||
| | |Beat the Alefgard board in second or first on Tour mode. | ||
|- | |- | ||
| | |Patty | ||
| | |Beat the Alltrades Abbey board in first on Tour mode. | ||
|} | |} | ||
===Other=== | ===Other=== | ||
<gallery> | |||
FortuneStMiis.png|[[Mii]] {{color|black|<sup><small>(new)</small></sup>}} | |||
</gallery> | |||
===Non- | ===Non-playable=== | ||
====''Super Mario'' franchise==== | |||
*[[Buzzy Beetle|8-bit Buzzy Beetle]] | |||
*[[ | |||
*[[Goomba|8-bit Goomba]] | *[[Goomba|8-bit Goomba]] | ||
*[[Koopa|8-bit Koopa]] | *[[Koopa Troopa|8-bit Koopa]] | ||
*[[ | *[[Piranha Plant|8-bit Piranha Plant]] | ||
*[[ | *[[Bob-omb]] | ||
*[[Boo]] | *[[Boo]] | ||
*[[Bullet Bill]] | *[[Bullet Bill]] | ||
*[[Chain Chomp]] | *[[Chain Chomp]] | ||
*[[Dry Bones]] | *[[Dry Bones]] | ||
*[[Lakitu]] | |||
*[[Luma]] | |||
*[[Noki]] | |||
*[[Pianta]] | |||
*[[Shy Guy]] | |||
*[[Thwomp]] | *[[Thwomp]] | ||
*[[Toad (species)|Toads]] | |||
*[[Yoshi (species)|Yoshis]] | |||
====''Dragon Quest'' series==== | |||
*[[Goodybag]] | |||
*[[Healslime]] | |||
*{{iw|dragonquest|Magmalice}} | |||
*{{iw|dragonquest|Malroth}} | |||
*{{iw|dragonquest|Metal slime}} | |||
*{{iw|dragonquest|Mottle slime}} | |||
*[[dragonquest:She-Slime|She-slime]] | |||
*{{iw|dragonquest|Rockbomb}} | |||
==Boards== | ==Boards== | ||
===''Super Mario'' Tour=== | ===''Super Mario'' Tour=== | ||
{|class=wikitable | |||
!Screenshot!!Board!!Official description | |||
|- | |||
|[[File:FS Mario Stadium Overview.png|200px]] | |||
|[[Mario Stadium (board)|Mario Stadium]] | |||
|''Fierce competition is a daily event at this seaside sports ground.'' | |||
|- | |||
|[[File:FS Starship Mario Overview.png|200px]] | |||
|[[Starship Mario (board)|Starship Mario]] | |||
|''A spaceship in the shape of Mario. He likes to zoom around the galaxy in it.'' | |||
|- | |||
|[[File:ISWii07.png|200px]] | |||
|[[Mario Circuit (board)|Mario Circuit]] | |||
|''A race track built within the Mushroom Kingdom. There's a never-ending drone of white-hot engines whizzing around the track.'' | |||
|- | |||
|[[File:ISWii17.png|200px]] | |||
|[[Yoshi's Island (board)|Yoshi's Island]] | |||
|''An island inhabited by members of the Yoshi race, a kaleidoscope assortment of friendly creatures. As a young snip, Mario had wild adventures here with his Yoshi friends.'' | |||
|- | |||
|[[File:FS Delfino Plaza Overview.png|200px]] | |||
|[[Delfino Plaza (board)|Delfino Plaza]] | |||
|''The largest metropolis on the southern resort of Isle Delfino. Once it was graffitied all over by the incorrigible Bowser Jr.'' | |||
|- | |||
|[[File:FS Peach Castle Overview.png|200px]] | |||
|[[Peach's Castle (board)|Peach's Castle]] | |||
|''The home of Princess Peach. Bowser's troops make frequent assaults on the place, but the Toad guards keep them at bay.'' | |||
|} | |||
===''Dragon Quest'' Tour=== | ===''Dragon Quest'' Tour=== | ||
{|class=wikitable | |||
!Screenshot!!Board!!Official description | |||
|- | |||
|[[File:CastleTrodain Fortune Street.png|200px]] | |||
|[[Castle Trodain]] | |||
|''The tranquil domain of [[dragonquest:Trode|King Trode]]. ...Though the once pitiful sight of it cocooned in cursed vines is impressed on all our memories.'' | |||
|- | |||
|[[File:The Observatory.png|200px]] | |||
|[[The Observatory]] | |||
|''Lofty home of the {{iw|dragonquest|Celestrian}}s, orbited by its unusual passenger service, the {{iw|dragonquest|Starflight Express}}.'' | |||
|- | |||
|[[File:Ita07.jpg|200px]] | |||
|[[Ghost Ship]] | |||
|''An eerie vessel that, after sinking in a wild tempest, meandered over boundless oceans with its crew of phantom seafarers.'' | |||
|- | |||
|[[File:Slimenia FS.png|200px]] | |||
|[[Slimenia]] | |||
|''A teardrop-shaped island that could only bring tears of joy, as its slimy inhabitants live in a fun-filled, gooey paradise!'' | |||
|- | |||
|[[File:Mt Magmageddon.png|200px]] | |||
|[[Mt. Magmageddon]] | |||
|''A volcano perforated with caves that hide the crucial {{iw|dragonquest|Circle of Fire}}. Press the switches to trigger eruptions and change the shape of the map.'' | |||
|- | |||
|[[File:RobbinHoodRuins FortuneStreet.png|200px]] | |||
|[[Robbin' Hood Ruins]] | |||
|''The place where the Great Thief, [[dragonquest:Robbin' 'Ood|Robbin' Hood]], stashed his bountiful loot. The mysterious doors dotted around within are the bane of the treasure-hunting explorer.'' | |||
|} | |||
===Special Tour | ===Special Tour (unlockable boards)=== | ||
{|class="wikitable"width=100% | |||
|- | |||
{| | |||
!Board | !Board | ||
! | !style="width:40%"|Description | ||
!style="width:40%"|Unlocking criteria | |||
|- | |||
|align=center|[[File:Alefgard FortuneStreet.png|200px]] | |||
|rowspan=2|''Homeland of the legendary hero, [[Hero|Erdrick]]. At its core, an island hosting the towering citadel of the [[Dragonlord]].'' | |||
|rowspan=2|Beat both the ''Super Mario'' and ''Dragon Quest'' Tours. | |||
|- | |||
!align=center|[[Alefgard]] | |||
|- | |||
|align=center|[[File:SuperMarioBros FortuneStreet.png|200px]] | |||
|rowspan=2|''The original and well-loved setting of the Super Mario Brothers. Home to some familiar lurking foes like Koopa Troopas and Goombas.'' | |||
|rowspan=2|Beat the Alefgard board in 2nd place or higher in Tour mode. | |||
|- | |||
!align=center|[[Super Mario Bros. (board)|Super Mario Bros.]] | |||
|- | |||
|align=center|[[File:ISWii18.png|200px]] | |||
|rowspan=2|''The home of Bowser. It's a minefield of tricks and traps where a single foot wrong could send you plummeting into a sea of molten lava.'' | |||
|rowspan=2|Beat the Super Mario Bros. board in 2nd or higher in Tour mode. | |||
|- | |||
!align=center|[[Bowser's Castle (board)|Bowser's Castle]] | |||
|- | |||
|align=center|[[File:Good Egg Galaxy board.jpg|200px]] | |||
|rowspan=2|''A capsule-shaped planet in the [[Good Egg Galaxy]]. You have to be very careful not to get lost there.'' | |||
|rowspan=2|Beat the Bowser's Castle board in 1st place in Tour mode. | |||
|- | |- | ||
| | !align=center|[[Good Egg Galaxy (board)|Good Egg Galaxy]] | ||
| | |||
|- | |- | ||
| | |align=center|[[File:Colossus.png|200px]] | ||
| | |rowspan=2|''A statue as tall as the heavens, whose cavernous innards are riddled with monsters. Press the switches to flip portions of the map.'' | ||
|rowspan=2|Beat the Good Egg Galaxy board in 1st place in Tour mode. | |||
|- | |- | ||
!align=center|[[Colossus]] | |||
| | |||
|- | |- | ||
| | |align=center|[[File:AlltradesAbbey FortuneStreet.png|200px]] | ||
| | |rowspan=2|''The bastion of vocationalism, visited by all who seek a new path in life.'' | ||
|rowspan=2|Beat the Colossus board in 1st place in Tour mode. | |||
|- | |- | ||
!align=center|[[Alltrades Abbey]] | |||
|} | |||
| | ==Minigames== | ||
| | {|class=wikitable | ||
!Screenshot!!Title!!Summary | |||
|- | |||
|[[File:FS Round the Blocks Mario.png|200px]] | |||
|[[Round the Blocks]] | |||
|This is essentially a game of slots. The player can get three 7s in a row and get 500 gold coins (the game's money currency, shortened as gold or simply G) times their level, get three warp pipes or wings (depending on the series which the board being played on is from) in a row to warp, three stock icons to get a set amount of stocks in one district (exclusive only to standard mode), three Suit Yourself cards (these are like wild cards; they can act as any suit the player does not have, and owning one Suit Yourself card means the player could only collect three suits and still get promoted) in a row to get one of the aforementioned cards, or get 3 mushrooms or Slimes (the aforementioned series rule) to get 50G times the player's level. | |||
|- | |||
|[[File:Memory Block.png|200px]] | |||
|[[Memory Block]] | |||
|The player chooses from a number of boxes to get either a 1-Up mushroom which makes all of their shops increase by 10%, a card with a coin which gives the player 10G multiplied by their level, a Suit Yourself card, 5 stocks in a district, or a card with Bowser's face on it which makes all of their shops decrease by 5%. Sometimes, all of the blocks are the same size, so there is a chance that the player may get a Bowser card easily. Commonly, it happens to first place the most. | |||
|- | |||
|[[File:Dart of Gold.png|200px]] | |||
|[[Dart of Gold]] | |||
|The player throws a dart at a wheel that has different items that can help or hurt players. Once the player throws the dart and hits an item (a treasure chest containing 100G times a player's level, a gold coin worth 10G times a player's level, three gold coins worth 30G times a player's level, stocks, a 1-Up Mushroom that increases the player's shop values by 5%, though items like a Bowser icon that decreases the player's shop values by 5% or a Suit Yourself card appears), the player then throws another dart at a different wheel that has all four players’ faces on it individually (with the person playing the game being the biggest) as well as a space that has everyone's faces on it. If the dart hits one player's space then that player gets the prize or punishment, but if the dart hits the space with all the faces, all four players get the prize or punishment. | |||
|- | |- | ||
| | |[[File:Slurpodrome.png|200px]] | ||
| | |[[Slurpodrome]] | ||
|Players choose from five different colored Slimes, and then a race to see which one makes it to the end first starts. Along the way, treasure chests open and reveal one of many things: a gold coin worth 20G, a Mimic which knocks the Slime out of the race, a Munchie which does nothing to affect the race, or a seed of agility which increases the Slime's speed. Sometimes, Rockbombs roll onto the track and knock a Slime out of the race. When a Slime gets to the end first, the player backing it wins the most money (100G times their level plus any coins they collect during the race). However, since players can collect coins along the way, all players get some money (depending on the number of chests hit) if they can collect at least one coin. Rewards are doubled for easy rules. This is also the only minigame which all four players immediately participate in upon it being selected. | |||
|} | |} | ||
== | ==Venture cards== | ||
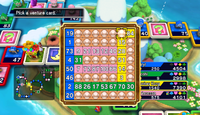
[[File:ISWii14.png|thumb|Venture cards]] | |||
When a player lands on a Venture square or a Suit square, they must select a venture card at random. Venture cards produce a variety of effects, either benefiting or inhibiting one or more players. They are analogous to Chance Cards in ''Itadaki Street DS'', with many venture cards and their effects having been directly copied from the predecessor. | |||
There are 128 cards in total, though 23 of them (ones involving districts or stocks) are exclusive to Standard rules. As such, only 105 cards are in the drawing during Easy rules. During gameplay, players select venture cards from a set of 64 panels, marking each chosen panel with their respective color. By lining up four panels of the same color horizontally, vertically, or diagonally, players will begin earning 10 gold per square as they add to the line (five panels earns 50 additional gold, etc.). If a player lines up eight panels, they get 200 gold. If all panels have been flipped, the venture card board resets. On ''Super Mario'' boards, the unflipped panels depict a [[Super Mushroom]] while the panels on ''Dragon Quest'' boards depict a Slime. | |||
== | The following is a list of venture cards and their effects (descriptions in '''bold''' are exclusive to Standard Rules while descriptions in ''italics'' indicate effects from which the player can opt out): | ||
{{ | {{br}} | ||
{|style="text-align:center"class=wikitable | |||
!#!!Image!!Description!!Notes | |||
|- | |||
|1||[[File:FS Venture Card Move.png|50px]]||Adventurous turning point! You can choose which way to move on your next go, (player's name).||When viewed in the Collection from the Main Menu, the game always assumes it is the player's turn. | |||
|- | |||
|2||[[File:FS Venture Card Roll.png|50px]]||Venture on! Roll the die again and move forward.||- | |||
|- | |||
|3||[[File:FS Venture Card Zoom.png|50px]]||Venture through space! Zoom over to any non-venture, non-suit square you like!||If chosen square is not player's own, said player will have to pay the fee. | |||
|- | |||
|4||[[File:FS Venture Card Die x Gold.png|50px]]||Moneymaking venture! Roll the die and get 40 times the number shown in gold coins from the player in first place!||Will affect all other players tied for first place. | |||
|- | |||
|5||[[File:FS Venture Card Zoom Shop Plot.png|50px]]||Venture through space! Zoom over to any shop or vacant plot!||- | |||
|- | |||
|6||[[File:FS Venture Card Zoom Venture.png|50px]]||Venture through space! Zoom over to any venture or suit square!||- | |||
|- | |||
|7||[[File:FS Venture Card Expansion 7%.png|50px]]||Special bonus! Your shops all grow by 7%!||- | |||
|- | |||
|8||[[File:FS Venture Card Roll Shop 30%.png|50px]]||Venture on! Everyone's shop prices increase by 30%! Now roll the die and move again.||- | |||
|- | |||
|9||[[File:FS Venture Card Roll Break.png|50px]]||Venture on! Everyone's shops close for the day! Now roll the die and move again.||- | |||
|- | |||
|10||[[File:FS Venture Card Roll Shop -50%.png|50px]]||Venture on! Everyone's shop prices cut in half! Now roll the die and move again.||- | |||
|- | |||
|11||[[File:FS Venture Card Take 11G.png|50px]]||Moneymaking venture! Roll the die and get 11 times the number shown in gold coins from all other players!||If there is only one other player left, the text displayed after rolling will contain a grammar error (it will say 1 "people" instead of 1 "person"). | |||
|- | |||
|12||[[File:FS Venture Card Invest.png|50px]]||''Capital venture! You can invest capital in any of your shops.''||- | |||
|- | |||
|13||[[File:FS Venture Card 13.png|50px]]||Misadventure! The values of all your shops drop by 13%!||The Curse music from ''[[dragonquest:Dragon Quest VIII: Journey of the Cursed King|Dragon Quest VIII]]'' plays when this card is revealed. | |||
|- | |||
|14||[[File:FS Venture Card Lose 30G.png|50px]]||Misadventure! You give everyone 30G each!||- | |||
|- | |||
|15||[[File:FS Venture Card Die Gold.png|50px]]||Moneymaking venture! Roll the die and get 50 times the number shown in gold coins from the bank!||- | |||
|- | |||
|16||[[File:FS Venture Card Expansion Random.png|50px]]||'''Random venture! Shops expand in three districts picked at random!'''||Shop values increase by 10%. | |||
|- | |||
|17||[[File:FS Venture Card Receive Gold.png|50px]]||Special bonus! You receive half of your salary!||- | |||
|- | |||
|18||[[File:FS Venture Card Bank Buying.png|50px]]||Misadventure! The bank is forcibly buying you out! You're compelled to sell a shop for only twice its value.||- | |||
|- | |||
|19||[[File:FS Venture Card Price Up 30%.png|50px]]||Price hike venture! Your shop prices go up by 30% until your next turn.||- | |||
|- | |||
|20||[[File:FS Venture Card Expansion 20%.png|50px]]||Revaluation venture! You can expand any one of your shops by 20%.||- | |||
|- | |||
|21||[[File:FS Venture Card 20 Stocks.png|50px]]||'''Random venture! You receive 20 stocks in a district picked at random!'''||- | |||
|- | |||
|22||[[File:FS Venture Card Sell x2.png|50px]]||''Cashback venture! You can sell a shop back to the bank for twice its shop value.''||- | |||
|- | |||
|23||[[File:FS Venture Card Expansion 50%.png|50px]]||Revaluation venture! You can expand any one of your shops by 50%.||- | |||
|- | |||
|24||[[File:FS Venture Card Bank Buying.png|50px]]||Misadventure! The bank is forcibly buying you out! You're compelled to sell a shop for only 200G more than its value.||- | |||
|- | |||
|25||[[File:FS Venture Card Halfed Price.png|50px]]||Misadventure! Your shop prices halve until your next turn!||- | |||
|- | |||
|26||[[File:FS Venture Card Commission.png|50px]]||Lucky venture! You get a big commission until your next turn!||The commission is 50% | |||
|- | |||
|27||[[File:FS Venture Card Shop x27.png|50px]]||Special bonus! You receive 27 times the number of shops you own in gold coins from the bank!||- | |||
|- | |||
|28||[[File:FS Venture Card Goodybag.png|50px]]||Cameo adventure! A [[goodybag]] appears!||Gumdrops pays the shop price to the owner if he stops on one. | |||
|- | |||
|29||[[File:FS Venture Card Get Heart.png|50px]]||Freebie! Take a [[File:FS Heart Suit.png]]!||If the player already has a [[File:FS Heart Suit.png]], they get 100G instead. | |||
|- | |||
|30||[[File:FS Venture Card Roll 100G.png|50px]]||Venture on! All shops charge a 100G flat rate! Now roll the die and move again.||This card's effect is a reference to Japan's [[wikipedia:100-yen shop|100-yen shops]]. | |||
|- | |||
|31||[[File:FS Venture Card Expansion 10% Random.png|50px]]||'''Random venture! Shops expand by 10% in a district picked at random!'''||- | |||
|- | |||
|32||[[File:FS Venture Card Expansion 20% Random.png|50px]]||'''Random venture! Shops expand by 20% in a district picked at random!'''||- | |||
|- | |||
|33||[[File:FS Venture Card Sell x3.png|50px]]||''Cashback venture! You can sell a shop back to the bank for three times its shop value.''||- | |||
|- | |||
|34||[[File:FS Venture Card Die Fate.png|50px]]||Dicey adventure! Roll 1/3/5 and your shops close for the day. Roll 2/4/6 and everyone else's shops close.||Despite saying that the other players' next shops will close until the card drawer's next turn when an even number is rolled, it actually only lasts until the shop owner's next turn, making this effect useless for the very next player. | |||
|- | |||
|35||[[File:FS Venture Card Sell Stock 35%.png|50px]]||'''''Stock venture! You can sell stocks you own at 35% above the market value.'''''||The player cannot take this offer if they do not own any stocks. | |||
|- | |||
|36||[[File:FS Venture Card Invest 100G.png|50px]]||''Capital venture! You can pay 100G for the chance to invest in your shops.''||The player cannot take this offer if they have less than 100G in ready cash. | |||
|- | |||
|37||[[File:FS Venture Card Expansion 30% Random.png|50px]]||'''Random venture! Shops expand by 30% in a district picked at random!'''||- | |||
|- | |||
|38||[[File:FS Venture Card Stock Buy 10%.png|50px]]||'''''Stock venture! You can buy stocks in a district of your choice at 10% above the market value.'''''||The player cannot take this offer if they do not have enough cash to buy any stocks. | |||
|- | |||
|39||[[File:FS Venture Card Suit Yourself 100G.png|50px]]||''Suit venture! Buy a Suit Yourself card for 100G.''||The player cannot take this offer if they already have 9 Suit Yourself cards or their ready cash is less than 100G. | |||
|- | |||
|40||[[File:FS Venture Card Gold -10%.png|50px]]||Misadventure! You give away 10% of your ready cash to the player in last place!||- | |||
|- | |||
|41||[[File:FS Venture Card Stock Price Fall 10%.png|50px]]||'''Misadventure! Stock prices fall by 10% in a district picked at random!'''||- | |||
|- | |||
|42||[[File:FS Venture Card Price Fall 20%.png|50px]]||'''Misadventure! Stock prices fall by 20% in a district picked at random!'''||- | |||
|- | |||
|43||[[File:FS Venture Card Lose per Stock.png|50px]]||'''Misadventure! You pay an assets tax of two gold coins per unit of stock that you own!'''||- | |||
|- | |||
|44||[[File:FS Venture Card Lose Die x 44.png|50px]]||Misadventure! Roll the die and pay 44 times the number in gold coins to the player in last place!||- | |||
|- | |||
|45||[[File:FS Venture Card Die Fate.png|50px]]||Dicey adventure! Roll 1/3/5 to warp to a take-a-break square. Roll 2/4/6 to warp to the arcade.||- | |||
|- | |||
|46||[[File:FS Venture Card Lose 10% Gold.png|50px]]||Misadventure! You drop your wallet and lose 10% of your ready cash!||- | |||
|- | |||
|47||[[File:FS Venture Card Die Fate.png|50px]]||Dicey adventure! Roll 2-6 to get all the suits. Roll 1 and lose all your suits.||If the player already has all the suits when a 2-6 is rolled, they receive 100G instead. | |||
|- | |||
|48||[[File:FS Venture Card Stock Price Fall 10%.png|50px]]||'''Misadventure! All shops in a district picked at random fall in value by 10%!'''||- | |||
|- | |||
|49||[[File:FS Venture Card Price Fall 20%.png|50px]]||'''Misadventure! All shops in a district picked at random fall in value by 20%!'''||- | |||
|- | |||
|50||[[File:FS Venture Card Move Die Amount.png|50px]]||Venture on! Move forward the same number of squares again.||- | |||
|- | |||
|51||[[File:FS Venture Card Move 1.png|50px]]||Venture on! Move forward 1 square more.||- | |||
|- | |||
|52||[[File:FS Venture Card Move 2.png|50px]]||Venture on! Move forward another 2 squares.||- | |||
|- | |||
|53||[[File:FS Venture Card Zoom Bank.png|50px]]||Venture through space! Zoom over to the bank!||- | |||
|- | |||
|54||[[File:FS Venture Card Zoom Bank 100G.png|50px]]||''Venture through space! Pay 100G to zoom straight to the bank!''||The player cannot take this offer if their ready cash is less than 100G. | |||
|- | |||
|55||[[File:FS Venture Card Roll Gold Bonus.png|50px]]||Venture on! Roll the die again and move forward (with an invitation to browse thrown in!).||The player does not pay any gold if they land on an owned shop. | |||
|- | |||
|56||[[File:FS Venture Card Roll Bonus.png|50px]]||Venture on! Roll the die again and move forward (with a half-price special offer thrown in!).||The player only pays half the gold of an owned shop if they land on one. | |||
|- | |||
|57||[[File:FS Venture Card Zoom All.png|50px]]||Venture through space! Zoom to any square you like.||- | |||
|- | |||
|58||[[File:FS Venture Card Zoom 100G.png|50px]]||''Venture through space! Pay 100G to zoom to any non-venture, non-suit square you like!''||The player cannot take this offer if their ready cash is less than 100G. | |||
|- | |||
|59||[[File:FS Venture Card Buy Stock -10%.png|50px]]||'''''Stock venture! You can buy stocks in a district of your choice at 10% below the market value.'''''||The player cannot take this offer if they do not have enough cash to buy any stocks. | |||
|- | |||
|60||[[File:FS Venture Card Stock Up 10%.png|50px]]||'''Random venture! Stock prices increase by 10% in a district picked at random!'''||- | |||
|- | |||
|61||[[File:FS Venture Card Dividend 10%.png|50px]]||'''Special bonus! You receive a 10% dividend on your stocks!'''||- | |||
|- | |||
|62||[[File:FS Venture Card Stock Dividend 20%.png|50px]]||'''Special bonus! You receive a 20% dividend on your stocks!'''||- | |||
|- | |||
|63||[[File:FS Venture Card Stock Up 20%.png|50px]]||'''Random venture! Stock prices increase by 20% in a district picked at random!'''||- | |||
|- | |||
|64||[[File:FS Venture Card Stock Up 30%.png|50px]]||'''Random venture! Stock prices increase by 30% in a district picked at random!'''||- | |||
|- | |||
|65||[[File:FS Venture Card Buyout x5.png|50px]]||''Forced buyout venture! You can buy a vacant plot or shop for five times its value, whether someone else owns it or not.''||- | |||
|- | |||
|66||[[File:FS Venture Stock Bonus.png|50px]]||'''Special bonus! You receive 10 of the most valuable stocks!'''||- | |||
|- | |||
|67||[[File:FS Venture Card Stock.png|50px]]||'''''Stock venture! You can buy stocks in a district of your choice.'''''||The player cannot take this offer if they do not have enough cash to buy any stocks. | |||
|- | |||
|68||[[File:FS Venture Arcade.png|50px]]||Special arcade adventure! You're invited to play [[Memory Block]]!||- | |||
|- | |||
|69||[[File:FS Venture Card Sell Stock 20%.png|50px]]||'''''Stock venture! You can sell stocks you own at 20% above the market value.'''''||The player cannot take this offer if they do not own any stocks. | |||
|- | |||
|70||[[File:FS Venture Promotion.png|50px]]||Special bonus! You get a sudden promotion and receive a salary! (You lose any suits you have.)||- | |||
|- | |||
|71||[[File:FS Venture Card Use 200G.png|50px]]||''Capital venture! You can invest up to 200G of the bank's money in your shops.''||- | |||
|- | |||
|72||[[File:FS Venture Card Die Fate.png|50px]]||Dicey adventure! Roll 1/3/5 to take 20 times the number of shops you own in gold coins. Roll 2/4/6 and pay the same.||- | |||
|- | |||
|73||[[File:FS Venture Card Shop.png|50px]]||''Property venture! You can buy any unowned shop or vacant plot.''||The player cannot take this offer if there are no unowned shops or vacant plots. | |||
|- | |||
|74||[[File:FS Venture Auction.png|50px]]||Misadventure! You are forced to auction one of your shops (with a starting price of twice the shop's value).||- | |||
|- | |||
|75||[[File:FS Venture Card Shop x2.png|50px]]||''Property venture! You can buy any unowned shop or vacant plot for twice its value.''||The player cannot take this offer if there are no unowned shops or vacant plots. | |||
|- | |||
|76||[[File:FS Venture Arcade.png|50px]]||Special arcade adventure! You're invited to play [[Round the Blocks]]!||- | |||
|- | |||
|77||[[File:FS Venture Stock Bonus +5.png|50px]]||'''Freebie! Take five of each district's stocks.'''||- | |||
|- | |||
|78||[[File:FS Venture Card Shop 200G.png|50px]]||''Property venture! You can buy any unowned shop or vacant plot for 200G more than its value.''||The player cannot take this offer if there are no unowned shops or vacant plots, or if they have less than 200G total in stocks and cash. | |||
|- | |||
|79||[[File:FS Venture Card Buyout x3.png|50px]]||''Forced buyout venture! You can buy a vacant plot or shop for three times its value, whether someone else owns it or not.''||- | |||
|- | |||
|80||[[File:FS Venture Card Get Spade.png|50px]]||Freebie! Take a [[File:FS Spade Suit.png]]!||If the player already has a [[File:FS Spade Suit.png]], they get 100G instead. | |||
|- | |||
|81||[[File:FS Venture Card Roll 1 All.png|50px]]||Misadventure! All other players can only move forward 1 on their next turn.||- | |||
|- | |||
|82||[[File:FS Venture Card Get Club.png|50px]]||Freebie! Take a [[File:FS Club Suit.png]]!||If the player already has a [[File:FS Club Suit.png]], they get 100G instead. | |||
|- | |||
|83||[[File:FS Venture Card Die Fate.png|50px]]||Dicey adventure! Roll 1/3/5 and warp to a random location. Roll 2/4/6 and everyone else warps.||- | |||
|- | |||
|84||[[File:FS Venture Card Take 10%.png|50px]]||Moneymaking venture! The winning player must pay you 10% of their ready cash!||- | |||
|- | |||
|85||[[File:FS Venture Card Gain Die x 85.png|50px]]||Moneymaking venture! Roll the die and get 85 times the number shown in gold coins from the bank!||- | |||
|- | |||
|86||[[File:FS Venture Card Take 100G.png|50px]]||Moneymaking venture! Take 100G from all other players!||- | |||
|- | |||
|87||[[File:FS Venture Card Roll 7 8.png|50px]]||Venture on! Roll the special all-7s-and-8s die and move forward again.||- | |||
|- | |||
|88||[[File:FS Venture Position Swap.png|50px]]||Misadventure! All other players swap places!||Does not take effect if there are only 2 active players. | |||
|- | |||
|89||[[File:FS Venture Card Suit Yourself All.png|50px]]||Freebie! All players take a Suit Yourself card!||- | |||
|- | |||
|90||[[File:FS Venture Card Price Up 30% All.png|50px]]||Price hike venture! All shop prices go up by 30% until your next turn.||Despite saying that all shop prices go up by 30% until the card drawer's next turn, it actually only lasts until the shop owner's next turn, making this effect useless for the very next player. | |||
|- | |||
|91||[[File:FS Venture Card Healslime.png|50px]]||Cameo adventure! A [[healslime]] appears!||Players who pass Healie can get a Suit of their choice. If a player has all four suits and passes Healie, he gives them a Suit Yourself card. | |||
|- | |||
|92||[[File:FS Venture Card Lakitu.png|50px]]||Cameo adventure! [[Lakitu]] appears!||Each shop he passes through closes for one turn. | |||
|- | |||
|93||[[File:FS Venture Card Die Fate.png|50px]]||Dicey adventure! Roll 1/3/5 and your shops expand by 10%. Roll 2/4/6 and everyone else's shops expand by 5%.||- | |||
|- | |||
|94||[[File:FS Venture Card Get Diamond.png|50px]]||Freebie! Take a [[File:FS Diamond Suit.png]]!||If the player already has a [[File:FS Diamond Suit.png]], they get 100G instead. | |||
|- | |||
|95||[[File:FS Venture Card Together.png|50px]]||Misadventure! You throw an impromptu party. All other players come to your location!||- | |||
|- | |||
|96||[[File:FS Venture Card Together.png|50px]]||Misadventure! All players scramble to another player's location!||- | |||
|- | |||
|97||[[File:FS Venture Card Stock Dividend 20% Choice.png|50px]]||'''Stock rise venture! Increase stock value by 20% in a district of your choice.'''||- | |||
|- | |||
|98||[[File:FS Venture Card Buyout x4.png|50px]]||''Forced buyout venture! You can buy a vacant plot or shop for four times its value, whether someone else owns it or not.''||- | |||
|- | |||
|99||[[File:FS Venture Card Freebie.png|50px]]||Freebie! What's inside...?||The player collects a Suit Yourself card should they already have all the suits, otherwise they pick up all four suits. If in a very rare case the player already has all 4 suits and has 9 Suit Yourself cards, the player instead earns 100G. | |||
|- | |||
|100||[[File:FS Venture Card Suit Yourself.png|50px]]||Freebie! Take a Suit Yourself card!||If the player already has 9 Suit Yourself cards, they get 100G instead. | |||
|- | |||
|101||[[File:FS Venture Card Expansion 21%.png|50px]]||Special bonus! Your shops all grow by 21%!||- | |||
|- | |||
|102||[[File:FS Venture Card Gain Die x33.png|50px]]||Moneymaking venture! Roll the die and get 33 times the number shown in gold coins from all other players!||If there is only one other player left, the text displayed after rolling will contain a grammar error (it will say 1 "people" instead of 1 "person"). | |||
|- | |||
|103||[[File:FS Venture Card Value Fall 25%.png|50px]]||Misadventure! The values of all your shops drop by 25%!||- | |||
|- | |||
|104||[[File:FS Venture Card Lose 80G.png|50px]]||Misadventure! You give everyone 80G each!||- | |||
|- | |||
|105||[[File:FS Venture Card Gold Bonus x40G.png|50px]]||Moneymaking venture! Roll the die and get the number shown x your level x 40G from the bank!||- | |||
|- | |||
|106||[[File:FS Venture Card Die Suit Yourself.png|50px]]||Freebie! Roll the die and get half the number shown of Suit Yourself cards! (Decimals will be rounded down.)||- | |||
|- | |||
|107||[[File:FS Venture Card Expansion 30%.png|50px]]||Revaluation venture! You can expand any one of your shops by 30%.||- | |||
|- | |||
|108||[[File:FS Venture Card Sell x4.png|50px]]||''Cashback venture! You can sell a shop back to the bank for four times its shop value.''||- | |||
|- | |||
|109||[[File:FS Venture Card Expansion 75%.png|50px]]||Revaluation venture! You can expand any one of your shops by 75%.||- | |||
|- | |||
|110||[[File:FS Venture Card Shop x77.png|50px]]||Special bonus! You receive 77 times the number of shops you own in gold coins from the bank!||- | |||
|- | |||
|111||[[File:FS Venture Card Sell +500G.png|50px]]||''Cashback venture! You can sell a shop back to the bank for 500G more than its shop value.''||- | |||
|- | |||
|112||[[File:FS Venture Card Shop x100.png|50px]]||Special bonus! You receive 100 times the number of shops you own in gold coins!||- | |||
|- | |||
|113||[[File:FS Venture Card Gold Bonus x20G.png|50px]]||Moneymaking venture! Roll the die and get the number shown x your level x 20G from the bank!||- | |||
|- | |||
|114||[[File:FS Venture Card Lv x40.png|50px]]||Moneymaking venture! Take your level times 40G from all other players!||- | |||
|- | |||
|115||[[File:FS Venture Card Roll 7 All.png|50px]]||Misadventure! All other players can only move forward 7 on their next turn.||- | |||
|- | |||
|116||[[File:FS Venture Card Gain Die x60.png|50px]]||Moneymaking venture! Roll the die and get 60 times the number shown in gold coins from the player in first place!||Will affect all other players tied for first place. | |||
|- | |||
|117||[[File:FS Venture Card Move All.png|50px]]||Adventurous turning point! Everyone gets to choose which way to move on their next go.||- | |||
|- | |||
|118||[[File:FS Venture Card Commission.png|50px]]||Lucky venture! You get a really big commission until your next turn! | |||
||The commission is 75% | |||
|- | |||
|119||[[File:FS Venture Card Gold -20%.png|50px]]||Misadventure! You give 20% of your ready cash to the player in last place!||- | |||
|- | |||
|120||[[File:FS Venture Card Lose 20% Gold.png|50px]]||Misadventure! You drop your wallet and lose 20% of your ready cash!||- | |||
|- | |||
|121||[[File:FS Venture Card Use 400G.png|50px]]||''Capital venture! You can invest up to 400G of the bank's money in your shops.''||- | |||
|- | |||
|122||[[File:FS Venture Card Take 20%.png|50px]]||Moneymaking venture! The winning player must pay you 20% of their ready cash!||- | |||
|- | |||
|123||[[File:FS Venture Card Die Fate.png|50px]]||Dicey adventure! Roll 1/3/5 and your shops expand by 20%. Roll 2/4/6 and everyone else's shops expand by 5%.||- | |||
|- | |||
|124||[[File:FS Venture Card Suit Yourself 50G.png|50px]]||''Suit venture! Buy a Suit Yourself card for 50G.''||The player cannot take this offer if they already have 9 Suit Yourself cards or if their ready cash is less than 50G. | |||
|- | |||
|125||[[File:FS Venture Card Die Fate.png|50px]]||Dicey adventure! Roll 1/3/5 to warp to a boon square. Roll 2/4/6 to warp to the arcade.||- | |||
|- | |||
|126||[[File:FS Venture Card Expansion Die x2%.png|50px]]||Revaluation venture! Roll the die and expand your shops by 2% for each number.||- | |||
|- | |||
|127||[[File:FS Venture Arcade.png|50px]]||Special arcade adventure! You're invited to play Round the Blocks and Memory Block!||- | |||
|- | |||
|128||[[File:FS Venture Card Shop x55.png|50px]]||Special bonus! You receive 55 times the number of shops you own in gold coins from the bank!||- | |||
|} | |||
===Notes=== | |||
*Venture cards #101 and up are far rarer than the others to balance out their more powerful effects. | |||
*When players are eliminated, certain venture Cards have different effects with fewer players. | |||
*The limit on the number of Suit Yourself cards that a player can hold is 9. | |||
*Some venture cards will break ties for first or last place, depending on the turn order at the start of the game. The player who went the earliest of those affected is considered to be placing lowest in a tie; the player who went the latest is considered to be placing highest. This means that whoever is first in the turn order will always be favored in these situations. | |||
==Results screen== | |||
When a game is finished, the player in first place does a winning animation and the player in 4th place does a losing animation (note: if there is a tie, then the tiebreaker is decided by whoever is later in the turn order). After that, trophies and prizes are handed out (only in Single Player mode, except Tutorial), then a details screen shows up, divided into three different screens (on all screens except in Sales and Payments the Target amount appears): | |||
===Graph=== | |||
[[File:FS End Graph.png|thumb|The graph]] | |||
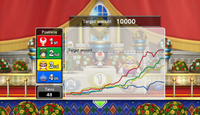
The first screen shows the players' positions and how many turns the game lasted. To the right is the graph, each player is identified with a colored line. Also, the red dotted line indicates the starting value and the black dotted line indicates the target net worth. | |||
{{br}} | |||
===Sales and Payments=== | |||
[[File:FS End Stats 1.png|thumb|The sales and payments]] | |||
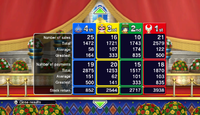
The second screen shows the number of times the player made sales including gold values: | |||
*'''Number of sales:''' Number of times rivals landed on the player's property and had to pay. | |||
**'''Total:''' The total gold the player gained from sales. | |||
**'''Average:''' Average amount of gold determined by the total divided by the number of sales. The average is reported as an integer, truncating the decimal part. | |||
**'''Greatest:''' The most amount of gold the player gained from one sale. | |||
It also shows the amount of payments including gold values: | |||
*'''Number of payments:''' Number of times the player landed on rivals' properties and had to pay. | |||
**'''Total:''' The total gold the player lost from payments. | |||
**'''Average:''' Average amount of gold determined by the total divided by the number of payments. | |||
**'''Greatest:''' The most amount of gold the player lost from one payment. | |||
In Standard Rules, there is also '''Stock Return''', which is the amount of gold gained or lost from stock prices rising or dropping. | |||
===Assets and Salary=== | |||
[[File:FS End Stats 2.png|thumb|The assets and salary]] | |||
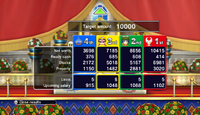
The third screen shows each player's net worth, ready cash, property and stock (only in Standard Rules) as follows: | |||
*'''Net worth:''' This is determined by sum of ready cash, property and stock (only in Standard Rules). If a player is bankrupt, this value is negative, same for Ready cash. | |||
*'''Ready cash:''' The amount of gold the player has in possession. | |||
*'''Property:''' Sum of the shop prices of the property the player owns. | |||
*'''Stocks:''' Only in Standard Rules, the sum of the stock prices on stocks the player invested in. | |||
It also shows the player's level and upcoming salary: | |||
*'''Level:''' Shows the player's level. | |||
*'''Upcoming salary:''' Shows the player's salary for their next promotion. | |||
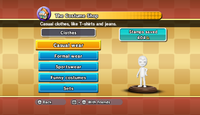
==Costume shop== | |||
[[File:FS Costume Shop.png|thumb|The different types of clothing available in the costume shop]] | |||
By completing boards in Tour mode, the player can earn stamps which can be used to purchase clothing, accessories, mascots, actions, and styles of play for their Mii. While most only change the aesthetics of the Mii, the style of play affects how the Mii acts when the player chooses "out to lunch" in the menu during a game. | |||
{{stub|section=y}} | |||
{{br}} | |||
==Staff== | |||
{{main|List of Fortune Street staff}} | |||
In conjunction with the [[Treehouse]] division, members of Keywords International Ltd. assisted in the English translation of this game, including Nobuhiro Izumisawa and Clare Saracine. [[Takashi Tezuka]] and [[Shigeru Miyamoto]] served as superviors while [[Koji Kondo]] acted as the sound supervisor. | |||
==Reception== | |||
{|class="wikitable reviews" | |||
!colspan="4"style="font-size:120%;text-align:center;background-color:silver"|Reviews | |||
|-style="background-color:#E6E6E6" | |||
|Release | |||
|Reviewer, Publication | |||
|Score | |||
|Comment | |||
|- | |||
|[[Wii]] | |||
|Heidi Kemps, [https://www.gamespot.com/reviews/fortune-street-review/1900-6347175/ GameSpot] | |||
|6/10 | |||
|align="left"|"''Fortune Street is a serviceable board-game-style experience, but it comes with plenty of caveats: a slow pace, some initial complexity that's hard to ease new players into, lengthy single-session play times, and a lack of interaction with your opponents. It's certainly fun to snatch property up and reap rewards from unlucky foes, but it requires a great deal of patience and time commitment. If you and some friends are willing to make the investment, you might find rewards on Fortune Street; otherwise, you're better off sticking to something more immediately fulfilling.'" | |||
|- | |||
|Wii | |||
|Christian Donlan, [https://www.eurogamer.net/articles/2012-01-10-boom-street-review Eurogamer] | |||
|6/10 | |||
|align="left"|''"Even if you work your way through the option menus to select the speediest settings for everything, I'm not entirely sure who the audience for this game is meant to be. Kids drawn in by the licensed characters are going to be disappointed that they're getting a crash course in personal finance and supply and demand curves rather than a trip through the chocolate factory, while those looking for a properly complex board game probably don't want to have to faff about with the Wii in order to enjoy themselves. Boom Street's left, then, to capitalise only on the love and appreciation we all feel towards our global banking overlords. Like I said, it's something of a hard sell.''" | |||
|- | |||
|Wii | |||
|Philip J. Reed, [http://www.nintendolife.com/reviews/2011/12/fortune_street_wii Nintendo Life] | |||
|8/10 | |||
|align="left"|''"Taken on its own merits, Fortune Street offers some tremendous potential for fun. The experience is hampered somewhat by its complexity, but that's nothing that can’t be overcome with a little bit of practice. Your mileage will depend entirely upon the patience of those you play it with, and not all gamers will stick around long enough to learn the nuances of the game's strategy. Those who do, however, will be glad they did.''" | |||
|- | |||
!colspan="4"style="background-color:silver;font-size:120%;text-align:center;"|Aggregators | |||
|-style="background-color:#E6E6E6" | |||
|colspan=2|Compiler | |||
|colspan=2|Platform / Score | |||
|- | |||
|colspan=2|Metacritic | |||
|colspan=2 style="background-color:Gold"|[https://www.metacritic.com/game/wii/fortune-street 68] | |||
|- | |||
|colspan=2|GameRankings | |||
|colspan=2|[https://www.gamerankings.com/wii/632973-fortune-street/index.html 70.07%] | |||
|} | |||
{{br}} | |||
==Quotes== | ==Quotes== | ||
{{main|List of quotes in Fortune Street}} | {{main|List of Fortune Street quotes}} | ||
*"''Ha ha! I guess this is the place where I can change my profession… Thanks, but I'm happy being a hero!''" - [[Mario]] | |||
*"''Ookie. Ookity ooo... (I've gotta keep my next move a secret. You know, corporate spies and all...)''" - [[Diddy Kong]] | |||
*"''I ain't pumpin' mazuma into the Family's stores at every oppurtoonity, ya know. I got my instructions.''" - [[Platypunk]] | |||
*"''Shops, suits, gold coins... This is really confoozing... My brain's turning to jelly!''" - [[Slime (Dragon Quest)|Slime]] | |||
*"''The goddess speaks. Victory cannot be attained in such manner. Please, give to me money!''" - [[Kiryl]] | |||
==Pre-release and unused content== | |||
{{main|List of Fortune Street pre-release and unused content}} | |||
Within the game's files are 30 board layouts that go unused. Among them are recreations of Street 1, Street 2, and Street 3 from ''Itadaki Street 2: Neon Sign wa Bara Iro ni''. However, the prices of the shops and the layout of the districts do not match exactly. On these boards, the maximum dice roll is set to five which is not used for any of the playable boards. | |||
== | ==Gallery== | ||
{{main-gallery}} | |||
<gallery> | |||
File:FortuneStMario.png|[[Mario]] | |||
FortuneStBowser.png|[[Bowser]] | |||
Yoshi FS.png|[[Yoshi]] | |||
Slime FS.png|[[Slime (Dragon Quest)|Slime]] | |||
FortuneStBianca.png|[[Bianca]] | |||
Dragonlord FS.png|[[Dragonlord]] | |||
</gallery> | |||
==Media== | ==Media== | ||
{{media | {{Main-media}} | ||
{{media table | |||
| | |file1=FS Trailer.ogv | ||
| | |title1=Fortune Street | ||
|description1=The game's trailer. | |description1=The game's trailer. | ||
|length1=1:21 | |length1=1:21 | ||
| | |file2=FS Theme.oga | ||
| | |title2=Fortune Street | ||
|description2=The game's main theme, as heard in the E3 2011 trailer. | |description2=The game's main theme, as heard in the E3 2011 trailer. | ||
|length2= | |length2=0:30 | ||
|file3=FS Peach's Castle.oga | |||
|title3=Peach's Castle | |||
|description3=The music for the Peach's Castle board. | |||
|length3=0:30 | |||
|file4=Fortune Street- Bowser's Castle.oga | |||
|title4=Bowser's Castle | |||
|description4=The music for the Bowser's Castle board. | |||
|length4=0:30 | |||
|file5=FS Level Up - Mario Series.oga | |||
|title5=Level Up! (''Super Mario'' franchise) | |||
|description5=The music for leveling up as ''Super Mario'' franchise characters. | |||
|length5=0:04 | |||
|file6=FS Alefgard.oga | |||
|title6=Alefgard | |||
|description6=The music for the Alefgard board. | |||
|length6=0:30 | |||
|file8=FS Forced Buyout.oga | |||
|title8=Forced Buyout | |||
|description8=The music for when a player performs a forced buyout. | |||
|length8=0:06 | |||
}} | }} | ||
==Names in | ==References to other games== | ||
{{ | *''[[Super Mario Bros.]]'': The World 1-1 board is based off the same level from this game. Additionally, the music of this board is an arrangement of the overworld theme of this game. Also, upon completing a ''Super Mario'' board, an arrangement of the "[[World Clear]]" music plays, followed by an arrangement of the "[[Ending (Super Mario Bros.)|Ending]]" theme. | ||
| | *[[dragonquest:Dragon Quest (series)|''Dragon Quest'' (series)]]: Arrangements of the level up, inn, and save jingles are used. When a slime wins the Slurpodrome or a player matches lucky sevens in Round the Blocks on a ''Dragon Quest'' board, an arrangement of the medium fanfare plays. {{iw|dragonquest|Seeds of agility}} can appear during a Slurpodrome race and {{iw|dragonquest|chimaera wings}} appear in Round the Blocks. Various recurring monsters appear. | ||
| | *''{{iw|dragonquest|Dragon Quest}}'': Alefgard is a playable board and it uses the overworld music from this game. An arrangement of the ending music is used when a player wins a ''Dragon Quest'' board. An arrangement of the [[Game Over]] jingle is used when a player is bankrupted. | ||
| | *''[[Super Mario Bros.: The Lost Levels]]'': The arrangement of the "Ending" theme is based on the one from this game. | ||
| | *''[[dragonquest:Dragon Quest III: The Seeds of Salvation|Dragon Quest III: The Seeds of Salvation]]'': The Ghost Ship is a playable board and it uses the overworld music from this game. The file select music is an arrangement of "Rolling Dice". | ||
| | *''[[Super Mario Bros. 3]]'': During an auction, an arrangement of the [[Toad House|Toad's House]]/[[P Switch]] music plays. An arrangement of the [[Pipe Land]] map music also plays in the stock menu. Also, an arrangement of the "3 Matching Cards" fanfare plays whenever a line is made in [[Round the Blocks]] on a ''Super Mario'' board or when the ''Super Mario'' Tour is completed in Tour mode, as well as an arrangement of the "World Clear" fanfare playing when a line of lucky 7's is made in Round the Blocks on a ''Super Mario'' board. | ||
|Ita=La | *''{{iw|dragonquest|Dragon Quest IV: Chapters of the Chosen}}'': Colossus is a playable board and it uses an arrangement of "Wagon Wheel's March". When a player reaches the target net worth on a ''Dragon Quest'' board, it plays an arrangement of this game's battle theme. The [[Healslime]] that can appear is named "{{iw|dragonquest|Healie}}", referencing the Healslime that assists {{iw|dragonquest|Ragnar McRyan}}. | ||
|ItaM=The | *''[[Super Mario World]]'': An arrangement of the {{file link|SMW The Evil King Koopa BGM.oga|final boss theme}} plays when someone reaches the target amount in a ''Super Mario'' board. An arrangement of the bonus stage music is heard in the minigame Round the Blocks if it is played on a Mario board. | ||
|SpaA=Fortune Street | *''[[Super Mario Kart]]'': An arrangement of [[SNES Mario Circuit 1|Mario Circuit]]'s music is used for the Mario Circuit board. | ||
|SpaE=Distrito Fortuna | *''{{iw|dragonquest|Dragon Quest V: Hand of the Heavenly Bride}}'': Mt. Magmageddon is a playable board and it uses an arrangement of this game's dungeon theme. The Slurpodrome is based off of this game's slime race minigame and plays rearrangements of the minigame's music. The [[Goodybag]] that can appear is named "Gumdrops", a reference to the [[dragonquest:Goodybag (Recruit)|recruitable Goodybag]]. | ||
|SpaEM=Fortune | *''[[Super Mario Land 2: 6 Golden Coins]]'': One of Wario's quotes on Starship Mario has him stating that the starship would be his if he turned the "M" upside down. This alludes to his [[Wario Castle|taking over]] of [[Mario's castle]] in this game, which involved flipping the castle's "M" so that it appeared as a "W". | ||
|Ger=Straßen des Glücks | *''[[Super Mario World 2: Yoshi's Island]]'': An arrangement of the title screen music for this game plays as the music for the Yoshi's Island board. Also, an arrangement of the athletic theme is heard in the Venture square or when Dart of Gold is being played. | ||
|GerM=Streets of Fortune | *''[[Super Mario RPG: Legend of the Seven Stars]]'': An arrangement of "[[Mushroom Kingdom|Hello, Happy Kingdom]]" plays on the [[Peach's Castle (board)|Peach's Castle]] board. | ||
| | *''[[Wario Land 3]]'': Wario mentions [[Rudy]] when building a tent on the board. | ||
*''[[Luigi's Mansion]]'': One of Luigi's quotes mentions the [[Poltergust 3000]]. | |||
*''[[Super Mario Sunshine]]'': Delfino Plaza returns as a ''Super Mario'' franchise board. An arrangement of its original theme is the music of this board. | |||
*''[[Wario World]]'': Wario mentions the [[Black Jewel]] in one of his quotes, who is the main antagonist of that game. | |||
*''[[Mario Kart: Double Dash!!]]'': Peach's quote on the Mario Circuit board is "I'm going to double-dash my way to victory! Good luck keeping up with me! Tee hee!" This references the two driver mechanic featured in said game. | |||
*''{{iw|dragonquest|Slime MoriMori Dragon Quest: Shougeki no Shippo Dan}}'': Slimenia appears as a board and it plays an arrangement of "Blue Skies, Blue Slime". | |||
*''[[Mario Party 6]]'': Yoshi's artwork is an updated version on his artwork from this game. | |||
*''[[Super Mario 64 DS]]'': Bowser's artwork from this game is reused. | |||
*''{{iw|dragonquest|Dragon Quest VIII: Journey of the Cursed King}}'': Castle Trodain is a playable board and uses an arrangement of its area music. The jingle that plays when the venture card #13 is drawn is taken directly from this game. When Dart of Gold is played by a ''Dragon Quest'' character or Round the Blocks is played on a ''Dragon Quest'' board, it plays an arrangement of "Fun Casino". [[dragonquest:Hero (Dragon Quest VIII)#Munchie|Munchie]] can appear in a Slurpodrome race. | |||
*''[[Dance Dance Revolution: Mario Mix]]'': Luigi's artwork from this game is reused. | |||
*''[[Mario Superstar Baseball]]'': The Mario Stadium and an arrangement of its music returns as one of the ''Super Mario'' franchise boards. | |||
*''{{iw|dragonquest|Dragon Quest Heroes: Rocket Slime}}'': An arrangement of Forewood Forest and Backwood's music is used on Slimenia. | |||
*''{{iw|dragonquest|Dragon Quest: Shōnen Yangus to Fushigi no Dungeon}}'': Robbin' Hood Ruins appears as a board and it uses its area music. | |||
*''[[New Super Mario Bros.]]'': An arrangement of the Bowser's Castle theme can be heard at certain boards. Gaining a level with a ''Super Mario'' franchise character plays an arrangement of the "Course Clear" music. Also, Bowser Jr.'s artwork from this game is reused. | |||
*''[[Mario Party 8]]'': Wario, Daisy, Toad, Waluigi, and Birdo's artwork from this game is reused. | |||
*''[[Itadaki Street DS]]'': All of the boards and playable characters in this game return. | |||
*''[[DK: Jungle Climber]]'': Diddy Kong's artwork from this game is reused. | |||
*''[[Super Mario Galaxy]]'': The Good Egg Galaxy returns as a ''Super Mario'' franchise board. | |||
*''[[Mario Kart Wii]]'': The Mario Circuit board resembles the [[Mario Circuit (Mario Kart Wii)|Mario Circuit]] from this game. | |||
*''[[Mario Super Sluggers]]'': The Mario Stadium board uses the stadium's design from this game. | |||
*''{{iw|dragonquest|Dragon Quest IX: Sentinels of the Starry Skies}}'': The Observatory and Alltrades Abbey are playable boards and they uses arrangements of their respective area music. On the Wi-Fi menu screen, an arrangement of "Pub Polka" plays. | |||
*''[[New Super Mario Bros. Wii]]'': [[Memory Block]] takes place in a Toad House from this game and features an arrangement of the Toad House music from this game. | |||
*''[[Super Mario Galaxy 2]]'': Starship Mario returns as a ''Super Mario'' franchise board. An arrangement of "Starship Mario, Launch!" also plays on this board. | |||
*''{{iw|dragonquest|Dragon Quest: Monster Battle Road Victory}}'': The music for the Ghost Ship, Alefgard, Colossus, reaching the target net worth on a ''Dragon Quest'' board, winning a ''Dragon Quest'' board, and the Wi-Fi menu are taken directly from this game. | |||
*''[[Mario Sports Mix]]'': The victory animations for some of the ''Super Mario'' franchise characters resemble the animations from this game, however their animations are slightly different and are not continuous; they revert to their standing animation when they finish their victory animation. | |||
==Names in other languages== | |||
{{foreign names | |||
|Jpn=いただきストリートWii | |||
|JpnR=Itadaki Sutorīto Wī | |||
|JpnM=''Top Street Wii | |||
|Fre=''Course à la fortune | |||
|FreM=''Race for fortune | |||
|Ita=''La via della fortuna | |||
|ItaM=''The fortune/luck street | |||
|SpaA=''Fortune Street | |||
|SpaE=''Distrito Fortuna | |||
|SpaEM=''Fortune District | |||
|Ger=''Straßen des Glücks | |||
|GerM=''Streets of Fortune | |||
|Dut=''Boom Street | |||
}} | }} | ||
| Line 393: | Line 976: | ||
<references/> | <references/> | ||
==External | ==External links== | ||
*[http://www.square-enix.co.jp/itastwii/ Official Japanese | *[https://www.nintendo.co.jp/wii/software/st7j/index.html Official Japanese website (Nintendo)] | ||
*[http://fortunestreet.nintendo.com/ Official North American | *[http://www.square-enix.co.jp/itastwii/ Official Japanese website (Square Enix)] | ||
*[ | *[https://web.archive.org/web/20111125055130/http://fortunestreet.nintendo.com/ Official North American website] (Wayback Machine) | ||
*[http://gamesites.nintendo.com.au/boom-street/ Official | *[https://www.nintendo.co.uk/Games/Wii/Boom-Street-280693.html Official European website] | ||
{{NIWA| | *[http://microsite.nintendo-europe.com/boomstreet/en_GB/ Official European microsite]{{dead link}} | ||
{{ | *[https://web.archive.org/web/20120112101614/http://gamesites.nintendo.com.au/boom-street/ Official Oceania website] (Wayback Machine) | ||
===Other wikis=== | |||
{{NIWA|StrategyWiki=1}} | |||
{{TCRF|Fortune Street (Wii)}} | |||
*''{{iw|dragonquest|Fortune Street}}'' on the Dragon Quest Wiki | |||
*''{{fandom|dragonquest|Fortune Street}}'' on Fandom's Dragon Quest Wiki | |||
{{FS}} | |||
{{Super Mario games}} | |||
{{Wii}} | {{Wii}} | ||
[[Category:Games]] | [[Category:Games]] | ||
[[Category:Wii games]] | |||
[[Category:Super Mario games]] | |||
[[Category:2011 games]] | [[Category:2011 games]] | ||
[[Category:2012 games]] | [[Category:2012 games]] | ||
[[Category:Crossover games]] | |||
[[Category:Games with Nintendo Wi-Fi Connection]] | |||
[[Category:Fortune Street|*]] | |||
[[it:La via della fortuna]] | |||
[[de:Straßen des Glücks]] | |||
Latest revision as of 00:37, January 18, 2025
It has been requested that this article be rewritten and expanded to include more information. Reason: include single player content such as the awards given at the end of matches and clothing available in the Costume Shop
| Fortune Street | |||||||||||
|---|---|---|---|---|---|---|---|---|---|---|---|
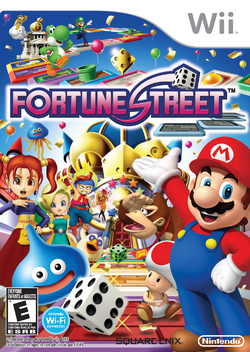 North American box art For alternate box art, see the game's gallery. | |||||||||||
| Developer | Marvelous AQL TOSE Software Co. | ||||||||||
| Publisher | Nintendo (US, EU) Square Enix (JP) | ||||||||||
| Platform(s) | Wii | ||||||||||
| Release date | |||||||||||
| Language(s) | English (United States) French (France) German Spanish (Spain) Italian Japanese | ||||||||||
| Genre | Party | ||||||||||
| Rating(s) |
| ||||||||||
| Mode(s) | Single-player, multiplayer (2–4 players) | ||||||||||
| Format | Wii: | ||||||||||
| Input | Wii:
| ||||||||||
| Serial code(s) | |||||||||||
Fortune Street (known as Boom Street in Europe and Oceania) is a follow-up to the 2007 Nintendo DS game Itadaki Street DS. It is a Wii game developed primarily by Marvelous AQL. It is a Super Mario game within Square Enix's Itadaki Street series, and was the first Itadaki Street game in general to be released outside of Japan.
This game was able to be played over Nintendo Wi-Fi Connection; however, the service was terminated on May 20, 2014, making this game no longer playable online. Also, mainly due to this game's Wi-Fi compatibilities, it is impossible to transfer the save data to an SD Card.
Gameplay[edit]
This game functions like a Monopoly style board game. It can be played with up to four players. If game data cannot be saved or will not be saved, only offline multiplayer is available (though Out to Lunch can be used to mimic a single player game. Every player can be COM players by doing this). When playing multiplayer offline, records are not saved. Also, when playing multiplayer offline, players can decide if each player should have their own Wii Remote, or that players share one Wii Remote. When using the latter option, players press one of the three buttons: ![]() ,
, ![]() , and
, and ![]() during an Auction to make a bid, and are ordered based on where characters appear in the Auction window.
during an Auction to make a bid, and are ordered based on where characters appear in the Auction window.
At the start of a game, all players use number machines to determine the turn order, with the highest number going first (note that it is possible for two numbers on the number machines to be the same, if so then the tying players use the number machines again). The only exceptions are the tutorial, where the human player always goes first; and in Custom Rules, should the Order of play be set to As picked, where it makes P1 goes first, then P2, then P3, then P4.
Four players (excluding the play system in Tutorial mode, where only three characters play) take turns by rolling dice to go around the board and buy shops. Some squares involve special attributes, such as Take-a-break squares (when a character lands there, all of their shops close until the player's next turn) and Venture squares (like a Chance space in Monopoly). Players also have the ability to invest money in their own shops when they land on them (a maximum of 999 per turn). Scattered around the board are four suits (Spade, Heart, Diamond, and Club); if the player collects all of them and returns to the Bank (also the starting square) they get a promotion. When a player gets a promotion, they get a fixed amount for their salary, plus a shop bonus which is based off 10% the sum of all the player's shop value, as well as a promotional bonus (extra money given to the player that increases as they level up). The player's level also goes up when they get a promotion. The maximum gold that can be held is 999,999.
The main accounting currency is the gold coin (abbreviated to G). The player wins by increasing their net worth to at least the target amount (usually determined by the game, if on Custom mode though, this can range between 6,000 and 999,000 in increments of 1,000) and returning to the bank first (in the Practice Boards, the target net worth for Easy Rules and Standard Rules are 5,000 G and 8,000 G respectively). Net worth is the total combined amount of ready cash and value in stocks and shops and can be increased by having other players land on their shops and buying multiple shops in an area or investing in stocks and owned shops to increase the stock price. If the player's ready cash drops below zero during their turn, they must sell either stocks or a shop to try and get out of debt; any shops sold for cash are auctioned (the winning bid gets paid to the bank). Note that the bank only offers 75% of the shop price to a player if they are in debt. Also, if a player auctions a shop from "Manage Shops" or gets Venture Card #74, the highest bid is credited to the original owner. If the player's debt cannot be resolved at the end of their turn, then they go bankrupt; all their assets are sold off if any remain and they are automatically eliminated from the game. The player with the highest net worth automatically wins if the bankruptcy limit is met (although in a very rare case should two or more players have the same highest net worth, the player that goes later in the turn order wins). In Tour mode, the game ends once one player goes bankrupt, in Custom mode, this can be set to when two players go bankrupt or to have a last-man-standing rule.
There are two different ways to play: the Easy rules and the Standard rules.
Standard Rules[edit]
In the Standard rules, the board is divided into several color-coded districts and includes a stock market. If the player has more than one shop in a district, both shops expand, meaning the shop's value, prices, and max capital (the amount of money that can be invested into a shop) all increase. Owning all the shops in a district results in a domination, which greatly expands all the shops in that district. There are usually 4 shops in a district.
Stocks can be purchased at the Bank or a Stockbroker square, but only 99 can be bought in one district at one given time. Despite that, stocks can be sold at any time before a player's turn. Stocks can increase or decrease in value at any time. An increase of shop values or a large purchase of stock at one time increases the stock value in that district. Conversely, a decrease of shop values or a large sale of stock at one time decreases the stock value in that district. Like shops, stocks are assets, and therefore, do not decrease net worth when purchased. When stocks increase or decrease in value, only the player's net worth is affected. This is dependent on two factors: how many stocks owned in that district, and by how much the stock value fluctuates. For example, if a district's stock value increases by 5G, a player who owns 200 stocks in that same district gains a 1000G bonus in net worth.
Exclusive to Standard rules are vacant plots. These squares allow a player to build upon the land. A vacant plot can be changed, or 'renovated', at any time before the player rolls the dice block. The following buildings can be built on vacant plots:
Three-Star Shops cost 1000G to build; everything else costs 200G. A surcharge of 150G is imposed to renovate an existing building.
Easy Rules[edit]
In Easy rules, there are no stocks, vacant plots, or districts, making the game more accessible for new players. To expand shops further, players have to buy adjacent shops in a row. The row's maximum potential length depends on its location on the board since suit squares, venture squares, the arcade, and the bank divide certain sections of the board.
Salary Calculation[edit]
A player's salary from a promotion is calculated as follows:
Formula[edit]
| Type | Calculation |
|---|---|
| Base salary | B (usually 250) |
| Promotion bonus | 150 × L (level before promotion) |
| Shop bonus | S ÷ 10 (rounded down) |
| Total | Sum of the three values above |
Variables[edit]
| Variable | Description |
|---|---|
| B | The fixed amount the player gets. |
| P | An amount that controls the amount the player gets corresponding to their level. |
| L | The player's level before promotion. |
| S | The sum of all the player's shop value. |
Squares[edit]
| Square | In-game description | Notes | |
|---|---|---|---|

|
Bank | "This is the finishing square. You'll also receive your salary each time you return here with all four suits, and you can buy stocks as you pass through." | Landing on the bank allows players to choose any direction to move on their next turn. |

|
Shop | N/A | The most common squares and the main focus of Fortune Street. A shop can be purchased as long as a player has enough assets (sum of ready cash and stocks) in possession. Purchasing or investing in a shop does not decrease net worth, but it costs ready cash to do so. |
   
|
Suit | "When you pass this suit square, you pick up a |
- |

|
Change-of-suit | "You pick up a suit when you pass this square. After you take it, the suit on offer changes to another." | This is just like a Suit square, except it cycles through all four suits as players pass it. |

|
Venture | "Land on this square for a chance to draw a venture card." | Allows a player to choose a card from a random selection of 64 cards. |

|
Take-a-break | "When you land on this square, all your shops shut until your next turn." | - |

|
Vacant plot | "You can build a variety of buildings and attractions." | Exclusive to Standard rules, these squares allow a player to build upon the land. They take the place of regular shops in districts. In Standard rules Free Play, the amount of vacant plots can be set in the custom rules. |

|
Boon | "Land on this square to receive a commission on everyone's profits until your next turn. (20% of all payments made)" | - |

|
Boom | "Land on this square to receive a great big commission on everyone's profits until your next turn. (50% of all payments made)" | - |

|
Arcade | "Land on this square for some serious fun at the mini-game arcade!" | - |

|
Roll-on | "When you land on this square, you roll the die and move again." | - |
 
|
Backstreet | "When you land on this square, you duck down a backstreet and come out on the other end." | Either a Warp Pipe or a warp square, these squares take the player to the connecting square of the same color. |

|
Stockbroker | "You have the opportunity to buy stocks when you land on this square." | |

|
One-way alley | "An alleyway to another part of the board. Dart down one and continue your turn when you come out the other end." | On Robbin' Hood Ruins and Bowser's Castle, these doors take the player to a different part of the board. On Super Mario series boards, they are based on the appearance of the Warp Door from New Super Mario Bros. Wii. |

|
Cannon | "Land here to become a living cannon ball and blast your way to a square where another player is." | Blasting to another player's square does not activate the square's function, but blasting to a Suit square allows the suit to be collected, and blasting to the Bank allows the player to buy stocks and receive a promotion. |

|
Switch | "Landing on this square throws the switch and changes the layout of the board." | Causes large segments of the board to move around. |

|
Lift | "You can take the lift to another location. Once you get off the lift, your turn ends." | Only found on Yoshi's Island, these squares act as a one-way path to a secluded spot of the board in standard rules and across the board in easy rules. |

|
"This is the lift's destination. It's for getting off the lift only. (You can't take the lift from here.)" | ||

|
Magmalice | "You can ride on the magnificent magmalice to another square, but then your turn ends." | Only found on Mt. Magmageddon, these squares cause a magmalice to bring players to other segments of the board when they are apart. |

|
"You can ride on the magnificent magmalice to another square. ...But it's not here at the moment!" | ||
Characters[edit]
All 22 characters from Itadaki Street DS return, with the addition of five new characters (Mii, Diddy Kong, Bowser Jr., Stella, and Patty) for a grand total of 27. Players can customize their Miis in the game with a variety of clothing and animation options.
Miis are the only playable characters in single-player and online mode; in multiplayer offline, players can also choose between the Dragon Quest and Super Mario characters as well. Each computer character is ranked from S, A, B, C, D in terms of difficulty (S being the highest, and D being the lowest) which means each computer character has a predetermined difficulty. If the player beats either all the Easy Tour boards or all the Standard Tour boards, they have the ability to switch the computers' difficulty to S rank from their normal rank.
Characters marked with an asterisk (*) are unlockable.
Playable in Multiplayer Mode[edit]
Super Mario franchise[edit]
| Image | Name and ranke | Official description |
|---|---|---|
|
Mario Rank A |
The universal hero who dashes and jumps his way around the world. His trademark outfit of a red shirt, overalls and an "M"-embroidered hat is known to all. |
|
Luigi Rank C |
Mario's twin brother. Though normally quiet and unassuming, he's a shrewd and powerful man. |
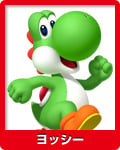
|
Yoshi Rank B |
Mario's trusty adventuring partner who carries Mario around on the shell on his back. His long tongue's perfect for slurping up fruit and giving his adversaries a good licking, too! |
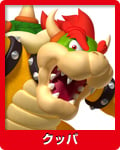
|
Bowser Rank A |
Head of the Koopa Troop, whose sole aim seems to be disturbing the peace in the Mushroom Kingdom. He's a dangerous business rival, who won't hesitate to buy your property from under you. |
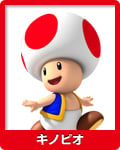
|
Toad Rank C |
Never far from Princess Peach's side, Toad is here on Fortune / Boom Street too. He's a thoroughly nice 'stool who's rooting for everyone! |
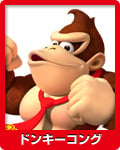
|
Donkey Kong Rank D |
A soft-hearted, yet hard as nails hero of the jungle. Is he only here on Fortune / Boom Street for the banana-selling fruit stalls!? |
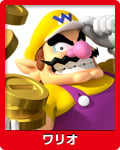
|
Wario Rank B |
A slightly vulgar miscreant who rivals Mario whether he wants it or not. He has no idea of value, but will do anything to make a quick buck! |
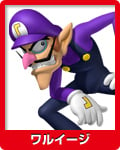
|
Waluigi Rank C |
A strange baddie who's fueled solely by the desire to oppose Luigi. His twisted ways are sure to upset everyone! |
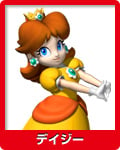
|
Princess Daisy Rank C |
The bright and lively, if slightly tomboyish, Princess of Sarasaland. Now she's bringing her bubbling enthusiasm to Fortune / Boom Street. |
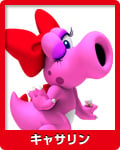
|
Birdo Rank D |
A fluttery-eyed, pouting, pink creature with a very unusual mouth that spews eggs! |
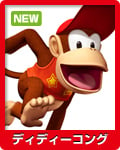
|
Diddy Kong (newcomer) Rank D |
The one and only, long-tailed, red-hatted partner to Donkey Kong. He swings deftly around Fortune / Boom Street as if it were his jungle home. |
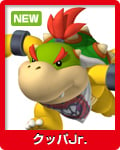
|
Bowser Jr. (newcomer) Rank A |
The mischievous, practical-joking son of Bowser. He's a chip off the old block and definitely not someone to be messed with! |
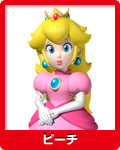
|
Princess Peach* Rank S |
Princess of Mushroom Kingdom, often kidnapped by the wicked Bowser. Although she lives a sheltered life, she's not afraid of a battle on Fortune / Boom Street! |
Dragon Quest series[edit]
| Image | Name and ranke | Official description |
|---|---|---|

|
Slime Rank D |
The quintessential quirky character of any Dragon Quest domain. Slimes are podgy and squishy and speak almost perfect "gooman". |

|
Princessa Rank C |
A noble princess dedicated to the restoration of her beloved Moonbroke after its ruinous fall at the hand of monsterkind. She's here to earn gold to fund the reconstruction work. |
|
Kiryl Rank C |
A priest serving in Zamoksva who secretly covets Tsarevna Alena. He remains glued to her side, protecting her from harm with his magical mastery. |
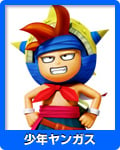
|
Yangus Rank D |
A half-inching hoodlum from the sticky-fingered town of Pinkham who dreams of becoming a thief among thieves. This is young Yangus, but he's as cor-blimey as ever! |
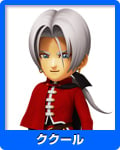
|
Angelo Rank A |
A Templar Knight from Maella Abbey whose cool character is just as adept at winning over the ladies as winning on Fortune / Boom Street. |
|
Platypunk Rank C |
A duck-billed, dough-collecting Don's dogsbody. He and his Plob mob once attacked Slimenia, and the wound's still oozing now. |
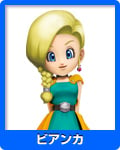
|
Bianca Rank B |
A bit of a tomboy in her youth, Bianca has grown up to be a kind and gentle woman. But she stills makes the odd daring move here and there! |

|
Alena Rank B |
A tomboyish Tsarevna from Zamoksva who's snuck out to try her hand at Fortune / Boom Street! She's a little too impulsive to make a go of it, though. |
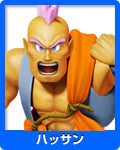
|
Carver Rank C |
Don't let this muscle-bound hulk's appearance deceive you. Carver is a gentle and feeling man. But can his carpentry skills build him a fortune on Fortune / Boom Street? |
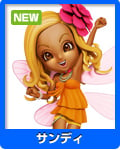
|
Stella (newcomer) Rank B |
A mysterious female who's all about appearances, devoted to fashion and definitely NOT a faer— She always does the first that enters her head, which might just win her the game! |
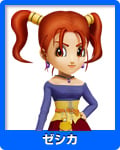
|
Jessica* Rank S |
A well-to-do young lady from Alexandria. She's headstrong and bold, and won't give you any quarter whatsoever. |
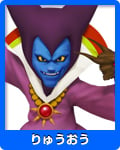
|
Dragonlord* Rank S |
The kingpin of monsterkind who would see the world plunged into darkness. True to his dastardly disposition, his shops are powerhouses of impoverishment that lurk around every bend to bring you to your knees. |
|
Patty* (newcomer) Rank S |
A networking pundit who the lonely adventurer can rely on to be behind the counter of her Party Planning Place whenever needed. When it comes to running a business, is there anyone better? |
Unlocking criteria[edit]
| Character | Unlock method |
|---|---|
| Princess Peach | Beat the Peach's Castle board in second or first in Tour mode. |
| Jessica | Beat the Robbin' Hood Ruins board in second or first on Tour mode. |
| Dragonlord | Beat the Alefgard board in second or first on Tour mode. |
| Patty | Beat the Alltrades Abbey board in first on Tour mode. |
Other[edit]
Mii (new)
Non-playable[edit]
Super Mario franchise[edit]
- 8-bit Buzzy Beetle
- 8-bit Goomba
- 8-bit Koopa
- 8-bit Piranha Plant
- Bob-omb
- Boo
- Bullet Bill
- Chain Chomp
- Dry Bones
- Lakitu
- Luma
- Noki
- Pianta
- Shy Guy
- Thwomp
- Toads
- Yoshis
Dragon Quest series[edit]
Boards[edit]
Super Mario Tour[edit]
| Screenshot | Board | Official description |
|---|---|---|
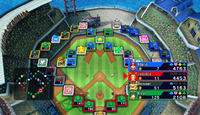
|
Mario Stadium | Fierce competition is a daily event at this seaside sports ground. |
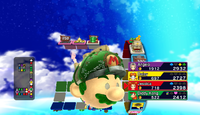
|
Starship Mario | A spaceship in the shape of Mario. He likes to zoom around the galaxy in it. |
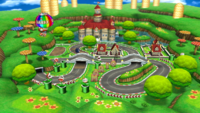
|
Mario Circuit | A race track built within the Mushroom Kingdom. There's a never-ending drone of white-hot engines whizzing around the track. |
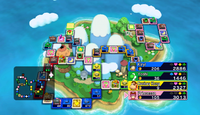
|
Yoshi's Island | An island inhabited by members of the Yoshi race, a kaleidoscope assortment of friendly creatures. As a young snip, Mario had wild adventures here with his Yoshi friends. |
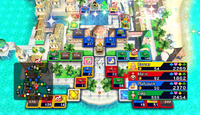
|
Delfino Plaza | The largest metropolis on the southern resort of Isle Delfino. Once it was graffitied all over by the incorrigible Bowser Jr. |
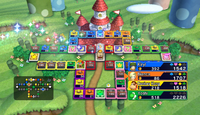
|
Peach's Castle | The home of Princess Peach. Bowser's troops make frequent assaults on the place, but the Toad guards keep them at bay. |
Dragon Quest Tour[edit]
| Screenshot | Board | Official description |
|---|---|---|
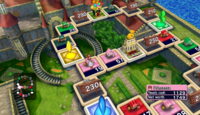
|
Castle Trodain | The tranquil domain of King Trode. ...Though the once pitiful sight of it cocooned in cursed vines is impressed on all our memories. |
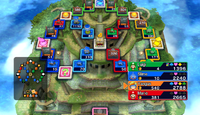
|
The Observatory | Lofty home of the Celestrians, orbited by its unusual passenger service, the Starflight Express. |
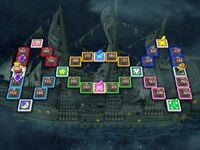
|
Ghost Ship | An eerie vessel that, after sinking in a wild tempest, meandered over boundless oceans with its crew of phantom seafarers. |
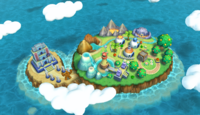
|
Slimenia | A teardrop-shaped island that could only bring tears of joy, as its slimy inhabitants live in a fun-filled, gooey paradise! |
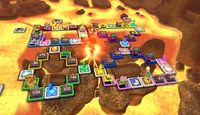
|
Mt. Magmageddon | A volcano perforated with caves that hide the crucial Circle of Fire. Press the switches to trigger eruptions and change the shape of the map. |
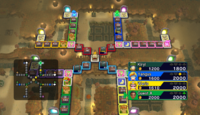
|
Robbin' Hood Ruins | The place where the Great Thief, Robbin' Hood, stashed his bountiful loot. The mysterious doors dotted around within are the bane of the treasure-hunting explorer. |
Special Tour (unlockable boards)[edit]
| Board | Description | Unlocking criteria |
|---|---|---|
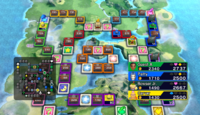
|
Homeland of the legendary hero, Erdrick. At its core, an island hosting the towering citadel of the Dragonlord. | Beat both the Super Mario and Dragon Quest Tours. |
| Alefgard | ||
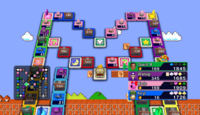
|
The original and well-loved setting of the Super Mario Brothers. Home to some familiar lurking foes like Koopa Troopas and Goombas. | Beat the Alefgard board in 2nd place or higher in Tour mode. |
| Super Mario Bros. | ||
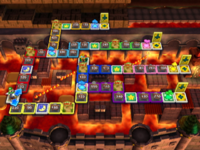
|
The home of Bowser. It's a minefield of tricks and traps where a single foot wrong could send you plummeting into a sea of molten lava. | Beat the Super Mario Bros. board in 2nd or higher in Tour mode. |
| Bowser's Castle | ||
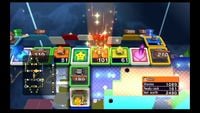
|
A capsule-shaped planet in the Good Egg Galaxy. You have to be very careful not to get lost there. | Beat the Bowser's Castle board in 1st place in Tour mode. |
| Good Egg Galaxy | ||
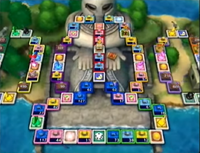
|
A statue as tall as the heavens, whose cavernous innards are riddled with monsters. Press the switches to flip portions of the map. | Beat the Good Egg Galaxy board in 1st place in Tour mode. |
| Colossus | ||
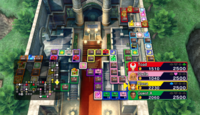
|
The bastion of vocationalism, visited by all who seek a new path in life. | Beat the Colossus board in 1st place in Tour mode. |
| Alltrades Abbey |
Minigames[edit]
| Screenshot | Title | Summary |
|---|---|---|
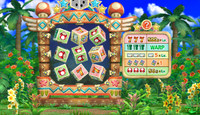
|
Round the Blocks | This is essentially a game of slots. The player can get three 7s in a row and get 500 gold coins (the game's money currency, shortened as gold or simply G) times their level, get three warp pipes or wings (depending on the series which the board being played on is from) in a row to warp, three stock icons to get a set amount of stocks in one district (exclusive only to standard mode), three Suit Yourself cards (these are like wild cards; they can act as any suit the player does not have, and owning one Suit Yourself card means the player could only collect three suits and still get promoted) in a row to get one of the aforementioned cards, or get 3 mushrooms or Slimes (the aforementioned series rule) to get 50G times the player's level. |
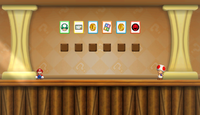
|
Memory Block | The player chooses from a number of boxes to get either a 1-Up mushroom which makes all of their shops increase by 10%, a card with a coin which gives the player 10G multiplied by their level, a Suit Yourself card, 5 stocks in a district, or a card with Bowser's face on it which makes all of their shops decrease by 5%. Sometimes, all of the blocks are the same size, so there is a chance that the player may get a Bowser card easily. Commonly, it happens to first place the most. |
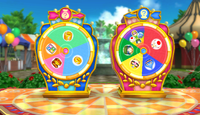
|
Dart of Gold | The player throws a dart at a wheel that has different items that can help or hurt players. Once the player throws the dart and hits an item (a treasure chest containing 100G times a player's level, a gold coin worth 10G times a player's level, three gold coins worth 30G times a player's level, stocks, a 1-Up Mushroom that increases the player's shop values by 5%, though items like a Bowser icon that decreases the player's shop values by 5% or a Suit Yourself card appears), the player then throws another dart at a different wheel that has all four players’ faces on it individually (with the person playing the game being the biggest) as well as a space that has everyone's faces on it. If the dart hits one player's space then that player gets the prize or punishment, but if the dart hits the space with all the faces, all four players get the prize or punishment. |
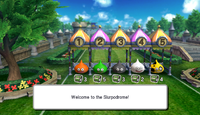
|
Slurpodrome | Players choose from five different colored Slimes, and then a race to see which one makes it to the end first starts. Along the way, treasure chests open and reveal one of many things: a gold coin worth 20G, a Mimic which knocks the Slime out of the race, a Munchie which does nothing to affect the race, or a seed of agility which increases the Slime's speed. Sometimes, Rockbombs roll onto the track and knock a Slime out of the race. When a Slime gets to the end first, the player backing it wins the most money (100G times their level plus any coins they collect during the race). However, since players can collect coins along the way, all players get some money (depending on the number of chests hit) if they can collect at least one coin. Rewards are doubled for easy rules. This is also the only minigame which all four players immediately participate in upon it being selected. |
Venture cards[edit]
When a player lands on a Venture square or a Suit square, they must select a venture card at random. Venture cards produce a variety of effects, either benefiting or inhibiting one or more players. They are analogous to Chance Cards in Itadaki Street DS, with many venture cards and their effects having been directly copied from the predecessor.
There are 128 cards in total, though 23 of them (ones involving districts or stocks) are exclusive to Standard rules. As such, only 105 cards are in the drawing during Easy rules. During gameplay, players select venture cards from a set of 64 panels, marking each chosen panel with their respective color. By lining up four panels of the same color horizontally, vertically, or diagonally, players will begin earning 10 gold per square as they add to the line (five panels earns 50 additional gold, etc.). If a player lines up eight panels, they get 200 gold. If all panels have been flipped, the venture card board resets. On Super Mario boards, the unflipped panels depict a Super Mushroom while the panels on Dragon Quest boards depict a Slime.
The following is a list of venture cards and their effects (descriptions in bold are exclusive to Standard Rules while descriptions in italics indicate effects from which the player can opt out):
| # | Image | Description | Notes |
|---|---|---|---|
| 1 |  |
Adventurous turning point! You can choose which way to move on your next go, (player's name). | When viewed in the Collection from the Main Menu, the game always assumes it is the player's turn. |
| 2 |  |
Venture on! Roll the die again and move forward. | - |
| 3 |  |
Venture through space! Zoom over to any non-venture, non-suit square you like! | If chosen square is not player's own, said player will have to pay the fee. |
| 4 |  |
Moneymaking venture! Roll the die and get 40 times the number shown in gold coins from the player in first place! | Will affect all other players tied for first place. |
| 5 |  |
Venture through space! Zoom over to any shop or vacant plot! | - |
| 6 |  |
Venture through space! Zoom over to any venture or suit square! | - |
| 7 |  |
Special bonus! Your shops all grow by 7%! | - |
| 8 |  |
Venture on! Everyone's shop prices increase by 30%! Now roll the die and move again. | - |
| 9 |  |
Venture on! Everyone's shops close for the day! Now roll the die and move again. | - |
| 10 |  |
Venture on! Everyone's shop prices cut in half! Now roll the die and move again. | - |
| 11 |  |
Moneymaking venture! Roll the die and get 11 times the number shown in gold coins from all other players! | If there is only one other player left, the text displayed after rolling will contain a grammar error (it will say 1 "people" instead of 1 "person"). |
| 12 |  |
Capital venture! You can invest capital in any of your shops. | - |
| 13 |  |
Misadventure! The values of all your shops drop by 13%! | The Curse music from Dragon Quest VIII plays when this card is revealed. |
| 14 |  |
Misadventure! You give everyone 30G each! | - |
| 15 |  |
Moneymaking venture! Roll the die and get 50 times the number shown in gold coins from the bank! | - |
| 16 |  |
Random venture! Shops expand in three districts picked at random! | Shop values increase by 10%. |
| 17 |  |
Special bonus! You receive half of your salary! | - |
| 18 |  |
Misadventure! The bank is forcibly buying you out! You're compelled to sell a shop for only twice its value. | - |
| 19 |  |
Price hike venture! Your shop prices go up by 30% until your next turn. | - |
| 20 |  |
Revaluation venture! You can expand any one of your shops by 20%. | - |
| 21 |  |
Random venture! You receive 20 stocks in a district picked at random! | - |
| 22 |  |
Cashback venture! You can sell a shop back to the bank for twice its shop value. | - |
| 23 |  |
Revaluation venture! You can expand any one of your shops by 50%. | - |
| 24 |  |
Misadventure! The bank is forcibly buying you out! You're compelled to sell a shop for only 200G more than its value. | - |
| 25 |  |
Misadventure! Your shop prices halve until your next turn! | - |
| 26 |  |
Lucky venture! You get a big commission until your next turn! | The commission is 50% |
| 27 |  |
Special bonus! You receive 27 times the number of shops you own in gold coins from the bank! | - |
| 28 |  |
Cameo adventure! A goodybag appears! | Gumdrops pays the shop price to the owner if he stops on one. |
| 29 |  |
Freebie! Take a |
If the player already has a |
| 30 |  |
Venture on! All shops charge a 100G flat rate! Now roll the die and move again. | This card's effect is a reference to Japan's 100-yen shops. |
| 31 |  |
Random venture! Shops expand by 10% in a district picked at random! | - |
| 32 |  |
Random venture! Shops expand by 20% in a district picked at random! | - |
| 33 |  |
Cashback venture! You can sell a shop back to the bank for three times its shop value. | - |
| 34 |  |
Dicey adventure! Roll 1/3/5 and your shops close for the day. Roll 2/4/6 and everyone else's shops close. | Despite saying that the other players' next shops will close until the card drawer's next turn when an even number is rolled, it actually only lasts until the shop owner's next turn, making this effect useless for the very next player. |
| 35 |  |
Stock venture! You can sell stocks you own at 35% above the market value. | The player cannot take this offer if they do not own any stocks. |
| 36 |  |
Capital venture! You can pay 100G for the chance to invest in your shops. | The player cannot take this offer if they have less than 100G in ready cash. |
| 37 |  |
Random venture! Shops expand by 30% in a district picked at random! | - |
| 38 |  |
Stock venture! You can buy stocks in a district of your choice at 10% above the market value. | The player cannot take this offer if they do not have enough cash to buy any stocks. |
| 39 |  |
Suit venture! Buy a Suit Yourself card for 100G. | The player cannot take this offer if they already have 9 Suit Yourself cards or their ready cash is less than 100G. |
| 40 |  |
Misadventure! You give away 10% of your ready cash to the player in last place! | - |
| 41 |  |
Misadventure! Stock prices fall by 10% in a district picked at random! | - |
| 42 |  |
Misadventure! Stock prices fall by 20% in a district picked at random! | - |
| 43 |  |
Misadventure! You pay an assets tax of two gold coins per unit of stock that you own! | - |
| 44 |  |
Misadventure! Roll the die and pay 44 times the number in gold coins to the player in last place! | - |
| 45 |  |
Dicey adventure! Roll 1/3/5 to warp to a take-a-break square. Roll 2/4/6 to warp to the arcade. | - |
| 46 |  |
Misadventure! You drop your wallet and lose 10% of your ready cash! | - |
| 47 |  |
Dicey adventure! Roll 2-6 to get all the suits. Roll 1 and lose all your suits. | If the player already has all the suits when a 2-6 is rolled, they receive 100G instead. |
| 48 |  |
Misadventure! All shops in a district picked at random fall in value by 10%! | - |
| 49 |  |
Misadventure! All shops in a district picked at random fall in value by 20%! | - |
| 50 |  |
Venture on! Move forward the same number of squares again. | - |
| 51 |  |
Venture on! Move forward 1 square more. | - |
| 52 |  |
Venture on! Move forward another 2 squares. | - |
| 53 |  |
Venture through space! Zoom over to the bank! | - |
| 54 |  |
Venture through space! Pay 100G to zoom straight to the bank! | The player cannot take this offer if their ready cash is less than 100G. |
| 55 |  |
Venture on! Roll the die again and move forward (with an invitation to browse thrown in!). | The player does not pay any gold if they land on an owned shop. |
| 56 |  |
Venture on! Roll the die again and move forward (with a half-price special offer thrown in!). | The player only pays half the gold of an owned shop if they land on one. |
| 57 |  |
Venture through space! Zoom to any square you like. | - |
| 58 |  |
Venture through space! Pay 100G to zoom to any non-venture, non-suit square you like! | The player cannot take this offer if their ready cash is less than 100G. |
| 59 |  |
Stock venture! You can buy stocks in a district of your choice at 10% below the market value. | The player cannot take this offer if they do not have enough cash to buy any stocks. |
| 60 |  |
Random venture! Stock prices increase by 10% in a district picked at random! | - |
| 61 |  |
Special bonus! You receive a 10% dividend on your stocks! | - |
| 62 |  |
Special bonus! You receive a 20% dividend on your stocks! | - |
| 63 |  |
Random venture! Stock prices increase by 20% in a district picked at random! | - |
| 64 |  |
Random venture! Stock prices increase by 30% in a district picked at random! | - |
| 65 |  |
Forced buyout venture! You can buy a vacant plot or shop for five times its value, whether someone else owns it or not. | - |
| 66 |  |
Special bonus! You receive 10 of the most valuable stocks! | - |
| 67 |  |
Stock venture! You can buy stocks in a district of your choice. | The player cannot take this offer if they do not have enough cash to buy any stocks. |
| 68 |  |
Special arcade adventure! You're invited to play Memory Block! | - |
| 69 |  |
Stock venture! You can sell stocks you own at 20% above the market value. | The player cannot take this offer if they do not own any stocks. |
| 70 |  |
Special bonus! You get a sudden promotion and receive a salary! (You lose any suits you have.) | - |
| 71 |  |
Capital venture! You can invest up to 200G of the bank's money in your shops. | - |
| 72 |  |
Dicey adventure! Roll 1/3/5 to take 20 times the number of shops you own in gold coins. Roll 2/4/6 and pay the same. | - |
| 73 |  |
Property venture! You can buy any unowned shop or vacant plot. | The player cannot take this offer if there are no unowned shops or vacant plots. |
| 74 |  |
Misadventure! You are forced to auction one of your shops (with a starting price of twice the shop's value). | - |
| 75 |  |
Property venture! You can buy any unowned shop or vacant plot for twice its value. | The player cannot take this offer if there are no unowned shops or vacant plots. |
| 76 |  |
Special arcade adventure! You're invited to play Round the Blocks! | - |
| 77 |  |
Freebie! Take five of each district's stocks. | - |
| 78 |  |
Property venture! You can buy any unowned shop or vacant plot for 200G more than its value. | The player cannot take this offer if there are no unowned shops or vacant plots, or if they have less than 200G total in stocks and cash. |
| 79 |  |
Forced buyout venture! You can buy a vacant plot or shop for three times its value, whether someone else owns it or not. | - |
| 80 |  |
Freebie! Take a |
If the player already has a |
| 81 |  |
Misadventure! All other players can only move forward 1 on their next turn. | - |
| 82 |  |
Freebie! Take a |
If the player already has a |
| 83 |  |
Dicey adventure! Roll 1/3/5 and warp to a random location. Roll 2/4/6 and everyone else warps. | - |
| 84 |  |
Moneymaking venture! The winning player must pay you 10% of their ready cash! | - |
| 85 |  |
Moneymaking venture! Roll the die and get 85 times the number shown in gold coins from the bank! | - |
| 86 |  |
Moneymaking venture! Take 100G from all other players! | - |
| 87 |  |
Venture on! Roll the special all-7s-and-8s die and move forward again. | - |
| 88 |  |
Misadventure! All other players swap places! | Does not take effect if there are only 2 active players. |
| 89 |  |
Freebie! All players take a Suit Yourself card! | - |
| 90 |  |
Price hike venture! All shop prices go up by 30% until your next turn. | Despite saying that all shop prices go up by 30% until the card drawer's next turn, it actually only lasts until the shop owner's next turn, making this effect useless for the very next player. |
| 91 |  |
Cameo adventure! A healslime appears! | Players who pass Healie can get a Suit of their choice. If a player has all four suits and passes Healie, he gives them a Suit Yourself card. |
| 92 |  |
Cameo adventure! Lakitu appears! | Each shop he passes through closes for one turn. |
| 93 |  |
Dicey adventure! Roll 1/3/5 and your shops expand by 10%. Roll 2/4/6 and everyone else's shops expand by 5%. | - |
| 94 |  |
Freebie! Take a |
If the player already has a |
| 95 |  |
Misadventure! You throw an impromptu party. All other players come to your location! | - |
| 96 |  |
Misadventure! All players scramble to another player's location! | - |
| 97 |  |
Stock rise venture! Increase stock value by 20% in a district of your choice. | - |
| 98 |  |
Forced buyout venture! You can buy a vacant plot or shop for four times its value, whether someone else owns it or not. | - |
| 99 |  |
Freebie! What's inside...? | The player collects a Suit Yourself card should they already have all the suits, otherwise they pick up all four suits. If in a very rare case the player already has all 4 suits and has 9 Suit Yourself cards, the player instead earns 100G. |
| 100 |  |
Freebie! Take a Suit Yourself card! | If the player already has 9 Suit Yourself cards, they get 100G instead. |
| 101 |  |
Special bonus! Your shops all grow by 21%! | - |
| 102 |  |
Moneymaking venture! Roll the die and get 33 times the number shown in gold coins from all other players! | If there is only one other player left, the text displayed after rolling will contain a grammar error (it will say 1 "people" instead of 1 "person"). |
| 103 |  |
Misadventure! The values of all your shops drop by 25%! | - |
| 104 |  |
Misadventure! You give everyone 80G each! | - |
| 105 |  |
Moneymaking venture! Roll the die and get the number shown x your level x 40G from the bank! | - |
| 106 |  |
Freebie! Roll the die and get half the number shown of Suit Yourself cards! (Decimals will be rounded down.) | - |
| 107 |  |
Revaluation venture! You can expand any one of your shops by 30%. | - |
| 108 |  |
Cashback venture! You can sell a shop back to the bank for four times its shop value. | - |
| 109 |  |
Revaluation venture! You can expand any one of your shops by 75%. | - |
| 110 |  |
Special bonus! You receive 77 times the number of shops you own in gold coins from the bank! | - |
| 111 |  |
Cashback venture! You can sell a shop back to the bank for 500G more than its shop value. | - |
| 112 |  |
Special bonus! You receive 100 times the number of shops you own in gold coins! | - |
| 113 |  |
Moneymaking venture! Roll the die and get the number shown x your level x 20G from the bank! | - |
| 114 |  |
Moneymaking venture! Take your level times 40G from all other players! | - |
| 115 |  |
Misadventure! All other players can only move forward 7 on their next turn. | - |
| 116 |  |
Moneymaking venture! Roll the die and get 60 times the number shown in gold coins from the player in first place! | Will affect all other players tied for first place. |
| 117 |  |
Adventurous turning point! Everyone gets to choose which way to move on their next go. | - |
| 118 |  |
Lucky venture! You get a really big commission until your next turn! | The commission is 75% |
| 119 |  |
Misadventure! You give 20% of your ready cash to the player in last place! | - |
| 120 |  |
Misadventure! You drop your wallet and lose 20% of your ready cash! | - |
| 121 |  |
Capital venture! You can invest up to 400G of the bank's money in your shops. | - |
| 122 |  |
Moneymaking venture! The winning player must pay you 20% of their ready cash! | - |
| 123 |  |
Dicey adventure! Roll 1/3/5 and your shops expand by 20%. Roll 2/4/6 and everyone else's shops expand by 5%. | - |
| 124 |  |
Suit venture! Buy a Suit Yourself card for 50G. | The player cannot take this offer if they already have 9 Suit Yourself cards or if their ready cash is less than 50G. |
| 125 |  |
Dicey adventure! Roll 1/3/5 to warp to a boon square. Roll 2/4/6 to warp to the arcade. | - |
| 126 |  |
Revaluation venture! Roll the die and expand your shops by 2% for each number. | - |
| 127 |  |
Special arcade adventure! You're invited to play Round the Blocks and Memory Block! | - |
| 128 |  |
Special bonus! You receive 55 times the number of shops you own in gold coins from the bank! | - |
Notes[edit]
- Venture cards #101 and up are far rarer than the others to balance out their more powerful effects.
- When players are eliminated, certain venture Cards have different effects with fewer players.
- The limit on the number of Suit Yourself cards that a player can hold is 9.
- Some venture cards will break ties for first or last place, depending on the turn order at the start of the game. The player who went the earliest of those affected is considered to be placing lowest in a tie; the player who went the latest is considered to be placing highest. This means that whoever is first in the turn order will always be favored in these situations.
Results screen[edit]
When a game is finished, the player in first place does a winning animation and the player in 4th place does a losing animation (note: if there is a tie, then the tiebreaker is decided by whoever is later in the turn order). After that, trophies and prizes are handed out (only in Single Player mode, except Tutorial), then a details screen shows up, divided into three different screens (on all screens except in Sales and Payments the Target amount appears):
Graph[edit]
The first screen shows the players' positions and how many turns the game lasted. To the right is the graph, each player is identified with a colored line. Also, the red dotted line indicates the starting value and the black dotted line indicates the target net worth.
Sales and Payments[edit]
The second screen shows the number of times the player made sales including gold values:
- Number of sales: Number of times rivals landed on the player's property and had to pay.
- Total: The total gold the player gained from sales.
- Average: Average amount of gold determined by the total divided by the number of sales. The average is reported as an integer, truncating the decimal part.
- Greatest: The most amount of gold the player gained from one sale.
It also shows the amount of payments including gold values:
- Number of payments: Number of times the player landed on rivals' properties and had to pay.
- Total: The total gold the player lost from payments.
- Average: Average amount of gold determined by the total divided by the number of payments.
- Greatest: The most amount of gold the player lost from one payment.
In Standard Rules, there is also Stock Return, which is the amount of gold gained or lost from stock prices rising or dropping.
Assets and Salary[edit]
The third screen shows each player's net worth, ready cash, property and stock (only in Standard Rules) as follows:
- Net worth: This is determined by sum of ready cash, property and stock (only in Standard Rules). If a player is bankrupt, this value is negative, same for Ready cash.
- Ready cash: The amount of gold the player has in possession.
- Property: Sum of the shop prices of the property the player owns.
- Stocks: Only in Standard Rules, the sum of the stock prices on stocks the player invested in.
It also shows the player's level and upcoming salary:
- Level: Shows the player's level.
- Upcoming salary: Shows the player's salary for their next promotion.
Costume shop[edit]
By completing boards in Tour mode, the player can earn stamps which can be used to purchase clothing, accessories, mascots, actions, and styles of play for their Mii. While most only change the aesthetics of the Mii, the style of play affects how the Mii acts when the player chooses "out to lunch" in the menu during a game.
This section is a stub. Please consider expanding it to include any missing information.
Staff[edit]
- Main article: List of Fortune Street staff
In conjunction with the Treehouse division, members of Keywords International Ltd. assisted in the English translation of this game, including Nobuhiro Izumisawa and Clare Saracine. Takashi Tezuka and Shigeru Miyamoto served as superviors while Koji Kondo acted as the sound supervisor.
Reception[edit]
| Reviews | |||
|---|---|---|---|
| Release | Reviewer, Publication | Score | Comment |
| Wii | Heidi Kemps, GameSpot | 6/10 | "Fortune Street is a serviceable board-game-style experience, but it comes with plenty of caveats: a slow pace, some initial complexity that's hard to ease new players into, lengthy single-session play times, and a lack of interaction with your opponents. It's certainly fun to snatch property up and reap rewards from unlucky foes, but it requires a great deal of patience and time commitment. If you and some friends are willing to make the investment, you might find rewards on Fortune Street; otherwise, you're better off sticking to something more immediately fulfilling.'" |
| Wii | Christian Donlan, Eurogamer | 6/10 | "Even if you work your way through the option menus to select the speediest settings for everything, I'm not entirely sure who the audience for this game is meant to be. Kids drawn in by the licensed characters are going to be disappointed that they're getting a crash course in personal finance and supply and demand curves rather than a trip through the chocolate factory, while those looking for a properly complex board game probably don't want to have to faff about with the Wii in order to enjoy themselves. Boom Street's left, then, to capitalise only on the love and appreciation we all feel towards our global banking overlords. Like I said, it's something of a hard sell." |
| Wii | Philip J. Reed, Nintendo Life | 8/10 | "Taken on its own merits, Fortune Street offers some tremendous potential for fun. The experience is hampered somewhat by its complexity, but that's nothing that can’t be overcome with a little bit of practice. Your mileage will depend entirely upon the patience of those you play it with, and not all gamers will stick around long enough to learn the nuances of the game's strategy. Those who do, however, will be glad they did." |
| Aggregators | |||
| Compiler | Platform / Score | ||
| Metacritic | 68 | ||
| GameRankings | 70.07% | ||
Quotes[edit]
- Main article: List of Fortune Street quotes
- "Ha ha! I guess this is the place where I can change my profession… Thanks, but I'm happy being a hero!" - Mario
- "Ookie. Ookity ooo... (I've gotta keep my next move a secret. You know, corporate spies and all...)" - Diddy Kong
- "I ain't pumpin' mazuma into the Family's stores at every oppurtoonity, ya know. I got my instructions." - Platypunk
- "Shops, suits, gold coins... This is really confoozing... My brain's turning to jelly!" - Slime
- "The goddess speaks. Victory cannot be attained in such manner. Please, give to me money!" - Kiryl
Pre-release and unused content[edit]
- Main article: List of Fortune Street pre-release and unused content
Within the game's files are 30 board layouts that go unused. Among them are recreations of Street 1, Street 2, and Street 3 from Itadaki Street 2: Neon Sign wa Bara Iro ni. However, the prices of the shops and the layout of the districts do not match exactly. On these boards, the maximum dice roll is set to five which is not used for any of the playable boards.
Gallery[edit]
- For this subject's image gallery, see Gallery:Fortune Street.
Media[edit]
- For a complete list of media for this subject, see List of Fortune Street media.
| File info 1:21 |
| File info 0:30 |
| File info 0:30 |
| File info 0:30 |
| File info 0:04 |
| File info 0:30 |
| File info 0:06 |
References to other games[edit]
- Super Mario Bros.: The World 1-1 board is based off the same level from this game. Additionally, the music of this board is an arrangement of the overworld theme of this game. Also, upon completing a Super Mario board, an arrangement of the "World Clear" music plays, followed by an arrangement of the "Ending" theme.
- Dragon Quest (series): Arrangements of the level up, inn, and save jingles are used. When a slime wins the Slurpodrome or a player matches lucky sevens in Round the Blocks on a Dragon Quest board, an arrangement of the medium fanfare plays. Seeds of agility can appear during a Slurpodrome race and chimaera wings appear in Round the Blocks. Various recurring monsters appear.
- Dragon Quest: Alefgard is a playable board and it uses the overworld music from this game. An arrangement of the ending music is used when a player wins a Dragon Quest board. An arrangement of the Game Over jingle is used when a player is bankrupted.
- Super Mario Bros.: The Lost Levels: The arrangement of the "Ending" theme is based on the one from this game.
- Dragon Quest III: The Seeds of Salvation: The Ghost Ship is a playable board and it uses the overworld music from this game. The file select music is an arrangement of "Rolling Dice".
- Super Mario Bros. 3: During an auction, an arrangement of the Toad's House/P Switch music plays. An arrangement of the Pipe Land map music also plays in the stock menu. Also, an arrangement of the "3 Matching Cards" fanfare plays whenever a line is made in Round the Blocks on a Super Mario board or when the Super Mario Tour is completed in Tour mode, as well as an arrangement of the "World Clear" fanfare playing when a line of lucky 7's is made in Round the Blocks on a Super Mario board.
- Dragon Quest IV: Chapters of the Chosen: Colossus is a playable board and it uses an arrangement of "Wagon Wheel's March". When a player reaches the target net worth on a Dragon Quest board, it plays an arrangement of this game's battle theme. The Healslime that can appear is named "Healie", referencing the Healslime that assists Ragnar McRyan.
- Super Mario World: An arrangement of the final boss theme plays when someone reaches the target amount in a Super Mario board. An arrangement of the bonus stage music is heard in the minigame Round the Blocks if it is played on a Mario board.
- Super Mario Kart: An arrangement of Mario Circuit's music is used for the Mario Circuit board.
- Dragon Quest V: Hand of the Heavenly Bride: Mt. Magmageddon is a playable board and it uses an arrangement of this game's dungeon theme. The Slurpodrome is based off of this game's slime race minigame and plays rearrangements of the minigame's music. The Goodybag that can appear is named "Gumdrops", a reference to the recruitable Goodybag.
- Super Mario Land 2: 6 Golden Coins: One of Wario's quotes on Starship Mario has him stating that the starship would be his if he turned the "M" upside down. This alludes to his taking over of Mario's castle in this game, which involved flipping the castle's "M" so that it appeared as a "W".
- Super Mario World 2: Yoshi's Island: An arrangement of the title screen music for this game plays as the music for the Yoshi's Island board. Also, an arrangement of the athletic theme is heard in the Venture square or when Dart of Gold is being played.
- Super Mario RPG: Legend of the Seven Stars: An arrangement of "Hello, Happy Kingdom" plays on the Peach's Castle board.
- Wario Land 3: Wario mentions Rudy when building a tent on the board.
- Luigi's Mansion: One of Luigi's quotes mentions the Poltergust 3000.
- Super Mario Sunshine: Delfino Plaza returns as a Super Mario franchise board. An arrangement of its original theme is the music of this board.
- Wario World: Wario mentions the Black Jewel in one of his quotes, who is the main antagonist of that game.
- Mario Kart: Double Dash!!: Peach's quote on the Mario Circuit board is "I'm going to double-dash my way to victory! Good luck keeping up with me! Tee hee!" This references the two driver mechanic featured in said game.
- Slime MoriMori Dragon Quest: Shougeki no Shippo Dan: Slimenia appears as a board and it plays an arrangement of "Blue Skies, Blue Slime".
- Mario Party 6: Yoshi's artwork is an updated version on his artwork from this game.
- Super Mario 64 DS: Bowser's artwork from this game is reused.
- Dragon Quest VIII: Journey of the Cursed King: Castle Trodain is a playable board and uses an arrangement of its area music. The jingle that plays when the venture card #13 is drawn is taken directly from this game. When Dart of Gold is played by a Dragon Quest character or Round the Blocks is played on a Dragon Quest board, it plays an arrangement of "Fun Casino". Munchie can appear in a Slurpodrome race.
- Dance Dance Revolution: Mario Mix: Luigi's artwork from this game is reused.
- Mario Superstar Baseball: The Mario Stadium and an arrangement of its music returns as one of the Super Mario franchise boards.
- Dragon Quest Heroes: Rocket Slime: An arrangement of Forewood Forest and Backwood's music is used on Slimenia.
- Dragon Quest: Shōnen Yangus to Fushigi no Dungeon: Robbin' Hood Ruins appears as a board and it uses its area music.
- New Super Mario Bros.: An arrangement of the Bowser's Castle theme can be heard at certain boards. Gaining a level with a Super Mario franchise character plays an arrangement of the "Course Clear" music. Also, Bowser Jr.'s artwork from this game is reused.
- Mario Party 8: Wario, Daisy, Toad, Waluigi, and Birdo's artwork from this game is reused.
- Itadaki Street DS: All of the boards and playable characters in this game return.
- DK: Jungle Climber: Diddy Kong's artwork from this game is reused.
- Super Mario Galaxy: The Good Egg Galaxy returns as a Super Mario franchise board.
- Mario Kart Wii: The Mario Circuit board resembles the Mario Circuit from this game.
- Mario Super Sluggers: The Mario Stadium board uses the stadium's design from this game.
- Dragon Quest IX: Sentinels of the Starry Skies: The Observatory and Alltrades Abbey are playable boards and they uses arrangements of their respective area music. On the Wi-Fi menu screen, an arrangement of "Pub Polka" plays.
- New Super Mario Bros. Wii: Memory Block takes place in a Toad House from this game and features an arrangement of the Toad House music from this game.
- Super Mario Galaxy 2: Starship Mario returns as a Super Mario franchise board. An arrangement of "Starship Mario, Launch!" also plays on this board.
- Dragon Quest: Monster Battle Road Victory: The music for the Ghost Ship, Alefgard, Colossus, reaching the target net worth on a Dragon Quest board, winning a Dragon Quest board, and the Wi-Fi menu are taken directly from this game.
- Mario Sports Mix: The victory animations for some of the Super Mario franchise characters resemble the animations from this game, however their animations are slightly different and are not continuous; they revert to their standing animation when they finish their victory animation.
Names in other languages[edit]
| Language | Name | Meaning | Notes |
|---|---|---|---|
| Japanese | いただきストリートWii[?] Itadaki Sutorīto Wī |
Top Street Wii | |
| Dutch | Boom Street[?] | - | |
| French | Course à la fortune[?] | Race for fortune | |
| German | Straßen des Glücks[?] | Streets of Fortune | |
| Italian | La via della fortuna[?] | The fortune/luck street | |
| Spanish (NOA) | Fortune Street[?] | - | |
| Spanish (NOE) | Distrito Fortuna[?] | Fortune District |
References[edit]
External links[edit]
- Official Japanese website (Nintendo)
- Official Japanese website (Square Enix)
- Official North American website (Wayback Machine)
- Official European website
- Official European microsite[dead link]
- Official Oceania website (Wayback Machine)
Other wikis[edit]
- Fortune Street on the Dragon Quest Wiki
- Fortune Street on Fandom's Dragon Quest Wiki
