|
|
| (85 intermediate revisions by 47 users not shown) |
| Line 1: |
Line 1: |
| {{worldbox | | {{italic title|id=yes}} |
| |title=World 2 | | {{world infobox |
| |image=[[File:World 2 - 3D Land.png|250px]] | | |image=[[File:World 2 - 3D Land.png|250px]] |
| |app=''[[Super Mario 3D Land]]'' | | |game=''[[Super Mario 3D Land]]'' |
| |lev=5 | | |levels=5 |
| |before=[[World 1 (Super Mario 3D Land)|<<]] | | |before=[[World 1 (Super Mario 3D Land)|<<]] |
| |after=[[World 3 (Super Mario 3D Land)|>>]] | | |after=[[World 3 (Super Mario 3D Land)|>>]] |
| }} | | }} |
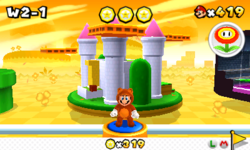
| | '''World 2''' is the second world explored in ''[[Super Mario 3D Land]]''. This world is a yellow field of flowers and clovers with many blocks and hills and a few mountains in the background. It has five levels, a [[Mystery Box]], and a [[Toad House]]. The boss of this world is Boom Boom. This is the only world to contain no locked levels. |
|
| |
|
| '''World 2''' is the second world explored in ''[[Super Mario 3D Land]]''. This world is a yellow field with blocks, hills and a mountain in the background. It has five levels, a [[Mystery Box (Super Mario 3D Land)|Mystery Box]], and a [[Toad House]]. The boss of this world is Boom Boom.
| | The following enemies first appear in World 2: |
|
| |
|
| ==Levels==
| | {{columns|count=2| |
| ===World 2-1===
| |
| ====Layout====
| |
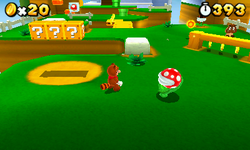
| [[File:2-1 SM3DL.png|thumb|200px|Tanooki Mario hitting a Goomba.]]
| |
| This level was featured as a demo course in E3 2011. In the first area, a pair of [[Binoculars]] that [[Mario]] can use to see [[Toad]] near the [[Flagpole]], some [[Goombas]], some dandelions (one of them hides a [[Super Mushroom]]; three [[? Block]]s and a [[Piranha Plant]] can be found.) In the next area, there are some [[Coin]]s and a [[Venus Fire Trap]] surrounded by two wood Goombas. The hero must turn to the left to find a [[Roulette Block]] and a gap and three moving platforms to go to the other side. If Mario goes to the far left, he will find a small path with three wood Goombas and a real [[Goomba]]. In the next area, there is a small mount with some coins. In the right side there is a [[P-Switch]] that collects 16 [[Rainbow Note]]s and a Warp Pipe. The [[Midway Flag]] won't appear in the level. Soon, Mario must go up to the top of a castle. In the way, there are Goombas and Tail Goombas. Three trampoline platforms will send Mario to a {{conjecturaltext|Warp Box}}. It will warp the plumber to a tiny platform floating a bit far from the top of the castle. To reach there, he needs to press a ! panel to make several platforms in the direction of the Flagpole. When Mario lands on the castle, he can use more green reproducing platforms to reach a trampoline to grab the Flagpole's top.
| |
| | |
| ====Star Medals====
| |
| *'''Star Medal 1''': It is given by Toad, after Mario finds him using the pair of binoculars. This Star Medal will land on the top of a small mount, near the start of the course.
| |
| *'''Star Medal 2''': Next to this mount, there is a pipe with a [[Piranha Plant]]. Mario must defeat it and enter in the [[Warp Pipe]]. He will be transported to an optical illusion room, where the medal is above a block.
| |
| *'''Star Medal 3''': In the far right of the first story of the castle, the Star Medal is visible a little behind of the place where Mario is. To take it, he can [[Long Jump]] to it, fly with [[Tanooki Mario]] or back a little until find a way that leads to the medal.
| |
| | |
| ===World 2-2===
| |
| ====Layout====
| |
| [[File:Mario SM3DL2.png|thumb|200px|right|World 2-2.]]
| |
| [[File:2-2.jpg|thumb|200px|left|Mario in a small area in 2-2.]]
| |
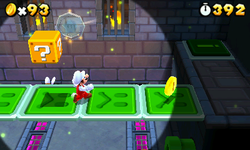
| This level takes place in a dark underground area with [[Poisonous Water]] and a flashlight that spots Mario. There are two ways. Above, green panels are found and conduct to the regular way, that contains a Star Medal. Under it, there are two [[Paragoomba]]s and a [[Warp Pipe]], that leads to a small room with the word "3D" made of coins. The next area is mostly a pool of poison that Mario can cross only by the green panels. In this area, some [[? Block]]s and another Paragoomba are faced. At the end of the poison, Mario can use the [[Midway Flag]] and a reproducing coin. Soon after, another poison pond is found, this time, bigger than the first one. After that, Mario will reach a small area with a Warp Pipe that lead to the [[Flagpole]]. Mario can reach the top of it only by activating some green reproducing panels.
| |
| | |
| ====Star Medals====
| |
| *'''Star Medal 1''': At the start of the level, it can be collected easily by going up on the first green panels. The Star Medal will be a bit behind the area.
| |
| *'''Star Medal 2''': Right after the Midway Flag, a hidden area exists in the ceiling. Mario can reach in the elevated area after the Midway Flag by a hole in the left part of the place.
| |
| *'''Star Medal 3''': On the outdoors final area, the wall in the left side have some Brick Blocks at the bottom part. Mario can break them with a somersault or [[Tanooki Mario]]'s tail. The Star Medal will be in a small corridor behind this blocks, where Mario must [[Wall Jump|wall jump]] in the far behind wall.
| |
| | |
| ===World 2-3===
| |
| ====Layout====
| |
| [[File:SM3DL23.png|thumb|200px|World 2-3.]]
| |
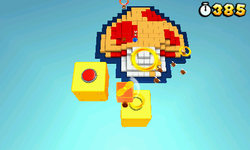
| This level takes place in an open blue sky. Mario starts in a platform shaped as himself in ''[[Super Mario Bros.]]''. There are three [[P-Switch]]es (two located at Mario's overalls' buttons, and the other in Mario's ear). Here, a [[Propeller Box]] can be found. Through some giant blocks, Mario will reach a pixelated [[Super Mushroom]] platform. Here, a P-Switch makes a line of coins to appear. In one of the mushroom's spots, there's a Brick Block hiding a spin trunk switch. Tapping it with Tanooki Mario's tail will cause the spot to rise and a [[Red Ring]] can be reached. Through some yellow and blue blocks with some Paragoombas, coins and a green [[Clock]], Mario will land in a [[Princess Peach]] 8-Bit platform. There's another spin trunk switch, which will raise Peach's dress stripe. Some [[Goomba]]s and [[Moneybag]]s are faced. Ahead, a {{conjecturaltext|Warp Box}} will lead the character to a grassy area, which a background that resembles the ''Super Mario Bros.'''s style. A classic half-pyramid is used to reach the Flagpole. Additionally, if Mario goes into the castle, he'll go into a hidden {{conjecturaltext|Warp Box}} which will take him into a pixelated [[1-Up Mushroom]] platform, which has a 1-Up Mushroom on it. After that, Mario should use another {{conjecturaltext|Warp Box}} to warp him back into the grassy area.
| |
| | |
| ====Star Medals====
| |
| *'''Star Medal 1''': In the Mario's platform, the right foot part contains a Brick Block with a spin switch. Hitting it will make the platform rise until a Luigi platform and the foot will fit on a hole. The Star Medal is located there.
| |
| *'''Star Medal 2''': Between the Super Mushroom and Peach's platform, a Coin Ring can be seen with the Star Medal under it. Mario, using a Propleller Box, can grab the coin and fly back up to the block.
| |
| *'''Star Medal 3''': Mario must rise Peach's dress stripe. The Star Medal is floating on the far left.
| |
| {{br}}
| |
| | |
| ===World 2-4===
| |
| ====Layout====
| |
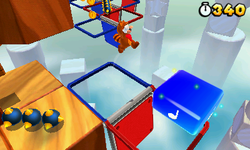
| [[File:SM3DL2-4.png|thumb|left|200px|World 2-4]]
| |
| [[File:Flippy platforms scene SM3DL.png|thumb|200px|right|Mario leaping from platforms.]]
| |
| The level starts in a small site made of wood cubes. In this place, a [[Reversible Platform]] is used to reach in the next area. After more wood cubes, Mario will find more Reversible Platforms and Hatchins. Ahead, he must cross even more Reversible Platforms, but now with [[Baddie Box]]es that release Goombas, spiked cubes and rotating spiked bars. In one of these platforms, there is a {{conjecturaltext|Rainbow ♪ Block}}. Near, Mario will face some rotating spiked bars above more platforms and another enemy box and a Hatchin. Now, next to the Flagpole, he can use one Reversible Platform to grab the top.
| |
| | |
| ====Star Medals====
| |
| *'''Star Medal 1''': in the first section with enemy boxes, the Star Medal is floating behind some spiked blocks.
| |
| *'''Star Medal 2''': soon after this section, Mario will find a {{conjecturaltext|Rainbow ♪ Block}} that will send him to a [[Coin Heaven]]. In the end of the area, a Star Medal can be collected.
| |
| *'''Star Medal 3''': In the next Reversible Platforms area, Mario will find a [[Flying ? Block]]. Jumping over it is sufficient to grab a Star Medal in the midair.
| |
| | |
| ==={{world|2|airship}}===
| |
| ====Layout====
| |
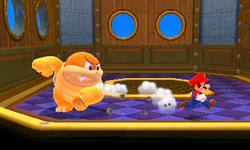
| [[File:3DS SuperMario 4 scrn04 E3.png|thumb|200px|Mario fighting against Boom Boom.]]
| |
| It's the first [[Airship]] level of the game. Mario will land on an Airship with three [[Rocket Engine]]s and a tightrope, that connects it to another. A little behind, there is a flying [[Bill Blaster]] that shoots [[Bullet Bills]] toward the rope. In the next ship, Mario will face with three Bill Blasters, and a {{conjecturaltext|Warp Box}}. Mario must go up in other Airship, that contains a rectangular [[? Block]] that release three [[Coin]]s. Ahead, there are a [[Rocky Wrench]] and a Star Medal above it. Then, there is another flying Bill Blaster, but this time shoots [[Tail Bullet Bill]]s. In the next ship, Mario can enter in a [[Warp Pipe]] to battle with a [[Boom Boom]]. After hit his head three times, other Warp Pipe will lead him to the Airship with the [[Goal Pole]].
| |
| | |
| ====Star Medals====
| |
| *'''Star Medal 1''': When Mario enters in the only {{conjecturaltext|Warp Box}} of the level, he must go on a small elevated area on the bonus Airship. There are a blue [[Clock]] and a [[Star Coin|Star Medal]].
| |
| *'''Star Medal 2''': There is a Star Medal above the [[Rocky Wrench]] in the third Airship. Mario must stomp the enemy to jump higher and collect the medal, or by doing a high wall-jump.
| |
| *'''Star Medal 3''': In the last ship, the plumber must fall down. Under, there is an area with coins and the third Star Medal. Upon entering the area the level will stop moving.
| |
| | |
| ==Enemies introduced==
| |
| *[[Bullet Bill]]s | | *[[Bullet Bill]]s |
| *[[Moneybag]]s | | *[[Bill Blaster]]s |
| *[[Rocket Engine]]s | | *[[Coin Coffer]]s |
| | *[[Baddie Box]]es |
| | *[[Spike Trap|Spike]]s |
| | *[[Burner|Jet engine]]s |
| *[[Rocky Wrench]]es | | *[[Rocky Wrench]]es |
| *[[Stingby]]s | | *[[Stingby|Stingbies]] |
| *[[Tail Bullet Bill]]s | | *[[Tail Bullet Bill]]s |
| *Boss: [[Boom Boom]]
| | }} |
|
| |
|
| ==Trivia== | | The four possible contents of this world's [[Mystery Box]] are: |
| *The secret area with the coins in the shape of "3D" may be a reference to a secret area in ''[[Super Mario Bros. 3]]'' where the coins are in the shape of the number 3.
| | *A [[Fire Flower]], a [[Goomba Tower]], two Goombas high, and a [[Fire Piranha Plant]]. Defeating the enemies causes 15 [[Coin]]s and a [[Star Medal]] to appear. |
| *When Mario completes World 2-3, the original winning tune from ''Super Mario Bros.'' is played.
| | *Two Fire Piranha Plants and a Fire Flower. Defeating the Fire Piranha Plants causes 15 Coins and a Star Medal to appear. |
| | *Two [[Tail Goomba]]s and a [[Super Leaf]]. |
| | *A golden Mystery Box containing nine [[Wooden cutout|Goomba Board]]s, five of which contain [[1-Up Mushroom]]s and the others, Coins, a Fire Flower, and two Star Medals. |
| | |
| | ==Levels== |
| | {{content description |
| | |name1=[[World 2-1 (Super Mario 3D Land)|World 2-1]] |
| | |image1=[[File:2-1 SM3DL.png|250px]] |
| | |description1=An outside course that seems to take place around a castle. |
| | |name2=[[World 2-2 (Super Mario 3D Land)|World 2-2]] |
| | |image2=[[File:Mario SM3DL2.png|250px]] |
| | |description2=An underground course with [[Flip Panel (platform)|Flip Panel]]s that create a path. |
| | |name3=[[World 2-3 (Super Mario 3D Land)|World 2-3]] |
| | |image3=[[File:SM3DL23.png|250px]] |
| | |description3=A course in the sky with platforms designed to look like various sprites from ''[[Super Mario Bros.]]'' |
| | |name4=[[World 2-4 (Super Mario 3D Land)|World 2-4]] |
| | |image4=[[File:SM3DL2-4.png|250px]] |
| | |description4=An athletic course and the introduction of [[Red-Blue Panel]]s. |
| | |name5={{world link|2|airship3D|World 2-Airship (Super Mario 3D Land)}} |
| | |image5=[[File:SM3DL Boom Boom W2.png|250px]] |
| | |description5=The first [[Airship]] course of the game, with a first confrontation with [[Boom Boom]]. |
| | }} |
|
| |
|
| ==Media== | | ==Music== |
| {{Media | | {{media table |
| |type1=audio | | |file1=SM3DL-World 2.oga |
| |name1=SM3DL-World 2
| | |title1=[[Super Mario 3D Land]] |
| |pipe1=[[Super Mario 3D Land]] | |
| |description1=World 2 Theme | | |description1=World 2 Theme |
| |length1=0:50 | | |length1=0:30 |
| }} | | }} |
| <br clear=all>
| | |
| | ==Trivia== |
| | *The secret area with the coins in the shape of "3D" may be a reference to a secret area in ''[[Super Mario Bros. 3]]'' where the coins are in the shape of the number three. |
| | *When Mario completes World 2-3, the original winning tune from ''Super Mario Bros.'' is played. This also plays at the end of [[Special 1-3]]. |
| | *World 5-2 was, during early builds, 2-5 as a reference to ''The Legend of Zelda'' series. |
| | |
| | {{SM3DL levels}} |
| {{SM3DL}} | | {{SM3DL}} |
| [[Category:Worlds]] | | [[Category:Grasslands]] |
| [[Category:Places]] | | [[Category:Super Mario 3D Land worlds]] |
| | [[de:Welt 2 (Super Mario 3D Land)]] |
| | [[it:Mondo 2 (Super Mario 3D Land)]] |
