Mario Tour (2021): Difference between revisions
(→Trivia) |
|||
| (96 intermediate revisions by 29 users not shown) | |||
| Line 1: | Line 1: | ||
{{ | {{tour infobox | ||
|image=[[File:MKT Mario Tour.png|200px]] | |image=[[File:MKT Mario Tour.png|200px]] | ||
|start=March 9, 2021<br>10:00 p.m. (PT) | |start=March 9, 2021<br>10:00 p.m. (PT) | ||
|end=March 23, 2021<br>10:59 p.m. (PT) | |end=March 23, 2021<br>10:59 p.m. (PT) | ||
|cups=12 | |cups=12 | ||
|rank=[[Mario Cup]] (week 1) | |rank=[[Mario Cup]] (week 1)<br>[[Birdo Cup]] (week 2) | ||
|coin=[[RMX Mario Circuit 1]] | |coin=[[RMX Mario Circuit 1]] | ||
|before=[[Snow Tour|<<]] | |before=[[Snow Tour|<<]] | ||
|after=[[Yoshi Tour (2021)|>>]] | |after=[[Yoshi Tour (2021)|>>]] | ||
}} | }} | ||
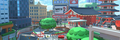
The '''Mario Tour''' | The '''Mario Tour''' was the thirty-ninth tour of ''[[Mario Kart Tour]]'', which began on March 10, 2021 (the same day as [[MAR10 Day]]) and ended on March 23, 2021. A new [[Tour Tokyo Blur|Tokyo Blur]] course, namely [[Tour Tokyo Blur|Tokyo Blur 4]], was introduced in this tour, while also introducing [[Mario]] in his racing [[Crazy Cap#Racing Helmet|helmet]] and [[Crazy Cap#Racing Outfit|outfit]] from ''[[Super Mario Odyssey]]''. From this tour to the end of the [[Yoshi Tour (2021)|following tour]], the title screen was changed to represent Team Peach's victory against Team Daisy in the [[Peach vs. Daisy Tour]]. Starting from this tour, a new [[#2-Player Challenge|2-Player Challenge]] was added in which players could team up with friends and earn [[event token]]s in the Multiplayer mode together. This tour's [[Coin Rush (Mario Kart Tour)|Coin Rush]] course was [[RMX Mario Circuit 1]], which was reused from the Mario Bros. Tour. The menu background featured {{wp|Mount Fuji}}, the {{wp|Tokyo Tower}}, and {{wp|Kaminarimon}} as landmarks for this tour. | ||
This was the final tour to introduce a Super glider, that being the [[Mushroom Glider]]. | |||
{{br|toc=1}} | |||
==Spotlights== | ==Spotlights== | ||
{| align=center width=66% cellspacing=0 border=1 cellpadding=3 style="border-collapse:collapse; font-family:Arial; text-align:center" | {|align=center width=66% cellspacing=0 border=1 cellpadding=3 style="border-collapse:collapse; font-family:Arial; text-align:center" | ||
|-style="background: #89A" | |-style="background: #89A" | ||
|colspan=3|'''Mario Pipe 1'''<br>March 9, 2021, 10:00 p.m. (PT) – <br>March 23, 2021, 10:59 p.m. (PT) | |colspan=3|'''Mario Pipe 1'''<br>March 9, 2021, 10:00 p.m. (PT) – <br>March 23, 2021, 10:59 p.m. (PT) | ||
| Line 22: | Line 22: | ||
|colspan=3|[[File:MKT Tour39 MarioPipe 2.png|x150px]] | |colspan=3|[[File:MKT Tour39 MarioPipe 2.png|x150px]] | ||
|-style="background: #ABC" | |-style="background: #ABC" | ||
! style="width: 15%;"| | !style="width: 15%;"|Driver | ||
! style="width: 15%;"| | !style="width: 15%;"|Kart | ||
! style="width: 15%;"| | !style="width: 15%;"|Glider | ||
! style="width: 15%;"|Drivers | !style="width: 15%;"|Drivers | ||
! style="width: 15%;"|Karts | !style="width: 15%;"|Karts | ||
! style="width: 15%;"|Gliders | !style="width: 15%;"|Gliders | ||
|- | |- | ||
|[[File:MKT Artwork MarioRacing.png|110x100px]] | |[[File:MKT Artwork MarioRacing.png|110x100px]] | ||
| Line 37: | Line 37: | ||
|- | |- | ||
|[[Mario|Mario (Racing)]] | |[[Mario|Mario (Racing)]] | ||
|[[ | |[[B Dasher Mk. 2]] | ||
|[[Mushroom Glider]] | |[[Mushroom Glider]] | ||
|[[Mario|Mario (Hakama)]], [[Mario|Mario (Happi)]], and [[Mario|Mario (SNES)]] | |[[Mario|Mario (Hakama)]], [[Mario|Mario (Happi)]], and [[Mario|Mario (SNES)]] | ||
| Line 45: | Line 45: | ||
==Special pipe== | ==Special pipe== | ||
{| align=center width= | {|align=center width=45% cellspacing=0 border=1 cellpadding=3 style="border-collapse:collapse; font-family:Arial; text-align:center" | ||
|-style="background: #89A" | |-style="background: #89A" | ||
|colspan=3|'''Streamliner Pipe'''<br> | |colspan=3|'''Streamliner Pipe'''<br>March 13, 2021, 10:00 p.m. (PT) – <br>March 18, 2021, 10:59 p.m. (PT) | ||
|- | |- | ||
|colspan=3|[[File:MKT Tour39 StreamlinerPipe.png|x150px]] | |colspan=3|[[File:MKT Tour39 StreamlinerPipe.png|x150px]] | ||
|-style="background: #ABC" | |-style="background: #ABC" | ||
! style="width: 100%;"| | !style="width: 100%;"|Spotlight High-End karts | ||
|- | |- | ||
| | |[[File:MKT Icon DecalStreamliner.png|100px]][[File:MKT Icon OrangeStreamliner.png|100px]] | ||
|- | |- | ||
|[[Circuit Special]], [[Green Circuit]], [[P-Wing (kart)|P-Wing]], [[Pink Wing]], [[Black Circuit | |[[Decal Streamliner]] and [[Orange Streamliner]] | ||
|- | |||
|-style="background: #ABC" | |||
! style="width: 100%;"|High-End karts | |||
|- | |||
|[[File:MKT Icon CircuitSpecial.png|80px]][[File:MKT Icon GreenCircuit.png|80px]][[File:MKT Icon PWing.png|80px]][[File:MKT Icon PinkWing.png|80px]][[File:MKT Icon BlackCircuit.png|80px]][[File:MKT Icon BDasher.png|70px]] | |||
|- | |||
|[[Circuit Special]], [[Green Circuit]], [[P-Wing (kart)|P-Wing]], [[Pink Wing]], [[Black Circuit]], and [[B Dasher]] | |||
|} | |} | ||
;Names in other languages | |||
{{foreign names | |||
|Ger=Flotte-Flitzer-Röhre | |||
|GerM=Fleet Dasher Pipe | |||
|ChiT=賽道車輛水管 | |||
|ChiTR=Sàidào chēliàng shuǐguǎn | |||
|ChiTM=Race Track Car Pipe | |||
}} | |||
==Cups== | ==Cups== | ||
{| align=center width=90% cellspacing=0 border=1 cellpadding=3 style="border-collapse:collapse; font-family:Arial; text-align:center" | {|align=center width=90% cellspacing=0 border=1 cellpadding=3 style="border-collapse:collapse; font-family:Arial; text-align:center" | ||
{{ | {{MKT cup table row | ||
|C=Mario||Ra=1 | |C=Mario||Ra=1 | ||
|R1=[[Tokyo Blur 4]]||R1.I=TokyoBlur4||R1.1=1,300||R1.2=1,900||R1.3=2,600||R1.4=3,200||R1.5=6,400 | |R1=[[Tour Tokyo Blur|Tokyo Blur 4]]||R1.I=TokyoBlur4 MarioRacing||R1.1=1,300||R1.2=1,900||R1.3=2,600||R1.4=3,200||R1.5=6,400 | ||
|R2=[[ | |R2=[[DS Airship Fortress]]||R2.I=AirshipFortressDS CatPeach||R2.1=1,400||R2.2=2,200||R2.3=2,900||R2.4=3,600||R2.5=7,200 | ||
|R3=[[ | |R3=[[SNES Mario Circuit 1]]||R3.I=MarioCircuit1SNES Mario||R3.1=900||R3.2=1,400||R3.3=1,900||R3.4=2,400||R3.5=4,700 | ||
|CN=Ring Race||C.I=Tour7 LuigiCupChallenge||CC=Baby Luigi||CT=[[ | |CN=[[Ring Race]]||C.I=Tour7 LuigiCupChallenge||CC=[[Baby Luigi]]||CT=[[3DS Rainbow Road]]||C.1=40||C.2=50||C.3=70 | ||
}} | }} | ||
{{ | {{MKT cup table row | ||
|C=Baby Mario||Ra= | |C=Baby Mario||Ra= | ||
|R1=[[DK Summit|Wii DK Summit T]]||R1.I=DKSummitTWii MarioRacing||R1.1=1,900||R1.2=2,900||R1.3=3,900||R1.4=4,900||R1.5=9,400 | |R1=[[Wii DK Summit|Wii DK Summit T]]||R1.I=DKSummitTWii MarioRacing||R1.1=1,900||R1.2=2,900||R1.3=3,900||R1.4=4,900||R1.5=9,400 | ||
|R2=[[ | |R2=[[3DS Toad Circuit]]||R2.I=ToadCircuit3DS BabyMario||R2.1=1,000||R2.2=1,600||R2.3=2,100||R2.4=2,600||R2.5=5,000 | ||
|R3=[[Ghost Valley 1|SNES Ghost Valley 1T]]||R3.I=GhostValley1TSNES MarioHakama||R3.1=1,500||R3.2=2,400||R3.3=3,200||R3.4=4,000||R3.5=7,700 | |R3=[[SNES Ghost Valley 1|SNES Ghost Valley 1T]]||R3.I=GhostValley1TSNES MarioHakama||R3.1=1,500||R3.2=2,400||R3.3=3,200||R3.4=4,000||R3.5=7,700 | ||
|CN=Time Trial||C.I=Tour9 BabyPeachCupChallenge||CC=Baby Peach||CT=[[ | |CN=[[Time Trial (Mario Kart Tour)|Time Trial]]||C.I=Tour9 BabyPeachCupChallenge||CC=[[Baby Peach]]||CT=[[GBA Bowser's Castle 1]]||C.1=1:25.00||C.2=1:18.00||C.3=1:12.00 | ||
}} | }} | ||
{{ | {{MKT cup table row | ||
|C=Birdo||Ra= | |C=Birdo||Ra=2 | ||
|R1=Tokyo Blur 4R/T||R1.I=TokyoBlur4RT||R1.1=1,300||R1.2=2,100||R1.3=2,900||R1.4=3,600||R1.5=6,700 | |R1=Tokyo Blur 4R/T||R1.I=TokyoBlur4RT MarioSNES||R1.1=1,300||R1.2=2,100||R1.3=2,900||R1.4=3,600||R1.5=6,700 | ||
|R2=3DS Rainbow Road||R2.I=RainbowRoad3DS Birdo||R2.1=1,700||R2.2=2,700||R2.3=3,700||R2.4=4,600||R2.5=8,500 | |R2=3DS Rainbow Road||R2.I=RainbowRoad3DS Birdo||R2.1=1,700||R2.2=2,700||R2.3=3,700||R2.4=4,600||R2.5=8,500 | ||
|R3=[[RMX Mario Circuit 1|RMX Mario Circuit 1R/T]]||R3.I=RMXMarioCircuit1RT MarioClassic||R3.1=1,400||R3.2=2,200||R3.3=3,000||R3.4=3,800||R3.5=7,000 | |R3=[[RMX Mario Circuit 1|RMX Mario Circuit 1R/T]]||R3.I=RMXMarioCircuit1RT MarioClassic||R3.1=1,400||R3.2=2,200||R3.3=3,000||R3.4=3,800||R3.5=7,000 | ||
|CN=Break Item Boxes||C.I=Tour15 LakituCupChallenge||CC=Lakitu||CT=[[ | |CN=[[Break Item Boxes]]||C.I=Tour15 LakituCupChallenge||CC=[[Lakitu]]||CT=[[SNES Donut Plains 1]]||C.1=5||C.2=10||C.3=14 | ||
}} | }} | ||
{{ | {{MKT cup table row | ||
|C=Baby Daisy||Ra= | |C=Baby Daisy||Ra= | ||
|R1=3DS Toad Circuit R||R1.I=ToadCircuitR3DS BabyDaisy||R1.1=1,100||R1.2=1,900||R1.3=2,500||R1.4=3,200||R1.5=5,700 | |R1=3DS Toad Circuit R||R1.I=ToadCircuitR3DS BabyDaisy||R1.1=1,100||R1.2=1,900||R1.3=2,500||R1.4=3,200||R1.5=5,700 | ||
|R2=SNES Donut Plains 1R||R2.I=DonutPlains1RSNES||R2.1=1,100||R2.2=1,800||R2.3=2,400||R2.4=3,000||R2.5=5,400 | |R2=SNES Donut Plains 1R||R2.I=DonutPlains1RSNES Toad||R2.1=1,100||R2.2=1,800||R2.3=2,400||R2.4=3,000||R2.5=5,400 | ||
|R3=DS Airship Fortress R||R3.I=AirshipFortressRDS KingBobomb||R3.1=1,500||R3.2=2,400||R3.3=3,300||R3.4=4,100||R3.5=7,400 | |R3=DS Airship Fortress R||R3.I=AirshipFortressRDS KingBobomb||R3.1=1,500||R3.2=2,400||R3.3=3,300||R3.4=4,100||R3.5=7,400 | ||
|CN=Glider Challenge||C.I=Tour39 BabyDaisyCupChallenge||CC=Pink Shy Guy||CT=Wii DK Summit||C.1=300||C.2=600||C.3=750 | |CN=[[Glider Challenge]]||C.I=Tour39 BabyDaisyCupChallenge||CC=[[Shy Guy|Pink Shy Guy]]||CT=Wii DK Summit||C.1=300||C.2=600||C.3=750 | ||
}} | }} | ||
{{ | {{MKT cup table row | ||
|C=Dry Bones||Ra= | |C=Dry Bones||Ra= | ||
|R1=Tokyo Blur 4R||R1.I=TokyoBlur4R||R1.1=1,500||R1.2=2,500||R1.3=3,400||R1.4=4,300||R1.5=7,400 | |R1=Tokyo Blur 4R||R1.I=TokyoBlur4R MetalMario||R1.1=1,500||R1.2=2,500||R1.3=3,400||R1.4=4,300||R1.5=7,400 | ||
|R2=RMX Mario Circuit 1R||R2.I=RMXMarioCircuit1R||R2.1=1,300||R2.2=2,100||R2.3=2,900||R2.4=3,700||R2.5=6,300 | |R2=RMX Mario Circuit 1R||R2.I=RMXMarioCircuit1R DryBones||R2.1=1,300||R2.2=2,100||R2.3=2,900||R2.4=3,700||R2.5=6,300 | ||
|R3=SNES Ghost Valley 1R||R3.I=GhostValley1RSNES BlackYoshi||R3.1=1,100||R3.2=1,900||R3.3=2,500||R3.4=3,200||R3.5=5,500 | |R3=SNES Ghost Valley 1R||R3.I=GhostValley1RSNES BlackYoshi||R3.1=1,100||R3.2=1,900||R3.3=2,500||R3.4=3,200||R3.5=5,500 | ||
|CN=Steer Clear of Obstacles||C.I=Tour18 BabyPeachCupChallenge||CC=Peachette||CT=3DS Toad Circuit||C.1=1||C.2=2||C.3=3 | |CN=[[Steer Clear of Obstacles]]||C.I=Tour18 BabyPeachCupChallenge||CC=[[Peachette]]||CT=3DS Toad Circuit||C.1=1||C.2=2||C.3=3 | ||
}} | }} | ||
{{ | {{MKT cup table row | ||
|C=Wendy||Ra= | |C=Wendy||Ra= | ||
|R1=SNES Donut Plains 1||R1.I=DonutPlains1SNES BoomerangBro||R1.1=1,000||R1.2=1,800||R1.3=2,500||R1.4=3,100||R1.5=5,200 | |R1=SNES Donut Plains 1||R1.I=DonutPlains1SNES BoomerangBro||R1.1=1,000||R1.2=1,800||R1.3=2,500||R1.4=3,100||R1.5=5,200 | ||
|R2=Tokyo Blur 4T||R2.I=TokyoBlur4T||R2.1=1,700||R2.2=3,000||R2.3=4,100||R2.4=5,200||R2.5=8,700 | |R2=Tokyo Blur 4T||R2.I=TokyoBlur4T MarioHappi||R2.1=1,700||R2.2=3,000||R2.3=4,100||R2.4=5,200||R2.5=8,700 | ||
|R3=3DS Rainbow Road T||R3.I=RainbowRoadT3DS||R3.1=2,100||R3.2=3,700||R3.3=5,000||R3.4=6,300||R3.5=10,500 | |R3=3DS Rainbow Road T||R3.I=RainbowRoadT3DS Wendy||R3.1=2,100||R3.2=3,700||R3.3=5,000||R3.4=6,300||R3.5=10,500 | ||
|CN=Time Trial||C.I=Tour39 WendyCupChallenge||CC=Ice Bro||CT=[[Luigi's Mansion | |CN=Time Trial||C.I=Tour39 WendyCupChallenge||CC=[[Ice Bro]]||CT=[[DS Luigi's Mansion|DS Luigi's Mansion R]]||C.1=2:05.00||C.2=1:54.00||C.3=1:48.00 | ||
}} | }} | ||
{{ | {{MKT cup table row | ||
|C=Baby Peach||Ra= | |C=Baby Peach||Ra= | ||
|R1=Wii DK Summit||R1.I=DKSummitWii KingBobomb||R1.1=1,400||R1.2=2,400||R1.3=3,300||R1.4=4,200||R1.5=6,800 | |R1=Wii DK Summit||R1.I=DKSummitWii KingBobomb||R1.1=1,400||R1.2=2,400||R1.3=3,300||R1.4=4,200||R1.5=6,800 | ||
|R2=SNES Mario Circuit 1R||R2.I=MarioCircuit1RSNES BabyPeach||R2.1=1,200||R2.2=2,100||R2.3=2,800||R2.4=3,600||R2.5=5,800 | |R2=SNES Mario Circuit 1R||R2.I=MarioCircuit1RSNES BabyPeach||R2.1=1,200||R2.2=2,100||R2.3=2,800||R2.4=3,600||R2.5=5,800 | ||
|R3=3DS Toad Circuit T||R3.I=ToadCircuitT3DS Peachette||R3.1=1,700||R3.2=3,000||R3.3=4,100||R3.4=5,100||R3.5=8,300 | |R3=3DS Toad Circuit T||R3.I=ToadCircuitT3DS Peachette||R3.1=1,700||R3.2=3,000||R3.3=4,100||R3.4=5,100||R3.5=8,300 | ||
|CN=Combo Attack||C.I=Tour39 BabyPeachCupChallenge||CC=Diddy Kong||CT=Tokyo Blur | |CN=[[Combo Attack]]||C.I=Tour39 BabyPeachCupChallenge||CC=[[Diddy Kong]]||CT=Tokyo Blur 4T||C.1=5||C.2=10||C.3=18 | ||
}} | }} | ||
{{ | {{MKT cup table row | ||
|C=Dry Bowser||Ra= | |C=Dry Bowser||Ra= | ||
|R1=RMX Mario Circuit 1T||R1.I=RMXMarioCircuit1T DryBowser||R1.1=1,700||R1.2=3,100||R1.3=4,200||R1.4=5,400||R1.5=8,400 | |R1=RMX Mario Circuit 1T||R1.I=RMXMarioCircuit1T DryBowser||R1.1=1,700||R1.2=3,100||R1.3=4,200||R1.4=5,400||R1.5=8,400 | ||
|R2=Tokyo Blur 4||R2.I=TokyoBlur4||R2.1=1,500||R2.2=2,800||R2.3=3,800||R2.4=4,800||R2.5=7,500 | |R2=Tokyo Blur 4||R2.I=TokyoBlur4 MarioRacing||R2.1=1,500||R2.2=2,800||R2.3=3,800||R2.4=4,800||R2.5=7,500 | ||
|R3=DS Airship Fortress T||R3.I=AirshipFortressTDS KingBobomb||R3.1=2,800||R3.2=5,300||R3.3=7,200||R3.4=9,100||R3.5=14,200 | |R3=DS Airship Fortress T||R3.I=AirshipFortressTDS KingBobomb||R3.1=2,800||R3.2=5,300||R3.3=7,200||R3.4=9,100||R3.5=14,200 | ||
|CN=Big Reverse Race||C.I=Tour3 BabyDaisyCupChallenge||CC=Any character||CT=SNES Ghost Valley 1||C.1=50cc||C.2=100cc||C.3=150cc | |CN=[[Big Reverse Race]]||C.I=Tour3 BabyDaisyCupChallenge||CC=Any character||CT=SNES Ghost Valley 1||C.1=50cc||C.2=100cc||C.3=150cc | ||
}} | }} | ||
{{ | {{MKT cup table row | ||
|C=Morton||Ra= | |C=Morton||Ra= | ||
|R1=Tokyo Blur 4T||R1.I=TokyoBlur4T||R1.1=1,800||R1.2=3,500||R1.3=4,800||R1.4=6,100||R1.5=9,200 | |R1=Tokyo Blur 4T||R1.I=TokyoBlur4T MarioHappi||R1.1=1,800||R1.2=3,500||R1.3=4,800||R1.4=6,100||R1.5=9,200 | ||
|R2=Wii DK Summit R||R2.I=DKSummitRWii BlackYoshi||R2.1=1,700||R2.2=3,200||R2.3=4,400||R2.4=5,500||R2.5=8,400 | |R2=Wii DK Summit R||R2.I=DKSummitRWii BlackYoshi||R2.1=1,700||R2.2=3,200||R2.3=4,400||R2.4=5,500||R2.5=8,400 | ||
|R3=SNES Donut Plains 1T||R3.I=DonutPlains1TSNES Morton||R3.1=1,800||R3.2=3,400||R3.3=4,600||R3.4=5,900||R3.5=8,900 | |R3=SNES Donut Plains 1T||R3.I=DonutPlains1TSNES Morton||R3.1=1,800||R3.2=3,400||R3.3=4,600||R3.4=5,900||R3.5=8,900 | ||
|CN=Do Jump Boosts||C.I=Tour12 WendyCupChallenge||CC=Yoshi||CT=RMX Mario Circuit 1||C.1=10||C.2=15||C.3=22 | |CN=[[Do Jump Boosts]]||C.I=Tour12 WendyCupChallenge||CC=[[Yoshi]]||CT=RMX Mario Circuit 1||C.1=10||C.2=15||C.3=22 | ||
}} | |||
{{MKT cup table row | |||
|C=Metal Mario||Ra= | |||
|R1=3DS Rainbow Road R||R1.I=RainbowRoadR3DS IceMario||R1.1=2,100||R1.2=4,000||R1.3=5,500||R1.4=7,000||R1.5=10,300 | |||
|R2=SNES Mario Circuit 1T||R2.I=MarioCircuit1TSNES MarioHakama||R2.1=1,500||R2.2=3,000||R2.3=4,100||R2.4=5,200||R2.5=7,600 | |||
|R3=Tokyo Blur 4R||R3.I=TokyoBlur4R MetalMario||R3.1=1,800||R3.2=3,500||R3.3=4,800||R3.4=6,100||R3.5=8,900 | |||
|CN=[[Smash Small Dry Bones]]||C.I=Tour39 MetalMarioCupChallenge||CC=[[Birdo|Birdo (Yellow)]]||CT=DS Airship Fortress||C.1=4||C.2=7||C.3=9 | |||
}} | |||
{{MKT cup table row | |||
|C=Baby Rosalina||Ra= | |||
|R1=SNES Ghost Valley 1||R1.I=GhostValley1SNES BabyRosalina||R1.1=1,500||R1.2=3,000||R1.3=4,100||R1.4=5,200||R1.5=7,400 | |||
|R2=RMX Mario Circuit 1||R2.I=RMXMarioCircuit1 MarioClassic||R2.1=1,800||R2.2=3,600||R2.3=5,000||R2.4=6,300||R2.5=9,000 | |||
|R3=GBA Bowser's Castle 1R/T||R3.I=BowsersCastle1RTGBA DryBowser||R3.1=1,900||R3.2=3,800||R3.3=5,300||R3.4=6,700||R3.5=9,600 | |||
|CN=Time Trial||C.I=Tour39 BabyRosalinaCupChallenge||CC=[[Roving Racers|Red Koopa (Freerunning)]]||CT=Tokyo Blur 4||C.1=1:10.00||C.2=1:04.00||C.3=0:58.00 | |||
}} | |||
{{MKT cup table row | |||
|C=Wario||Ra= | |||
|R1=DS Luigi's Mansion R/T||R1.I=LuigisMansionRTDS Wario||R1.1=2,100||R1.2=4,300||R1.3=5,900||R1.4=7,500||R1.5=10,400 | |||
|R2=SNES Mario Circuit 1R/T||R2.I=MarioCircuit1RTSNES IceMario||R2.1=1,900||R2.2=3,900||R2.3=5,400||R2.4=6,800||R2.5=9,500 | |||
|R3=Tokyo Blur 4R/T||R3.I=TokyoBlur4RT MarioSNES||R3.1=2,000||R3.2=4,100||R3.3=5,600||R3.4=7,100||R3.5=9,900 | |||
|CN=[[Vs. Mega]] [[Bowser]]||C.I=Tour1 ToadetteCupChallenge||CC=Any character||CT=3DS Toad Circuit||C.1=50cc||C.2=100cc||C.3=150cc | |||
}} | }} | ||
|} | |} | ||
===Signature kart sets=== | ===Signature kart sets=== | ||
Drivers with a corresponding cup were bumped one rank up in every course of their cup. | Drivers with a corresponding cup were bumped one rank up in every course of their cup. | ||
{| class="wikitable" style="text-align: center" width=40% | {|class="wikitable"style="text-align:center"width=40% | ||
!width=10%|Cup | !width=10%|Cup | ||
!width=20%|Driver | !width=20%|Driver | ||
| Line 138: | Line 170: | ||
|Second course of every cup | |Second course of every cup | ||
|[[File:MKT Icon MarioRacing.png|50px|link=Mario|Mario (Racing)]] | |[[File:MKT Icon MarioRacing.png|50px|link=Mario|Mario (Racing)]] | ||
|[[File:MKT Icon BDasherMk2.png|60px|link= | |[[File:MKT Icon BDasherMk2.png|60px|link=B Dasher Mk. 2]] | ||
|[[File:MKT Icon MushroomGlider.png|55px|link=Mushroom Glider]] | |[[File:MKT Icon MushroomGlider.png|55px|link=Mushroom Glider]] | ||
|- | |- | ||
| Line 192: | Line 224: | ||
|- | |- | ||
|[[File:MKT Icon Metal Mario Cup.png|50px|link=Metal Mario Cup]] | |[[File:MKT Icon Metal Mario Cup.png|50px|link=Metal Mario Cup]] | ||
|[[File:MKT Icon MetalMario.png|50px|link= | |[[File:MKT Icon MetalMario.png|50px|link=Metal Mario]] | ||
|— | |— | ||
|— | |— | ||
| Line 209: | Line 241: | ||
==Rewards== | ==Rewards== | ||
Gold cells indicate rewards that are exclusive to Gold Pass members. | Gold cells indicate rewards that are exclusive to Gold Pass members. | ||
{|class="wikitable" style="margin:auto; text-align:center" | {|class="wikitable"style="margin:auto; text-align:center" | ||
|- | |- | ||
![[File:MKT Icon GrandStar.png|20x20px]] 15 | ![[File:MKT Icon GrandStar.png|20x20px]] 15 | ||
| Line 238: | Line 270: | ||
|} | |} | ||
<br> | <br> | ||
{|class="wikitable" style="margin:auto; text-align:center" | {|class="wikitable"style="margin:auto; text-align:center" | ||
|- | |- | ||
!Grand Stars!![[File:MKT Icon GrandStar.png|20x20px]]!!15!!30!!45!!60!!80!!100!!120!!130!!140!!150!!160!!170!!180!!190!!200!!210!!215!!220!!225!!230!!235!!240!!245!!250!!255!!Total!!Grand total | !Grand Stars!![[File:MKT Icon GrandStar.png|20x20px]]!!15!!30!!45!!60!!80!!100!!120!!130!!140!!150!!160!!170!!180!!190!!200!!210!!215!!220!!225!!230!!235!!240!!245!!250!!255!!Total!!Grand total | ||
| Line 309: | Line 341: | ||
===Karts=== | ===Karts=== | ||
<gallery> | <gallery> | ||
MKT Icon BDasherMk2.png|[[ | MKT Icon BDasherMk2.png|[[B Dasher Mk. 2]] | ||
MKT Icon DecalStreamliner.png|[[Decal Streamliner]] | MKT Icon DecalStreamliner.png|[[Decal Streamliner]] | ||
MKT Icon OrangeStreamliner.png|[[Orange Streamliner]] | MKT Icon OrangeStreamliner.png|[[Orange Streamliner]] | ||
| Line 321: | Line 353: | ||
===Courses=== | ===Courses=== | ||
<gallery> | <gallery heights=50px> | ||
MKT Icon Tokyo Blur 4.png|[[Tokyo Blur 4]] (N, R, T, R/T) | MKT Icon Tokyo Blur 4.png|[[Tour Tokyo Blur|Tokyo Blur 4]] (N, R, T, R/T) | ||
</gallery> | </gallery> | ||
==Paid banners== | ==Paid banners== | ||
{| align=center width=960px cellspacing=0 border=1 cellpadding=3 style="border-collapse:collapse; font-family:Arial; text-align:center" | {|align=center width=960px cellspacing=0 border=1 cellpadding=3 style="border-collapse:collapse; font-family:Arial; text-align:center" | ||
|-style="background: #ABC" | |-style="background: #ABC" | ||
!Name | !Name | ||
| Line 366: | Line 398: | ||
|[[File:MKT Tour39 SilverStarchutePack.png|x150px]] | |[[File:MKT Tour39 SilverStarchutePack.png|x150px]] | ||
|- | |- | ||
|''' | |'''Iron Cucumber Pack''' | ||
|March 17, 2021 – March 23, 2021 | |March 17, 2021 – March 23, 2021 | ||
|US$39.99 | |US$39.99 | ||
|[[File:MKT Icon MetalMario.png|30px]] [[ | |[[File:MKT Icon MetalMario.png|30px]] [[Metal Mario]] ×1<br> | ||
[[File:MKT Icon IronCucumber.png|30px]] [[Iron Cucumber]] ×1<br> | [[File:MKT Icon IronCucumber.png|30px]] [[Iron Cucumber]] ×1<br> | ||
[[File:MKT Icon Ruby.png|30px]] [[Ruby|Rubies]] ×90 | [[File:MKT Icon Ruby.png|30px]] [[Ruby|Rubies]] ×90 | ||
|[[File:MKT Tour39 | |[[File:MKT Tour39 IronCucumberPack.png|x150px]] | ||
|} | |} | ||
==Challenges== | ==Challenges== | ||
{{ | {{MKT challenge table | ||
|TCR1=[[File:MKT Icon QuickTicket.png|70px]] [[Quick ticket]] ×1 | |TCR1=[[File:MKT Icon QuickTicket.png|70px]] [[Quick ticket]] ×1 | ||
|T1.1=133 | |T1.1=133 | ||
|T1.1E=Do 20 | |T1.1E=Do 20 {{Color link|#A1A1FF|Trick|Jump Boosts}}. | ||
|T1.1S=1 | |T1.1S=1 | ||
|T1.2=049 | |T1.2=049 | ||
|T1.2E=Land 5 hits with | |T1.2E=Land 5 hits with {{Color link|#A1A1FF|Banana|Bananas}}. | ||
|T1.2S=1 | |T1.2S=1 | ||
|T1.3=111 | |T1.3=111 | ||
|T1.3E=Use | |T1.3E=Use {{Color link|#A1A1FF|Lightning}}. | ||
|T1.3S=1 | |T1.3S=1 | ||
|T1.4=042 | |T1.4=042 | ||
| Line 400: | Line 432: | ||
|T1.7S=2 | |T1.7S=2 | ||
|T1.8=174 | |T1.8=174 | ||
|T1.8E=Earn a total score of 20,000 or higher in the | |T1.8E=Earn a total score of 20,000 or higher in the {{Color link|#A1A1FF|Mario Cup}}. | ||
|T1.8S=2 | |T1.8S=2 | ||
|T1.9=214 | |T1.9=214 | ||
|T1.9E=Take out 3 | |T1.9E=Take out 3 {{Color link|#A1A1FF|Goomba|Goombas}}. | ||
|T1.9S=2 | |T1.9S=2 | ||
|TCR2=[[File:MKT Icon CoinRushTicket.png|70px]] [[Coin Rush ticket]] ×1 | |TCR2=[[File:MKT Icon CoinRushTicket.png|70px]] [[Coin Rush ticket]] ×1 | ||
|T2.1= | |T2.1=117 | ||
|T2.1E= | |T2.1E=Do a total of 3 {{Color link|#A1A1FF|Slipstream}} boosts. | ||
|T2.1S=1 | |T2.1S=1 | ||
|T2.2= | |T2.2=041 | ||
|T2.2E= | |T2.2E=Land 5 hits with {{Color link|#A1A1FF|Red Shell|Red Shells}}. | ||
|T2.2S=1 | |T2.2S=1 | ||
|T2.3= | |T2.3=101 | ||
|T2.3E= | |T2.3E=Get a Fantastic combo a total of 5 times. | ||
|T2.3S=1 | |T2.3S=1 | ||
|T2.4= | |T2.4=054 | ||
|T2.4E= | |T2.4E=Cause an opponent to crash while gliding. | ||
|T2.4S=2 | |T2.4S=2 | ||
|T2.5= | |T2.5=236 | ||
|T2.5E= | |T2.5E=Cause opponents to crash a total of 3 times using a driver wearing gloves. | ||
|T2.5S=2 | |T2.5S=2 | ||
|T2.6= | |T2.6=061 | ||
|T2.6E= | |T2.6E=Send Greeting {{Color link|#A1A1FF|Coin|Coins}} to a friend. | ||
|T2.6S=2 | |T2.6S=2 | ||
|T2.7= | |T2.7=051 | ||
|T2.7E= | |T2.7E=Earn a score of 8,000 or higher on 3 T or R/T courses. | ||
|T2.7S=2 | |T2.7S=2 | ||
|T2.8= | |T2.8=195 | ||
|T2.8E= | |T2.8E=Earn a total score of 18,000 or higher in the {{Color link|#A1A1FF|Metal Mario Cup}}. | ||
|T2.8S=2 | |T2.8S=2 | ||
|T2.9= | |T2.9=126 | ||
|T2.9E= | |T2.9E=Race in every course of every cup, including bonus challenges. | ||
|T2.9S=2 | |T2.9S=2 | ||
|GCR=[[File:MKT Icon 1Ruby.png|50px]] [[Ruby|Rubies]] ×5 | |GCR=[[File:MKT Icon 1Ruby.png|50px]] [[Ruby|Rubies]] ×5 | ||
|G.1=119 | |G.1=119 | ||
|G.1E=Do 100 | |G.1E=Do 100 {{Color link|#A1A1FF|Mini-Turbo}} boosts. | ||
|G.1S=1 | |G.1S=1 | ||
|G.2=146 | |G.2=146 | ||
|G.2E=Use 10 | |G.2E=Use 10 {{Color link|#A1A1FF|Mushroom|Mushrooms}}. | ||
|G.2S=1 | |G.2S=1 | ||
|G.3=108 | |G.3=108 | ||
|G.3E=Land 10 hits with | |G.3E=Land 10 hits with {{Color link|#A1A1FF|Green Shell|Green Shells}}. | ||
|G.3S=1 | |G.3S=1 | ||
|G.4=133 | |G.4=133 | ||
| Line 447: | Line 479: | ||
|G.4S=2 | |G.4S=2 | ||
|G.5=239 | |G.5=239 | ||
|G.5E=Activate | |G.5E=Activate {{Color link|#A1A1FF|Frenzy}} mode 5 times using a driver with a mustache. | ||
|G.5S=2 | |G.5S=2 | ||
|G.6=059 | |G.6=059 | ||
|G.6E=Use a | |G.6E=Use a {{Color link|#A1A1FF|points-cap ticket}}. | ||
|G.6S=2 | |G.6S=2 | ||
|G.7=023 | |G.7=023 | ||
| Line 459: | Line 491: | ||
|G.8S=2 | |G.8S=2 | ||
|G.9=051 | |G.9=051 | ||
|G.9E=Take out 3 | |G.9E=Take out 3 {{Color link|#A1A1FF|Warp Pipe|pipes}}. | ||
|G.9S=2 | |G.9S=2 | ||
}} | }} | ||
| Line 471: | Line 503: | ||
|colspan=3 style="background: #EEEEFF"|'''Three in a row reward:''' [[File:MKT Icon Coins 2.png|70px]] [[Coin|Coins]] ×300 | |colspan=3 style="background: #EEEEFF"|'''Three in a row reward:''' [[File:MKT Icon Coins 2.png|70px]] [[Coin|Coins]] ×300 | ||
|- | |- | ||
|colspan=3 style="background: #EEEEFF"|'''Completion reward:''' [[File:MKT Artwork | |colspan=3 style="background: #EEEEFF"|'''Completion reward:''' [[File:MKT Artwork MarioMusician.png|x90px]] [[Mario|Mario (Musician)]] ×1 | ||
|-style="height: 80px" | |-style="height: 80px" | ||
|width=10% style="background: # | |width=10% style="background:linear-gradient(#F2E18F,#B9800F)"|[[File:MKT Icon BirthdayGirlRosalina.png|50x80px]] | ||
|width=10% style="background: # | |width=10% style="background:linear-gradient(#F2E18F,#B9800F)"|[[File:MKT Icon BlueFlowerGlider.png|50x80px]] | ||
|width=10% style="background: # | |width=10% style="background:linear-gradient(#F2E18F,#B9800F)"|[[File:Rosalina-MPTop100-Transparent.png|50x80px]] | ||
|-style="color: #FFF" | |-style="color: #FFF" | ||
|style="background: # | |style="background:linear-gradient(#864D00,#A26000); border-top:1px solid #B9800F;"|{{Color link|#A1A1FF|Birthday Girl Rosalina}} ×1 | ||
|style="background: # | |style="background:linear-gradient(#864D00,#A26000); border-top:1px solid #B9800F;"|{{Color link|#A1A1FF|Blue Flower Glider}} ×1 | ||
|style="background: # | |style="background:linear-gradient(#864D00,#A26000); border-top:1px solid #B9800F;"|{{Color link|#A1A1FF|Rosalina}} ×1 | ||
|-style="color: #FFF" | |-style="color: #FFF" | ||
|style="background: # | |style="background:linear-gradient(#A26000,#C88512); border-top:1px solid #A26000;"|''Land 5 hits with Green Shells.'' | ||
|style="background: # | |style="background:linear-gradient(#A26000,#C88512); border-top:1px solid #A26000;"|''Land 10 hits with Bananas.'' | ||
|style="background: # | |style="background:linear-gradient(#A26000,#C88512); border-top:1px solid #A26000;"|''Land 10 hits with Bob-ombs.'' | ||
|-style="height: 80px" | |-style="height: 80px" | ||
|width=10% style="background: # | |width=10% style="background:linear-gradient(#F2E18F,#B9800F)"|[[File:MKT Icon Coins 3.png|70px]] | ||
|width=10% style="background: # | |width=10% style="background:linear-gradient(#F2E18F,#B9800F)"|[[File:MKT Icon Ruby.png|70px]] | ||
|width=10% style="background: # | |width=10% style="background:linear-gradient(#F2E18F,#B9800F)"|[[File:MKT Icon Point-boostticket2.png|70px]] | ||
|-style="color: #FFF" | |-style="color: #FFF" | ||
|style="background: # | |style="background:linear-gradient(#864D00,#A26000); border-top:1px solid #B9800F;"|{{Color link|#A1A1FF|Coin|Coins}} ×3,000 | ||
|style="background: # | |style="background:linear-gradient(#864D00,#A26000); border-top:1px solid #B9800F;"|{{Color link|#A1A1FF|Ruby|Rubies}} ×10 | ||
|style="background: # | |style="background:linear-gradient(#864D00,#A26000); border-top:1px solid #B9800F;"|Kart {{Color link|#A1A1FF|point-boost ticket}} ×3 | ||
|-style="color: #FFF" | |-style="color: #FFF" | ||
|style="background: # | |style="background:linear-gradient(#A26000,#C88512); border-top:1px solid #A26000;"|''Do 50 Jump Boosts.'' | ||
|style="background: # | |style="background:linear-gradient(#A26000,#C88512); border-top:1px solid #A26000;"|''Participate in a race.'' | ||
|style="background: # | |style="background:linear-gradient(#A26000,#C88512); border-top:1px solid #A26000;"|''Do 100 Mini-Turbo boosts.'' | ||
|-style="height: 80px" | |-style="height: 80px" | ||
|width=10% style="background: # | |width=10% style="background:linear-gradient(#F2E18F,#B9800F)"|[[File:MKT Icon Level-boostticket2.png|70px]] | ||
|width=10% style="background: # | |width=10% style="background:linear-gradient(#F2E18F,#B9800F)"|[[File:MKT Icon Level-boostticket5.png|70px]] | ||
|width=10% style="background: # | |width=10% style="background:linear-gradient(#F2E18F,#B9800F)"|[[File:MKT Icon Level-boostticket8.png|70px]] | ||
|-style="color: #FFF" | |-style="color: #FFF" | ||
|style="background: # | |style="background:linear-gradient(#864D00,#A26000); border-top:1px solid #B9800F;"|Normal kart {{Color link|#A1A1FF|level-boost ticket}} ×1 | ||
|style="background: # | |style="background:linear-gradient(#864D00,#A26000); border-top:1px solid #B9800F;"|Super kart level-boost ticket ×1 | ||
|style="background: # | |style="background:linear-gradient(#864D00,#A26000); border-top:1px solid #B9800F;"|High-End kart level-boost ticket ×1 | ||
|-style="color: #FFF" | |-style="color: #FFF" | ||
|style="background: # | |style="background:linear-gradient(#A26000,#C88512); border-top:1px solid #A26000;"|''Get 1st place in a race 10 times.'' | ||
|style="background: # | |style="background:linear-gradient(#A26000,#C88512); border-top:1px solid #A26000;"|''Get 1st place in a race 15 times.'' | ||
|style="background: # | |style="background:linear-gradient(#A26000,#C88512); border-top:1px solid #A26000;"|''Get 1st place in a race 20 times.'' | ||
|} | |} | ||
<br> | <br> | ||
{|class="wikitable" style="margin:auto; text-align:center" width=30% | {|class="wikitable"style="margin:auto; text-align:center"width=30% | ||
!colspan=2|Total Points Challenge | !colspan=2|Total Points Challenge | ||
|- | |- | ||
| Line 545: | Line 577: | ||
|[[File:MKT Icon Coins 3.png|30px]] Coins ×1,000<br> | |[[File:MKT Icon Coins 3.png|30px]] Coins ×1,000<br> | ||
[[File:MKT Icon Point-boostticket3.png|30px]] Point-boost tickets (glider) ×3 | [[File:MKT Icon Point-boostticket3.png|30px]] Point-boost tickets (glider) ×3 | ||
|} | |||
==2-Player Challenge== | |||
{|class="wikitable"style="text-align:center"width=100% | |||
!rowspan=2|Name | |||
!colspan=3|Courses | |||
!colspan=7|Opponents | |||
|- | |||
!First | |||
!Second | |||
!Final | |||
! | |||
!6th | |||
!5th | |||
!4th | |||
!3rd | |||
!2nd | |||
!1st | |||
|- | |||
|rowspan=3|[[File:MKT 2-Player Challenge.jpg|200px]]<br>'''vs. Racing Team''' | |||
|rowspan=3|[[File:MKT Icon Toad Circuit.png|150px]]<br>[[3DS Toad Circuit]] | |||
|rowspan=3|[[File:MKT Icon DK Summit.png|150px]]<br>[[Wii DK Summit]] | |||
|rowspan=3|[[File:MKT Icon Tokyo Blur.png|150px]]<br>[[Tour Tokyo Blur|Tokyo Blur]] | |||
!Driver | |||
|[[File:MKT Icon RedKoopaFreerunning.png|37px|link=Roving Racers]] | |||
|[[File:MKT Icon RedKoopaFreerunning.png|37px|link=Roving Racers]] | |||
|[[File:MKT Icon RedKoopaFreerunning.png|37px|link=Roving Racers]] | |||
|[[File:MKT Icon RedKoopaFreerunning.png|37px|link=Roving Racers]] | |||
|[[File:MKT Icon RedKoopaFreerunning.png|37px|link=Roving Racers]] | |||
|[[File:MKT Icon GoldKoopaFreerunning.png|37px|link=Roving Racers]] | |||
|- | |||
!Kart | |||
|[[File:MKT Icon RedStreamliner.png|37px|link=Red Streamliner]] | |||
|[[File:MKT Icon RedStreamliner.png|37px|link=Red Streamliner]] | |||
|[[File:MKT Icon RedStreamliner.png|37px|link=Red Streamliner]] | |||
|[[File:MKT Icon RedStreamliner.png|37px|link=Red Streamliner]] | |||
|[[File:MKT Icon RedStreamliner.png|37px|link=Red Streamliner]] | |||
|[[File:MKT Icon OrangeStreamliner.png|37px|link=Orange Streamliner]] | |||
|- | |||
!Glider | |||
|[[File:MKT Icon SuperGliderRed.png|37px|link=Super Glider]] | |||
|[[File:MKT Icon SuperGliderRed.png|37px|link=Super Glider]] | |||
|[[File:MKT Icon SuperGliderRed.png|37px|link=Super Glider]] | |||
|[[File:MKT Icon SuperGliderRed.png|37px|link=Super Glider]] | |||
|[[File:MKT Icon SuperGliderRed.png|37px|link=Super Glider]] | |||
|[[File:MKT Icon SuperGliderBlack.png|37px|link=Super Glider]] | |||
|} | |} | ||
==Initial pipe appearance rates== | ==Initial pipe appearance rates== | ||
===All-Clear Pipe=== | |||
The All-Clear Pipe randomly shot out one of the following regular High-End items. | |||
{|class="wikitable"style="margin:auto; text-align:center" | |||
!colspan=2|High-End items obtainable from the All-Clear Pipe during the Mario Tour | |||
|- | |||
!High-End drivers | |||
|[[Dry Bowser]], [[Metal Mario]], [[Pink Gold Peach]], [[Cat Mario|Cat Peach]], [[Pauline]], [[King Bob-omb]], [[Peachette]], [[Yoshi (species)|Black Yoshi]], [[Funky Kong]], [[Ice Mario (Super Mario Galaxy)|Ice Mario]] | |||
|- | |||
!High-End karts | |||
|[[B Dasher]], [[Badwagon]], [[Cat Cruiser]], [[Sports Coupe]], [[Circuit Special]], [[Bruiser]], [[Wild Wing]], [[Bumble V]], [[Steel Driver]], [[Macharon]], [[Wildfire Flyer]], [[Red B Dasher]], [[P-Wing (kart)|P-Wing]], [[Green Apple Kart]], [[Poison Apple Kart]], [[Dozer Dasher]], [[Banana Master]], [[Offroader]], [[Head Honcho]], [[Pink Wing]], [[Koopa King]], [[Cact-X]], [[Sushi Racer]], [[Green Circuit]], [[Crawly Kart]], [[Cact-Ice]] | |||
|- | |||
!High-End gliders | |||
|[[Swooper (glider)|Swooper]], [[Cloud Glider]], [[Gold Glider]], [[Pink Gold Paper Glider]], [[Dry Bowser Umbrella]], [[Blizzard Balloons]], [[Starchute]], [[Silver Starchute]], [[Crimson Crane]], [[Butterfly Sunset]], [[Strawberry Donut]], [[Heart Balloons]], [[Great Sail]], [[Tropical Glider]], [[8-Bit Star]], [[Silver Bells]], [[Cheep Cheep Masks]] | |||
|} | |||
<br> | |||
===Mario Pipe 1=== | ===Mario Pipe 1=== | ||
{|class="wikitable" style="margin:auto; text-align:center" | {|class="wikitable"style="margin:auto; text-align:center" | ||
!colspan=16|Items obtained from a new | !colspan=16|Items obtained from a new Mario Pipe 1 | ||
|- | |- | ||
!rowspan=2|Item | !rowspan=2|Item | ||
| Line 592: | Line 686: | ||
|0 | |0 | ||
|}<br> | |}<br> | ||
{|class="wikitable" style="margin:auto; text-align:center" | {|class="wikitable"style="margin:auto; text-align:center" | ||
!Class | !Class | ||
!Parts | !Parts | ||
| Line 602: | Line 696: | ||
|- | |- | ||
!High-End Spotlight Kart | !High-End Spotlight Kart | ||
|[[ | |[[B Dasher Mk. 2]] | ||
|1.0000% | |1.0000% | ||
|- | |- | ||
!High-End drivers | !High-End drivers | ||
|[[Dry Bowser]], [[ | |[[Dry Bowser]], [[Metal Mario]], [[Pink Gold Peach]], [[Cat Mario|Cat Peach]], [[Pauline]], [[Mario|Mario (Hakama)]], [[King Bob-omb]], [[Peachette]], [[Yoshi (species)|Black Yoshi]], [[Mario|Mario (Happi)]], [[Funky Kong]], [[Ice Mario (Super Mario Galaxy)|Ice Mario]], [[Mario|Mario (SNES)]] | ||
|0.0769% | |0.0769% | ||
|- | |- | ||
| Line 622: | Line 716: | ||
|- | |- | ||
!Super drivers | !Super drivers | ||
|[[Donkey Kong]], [[Toad]], [[Bowser]], [[Luigi]], [[Mario]], [[Peach]], [[Yoshi]], [[Daisy]], [[Lakitu]], [[King Boo]], [[Toadette]], [[Bowser Jr.]], [[Waluigi]], [[Wario]], [[Rosalina]], [[Birdo]], [[Diddy Kong]], [[Hammer Bro]], [[Boomerang Bro]], [[Fire Bro]], [[Ice Bro]], [[Red Yoshi]], [[Black Shy Guy]], [[Pink Shy Guy]], [[Toad|Toad (Pit Crew)]], [[Monty Mole]], [[Birdo | |[[Donkey Kong]], [[Toad]], [[Bowser]], [[Luigi]], [[Mario]], [[Peach]], [[Yoshi]], [[Daisy]], [[Lakitu]], [[King Boo]], [[Toadette]], [[Bowser Jr.]], [[Waluigi]], [[Wario]], [[Rosalina]], [[Birdo]], [[Diddy Kong]], [[Hammer Bro]], [[Boomerang Bro]], [[Fire Bro]], [[Ice Bro]], [[Red Yoshi]], [[Black Shy Guy]], [[Pink Shy Guy]], [[Toad|Toad (Pit Crew)]], [[Monty Mole]], [[Birdo|Birdo (Light Blue)]], [[Birdo|Birdo (Yellow)]], [[Roving Racers|Red Koopa (Freerunning)]] | ||
|0.3103% | |0.3103% | ||
|- | |- | ||
| Line 644: | Line 738: | ||
|[[Super Glider]], [[Paper Glider]], [[Parachute (glider)|Parachute]], [[Parafoil]], [[Piston Glider]], [[Droplet Glider]], [[BBIA Parafoil]], [[Piranha Plant Parafoil]], [[Minion Paper Glider]] | |[[Super Glider]], [[Paper Glider]], [[Parachute (glider)|Parachute]], [[Parafoil]], [[Piston Glider]], [[Droplet Glider]], [[BBIA Parafoil]], [[Piranha Plant Parafoil]], [[Minion Paper Glider]] | ||
|1.6667% | |1.6667% | ||
|} | |||
<br> | |||
===Mario Pipe 2=== | |||
{|class="wikitable"style="margin:auto; text-align:center" | |||
!colspan=16|Items obtained from a new Mario Pipe 2 | |||
|- | |||
!rowspan=2|Item | |||
!colspan=3|[[File:MKT Icon Normal.png|50px]]<br>Normal | |||
!colspan=3|[[File:MKT Icon Rare.png|50px]]<br>Super | |||
!colspan=3|[[File:MKT Icon HighEnd.png|50px]]<br>High-End | |||
!colspan=3|[[File:MKT Icon HighEnd.png|50px]]<br>Featured High-End | |||
|- | |||
!Driver | |||
!Kart | |||
!Glider | |||
!Driver | |||
!Kart | |||
!Glider | |||
!Driver | |||
!Kart | |||
!Glider | |||
!Driver | |||
!Kart | |||
!Glider | |||
|- | |||
!Amount | |||
|30 | |||
|24 | |||
|14 | |||
|9 | |||
|7 | |||
|4 | |||
|1 | |||
|1 | |||
|1 | |||
|3 | |||
|3 | |||
|3 | |||
|}<br> | |||
{|class="wikitable"style="margin:auto; text-align:center" | |||
!Class | |||
!Parts | |||
!Rate (each) | |||
|- | |||
!High-End Spotlight Drivers | |||
|[[Mario|Mario (Hakama)]], [[Mario|Mario (Happi)]], [[Mario|Mario (SNES)]] | |||
|1.0000% | |||
|- | |||
!High-End Spotlight Karts | |||
|[[Kabuki Dasher]], [[Quickshaw]], [[8-Bit Pipe Frame]] | |||
|1.0000% | |||
|- | |||
!High-End Spotlight Gliders | |||
|[[Full Flight]], [[Fireworks Parachute]], [[8-Bit Star]] | |||
|1.0000% | |||
|- | |||
!High-End drivers | |||
|[[Dry Bowser]], [[Metal Mario]], [[Pink Gold Peach]], [[Cat Mario|Cat Peach]], [[Pauline]], [[King Bob-omb]], [[Peachette]], [[Yoshi (species)|Black Yoshi]], [[Funky Kong]], [[Ice Mario (Super Mario Galaxy)|Ice Mario]], [[Mario|Mario (Racing)]] | |||
|0.0909% | |||
|- | |||
!High-End karts | |||
|[[B Dasher]], [[Badwagon]], [[Cat Cruiser]], [[Sports Coupe]], [[Circuit Special]], [[Bruiser]], [[Wild Wing]], [[Bumble V]], [[Steel Driver]], [[Macharon]], [[Wildfire Flyer]], [[Red B Dasher]], [[P-Wing (kart)|P-Wing]], [[Green Apple Kart]], [[Poison Apple Kart]], [[Dozer Dasher]], [[Banana Master]], [[Offroader]], [[Head Honcho]], [[Pink Wing]], [[Koopa King]], [[Cact-X]], [[Sushi Racer]], [[Green Circuit]], [[Crawly Kart]], [[Cact-Ice]], [[B Dasher Mk. 2]] | |||
|0.0370% | |||
|- | |||
!High-End gliders | |||
|[[Swooper (glider)|Swooper]], [[Cloud Glider]], [[Gold Glider]], [[Pink Gold Paper Glider]], [[Dry Bowser Umbrella]], [[Blizzard Balloons]], [[Starchute]], [[Silver Starchute]], [[Crimson Crane]], [[Butterfly Sunset]], [[Strawberry Donut]], [[Heart Balloons]], [[Great Sail]], [[Tropical Glider]], [[8-Bit Star]], [[Silver Bells]], [[Cheep Cheep Masks]] | |||
|0.0625% | |||
|- | |||
!Super drivers | |||
|[[Donkey Kong]], [[Toad]], [[Bowser]], [[Luigi]], [[Mario]], [[Peach]], [[Yoshi]], [[Daisy]], [[Lakitu]], [[King Boo]], [[Toadette]], [[Bowser Jr.]], [[Waluigi]], [[Wario]], [[Rosalina]], [[Birdo]], [[Diddy Kong]], [[Hammer Bro]], [[Boomerang Bro]], [[Fire Bro]], [[Ice Bro]], [[Red Yoshi]], [[Black Shy Guy]], [[Pink Shy Guy]], [[Toad|Toad (Pit Crew)]], [[Monty Mole]], [[Birdo|Birdo (Light Blue)]], [[Birdo|Birdo (Yellow)]], [[Roving Racers|Red Koopa (Freerunning)]] | |||
|0.3103% | |||
|- | |||
!Super karts | |||
|[[Cucumber]], [[Zucchini]], [[Egg 1]], [[Daytripper]], [[Mach 8]], [[Cloud 9]], [[Soda Jet]], [[Koopa Clown]], [[Poltergust 4000]], [[Royale]], [[Barrel Train]], [[Turbo Yoshi]], [[Blue Seven]], [[Flame Flyer]], [[Para-Wing]], [[Super Blooper (kart)|Super Blooper]], [[Turbo Birdo]], [[Streamliner]], [[DK Jumbo]], [[Red Turbo Yoshi]], [[Light-blue Turbo Birdo]], [[Yellow Turbo Birdo]] | |||
|0.3182% | |||
|- | |||
!Super gliders | |||
|[[Flower Glider]], [[Peach Parasol (glider)|Peach Parasol]], [[BaNaNa Parafoil]], [[Bob-omb Parafoil]], [[Wario Wing]], [[Oilpaper Umbrella]], [[Mushroom Glider]], [[Shell Parachute]], [[Lightning Oilpaper]], [[Blue Flower Glider]], [[Pink Flower Glider]], [[Waluigi Wing]], [[? Block (glider)|? Block]], [[8-Bit Jumping Mario]], [[Eggshell Glider]] | |||
|0.2667% | |||
|- | |||
!Normal drivers | |||
|[[Koopa Troopa]], [[Shy Guy]], [[Dry Bones]], [[Baby Daisy]], [[Baby Luigi]], [[Baby Mario]], [[Baby Peach]], [[Baby Rosalina]], [[Iggy]], [[Larry]], [[Lemmy]], [[Ludwig]], [[Morton]], [[Roy]], [[Wendy]] | |||
|2.0000% | |||
|- | |||
!Normal karts | |||
|[[Birthday Girl]], [[Landship]], [[Bullet Blaster]], [[Mushmellow]], [[Biddybuggy]], [[Pipe Frame]], [[Pipe Buggy]], [[Cheep Charger]], [[Red Kiddie Kart]], [[Koopa Dasher]], [[Green Kiddie Kart]] | |||
|2.1818% | |||
|- | |||
!Normal gliders | |||
|[[Super Glider]], [[Paper Glider]], [[Parachute (glider)|Parachute]], [[Parafoil]], [[Piston Glider]], [[Droplet Glider]], [[BBIA Parafoil]], [[Piranha Plant Parafoil]], [[Minion Paper Glider]] | |||
|1.5556% | |||
|}<br> | |||
===Streamliner Pipe=== | |||
{|class="wikitable"style="margin:auto; text-align:center" | |||
!colspan=16|Items obtained from a new Streamliner Pipe | |||
|- | |||
!rowspan=2|Item | |||
!colspan=3|[[File:MKT Icon Normal.png|50px]]<br>Normal | |||
!colspan=3|[[File:MKT Icon Rare.png|50px]]<br>Super | |||
!colspan=3|[[File:MKT Icon HighEnd.png|50px]]<br>High-End | |||
!colspan=3|[[File:MKT Icon HighEnd.png|50px]]<br>Featured High-End | |||
|- | |||
!Driver | |||
!Kart | |||
!Glider | |||
!Driver | |||
!Kart | |||
!Glider | |||
!Driver | |||
!Kart | |||
!Glider | |||
!Driver | |||
!Kart | |||
!Glider | |||
|- | |||
!Amount | |||
|0 | |||
|33 | |||
|0 | |||
|0 | |||
|12 | |||
|0 | |||
|0 | |||
|3 | |||
|0 | |||
|0 | |||
|2 | |||
|0 | |||
|}<br> | |||
{|class="wikitable"style="margin:auto; text-align:center" | |||
!Class | |||
!Parts | |||
!Rate (each) | |||
|- | |||
!High-End Spotlight karts | |||
|[[Decal Streamliner]], [[Orange Streamliner]] | |||
|2.0000% | |||
|- | |||
!High-End karts | |||
|[[B Dasher]], [[Circuit Special]], [[Black Circuit]], [[P-Wing (kart)|P-Wing]], [[Pink Wing]], [[Green Circuit]] | |||
|1.0000% | |||
|- | |||
!Super karts | |||
|[[Cucumber]], [[Zucchini]], [[Egg 1]], [[Daytripper]], [[Mach 8]], [[Cloud 9]], [[Soda Jet]], [[Koopa Clown]], [[Poltergust 4000]], [[Royale]], [[Barrel Train]], [[Turbo Yoshi]], [[Blue Seven]], [[Flame Flyer]], [[Para-Wing]], [[Super Blooper (kart)|Super Blooper]], [[Turbo Birdo]], [[Streamliner]], [[DK Jumbo]], [[Red Turbo Yoshi]], [[Light-blue Turbo Birdo]], [[Yellow Turbo Birdo]] | |||
|1.0909% | |||
|- | |||
!Normal karts | |||
|[[Birthday Girl]], [[Landship]], [[Bullet Blaster]], [[Mushmellow]], [[Biddybuggy]], [[Pipe Frame]], [[Pipe Buggy]], [[Cheep Charger]], [[Red Kiddie Kart]], [[Koopa Dasher]], [[Green Kiddie Kart]] | |||
|6.0000% | |||
|} | |} | ||
==Token Shop== | ==Token Shop== | ||
The limited-time event where [[event token]]s appeared began on March 10, 2021 and | The limited-time event where [[event token]]s appeared began on March 10, 2021 and ended on March 23, 2021. Event tokens could be earned from collecting them in courses. | ||
{|class="wikitable"style="margin:auto; text-align:center"width=50% | |||
{| class="wikitable" style="margin:auto; text-align:center" width=50% | !colspan=3|'''Token Shop''' (March 10, 2021 - March 23, 2021) | ||
!colspan=3|'''Token Shop''' (March 10 - March 23, 2021) | |||
|- | |- | ||
|[[File:MKT Artwork Mario.png| | |[[File:MKT Artwork Mario.png|90x90px]] | ||
|[[File:MKT Icon RedBDasher.png| | |[[File:MKT Icon RedBDasher.png|90px]] | ||
|[[File:MKT Icon SuperGliderGold.png|90px]] | |[[File:MKT Icon SuperGliderGold.png|90px]] | ||
|- | |- | ||
| Line 660: | Line 904: | ||
![[Gold Glider]]<br>[[File:MKT Icon Eventtoken.png|20px]] 100<br>Amount: 1 | ![[Gold Glider]]<br>[[File:MKT Icon Eventtoken.png|20px]] 100<br>Amount: 1 | ||
|- | |- | ||
|[[File:Mario Party- Island Tour Luigi Artwork.png| | |[[File:Mario Party- Island Tour Luigi Artwork.png|90x90px]] | ||
|[[File:MKT Icon Cucumber.png| | |[[File:MKT Icon Cucumber.png|105px]] | ||
|[[File:MKT Icon Starchute.png| | |[[File:MKT Icon Starchute.png|90px]] | ||
|- | |- | ||
![[Luigi]]<br>[[File:MKT Icon Eventtoken.png|20px]] 50<br>Amount: 1 | ![[Luigi]]<br>[[File:MKT Icon Eventtoken.png|20px]] 50<br>Amount: 1 | ||
| Line 711: | Line 955: | ||
==Tier Shop== | ==Tier Shop== | ||
The shop featured a variety of set and randomized items available for purchase. The item slots in the shop are unlocked based on the highest tier of players. | The shop featured a variety of set and randomized items available for purchase. The item slots in the shop are unlocked based on the highest tier of players. | ||
{|class="wikitable"style="margin:auto; text-align:center"width=50% | |||
{| class="wikitable" style="margin:auto; text-align:center" width=50% | |||
!colspan=3|Items available in Tier Shop (March 10, 2021 - March 16, 2021) | !colspan=3|Items available in Tier Shop (March 10, 2021 - March 16, 2021) | ||
|- | |- | ||
|[[File:MKT Artwork ToadPitCrew.png| | |[[File:MKT Artwork ToadPitCrew.png|80x80px]] | ||
|[[File:MKT Icon Mach8.png| | |[[File:MKT Icon Mach8.png|85px]] | ||
|[[File:MKT Icon PinkGoldPaperGlider.png| | |[[File:MKT Icon PinkGoldPaperGlider.png|80px]] | ||
|- | |- | ||
![[Toad|Toad (Pit Crew)]]<br>[[File:MKT Icon Coin.png|20px]] 3,000<br>Amount: 1 | ![[Toad|Toad (Pit Crew)]]<br>[[File:MKT Icon Coin.png|20px]] 3,000<br>Amount: 1 | ||
![[Mach 8]]<br>[[File:MKT Icon Coin.png|20px]] 2,000<br>Amount: 1 | ![[Mach 8]]<br>[[File:MKT Icon Coin.png|20px]] 2,000<br>Amount: 1 | ||
![[Pink Gold Paper Glider]]<br>[[File:MKT Icon Coin.png|20px]] 10,000<br>Amount: 1 | ![[Pink Gold Paper Glider]]<br>[[File:MKT Icon Coin.png|20px]] 10,000<br>Amount: 1 | ||
|- | |||
!colspan=3|Items available in Tier Shop (March 17, 2021 - March 23, 2021) | |||
|- | |||
|[[File:MKT Artwork BirdoLightBlue.png|80x80px]] | |||
|[[File:MKT Icon RedStreamliner.png|80px]] | |||
|[[File:MKT Icon CrimsonCrane.png|80px]] | |||
|- | |||
![[Birdo|Birdo (Light Blue)]]<br>[[File:MKT Icon Coin.png|20px]] 3,000<br>Amount: 1 | |||
![[Red Streamliner]]<br>[[File:MKT Icon Coin.png|20px]] 2,000<br>Amount: 1 | |||
![[Crimson Crane]]<br>[[File:MKT Icon Coin.png|20px]] 10,000<br>Amount: 1 | |||
|- | |- | ||
!colspan=3|Items available in Tier Shop (March 10, 2021 - March 23, 2021) | !colspan=3|Items available in Tier Shop (March 10, 2021 - March 23, 2021) | ||
| Line 752: | Line 1,005: | ||
==Profiles== | ==Profiles== | ||
*'''''Mario Kart Tour'' Twitter:''' | *'''''Mario Kart Tour'' Twitter:''' | ||
**''"The Snow Tour is wrapping up in {{color|#MarioKartTour | **''"The Snow Tour is wrapping up in {{color|blue|#MarioKartTour}}. Next up is the Mario Tour featuring Tokyo Blur 4, a brand-new variant of the existing Tokyo-based course!"''<ref>mariokarttourEN (March 4, 2021). [https://twitter.com/mariokarttourEN/status/1367724372765642753 ''Twitter'']. Retrieved March 4, 2021.</ref> | ||
**''"The Snow Tour is almost over. Thanks for racing! Tomorrow is Mar10 Day, which means it's Mario Day! Naturally, the next tour in {{color|#MarioKartTour | **''"The Snow Tour is almost over. Thanks for racing! Tomorrow is Mar10 Day, which means it's Mario Day! Naturally, the next tour in {{color|blue|#MarioKartTour}} is the Mario Tour!"''<ref>mariokarttourEN (March 9, 2021). [https://twitter.com/mariokarttourEN/status/1369196893075570688 ''Twitter'']. Retrieved March 9, 2021.</ref> | ||
**''"Mar.10 is Mar10 Day! And of course, this tour is the Mario Tour! Tokyo Blur 4 will set the stage for some heated races in {{color|blue|#MarioKartTour}}!<ref>mariokarttourEN (March 10, 2021). [https://twitter.com/mariokarttourEN/status/1369530960161566721 ''Twitter'']. Retrieved August 22, 2021.</ref> | |||
==Names in other languages== | ==Names in other languages== | ||
{{foreign names | {{foreign names | ||
| | |Jpn=マリオツアー | ||
| | |JpnR=Mario Tsuā | ||
| | |JpnM=Mario Tour | ||
|Spa=Temporada de Mario | |Spa=Temporada de Mario | ||
|SpaM=Mario's Season | |SpaM=Mario's Season | ||
| Line 771: | Line 1,025: | ||
|PorM=Mario Season | |PorM=Mario Season | ||
|Kor=마리오 투어 | |Kor=마리오 투어 | ||
|KorR= | |KorR=Mario Tueo | ||
|KorM=Mario Tour | |KorM=Mario Tour | ||
|ChiS=马力欧巡回赛 | |ChiS=马力欧巡回赛 | ||
|ChiSR=Mǎlìōu | |ChiSR=Mǎlìōu xúnhuísài | ||
|ChiSM=Mario Tour | |ChiSM=Mario Tour | ||
|ChiT=瑪利歐巡迴賽 | |ChiT=瑪利歐巡迴賽 | ||
|ChiTR=Mǎlìōu | |ChiTR=Mǎlìōu xúnhuísài | ||
|ChiTM=Mario Tour | |ChiTM=Mario Tour | ||
}} | }} | ||
== | ==Notes== | ||
*As of this tour, all the bonus challenges from the | *As of this tour, all the bonus challenges from the [[Halloween Tour (2019)|2019 Halloween Tour]] have been reused in later tours. | ||
*This | *This was the first tour to lack a [[Goomba Takedown]] bonus challenge. | ||
==References== | ==References== | ||
| Line 790: | Line 1,043: | ||
{{MKT}} | {{MKT}} | ||
[[Category:Mario Kart Tour | [[Category:Mario Kart Tour tours]] | ||
[[it:Tour Mario]] | |||
Latest revision as of 22:28, March 11, 2025
| Mario Tour | |
|---|---|

| |
| Start date | March 9, 2021 10:00 p.m. (PT)[?] |
| End date | March 23, 2021 10:59 p.m. (PT)[?] |
| Number of cups | 12 |
| Ranked cups | Mario Cup (week 1) Birdo Cup (week 2) |
| Coin Rush course | RMX Mario Circuit 1 |
| << List of tours >> | |
The Mario Tour was the thirty-ninth tour of Mario Kart Tour, which began on March 10, 2021 (the same day as MAR10 Day) and ended on March 23, 2021. A new Tokyo Blur course, namely Tokyo Blur 4, was introduced in this tour, while also introducing Mario in his racing helmet and outfit from Super Mario Odyssey. From this tour to the end of the following tour, the title screen was changed to represent Team Peach's victory against Team Daisy in the Peach vs. Daisy Tour. Starting from this tour, a new 2-Player Challenge was added in which players could team up with friends and earn event tokens in the Multiplayer mode together. This tour's Coin Rush course was RMX Mario Circuit 1, which was reused from the Mario Bros. Tour. The menu background featured Mount Fuji, the Tokyo Tower, and Kaminarimon as landmarks for this tour.
This was the final tour to introduce a Super glider, that being the Mushroom Glider.
Spotlights
| Mario Pipe 1 March 9, 2021, 10:00 p.m. (PT) – March 23, 2021, 10:59 p.m. (PT) |
Mario Pipe 2 March 16, 2021, 11:00 p.m. (PT) – March 23, 2021, 10:59 p.m. (PT) | ||||

|

| ||||
| Driver | Kart | Glider | Drivers | Karts | Gliders |
|---|---|---|---|---|---|

|
  
|
||||
| Mario (Racing) | B Dasher Mk. 2 | Mushroom Glider | Mario (Hakama), Mario (Happi), and Mario (SNES) | Kabuki Dasher, Quickshaw, and 8-Bit Pipe Frame | Full Flight, Fireworks Parachute, and 8-Bit Star |
Special pipe
| Streamliner Pipe March 13, 2021, 10:00 p.m. (PT) – March 18, 2021, 10:59 p.m. (PT) | ||

| ||
| Spotlight High-End karts | ||
|---|---|---|
| Decal Streamliner and Orange Streamliner | ||
| High-End karts | ||
| Circuit Special, Green Circuit, P-Wing, Pink Wing, Black Circuit, and B Dasher | ||
- Names in other languages
| Language | Name | Meaning | Notes |
|---|---|---|---|
| Chinese (traditional) | 賽道車輛水管[?] Sàidào chēliàng shuǐguǎn |
Race Track Car Pipe | |
| German | Flotte-Flitzer-Röhre[?] | Fleet Dasher Pipe |
Cups
Mario Cup Ranked cup (week 1) |
Tokyo Blur 4 |
DS Airship Fortress |
SNES Mario Circuit 1 |
Ring Race | ||||
 3DS Rainbow Road |
Baby Luigi | |||||||
Baby Mario Cup |
Wii DK Summit T |
3DS Toad Circuit |
SNES Ghost Valley 1T |
Time Trial | ||||
 GBA Bowser's Castle 1 |
Baby Peach | |||||||
Birdo Cup Ranked cup (week 2) |
Tokyo Blur 4R/T |
3DS Rainbow Road |
RMX Mario Circuit 1R/T |
Break Item Boxes | ||||
 SNES Donut Plains 1 |
Lakitu | |||||||
Baby Daisy Cup |
3DS Toad Circuit R |
SNES Donut Plains 1R |
DS Airship Fortress R |
Glider Challenge | ||||
 Wii DK Summit |
Pink Shy Guy | |||||||
Dry Bones Cup |
Tokyo Blur 4R |
RMX Mario Circuit 1R |
SNES Ghost Valley 1R |
Steer Clear of Obstacles | ||||
 3DS Toad Circuit |
Peachette | |||||||
Wendy Cup |
SNES Donut Plains 1 |
Tokyo Blur 4T |
3DS Rainbow Road T |
Time Trial | ||||
 DS Luigi's Mansion R |
Ice Bro | |||||||
Baby Peach Cup |
Wii DK Summit |
SNES Mario Circuit 1R |
3DS Toad Circuit T |
Combo Attack | ||||
 Tokyo Blur 4T |
Diddy Kong | |||||||
Dry Bowser Cup |
RMX Mario Circuit 1T |
Tokyo Blur 4 |
DS Airship Fortress T |
Big Reverse Race | ||||
 SNES Ghost Valley 1 |
Any character | |||||||
Morton Cup |
Tokyo Blur 4T |
Wii DK Summit R |
SNES Donut Plains 1T |
Do Jump Boosts | ||||
 RMX Mario Circuit 1 |
Yoshi | |||||||
Metal Mario Cup |
3DS Rainbow Road R |
SNES Mario Circuit 1T |
Tokyo Blur 4R |
Smash Small Dry Bones | ||||
 DS Airship Fortress |
Birdo (Yellow) | |||||||
Baby Rosalina Cup |
SNES Ghost Valley 1 |
RMX Mario Circuit 1 |
GBA Bowser's Castle 1R/T |
Time Trial | ||||
 Tokyo Blur 4 |
Red Koopa (Freerunning) | |||||||
Wario Cup |
DS Luigi's Mansion R/T |
SNES Mario Circuit 1R/T |
Tokyo Blur 4R/T |
Vs. Mega Bowser | ||||
 3DS Toad Circuit |
Any character | |||||||
Signature kart sets
Drivers with a corresponding cup were bumped one rank up in every course of their cup.
| Cup | Driver | Kart | Glider |
|---|---|---|---|
| Second course of every cup | |||
| Third course of every cup | |||
| — | — | ||
| — | — | ||
| — | — | ||
| — | — | ||
| — | — | ||
| — | — | ||
| — | — | ||
| — | — | ||
| — | — | ||
| — | — | ||
| — | — | ||
| — | — |
Rewards
Gold cells indicate rewards that are exclusive to Gold Pass members.

|
|||||||
| Piston Glider | Mario | Mushmellow | Toad (Pit Crew) | Super 1 | Baby Mario | Streamliner | 8-Bit Jumping Mario |
| Grand Stars | 15 | 30 | 45 | 60 | 80 | 100 | 120 | 130 | 140 | 150 | 160 | 170 | 180 | 190 | 200 | 210 | 215 | 220 | 225 | 230 | 235 | 240 | 245 | 250 | 255 | Total | Grand total | |
|---|---|---|---|---|---|---|---|---|---|---|---|---|---|---|---|---|---|---|---|---|---|---|---|---|---|---|---|---|
| Free pipe launch | 1 | 1 | 1 | 1 | 4 | |||||||||||||||||||||||
| Coin | 100 | 100 | 100 | 100 | 100 | 100 | 100 | 700 | 1500 | |||||||||||||||||||
| 300 | 500 | 800 | ||||||||||||||||||||||||||
| Rubies | 5 | 3 | 3 | 3 | 3 | 3 | 20 | 50 | ||||||||||||||||||||
| 5 | 5 | 5 | 5 | 5 | 5 | 30 | ||||||||||||||||||||||
| Item tickets | 2 | 2 | 2 | 2 | 2 | 10 | 25 | |||||||||||||||||||||
| 2 | 2 | 2 | 3 | 3 | 3 | 15 | ||||||||||||||||||||||
| Star tickets | 1 | 1 | 2 | 3 | ||||||||||||||||||||||||
| 1 | 1 | |||||||||||||||||||||||||||
| Point-boost tickets | 1 | 1 | 1 | 3 | 5 | |||||||||||||||||||||||
| 1 | 1 | 2 | ||||||||||||||||||||||||||
| 1 | 1 | 1 | 3 | 5 | ||||||||||||||||||||||||
| 1 | 1 | 2 | ||||||||||||||||||||||||||
| 1 | 1 | 1 | 3 | 5 | ||||||||||||||||||||||||
| 1 | 1 | 2 | ||||||||||||||||||||||||||
| Level-boost ticket | 3 | 12 | ||||||||||||||||||||||||||
| 9 | ||||||||||||||||||||||||||||
New content
Drivers
Karts
Gliders
Courses
Tokyo Blur 4 (N, R, T, R/T)
Paid banners
| Name | Availability | Cost | Contents | Banner image |
|---|---|---|---|---|
| Value Pack | March 10, 2021 – March 23, 2021 | US$1.99 |
|

|
| Black Kabuki Dasher Pack | March 10, 2021 – March 23, 2021 | US$19.99 |
|

|
| Mario (Classic) Pack | March 10, 2021 – March 23, 2021 | US$39.99 |
|

|
| Silver Starchute Pack | March 17, 2021 – March 23, 2021 | US$19.99 |
|

|
| Iron Cucumber Pack | March 17, 2021 – March 23, 2021 | US$39.99 |
|

|
Challenges
| Tour Challenges 1 | Tour Challenges 2 | Gold Challenges | ||||||||
|---|---|---|---|---|---|---|---|---|---|---|
| Completion reward: |
Completion reward: |
Completion reward: | ||||||||
 |
 |
 |
 |
 |
 |
 |
 |
 | ||
| Do 20 Jump Boosts. | Land 5 hits with Bananas. | Use Lightning. | Do a total of 3 Slipstream boosts. | Land 5 hits with Red Shells. | Get a Fantastic combo a total of 5 times. | Do 100 Mini-Turbo boosts. | Use 10 Mushrooms. | Land 10 hits with Green Shells. | ||
 |
 |
 |
 |
 |
 |
 |
 |
 | ||
| Get an item from the Tier Shop. | Earn a score of 9,000 or higher using a driver with a hat. | Race in auto mode. | Cause an opponent to crash while gliding. | Cause opponents to crash a total of 3 times using a driver wearing gloves. | Send Greeting Coins to a friend. | Do 100 Jump Boosts. | Activate Frenzy mode 5 times using a driver with a mustache. | Use a points-cap ticket. | ||
 |
 |
 |
 |
 |
 |
 |
 |
 | ||
| Get 1st place on an SNES course using a driver with a mustache. | Earn a total score of 20,000 or higher in the Mario Cup. | Take out 3 Goombas. | Earn a score of 8,000 or higher on 3 T or R/T courses. | Earn a total score of 18,000 or higher in the Metal Mario Cup. | Race in every course of every cup, including bonus challenges. | Earn a score of 9,000 or higher using a driver wearing a helmet. | Earn a score of 10,000 or higher on 5 courses. | Take out 3 pipes. | ||
| Premium Challenges | ||
|---|---|---|
| Cost: US$4.99 | ||
| Three in a row reward: | ||
Completion reward:  Mario (Musician) ×1 Mario (Musician) ×1
| ||
| Birthday Girl Rosalina ×1 | Blue Flower Glider ×1 | Rosalina ×1 |
| Land 5 hits with Green Shells. | Land 10 hits with Bananas. | Land 10 hits with Bob-ombs. |
| Coins ×3,000 | Rubies ×10 | Kart point-boost ticket ×3 |
| Do 50 Jump Boosts. | Participate in a race. | Do 100 Mini-Turbo boosts. |
| Normal kart level-boost ticket ×1 | Super kart level-boost ticket ×1 | High-End kart level-boost ticket ×1 |
| Get 1st place in a race 10 times. | Get 1st place in a race 15 times. | Get 1st place in a race 20 times. |
| Total Points Challenge | |
|---|---|
| Points | Rewards |
| 600,000 |
|
| 550,000 |
|
| 500,000 |
|
| 400,000 |
|
| 300,000 |
|
| 150,000 |
|
2-Player Challenge
| Name | Courses | Opponents | ||||||||
|---|---|---|---|---|---|---|---|---|---|---|
| First | Second | Final | 6th | 5th | 4th | 3rd | 2nd | 1st | ||
 vs. Racing Team |
3DS Toad Circuit |
Wii DK Summit |
Tokyo Blur |
Driver | ||||||
| Kart | ||||||||||
| Glider | ||||||||||
Initial pipe appearance rates
All-Clear Pipe
The All-Clear Pipe randomly shot out one of the following regular High-End items.
| High-End items obtainable from the All-Clear Pipe during the Mario Tour | |
|---|---|
| High-End drivers | Dry Bowser, Metal Mario, Pink Gold Peach, Cat Peach, Pauline, King Bob-omb, Peachette, Black Yoshi, Funky Kong, Ice Mario |
| High-End karts | B Dasher, Badwagon, Cat Cruiser, Sports Coupe, Circuit Special, Bruiser, Wild Wing, Bumble V, Steel Driver, Macharon, Wildfire Flyer, Red B Dasher, P-Wing, Green Apple Kart, Poison Apple Kart, Dozer Dasher, Banana Master, Offroader, Head Honcho, Pink Wing, Koopa King, Cact-X, Sushi Racer, Green Circuit, Crawly Kart, Cact-Ice |
| High-End gliders | Swooper, Cloud Glider, Gold Glider, Pink Gold Paper Glider, Dry Bowser Umbrella, Blizzard Balloons, Starchute, Silver Starchute, Crimson Crane, Butterfly Sunset, Strawberry Donut, Heart Balloons, Great Sail, Tropical Glider, 8-Bit Star, Silver Bells, Cheep Cheep Masks |
Mario Pipe 1
| Items obtained from a new Mario Pipe 1 | |||||||||||||||
|---|---|---|---|---|---|---|---|---|---|---|---|---|---|---|---|
| Item | Normal |
Super |
Featured Super |
High-End |
Featured High-End | ||||||||||
| Driver | Kart | Glider | Driver | Kart | Glider | Driver | Kart | Glider | Driver | Kart | Glider | Driver | Kart | Glider | |
| Amount | 32 | 26 | 15 | 9 | 7 | 4 | 0 | 0 | 1 | 1 | 1 | 2 | 1 | 1 | 0 |
Mario Pipe 2
| Items obtained from a new Mario Pipe 2 | |||||||||||||||
|---|---|---|---|---|---|---|---|---|---|---|---|---|---|---|---|
| Item | Normal |
Super |
High-End |
Featured High-End | |||||||||||
| Driver | Kart | Glider | Driver | Kart | Glider | Driver | Kart | Glider | Driver | Kart | Glider | ||||
| Amount | 30 | 24 | 14 | 9 | 7 | 4 | 1 | 1 | 1 | 3 | 3 | 3 | |||
Streamliner Pipe
| Items obtained from a new Streamliner Pipe | |||||||||||||||
|---|---|---|---|---|---|---|---|---|---|---|---|---|---|---|---|
| Item | Normal |
Super |
High-End |
Featured High-End | |||||||||||
| Driver | Kart | Glider | Driver | Kart | Glider | Driver | Kart | Glider | Driver | Kart | Glider | ||||
| Amount | 0 | 33 | 0 | 0 | 12 | 0 | 0 | 3 | 0 | 0 | 2 | 0 | |||
| Class | Parts | Rate (each) |
|---|---|---|
| High-End Spotlight karts | Decal Streamliner, Orange Streamliner | 2.0000% |
| High-End karts | B Dasher, Circuit Special, Black Circuit, P-Wing, Pink Wing, Green Circuit | 1.0000% |
| Super karts | Cucumber, Zucchini, Egg 1, Daytripper, Mach 8, Cloud 9, Soda Jet, Koopa Clown, Poltergust 4000, Royale, Barrel Train, Turbo Yoshi, Blue Seven, Flame Flyer, Para-Wing, Super Blooper, Turbo Birdo, Streamliner, DK Jumbo, Red Turbo Yoshi, Light-blue Turbo Birdo, Yellow Turbo Birdo | 1.0909% |
| Normal karts | Birthday Girl, Landship, Bullet Blaster, Mushmellow, Biddybuggy, Pipe Frame, Pipe Buggy, Cheep Charger, Red Kiddie Kart, Koopa Dasher, Green Kiddie Kart | 6.0000% |
Token Shop
The limited-time event where event tokens appeared began on March 10, 2021 and ended on March 23, 2021. Event tokens could be earned from collecting them in courses.
| Token Shop (March 10, 2021 - March 23, 2021) | ||
|---|---|---|
| Mario Amount: 1 |
Red B Dasher Amount: 1 |
Gold Glider Amount: 1 |

|
||
| Luigi Amount: 1 |
Cucumber Amount: 1 |
Starchute Amount: 1 |
| Ruby ×3 Amount: 5 |
Coin ×500 Amount: 5 |
Coin Rush ticket Amount: 1 |
| Level-boost ticket (Normal) Amount: 3 |
Level-boost ticket (Normal) Amount: 3 |
Level-boost ticket (Normal) Amount: 3 |
| Level-boost ticket (Super) Amount: 2 |
Level-boost ticket (Super) Amount: 2 |
Level-boost ticket (Super) Amount: 2 |
| Level-boost ticket (High-End) Amount: 1 |
Level-boost ticket (High-End) Amount: 1 |
Level-boost ticket (High-End) Amount: 1 |
| Points-cap ticket (Normal) Amount: 1 |
Points-cap ticket (Super) Amount: 1 |
Points-cap ticket (High-End) Amount: 1 |
Tier Shop
The shop featured a variety of set and randomized items available for purchase. The item slots in the shop are unlocked based on the highest tier of players.
| Items available in Tier Shop (March 10, 2021 - March 16, 2021) | ||
|---|---|---|
|
|
||
| Toad (Pit Crew) Amount: 1 |
Mach 8 Amount: 1 |
Pink Gold Paper Glider Amount: 1 |
| Items available in Tier Shop (March 17, 2021 - March 23, 2021) | ||

|
||
| Birdo (Light Blue) Amount: 1 |
Red Streamliner Amount: 1 |
Crimson Crane Amount: 1 |
| Items available in Tier Shop (March 10, 2021 - March 23, 2021) | ||
| Level-boost ticket (Normal) Amount: 3 per week |
Level-boost ticket (Normal) Amount: 3 per week |
Level-boost ticket (Normal) Amount: 3 per week |
OR |
OR |
OR |
| Level-boost ticket (Super) Amount: 2 per week OR Level-boost ticket (High-End) Amount: 1 per week |
Level-boost ticket (Super) Amount: 2 per week OR Level-boost ticket (High-End) Amount: 1 per week |
Level-boost ticket (Super) Amount: 2 per week OR Level-boost ticket (High-End) Amount: 1 per week |
OR OR |
OR OR |
OR OR |
| Points-cap ticket (Normal) Amount: 1 per week |
Points-cap ticket (Super) Amount: 1 per week |
Points-cap ticket (High-End) Amount: 1 per week |
Profiles
- Mario Kart Tour Twitter:
- "The Snow Tour is wrapping up in #MarioKartTour. Next up is the Mario Tour featuring Tokyo Blur 4, a brand-new variant of the existing Tokyo-based course!"[1]
- "The Snow Tour is almost over. Thanks for racing! Tomorrow is Mar10 Day, which means it's Mario Day! Naturally, the next tour in #MarioKartTour is the Mario Tour!"[2]
- "Mar.10 is Mar10 Day! And of course, this tour is the Mario Tour! Tokyo Blur 4 will set the stage for some heated races in #MarioKartTour![3]
Names in other languages
| Language | Name | Meaning | Notes |
|---|---|---|---|
| Japanese | マリオツアー[?] Mario Tsuā |
Mario Tour | |
| Chinese (simplified) | 马力欧巡回赛[?] Mǎlìōu xúnhuísài |
Mario Tour | |
| Chinese (traditional) | 瑪利歐巡迴賽[?] Mǎlìōu xúnhuísài |
Mario Tour | |
| French | Saison de Mario[?] | Mario's Tour | |
| German | Mario-Tour-Saison[?] | Mario Tour Season | |
| Italian | Tour Mario[?] | Mario Tour | |
| Korean | 마리오 투어[?] Mario Tueo |
Mario Tour | |
| Portuguese | Temporada Mario[?] | Mario Season | |
| Spanish | Temporada de Mario[?] | Mario's Season |
Notes
- As of this tour, all the bonus challenges from the 2019 Halloween Tour have been reused in later tours.
- This was the first tour to lack a Goomba Takedown bonus challenge.