Baby Rosalina Tour: Difference between revisions
m (Text replacement - "{{[Mm]KTTour" to "{{tour infobox") |
m (Text replacement - "== *Trivia *==" to "==Notes==") |
||
| (11 intermediate revisions by 8 users not shown) | |||
| Line 10: | Line 10: | ||
|after=[[Hammer Bro Tour|>>]] | |after=[[Hammer Bro Tour|>>]] | ||
}} | }} | ||
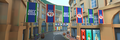
The '''Baby Rosalina Tour''' was the thirteenth tour of ''[[Mario Kart Tour]]'', which began on March 11, 2020 and ended on March 24, 2020. It was the first tour to be named directly after a character, and the second tour to introduce only one spotlight driver: [[Baby Rosalina]] in a detective outfit, while [[Waluigi|Waluigi (Bus Driver)]] returned from the [[London Tour]] as the spotlight driver for the second week. Additionally, [[Rosalina]] was made available as the third Super spotlight character after the Mario Bros. in the [[Mario Bros. Tour]]. London Loop was once again the featured course of the tour through the new course [[London Loop 2]], a reference to the fact that {{wp|Sherlock Holmes}}, a famous fictional detective, is based in London. The menu's background featured the [[Big Ben]] and some buildings from the | The '''Baby Rosalina Tour''' was the thirteenth tour of ''[[Mario Kart Tour]]'', which began on March 11, 2020 and ended on March 24, 2020. It was the first tour to be named directly after a character, and the second tour to introduce only one spotlight driver: [[Baby Rosalina]] in a detective outfit, while [[Waluigi|Waluigi (Bus Driver)]] returned from the [[London Tour]] as the spotlight driver for the second week. Additionally, [[Rosalina]] was made available as the third Super spotlight character after the Mario Bros. in the [[Mario Bros. Tour]]. [[London Loop]] was once again the featured course of the tour through the new course [[Tour London Loop|London Loop 2]], a reference to the fact that {{wp|Sherlock Holmes}}, a famous fictional detective, is based in London. This tour also introduced [[3DS Rainbow Road]]'s R/T variant. The menu's background featured the [[Big Ben]] and some buildings from the London Loop courses as the landmark for this tour, which was reused from the [[London Tour]]. This was the first tour to feature four R/T classic courses instead of three. | ||
Starting with this tour, the player can earn [[Grand Star]]s to unlock free pipe launches from the first pipe in addition to Tour Gifts. Grand Stars are also no longer required to unlock cups; there are now only | Starting with this tour, the player can earn [[Grand Star]]s to unlock free pipe launches from the first pipe in addition to Tour Gifts. Grand Stars are also no longer required to unlock cups; there are now only twelve cups, the first seven of which are available from the start and can be played in any order, while the other five cups are locked by the usual availability timers. | ||
A datamine of the game revealed a string in its files containing <tt>emergency_firstTour</tt> in relation to the Baby Rosalina Tour.<ref>kart_tour (April 9, 2020). ''[https://twitter.com/kart_tour/status/1248197633333694464 Breaking news: Emergency Tours are found in the files! #MarioKartTour Datamining done by: Trainiax]''. ''Twitter''. Retrieved April 17, 2020.</ref> It was later determined that <tt>emergency_</tt> is a prefix for in-game news items that open automatically upon launch.<ref>kart_tour (April 27, 2020). ''[https://twitter.com/kart_tour/status/1254744976254173186 Update: #MarioKartTour]''. ''Twitter''. Retrieved April 27, 2020.</ref> | A datamine of the game revealed a string in its files containing <tt>emergency_firstTour</tt> in relation to the Baby Rosalina Tour.<ref>kart_tour (April 9, 2020). ''[https://twitter.com/kart_tour/status/1248197633333694464 Breaking news: Emergency Tours are found in the files! #MarioKartTour Datamining done by: Trainiax]''. ''Twitter''. Retrieved April 17, 2020.</ref> It was later determined that <tt>emergency_</tt> is a prefix for in-game news items that open automatically upon launch.<ref>kart_tour (April 27, 2020). ''[https://twitter.com/kart_tour/status/1254744976254173186 Update: #MarioKartTour]''. ''Twitter''. Retrieved April 27, 2020.</ref> | ||
This tour also marks [[Hammer Bro]]'s debut in the game in the [[Vs. Mega | This tour also marks [[Hammer Bro]]'s debut in the game in the [[Vs. Mega]] Hammer Bro bonus challenge, which makes him the first to appear in a Vs. Mega bonus challenge without being a playable character and was added as a playable character in the [[Hammer Bro Tour|next tour]]. This was also the first tour to feature only one Vs. Mega bonus challenge instead of two. | ||
{{br|toc=1}} | {{br|toc=1}} | ||
==Spotlights== | ==Spotlights== | ||
{|align=center width=66% cellspacing=0 border=1 cellpadding=3 style="border-collapse:collapse; font-family:Arial; text-align:center" | {|align=center width=66% cellspacing=0 border=1 cellpadding=3 style="border-collapse:collapse; font-family:Arial; text-align:center" | ||
| Line 52: | Line 51: | ||
==Cups== | ==Cups== | ||
{|align=center width=90% cellspacing=0 border=1 cellpadding=3 style="border-collapse:collapse; font-family:Arial; text-align:center" | {|align=center width=90% cellspacing=0 border=1 cellpadding=3 style="border-collapse:collapse; font-family:Arial; text-align:center" | ||
{{ | {{MKT cup table row | ||
|C=Baby Rosalina||Ra=1 | |C=Baby Rosalina||Ra=1 | ||
|R1=[[London Loop 2]]||R1.I=LondonLoop2||R1.1=1,000||R1.2=1,600||R1.3=2,100||R1.4=2,600||R1.5=5,200 | |R1=[[London Loop 2]]||R1.I=LondonLoop2||R1.1=1,000||R1.2=1,600||R1.3=2,100||R1.4=2,600||R1.5=5,200 | ||
| Line 59: | Line 58: | ||
|CN=[[Ring Race]]||C.I=Tour13 BabyRosalinaCupChallenge||CC=Baby Rosalina||CT=London Loop 2||C.1=15||C.2=24||C.3=30 | |CN=[[Ring Race]]||C.I=Tour13 BabyRosalinaCupChallenge||CC=Baby Rosalina||CT=London Loop 2||C.1=15||C.2=24||C.3=30 | ||
}} | }} | ||
{{ | {{MKT cup table row | ||
|C=Mario||Ra= | |C=Mario||Ra= | ||
|R1=[[3DS Cheep Cheep Lagoon]]||R1.I=CheepCheepLagoon3DS Rosalina||R1.1=1,000||R1.2=1,600||R1.3=2,100||R1.4=2,600||R1.5=5,000 | |R1=[[3DS Cheep Cheep Lagoon]]||R1.I=CheepCheepLagoon3DS Rosalina||R1.1=1,000||R1.2=1,600||R1.3=2,100||R1.4=2,600||R1.5=5,000 | ||
| Line 66: | Line 65: | ||
|CN=[[Do Jump Boosts]]||C.I=Tour13 MarioCupChallenge||CC=Mario||CT=N64 Kalimari Desert||C.1=5||C.2=8||C.3=12 | |CN=[[Do Jump Boosts]]||C.I=Tour13 MarioCupChallenge||CC=Mario||CT=N64 Kalimari Desert||C.1=5||C.2=8||C.3=12 | ||
}} | }} | ||
{{ | {{MKT cup table row | ||
|C=Waluigi||Ra=2 | |C=Waluigi||Ra=2 | ||
|R1=[[SNES Mario Circuit 3]]||R1.I=MarioCircuit3SNES ToadPitCrew||R1.1=1,000||R1.2=1,700||R1.3=2,200||R1.4=2,800||R1.5=5,200 | |R1=[[SNES Mario Circuit 3]]||R1.I=MarioCircuit3SNES ToadPitCrew||R1.1=1,000||R1.2=1,700||R1.3=2,200||R1.4=2,800||R1.5=5,200 | ||
| Line 73: | Line 72: | ||
|CN=[[Time Trial (Mario Kart Tour)|Time Trial]]||C.I=Tour13 WaluigiCupChallenge||CC=Waluigi||CT=[[SNES Mario Circuit 2|SNES Mario Circuit 2R]]||C.1=1:35.00||C.2=1:25.00||C.3=1:15.00 | |CN=[[Time Trial (Mario Kart Tour)|Time Trial]]||C.I=Tour13 WaluigiCupChallenge||CC=Waluigi||CT=[[SNES Mario Circuit 2|SNES Mario Circuit 2R]]||C.1=1:35.00||C.2=1:25.00||C.3=1:15.00 | ||
}} | }} | ||
{{ | {{MKT cup table row | ||
|C=Iggy||Ra= | |C=Iggy||Ra= | ||
|R1=N64 Kalimari Desert R||R1.I=KalimariDesertRN64 Iggy||R1.1=1,100||R1.2=1,900||R1.3=2,500||R1.4=3,200||R1.5=5,700 | |R1=N64 Kalimari Desert R||R1.I=KalimariDesertRN64 Iggy||R1.1=1,100||R1.2=1,900||R1.3=2,500||R1.4=3,200||R1.5=5,700 | ||
| Line 80: | Line 79: | ||
|CN=[[Combo Attack]]||C.I=Tour13 IggyCupChallenge||CC=Roy||CT=[[3DS Daisy Hills|3DS Daisy Hills T]]||C.1=5||C.2=15||C.3=25 | |CN=[[Combo Attack]]||C.I=Tour13 IggyCupChallenge||CC=Roy||CT=[[3DS Daisy Hills|3DS Daisy Hills T]]||C.1=5||C.2=15||C.3=25 | ||
}} | }} | ||
{{ | {{MKT cup table row | ||
|C=Baby Peach||Ra= | |C=Baby Peach||Ra= | ||
|R1=London Loop 2R||R1.I=LondonLoop2R||R1.1=1,200||R1.2=2,000||R1.3=2,800||R1.4=3,500||R1.5=6,000 | |R1=London Loop 2R||R1.I=LondonLoop2R||R1.1=1,200||R1.2=2,000||R1.3=2,800||R1.4=3,500||R1.5=6,000 | ||
| Line 87: | Line 86: | ||
|CN=[[Smash Small Dry Bones]]||C.I=Tour13 BabyPeachCupChallenge||CC=Pauline||CT=GCN Dino Dino Jungle||C.1=5||C.2=10||C.3=15 | |CN=[[Smash Small Dry Bones]]||C.I=Tour13 BabyPeachCupChallenge||CC=Pauline||CT=GCN Dino Dino Jungle||C.1=5||C.2=10||C.3=15 | ||
}} | }} | ||
{{ | {{MKT cup table row | ||
|C=Wario||Ra= | |C=Wario||Ra= | ||
|R1=RMX Mario Circuit 1||R1.I=RMXMarioCircuit1 MetalMario||R1.1=1,500||R1.2=2,600||R1.3=3,500||R1.4=4,400||R1.5=7,300 | |R1=RMX Mario Circuit 1||R1.I=RMXMarioCircuit1 MetalMario||R1.1=1,500||R1.2=2,600||R1.3=3,500||R1.4=4,400||R1.5=7,300 | ||
| Line 94: | Line 93: | ||
|CN=[[Glider Challenge]]||C.I=Tour13 WarioCupChallenge||CC=Wario||CT=SNES Mario Circuit 1||C.1=250||C.2=350||C.3=450 | |CN=[[Glider Challenge]]||C.I=Tour13 WarioCupChallenge||CC=Wario||CT=SNES Mario Circuit 1||C.1=250||C.2=350||C.3=450 | ||
}} | }} | ||
{{ | {{MKT cup table row | ||
|C=Koopa Troopa||Ra= | |C=Koopa Troopa||Ra= | ||
|R1=GCN Dino Dino Jungle T||R1.I=DinoDinoJungleTGCN||R1.1=1,700||R1.2=3,100||R1.3=4,300||R1.4=5,400||R1.5=8,700 | |R1=GCN Dino Dino Jungle T||R1.I=DinoDinoJungleTGCN||R1.1=1,700||R1.2=3,100||R1.3=4,300||R1.4=5,400||R1.5=8,700 | ||
| Line 101: | Line 100: | ||
|CN=[[Steer Clear of Obstacles]]||C.I=Tour13 KoopaTroopaCupChallenge||CC=Koopa Troopa||CT=London Loop 2||C.1=1||C.2=2||C.3=3 | |CN=[[Steer Clear of Obstacles]]||C.I=Tour13 KoopaTroopaCupChallenge||CC=Koopa Troopa||CT=London Loop 2||C.1=1||C.2=2||C.3=3 | ||
}} | }} | ||
{{ | {{MKT cup table row | ||
|C=Toadette||Ra= | |C=Toadette||Ra= | ||
|R1=SNES Mario Circuit 3R||R1.I=MarioCircuit3RSNES||R1.1=1,200||R1.2=2,200||R1.3=3,000||R1.4=3,800||R1.5=6,000 | |R1=SNES Mario Circuit 3R||R1.I=MarioCircuit3RSNES||R1.1=1,200||R1.2=2,200||R1.3=3,000||R1.4=3,800||R1.5=6,000 | ||
| Line 108: | Line 107: | ||
|CN=[[Break Item Boxes]]||C.I=Tour13 ToadetteCupChallenge||CC=Toadette||CT=RMX Mario Circuit 1||C.1=5||C.2=10||C.3=18 | |CN=[[Break Item Boxes]]||C.I=Tour13 ToadetteCupChallenge||CC=Toadette||CT=RMX Mario Circuit 1||C.1=5||C.2=10||C.3=18 | ||
}} | }} | ||
{{ | {{MKT cup table row | ||
|C=Ludwig||Ra= | |C=Ludwig||Ra= | ||
|R1=London Loop 2R/T||R1.I=LondonLoop2RT||R1.1=2,000||R1.2=3,800||R1.3=5,100||R1.4=6,500||R1.5=9,900 | |R1=London Loop 2R/T||R1.I=LondonLoop2RT||R1.1=2,000||R1.2=3,800||R1.3=5,100||R1.4=6,500||R1.5=9,900 | ||
| Line 115: | Line 114: | ||
|CN=[[Big Reverse Race]]||C.I=Tour13 LudwigCupChallenge||CC=Any character||CT=3DS Cheep Cheep Lagoon||C.1=50cc||C.2=100cc||C.3=150cc | |CN=[[Big Reverse Race]]||C.I=Tour13 LudwigCupChallenge||CC=Any character||CT=3DS Cheep Cheep Lagoon||C.1=50cc||C.2=100cc||C.3=150cc | ||
}} | }} | ||
{{ | {{MKT cup table row | ||
|C=Peachette||Ra= | |C=Peachette||Ra= | ||
|R1=SNES Mario Circuit 1R||R1.I=MarioCircuit1RSNES Peachette||R1.1=1,300||R1.2=2,500||R1.3=3,400||R1.4=4,400||R1.5=6,400 | |R1=SNES Mario Circuit 1R||R1.I=MarioCircuit1RSNES Peachette||R1.1=1,300||R1.2=2,500||R1.3=3,400||R1.4=4,400||R1.5=6,400 | ||
| Line 122: | Line 121: | ||
|CN=[[Goomba Takedown]]||C.I=Tour13 PeachetteCupChallenge||CC=Peachette||CT=[[3DS Rainbow Road]]||C.1=25||C.2=55||C.3=95 | |CN=[[Goomba Takedown]]||C.I=Tour13 PeachetteCupChallenge||CC=Peachette||CT=[[3DS Rainbow Road]]||C.1=25||C.2=55||C.3=95 | ||
}} | }} | ||
{{ | {{MKT cup table row | ||
|C=Lakitu||Ra= | |C=Lakitu||Ra= | ||
|R1=3DS Daisy Hills R/T||R1.I=DaisyHillsRT3DS BabyDaisy||R1.1=2,400||R1.2=4,800||R1.3=6,600||R1.4=8,400||R1.5=12,000 | |R1=3DS Daisy Hills R/T||R1.I=DaisyHillsRT3DS BabyDaisy||R1.1=2,400||R1.2=4,800||R1.3=6,600||R1.4=8,400||R1.5=12,000 | ||
| Line 129: | Line 128: | ||
|CN=Combo Attack||C.I=Tour13 LakituCupChallenge||CC=Rosalina||CT=3DS Shy Guy Bazaar T||C.1=5||C.2=15||C.3=25 | |CN=Combo Attack||C.I=Tour13 LakituCupChallenge||CC=Rosalina||CT=3DS Shy Guy Bazaar T||C.1=5||C.2=15||C.3=25 | ||
}} | }} | ||
{{ | {{MKT cup table row | ||
|C=Rosalina||Ra= | |C=Rosalina||Ra= | ||
|R1=SNES Mario Circuit 2R/T||R1.I=MarioCircuit2RTSNES BirdoLightBlue||R1.1=2,100||R1.2=4,300||R1.3=6,000||R1.4=7,600||R1.5=10,600 | |R1=SNES Mario Circuit 2R/T||R1.I=MarioCircuit2RTSNES BirdoLightBlue||R1.1=2,100||R1.2=4,300||R1.3=6,000||R1.4=7,600||R1.5=10,600 | ||
| Line 320: | Line 319: | ||
===Courses=== | ===Courses=== | ||
<gallery heights=50px> | <gallery heights=50px> | ||
MKT Icon London Loop 2.png|[[London Loop 2]] (N, R, T, R/T) | MKT Icon London Loop 2.png|[[Tour London Loop|London Loop 2]] (N, R, T, R/T) | ||
MKT Icon 3DS Rainbow Road RT.png|[[3DS Rainbow Road]] (R/T) | MKT Icon 3DS Rainbow Road RT.png|[[3DS Rainbow Road]] (R/T) | ||
</gallery> | </gallery> | ||
| Line 376: | Line 375: | ||
==Challenges== | ==Challenges== | ||
{{ | {{MKT challenge table | ||
|TCR1=[[File:MKT Icon QuickTicket.png|70px]] [[Quick ticket]] ×1 | |TCR1=[[File:MKT Icon QuickTicket.png|70px]] [[Quick ticket]] ×1 | ||
|T1.1=117 | |T1.1=117 | ||
|T1.1E=Do a total of 3 {{ | |T1.1E=Do a total of 3 {{color link|#A1A1FF|Slipstream}} boosts. | ||
|T1.1S=1 | |T1.1S=1 | ||
|T1.2=069 | |T1.2=069 | ||
|T1.2E=Land 3 hits with {{ | |T1.2E=Land 3 hits with {{color link|#A1A1FF|Bob-omb|Bob-ombs}}. | ||
|T1.2S=1 | |T1.2S=1 | ||
|T1.3=115 | |T1.3=115 | ||
|T1.3E=Do 10 {{ | |T1.3E=Do 10 {{color link|#A1A1FF|Rocket Start|Rocket Starts}}. | ||
|T1.3S=1 | |T1.3S=1 | ||
|T1.4=086 | |T1.4=086 | ||
|T1.4E=Land 3 hits with {{ | |T1.4E=Land 3 hits with {{color link|#A1A1FF|Banana|Bananas}} in a single race. | ||
|T1.4S=2 | |T1.4S=2 | ||
|T1.5=203 | |T1.5=203 | ||
| Line 397: | Line 396: | ||
|T1.6S=2 | |T1.6S=2 | ||
|T1.7=104 | |T1.7=104 | ||
|T1.7E=Use a total of 10 {{ | |T1.7E=Use a total of 10 {{color link|#A1A1FF|Mushroom|Mushrooms}} in Standard Races. | ||
|T1.7S=2 | |T1.7S=2 | ||
|T1.8=108 | |T1.8=108 | ||
|T1.8E=Land a hit with a {{ | |T1.8E=Land a hit with a {{color link|#A1A1FF|Green Shell|Green Shells}} while racing via With Friends or Others Nearby. | ||
|T1.8S=2 | |T1.8S=2 | ||
|T1.9=088 | |T1.9=088 | ||
|T1.9E=Break 10 {{ | |T1.9E=Break 10 {{color link|#A1A1FF|barrel|barrels}}. | ||
|T1.9S=2 | |T1.9S=2 | ||
|TCR2=[[File:MKT Icon CoinRushTicket.png|70px]] [[Coin Rush ticket]] ×1 | |TCR2=[[File:MKT Icon CoinRushTicket.png|70px]] [[Coin Rush ticket]] ×1 | ||
|T2.1=170 | |T2.1=170 | ||
|T2.1E=Use 10 {{ | |T2.1E=Use 10 {{color link|#A1A1FF|Mushroom|Mushrooms}}. | ||
|T2.1S=1 | |T2.1S=1 | ||
|T2.2=067 | |T2.2=067 | ||
|T2.2E=Land 5 hits with {{ | |T2.2E=Land 5 hits with {{color link|#A1A1FF|Banana|Bananas}}. | ||
|T2.2S=1 | |T2.2S=1 | ||
|T2.3=133 | |T2.3=133 | ||
|T2.3E=Do 10 {{ | |T2.3E=Do 10 {{color link|#A1A1FF|Trick|Jump Boosts}} in a single race. | ||
|T2.3S=1 | |T2.3S=1 | ||
|T2.4=101 | |T2.4=101 | ||
| Line 435: | Line 434: | ||
|GCR=[[File:MKT Icon 1Ruby.png|50px]] [[Ruby|Rubies]] ×5 | |GCR=[[File:MKT Icon 1Ruby.png|50px]] [[Ruby|Rubies]] ×5 | ||
|G.1=119 | |G.1=119 | ||
|G.1E=Do 50 {{ | |G.1E=Do 50 {{color link|#A1A1FF|Mini-Turbo}} boosts. | ||
|G.1S=1 | |G.1S=1 | ||
|G.2=068 | |G.2=068 | ||
|G.2E=Land 3 hits with {{ | |G.2E=Land 3 hits with {{color link|#A1A1FF|Green Shell|Green Shells}}. | ||
|G.2S=1 | |G.2S=1 | ||
|G.3=021 | |G.3=021 | ||
|G.3E=Activate {{ | |G.3E=Activate {{color link|#A1A1FF|Frenzy}} mode 3 times. | ||
|G.3S=1 | |G.3S=1 | ||
|G.4=209 | |G.4=209 | ||
| Line 447: | Line 446: | ||
|G.4S=2 | |G.4S=2 | ||
|G.5=046 | |G.5=046 | ||
|G.5E=Break 5 {{ | |G.5E=Break 5 {{color link|#A1A1FF|jar|jars}}. | ||
|G.5S=2 | |G.5S=2 | ||
|G.6=088 | |G.6=088 | ||
| Line 456: | Line 455: | ||
|G.7S=2 | |G.7S=2 | ||
|G.8=024 | |G.8=024 | ||
|G.8E=Finish a race in {{ | |G.8E=Finish a race in {{color link|#A1A1FF|Frenzy}} mode. | ||
|G.8S=2 | |G.8S=2 | ||
|G.9=095 | |G.9=095 | ||
| Line 521: | Line 520: | ||
|- | |- | ||
!High-End drivers | !High-End drivers | ||
|[[Dry Bowser]], [[ | |[[Dry Bowser]], [[Metal Mario]], [[Pauline]], [[Peachette]], [[Ice Mario (Super Mario Galaxy)|Ice Mario]] | ||
|0.4000% | |0.4000% | ||
|- | |- | ||
| Line 625: | Line 624: | ||
|- | |- | ||
!High-End drivers | !High-End drivers | ||
|[[Dry Bowser]], [[ | |[[Dry Bowser]], [[Metal Mario]], [[Pauline]], [[Peachette]], [[Ice Mario (Super Mario Galaxy)|Ice Mario]] | ||
|0.4000% | |0.4000% | ||
|- | |- | ||
| Line 672: | Line 671: | ||
==Names in other languages== | ==Names in other languages== | ||
{{foreign names | {{foreign names | ||
| | |Jpn=ベビィロゼッタツアー | ||
| | |JpnR=Bebī Rozetta Tsuā | ||
| | |JpnM=Baby Rosalina Tour | ||
|SpaA=Temporada de Bebé Rosalina | |SpaA=Temporada de Bebé Rosalina | ||
|SpaAM=Baby Rosalina Season | |SpaAM=Baby Rosalina Season | ||
| Line 698: | Line 697: | ||
}} | }} | ||
== | ==Notes== | ||
*[[Hammer Bro]], who appeared as the opponent in the Rosalina Cup's bonus challenge (marking the first instance of a driver appearing without being playable), could be seen in a [[Pipe Frame]] within [[Baby Rosalina|Baby Rosalina (Detective)]]'s magnifying glass in the splash art and the trailer for the Baby Rosalina Tour. | *[[Hammer Bro]], who appeared as the opponent in the Rosalina Cup's bonus challenge (marking the first instance of a driver appearing without being playable), could be seen in a [[Pipe Frame]] within [[Baby Rosalina|Baby Rosalina (Detective)]]'s magnifying glass in the splash art and the trailer for the Baby Rosalina Tour, hinting at the tour that followed this tour, the [[Hammer Bro Tour]]. | ||
*When the tour began, the English ''Mario Kart Tour'' Twitter account accidentally uploaded the Japanese trailer for the introductory tweet. The English version of the trailer was later added in a correction tweet. | *When the tour began, the English ''Mario Kart Tour'' Twitter account accidentally uploaded the Japanese trailer for the introductory tweet. The English version of the trailer was later added in a correction tweet. | ||
Latest revision as of 13:48, February 2, 2025
- Not to be confused with Rosalina Tour.
| Baby Rosalina Tour | |
|---|---|

| |
| Start date | March 10, 2020 11:00 p.m. (PT)[?] |
| End date | March 24, 2020 10:59 p.m. (PT)[?] |
| Number of cups | 12 |
| Ranked cups | Baby Rosalina Cup (week 1) Waluigi Cup (week 2) |
| Coin Rush course | 3DS Neo Bowser City |
| << List of tours >> | |
The Baby Rosalina Tour was the thirteenth tour of Mario Kart Tour, which began on March 11, 2020 and ended on March 24, 2020. It was the first tour to be named directly after a character, and the second tour to introduce only one spotlight driver: Baby Rosalina in a detective outfit, while Waluigi (Bus Driver) returned from the London Tour as the spotlight driver for the second week. Additionally, Rosalina was made available as the third Super spotlight character after the Mario Bros. in the Mario Bros. Tour. London Loop was once again the featured course of the tour through the new course London Loop 2, a reference to the fact that Sherlock Holmes, a famous fictional detective, is based in London. This tour also introduced 3DS Rainbow Road's R/T variant. The menu's background featured the Big Ben and some buildings from the London Loop courses as the landmark for this tour, which was reused from the London Tour. This was the first tour to feature four R/T classic courses instead of three.
Starting with this tour, the player can earn Grand Stars to unlock free pipe launches from the first pipe in addition to Tour Gifts. Grand Stars are also no longer required to unlock cups; there are now only twelve cups, the first seven of which are available from the start and can be played in any order, while the other five cups are locked by the usual availability timers.
A datamine of the game revealed a string in its files containing emergency_firstTour in relation to the Baby Rosalina Tour.[1] It was later determined that emergency_ is a prefix for in-game news items that open automatically upon launch.[2]
This tour also marks Hammer Bro's debut in the game in the Vs. Mega Hammer Bro bonus challenge, which makes him the first to appear in a Vs. Mega bonus challenge without being a playable character and was added as a playable character in the next tour. This was also the first tour to feature only one Vs. Mega bonus challenge instead of two.
Spotlights[edit]
| Baby Rosalina Pipe 1 March 10, 2020, 11:00 p.m. (PT) – March 24, 2020, 10:59 p.m. (PT) |
Baby Rosalina Pipe 2 March 17, 2020, 11:00 p.m. (PT) – March 24, 2020, 10:59 p.m. (PT) | ||||

|

| ||||
| Driver | Kart | Glider | High-End driver | Super driver | Kart |
|---|---|---|---|---|---|

|
|||||
| Baby Rosalina (Detective) | Tea Coupe | Plaid Ribbon | Waluigi (Bus Driver) | Rosalina | Double-Decker |
Cups[edit]
Baby Rosalina Cup Ranked cup (week 1) |
London Loop 2 |
GCN Dino Dino Jungle |
N64 Kalimari Desert |
Ring Race | ||||
 London Loop 2 |
Baby Rosalina | |||||||
Mario Cup |
3DS Cheep Cheep Lagoon |
SNES Mario Circuit 1 |
DS Luigi's Mansion |
Do Jump Boosts | ||||
 N64 Kalimari Desert |
Mario | |||||||
Waluigi Cup Ranked cup (week 2) |
SNES Mario Circuit 3 |
3DS Shy Guy Bazaar T |
London Loop 2T |
Time Trial | ||||
 SNES Mario Circuit 2R |
Waluigi | |||||||
Iggy Cup |
N64 Kalimari Desert R |
RMX Mario Circuit 1R |
GCN Dino Dino Jungle R |
Combo Attack | ||||
 3DS Daisy Hills T |
Roy | |||||||
Baby Peach Cup |
London Loop 2R |
DS Luigi's Mansion R |
3DS Shy Guy Bazaar |
Smash Small Dry Bones | ||||
 GCN Dino Dino Jungle |
Pauline | |||||||
Wario Cup |
RMX Mario Circuit 1 |
London Loop 2T |
N64 Kalimari Desert T |
Glider Challenge | ||||
 SNES Mario Circuit 1 |
Wario | |||||||
Koopa Troopa Cup |
GCN Dino Dino Jungle T |
3DS Cheep Cheep Lagoon R |
SNES Mario Circuit 1T |
Steer Clear of Obstacles | ||||
 London Loop 2 |
Koopa Troopa | |||||||
Toadette Cup |
SNES Mario Circuit 3R |
London Loop 2 |
DS Luigi's Mansion T |
Break Item Boxes | ||||
 RMX Mario Circuit 1 |
Toadette | |||||||
Ludwig Cup |
London Loop 2R/T |
3DS Shy Guy Bazaar R |
RMX Mario Circuit 1T |
Big Reverse Race | ||||
 3DS Cheep Cheep Lagoon |
Any character | |||||||
Peachette Cup |
SNES Mario Circuit 1R |
3DS Cheep Cheep Lagoon T |
London Loop 2R |
Goomba Takedown | ||||
 3DS Rainbow Road |
Peachette | |||||||
Lakitu Cup |
3DS Daisy Hills R/T |
SNES Mario Circuit 3T |
3DS Neo Bowser City R/T |
Combo Attack | ||||
 3DS Shy Guy Bazaar T |
Rosalina | |||||||
Rosalina Cup |
SNES Mario Circuit 2R/T |
3DS Rainbow Road R/T |
London Loop 2R/T |
vs. Mega Hammer Bro1 | ||||
 London Loop 2 |
Any character | |||||||
1 - Though Hammer Bro appeared as an opponent, he was not available in the game yet as a playable character during this tour.
Signature kart sets[edit]
Drivers with a corresponding cup in the tour were bumped one rank up in every course of their cup.
| Cup | Character | Kart | Glider |
|---|---|---|---|
| Second course of every cup | |||
| Third course of every cup | — | ||
| — | — | ||
| — | — | ||
| — | — | ||
| — | — | ||
| — | — | ||
| — | — | ||
| — | — | ||
| — | — | ||
| — | — | ||
| — | — | ||
| — | — | ||
| — | — |
Rewards[edit]
Gold cells indicate rewards exclusive to Gold Pass members.

|
|||||
| Parafoil | Lakitu | Bullet Blaster | Double-Decker | Baby Mario | Soaring Jack |
| Grand Stars | 15 | 30 | 45 | 60 | 75 | 90 | 105 | 120 | 135 | 150 | 165 | 180 | 195 | 210 | 225 | 240 | 255 | 270 | Total | Grand total | |
|---|---|---|---|---|---|---|---|---|---|---|---|---|---|---|---|---|---|---|---|---|---|
| Free pipe launch | 1 | 1 | 2 | ||||||||||||||||||
| Coin | 100 | 100 | 100 | 100 | 200 | 100 | 100 | 100 | 900 | 2500 | |||||||||||
| 300 | 300 | 500 | 500 | 1600 | |||||||||||||||||
| Rubies | 5 | 5 | 5 | 5 | 5 | 25 | 55 | ||||||||||||||
| 5 | 5 | 5 | 5 | 5 | 5 | 30 | |||||||||||||||
| Item tickets | 3 | 3 | 3 | 9 | 54 | ||||||||||||||||
| 5 | 5 | 5 | 10 | 10 | 10 | 45 | |||||||||||||||
| Star tickets | 1 | 1 | 3 | ||||||||||||||||||
| 2 | 2 | ||||||||||||||||||||
| Point-boost tickets | 3 | 3 | 6 | 10 | |||||||||||||||||
| 1 | 3 | 4 | |||||||||||||||||||
| 3 | 3 | 6 | 10 | ||||||||||||||||||
| 1 | 3 | 4 | |||||||||||||||||||
| 3 | 3 | 6 | 10 | ||||||||||||||||||
| 1 | 3 | 4 | |||||||||||||||||||
| Level-boost ticket | 3 | 12 | |||||||||||||||||||
| 9 | |||||||||||||||||||||
New content[edit]
Drivers[edit]
Karts[edit]
Gliders[edit]
Courses[edit]
London Loop 2 (N, R, T, R/T)

3DS Rainbow Road (R/T)
Paid banners[edit]
| Name | Availability | Cost | Contents | Banner image |
|---|---|---|---|---|
| Value Pack | March 10, 2020 – March 17, 2020 (first batch of 3) March 17, 2020 – March 24, 2020 (second batch of 3) |
US$1.99 |
|

|
| Plaid Ribbon Pack | March 10, 2020 – March 17, 2020 | US$19.99 |
|

|
| Tea Coupe Pack | March 10, 2020 – March 17, 2020 | US$39.99 | 
| |
| Swift Jack Pack | March 17, 2020 – March 24, 2020 | US$19.99 |
|

|
| Waluigi Pack | March 17, 2020 – March 24, 2020 | US$39.99 |
|

|
Challenges[edit]
| Tour Challenges 1 | Tour Challenges 2 | Gold Challenges | ||||||||
|---|---|---|---|---|---|---|---|---|---|---|
| Completion reward: |
Completion reward: |
Completion reward: | ||||||||
 |
 |
 |
 |
 |
 |
 |
 |
 | ||
| Do a total of 3 Slipstream boosts. | Land 3 hits with Bob-ombs. | Do 10 Rocket Starts. | Use 10 Mushrooms. | Land 5 hits with Bananas. | Do 10 Jump Boosts in a single race. | Do 50 Mini-Turbo boosts. | Land 3 hits with Green Shells. | Activate Frenzy mode 3 times. | ||
 |
 |
 |
 |
 |
 |
 |
 |
 | ||
| Land 3 hits with Bananas in a single race. | Earn a score of 7,000 or higher using a driver with a hat. | Get 1st place in a multiplayer race. | Get a Fantastic combo a total of 3 times. | Earn a score of 7,000 or higher using a driver with a ribbon. | Glide a total distance of 5,000. | Earn a score of 9,000 or higher using a driver wearing gloves. | Break 5 jars. | Earn a score of 7,000 or higher using a driver with three hairs. | ||
 |
 |
 |
 |
 |
 |
 |
 |
 | ||
| Use a total of 10 Mushrooms in Standard Races. | Land a hit with a Green Shells while racing via With Friends or Others Nearby. | Break 10 barrels. | Ride on air currents 5 times. | Get 1st place in a race 3 times in a row. | Race in every course of every cup, including bonus challenges. | Earn a score of 9,000 or higher using a driver with a hat. | Finish a race in Frenzy mode. | Get 1st place a total of 3 times in Standard Races or Gold Races. | ||
Initial pipe appearance rates[edit]
During the Baby Rosalina Tour, each of the following pipes held 50 items instead of 100.
Baby Rosalina Pipe 1[edit]
| Items obtained from a new Baby Rosalina Pipe 1 | |||||||||||||||
|---|---|---|---|---|---|---|---|---|---|---|---|---|---|---|---|
| Item | Normal |
Super |
Featured Super |
High-End |
Featured High-End | ||||||||||
| Character | Kart | Glider | Character | Kart | Glider | Character | Kart | Glider | Character | Kart | Glider | Character | Kart | Glider | |
| Amount | 15 | 11 | 9 | 4 | 3 | 2 | 0 | 1 | 1 | 1 | 1 | 1 | 1 | 0 | 0 |
Baby Rosalina Pipe 2[edit]
| Items obtained from a new Baby Rosalina Pipe 2 | |||||||||||||||
|---|---|---|---|---|---|---|---|---|---|---|---|---|---|---|---|
| Item | Normal |
Super |
Featured Super |
High-End |
Featured High-End | ||||||||||
| Character | Kart | Glider | Character | Kart | Glider | Character | Kart | Glider | Character | Kart | Glider | Character | Kart | Glider | |
| Amount | 15 | 11 | 9 | 4 | 3 | 2 | 1 | 0 | 0 | 1 | 1 | 1 | 1 | 1 | 0 |
Profiles[edit]
- Mario Kart Tour Twitter:
- "The Mario Bros. Tour is drawing to a close. Starting Mar. 10, 11 PM PT, the Baby Rosalina Tour kicks off in blue. We're returning to the foggy streets of London! Rumor has it there's a new costume for our featured petite princess…"[3]
- "It's time for the Baby Rosalina Tour! Return to the storied streets of London (but watch out for the Chain Chomps!) and enjoy twists and turns on courses spread out over 12 cups."[4]
Names in other languages[edit]
| Language | Name | Meaning | Notes |
|---|---|---|---|
| Japanese | ベビィロゼッタツアー[?] Bebī Rozetta Tsuā |
Baby Rosalina Tour | |
| Chinese (simplified) | 罗莎塔宝贝巡回赛[?] Luóshātǎbǎobèi Xúnhuísài |
Baby Rosalina Tour | |
| Chinese (traditional) | 羅潔塔寶寶巡迴賽[?] Luójiétǎbǎobǎo Xúnhuísài |
Baby Rosalina Tour | |
| French | Saison de Bébé Harmonie[?] | Baby Rosalina Season | |
| German | Baby-Rosalina-Tour-Saison[?] | Baby Rosalina Tour Season | |
| Italian | Tour Baby Rosalinda[?] | Baby Rosalina Tour | |
| Korean | 베이비로젤리나 투어[?] Beibi Rojellina Tueo |
Baby Rosalina Tour | |
| Portuguese (NOA) | Temporada Bebê Rosalina[?] | Baby Rosalina Season | |
| Spanish (NOA) | Temporada de Bebé Rosalina[?] | Baby Rosalina Season | |
| Spanish (NOE) | Temporada de Bebé Estela[?] | Baby Rosalina Season |
Notes[edit]
- Hammer Bro, who appeared as the opponent in the Rosalina Cup's bonus challenge (marking the first instance of a driver appearing without being playable), could be seen in a Pipe Frame within Baby Rosalina (Detective)'s magnifying glass in the splash art and the trailer for the Baby Rosalina Tour, hinting at the tour that followed this tour, the Hammer Bro Tour.
- When the tour began, the English Mario Kart Tour Twitter account accidentally uploaded the Japanese trailer for the introductory tweet. The English version of the trailer was later added in a correction tweet.
References[edit]
- ^ kart_tour (April 9, 2020). Breaking news: Emergency Tours are found in the files! #MarioKartTour Datamining done by: Trainiax. Twitter. Retrieved April 17, 2020.
- ^ kart_tour (April 27, 2020). Update: #MarioKartTour. Twitter. Retrieved April 27, 2020.
- ^ mariokarttourEN (March 6, 2020). Twitter. Retrieved March 29, 2020.
- ^ mariokarttourEN (March 11, 2020). Twitter. Retrieved March 29, 2020.