Slipslide Ride: Difference between revisions
m (Text replacement - "(\| *)Jap([RMCN\d]* *=)" to "$1Jpn$2") |
|||
| (22 intermediate revisions by 8 users not shown) | |||
| Line 1: | Line 1: | ||
{{more | {{image|more=yes|K-O-N-G Letters and remaining Bonus Levels.}} | ||
{{ | {{DKC level infobox | ||
|world=[[Gorilla Glacier]] | |||
|image=[[File:Slipslide Ride SNES.png]] | |image=[[File:Slipslide Ride SNES.png]] | ||
|code=4 - 2 | |code=4 - 2 | ||
| Line 8: | Line 9: | ||
|before3=[[Snow Barrel Blast|<<]] | |before3=[[Snow Barrel Blast|<<]] | ||
|after3=[[Croctopus Chase|>>]] | |after3=[[Croctopus Chase|>>]] | ||
| | |track=Ice Cave Chant (SNES and GBA versions)<br>Kremlantis (GBC version) | ||
}} | }} | ||
'''Slipslide Ride''' is the eighteenth level of ''[[Donkey Kong Country]]'' and the second level of [[Gorilla Glacier]]. | '''Slipslide Ride''' is the eighteenth level of ''[[Donkey Kong Country]]'' and the second level of [[Gorilla Glacier]]. Slipslide Ride is the only ice cave level in ''Donkey Kong Country'', and as such, it is the only level with the "Ice Cave Chant" tune, or the [[Kremlantis]] underwater ruins theme from ''[[Donkey Kong Land]]'' in the [[Donkey Kong Country (Game Boy Color)|Game Boy Color version]]. [[Donkey Kong]] and [[Diddy Kong]] must climb slippery [[rope]]s that forcefully slide them either up or down. The blue ropes slide the [[Kong]]s up and the purple ones slide them down (though the inverse is the case in the Game Boy Color version). Many [[Zinger]]s appear as the main obstacle of the level, especially around the ropes. | ||
Slipslide Ride is the only ice cave level in ''Donkey Kong Country'', and as such, it is the only level with the "Ice Cave Chant" tune | |||
==Layout== | ==Layout== | ||
[[File:Slipslide Ride | {{multiframe|[[File:SlipslideRide-GBC-1.png]] [[File:Slipslide Ride GBA.png|180px]]|Slipslide Ride's appearance in the Game Boy Color version, top, and the Game Boy Advance version, bottom|align=left|size=200}} | ||
The Kongs are greeted by a hopping Kritter as they enter the level. A rope dangles above them here that can pull them into a secret area. Another rope hangs in a narrow passage farther ahead, which can pull the primates up to a piece of land with the [[DK Barrel]] wobbling on it. After walking up a slippery hill, the heroes encounter an Army and another rope that can lift them onto a ledge. The [[KONG Letters|letter K]] floats in an alcove on the ceiling. The Kongs can find a purple rope to the right of here. As they slide down it, they must be cautious of a pair of Zingers, who guard the sides of an alcove with a [[barrel]] in it. When the Kongs reach the cold ground again, they can find a slanted pathway and a ledge ahead of them. An Army rolls off the ledge as they approach. They can find another rope above a lone Zinger on top of the ledge that pulls them up through a narrow passage. | The Kongs are greeted by a hopping Kritter as they enter the level. A rope dangles above them here that can pull them into a secret area. Another rope hangs in a narrow passage farther ahead, which can pull the primates up to a piece of land with the [[DK Barrel]] wobbling on it. After walking up a slippery hill, the heroes encounter an Army and another rope that can lift them onto a ledge. The [[KONG Letters|letter K]] floats in an alcove on the ceiling. The Kongs can find a purple rope to the right of here. As they slide down it, they must be cautious of a pair of Zingers, who guard the sides of an alcove with a [[barrel]] in it. When the Kongs reach the cold ground again, they can find a slanted pathway and a ledge ahead of them. An Army rolls off the ledge as they approach. They can find another rope above a lone Zinger on top of the ledge that pulls them up through a narrow passage. | ||
At the top of this rope, two more ropes can be seen to the left above a Zinger. As they climb, they must alternate between ropes, as Zingers fly on top of them. A DK Barrel shakes in an alcove to the right of the ropes when the primates access the top of the area. To the left, they can find a slanted pathway with a gap at the end of it. A Necky with a [[Banana Bunch]] above it is above the gap. If the heroes jump into the narrow abyss, they land on the top of a steep, but small, hill. Another hill is located ahead after a flat pathway leading under a low ceiling of crystals. A small abyss follows, but the primates can cross it with the use of a purple rope, which has a Zinger under it. If they continue, they head down a long, steep hill with a pair of hopping Kritters at the bottom of it. Three more ropes dangle above an abyss ahead. Zingers as positioned around the ends of them, so the heroes must jump off of the objects quickly to avoid being pulled into them. The level's [[Star Barrel|Continue Barrel]] waits at the other side of the abyss. | At the top of this rope, two more ropes can be seen to the left above a Zinger. As they climb, they must alternate between ropes, as Zingers fly on top of them. A DK Barrel shakes in an alcove to the right of the ropes when the primates access the top of the area. To the left, they can find a slanted pathway with a gap at the end of it. A Necky with a [[Banana Bunch]] above it is above the gap. If the heroes jump into the narrow abyss, they land on the top of a steep, but small, hill. Another hill is located ahead after a flat pathway leading under a low ceiling of crystals. A small abyss follows, but the primates can cross it with the use of a purple rope, which has a Zinger under it. If they continue, they head down a long, steep hill with a pair of hopping Kritters at the bottom of it. Three more ropes dangle above an abyss ahead. Zingers as positioned around the ends of them, so the heroes must jump off of the objects quickly to avoid being pulled into them. The level's [[Star Barrel|Continue Barrel]] waits at the other side of the abyss. | ||
If the duo journeys a bit farther, they can find a slanted surface with a blue rope on the other side of it. The rope pulls them to a steep slope with a Klaptrap and a [[Blast Barrel]] on it. As they ride up the rope, the are lifted past a DK Barrel. The Blast Barrel mentioned previously can blast the Kongs into an area at a higher elevation, where there are a few Kritters and Klaptraps. A rope leading to the letter O in an alcove hangs above the Kritter. After a steep hill, the Kongs can find a large abyss with several blue ropes dangling above it. The ropes can pull them into the gap if they are not fast enough, but they can also bump into a Zinger at the top of the ropes if they move too fast. Once they cross the abyss, they can find a purple rope in a smaller gap with a Zinger at the bottom of it. Two ropes are present on the area of land ahead. The closest rope leads up to the next area, while the second rope leads up to an alcove with the letter N. Zingers fly are around this rope. From the top of the first rope, the heroes can find a path leading to the west. Two Klaptraps march along it, and they are followed by a blue rope with a Zinger in front of it. | If the duo journeys a bit farther, they can find a slanted surface with a blue rope on the other side of it. The rope pulls them to a steep slope with a Klaptrap and a [[Blast Barrel]] on it. As they ride up the rope, the are lifted past a DK Barrel. The Blast Barrel mentioned previously can blast the Kongs into an area at a higher elevation, where there are a few Kritters and Klaptraps. A rope leading to the letter O in an alcove hangs above the Kritter. After a steep hill, the Kongs can find a large abyss with several blue ropes dangling above it. The ropes can pull them into the gap if they are not fast enough, but they can also bump into a Zinger at the top of the ropes if they move too fast. Once they cross the abyss, they can find a purple rope in a smaller gap with a Zinger at the bottom of it. Two ropes are present on the area of land ahead. The closest rope leads up to the next area, while the second rope leads up to an alcove with the letter N. Zingers fly are around this rope. From the top of the first rope, the heroes can find a path leading to the west. Two Klaptraps march along it, and they are followed by a blue rope with a Zinger in front of it. | ||
| Line 31: | Line 24: | ||
{{br}} | {{br}} | ||
==Enemies== | ==Enemies== | ||
The following enemies appear in the following quantities: | |||
<gallery> | |||
Army DKC sprite.png|[[Army]] (3) | |||
Klaptrap DKC.png|[[Klaptrap]] (4) | |||
Kritter-blue-DKC.png|[[Kritter]] (blue) (5) | |||
Necky.png|[[Necky]] (2) | |||
Zinger-orange-DKC.png|[[Zinger]] (29) | |||
</gallery> | |||
==Items and objects== | |||
The following items and objects appear in the following quantities: | |||
<gallery> | |||
Banana Bunch DKC SNES.png|[[Banana Bunch]] (5) | |||
Barrel DKC.png|[[Barrel]] (2) | |||
DK Barrel DKC.png|[[DK Barrel]] (3) | |||
Enguarde Token Sprite SNES.png|[[Enguarde]] [[animal token|Token]] (1){{footnote|main|a}} | |||
</gallery> | |||
{{footnote|note|a|In an item cache after the Continue Barrel. The Kongs must bounce on a jumping Kritter to land onto the item cache that releases the Enguarde token.}} | |||
| | |||
| | |||
|} | |||
===K-O-N-G Letters=== | ===K-O-N-G Letters=== | ||
*'''K:''' After encountering the first Army, the Kongs must slide to the top of a blue rope and jump right to the letter K, which is at the ceiling. | |||
*'''O:''' After the Continue Barrel, the Kongs must continue slightly farther until they encounter a bouncing Kritter. They must bounce on it to reach a blue rope that slides them up to a hidden area with the letter O, which is between two Banana Bunches. | |||
*'''N:''' Shortly after the third Bonus Level, are two blue ropes above an ice platform. The Kongs must slide up the rope to the right and avoid some Zingers that quickly fly back and forth at the rope. After going above the Zingers, is a small ledge with the letter N on the ground, between two Banana Bunches, and a DK Barrel against the right wall. | |||
*'''G:''' Right before the level exit, the Kongs must jump up a purple rope to reach the letter G on top of it. | |||
== | ===Key item=== | ||
*'''[[Photograph]]''' (Game Boy Advance version only): To the left of the letter N are a pair of Zingers; a blue rope next to them that has a [[photograph]] on top. The photograph depicts [[Chomps]] in the second page of the [[Scrapbook (Donkey Kong Country series)|scrapbook]]. | |||
== | ==Bonus Levels== | ||
[[File:Slipslide Ride SNES 5.png|thumb|The second Bonus Level]] | |||
| | Slipslide Ride has three Bonus Levels, listed by their type in the Game Boy Advance version: | ||
*'''''Stop the Barrel!''''': At the start of the level, the Kongs must approach two bouncing Kritters and go back left to a blue rope hanging from a gap in the ceiling. The Kongs must bounce on a Kritter to reach the rope, which slides them up to a hidden area with a [[barrel]]. The Kongs must pick up the barrel and throw it at the left wall to create an opening into the first [[Bonus Level]]. There, the Kongs must spell out the word "KONG" by jumping at four barrels from left to right; each of the barrels move between a [[banana]] and K-O-N-G Letters. If the Kongs spell the word correctly, they are rewarded an [[animal token]] or a [[Red Balloon|Life Balloon]]. | |||
! | *'''''Spell it Out!''''': When the Kongs reach the first purple rope of the level, they must jump right between two Zingers to land on a ledge with a barrel. The Kongs must pick up the barrel, jump down the rope, and throw the barrel at a wall on the left. This reveals an opening into the second Bonus Level. In the Bonus Level, there are K-O-N-G Letters circling in midair. The Kongs must jump at them in order to spell out the word [[Nintendo|NINTENDO]]. If they do so correctly, the Kongs are rewarded a Life Balloon. | ||
*'''''Collect the Bananas!''''': After the letter O, the Kongs must jump from a few blue ropes over a gap. Just before going to the top of the fourth blue rope, the Kongs must jump left over a Zinger on the third rope and slide up to a [[Bonus Barrel]]. In the Bonus Level, the Kongs can collect bananas by jumping from two blue ropes and two purple ropes. A Banana Bunch is at the bottom of each rope. An [[Expresso]] [[animal token|Token]] is on the right ledge, in front of the exit back into the main level. | |||
==Warp Barrel== | |||
The Kongs should jump above the entrance to the first Bonus Level to land in a hidden [[Warp Barrel]] that takes them to an area shortly after the letter N. In the original version, the Warp Barrel is blue, making it blend in with the crystals. This [[Game Boy Advance]] version does not feature this warp. | |||
==Gallery== | ==Gallery== | ||
<gallery> | <gallery> | ||
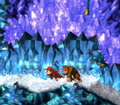
Slipslide Ride SNES 2.png|The Kongs stand at the beginning of the level | |||
Slipslide Ride SNES 3.png|The primates travel mid-way through the level | |||
Slipslide Ride SNES 4.png|The Kongs walk away from a blue Kritter | Slipslide Ride SNES 4.png|The Kongs walk away from a blue Kritter | ||
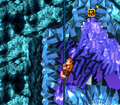
Slipslide Ride Letter K.png|The Kongs hold on a blue rope to the left of the letter K | Slipslide Ride Letter K.png|The Kongs hold on a blue rope to the left of the letter K | ||
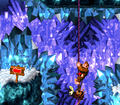
Slipslide Ride left arrow sign.png|Donkey Kong holds on a purple rope above a Zinger | Slipslide Ride left arrow sign.png|Donkey Kong holds on a purple rope above a Zinger | ||
Slipslide Ride design.jpg|Design sheet for the level by [[Gregg Mayles]]<ref>@Ghoulyboy (11:09, September 12, 2015). [https://twitter.com/Ghoulyboy/status/642762092278382592 Last bunch of #DKCrevealed levels before I move onto some unused stuff. It's a Barrels, Ice and Temple combo.] ''Twitter.'' Retrieved July 24, 2018.</ref> | Slipslide Ride design.jpg|Design sheet for the level by [[Gregg Mayles]]<ref>@Ghoulyboy (11:09, September 12, 2015). [https://twitter.com/Ghoulyboy/status/642762092278382592 Last bunch of #DKCrevealed levels before I move onto some unused stuff. It's a Barrels, Ice and Temple combo.] ''Twitter.'' Retrieved July 24, 2018.</ref> | ||
SlipslideRide-GBC-2.png|Donkey Kong climbing near a Zinger in the Game Boy Color version | |||
SlipslideRide-GBA-1.png|Donkey Kong carries a barrel at an Army in the Game Boy Advance version | |||
SlipslideRide-GBA-2.png|Diddy goes up to the third Bonus Barrel in the Game Boy Advance version | |||
SlipslideRide-GBC-2.png | |||
SlipslideRide-GBA-1.png|Donkey Kong carries a barrel at an Army | |||
SlipslideRide-GBA-2.png|Diddy goes up to the third Bonus Barrel | |||
</gallery> | </gallery> | ||
==Names in other languages== | ==Names in other languages== | ||
{{foreign names | {{foreign names | ||
| | |Jpn=クリスタルトンネル | ||
| | |JpnR=Kurisutaru tonneru | ||
| | |JpnM=Crystal Tunnel | ||
| | |Fre=Balade en glissade (SNES)<br>Course Glissèe (GBC) | ||
| | |FreM=Sliding Ride (SNES)<br>Slippery Race (GBC) | ||
|Spa=Paseo Deslizante | |Spa=Paseo Deslizante | ||
|SpaM=Sliding Ride | |SpaM=Sliding Ride | ||
|Ger=Schwarzwald Tour (SNES)<br | |Ger=Schwarzwald Tour (SNES)<br>Eistal (GBC/GBA) | ||
|GerM=Black Forest Tour (SNES)<br | |GerM=Black Forest Tour (SNES)<br>Ice Valley (GBC/GBA) | ||
|Ita=Foresta Fosca | |Ita=Foresta Fosca | ||
|ItaM=Gloomy Forest | |ItaM=Gloomy Forest | ||
| Line 184: | Line 102: | ||
{{DKC}} | {{DKC}} | ||
{{DKC | {{DKC levels}} | ||
[[Category: | [[Category:Ice caves]] | ||
[[Category:Donkey Kong Island]] | [[Category:Donkey Kong Island]] | ||
[[Category:Donkey Kong Country | [[Category:Donkey Kong Country levels]] | ||
Latest revision as of 17:10, January 7, 2025
It has been requested that more images be uploaded for this article. Remove this notice only after the additional images have been added. Specifics: K-O-N-G Letters and remaining Bonus Levels.
| Level | |
|---|---|
| Slipslide Ride | |
| |
| Level code | 4 - 2 |
| World | Gorilla Glacier |
| Game | Donkey Kong Country |
| Music track | Ice Cave Chant (SNES and GBA versions) Kremlantis (GBC version) |
| << Directory of levels (SNES & GBC) >> | |
| << Directory of levels (GBA) >> | |
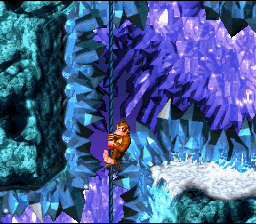
Slipslide Ride is the eighteenth level of Donkey Kong Country and the second level of Gorilla Glacier. Slipslide Ride is the only ice cave level in Donkey Kong Country, and as such, it is the only level with the "Ice Cave Chant" tune, or the Kremlantis underwater ruins theme from Donkey Kong Land in the Game Boy Color version. Donkey Kong and Diddy Kong must climb slippery ropes that forcefully slide them either up or down. The blue ropes slide the Kongs up and the purple ones slide them down (though the inverse is the case in the Game Boy Color version). Many Zingers appear as the main obstacle of the level, especially around the ropes.
Layout[edit]
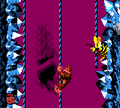
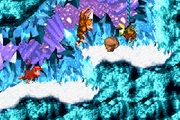
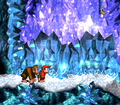
The Kongs are greeted by a hopping Kritter as they enter the level. A rope dangles above them here that can pull them into a secret area. Another rope hangs in a narrow passage farther ahead, which can pull the primates up to a piece of land with the DK Barrel wobbling on it. After walking up a slippery hill, the heroes encounter an Army and another rope that can lift them onto a ledge. The letter K floats in an alcove on the ceiling. The Kongs can find a purple rope to the right of here. As they slide down it, they must be cautious of a pair of Zingers, who guard the sides of an alcove with a barrel in it. When the Kongs reach the cold ground again, they can find a slanted pathway and a ledge ahead of them. An Army rolls off the ledge as they approach. They can find another rope above a lone Zinger on top of the ledge that pulls them up through a narrow passage.
At the top of this rope, two more ropes can be seen to the left above a Zinger. As they climb, they must alternate between ropes, as Zingers fly on top of them. A DK Barrel shakes in an alcove to the right of the ropes when the primates access the top of the area. To the left, they can find a slanted pathway with a gap at the end of it. A Necky with a Banana Bunch above it is above the gap. If the heroes jump into the narrow abyss, they land on the top of a steep, but small, hill. Another hill is located ahead after a flat pathway leading under a low ceiling of crystals. A small abyss follows, but the primates can cross it with the use of a purple rope, which has a Zinger under it. If they continue, they head down a long, steep hill with a pair of hopping Kritters at the bottom of it. Three more ropes dangle above an abyss ahead. Zingers as positioned around the ends of them, so the heroes must jump off of the objects quickly to avoid being pulled into them. The level's Continue Barrel waits at the other side of the abyss.
If the duo journeys a bit farther, they can find a slanted surface with a blue rope on the other side of it. The rope pulls them to a steep slope with a Klaptrap and a Blast Barrel on it. As they ride up the rope, the are lifted past a DK Barrel. The Blast Barrel mentioned previously can blast the Kongs into an area at a higher elevation, where there are a few Kritters and Klaptraps. A rope leading to the letter O in an alcove hangs above the Kritter. After a steep hill, the Kongs can find a large abyss with several blue ropes dangling above it. The ropes can pull them into the gap if they are not fast enough, but they can also bump into a Zinger at the top of the ropes if they move too fast. Once they cross the abyss, they can find a purple rope in a smaller gap with a Zinger at the bottom of it. Two ropes are present on the area of land ahead. The closest rope leads up to the next area, while the second rope leads up to an alcove with the letter N. Zingers fly are around this rope. From the top of the first rope, the heroes can find a path leading to the west. Two Klaptraps march along it, and they are followed by a blue rope with a Zinger in front of it.
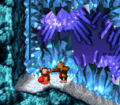
An icy platform is located at the top of the rope with a large abyss next to it. This gap must be crossed using six separate purple ropes, most of which that have Zingers at the bottom of them. A smaller abyss follows the platform on the other side of this gap. If consists of a single purple rope that can pull the heroes downwards if they do not jump off of it fast enough. The platform after this pit carries a sign that indicates that the level is near complete. A pair of purple ropes hang parallel to each other above a gap ahead of here. Although the Kongs must climb up the ropes, they force them downwards. With good speed, the ropes can be climbed with the Kongs jump between them fast enough. Once the heroes reach the top of the ropes, they can find an area of land with some ropes placed across from it. The letter G floats above the first of the ropes. Ahead, an exit sign can be found. An opening in the wall is also nearby, and when it is entered, the level is completed.
Enemies[edit]
The following enemies appear in the following quantities:
Items and objects[edit]
The following items and objects appear in the following quantities:
Banana Bunch (5)
Barrel (2)
DK Barrel (3)
a - In an item cache after the Continue Barrel. The Kongs must bounce on a jumping Kritter to land onto the item cache that releases the Enguarde token.
K-O-N-G Letters[edit]
- K: After encountering the first Army, the Kongs must slide to the top of a blue rope and jump right to the letter K, which is at the ceiling.
- O: After the Continue Barrel, the Kongs must continue slightly farther until they encounter a bouncing Kritter. They must bounce on it to reach a blue rope that slides them up to a hidden area with the letter O, which is between two Banana Bunches.
- N: Shortly after the third Bonus Level, are two blue ropes above an ice platform. The Kongs must slide up the rope to the right and avoid some Zingers that quickly fly back and forth at the rope. After going above the Zingers, is a small ledge with the letter N on the ground, between two Banana Bunches, and a DK Barrel against the right wall.
- G: Right before the level exit, the Kongs must jump up a purple rope to reach the letter G on top of it.
Key item[edit]
- Photograph (Game Boy Advance version only): To the left of the letter N are a pair of Zingers; a blue rope next to them that has a photograph on top. The photograph depicts Chomps in the second page of the scrapbook.
Bonus Levels[edit]
Slipslide Ride has three Bonus Levels, listed by their type in the Game Boy Advance version:
- Stop the Barrel!: At the start of the level, the Kongs must approach two bouncing Kritters and go back left to a blue rope hanging from a gap in the ceiling. The Kongs must bounce on a Kritter to reach the rope, which slides them up to a hidden area with a barrel. The Kongs must pick up the barrel and throw it at the left wall to create an opening into the first Bonus Level. There, the Kongs must spell out the word "KONG" by jumping at four barrels from left to right; each of the barrels move between a banana and K-O-N-G Letters. If the Kongs spell the word correctly, they are rewarded an animal token or a Life Balloon.
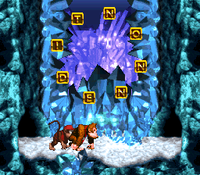
- Spell it Out!: When the Kongs reach the first purple rope of the level, they must jump right between two Zingers to land on a ledge with a barrel. The Kongs must pick up the barrel, jump down the rope, and throw the barrel at a wall on the left. This reveals an opening into the second Bonus Level. In the Bonus Level, there are K-O-N-G Letters circling in midair. The Kongs must jump at them in order to spell out the word NINTENDO. If they do so correctly, the Kongs are rewarded a Life Balloon.
- Collect the Bananas!: After the letter O, the Kongs must jump from a few blue ropes over a gap. Just before going to the top of the fourth blue rope, the Kongs must jump left over a Zinger on the third rope and slide up to a Bonus Barrel. In the Bonus Level, the Kongs can collect bananas by jumping from two blue ropes and two purple ropes. A Banana Bunch is at the bottom of each rope. An Expresso Token is on the right ledge, in front of the exit back into the main level.
Warp Barrel[edit]
The Kongs should jump above the entrance to the first Bonus Level to land in a hidden Warp Barrel that takes them to an area shortly after the letter N. In the original version, the Warp Barrel is blue, making it blend in with the crystals. This Game Boy Advance version does not feature this warp.
Gallery[edit]
Design sheet for the level by Gregg Mayles[1]
Names in other languages[edit]
| Language | Name | Meaning | Notes |
|---|---|---|---|
| Japanese | クリスタルトンネル[?] Kurisutaru tonneru |
Crystal Tunnel | |
| French | Balade en glissade (SNES) Course Glissèe (GBC)[?] |
Sliding Ride (SNES) Slippery Race (GBC) |
|
| German | Schwarzwald Tour (SNES) Eistal (GBC/GBA)[?] |
Black Forest Tour (SNES) Ice Valley (GBC/GBA) |
|
| Italian | Foresta Fosca[?] | Gloomy Forest | |
| Spanish | Paseo Deslizante[?] | Sliding Ride |
Trivia[edit]
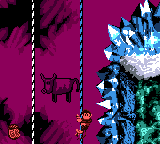
- In the Game Boy Color version, the player can find a crude drawing of a bull in the lower half of the third Bonus Level. This is the "Rareware Cow", a visual Easter Egg that has appeared in other handheld works by the company.[2]
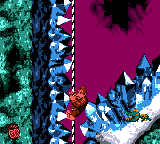
- Slipslide Ride is the only level where an arrow sign indicating the nearby exit is pointing left.
References[edit]
- ^ @Ghoulyboy (11:09, September 12, 2015). Last bunch of #DKCrevealed levels before I move onto some unused stuff. It's a Barrels, Ice and Temple combo. Twitter. Retrieved July 24, 2018.
- ^ Zoltanish. "On the level 'Slip Slide Ride' in the Game Boy Color version of [Donkey Kong Country], you can find the RareWare cow. This cow is present in some other Rare handheld games, such as Banjo Kazooie: Grunty's Revenge and Conker's Pocket Tales". VGFacts. Retrieved March 13, 2015.


![Design sheet for the level by Gregg Mayles[1]](https://mario.wiki.gallery/images/thumb/3/3e/Slipslide_Ride_design.jpg/89px-Slipslide_Ride_design.jpg)
