Ropey Rampage: Difference between revisions
(→Bonus Level(s): tense) |
m (Text replacement - "(\| *)Jap([RMCN\d]* *=)" to "$1Jpn$2") |
||
| (104 intermediate revisions by 47 users not shown) | |||
| Line 1: | Line 1: | ||
{{level | {{level infobox | ||
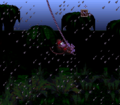
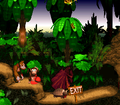
|image=[[File:Ropey Rampage SNES.png]]<br>Donkey Kong swinging from a rope | |||
|image=[[ | |||
|code=1 - 2 | |code=1 - 2 | ||
|world=[[Kongo Jungle]] | |||
|game=''[[Donkey Kong Country]] | |game=''[[Donkey Kong Country]] | ||
|before=[[Jungle Hijinxs (Donkey Kong Country)|<<]] | |||
|before=[[Jungle | |||
|after=[[Reptile Rumble|>>]] | |after=[[Reptile Rumble|>>]] | ||
|track=[[DK Island Swing]] | |||
}} | }} | ||
'''Ropey Rampage''' is the second level of the | '''Ropey Rampage''' is the second level in ''[[Donkey Kong Country]]'' and of the first world, [[Kongo Jungle]]. It takes place in a jungle during a tropical thunderstorm at night, transitioning right after [[Jungle Hijinxs (Donkey Kong Country)|Jungle Hijinxs]]. A lot of the level involves [[Donkey Kong]] and [[Diddy Kong]] swinging and climbing from [[rope]]s around treetops and gaps. [[Army|Armies]], [[Zinger]]s, and [[Kritter]]s appear throughout the level, and the former two enemies first appear in the level. When Kongs reach the end of the level, the storm ends, and a sunrise appears in the background. In the [[Donkey Kong Country (Game Boy Advance)|Game Boy Advance version]], the level instead takes place during a rainstorm at daytime. | ||
==Layout== | |||
{{multiframe|[[File:Ropey Rampage GBC.png]] [[File:RopeyRampage GBA.png|180px]]|Ropey Rampage, as it appears in the Game Boy Color version (top) and the Game Boy Advance version (bottom)|align=left|size=200}} | |||
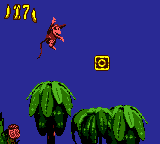
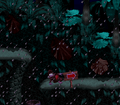
At the beginning of the level, the primates emerge from a tunnel onto a straight pathway leading to a pair of Armies and a [[TNT Barrel|TNT Drum]]. Raised areas of land are behind this path, holding [[banana]]s and a Kritter. The [[KONG Letters|letter K]] hovers to the right of this foe. Farther ahead, they can find a rope hanging by the edge of a cliff. They can use it to reach the treetops, where another Army is present. An area of land follows a gap after the trees with a trio of Kritters and another raised piece of land on it. The heroes can reach the top of it, where the first [[DK Barrel]] is located, if they climb a nearby rope. A wide alcove is ahead with a rope above it. A [[Rambi]] [[animal token|Token]] is present on a treetop behind the rope, which can be used to swing over the alcove. If the primates travel to the east from here, they can find an Army at the edge of a cliff and a rope that is able to swing them over an abyss and onto the treetops, where the letter O is placed. Two trees next to the letter carry a Kritter. A wide pit follows these trees, but the duo can swing over it with a rope. Once they cross the abyss, they find themselves on solid ground, where the level's [[Star Barrel|Continue Barrel]] is located. | |||
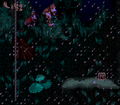
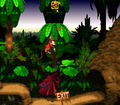
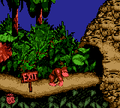
A TNT Drum and a Kritter stand in the area after the barrel. The heroes can find a pair of Armies and a TNT Drum nearby in a wide alcove with a few ropes above it. They can swing over the foes with these ropes. Another alcove is ahead, containing a raised piece of land with the next Army on it. A DK Barrel wobbles below it. A straight pathway nearby leading to an abyss holds a marching Kritter. This abyss can be crossed with the use of a rope. The Kongs reach a single treetop with a Kritter on it on the opposite side of the pit. A larger pit follows that must be crossed with the aid of two more ropes. They come up to one of the two letter N's in the level as they swing. A Zinger that moves in a vertical path flies in their way as they cross. Once the primates access the solid piece of land after the foe, they can find a spot in the ground that they can break to reveal a tire. There is a small, raised piece of land near here, which has a part of the ground that can be broken open to release a [[Winky]] [[animal token|Token]]. It is followed by an abyss with several ropes above it. One of Two Zingers fly between each of the ropes, which they must swing on to cross. Once they pass this abyss, the two friends land on a small platform with a Kritter on it. A gap is ahead, and once they pass it, they can find a sign that indicates that the level is almost complete. The straight pathway ahead of here leads to an Army and an exit sign with a tunnel after it. A tree above this area holds the letter G. Once the tunnel is entered, the level is completed. | |||
{{br|left}} | |||
==Enemies== | |||
The following enemies appear in the following quantities, and enemies marked in '''bold''' make their level debut in Ropey Rampage: | |||
<gallery> | |||
Army DKC sprite.png|'''[[Army]]''' (9) | |||
Kritter-DKC.png|[[Kritter]] (10){{footnote|main|a}} | |||
Zinger DKC.png|'''[[Zinger]]''' (5){{footnote|main|b}} | |||
</gallery> | |||
{{footnote|note|a|Nine Kritters appear in the remakes}} | |||
{{footnote|note|b|Three Zingers appear in the Game Boy Color version}} | |||
== | ==Items and objects== | ||
The | The following items and objects appear in the following quantities: | ||
<gallery> | |||
Banana DKC SNES.png|[[Banana]] (91){{footnote|main|c}} | |||
Banana Bunch DKC SNES.png|[[Banana Bunch]] (19){{footnote|main|d}} | |||
Star Barrel DKC.png|[[Star Barrel|Continue Barrel]] (1) | |||
DK Barrel DKC.png|[[DK Barrel]] (2) | |||
Red Balloon DKC SNES.png|[[Red Balloon|Life Balloon]] (1) | |||
Rambi Token Sprite SNES.png|[[Rambi]] [[animal token|Token]] (1) | |||
Winky Token Sprite SNES.png|[[Winky]] [[animal token|Token]] (1) | |||
</gallery> | |||
{{footnote|note|c|55 of the Bananas are in the main level, while 36 are in the first Bonus Level.}} | |||
{{footnote|note|d|14 of the Banana Bunches are hidden in certain spots on the ground.}} | |||
==Bonus Level | ===K-O-N-G letters=== | ||
* | [[File:RopeyRampage SNES 4.png|thumb|The location of the letter O]] | ||
* | *'''K:''' Next to the first Kritter to the right of a high platform. | ||
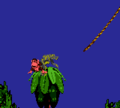
*'''O:''' Above the second pair of treetops after the second swinging rope | |||
*'''N:''' The level has two N's: the first is located at the end of the first Bonus Level, and the other is after the Continue Barrel between swinging two ropes after a lone Kritter on a treetop. | |||
*'''G:''' On a treetop to the top-left of the level exit. | |||
{{br}} | |||
==Bonus Levels== | |||
{{multiframe|[[File:RopeyRampage-Bonus1.png|180px]] [[File:Ropey Rampage's Bonus Level.png|180px]]|size=380|The first and second Bonus Levels, respectively}} | |||
Ropey Rampage has two Bonus Levels, listed by their type in the Game Boy Advance version: | |||
*'''''Find the Exit!''''': Right after the letter O, the Kongs must fall down a small abyss to land in a [[Blast Barrel]], which blasts them through a wall leading into the [[Bonus Level]]. The Bonus Level consists of six vertical ropes, each with by six bananas. They can climb up and collect bananas and go to a ledge at the right with the letter N and the exit. When the Kongs exit the Bonus Level, they blast by some swinging ropes and a single Zinger. | |||
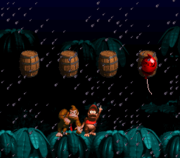
*'''''Stop the Barrel!''''': The Kongs must jump into the first gap before the arrow sign, where they are caught into another Blast Barrel. In the Bonus Level, the Kongs must observe a [[Red Balloon|Life Balloon]] as it quickly alternates between four barrels. The Life Balloon eventually stops on one of the barrels, and if the Kongs choose the correct barrel, they win the Life Balloon. If they choose an incorrect barrel, the Kongs lose at the challenge. Either way, the Kongs are redirected back into the main level. | |||
==Warp Barrel== | |||
Instead of climbing up the first rope in the level, the Kongs must roll jump into the abyss ahead to enter a [[Warp Barrel]]. It leads them to the arrow sign, which indicates that the level exit is nearby. | |||
==Gallery== | ==Gallery== | ||
< | <gallery> | ||
RopeyRampage-SNES-K.png|The letter K | |||
Ropey Rampage DKC Zinger.png|The Kongs jump over a Zinger between two ropes | |||
Ropey Rampage SNES 2.png|Donkey Kong travels towards a TNT Drum and a Kritter | |||
RopeyRampage SNES 5.png|The Blast Barrel leading to the second Bonus Level is in the bottom-left gap | |||
RopeyRampage-SNES-N.png|The letter N | |||
</gallery | RopeyRampage-SNES-N2.png|The other letter N | ||
RopeyRampage-SNES-G.png|The location of the letter G | |||
Ropey Rampage SNES 3.png|The end of the level | |||
Ropey Rampage GBC world map.png|The level from the Kongo Jungle map in the Game Boy Color version | |||
Ropey Rampage GBC 2.png|Diddy is hit by a Kritter in the Game Boy Color version | |||
Ropey Rampage GBC end.png|Donkey Kong at the level exit in the Game Boy Color version | |||
RopeyRampage-GBA-N.png|The letter N in the Game Boy Advance version | |||
RopeyRampage-GBA-G.png|The letter G in the Game Boy Advance version | |||
</gallery> | |||
==Names in | ==Names in other languages== | ||
{{ | {{foreign names | ||
|Jpn=ロープジャングル | |||
| | |JpnR=Rōpu janguru | ||
| | |JpnM=Rope Jungle | ||
| | |||
|Spa=Lío de Lianas | |Spa=Lío de Lianas | ||
|SpaM= | |SpaM=Vine Mess | ||
<br | |Fre=Liane Folies | ||
|FreM=Vine Capers | |||
|Ger=Sturztal<br> Lianen-Limbo (GBA) | |||
|GerM=Fall Valley<br>Vine Limbo | |||
|Ita=Liane Lanose | |||
|ItaM=Woolly Liana | |||
|Por=Área da Corda | |||
|PorM=Rope Area | |||
}} | |||
{{DKC}} | {{DKC}} | ||
{{DKC levels}} | |||
[[Category:Donkey Kong Island]] | [[Category:Donkey Kong Island]] | ||
[[Category: | [[Category:Jungles]] | ||
[[Category:Donkey Kong | [[Category:Donkey Kong Country levels]] | ||
[[ | [[de:Lianen-Limbo]] | ||
Latest revision as of 15:57, January 7, 2025
| Level | |
|---|---|
| Ropey Rampage | |
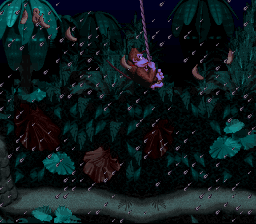 Donkey Kong swinging from a rope | |
| Level code | 1 - 2 |
| World | Kongo Jungle |
| Game | Donkey Kong Country |
| Music track | DK Island Swing |
| << Directory of levels >> | |
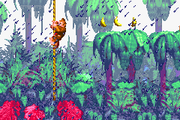
Ropey Rampage is the second level in Donkey Kong Country and of the first world, Kongo Jungle. It takes place in a jungle during a tropical thunderstorm at night, transitioning right after Jungle Hijinxs. A lot of the level involves Donkey Kong and Diddy Kong swinging and climbing from ropes around treetops and gaps. Armies, Zingers, and Kritters appear throughout the level, and the former two enemies first appear in the level. When Kongs reach the end of the level, the storm ends, and a sunrise appears in the background. In the Game Boy Advance version, the level instead takes place during a rainstorm at daytime.
Layout[edit]
At the beginning of the level, the primates emerge from a tunnel onto a straight pathway leading to a pair of Armies and a TNT Drum. Raised areas of land are behind this path, holding bananas and a Kritter. The letter K hovers to the right of this foe. Farther ahead, they can find a rope hanging by the edge of a cliff. They can use it to reach the treetops, where another Army is present. An area of land follows a gap after the trees with a trio of Kritters and another raised piece of land on it. The heroes can reach the top of it, where the first DK Barrel is located, if they climb a nearby rope. A wide alcove is ahead with a rope above it. A Rambi Token is present on a treetop behind the rope, which can be used to swing over the alcove. If the primates travel to the east from here, they can find an Army at the edge of a cliff and a rope that is able to swing them over an abyss and onto the treetops, where the letter O is placed. Two trees next to the letter carry a Kritter. A wide pit follows these trees, but the duo can swing over it with a rope. Once they cross the abyss, they find themselves on solid ground, where the level's Continue Barrel is located.
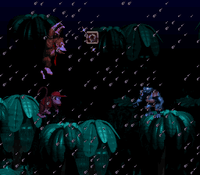
A TNT Drum and a Kritter stand in the area after the barrel. The heroes can find a pair of Armies and a TNT Drum nearby in a wide alcove with a few ropes above it. They can swing over the foes with these ropes. Another alcove is ahead, containing a raised piece of land with the next Army on it. A DK Barrel wobbles below it. A straight pathway nearby leading to an abyss holds a marching Kritter. This abyss can be crossed with the use of a rope. The Kongs reach a single treetop with a Kritter on it on the opposite side of the pit. A larger pit follows that must be crossed with the aid of two more ropes. They come up to one of the two letter N's in the level as they swing. A Zinger that moves in a vertical path flies in their way as they cross. Once the primates access the solid piece of land after the foe, they can find a spot in the ground that they can break to reveal a tire. There is a small, raised piece of land near here, which has a part of the ground that can be broken open to release a Winky Token. It is followed by an abyss with several ropes above it. One of Two Zingers fly between each of the ropes, which they must swing on to cross. Once they pass this abyss, the two friends land on a small platform with a Kritter on it. A gap is ahead, and once they pass it, they can find a sign that indicates that the level is almost complete. The straight pathway ahead of here leads to an Army and an exit sign with a tunnel after it. A tree above this area holds the letter G. Once the tunnel is entered, the level is completed.
Enemies[edit]
The following enemies appear in the following quantities, and enemies marked in bold make their level debut in Ropey Rampage:
Army (9)
a - Nine Kritters appear in the remakes
b - Three Zingers appear in the Game Boy Color version
Items and objects[edit]
The following items and objects appear in the following quantities:
Banana Bunch (19)d
Continue Barrel (1)
DK Barrel (2)
Life Balloon (1)
c - 55 of the Bananas are in the main level, while 36 are in the first Bonus Level.
d - 14 of the Banana Bunches are hidden in certain spots on the ground.
K-O-N-G letters[edit]
- K: Next to the first Kritter to the right of a high platform.
- O: Above the second pair of treetops after the second swinging rope
- N: The level has two N's: the first is located at the end of the first Bonus Level, and the other is after the Continue Barrel between swinging two ropes after a lone Kritter on a treetop.
- G: On a treetop to the top-left of the level exit.
Bonus Levels[edit]
Ropey Rampage has two Bonus Levels, listed by their type in the Game Boy Advance version:
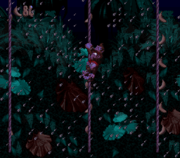
- Find the Exit!: Right after the letter O, the Kongs must fall down a small abyss to land in a Blast Barrel, which blasts them through a wall leading into the Bonus Level. The Bonus Level consists of six vertical ropes, each with by six bananas. They can climb up and collect bananas and go to a ledge at the right with the letter N and the exit. When the Kongs exit the Bonus Level, they blast by some swinging ropes and a single Zinger.
- Stop the Barrel!: The Kongs must jump into the first gap before the arrow sign, where they are caught into another Blast Barrel. In the Bonus Level, the Kongs must observe a Life Balloon as it quickly alternates between four barrels. The Life Balloon eventually stops on one of the barrels, and if the Kongs choose the correct barrel, they win the Life Balloon. If they choose an incorrect barrel, the Kongs lose at the challenge. Either way, the Kongs are redirected back into the main level.
Warp Barrel[edit]
Instead of climbing up the first rope in the level, the Kongs must roll jump into the abyss ahead to enter a Warp Barrel. It leads them to the arrow sign, which indicates that the level exit is nearby.
Gallery[edit]
Names in other languages[edit]
| Language | Name | Meaning | Notes |
|---|---|---|---|
| Japanese | ロープジャングル[?] Rōpu janguru |
Rope Jungle | |
| French | Liane Folies[?] | Vine Capers | |
| German | Sturztal Lianen-Limbo (GBA)[?] |
Fall Valley Vine Limbo |
|
| Italian | Liane Lanose[?] | Woolly Liana | |
| Portuguese | Área da Corda[?] | Rope Area | |
| Spanish | Lío de Lianas[?] | Vine Mess |
