Flower Tour: Difference between revisions
m (Text replacement - "(\| *)Jap([RMCN\d]* *=)" to "$1Jpn$2") |
|||
| (26 intermediate revisions by 14 users not shown) | |||
| Line 1: | Line 1: | ||
{{ | {{tour infobox | ||
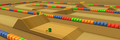
|image=[[File:MKT Flower Tour.png|200px]] | |image=[[File:MKT Flower Tour.png|200px]] | ||
|start=May 5, 2020<br>11:00 p.m. (PT) | |start=May 5, 2020<br>11:00 p.m. (PT) | ||
| Line 5: | Line 5: | ||
|cups=12 | |cups=12 | ||
|rank=[[Daisy Cup]] (week 1)<br>[[Baby Daisy Cup]] (week 2) | |rank=[[Daisy Cup]] (week 1)<br>[[Baby Daisy Cup]] (week 2) | ||
|coin=[[ | |coin=[[3DS Daisy Hills]] | ||
|before=[[Trick Tour|<<]] | |before=[[Trick Tour (2020)|<<]] | ||
|after=[[Jungle Tour|>>]] | |after=[[Jungle Tour|>>]] | ||
}} | }} | ||
The '''Flower Tour''' was the seventeenth tour of ''[[Mario Kart Tour]]'', which began on May 6, 2020 and ended on May 19, 2020. The tour had a springtime theme due to it taking place in the spring in the Northern Hemisphere, and added a fairy-themed variant of [[Princess Daisy|Daisy]], [[Monty Mole]] in his playable ''Mario Kart'' debut, and themed karts and gliders including the [[Daisy Glider]] and the [[Butterfly Sunset]]. It was the first tour since the [[Hammer Bro Tour]] to add a new course: another RMX course themed around the Choco Island courses, aptly named [[RMX Choco Island 1]], which was the tour's | The '''Flower Tour''' was the seventeenth tour of ''[[Mario Kart Tour]]'', which began on May 6, 2020 and ended on May 19, 2020. The tour had a springtime theme due to it taking place in the spring in the {{wp|Northern Hemisphere}}, and added a fairy-themed variant of [[Princess Daisy|Daisy]], [[Monty Mole]] in his playable ''Mario Kart'' debut, and themed karts and gliders including the [[Daisy Glider]] and the [[Butterfly Sunset]]. It was the first tour since the [[Hammer Bro Tour]] to add a new course: another RMX course themed around the Choco Island courses, aptly named [[RMX Choco Island 1]], which was the tour's spotlight course, despite the tour being themed around [[3DS Daisy Hills|Daisy Hills]]. The menu's background featured the windmill and hot air balloons from Daisy Hills as landmarks for this tour. | ||
This was the final tour to introduce a new, non-alternate costume Super character to the game, that being Monty Mole. All Super characters introduced in future tours would be either costumes or color swaps of other characters. | |||
{{br|toc=1}} | |||
==Spotlights== | ==Spotlights== | ||
{| align=center width=66% cellspacing=0 border=1 cellpadding=3 style="border-collapse:collapse; font-family:Arial; text-align:center" | {|align=center width=66% cellspacing=0 border=1 cellpadding=3 style="border-collapse:collapse; font-family:Arial; text-align:center" | ||
|-style="background: #89A" | |-style="background: #89A" | ||
|colspan=3|'''Flower Pipe 1'''<br>May 5, 2020, 11:00 p.m. (PT) – <br>May 19, 2020, 10:59 p.m. (PT) | |colspan=3|'''Flower Pipe 1'''<br>May 5, 2020, 11:00 p.m. (PT) – <br>May 19, 2020, 10:59 p.m. (PT) | ||
| Line 20: | Line 22: | ||
|colspan=3|[[File:MKT Tour17 FlowerPipe2.png|x150px]] | |colspan=3|[[File:MKT Tour17 FlowerPipe2.png|x150px]] | ||
|-style="background: #ABC" | |-style="background: #ABC" | ||
! style="width: 16.6%;"|Driver | !style="width: 16.6%;"|Driver | ||
! style="width: 16.7%;"|Kart | !style="width: 16.7%;"|Kart | ||
! style="width: 16.7%;"|Glider | !style="width: 16.7%;"|Glider | ||
! style="width: 16.6%;"|Driver | !style="width: 16.6%;"|Driver | ||
! style="width: 16.7%;"|Kart | !style="width: 16.7%;"|Kart | ||
! style="width: 16.7%;"|Glider | !style="width: 16.7%;"|Glider | ||
|- | |- | ||
|[[File:MKT Artwork DaisyFairy.png|80x80px]] | |[[File:MKT Artwork DaisyFairy.png|80x80px]] | ||
| Line 43: | Line 45: | ||
==Cups== | ==Cups== | ||
{| align=center width=90% cellspacing=0 border=1 cellpadding=3 style="border-collapse:collapse; font-family:Arial; text-align:center" | {|align=center width=90% cellspacing=0 border=1 cellpadding=3 style="border-collapse:collapse; font-family:Arial; text-align:center" | ||
{{ | {{MKT cup table row | ||
|C=Daisy||Ra=1 | |C=Daisy||Ra=1 | ||
|R1=[[Daisy Hills|3DS Daisy Hills T]]||R1.I=DaisyHillsT3DS Daisy||R1.1=1,500||R1.2=2,300||R1.3=3,000||R1.4=3,800||R1.5=7,600 | |R1=[[3DS Daisy Hills|3DS Daisy Hills T]]||R1.I=DaisyHillsT3DS Daisy||R1.1=1,500||R1.2=2,300||R1.3=3,000||R1.4=3,800||R1.5=7,600 | ||
|R2=[[Shy Guy Bazaar|3DS Shy Guy Bazaar R]]||R2.I=ShyGuyBazaarR3DS||R2.1=1,500||R2.2=2,200||R2.3=2,900||R2.4=3,700||R2.5=7,300 | |R2=[[3DS Shy Guy Bazaar|3DS Shy Guy Bazaar R]]||R2.I=ShyGuyBazaarR3DS||R2.1=1,500||R2.2=2,200||R2.3=2,900||R2.4=3,700||R2.5=7,300 | ||
|R3=[[RMX Choco Island 1]]||R3.I=RMXChocoIsland1||R3.1=1,500||R3.2=2,200||R3.3=3,000||R3.4=3,700||R3.5=7,400 | |R3=[[RMX Choco Island 1]]||R3.I=RMXChocoIsland1||R3.1=1,500||R3.2=2,200||R3.3=3,000||R3.4=3,700||R3.5=7,400 | ||
|CN=Ring Race||C.I=Tour3 YoshiCupChallenge||CC=Peach||CT=[[ | |CN=[[Ring Race]]||C.I=Tour3 YoshiCupChallenge||CC=Peach||CT=[[3DS Mario Circuit]]||C.1=20||C.2=30||C.3=40 | ||
}} | }} | ||
{{ | {{MKT cup table row | ||
|C=Peach||Ra= | |C=Peach||Ra= | ||
|R1=[[Mario Circuit 1|SNES Mario Circuit 1R]]||R1.I=MarioCircuit1RSNES||R1.1=1,000||R1.2=1,600||R1.3=2,100||R1.4=2,600||R1.5=5,000 | |R1=[[SNES Mario Circuit 1|SNES Mario Circuit 1R]]||R1.I=MarioCircuit1RSNES||R1.1=1,000||R1.2=1,600||R1.3=2,100||R1.4=2,600||R1.5=5,000 | ||
|R2=[[ | |R2=[[DS Waluigi Pinball]]||R2.I=WaluigiPinballDS||R2.1=1,200||R2.2=1,800||R2.3=2,400||R2.4=3,100||R2.5=5,900 | ||
|R3=[[ | |R3=[[3DS Rainbow Road]]||R3.I=RainbowRoad3DS DaisyFairy||R3.1=1,700||R3.2=2,700||R3.3=3,600||R3.4=4,500||R3.5=8,600 | ||
|CN=Do Jump Boosts||C.I=Tour17 PeachCupChallenge||CC=Daisy||CT=RMX Choco Island 1||C.1=10||C.2=15||C.3=22 | |CN=[[Do Jump Boosts]]||C.I=Tour17 PeachCupChallenge||CC=Daisy||CT=RMX Choco Island 1||C.1=10||C.2=15||C.3=22 | ||
}} | }} | ||
{{ | {{MKT cup table row | ||
|C=Baby Daisy||Ra=2 | |C=Baby Daisy||Ra=2 | ||
|R1=[[Toad Circuit|3DS Toad Circuit R]]||R1.I=ToadCircuitR3DS BabyDaisy||R1.1=1,100||R1.2=1,800||R1.3=2,400||R1.4=3,000||R1.5=5,600 | |R1=[[3DS Toad Circuit|3DS Toad Circuit R]]||R1.I=ToadCircuitR3DS BabyDaisy||R1.1=1,100||R1.2=1,800||R1.3=2,400||R1.4=3,000||R1.5=5,600 | ||
|R2=RMX Choco Island 1T||R2.I=RMXChocoIsland1T||R2.1=1,800||R2.2=2,900||R2.3=3,900||R2.4=4,900||R2.5=9,100 | |R2=RMX Choco Island 1T||R2.I=RMXChocoIsland1T||R2.1=1,800||R2.2=2,900||R2.3=3,900||R2.4=4,900||R2.5=9,100 | ||
|R3=3DS Mario Circuit R||R3.I=MarioCircuitR3DS Toad||R3.1=1,400||R3.2=2,300||R3.3=3,100||R3.4=3,800||R3.5=7,100 | |R3=3DS Mario Circuit R||R3.I=MarioCircuitR3DS Toad||R3.1=1,400||R3.2=2,300||R3.3=3,100||R3.4=3,800||R3.5=7,100 | ||
|CN=Steer Clear of Obstacles||C.I=Tour17 BabyDaisyCupChallenge||CC=Dry Bones||CT=[[ | |CN=[[Steer Clear of Obstacles]]||C.I=Tour17 BabyDaisyCupChallenge||CC=Dry Bones||CT=[[GBA Bowser's Castle 1]]||C.1=1||C.2=2||C.3=3 | ||
}} | }} | ||
{{ | {{MKT cup table row | ||
|C=Mario||Ra= | |C=Mario||Ra= | ||
|R1=3DS Shy Guy Bazaar||R1.I=ShyGuyBazaar3DS||R1.1=1,400||R1.2=2,200||R1.3=3,000||R1.4=3,800||R1.5=6,800 | |R1=3DS Shy Guy Bazaar||R1.I=ShyGuyBazaar3DS||R1.1=1,400||R1.2=2,200||R1.3=3,000||R1.4=3,800||R1.5=6,800 | ||
|R2=SNES Mario Circuit 1||R2.I=MarioCircuit1SNES||R2.1=1,000||R2.2=1,600||R2.3=2,100||R2.4=2,700||R2.5=4,800 | |R2=SNES Mario Circuit 1||R2.I=MarioCircuit1SNES||R2.1=1,000||R2.2=1,600||R2.3=2,100||R2.4=2,700||R2.5=4,800 | ||
|R3=3DS Rainbow Road R||R3.I=RainbowRoadR3DS IceMario||R3.1=1,900||R3.2=3,100||R3.3=4,200||R3.4=5,300||R3.5=9,500 | |R3=3DS Rainbow Road R||R3.I=RainbowRoadR3DS IceMario||R3.1=1,900||R3.2=3,100||R3.3=4,200||R3.4=5,300||R3.5=9,500 | ||
|CN=Smash Small Dry Bones||C.I=Tour3 MortonCupChallenge||CC=Donkey Kong||CT=[[ | |CN=[[Smash Small Dry Bones]]||C.I=Tour3 MortonCupChallenge||CC=Donkey Kong||CT=[[N64 Koopa Troopa Beach]]||C.1=5||C.2=8||C.3=10 | ||
}} | }} | ||
{{ | {{MKT cup table row | ||
|C=Lakitu||Ra= | |C=Lakitu||Ra= | ||
|R1=RMX Choco Island 1||R1.I=RMXChocoIsland1 PinkGoldPeach||R1.1=1,500||R1.2=2,500||R1.3=3,400||R1.4=4,300||R1.5=7,400 | |R1=RMX Choco Island 1||R1.I=RMXChocoIsland1 PinkGoldPeach||R1.1=1,500||R1.2=2,500||R1.3=3,400||R1.4=4,300||R1.5=7,400 | ||
|R2=DS Waluigi Pinball T||R2.I=WaluigiPinballTDS||R2.1=1,600||R2.2=2,700||R2.3=3,600||R2.4=4,600||R2.5=7,900 | |R2=DS Waluigi Pinball T||R2.I=WaluigiPinballTDS||R2.1=1,600||R2.2=2,700||R2.3=3,600||R2.4=4,600||R2.5=7,900 | ||
|R3=3DS Daisy Hills||R3.I=DaisyHills3DS||R3.1=1,300||R3.2=2,200||R3.3=3,000||R3.4=3,800||R3.5=6,500 | |R3=3DS Daisy Hills||R3.I=DaisyHills3DS||R3.1=1,300||R3.2=2,200||R3.3=3,000||R3.4=3,800||R3.5=6,500 | ||
|CN=Combo Attack||C.I=Tour17 LakituCupChallenge||CC=Lakitu||CT=3DS Rainbow Road T||C.1=15||C.2=25||C.3=45 | |CN=[[Combo Attack]]||C.I=Tour17 LakituCupChallenge||CC=Lakitu||CT=3DS Rainbow Road T||C.1=15||C.2=25||C.3=45 | ||
}} | }} | ||
{{ | {{MKT cup table row | ||
|C=Lemmy||Ra= | |C=Lemmy||Ra= | ||
|R1=SNES Mario Circuit 1T||R1.I=MarioCircuit1TSNES||R1.1=1,300||R1.2=2,200||R1.3=3,000||R1.4=3,800||R1.5=6,400 | |R1=SNES Mario Circuit 1T||R1.I=MarioCircuit1TSNES||R1.1=1,300||R1.2=2,200||R1.3=3,000||R1.4=3,800||R1.5=6,400 | ||
|R2=3DS Shy Guy Bazaar T||R2.I=ShyGuyBazaarT3DS||R2.1=1,700||R2.2=3,000||R2.3=4,100||R2.4=5,200||R2.5=8,700 | |R2=3DS Shy Guy Bazaar T||R2.I=ShyGuyBazaarT3DS||R2.1=1,700||R2.2=3,000||R2.3=4,100||R2.4=5,200||R2.5=8,700 | ||
|R3=GBA Bowser's Castle 1||R3.I=BowsersCastle1GBA Lemmy||R3.1=1,300||R3.2=2,300||R3.3=3,100||R3.4=3,900||R3.5=6,500 | |R3=GBA Bowser's Castle 1||R3.I=BowsersCastle1GBA Lemmy||R3.1=1,300||R3.2=2,300||R3.3=3,100||R3.4=3,900||R3.5=6,500 | ||
|CN=Goomba Takedown||C.I=Tour17 LemmyCupChallenge||CC=Yoshi||CT=RMX Choco Island 1||C.1=15||C.2=30||C.3=45 | |CN=[[Goomba Takedown]]||C.I=Tour17 LemmyCupChallenge||CC=Yoshi||CT=RMX Choco Island 1||C.1=15||C.2=30||C.3=45 | ||
}} | }} | ||
{{ | {{MKT cup table row | ||
|C=Toad||Ra= | |C=Toad||Ra= | ||
|R1=3DS Toad Circuit T||R1.I=ToadCircuitT3DS Toad||R1.1=1,600||R1.2=2,800||R1.3=3,900||R1.4=4,900||R1.5=7,900 | |R1=3DS Toad Circuit T||R1.I=ToadCircuitT3DS Toad||R1.1=1,600||R1.2=2,800||R1.3=3,900||R1.4=4,900||R1.5=7,900 | ||
|R2=3DS Mario Circuit||R2.I=MarioCircuit3DS||R2.1=1,400||R2.2=2,400||R2.3=3,300||R2.4=4,200||R2.5=6,800 | |R2=3DS Mario Circuit||R2.I=MarioCircuit3DS||R2.1=1,400||R2.2=2,400||R2.3=3,300||R2.4=4,200||R2.5=6,800 | ||
|R3=RMX Choco Island 1R||R3.I=RMXChocoIsland1R||R3.1=1,400||R3.2=2,500||R3.3=3,400||R3.4=4,300||R3.5=6,900 | |R3=RMX Choco Island 1R||R3.I=RMXChocoIsland1R||R3.1=1,400||R3.2=2,500||R3.3=3,400||R3.4=4,300||R3.5=6,900 | ||
|CN=Big Reverse Race||C.I=Tour17 ToadCupChallenge||CC=Any character||CT=SNES Mario Circuit 1||C.1=50cc||C.2=100cc||C.3=150cc | |CN=[[Big Reverse Race]]||C.I=Tour17 ToadCupChallenge||CC=Any character||CT=SNES Mario Circuit 1||C.1=50cc||C.2=100cc||C.3=150cc | ||
}} | }} | ||
{{ | {{MKT cup table row | ||
|C=Koopa Troopa||Ra= | |C=Koopa Troopa||Ra= | ||
|R1=[[Vanilla Lake 1|SNES Vanilla Lake 1R/T]]||R1.I=VanillaLake1RTSNES IceBro||R1.1=1,300||R1.2=2,500||R1.3=3,400||R1.4=4,300||R1.5=6,700 | |R1=[[SNES Vanilla Lake 1|SNES Vanilla Lake 1R/T]]||R1.I=VanillaLake1RTSNES IceBro||R1.1=1,300||R1.2=2,500||R1.3=3,400||R1.4=4,300||R1.5=6,700 | ||
|R2=3DS Daisy Hills R||R2.I=DaisyHillsR3DS Toadette||R2.1=1,500||R2.2=2,800||R2.3=3,800||R2.4=4,800||R2.5=7,500 | |R2=3DS Daisy Hills R||R2.I=DaisyHillsR3DS Toadette||R2.1=1,500||R2.2=2,800||R2.3=3,800||R2.4=4,800||R2.5=7,500 | ||
|R3=[[Cheep Cheep Lagoon | |R3=[[3DS Cheep Cheep Lagoon|3DS Cheep Cheep Lagoon R/T]]||R3.I=CheepCheepLagoonRT3DS||R3.1=1,800||R3.2=3,300||R3.3=4,400||R3.4=5,600||R3.5=8,800 | ||
|CN=Break Item Boxes||C.I=Tour4 ToadCupChallenge||CC=Waluigi||CT=DS Waluigi Pinball||C.1=5||C.2=12||C.3=20 | |CN=[[Break Item Boxes]]||C.I=Tour4 ToadCupChallenge||CC=Waluigi||CT=DS Waluigi Pinball||C.1=5||C.2=12||C.3=20 | ||
}} | }} | ||
{{ | {{MKT cup table row | ||
|C=Yoshi||Ra= | |C=Yoshi||Ra= | ||
|R1=RMX Choco Island 1T||R1.I=RMXChocoIsland1T||R1.1=2,000||R1.2=3,800||R1.3=5,100||R1.4=6,500||R1.5=9,900 | |R1=RMX Choco Island 1T||R1.I=RMXChocoIsland1T||R1.1=2,000||R1.2=3,800||R1.3=5,100||R1.4=6,500||R1.5=9,900 | ||
| Line 107: | Line 109: | ||
|CN=Steer Clear of Obstacles||C.I=Tour17 YoshiCupChallenge||CC=Lemmy||CT=SNES Vanilla Lake 1||C.1=1||C.2=2||C.3=3 | |CN=Steer Clear of Obstacles||C.I=Tour17 YoshiCupChallenge||CC=Lemmy||CT=SNES Vanilla Lake 1||C.1=1||C.2=2||C.3=3 | ||
}} | }} | ||
{{ | {{MKT cup table row | ||
|C=Dry Bones||Ra= | |C=Dry Bones||Ra= | ||
|R1=3DS Toad Circuit||R1.I=ToadCircuit3DS Toadette||R1.1=1,200||R1.2=2,400||R1.3=3,300||R1.4=4,200||R1.5=6,200 | |R1=3DS Toad Circuit||R1.I=ToadCircuit3DS Toadette||R1.1=1,200||R1.2=2,400||R1.3=3,300||R1.4=4,200||R1.5=6,200 | ||
| Line 114: | Line 116: | ||
|CN=Goomba Takedown||C.I=Tour1 ToadCupChallenge||CC=Toad||CT=3DS Toad Circuit||C.1=15||C.2=25||C.3=30 | |CN=Goomba Takedown||C.I=Tour1 ToadCupChallenge||CC=Toad||CT=3DS Toad Circuit||C.1=15||C.2=25||C.3=30 | ||
}} | }} | ||
{{ | {{MKT cup table row | ||
|C=Hammer Bro||Ra= | |C=Hammer Bro||Ra= | ||
|R1=3DS Rainbow Road T||R1.I=RainbowRoadT3DS HammerBro||R1.1=2,300||R1.2=4,600||R1.3=6,400||R1.4=8,100||R1.5=11,600 | |R1=3DS Rainbow Road T||R1.I=RainbowRoadT3DS HammerBro||R1.1=2,300||R1.2=4,600||R1.3=6,400||R1.4=8,100||R1.5=11,600 | ||
|R2=RMX Choco Island 1R||R2.I=RMXChocoIsland1R DaisyFairy||R2.1=1,600||R2.2=3,200||R2.3=4,400||R2.4=5,600||R2.5=8,000 | |R2=RMX Choco Island 1R||R2.I=RMXChocoIsland1R DaisyFairy||R2.1=1,600||R2.2=3,200||R2.3=4,400||R2.4=5,600||R2.5=8,000 | ||
|R3=SNES Vanilla Lake 1R/T||R3.I=VanillaLake1RTSNES IceBro||R3.1=1,600||R3.2=3,300||R3.3=4,500||R3.4=5,700||R3.5=8,200 | |R3=SNES Vanilla Lake 1R/T||R3.I=VanillaLake1RTSNES IceBro||R3.1=1,600||R3.2=3,300||R3.3=4,500||R3.4=5,700||R3.5=8,200 | ||
|CN=Time Trial||C.I=Tour17 HammerBroCupChallenge||CC=Hammer Bro||CT=3DS Shy Guy Bazaar R||C.1=2:30.00||C.2=2:10.00||C.3=1:55.00 | |CN=[[Time Trial (Mario Kart Tour)|Time Trial]]||C.I=Tour17 HammerBroCupChallenge||CC=Hammer Bro||CT=3DS Shy Guy Bazaar R||C.1=2:30.00||C.2=2:10.00||C.3=1:55.00 | ||
}} | }} | ||
{{ | {{MKT cup table row | ||
|C=Pauline||Ra= | |C=Pauline||Ra= | ||
|R1=GBA Bowser's Castle 1R||R1.I=BowsersCastle1RGBA BowserJr||R1.1=1,800||R1.2=3,700||R1.3=5,100||R1.4=6,600||R1.5=9,100 | |R1=GBA Bowser's Castle 1R||R1.I=BowsersCastle1RGBA BowserJr||R1.1=1,800||R1.2=3,700||R1.3=5,100||R1.4=6,600||R1.5=9,100 | ||
|R2=3DS Cheep Cheep Lagoon R/T||R2.I=CheepCheepLagoonRT3DS BoomerangBro||R2.1=2,100||R2.2=4,400||R2.3=6,000||R2.4=7,700||R2.5=10,700 | |R2=3DS Cheep Cheep Lagoon R/T||R2.I=CheepCheepLagoonRT3DS BoomerangBro||R2.1=2,100||R2.2=4,400||R2.3=6,000||R2.4=7,700||R2.5=10,700 | ||
|R3=N64 Koopa Troopa Beach R/T||R3.I=KoopaTroopaBeachRTN64||R3.1=2,000||R3.2=4,200||R3.3=5,800||R3.4=7,300||R3.5=10,200 | |R3=N64 Koopa Troopa Beach R/T||R3.I=KoopaTroopaBeachRTN64||R3.1=2,000||R3.2=4,200||R3.3=5,800||R3.4=7,300||R3.5=10,200 | ||
|CN=Vs. Mega Donkey Kong||C.I=Tour17 PaulineCupChallenge||CC=Any character||CT=3DS Cheep Cheep Lagoon||C.1=50cc||C.2=100cc||C.3=150cc | |CN=[[Vs. Mega]] [[Donkey Kong]]||C.I=Tour17 PaulineCupChallenge||CC=Any character||CT=3DS Cheep Cheep Lagoon||C.1=50cc||C.2=100cc||C.3=150cc | ||
}} | }} | ||
|} | |} | ||
===Signature kart sets=== | ===Signature kart sets=== | ||
Drivers with a corresponding cup in the tour were bumped one rank up in every course of their cup. | Drivers with a corresponding cup in the tour were bumped one rank up in every course of their cup. | ||
{| class="wikitable" style="text-align: center" width=40% | {|class="wikitable"style="text-align: center"width=40% | ||
!width=10%|Cup | !width=10%|Cup | ||
!width=10%|Character | !width=10%|Character | ||
| Line 214: | Line 213: | ||
==Rewards== | ==Rewards== | ||
Gold cells indicate rewards exclusive to Gold Pass members. | Gold cells indicate rewards exclusive to Gold Pass members. | ||
{|class="wikitable" style="margin:auto; text-align:center" | {|class="wikitable"style="margin:auto; text-align:center" | ||
|- | |- | ||
![[File:MKT Icon GrandStar.png|20x20px]] 30!![[File:MKT Icon GrandStar.png|20x20px]] 60!![[File:MKT Icon GrandStar.png|20x20px]] 75!![[File:MKT Icon GrandStar.png|20x20px]] 120!!colspan=2|[[File:MKT Icon GrandStar.png|20x20px]] 165!![[File:MKT Icon GrandStar.png|20x20px]] 200 | ![[File:MKT Icon GrandStar.png|20x20px]] 30!![[File:MKT Icon GrandStar.png|20x20px]] 60!![[File:MKT Icon GrandStar.png|20x20px]] 75!![[File:MKT Icon GrandStar.png|20x20px]] 120!!colspan=2|[[File:MKT Icon GrandStar.png|20x20px]] 165!![[File:MKT Icon GrandStar.png|20x20px]] 200 | ||
| Line 235: | Line 234: | ||
|} | |} | ||
<br> | <br> | ||
{|class="wikitable" style="margin:auto; text-align:center" | {|class="wikitable"style="margin:auto; text-align:center" | ||
|- | |- | ||
!Grand Stars!![[File:MKT Icon GrandStar.png|20x20px]]!!15!!30!!45!!60!!75!!90!!105!!120!!135!!150!!165!!180!!190!!200!!210!!220!!225!!230!!235!!240!!245!!250!!255!!260!!265!!270!!Total!!Grand total | !Grand Stars!![[File:MKT Icon GrandStar.png|20x20px]]!!15!!30!!45!!60!!75!!90!!105!!120!!135!!150!!165!!180!!190!!200!!210!!220!!225!!230!!235!!240!!245!!250!!255!!260!!265!!270!!Total!!Grand total | ||
| Line 321: | Line 320: | ||
===Courses=== | ===Courses=== | ||
<gallery> | <gallery heights=50px> | ||
MKT Icon RMX Choco Island 1.png|[[RMX Choco Island 1]] (N, R, T) | MKT Icon RMX Choco Island 1.png|[[RMX Choco Island 1]] (N, R, T) | ||
</gallery> | </gallery> | ||
==Paid banners== | ==Paid banners== | ||
{| align=center width=960px cellspacing=0 border=1 cellpadding=3 style="border-collapse:collapse; font-family:Arial; text-align:center" | {|align=center width=960px cellspacing=0 border=1 cellpadding=3 style="border-collapse:collapse; font-family:Arial; text-align:center" | ||
|-style="background: #ABC" | |-style="background: #ABC" | ||
!Name | !Name | ||
| Line 374: | Line 373: | ||
|[[File:MKT Tour17 GreenAppleKartPack.png|x150px]] | |[[File:MKT Tour17 GreenAppleKartPack.png|x150px]] | ||
|} | |} | ||
{{footnote|note|a|This is the first tour since the Paris Tour where paid banners introduced in the first | {{footnote|note|a|This is the first tour since the Paris Tour where paid banners introduced in the first week of the tour are available throughout the entire duration of the tour.}} | ||
week of the tour are available throughout the entire duration of the tour.}} | |||
==Challenges== | ==Challenges== | ||
{{ | {{MKT challenge table | ||
|TCR1=[[File:MKT Icon QuickTicket.png|70px]] [[Quick ticket]] ×1 | |TCR1=[[File:MKT Icon QuickTicket.png|70px]] [[Quick ticket]] ×1 | ||
|T1.1=133 | |T1.1=133 | ||
| Line 427: | Line 425: | ||
|T2.6S=2 | |T2.6S=2 | ||
|T2.7=315 | |T2.7=315 | ||
|T2.7E=Get 1st place on [[Rainbow Road | |T2.7E=Get 1st place on [[3DS Rainbow Road|Rainbow Road]]. | ||
|T2.7S=2 | |T2.7S=2 | ||
|T2.8=075 | |T2.8=075 | ||
| Line 461: | Line 459: | ||
|G.8S=2 | |G.8S=2 | ||
|G.9=039 | |G.9=039 | ||
|G.9E=Take out 5 [[ | |G.9E=Take out 5 [[goat]]s. | ||
|G.9S=2 | |G.9S=2 | ||
}} | }} | ||
==Intial pipe appearance rates== | ==Intial pipe appearance rates== | ||
===Flower Pipe 1=== | ===Flower Pipe 1=== | ||
{|class="wikitable" style="margin:auto; text-align:center" | {|class="wikitable"style="margin:auto; text-align:center" | ||
!Class | !Class | ||
!Parts | !Parts | ||
| Line 530: | Line 483: | ||
|- | |- | ||
!High-End drivers | !High-End drivers | ||
|[[Dry Bowser]], [[ | |[[Dry Bowser]], [[Metal Mario]], [[Pauline]], [[Peachette]], [[Ice Mario (Super Mario Galaxy)|Ice Mario]] | ||
|0.2000% | |0.2000% | ||
|- | |- | ||
| Line 538: | Line 491: | ||
|- | |- | ||
!High-End gliders | !High-End gliders | ||
|[[Swooper]], [[Cloud Glider]], [[Gold Glider]], [[Pink Gold Paper Glider]], [[Butterfly Sunset]],[[Crimson Crane]], [[Heart Balloons]] | |[[Swooper (glider)|Swooper]], [[Cloud Glider]], [[Gold Glider]], [[Pink Gold Paper Glider]], [[Butterfly Sunset]],[[Crimson Crane]], [[Heart Balloons]] | ||
|0.1429% | |0.1429% | ||
|- | |- | ||
!Super drivers | !Super drivers | ||
|[[Donkey Kong]], [[Toad]], [[Bowser]], [[Luigi]], [[Mario]], [[Peach]], [[Yoshi]], [[Daisy]], [[Lakitu]], [[King Boo]], [[Toadette]], [[Bowser Jr.]], [[Waluigi]], [[Wario]], [[Rosalina]], [[Birdo]], [[Diddy Kong]], [[Hammer Bro]], [[Boomerang Bro]], [[Fire Bro]], [[Ice Bro]], [[Red Yoshi]], [[Black Shy Guy]], [[Pink Shy Guy]], [[Toad]] (Pit Crew), [[Monty Mole]], [[ | |[[Donkey Kong]], [[Toad]], [[Bowser]], [[Luigi]], [[Mario]], [[Peach]], [[Yoshi]], [[Daisy]], [[Lakitu]], [[King Boo]], [[Toadette]], [[Bowser Jr.]], [[Waluigi]], [[Wario]], [[Rosalina]], [[Birdo]], [[Diddy Kong]], [[Hammer Bro]], [[Boomerang Bro]], [[Fire Bro]], [[Ice Bro]], [[Red Yoshi]], [[Black Shy Guy]], [[Pink Shy Guy]], [[Toad]] (Pit Crew), [[Monty Mole]], [[Birdo]] (Light Blue), [[Birdo]] (Yellow), [[Roving Racers|Red Koopa]] (Freerunning) | ||
|0.3103% | |0.3103% | ||
|- | |- | ||
!Super karts | !Super karts | ||
|[[Zucchini]], [[Egg 1]], [[Daytripper]], [[Mach 8]], [[Cloud 9]], [[Soda Jet]], [[Koopa Clown]], [[Poltergust 4000]], [[Royale]], [[Barrel Train]], [[Turbo Yoshi]], [[Blue Seven]], [[Flame Flyer]], [[Para-Wing]], [[Super Blooper]], [[Turbo Birdo]], [[Streamliner]], [[DK Jumbo]], [[Red Turbo Yoshi]], [[Light-blue Turbo Birdo]], [[Yellow Turbo Birdo]] | |[[Zucchini]], [[Egg 1]], [[Daytripper]], [[Mach 8]], [[Cloud 9]], [[Soda Jet]], [[Koopa Clown]], [[Poltergust 4000]], [[Royale]], [[Barrel Train]], [[Turbo Yoshi]], [[Blue Seven]], [[Flame Flyer]], [[Para-Wing]], [[Super Blooper (kart)|Super Blooper]], [[Turbo Birdo]], [[Streamliner]], [[DK Jumbo]], [[Red Turbo Yoshi]], [[Light-blue Turbo Birdo]], [[Yellow Turbo Birdo]] | ||
|0.3333% | |0.3333% | ||
|- | |- | ||
!Super gliders | !Super gliders | ||
|[[Flower Glider]], [[Peach Parasol]], [[BaNaNa Parafoil]], [[Bob-omb Parafoil]], [[Wario Wing]], [[Oilpaper Umbrella]], [[Shell Parachute]], [[Lightning Oilpaper]], [[Blue Flower Glider]], [[Pink Flower Glider]], [[Waluigi Wing]], [[? Block (glider)|? Block]], [[8-Bit Jumping Mario]], [[Eggshell Glider]] | |[[Flower Glider]], [[Peach Parasol (glider)|Peach Parasol]], [[BaNaNa Parafoil]], [[Bob-omb Parafoil]], [[Wario Wing]], [[Oilpaper Umbrella]], [[Shell Parachute]], [[Lightning Oilpaper]], [[Blue Flower Glider]], [[Pink Flower Glider]], [[Waluigi Wing]], [[? Block (glider)|? Block]], [[8-Bit Jumping Mario]], [[Eggshell Glider]] | ||
|0.2857% | |0.2857% | ||
|- | |- | ||
| Line 565: | Line 518: | ||
|1.7778% | |1.7778% | ||
|} | |} | ||
<br> | |||
===Flower Pipe 2=== | ===Flower Pipe 2=== | ||
{|class="wikitable" style="margin:auto; text-align:center" | {|class="wikitable"style="margin:auto; text-align:center" | ||
!colspan=16|Items obtained from a new Flower Pipe 2 | |||
|- | |||
!rowspan=2|Item | |||
!colspan=3|[[File:MKT Icon Normal.png|50px]]<br>Normal | |||
!colspan=3|[[File:MKT Icon Rare.png|50px]]<br>Super | |||
!colspan=3|[[File:MKT Icon Rare.png|50px]]<br>Featured Super | |||
!colspan=3|[[File:MKT Icon HighEnd.png|50px]]<br>High-End | |||
!colspan=3|[[File:MKT Icon HighEnd.png|50px]]<br>Featured High-End | |||
|- | |||
!Character | |||
!Kart | |||
!Glider | |||
!Character | |||
!Kart | |||
!Glider | |||
!Character | |||
!Kart | |||
!Glider | |||
!Character | |||
!Kart | |||
!Glider | |||
!Character | |||
!Kart | |||
!Glider | |||
|- | |||
!Amount | |||
|32 | |||
|26 | |||
|16 | |||
|8 | |||
|7 | |||
|4 | |||
|1 | |||
|0 | |||
|0 | |||
|2 | |||
|1 | |||
|1 | |||
|0 | |||
|1 | |||
|1 | |||
|} | |||
<br> | |||
{|class="wikitable"style="margin:auto; text-align:center" | |||
!Class | !Class | ||
!Parts | !Parts | ||
| Line 581: | Line 579: | ||
|- | |- | ||
!High-End drivers | !High-End drivers | ||
|[[Dry Bowser]], [[ | |[[Dry Bowser]], [[Metal Mario]], [[Pauline]], [[Peachette]], [[Princess Daisy|Daisy]] (Fairy), [[Ice Mario (Super Mario Galaxy)|Ice Mario]] | ||
|0.3333% | |0.3333% | ||
|- | |- | ||
| Line 589: | Line 587: | ||
|- | |- | ||
!High-End gliders | !High-End gliders | ||
|[[Swooper]], [[Cloud Glider]], [[Gold Glider]], [[Pink Gold Paper Glider]], [[Daisy Glider]], [[Butterfly Sunset]], [[Crimson Crane]] | |[[Swooper (glider)|Swooper]], [[Cloud Glider]], [[Gold Glider]], [[Pink Gold Paper Glider]], [[Daisy Glider]], [[Butterfly Sunset]], [[Crimson Crane]] | ||
|0.1429% | |0.1429% | ||
|- | |- | ||
| Line 597: | Line 595: | ||
|- | |- | ||
!Super drivers | !Super drivers | ||
|[[Donkey Kong]], [[Toad]], [[Bowser]], [[Luigi]], [[Mario]], [[Peach]], [[Yoshi]], [[Daisy]], [[Lakitu]], [[King Boo]], [[Toadette]], [[Bowser Jr.]], [[Waluigi]], [[Wario]], [[Rosalina]], [[Birdo]], [[Diddy Kong]], [[Hammer Bro]], [[Boomerang Bro]], [[Fire Bro]], [[Ice Bro]], [[Red Yoshi]], [[Black Shy Guy]], [[Pink Shy Guy]], [[Toad]] (Pit Crew), [[ | |[[Donkey Kong]], [[Toad]], [[Bowser]], [[Luigi]], [[Mario]], [[Peach]], [[Yoshi]], [[Daisy]], [[Lakitu]], [[King Boo]], [[Toadette]], [[Bowser Jr.]], [[Waluigi]], [[Wario]], [[Rosalina]], [[Birdo]], [[Diddy Kong]], [[Hammer Bro]], [[Boomerang Bro]], [[Fire Bro]], [[Ice Bro]], [[Red Yoshi]], [[Black Shy Guy]], [[Pink Shy Guy]], [[Toad]] (Pit Crew), [[Birdo]] (Light Blue), [[Birdo]] (Yellow), [[Roving Racers|Red Koopa]] (Freerunning) | ||
|0.2857% | |0.2857% | ||
|- | |- | ||
!Super karts | !Super karts | ||
|[[Zucchini]], [[Egg 1]], [[Daytripper]], [[Mach 8]], [[Cloud 9]], [[Soda Jet]], [[Koopa Clown]], [[Poltergust 4000]], [[Royale]], [[Barrel Train]], [[Turbo Yoshi]], [[Blue Seven]], [[Flame Flyer]], [[Para-Wing]], [[Super Blooper]], [[Turbo Birdo]], [[Streamliner]], [[DK Jumbo]], [[Red Turbo Yoshi]], [[Light-blue Turbo Birdo]], [[Yellow Turbo Birdo]] | |[[Zucchini]], [[Egg 1]], [[Daytripper]], [[Mach 8]], [[Cloud 9]], [[Soda Jet]], [[Koopa Clown]], [[Poltergust 4000]], [[Royale]], [[Barrel Train]], [[Turbo Yoshi]], [[Blue Seven]], [[Flame Flyer]], [[Para-Wing]], [[Super Blooper (kart)|Super Blooper]], [[Turbo Birdo]], [[Streamliner]], [[DK Jumbo]], [[Red Turbo Yoshi]], [[Light-blue Turbo Birdo]], [[Yellow Turbo Birdo]] | ||
|0.3333% | |0.3333% | ||
|- | |- | ||
!Super gliders | !Super gliders | ||
|[[Flower Glider]], [[Peach Parasol]], [[BaNaNa Parafoil]], [[Bob-omb Parafoil]], [[Wario Wing]], [[Oilpaper Umbrella]], [[Shell Parachute]], [[Lightning Oilpaper]], [[Blue Flower Glider]], [[Pink Flower Glider]], [[Waluigi Wing]], [[? Block (glider)|? Block]], [[8-Bit Jumping Mario]], [[Eggshell Glider]] | |[[Flower Glider]], [[Peach Parasol (glider)|Peach Parasol]], [[BaNaNa Parafoil]], [[Bob-omb Parafoil]], [[Wario Wing]], [[Oilpaper Umbrella]], [[Shell Parachute]], [[Lightning Oilpaper]], [[Blue Flower Glider]], [[Pink Flower Glider]], [[Waluigi Wing]], [[? Block (glider)|? Block]], [[8-Bit Jumping Mario]], [[Eggshell Glider]] | ||
|0.2857% | |0.2857% | ||
|- | |- | ||
| Line 623: | Line 621: | ||
==Profiles== | ==Profiles== | ||
*'''''Mario Kart Tour'' Twitter:''' | *'''''Mario Kart Tour'' Twitter:''' | ||
**"''The Trick Tour is ending soon. But don't fret, there's another terrific tour on the way. Starting May 5, 11 PM PT, the Flower Tour kicks off in {{color|#MarioKartTour | **"''The Trick Tour is ending soon. But don't fret, there's another terrific tour on the way. Starting May 5, 11 PM PT, the Flower Tour kicks off in {{color|blue|#MarioKartTour}}. A certain driver whose name pairs perfectly with flowers will appear in a new outfit!''"<ref>mariokarttourEN (May 1, 2020). [https://twitter.com/mariokarttourEN/status/1256221837878456320 ''Twitter'']. Retrieved May 1, 2020.</ref> | ||
**"''A fairy has found her way into Daisy Hills. It's time to celebrate the Flower Tour's arrival!''"<ref>mariokarttourEN (May 6, 2020). [https://twitter.com/mariokarttourEN/status/1257915497531703297 ''Twitter'']. Retrieved May 6, 2020.</ref> | **"''A fairy has found her way into Daisy Hills. It's time to celebrate the Flower Tour's arrival!''"<ref>mariokarttourEN (May 6, 2020). [https://twitter.com/mariokarttourEN/status/1257915497531703297 ''Twitter'']. Retrieved May 6, 2020.</ref> | ||
**"''Part 2 of the Flower Tour will start soon in {{color|#MarioKartTour | **"''Part 2 of the Flower Tour will start soon in {{color|blue|#MarioKartTour}}! Get hyped for a ton of new challenges too. Here's a head start—you'll have to get 1st place on a certain multi-colored course. Good luck!''"<ref>mariokarttourEN (May 11, 2020). [https://twitter.com/mariokarttourEN/status/1259845717495078914 ''Twitter'']. Retrieved May 11, 2020.</ref> | ||
**"''The {{color|#MarioKartTour | **"''The {{color|blue|#MarioKartTour}} ranked cup for part two of the Flower Tour is the Baby Daisy Cup! This {{color|blue|#MKT}} cup includes the following courses: 3DS Toad Circuit R, RMX Choco Island 1T, and 3DS Mario Circuit R. Part two begins May 12, 11 PM PT!''"<ref>mariokarttourEN (May 12, 2020). [https://twitter.com/mariokarttourEN/status/1260208109081047040 ''Twitter'']. Retrieved May 13, 2020.</ref> | ||
==Names in other languages== | ==Names in other languages== | ||
{{Foreign names | {{Foreign names | ||
| | |Jpn=フラワーツアー | ||
| | |JpnR=Furawā Tsuā | ||
| | |JpnM=Flower Tour | ||
|Spa=Temporada floral | |Spa=Temporada floral | ||
|SpaM=Floral Season | |SpaM=Floral Season | ||
|Fre=Saison florale | |Fre=Saison florale | ||
|FreM=Floral Season | |FreM=Floral Season | ||
|Ger=Blumen-Tour | |Ger=Blumen-Tour-Saison | ||
|GerM=Flower Tour | |GerM=Flower Tour Season | ||
|Ita=Tour floreale | |Ita=Tour floreale | ||
|ItaM=Floral Tour | |ItaM=Floral Tour | ||
| Line 658: | Line 656: | ||
{{MKT}} | {{MKT}} | ||
[[Category:Mario Kart Tour | [[Category:Mario Kart Tour tours]] | ||
[[it:Tour floreale]] | [[it:Tour floreale]] | ||
Latest revision as of 13:33, January 7, 2025
| Flower Tour | |
|---|---|

| |
| Start date | May 5, 2020 11:00 p.m. (PT)[?] |
| End date | May 19, 2020 10:59 p.m. (PT)[?] |
| Number of cups | 12 |
| Ranked cups | Daisy Cup (week 1) Baby Daisy Cup (week 2) |
| Coin Rush course | 3DS Daisy Hills |
| << List of tours >> | |
The Flower Tour was the seventeenth tour of Mario Kart Tour, which began on May 6, 2020 and ended on May 19, 2020. The tour had a springtime theme due to it taking place in the spring in the Northern Hemisphere, and added a fairy-themed variant of Daisy, Monty Mole in his playable Mario Kart debut, and themed karts and gliders including the Daisy Glider and the Butterfly Sunset. It was the first tour since the Hammer Bro Tour to add a new course: another RMX course themed around the Choco Island courses, aptly named RMX Choco Island 1, which was the tour's spotlight course, despite the tour being themed around Daisy Hills. The menu's background featured the windmill and hot air balloons from Daisy Hills as landmarks for this tour.
This was the final tour to introduce a new, non-alternate costume Super character to the game, that being Monty Mole. All Super characters introduced in future tours would be either costumes or color swaps of other characters.
Spotlights[edit]
| Flower Pipe 1 May 5, 2020, 11:00 p.m. (PT) – May 19, 2020, 10:59 p.m. (PT) |
Flower Pipe 2 May 12, 2020, 11:00 p.m. (PT) – May 19, 2020, 10:59 p.m. (PT) | ||||

|

| ||||
| Driver | Kart | Glider | Driver | Kart | Glider |
|---|---|---|---|---|---|

|
|||||
| Daisy (Fairy) | Prancer | Daisy Glider | Monty Mole | Queen Bee | Heart Balloons |
Cups[edit]
Daisy Cup Ranked cup (week 1) |
3DS Daisy Hills T |
3DS Shy Guy Bazaar R |
RMX Choco Island 1 |
Ring Race | ||||
 3DS Mario Circuit |
Peach | |||||||
Peach Cup |
SNES Mario Circuit 1R |
DS Waluigi Pinball |
3DS Rainbow Road |
Do Jump Boosts | ||||
 RMX Choco Island 1 |
Daisy | |||||||
Baby Daisy Cup Ranked cup (week 2) |
3DS Toad Circuit R |
RMX Choco Island 1T |
3DS Mario Circuit R |
Steer Clear of Obstacles | ||||
 GBA Bowser's Castle 1 |
Dry Bones | |||||||
Mario Cup |
3DS Shy Guy Bazaar |
SNES Mario Circuit 1 |
3DS Rainbow Road R |
Smash Small Dry Bones | ||||
 N64 Koopa Troopa Beach |
Donkey Kong | |||||||
Lakitu Cup |
RMX Choco Island 1 |
DS Waluigi Pinball T |
3DS Daisy Hills |
Combo Attack | ||||
 3DS Rainbow Road T |
Lakitu | |||||||
Lemmy Cup |
SNES Mario Circuit 1T |
3DS Shy Guy Bazaar T |
GBA Bowser's Castle 1 |
Goomba Takedown | ||||
 RMX Choco Island 1 |
Yoshi | |||||||
Toad Cup |
3DS Toad Circuit T |
3DS Mario Circuit |
RMX Choco Island 1R |
Big Reverse Race | ||||
 SNES Mario Circuit 1 |
Any character | |||||||
Koopa Troopa Cup |
SNES Vanilla Lake 1R/T |
3DS Daisy Hills R |
3DS Cheep Cheep Lagoon R/T |
Break Item Boxes | ||||
 DS Waluigi Pinball |
Waluigi | |||||||
Yoshi Cup |
RMX Choco Island 1T |
N64 Koopa Troopa Beach R/T |
DS Waluigi Pinball R |
Steer Clear of Obstacles | ||||
 SNES Vanilla Lake 1 |
Lemmy | |||||||
Dry Bones Cup |
3DS Toad Circuit |
3DS Mario Circuit T |
GBA Bowser's Castle 1T |
Goomba Takedown | ||||
 3DS Toad Circuit |
Toad | |||||||
Hammer Bro Cup |
3DS Rainbow Road T |
RMX Choco Island 1R |
SNES Vanilla Lake 1R/T |
Time Trial | ||||
 3DS Shy Guy Bazaar R |
Hammer Bro | |||||||
Pauline Cup |
GBA Bowser's Castle 1R |
3DS Cheep Cheep Lagoon R/T |
N64 Koopa Troopa Beach R/T |
Vs. Mega Donkey Kong | ||||
 3DS Cheep Cheep Lagoon |
Any character | |||||||
Signature kart sets[edit]
Drivers with a corresponding cup in the tour were bumped one rank up in every course of their cup.
| Cup | Character | Kart | Glider |
|---|---|---|---|
| Second course of every cup | |||
| Third course of every cup | |||
| — | — | ||
| — | — | ||
| — | — | ||
| — | — | ||
| — | — | ||
| — | — | ||
| — | — | ||
| — | — | ||
| — | — | ||
| — | — | ||
| — | — | ||
| — | — |
Rewards[edit]
Gold cells indicate rewards exclusive to Gold Pass members.
| Piranha Plant Parafoil | Baby Daisy | Red Kiddie Kart | Birthday Girl Daisy | Koopa Troopa | Flower Glider | Apple Kart |
| Grand Stars | 15 | 30 | 45 | 60 | 75 | 90 | 105 | 120 | 135 | 150 | 165 | 180 | 190 | 200 | 210 | 220 | 225 | 230 | 235 | 240 | 245 | 250 | 255 | 260 | 265 | 270 | Total | Grand total | |
|---|---|---|---|---|---|---|---|---|---|---|---|---|---|---|---|---|---|---|---|---|---|---|---|---|---|---|---|---|---|
| Free pipe launch | 1 | 1 | 1 | 1 | 4 | ||||||||||||||||||||||||
| Coin | 100 | 100 | 100 | 100 | 100 | 100 | 100 | 100 | 100 | 100 | 1000 | 2100 | |||||||||||||||||
| 300 | 300 | 500 | 1100 | ||||||||||||||||||||||||||
| Rubies | 5 | 3 | 3 | 3 | 3 | 3 | 20 | 50 | |||||||||||||||||||||
| 5 | 5 | 5 | 5 | 5 | 5 | 30 | |||||||||||||||||||||||
| Item tickets | 3 | 3 | 3 | 2 | 3 | 14 | 44 | ||||||||||||||||||||||
| 5 | 5 | 5 | 5 | 5 | 5 | 30 | |||||||||||||||||||||||
| Star tickets | 1 | 1 | 2 | 3 | |||||||||||||||||||||||||
| 1 | 1 | ||||||||||||||||||||||||||||
| Point-boost tickets | 1 | 2 | 3 | 6 | 12 | ||||||||||||||||||||||||
| 3 | 3 | 6 | |||||||||||||||||||||||||||
| 1 | 1 | 2 | 4 | 8 | |||||||||||||||||||||||||
| 2 | 2 | 4 | |||||||||||||||||||||||||||
| 1 | 1 | 1 | 3 | 5 | |||||||||||||||||||||||||
| 1 | 1 | 2 | |||||||||||||||||||||||||||
| Level-boost ticket | 3 | 12 | |||||||||||||||||||||||||||
| 9 | |||||||||||||||||||||||||||||
New content[edit]
Drivers[edit]

Karts[edit]
Gliders[edit]
Courses[edit]
RMX Choco Island 1 (N, R, T)
Paid banners[edit]
| Name | Availability | Cost | Contents | Banner image |
|---|---|---|---|---|
| Value Pack | May 5, 2020 – May 19, 2020a | US$1.99 |
|

|
| Rose Queen Pack | May 5, 2020 – May 19, 2020a | US$19.99 |
|

|
| Pink Gold Paper Glider Pack | May 5, 2020 – May 19, 2020a | US$39.99 |
|

|
| Butterfly Sunset Pack | May 12, 2020 – May 19, 2020 | US$19.99 |
|

|
| Green Apple Kart Pack | May 12, 2020 – May 19, 2020 | US$39.99 |
|

|
a - This is the first tour since the Paris Tour where paid banners introduced in the first week of the tour are available throughout the entire duration of the tour.
Challenges[edit]
| Tour Challenges 1 | Tour Challenges 2 | Gold Challenges | ||||||||
|---|---|---|---|---|---|---|---|---|---|---|
| Completion reward: |
Completion reward: |
Completion reward: | ||||||||
 |
 |
 |
 |
 |
 |
 |
 |
 | ||
| Do 20 Jump Boosts. | Land 3 hits with Bob-ombs. | Land 10 hits with Bananas. | Land 3 hits with Red Shells. | Get 1st place in a 100cc or higher race 3 times. | Activate Frenzy mode 5 times. | Get 1st place in a 150cc or higher race 2 times. | Use 10 Mushrooms. | Do 100 Mini-Turbo boosts. | ||
 |
 |
 |
 |
 |
 |
 |
 |
 | ||
| Get 1st place in a 100cc or higher race 2 times in a row. | Get 1st place using a driver wearing a dress. | Use 3 Mushrooms in a single race. | Get 1st place in a multiplayer race. | Earn a score of 10,000 or higher using a driver with a mustache. | Use a Heart a total of 3 times. | Perform a total of 3 Jump Boosts by bouncing off hot-air balloons. | Earn a score of 8,000 or higher using a driver wearing a crown. | Cause an opponent to crash in a Gold Race. | ||
 |
 |
 |
 |
 |
 |
 |
 |
 | ||
| Earn a score of 6,000 or higher using a driver wearing earrings. | Earn a total score of 20,000 or higher in the Dry Bones Cup. | Earn a score of 9,000 or higher using a driver wearing a dress. | Get 1st place on Rainbow Road. | Earn 200,000 or more total points in a tour. | Race in every course of every cup, including bonus challenges. | Earn a total score of 20,000 or higher in the Koopa Troopa Cup. | Earn a total score of 20,000 or higher in the Pauline Cup. | Take out 5 goats. | ||
Intial pipe appearance rates[edit]
Flower Pipe 1[edit]
Flower Pipe 2[edit]
| Items obtained from a new Flower Pipe 2 | |||||||||||||||
|---|---|---|---|---|---|---|---|---|---|---|---|---|---|---|---|
| Item | Normal |
Super |
Featured Super |
High-End |
Featured High-End | ||||||||||
| Character | Kart | Glider | Character | Kart | Glider | Character | Kart | Glider | Character | Kart | Glider | Character | Kart | Glider | |
| Amount | 32 | 26 | 16 | 8 | 7 | 4 | 1 | 0 | 0 | 2 | 1 | 1 | 0 | 1 | 1 |
Profiles[edit]
- Mario Kart Tour Twitter:
- "The Trick Tour is ending soon. But don't fret, there's another terrific tour on the way. Starting May 5, 11 PM PT, the Flower Tour kicks off in #MarioKartTour. A certain driver whose name pairs perfectly with flowers will appear in a new outfit!"[1]
- "A fairy has found her way into Daisy Hills. It's time to celebrate the Flower Tour's arrival!"[2]
- "Part 2 of the Flower Tour will start soon in #MarioKartTour! Get hyped for a ton of new challenges too. Here's a head start—you'll have to get 1st place on a certain multi-colored course. Good luck!"[3]
- "The #MarioKartTour ranked cup for part two of the Flower Tour is the Baby Daisy Cup! This #MKT cup includes the following courses: 3DS Toad Circuit R, RMX Choco Island 1T, and 3DS Mario Circuit R. Part two begins May 12, 11 PM PT!"[4]
Names in other languages[edit]
| Language | Name | Meaning | Notes |
|---|---|---|---|
| Japanese | フラワーツアー[?] Furawā Tsuā |
Flower Tour | |
| Chinese (simplified) | 花朵巡回赛[?] Huāduǒ Xúnhuísài |
Flower Tour | |
| Chinese (traditional) | 花朵巡迴賽[?] Huāduǒ Xúnhuísài |
Flower Tour | |
| French | Saison florale[?] | Floral Season | |
| German | Blumen-Tour-Saison[?] | Flower Tour Season | |
| Italian | Tour floreale[?] | Floral Tour | |
| Korean | 플라워 투어[?] Peullawo Tueo |
Flower Tour | |
| Portuguese | Temporada das flores[?] | Season of Flowers | |
| Spanish | Temporada floral[?] | Floral Season |