Cursa's stronghold: Difference between revisions
No edit summary |
m (Text replacement - "(\| *)Jap([RMCN\d]* *=)" to "$1Jpn$2") |
||
| (12 intermediate revisions by 5 users not shown) | |||
| Line 1: | Line 1: | ||
{{ | {{M+RSOH planet infobox | ||
|title='''Cursa's stronghold''' [[File:M+RSOH-CursasStronghold-Icon.png]] | |||
|image=M+RSOH Cursa's stronghold.png | |image=M+RSOH Cursa's stronghold.png | ||
| | |level=26-30 | ||
| | |before=[[Barrendale Mesa|<<]] | ||
}} | }} | ||
{{quote|'''Cursa's stronghold''' [[File:M+RSOH-CursasStronghold-Icon.png|15px]] . It may appear daunting, but remember [[Momma]]'s words. Unity. We must trust in one another. Trust that our bond makes us stronger than all the fear and anger Cursa could EVER add to the galaxy.|JEANIE|Mario + Rabbids Sparks of Hope}} | {{quote|'''Cursa's stronghold''' [[File:M+RSOH-CursasStronghold-Icon.png|15px]] . It may appear daunting, but remember [[Momma]]'s words. Unity. We must trust in one another. Trust that our bond makes us stronger than all the fear and anger Cursa could EVER add to the galaxy.|JEANIE|Mario + Rabbids Sparks of Hope}} | ||
'''Cursa's stronghold''' is the sixth and final world the player visits in ''[[Mario + Rabbids Sparks of Hope]]'', accessible after having collected two [[Purified Darkmess Energy Crystal]]s from [[Barrendale Mesa]]. | '''Cursa's stronghold''' is the sixth and final world the player visits in ''[[Mario + Rabbids Sparks of Hope]]'', accessible after having collected two [[Purified Darkmess Energy Crystal]]s from [[Barrendale Mesa]]. It is comprised of many floating rocky platforms and the [[Comet Observatory]], controlled by [[Cursa]]. Also in the background are smaller versions of objects found from the other planets: the [[Lighthouse (Mario + Rabbids Sparks of Hope)|lighthouse]] from [[Beacon Beach]], the Stone Mask from [[Pristine Peaks]], a Rabbid scarecrow from [[Palette Prime]], the [[Everbloom Tree]] from [[Terra Flora]], and the [[Windmill]] from [[Barrendale Mesa]]. | ||
Several cannons are found and are used to launch the player from one major platform to the next, and a golden cannon at the end of the area that launches the heroes to the Comet Observatory for the final battle with Cursa. | |||
After Cursa is defeated, Cursa's stronghold [[Unrevisitable area|can no longer be revisited]] though the Quest battles can be played again from the Quests menu. There are three [[Memory|Memories]] that the player can unlock. | |||
==History== | |||
The heroes arrive at Cursa's stronghold, and use the [[Shield Buster]] from [[Momma]] to destroy the barrier. After it is destroyed, it reveals the [[Comet Observatory]], with the core to the [[Darkmess Dimension]] in the center. Due to the large density of Darkmess energy around the Comet Observatory, the thrusters for the [[WM ARC]] cannot function, so the heroes land on debris from the barrier. | |||
To reach the Comet Observatory, the heroes must get past two [[Darkmess Puddle]]s, which have [[Darkmess]] clones of [[Bowser]] and [[Edge]], known as [[Darkmess Bowser]] and [[Darkmess Edge]], respectively. After defeating the latter, Edge reveals to the group that she was created by Cursa, and rebelled against her. The heroes then use a golden cannon to reach the Comet Observatory. | |||
In the Darkmess Dimension, the heroes confront and defeat Cursa, as well as free [[Rosalina]]. Afterwards, the heroes travel back to [[Peach's Castle]], and Rosalina thanks the heroes and bids them farewell. | |||
==Main Quest== | ==Main Quest== | ||
{|class="wikitable" width=30% border=1 style="text-align:center;" | |||
![[File:Main Quest icon MRSOH.png|15px]] Main Quest | |||
![[File:Darkmess Puddle icon MRSOH.png|15px]] Battles | |||
!Final battle | |||
|- | |||
![[Cursa the Destroyer]] | |||
| | |||
{| style="text-align: center" | |||
|- | |||
|[[File:MRSOH King of Darkmess.png|200px]]<br>[[King of Darkmess]] | |||
|[[File:MRSOH Deep, Dark Secret.png|200px]]<br>[[Deep, Dark Secret]] | |||
|} | |||
|[[File:MRSOH Cursa first phase.png|200px]]<br>[[Cursa!!!]] | |||
|} | |||
==[[Weapon Skin]] found== | ==[[Weapon Skin]] found== | ||
| Line 25: | Line 44: | ||
|Reach 100% completion for Cursa's stronghold | |Reach 100% completion for Cursa's stronghold | ||
|} | |} | ||
==Shops== | |||
{{main|SALESBOT 9.99+TX#List of shops}} | |||
The shop on Cursa's stronghold is located near the first [[Darkmess Puddle]]. | |||
==Bosses and enemies== | ==Bosses and enemies== | ||
| Line 36: | Line 59: | ||
**[[Medician]]s | **[[Medician]]s | ||
**[[Stooge]]s | **[[Stooge]]s | ||
**[[Spellraiser]]s | |||
*[[Cursa]] | *[[Cursa]] | ||
**[[Lone Wolf|Lone Wolves]] | **[[Lone Wolf|Lone Wolves]] | ||
| Line 54: | Line 78: | ||
==Names in other languages== | ==Names in other languages== | ||
{{foreign names | {{foreign names | ||
| | |Jpn=クルサの{{ruby|根城|ねじろ}} | ||
| | |JpnR=Kurusa no Nejiro | ||
| | |JpnM=Cursa's Stronghold | ||
|Chi=咒煞據點 | |||
|ChiR=Zhòu Shā Jùdiǎn | |||
|ChiM=Cursed Foothold | |||
|Ger=Miseras Festung | |Ger=Miseras Festung | ||
|GerM=Cursa's Fortress | |GerM=Cursa's Fortress | ||
|Rus=Цитадель Курсы | |||
|RusR=Tsytadel' Kursy | |||
|RusM=Cursa's Citadel | |||
|Spa=Fortaleza de Cursa | |Spa=Fortaleza de Cursa | ||
|SpaM=Cursa Fortress | |SpaM=Cursa Fortress | ||
Latest revision as of 13:58, January 7, 2025
| Cursa's stronghold | |

| |
| Enemy levels | 26-30 |
| << >> | |
- “Cursa's stronghold
 . It may appear daunting, but remember Momma's words. Unity. We must trust in one another. Trust that our bond makes us stronger than all the fear and anger Cursa could EVER add to the galaxy.”
 - —JEANIE, Mario + Rabbids Sparks of Hope
Cursa's stronghold is the sixth and final world the player visits in Mario + Rabbids Sparks of Hope, accessible after having collected two Purified Darkmess Energy Crystals from Barrendale Mesa. It is comprised of many floating rocky platforms and the Comet Observatory, controlled by Cursa. Also in the background are smaller versions of objects found from the other planets: the lighthouse from Beacon Beach, the Stone Mask from Pristine Peaks, a Rabbid scarecrow from Palette Prime, the Everbloom Tree from Terra Flora, and the Windmill from Barrendale Mesa.
Several cannons are found and are used to launch the player from one major platform to the next, and a golden cannon at the end of the area that launches the heroes to the Comet Observatory for the final battle with Cursa.
After Cursa is defeated, Cursa's stronghold can no longer be revisited though the Quest battles can be played again from the Quests menu. There are three Memories that the player can unlock.
History[edit]
The heroes arrive at Cursa's stronghold, and use the Shield Buster from Momma to destroy the barrier. After it is destroyed, it reveals the Comet Observatory, with the core to the Darkmess Dimension in the center. Due to the large density of Darkmess energy around the Comet Observatory, the thrusters for the WM ARC cannot function, so the heroes land on debris from the barrier.
To reach the Comet Observatory, the heroes must get past two Darkmess Puddles, which have Darkmess clones of Bowser and Edge, known as Darkmess Bowser and Darkmess Edge, respectively. After defeating the latter, Edge reveals to the group that she was created by Cursa, and rebelled against her. The heroes then use a golden cannon to reach the Comet Observatory.
In the Darkmess Dimension, the heroes confront and defeat Cursa, as well as free Rosalina. Afterwards, the heroes travel back to Peach's Castle, and Rosalina thanks the heroes and bids them farewell.
Main Quest[edit]
| Final battle | ||||
|---|---|---|---|---|
| Cursa the Destroyer |
|
 Cursa!!! |


Weapon Skin found[edit]
| Weapon Skin | How to obtain |
|---|---|
Gleaming Dual Slinger |
Reach 100% completion for Cursa's stronghold |
Shops[edit]
- Main article: SALESBOT 9.99+TX § List of shops
The shop on Cursa's stronghold is located near the first Darkmess Puddle.
Bosses and enemies[edit]
Gallery[edit]
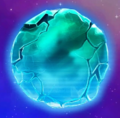
World icon (before entering world)
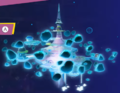
World icon (after entering world)

Icon
Names in other languages[edit]
| Language | Name | Meaning | Notes |
|---|---|---|---|
| Japanese | クルサの Kurusa no Nejiro |
Cursa's Stronghold | |
| Chinese | 咒煞據點[?] Zhòu Shā Jùdiǎn |
Cursed Foothold | |
| German | Miseras Festung[?] | Cursa's Fortress | |
| Italian | Fortezza di Cursa[?] | Cursa's Fortress | |
| Russian | Цитадель Курсы[?] Tsytadel' Kursy |
Cursa's Citadel | |
| Spanish | Fortaleza de Cursa[?] | Cursa Fortress |