Gallery:Mario + Rabbids Sparks of Hope: Difference between revisions
| (130 intermediate revisions by 27 users not shown) | |||
| Line 11: | Line 11: | ||
M+RSoH Logo TC.png|Traditional Chinese logo | M+RSoH Logo TC.png|Traditional Chinese logo | ||
M+RSoH Logo Kr.png|Korean logo | M+RSoH Logo Kr.png|Korean logo | ||
</gallery> | |||
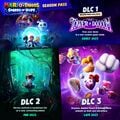
===DLC=== | |||
<gallery widths=250px> | |||
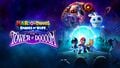
MRSoH logo The Tower of Doom.png|[[The Tower of Doooom]] | |||
MRSoH logo The Last Spark Hunter.png|[[The Last Spark Hunter]] | |||
MRSoH logo Rayman.png|[[Rayman in the Phantom Show]] | |||
</gallery> | </gallery> | ||
| Line 22: | Line 29: | ||
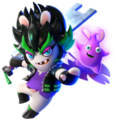
MRSOH Luigi and Spark.png|Luigi and [[Aquanox]] | MRSOH Luigi and Spark.png|Luigi and [[Aquanox]] | ||
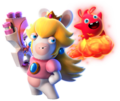
MRSoH Peach Artwork.png|[[Princess Peach|Peach]] | MRSoH Peach Artwork.png|[[Princess Peach|Peach]] | ||
MRSOH Peach and Spark.png|Peach and [[ | MRSOH Peach and Spark.png|Peach and [[Reflector]] | ||
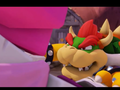
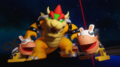
MRSoH Bowser artwork.png|[[Bowser]] | MRSoH Bowser artwork.png|[[Bowser]] | ||
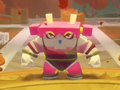
MRSOH Bowser and Spark.png|Bowser and [[Exosphere]] | MRSOH Bowser and Spark.png|Bowser and [[Exosphere]] | ||
MRSoH Rabbid Mario artwork.png|[[Rabbid Mario]] | MRSoH Rabbid Mario artwork.png|[[Rabbid Mario]] | ||
MRSOH Rabbid Mario and Spark.png|Rabbid Mario and [[ | MRSOH Rabbid Mario and Spark.png|Rabbid Mario and [[Glitter]] | ||
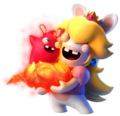
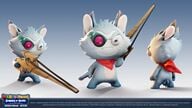
MRSoH Rabbid Luigi artwork.png|[[Rabbid Luigi]] | MRSoH Rabbid Luigi artwork.png|[[Rabbid Luigi]] | ||
MRSOH Rabbid Luigi and Spark.png|Rabbid Luigi and [[Toxiquake]] | MRSOH Rabbid Luigi and Spark.png|Rabbid Luigi and [[Toxiquake]] | ||
| Line 35: | Line 42: | ||
MRSOH Rabbid Rosalina.png|Rabbid Rosalina and [[Ethering]] | MRSOH Rabbid Rosalina.png|Rabbid Rosalina and [[Ethering]] | ||
MRSoH Edge artwork.png|[[Edge]] | MRSoH Edge artwork.png|[[Edge]] | ||
MRSOH Edge and | MRSOH Edge and Vampdash.png|Edge and [[Vampdash]] | ||
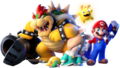
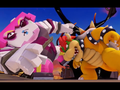
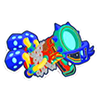
MRSOH Mario Bowser Rabbid Rosalina.png|Mario, Bowser, Rabbid Rosalina, and Starburst | MRSOH Mario Bowser Rabbid Rosalina.png|Mario, Bowser, Rabbid Rosalina, and Starburst | ||
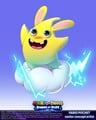
MRSOH | MRSOH Starburst.png|Starburst | ||
MR-SoH RNDR | MR-SoH RNDR Starburst.png|Starburst | ||
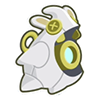
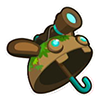
MRSOH | MRSOH Aquanox.png|Aquanox | ||
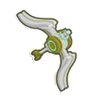
MRSOH | MRSOH Reflector.png|Reflector | ||
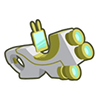
MRSoH Exosphere artwork.png|Exosphere | MRSoH Exosphere artwork.png|Exosphere | ||
MRSOH | MRSOH Glitter.png|Glitter | ||
MRSoH Toxiquake artwork.png|Toxiquake | MRSoH Toxiquake artwork.png|Toxiquake | ||
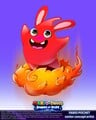
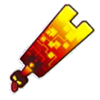
MRSOH | MRSOH Pyrogeddon.png|Pyrogeddon | ||
MRSOH | MRSOH Ethering.png|Ethering | ||
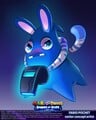
MRSOH | MRSOH Vampdash.png|Vampdash | ||
MRSoH art Electroquake.png|[[Electroquake]] | |||
MRSoH art Mayhem.png|[[Mayhem]] | |||
Bob-omb_MRSOH.png|[[Bob-omb]] | Bob-omb_MRSOH.png|[[Bob-omb]] | ||
Armored_Goomba_MRSOH.png|[[Armored Goomba]] | Armored_Goomba_MRSOH.png|[[Armored Goomba]] | ||
| Line 54: | Line 63: | ||
Stooge_MRSOH.png|[[Stooge]] | Stooge_MRSOH.png|[[Stooge]] | ||
Wildclaw_MRSOH.png|[[Wildclaw]] | Wildclaw_MRSOH.png|[[Wildclaw]] | ||
MRSPH Madame Bwahstrella art.png|[[Madame Bwahstrella]] | |||
MRSoH art Mecha King Bobomb.png|[[Mecha King Bob-omb]] | |||
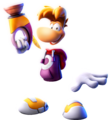
MRSoH Rayman Artwork 2.png|[[Rayman]] | |||
MRSOH Rayman artwork.jpg|Rayman | |||
MRSoH Rayman Artwork.png|Rayman | |||
MRSOH Rayman Alternate artwork.jpg|Rayman | |||
MRSoH Phantom Artwork.png|[[Phantom (character)|Swingin' Phantom]] | |||
</gallery> | </gallery> | ||
| Line 75: | Line 91: | ||
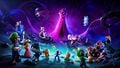
MRSOH Cursa team artwork.jpg|Artwork of the team against [[Cursa]] and her minions (with logo) | MRSOH Cursa team artwork.jpg|Artwork of the team against [[Cursa]] and her minions (with logo) | ||
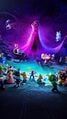
MRSOH Cursa team artwork no logo.jpg|Artwork of the team against Cursa and her minions (without logo) | MRSOH Cursa team artwork no logo.jpg|Artwork of the team against Cursa and her minions (without logo) | ||
</gallery> | |||
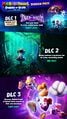
====Downloadable content==== | |||
<gallery> | |||
Mario + Rabbids Sparks of Hope DLC 1 - The Tower of Doooom - Key Art.jpg|Key artwork for [[The Tower of Doooom]] | |||
Mario + Rabbids Sparks of Hope DLC 1 - The Tower of Doooom - Alternate Key Art.jpg|Alternative key artwork for The Tower of Doooom | |||
Mario + Rabbids Sparks of Hope DLC 1 - The Tower of Doooom - Alternate Key Art 2.jpg|Alternative key artwork for The Tower of Doooom | |||
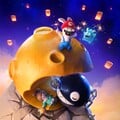
MRSOH The Last Spark Hunter artwork.jpg|Key artwork for [[The Last Spark Hunter]] | |||
MRSOH Rayman in the Phantom Show key artwork.jpg|Key artwork for [[Rayman in the Phantom Show]] | |||
MRSOH Rayman vortex art.jpg|Key artwork of Rayman using Vortex Pull for Rayman in the Phantom Show | |||
MRSOH Rayman rocket art.jpg|Key artwork of Rayman using Rocket Ride for Rayman in the Phantom Show | |||
MRSOH Rayman flying art.jpg|Key artwork of Rayman gliding for Rayman in the Phantom Show | |||
</gallery> | |||
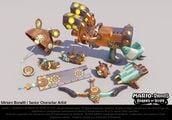
===Render sheets=== | |||
<gallery widths=192px> | |||
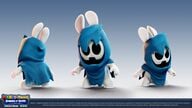
Bonetti Miriam MRSOH Bedrock.jpg|[[Bedrock]] | |||
Bonetti Miriam MRSOH Edge.jpg|Edge | |||
Bonetti Miriam MRSOH Augie.jpg|[[Augie]] | |||
Bonetti Miriam MRSOH Rabbid Rosalina.jpg|Rabbid Rosalina | |||
Bonetti Miriam MRSOH Wildclaw.jpg|Wildclaw | |||
Bonetti Miriam MRSOH Sullivan.jpg|[[Sullivan]] | |||
Bonetti Miriam MRSOH Bea.jpg|[[Bea]] | |||
Bonetti Miriam MRSOH Professor Backpack.jpg|[[Professor Backpack]] | |||
Bonetti Miriam MRSOH Megabug Collection.jpg|Megabug Collection | |||
Bonetti Miriam MRSOH Steampunk Collection.jpg|Steampunk Collection | |||
Bonetti Miriam MRSOH Galactic Prestige Pack.jpg|Galactic Prestige Pack | |||
Ditrani Salvatore MRSOH Rabbid Luigi.jpg|Rabbid Luigi | |||
Ditrani Salvatore MRSOH Captain Orion.jpg|[[Captain Orion]] | |||
Ditrani Salvatore MRSOH Sweetlopek.jpg|[[Sweetlopek]] | |||
Ditrani Salvatore MRSOH Woodrow.jpg|[[Woodrow]] | |||
Ditrani Salvatore MRSOH Daphne.jpg|[[Daphne]] | |||
Ditrani Salvatore MRSOH Midnite.jpg|[[Midnite]] | |||
Ditrani Salvatore MRSOH Lone Wolf.jpg|Lone Wolf | |||
Ditrani Salvatore MRSOH Stooge.jpg|Stooge | |||
Ditrani Salvatore MRSOH Medicians.jpg|[[Spellraiser]], [[Ghostly Walker]], and a [[Depleter]] | |||
Ditrani Salvatore MRSOH Rabbid.jpg|[[Dr. Vent]] | |||
Ditrani Salvatore MRSOH WM ARC.jpg|[[WM ARC]] | |||
Ditrani Salvatore MRSOH misc.jpg|Ambient creatures | |||
MRSOH Kanya renders.jpg|[[Kanya]] | |||
</gallery> | |||
===Concept artwork=== | |||
<gallery widths=192px> | |||
Chauvet Gael MRSOH Rabbid Peach and Pyrogeddon sketches.jpg|Rabbid Peach and Pyrogeddon | |||
Cryogeddon concept art MRSOH.jpg|Cryogeddon | |||
Electrogeddon concept art MRSOH.jpg|Electrogeddon | |||
Oozer Master concept art MRSOH.jpg|Oozer Master | |||
Pyrogeddon concept art MRSOH.jpg|Pyrogeddon | |||
Wildclaw Master concept art MRSOH.jpg|Wildclaw Master | |||
Power-up Sparks concept art MRSOH.jpg|Twinkle, Decibel, Drizzle | |||
Sparks 1 concept art MRSOH.jpg|Electrodash, Vampdash, Cryodash, Aquadash, Reflector, Exosphere, Screech, Ethering | |||
Sparks 2 concept art MRSOH.jpg|Zephyrquake, Toxiquake, Aquaquake, Glitter, Pulser, Regenesis | |||
M+RSoH Pristine Peaks concept art.jpg|Pristine Peaks | |||
M+RSoH Terra Flora concept art.jpg|Terra Flora | |||
MRSOH Kanya concept art.jpg|Kanya | |||
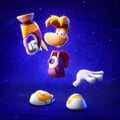
M+RSoH Rayman concept art 1.png|Rayman | |||
M+RSoH Rayman concept art 2.png|Rayman | |||
M+RSoH Rayman concept art 3.png|Rayman | |||
M+RSoH Rayman concept art 4.png|Rayman | |||
M+RSoH Rayman concept art expressions.png|Rayman's expressions | |||
</gallery> | </gallery> | ||
===Wallpapers=== | ===Wallpapers=== | ||
<gallery> | <gallery heights=108px widths=192px> | ||
MRSOH Wallpaper Heroes 4K (landscape).jpg|Mario, Rabbid Peach, Rabbid Rosalina, and Sparks | MRSOH Wallpaper Heroes 4K (landscape).jpg|Mario, Rabbid Peach, Rabbid Rosalina, and some Sparks | ||
MRSOH Wallpaper Heroes-Trio 4K (landscape).jpg|Mario, Rabbid Peach, and Sparks | MRSOH Wallpaper Heroes-Trio 4K (landscape).jpg|Mario, Rabbid Peach, and Sparks | ||
MRSOH Wallpaper Hero-Mario 4K (landscape).jpg|Mario and | MRSOH Wallpaper Hero-Mario 4K (landscape).jpg|Mario and Starburst | ||
MRSOH Wallpaper Hero-Rabbid-Peach (landscape).jpg|Rabbid Peach and | MRSOH Wallpaper Hero-Rabbid-Peach (landscape).jpg|Rabbid Peach and Pyrogeddon | ||
MRSOH Wallpaper Hero-Rabbid-Rosalina 4K (landscape).jpg|Rabbid Rosalina and | MRSOH Wallpaper Hero-Rabbid-Rosalina 4K (landscape).jpg|Rabbid Rosalina and Ethering | ||
MRSOH Wallpaper Scrn-Bobombs 4K (landscape).jpg|Rabbid Peach and a Spark with a gameplay screenshot | MRSOH Wallpaper Scrn-Bobombs 4K (landscape).jpg|Rabbid Peach and a Spark with a gameplay screenshot | ||
MRSOH Wallpaper Scrn-Tactical 4K (landscape).jpg|Mario and a Spark with a gameplay screenshot | MRSOH Wallpaper Scrn-Tactical 4K (landscape).jpg|Mario and a Spark with a gameplay screenshot | ||
| Line 104: | Line 181: | ||
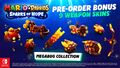
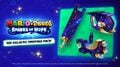
M+RSoH Jp Adventure Pack Art.jpg|Art for the ''Mario + Rabbids Sparks of Hope'' Adventure Pack (Japanese text) | M+RSoH Jp Adventure Pack Art.jpg|Art for the ''Mario + Rabbids Sparks of Hope'' Adventure Pack (Japanese text) | ||
Mario + Rabbids Sparks of Hope Season Pass.jpg|Key artwork for the story content featured in the ''Mario + Rabbids Sparks of Hope'' - Season Pass | Mario + Rabbids Sparks of Hope Season Pass.jpg|Key artwork for the story content featured in the ''Mario + Rabbids Sparks of Hope'' - Season Pass | ||
Mario + Rabbids Sparks of Hope Season Pass Alt Image.jpg|Alternative key artwork for the story content featured in the ''Mario + Rabbids Sparks of Hope'' - Season Pass | |||
Mario + Rabbids Sparks of Hope Season Pass Alt Image 2.jpg|Alternative key artwork for the story content featured in the ''Mario + Rabbids Sparks of Hope'' - Season Pass | |||
MRSOH Galactic Prestige Pack.jpg|Promotional image for the Galactic Prestige Pack | |||
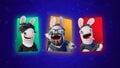
MRSOH Rabbidified staff.jpg|"Rabbidified" versions of three of the game's staff (left to right): senior associate producer Cristina Nava, creative director [[Davide Soliani]], and composer [[Grant Kirkhope]] | |||
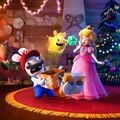
MRSOH Holiday.jpg|Holiday 2022 artwork | |||
MRSOH Lunar New Year 2023.jpg|Lunar New Year 2023 artwork | |||
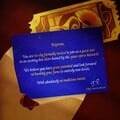
MRSoH Rayman Ticket.jpg|Rayman's ticket to the Space Opera Network | |||
MarioRabbids profile pic 2023-08-30.jpg|Profile picture of the "[[Mario + Rabbids (series)|MarioRabbids]]" social media accounts promoting the Rayman in the Phantom Show DLC | |||
</gallery> | </gallery> | ||
| Line 110: | Line 195: | ||
Cursa.png|[[Cursa]] | Cursa.png|[[Cursa]] | ||
Rabbid Edge.jpg|[[Edge]] | Rabbid Edge.jpg|[[Edge]] | ||
Mario Rabbids Sparks of Hope beach.jpg | Mario Rabbids Sparks of Hope beach.jpg|Beacon Beach (pre-release) | ||
Mario Rabbids Sparks of Hope plain.jpg | Mario Rabbids Sparks of Hope plain.jpg|Beacon Beach (pre-release) | ||
Mario Rabbids Sparks of Hope ruins.jpg | Mario Rabbids Sparks of Hope ruins.jpg|Sunrise Temple | ||
Mario Rabbids Sparks of Hope group screenshot.png | Mario Rabbids Sparks of Hope group screenshot.png | ||
Mario Rabbids Sparks of Hope battle.png | Mario Rabbids Sparks of Hope battle.png | ||
Mario Rabbids Sparks of Hope battle 2.png | Mario Rabbids Sparks of Hope battle 2.png | ||
Mario Rabbids Sparks of Hope battle 3.png | Mario Rabbids Sparks of Hope battle 3.png | ||
Darkmess spreading.jpg | Darkmess spreading.jpg|[[Darkmess]] | ||
Mario Rabbids Sparks of Hope World1.png|Palette Prime | |||
Mario Rabbids Sparks of Hope World2.png | |||
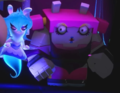
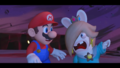
Midnite attacking MRSOH.png|[[Midnite]] | |||
Midnite_in_hallway.png|Midnite in a hallway inside the Winter Palace | |||
Edge_&_Midnite.png|Edge and Midnite | |||
Midnite_capturing_Captain_Orion.png|Captain Orion captured by Midnite | |||
Midnite_second_phase.png|Midnite before the second phase of the battle | |||
Midnite_third_phase.png|Midnite before the third phase of the battle | |||
M+RSOH_Midnite_after_her_defeat.png|Midnite after her defeat | |||
Bedrock_&_Bowser.png|Bedrock and Bowser battling | |||
Bowser_about_to_notice_Mario.png|Bowser about to notice Mario during his duel with Bedrock | |||
Bedrock_before_noticing_Edge.png|Bedrock before she notices Edge | |||
Bedrock_noticing_Edge.png|Bedrock surprised after she notices Edge | |||
Bedrock_headbutted.png|Bedrock headbutted by Bowser | |||
Bowser_headbutted.png|Bedrock headbutting Bowser | |||
Bedrock_throwing_Bowser.png|Bedrock throwing Bowser | |||
Bedrock_jumping_into_Darkmess.png|Bedrock jumping into a Darkmess Tentacle after throwing Bowser | |||
Bedrock_in_battle.png|Bedrock in battle | |||
Bedrock_after_being_attacked.png|Bedrock jumping after being attacked by a weapon | |||
Bedrock_defeated.png|Bedrock after her defeat | |||
Bedrock_escaping.png|Bedrock grabbing on to one of Daphne's vines to escape | |||
Bedrock_angry_at_Edge.png|Bedrock angry at Edge before she escapes | |||
Midnite_being_spared.png|Midnite being spared by Edge | |||
Midnite_&_Bedrock_annoyed.png|Midnite and Bedrock annoyed at Daphne | |||
Midnite_&_Bedrock_worried.png|Midnite and Bedrock worried about failing Cursa | |||
SoH Rabbid Mechakoopas.png|Bowser summoning [[Rabbid Mechakoopa]]s | |||
Angry_Spark_Hunters.png|Daphne and the other Spark Hunters heading out to capture Sparks | |||
Daphne_bringing_Sparks.png|Daphne bringing three Sparks to Cursa | |||
Daphne_snickering.png|Daphne snickering after ambushing the heroes | |||
Daphne_in_battle.png|Daphne in battle | |||
Daphne_Slimy_Swell.png|Daphne using her Slimy Swell technique | |||
Daphne_Fresh_Start.png|Daphne using her Fresh Start ability between phases | |||
Daphne_defeated.png|Daphne after her defeat | |||
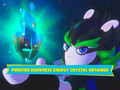
Rabbid_Rosalina_victory.png|Rabbid Rosalina obtaining a [[Purified Darkmess Energy Crystal]] | |||
Rabbid_Rosalina_happy.png|Rabbid Rosalina happy after seeing Rosalina break free from Cursa | |||
Rabbid_Rosalina_angry.png|Rabbid Rosalina not wanting to leave Rosalina after she gets captured again. | |||
Rabbid_Rosalina_grumpy.png|Rabbid Rosalina deciding not to leave Rosalina behind | |||
Mario_carrying_Rabbid_Rosalina.png|Mario carrying Rabbid Rosalina to escape Cursa | |||
Rabbid_Rosalina_surprised.png|Rabbid Rosalina surprised to see Rosalina again | |||
Rabbid_Rosalina_excited.png|Rabbid Rosalina excited after Rosalina finally breaks free from Cursa | |||
Rabbid_Rosalina_leading.png|Rabbid Rosalina leading the heroes to defeat Cursa | |||
Rabbid_Rosalina_stays.png|Rabbid Rosalina deciding to stay with the heroes after saving Rosalina and defeating Cursa | |||
DarkmessBowser.png|[[Darkmess Bowser]] | |||
Darkmess Edge.png|[[Darkmess Edge]] | |||
Edge_victory.png|Edge obtaining a [[Purified Darkmess Energy Crystal]] | |||
Edge_&_Midnite.png|Edge and Midnite | |||
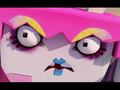
Angry_Edge.png|Edge angry at Beep-0 | |||
Edge_defeating_Stooges.png|Edge defeating Stooges inside the Sunrise Temple | |||
Edge_showing_mercy.png|Edge showing mercy to Twinkle | |||
Edge_using_Stormblade.png|Edge using her Stormblade technique | |||
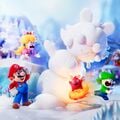
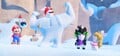
Rabbid_Mario_snowman.jpg|[[Mario]], Edge, and [[Rabbid Peach]] witnessing [[Rabbid Mario]]'s snow sculpture | |||
Edge_distracting_Bedrock.png|Edge distracting Bedrock in [[Palette Prime]] | |||
Edge_before_Barrendale_Mesa.png|Edge warning everyone about finding Momma before Daphne does | |||
Edge_alerting_Mario.png|Edge alerting Mario and the others to escape from Cursa | |||
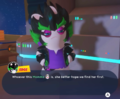
MRSOH Edge confesses.jpg|Edge confesses her origins to the group | |||
Rabbid_Rosalina_Ennui.png|Rabbid Rosalina using her Ennui technique | |||
Edge_new_profession.png|Edge talking about what the other Spark Hunters might do after Cursa's defeat | |||
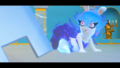
Cursa unleashed form.png|Mario, Peach, Rosalina, and Rabbid Rosalina up against Cursa's unleashed form | Cursa unleashed form.png|Mario, Peach, Rosalina, and Rabbid Rosalina up against Cursa's unleashed form | ||
Sillyfish.png|[[Sillyfish]] | |||
TowerofDooomCutscence.jpg|The Tower of Doooom cutscene. | |||
M+RSoH-BrainwashGoomba.png|[[Goomba]]s after being brainwashed by Cursa | |||
</gallery> | </gallery> | ||
==Sprites== | ==Sprites== | ||
=== | {{image|more=yes|To add Enemy weapon icons}} | ||
===Hero icons=== | |||
<gallery> | <gallery> | ||
Beep-0_icon_MRSOH.png|[[Beep-0]] | Beep-0_icon_MRSOH.png|[[Beep-0]] | ||
Bowser_icon_MRSOH.png|[[Bowser]] | Bowser_icon_MRSOH.png|[[Bowser]] | ||
Edge_icon_MRSOH.png|[[Edge]] | Edge_icon_MRSOH.png|[[Edge]] | ||
Jeanie_icon_MRSOH.png|[[ | Jeanie_icon_MRSOH.png|[[JEANIE]] | ||
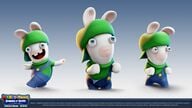
Luigi_icon_MRSOH.png|[[Luigi]] | Luigi_icon_MRSOH.png|[[Luigi]] | ||
Mario_icon_MRSOH.png|[[Mario]] | Mario_icon_MRSOH.png|[[Mario]] | ||
Peach_icon_MRSOH.png|[[Peach]] | Peach_icon_MRSOH.png|[[Princess Peach]] | ||
Rabbid_Luigi_icon_MRSOH.png|[[Rabbid Luigi]] | Rabbid_Luigi_icon_MRSOH.png|[[Rabbid Luigi]] | ||
Rabbid_Mario_icon_MRSOH.png|[[Rabbid Mario]] | Rabbid_Mario_icon_MRSOH.png|[[Rabbid Mario]] | ||
Rabbid_Peach_icon_MRSOH.png|[[Rabbid Peach]] | Rabbid_Peach_icon_MRSOH.png|[[Rabbid Peach]] | ||
Rabbid_Rosalina_icon_MRSOH.png|[[Rabbid Rosalina]] | Rabbid_Rosalina_icon_MRSOH.png|[[Rabbid Rosalina]] | ||
MRSOH Rayman icon.png|[[Rayman]] | |||
MRSOH Vortex Rayman icon.png|Rayman (Vortex costume) | |||
MRSOH Rocket Rayman icon.png|Rayman (Rocket costume) | |||
</gallery> | |||
===[[Spark (Mario + Rabbids Sparks of Hope)|Spark]] icons=== | |||
<gallery> | |||
Aquadash icon MRSOH.png|[[Aquadash]] | |||
Aquanox icon MRSOH.png|[[Aquanox]] | |||
Aquanox icon 2 MRSOH.png|Aquanox | |||
Aquaquake icon MRSOH.png|[[Aquaquake]] | |||
MRSOH Berserk icon.png|[[Berserk]] | |||
Cryobolide icon MRSOH.png|[[Cryobolide]] | |||
Cryobolide icon 2 MRSOH.png|Cryobolide | |||
MRSOH Cryodash icon.png|[[Cryodash]] | |||
MRSOH Cryodash battle icon.png|Cryodash | |||
Cryogeddon icon MRSOH.png|[[Cryogeddon]] | |||
Cryogeddon icon 2 MRSOH.png|Cryogeddon | |||
MRSOH Cryoquake icon.png|[[Cryoquake]] | |||
Decibel icon MRSOH.png|[[Decibel]] | |||
Drizzle icon MRSOH.png|[[Drizzle]] | |||
Electrodash icon MRSOH.png|[[Electrodash]] | |||
Electrodash icon 2 MRSOH.png|Electrodash | |||
Electroid icon MRSOH.png|[[Electroid (character)|Electroid]] | |||
Electroid icon 2 MRSOH.png|Electroid | |||
Electrogeddon icon MRSOH.png|[[Electrogeddon]] | |||
Electrogeddon icon 2 MRSOH.png|Electrogeddon | |||
MRSOH Electroquake icon.png|[[Electroquake]] | |||
MRSOH Electroquake battle icon.png|Electroquake | |||
Ethering icon MRSOH.png|[[Ethering]] | |||
Exosphere icon MRSOH.png|[[Exosphere]] | |||
Gargantu-fan icon MRSOH.png|[[Gargantu-fan]] | |||
Glitter icon MRSOH.png|[[Glitter]] | |||
Glitter icon 2 MRSOH.png|Glitter | |||
MRSOH Mayhem icon.png|[[Mayhem]] | |||
MRSOH Movie Director icon.png|[[Movie Director]] | |||
Oozer Master icon MRSOH.png|[[Oozer Master]] | |||
Pulser icon MRSOH.png|[[Pulser]] | |||
Pulser icon 2 MRSOH.png|Pulser | |||
Pyrogeddon icon MRSOH.png|[[Pyrogeddon]] | |||
Pyrogeddon icon 2 MRSOH.png|Pyrogeddon | |||
Pyrostar icon MRSOH.png|[[Pyrostar]] | |||
Pyrostar icon 2 MRSOH.png|Pyrostar | |||
MRSOH Icon Quiz Host.png|[[Quiz Host]] | |||
Reflector icon MRSOH.png|[[Reflector]] | |||
Regenesis icon MRSOH.png|[[Regenesis]] | |||
Regenesis icon 2 MRSOH.png|Regenesis | |||
Scoper Master icon MRSOH.png|[[Scoper Master]] | |||
Screech icon MRSOH.png|[[Screech (Mario + Rabbids Sparks of Hope)|Screech]] | |||
Screech icon 2 MRSOH.png|Screech | |||
MRSOH Selfie icon.png|[[Selfie]] | |||
Squashette Master icon MRSOH.png|[[Squashette Master]] | |||
Starburst icon MRSOH.png|[[Starburst]] | |||
Starburst icon 2 MRSOH.png|Starburst | |||
Toxicomet icon MRSOH.png|[[Toxicomet]] | |||
Toxicomet icon 2 MRSOH.png|Toxicomet | |||
Toxiquake icon MRSOH.png|[[Toxiquake]] | |||
Twinkle icon MRSOH.png|[[Twinkle]] | |||
Vampastra icon MRSOH.png|[[Vampastra]] | |||
Vampastra icon 2 MRSOH.png|Vampastra | |||
Vampdash icon MRSOH.png|[[Vampdash]] | |||
Vampdash icon 2 MRSOH.png|Vampdash | |||
MRSOH Vampgeddon icon.png|[[Vampgeddon]] | |||
MRSOH Vampgeddon battle icon.png|Vampgeddon | |||
Wildclaw Master icon MRSOH.png|[[Wildclaw Master]] | |||
Zephyrdash icon MRSOH.png|[[Zephyrdash]] | |||
Zephyrdash icon 2 MRSOH.png|Zephyrdash | |||
Zephyrquake icon MRSOH.png|[[Zephyrquake]] | |||
Zephystar icon MRSOH.png|[[Zephystar]] | |||
Zephystar icon 2 MRSOH.png|Zephystar | |||
</gallery> | </gallery> | ||
===Character icons=== | ===Character icons=== | ||
<gallery> | <gallery> | ||
Alkementor icon MRSOH.png|[[Alkementor]] | |||
MRSOH Allegra icon.png|[[Allegra]] | |||
Augie_icon_MRSOH.png|[[Augie]] | Augie_icon_MRSOH.png|[[Augie]] | ||
Bea_icon_MRSOH.png|[[Bea]] | Bea_icon_MRSOH.png|[[Bea]] | ||
Capt_Orion_icon_MRSOH.png|[[Captain Orion]] | Capt_Orion_icon_MRSOH.png|[[Captain Orion]] | ||
DJ_Cheep_Tuna_icon_MRSOH.png|[[DJ Cheep Tuna]] | DJ_Cheep_Tuna_icon_MRSOH.png|[[DJ Cheep Tuna]] | ||
Momma_icon_MRSOH.png|[[ | MRSOH Dorrie icon.png|[[Dorrie]] | ||
Dr. Vent icon MRSOH.png|[[Dr. Vent]] | |||
Dryad icon MRSOH.png|[[Dryad]] | |||
Gerspard icon MRSOH.png|[[Gerspard]] | |||
Hinky icon MRSOH.png|[[Hinky]] | |||
Madame Bwahstrella icon MRSOH.png|[[Madame Bwahstrella]] | |||
MRSOH Melosphere icon.png|[[Melosphere]] | |||
Momma_icon_MRSOH.png|[[Momma]] | |||
Prof_Backpack_icon_MRSOH.png|[[Professor Backpack]] | Prof_Backpack_icon_MRSOH.png|[[Professor Backpack]] | ||
Rabbid icon MRSOH.png|[[Rabbid]] | |||
Rabbid icon 2 MRSOH.png|Rabbid | |||
Rosalina icon MRSOH.png|[[Rosalina]] | |||
SALESBOT_icon_MRSOH.png|[[SALESBOT 9.99+TX]] | SALESBOT_icon_MRSOH.png|[[SALESBOT 9.99+TX]] | ||
Team Heal icon MRSOH.png|SALESBOT 9.99+TX (Team Heal) | |||
Spawny icon MRSOH.png|[[Spawny]] | |||
Sweetlopek icon MRSOH.png|[[Sweetlopek]] | |||
Sullivan_icon_MRSOH.png|[[Sullivan]] | Sullivan_icon_MRSOH.png|[[Sullivan]] | ||
The Fork icon MRSOH.png|[[The Fork]] | |||
Woodrow_icon_MRSOH.png|[[Woodrow]] | Woodrow_icon_MRSOH.png|[[Woodrow]] | ||
Victor icon MRSOH.png|[[Victor]] | |||
</gallery> | </gallery> | ||
===Enemy and boss icons=== | ===Enemy and boss icons=== | ||
<gallery> | <gallery> | ||
Armored Goomba icon MRSOH.png|[[Armored Goomba]] | |||
Bedrock_icon_MRSOH.png|[[Bedrock]] | Bedrock_icon_MRSOH.png|[[Bedrock]] | ||
Bob-omb icon MRSOH.png|[[Bob-omb]] | |||
MRSOH Bravado icon.png|[[Bravado]] | |||
Cursa_icon_MRSOH.png|[[Cursa]] | Cursa_icon_MRSOH.png|[[Cursa]] | ||
Cursa's Astral Arm icon_MRSOH.png|Cursa's astral arm | |||
Cursa final form icon_MRSOH.png|Cursa (final form) | |||
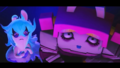
Daphne_icon_MRSOH.png|[[Daphne]] | Daphne_icon_MRSOH.png|[[Daphne]] | ||
Darkmess_Bowser_icon_MRSOH.png|[[Darkmess Bowser]] | Darkmess_Bowser_icon_MRSOH.png|[[Darkmess Bowser]] | ||
Darkmess_Edge_icon_MRSOH.png|[[Darkmess Edge]] | Darkmess_Edge_icon_MRSOH.png|[[Darkmess Edge]] | ||
Darkmess_Eye_icon_MRSOH.png|[[Darkmess Eye]] | Darkmess_Eye_icon_MRSOH.png|[[Darkmess Eye]] | ||
Darkmess Eye icon 2 MRSOH.png|Darkmess Eye (large) | |||
Darkmess Dam icon MRSOH.png|[[Darkmess Dam]] | |||
Darkmess Taproot icon MRSOH.png|[[Darkmess Taproot]] | |||
Deep Freeze icon MRSOH.png|[[Deep Freeze]] | |||
Depleter icon MRSOH.png|[[Depleter]] | |||
MRSOH Fieldbreaker icon.png|[[Fieldbreaker]] | |||
MRSOH Flamin' Golem icon.png|[[Flamin' Golem]] | |||
Flamin' Stooge icon MRSOH.png|[[Flamin' Stooge]] | |||
Ghostly Walker icon MRSOH.png|[[Ghostly Walker]] | |||
Giant Depleter icon MRSOH.png|[[Giant Depleter]] | |||
MRSOH Giant Flamin' Stooge icon.png|[[Giant Flamin' Stooge]] | |||
Giant Goomba icon MRSOH.png|[[Giant Goomba]] | |||
Giant Magikoopa icon MRSOH.png|[[Big Magikoopa|Giant Magikoopa]] | |||
Giant Magnafowl icon MRSOH.png|[[Giant Magnafowl]] | |||
Giant Squashette icon MRSOH.png|[[Giant Squashette]] | |||
Goomba icon MRSOH.png|[[Goomba]] | |||
Lone_Wolf_icon_MRSOH.png|[[Lone Wolf]] | Lone_Wolf_icon_MRSOH.png|[[Lone Wolf]] | ||
MRSOH Kanya icon.png|[[Kanya]] | |||
MRSOH Kraken icon.png|[[Kraken]] | |||
Magikoopa icon MRSOH.png|[[Magikoopa]] | |||
Magnafowl icon MRSOH.png|[[Magnafowl]] | |||
MRSOH Mecha King Bob-omb icon.png|[[Mecha King Bob-omb]] | |||
Medician icon MRSOH.png|[[Medician]] | |||
Midnite_icon_MRSOH.png|[[Midnite]] | Midnite_icon_MRSOH.png|[[Midnite]] | ||
Oozer_icon_MRSOH.png|[[Oozer (Mario + Rabbids Sparks of Hope)|Oozer]] | Oozer_icon_MRSOH.png|[[Oozer (Mario + Rabbids Sparks of Hope)|Oozer]] | ||
MRSOH Final Phantom icon.png|[[Phantom (character)|Phantom]]/Final Phantom | |||
MRSOH Proto Mecha King Bob-omb icon.png|[[Proto Mecha King Bob-omb]] | |||
Riptide icon MRSOH.png|[[Riptide]] | |||
MRSOH Rockin' Phantom icon.png|Rockin' Phantom | |||
Scoper icon MRSOH.png|[[Scoper]] | |||
Sea_Stooge_icon_MRSOH.png|[[Sea Stooge]] | Sea_Stooge_icon_MRSOH.png|[[Sea Stooge]] | ||
Wildclaw_icon_MRSOH.png|[[Giant Wildclaw]] | MRSOH Shockin' Golem icon.png|[[Shockin' Golem]] | ||
Spellraiser icon MRSOH.png|[[Spellraiser]] | |||
Squasher icon MRSOH.png|[[Squasher]] | |||
Squashette icon MRSOH.png|[[Squashette]] | |||
Stone Mask icon_MRSOH.png|[[Stone Mask]] | |||
Stooge_icon_MRSOH.png|[[Stooge]] | |||
MRSOH Swingin' Phantom icon.png|Swingin' Phantom | |||
MRSOH Tidal Golem icon.png|[[Tidal Golem]] | |||
Wildclaw_icon_MRSOH.png|[[Wildclaw]]/[[Giant Wildclaw]] | |||
</gallery> | |||
===Battle objects=== | |||
<gallery> | |||
Nest icon MRSOH.png|[[Nesting Instinct|Nest]] | |||
Turning mechanism icon MRSOH.png|[[A Foul Windmill Blows|Turning mechanism]] | |||
</gallery> | </gallery> | ||
===Weapon icons=== | ===[[Weapon Skin]] icons=== | ||
<gallery> | <gallery> | ||
Boom-Brella_icon_MRSOH.png|[[Boom-Brella]] | Boom-Brella_icon_MRSOH.png|[[Boom-Brella]] | ||
| Line 175: | Line 451: | ||
Dual_Slinger_icon_MRSOH.png|[[Dual Slinger]] | Dual_Slinger_icon_MRSOH.png|[[Dual Slinger]] | ||
Flying_Blade_icon_MRSOH.png|[[Flying Blade]] | Flying_Blade_icon_MRSOH.png|[[Flying Blade]] | ||
Galactic Blade icon_MRSOH.png|Galactic Blade | |||
Galactic Dual Slinger icon_MRSOH.png|Galactic Dual Slinger | |||
Galactic Triple Troll icon_MRSOH.png|Galactic Triple Troll | |||
Gleaming Blade icon_MRSOH.png|Gleaming Blade | |||
Gleaming Boom-Brella icon_MRSOH.png|Gleaming Boom-Brella | |||
Gleaming Bowzooka icon_MRSOH.png|Gleaming Bowzooka | |||
Gleaming Discruptor icon_MRSOH.png|Gleaming Discruptor | |||
Gleaming Dual Slinger icon_MRSOH.png|Gleaming Dual Slinger | |||
Gleaming Kaboomer icon_MRSOH.png|Gleaming Kaboomer | |||
Gleaming Sharpshooter icon_MRSOH.png|Gleaming Sharpshooter | |||
Gleaming Triple Troll icon_MRSOH.png|Gleaming Triple Troll | |||
Kaboomer_icon_MRSOH.png|[[Kaboomer]] | Kaboomer_icon_MRSOH.png|[[Kaboomer]] | ||
Megabug_Blade_icon_MRSOH.png|Megabug Blade | Megabug_Blade_icon_MRSOH.png|Megabug Blade | ||
| Line 185: | Line 471: | ||
Megabug_Sharpshooter_icon_MRSOH.png|Megabug Sharpshooter | Megabug_Sharpshooter_icon_MRSOH.png|Megabug Sharpshooter | ||
Megabug_Triple-Troll_icon_MRSOH.png|Megabug Triple-Troll | Megabug_Triple-Troll_icon_MRSOH.png|Megabug Triple-Troll | ||
Sassy Flying Blade.png|Sassy Blade | |||
Sassy Boom-Brella.png|Sassy Boom-Brella | |||
Sassy Bowzooka.png|Sassy Bowzooka | |||
Sassy Discruptor.png|Sassy Discruptor | |||
Sassy Dual Slinger.png|Sassy Dual Slinger | |||
Sassy Kaboomer.png|Sassy Kaboomer | |||
Sassy Sharpshooter.png|Sassy SharpShooter | |||
Sassy Triple Troll.png|Sassy Triple Troll | |||
Sharpshooter_icon_MRSOH.png|[[Sharpshooter]] | Sharpshooter_icon_MRSOH.png|[[Sharpshooter]] | ||
Steampunk_Blade_icon_MRSOH.png|Steampunk Blade | Steampunk_Blade_icon_MRSOH.png|Steampunk Blade | ||
| Line 203: | Line 497: | ||
Speedway_Triple-Troll_icon_MRSOH.png|Speedway Triple-Troll | Speedway_Triple-Troll_icon_MRSOH.png|Speedway Triple-Troll | ||
The_Dukes_icon_MRSOH.png|[[The Dukes]] | The_Dukes_icon_MRSOH.png|[[The Dukes]] | ||
The Gleaming Dukes icon_MRSOH.png|The Gleaming Dukes | |||
The_Megabug_Dukes_icon_MRSOH.png|The Megabug Dukes | The_Megabug_Dukes_icon_MRSOH.png|The Megabug Dukes | ||
The Sassy Dukes.png|The Sassy Dukes | |||
The_Speedway_Dukes_icon_MRSOH.png|The Speedway Dukes | The_Speedway_Dukes_icon_MRSOH.png|The Speedway Dukes | ||
The_Steampunk_Dukes_icon_MRSOH.png|The Steampunk Dukes | The_Steampunk_Dukes_icon_MRSOH.png|The Steampunk Dukes | ||
| Line 212: | Line 508: | ||
Vintage_Boom_Brella_icon_MRSOH.png|Vintage Boom-Brella | Vintage_Boom_Brella_icon_MRSOH.png|Vintage Boom-Brella | ||
Vintage_Bowzooka_icon_MRSOH.png|Vintage Bowzooka | Vintage_Bowzooka_icon_MRSOH.png|Vintage Bowzooka | ||
Vintage_Dual Slinger_icon_MRSOH.png|Vintage Dual Slinger | |||
Vintage_Discruptor_icon_MRSOH.png|Vintage Discruptor | Vintage_Discruptor_icon_MRSOH.png|Vintage Discruptor | ||
Vintage_Kaboomer_icon_MRSOH.png|Vintage Kaboomer | Vintage_Kaboomer_icon_MRSOH.png|Vintage Kaboomer | ||
| Line 224: | Line 521: | ||
Wildwood_Sharpshooter_icon_MRSOH.png|Wildwood Sharpshooter | Wildwood_Sharpshooter_icon_MRSOH.png|Wildwood Sharpshooter | ||
Wildwood_Triple-Troll_icon_MRSOH.png|Wildwood Triple-Troll | Wildwood_Triple-Troll_icon_MRSOH.png|Wildwood Triple-Troll | ||
</gallery> | |||
===World icons=== | |||
<gallery> | |||
M+RSOH-PrologueIcon.png|Prologue ([[Peach's Castle]]/[[Darkmess Manta]]) | |||
M+RSOH-BeaconBeachIcon.png|[[Beacon Beach]] | |||
M+RSOH-PristinePeaks-Icon.png|[[Pristine Peaks]] | |||
M+RSOH-PalettePrime-Icon.png|[[Palette Prime]] | |||
M+RSOH-TerraFlora-Icon.png|[[Terra Flora]] | |||
M+RSOH-BarrendaleMesa-Icon.png|[[Barrendale Mesa]] | |||
M+RSOH-CursasStronghold-Icon.png|[[Cursa's stronghold]] | |||
MRSOH The Tower of Doooom icon.png|[[The Tower of Doooom]] | |||
MRSOH Melodic Gardens icon.png|[[Melodic Gardens]] | |||
MRSOH Space Opera Network icon.png|[[Space Opera Network]] | |||
</gallery> | |||
===Object icons=== | |||
<gallery> | |||
Barren Key icon.png|[[Barren Key]] | |||
Blue Coin icon MRSOH.png|[[Blue Coin]] | |||
Coin icon MRSOH.png|[[Coin]] | |||
Efflorescent Key Icon.png|[[Efflorescent Key]] | |||
Gold Prism icon MRSOH.png|[[Gold Prism]] | |||
Green Coin icon MRSOH.png|[[Green Coin]] | |||
Midwinter Key Icon.png|[[Midwinter Key]] | |||
MRSOH Beacon Beach Planet Coin.png|[[Planet Coin]] (Beacon Beach) | |||
MRSOH Pristine Peaks Planet Coin.png|Planet Coin (Pristine Peaks) | |||
MRSOH Palette Prime Planet Coin.png|Planet Coin (Palette Prime) | |||
MRSOH Terra Flora Planet Coin.png|Planet Coin (Terra Flora) | |||
MRSOH Barrendale Mesa Planet Coin.png|Planet Coin (Barrendale Mesa) | |||
MRSOH Melodic Gardens Planet Coin.png|Planet Coin (Melodic Gardens) | |||
MRSOH Space Opera Network Planet Coin.png|Planet Coin (Space Opera Network) | |||
Purified Darkmess Energy Crystal icon MRSOH.png|[[Purified Darkmess Energy Crystal]] | |||
Red Coin icon MRSOH.png|[[Red Coin]] | |||
Skill Prism icon MRSOH.png|[[Skill Prism]] | |||
Spellbound Key Icon.png|[[Spellbound Key]] | |||
Star Bit icon MRSOH.png|[[Star Bit]] | |||
Sunrise Key Icon.png|[[Sunrise Key]] | |||
Beacon Beach Teleport Flag icon MRSOH.png|[[Teleport Flag]] (Beacon Beach) | |||
Pristine Peaks Teleport Flag icon MRSOH.png|Teleport Flag (Pristine Peaks) | |||
Palette Prime Teleport Flag icon MRSOH.png|Teleport Flag (Palette Prime) | |||
Terra Flora Teleport Flag icon MRSOH.png|Teleport Flag (Terra Flora) | |||
Barrendale Mesa Teleport Flag icon MRSOH.png|Teleport Flag (Barrendale Mesa) | |||
</gallery> | |||
===Item icons=== | |||
<gallery> | |||
Cleansing Elixir icon.png|[[Cleansing Elixir]] | |||
Cooldown Clock.png|[[Cooldown Clock]] | |||
Immunity Charm icon.png|[[Immunity Charm]] | |||
Move Boost icon.png|[[Move Boost]] | |||
Multi Dash icon.png|[[Multi Dash]] | |||
POW Block icon MRSOH.png|[[POW Block]] | |||
Star Potion icon.png|[[Star Potion]] | |||
Super Mushroom icon MRSOH.png|[[Super Mushroom]] | |||
Super Mushroom Bag icon.png|[[Super Mushroom Bag]] | |||
Super Mushroom Chest icon.png|[[Super Mushroom Chest]] | |||
Super Mushroom Chest DX icon.png|[[Super Mushroom Chest DX]] | |||
The Healer icon MRSOH.png|[[The Healer]] | |||
The Strongman icon MRSOH.png|[[The Strongman]] | |||
The Weakling icon MRSOH.png|[[The Weakling]] | |||
</gallery> | |||
===Super Effect icons=== | |||
<gallery> | |||
Burn icon MRSOH.png|[[Burn]] | |||
Burn Resistance icon MRSOH.png|Burn resistance | |||
Burn Weakness icon MRSOH.png|Burn weakness | |||
Frostbite icon MRSOH.png|[[Freeze|Frostbite]] | |||
Frostbite Resistance icon MRSOH.png|Frostbite resistance | |||
Frostbite Weakness icon MRSOH.png|Frostbite weakness | |||
Gust icon MRSOH.png|[[Gust]] | |||
Gust Resistance icon MRSOH.png|Gust resistance | |||
Gust Weakness icon MRSOH.png|Gust weakness | |||
Ooze icon MRSOH.png|[[Poison (status effect)|Ooze]] | |||
Ooze Resistance icon MRSOH.png|Ooze weakness | |||
Ooze Weakness icon MRSOH.png|Ooze weakness | |||
Shock icon MRSOH.png|[[Shock]] | |||
Shock Resistance icon MRSOH.png|Shock resistance | |||
Shock Weakness icon MRSOH.png|Shock weakness | |||
Splash icon MRSOH.png|[[Splash]] | |||
Splash Resistance icon MRSOH.png|Splash resistance | |||
Splash Weakness icon MRSOH.png|Splash weakness | |||
Vamp icon MRSOH.png|[[Vamp|Lifesteal]] | |||
</gallery> | |||
===Battle icons=== | |||
<gallery> | |||
Coins icon MRSOH.png|[[Coin Stack|Coins]] | |||
Damage Up icon MRSOH.png|+[[Power|Damage]] | |||
Flippable icon MRSOH.png|Flippable attribute | |||
M+RSOH-EnemyHPIcon.png|[[HP]] | |||
HP Recover icon MRSOH.png|HP Recovered | |||
Level Up icon MRSOH.png|[[Level Up]] | |||
Max HP Up icon MRSOH.png|+Max HP | |||
Star Bits icon MRSOH.png|Star Bits | |||
Undashable icon MRSOH.png|Undashable attribute | |||
XP icon MRSOH.png|[[Experience Point|XP]] | |||
</gallery> | |||
===[[Quest]] icons=== | |||
<gallery> | |||
Giant Enemy icon MRSOH.png|Giant Enemy Quest | |||
Locked icon MRSOH.png|Locked Quest | |||
Hidden Quest icon MRSOH.png|Hidden Quest | |||
Main Quest icon MRSOH.png|Main Quest | |||
New Side Quest icon MRSOH.png|New Side Quest | |||
Quest icon MRSOH.png|Quest | |||
Spark Quest icon MRSOH.png|Spark Quest | |||
</gallery> | |||
===[[List of Skill Trees in Mario + Rabbids Sparks of Hope|Skill Tree]] icons=== | |||
====Health==== | |||
<gallery> | |||
Extra Health Skill Tree icon MRSOH.png|Extra Health | |||
HP Chill Out Skill Tree icon MRSOH.png|HP Chill Out | |||
Heal Sponge Skill Tree icon MRSOH.png|Health Sponge | |||
</gallery> | |||
====Spark==== | |||
<gallery> | |||
Spark Gift Skill Tree icon MRSOH.png|Spark Gift | |||
Spark Guard Skill Tree icon MRSOH.png|Spark Guard | |||
Spark Refresher Skill Tree icon MRSOH.png|Spark Refresher | |||
Spark Energy Skill Tree icon MRSOH.png|Spark Energy | |||
</gallery> | |||
===Miscellaneous icons=== | |||
<gallery> | |||
Beep-0 Tacticam icon MRSOH.png|Beep-0 [[Tacticam]] | |||
Darkmess Puddle icon MRSOH.png|[[Darkmess Puddle]] | |||
Darkmess Tentacle icon MRSOH.png|[[Darkmess Tentacle]] | |||
Dash icon MRSOH.png|[[Dash (Mario + Rabbids)|Dash]] | |||
Defeat All icon MRSOH.png|"Defeat All" objective | |||
Enemy icon MRSOH.png|Enemy icon | |||
MRSOH Hypnotize icon.png|[[Hypnotize]] | |||
Music icon MRSOH.png|Gather 'Round/Whoopsgottago | |||
Rabbid Mario's overalls icon MRSOH.png|Rabbid Mario's overalls | |||
Reach Area icon MRSOH.png|"Reach Area" objective | |||
Reach Area goal icon MRSOH.png|"Reach Area" goal | |||
Reflect icon MRSOH.png|Reflect/Fortify | |||
Scan Power icon MRSOH.png|[[Scan Power]] | |||
Shop icon MRSOH.png|[[Shop]] icon | |||
Sillyfish icon MRSOH.png|[[Sillyfish]] | |||
Turbocharge icon MRSOH.png|[[Turbocharge]] | |||
Unseen icon MRSOH.png|Unseen | |||
Wave Power icon MRSOH.png|[[Wave Power]] | |||
Weapon Skin icon MRSOH.png|[[Weapon Skin]] | |||
</gallery> | |||
==Models== | |||
===Playable characters=== | |||
<gallery> | |||
Bowser model MRSOH.png|[[Bowser]] | |||
Edge model MRSOH.png|[[Edge]] | |||
Peach model MRSOH.png|[[Princess Peach|Peach]] | |||
Rabbid Mario naked model MRSOH.png|[[Rabbid Mario]] (naked) | |||
Rabbid Peach model MRSOH.png|[[Rabbid Peach]] | |||
</gallery> | |||
===Supporting characters=== | |||
<gallery> | |||
Beep-0 model MRSOH.png|[[Beep-0]] | |||
Captain Orion model MRSOH.png|[[Captain Orion]] | |||
Dorrie model MRSOH.png|[[Dorrie]] | |||
Fire Rabbid Mechakoopa model MRSOH.png|[[Fire Rabbid Mechakoopa]] | |||
JEANIE model MRSOH.png|[[JEANIE]] | |||
Kanya model MRSOH.png|[[Kanya]] | |||
Penguin model MRSOH.png|[[Penguin]] | |||
Rabbid model MRSOH.png|[[Rabbid]] | |||
Rabbid Kong model MRSOH.png|[[Rabbid Kong]] | |||
Rabbid Mechakoopa model MRSOH.png|[[Rabbid Mechakoopa]] | |||
Rosalina model MRSOH.png|[[Rosalina]] | |||
SALESBOT model MRSOH.png|[[SALESBOT 9.99+TX]] | |||
Toad model MRSOH.png|[[Toad]] | |||
Toadette model MRSOH.png|[[Toadette]] | |||
Victor model MRSOH.png|[[Victor]] | |||
</gallery> | |||
===Creatures=== | |||
<gallery> | |||
Blooper model MRSOH.png|[[Blooper]] | |||
Boar model MRSOH.png|Boar | |||
Chain Chomp model MRSOH.png|[[Chain Chomp]] | |||
</gallery> | |||
===Enemies=== | |||
<gallery> | |||
Flaming Stooge model MRSOH.png|[[Flamin' Stooge]] | |||
Magikoopa model MRSOH.png|[[Magikoopa]] | |||
Scoper model MRSOH.png|[[Scoper]] | |||
Sea Stooge model MRSOH.png|[[Sea Stooge]] | |||
Stooge model MRSOH.png|[[Stooge]] | |||
</gallery> | |||
===Bosses=== | |||
<gallery> | |||
Bedrock model MRSOH.png|[[Bedrock]] | |||
Daphne model MRSOH.png|[[Daphne]] | |||
Wiggler model MRSOH.png|[[Wiggler]] | |||
</gallery> | |||
===Objects=== | |||
<gallery> | |||
Flamingo floatie model MRSOH.png|Flamingo floatie | |||
Luma model MRSOH.png|[[Luma]] hologram | |||
Rabbid Mario's overalls model MRSOH.png|[[Rabbid Mario]]'s overalls | |||
Mushroom model MRSOH.png|[[Super Mushroom]] | |||
</gallery> | </gallery> | ||
| Line 240: | Line 739: | ||
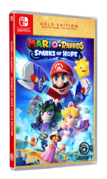
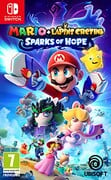
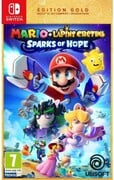
Mario + Rabbids Sparks of Hope Gold Edition Saudi Arabia boxart.jpg|Saudi Arabian cover (Gold Edition) | Mario + Rabbids Sparks of Hope Gold Edition Saudi Arabia boxart.jpg|Saudi Arabian cover (Gold Edition) | ||
M+RSoH Jp Box Art.png|Japanese cover | M+RSoH Jp Box Art.png|Japanese cover | ||
Mario + Rabbids Sparks of Hope Cosmic Edition South Korea boxart.jpg|Korean cover ( | M+RSoH Korea Box Art.png|Korean cover (Cosmic Edition) | ||
Mario + Rabbids Sparks of Hope Cosmic Edition South Korea boxart.jpg|Korean cover (with English logo) | |||
Mario + Rabbids Sparks of Hope Gold Edition South Korea boxart.jpg|Korean cover (Gold Edition) | Mario + Rabbids Sparks of Hope Gold Edition South Korea boxart.jpg|Korean cover (Gold Edition) | ||
M+RSoH Box Art.png|Generic English cover | M+RSoH Box Art.png|Generic English cover | ||
| Line 246: | Line 746: | ||
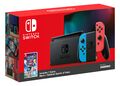
Mario + Rabbids Sparks of Hope Active Gulf Nintendo Switch bundle backside.jpg|''Mario + Rabbids Sparks of Hope Battle'' Nintendo Switch bundle box art with neon blue and red Joy-Con, distributed by [http://www.active-gulf.com/ Active Gulf] (backside render) | Mario + Rabbids Sparks of Hope Active Gulf Nintendo Switch bundle backside.jpg|''Mario + Rabbids Sparks of Hope Battle'' Nintendo Switch bundle box art with neon blue and red Joy-Con, distributed by [http://www.active-gulf.com/ Active Gulf] (backside render) | ||
Mario + Rabbids Sparks of Hope Active Gulf Nintendo Switch bundle frontside.jpg|''Mario + Rabbids Sparks of Hope Battle'' Nintendo Switch bundle box art with neon blue and red Joy-Con, distributed by [http://www.active-gulf.com/ Active Gulf] (frontside render) | Mario + Rabbids Sparks of Hope Active Gulf Nintendo Switch bundle frontside.jpg|''Mario + Rabbids Sparks of Hope Battle'' Nintendo Switch bundle box art with neon blue and red Joy-Con, distributed by [http://www.active-gulf.com/ Active Gulf] (frontside render) | ||
</gallery> | |||
===Pre-release box art=== | |||
<gallery heights="180"> | |||
M+TLPSOHFrenchFrontpre.jpg|Pre-release French box art | |||
M+TLPSOHFrenchFrontGoldEditionpre.jpg|Pre-release French Gold Edition box art | |||
M+TLPSOHFrenchFrontCosmicEditionpre.jpg|Pre-release French Cosmic Edition box art | |||
</gallery> | </gallery> | ||
==Miscellaneous== | ==Miscellaneous== | ||
<gallery> | |||
M+RSoH commemorative coin.jpg|Commemorative coin given to [[Ubisoft]] employees | |||
</gallery> | |||
===Play Nintendo=== | ===Play Nintendo=== | ||
<gallery> | <gallery> | ||
| Line 274: | Line 785: | ||
MRSoH Phone Ring Holder.jpg|Phone ring holder | MRSoH Phone Ring Holder.jpg|Phone ring holder | ||
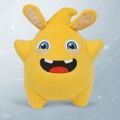
MRSoH Starburst Plush.jpg|Starburst plush | MRSoH Starburst Plush.jpg|Starburst plush | ||
MRSOH Starburst Keychain Front.jpg|Keychain | |||
MRSOH Starburst Keychain Back.jpg|Keychain | |||
MRSOH Starburst Keychain Packaging.jpg|Keychain | |||
</gallery> | </gallery> | ||
Revision as of 19:03, January 6, 2025
This is a gallery of images for the game Mario + Rabbids Sparks of Hope.
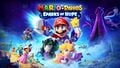
Logos

English logo

French logo

Russian logo
Japanese logo

Simplified Chinese logo

Traditional Chinese logo

Korean logo
DLC
Artwork

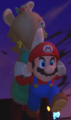
Mario and Starburst

Mario and Beep-0

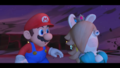
Mario and Beep-0

Luigi and Aquanox

Peach and Reflector
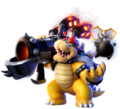
Bowser and Exosphere

Rabbid Mario and Glitter

Rabbid Luigi and Toxiquake
Rabbid Peach and Pyrogeddon
Rabbid Peach and Pyrogeddon

Rabbid Rosalina and Ethering
Edge and Vampdash
Mario, Bowser, Rabbid Rosalina, and Starburst

Starburst

Starburst

Aquanox

Reflector

Exosphere

Glitter

Toxiquake

Pyrogeddon

Ethering

Vampdash

Rayman
Rayman
Rayman


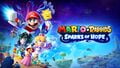
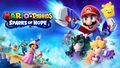
Key artwork
Key artwork (landscape)
Key artwork - alternate (landscape)
Key artwork (portrait)
Key artwork (with logo, landscape)
Key artwork - alternate (with logo, landscape)
Japanese key artwork (with logo, landscape)
Key artwork - alternate (with logo, landscape)
Key artwork - alternate (with logo, landscape)
Key artwork (with logo, portrait)
Key artwork - alternate (with logo, portrait)
Second key artwork (with logo, landscape)
Artwork of Wiggler and the Wiggler Train
Artwork of Wiggler and the Wiggler Train
Artwork of Wiggler and the Wiggler Train
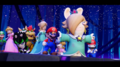
Artwork of enemies in the game
Artwork of the team against Cursa and her minions (with logo)
Artwork of the team against Cursa and her minions (without logo)


Downloadable content
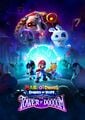
Key artwork for The Tower of Doooom
Alternative key artwork for The Tower of Doooom

Alternative key artwork for The Tower of Doooom
Key artwork for The Last Spark Hunter
Key artwork for Rayman in the Phantom Show
Key artwork of Rayman using Vortex Pull for Rayman in the Phantom Show
Key artwork of Rayman using Rocket Ride for Rayman in the Phantom Show
Key artwork of Rayman gliding for Rayman in the Phantom Show


Render sheets
Edge
Rabbid Rosalina
Wildclaw
Megabug Collection
Steampunk Collection

Galactic Prestige Pack
Rabbid Luigi
Lone Wolf
Stooge
Spellraiser, Ghostly Walker, and a Depleter
Ambient creatures


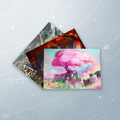
Concept artwork
Rabbid Peach and Pyrogeddon
Cryogeddon
Electrogeddon

Oozer Master
Pyrogeddon
Wildclaw Master

Twinkle, Decibel, Drizzle
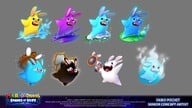
Electrodash, Vampdash, Cryodash, Aquadash, Reflector, Exosphere, Screech, Ethering

Zephyrquake, Toxiquake, Aquaquake, Glitter, Pulser, Regenesis
Pristine Peaks
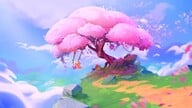
Terra Flora
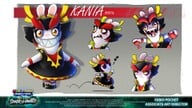
Kanya
Rayman
Rayman
Rayman
Rayman
Rayman's expressions


Wallpapers
Mario, Rabbid Peach, Rabbid Rosalina, and some Sparks
Mario, Rabbid Peach, and Sparks
Mario and Starburst
Rabbid Peach and Pyrogeddon
Rabbid Rosalina and Ethering
Rabbid Peach and a Spark with a gameplay screenshot
Mario and a Spark with a gameplay screenshot

Mario with the logo

Sparks with the logo
.jpg)
.jpg)
.jpg)
.jpg)
.jpg)
.jpg)
.jpg)


Miscellaneous
Promotional artwork from Rabbid Peach's Instagram account
Artwork released on the Mario + Rabbids Twitter account during the game's development celebrating the series' 4th anniversary
Artwork from Rabbid Peach's Instagram account celebrating Christmas 2021 featuring Pyrogeddon
Artwork from Rabbid Peach's Instagram account celebrating the game's release
Promotional image for the Megabug Collection
Japanese promotional image for the Megabug Skinpack
Promotional image for Rayman's adventure
Promotional image for Rayman's adventure

Starburst hashflag used to promote the game on Twitter

Art for the Mario + Rabbids Sparks of Hope Season Pass
Art for the Mario + Rabbids Sparks of Hope Adventure Pack (Japanese text)

Key artwork for the story content featured in the Mario + Rabbids Sparks of Hope - Season Pass
Alternative key artwork for the story content featured in the Mario + Rabbids Sparks of Hope - Season Pass
Alternative key artwork for the story content featured in the Mario + Rabbids Sparks of Hope - Season Pass
Promotional image for the Galactic Prestige Pack
"Rabbidified" versions of three of the game's staff (left to right): senior associate producer Cristina Nava, creative director Davide Soliani, and composer Grant Kirkhope
Holiday 2022 artwork
Lunar New Year 2023 artwork
Rayman's ticket to the Space Opera Network

Profile picture of the "MarioRabbids" social media accounts promoting the Rayman in the Phantom Show DLC


Screenshots
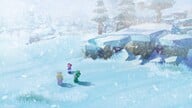
Beacon Beach (pre-release)
Beacon Beach (pre-release)
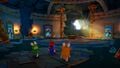
Sunrise Temple

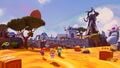
Palette Prime
Midnite in a hallway inside the Winter Palace

Edge and Midnite
Captain Orion captured by Midnite
Midnite before the second phase of the battle
Midnite before the third phase of the battle
Midnite after her defeat
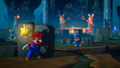
Bedrock and Bowser battling
Bowser about to notice Mario during his duel with Bedrock
Bedrock before she notices Edge
Bedrock surprised after she notices Edge
Bedrock headbutted by Bowser
Bedrock headbutting Bowser

Bedrock throwing Bowser
Bedrock jumping into a Darkmess Tentacle after throwing Bowser
Bedrock in battle
Bedrock jumping after being attacked by a weapon
Bedrock after her defeat
Bedrock grabbing on to one of Daphne's vines to escape
Bedrock angry at Edge before she escapes
Midnite being spared by Edge
Midnite and Bedrock annoyed at Daphne
Midnite and Bedrock worried about failing Cursa
Bowser summoning Rabbid Mechakoopas
Daphne and the other Spark Hunters heading out to capture Sparks
Daphne bringing three Sparks to Cursa

Daphne snickering after ambushing the heroes
Daphne in battle
Daphne using her Slimy Swell technique
Daphne using her Fresh Start ability between phases
Daphne after her defeat
Rabbid Rosalina obtaining a Purified Darkmess Energy Crystal

Rabbid Rosalina happy after seeing Rosalina break free from Cursa
Rabbid Rosalina not wanting to leave Rosalina after she gets captured again.
Rabbid Rosalina deciding not to leave Rosalina behind
Mario carrying Rabbid Rosalina to escape Cursa

Rabbid Rosalina surprised to see Rosalina again

Rabbid Rosalina excited after Rosalina finally breaks free from Cursa
Rabbid Rosalina leading the heroes to defeat Cursa
Rabbid Rosalina deciding to stay with the heroes after saving Rosalina and defeating Cursa
Edge obtaining a Purified Darkmess Energy Crystal
Edge and Midnite
Edge angry at Beep-0
Edge defeating Stooges inside the Sunrise Temple
Edge showing mercy to Twinkle
Edge using her Stormblade technique
Mario, Edge, and Rabbid Peach witnessing Rabbid Mario's snow sculpture
Edge distracting Bedrock in Palette Prime
Edge warning everyone about finding Momma before Daphne does
Edge alerting Mario and the others to escape from Cursa
Edge confesses her origins to the group
Rabbid Rosalina using her Ennui technique
Edge talking about what the other Spark Hunters might do after Cursa's defeat

Mario, Peach, Rosalina, and Rabbid Rosalina up against Cursa's unleashed form

The Tower of Doooom cutscene.
Goombas after being brainwashed by Cursa


Sprites
It has been requested that more images be uploaded for this article. Remove this notice only after the additional images have been added. Specifics: To add Enemy weapon icons
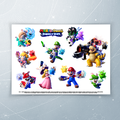
Hero icons

Rayman (Vortex costume)
Rayman (Rocket costume)
Spark icons

Aquanox

Cryobolide

Cryodash

Cryogeddon

Electrodash

Electroid

Electrogeddon
Electroquake

Glitter

Pulser

Pyrogeddon

Pyrostar

Regenesis

Screech

Starburst

Toxicomet

Vampastra

Vampdash

Vampgeddon

Zephyrdash

Zephystar
Character icons

Rabbid

SALESBOT 9.99+TX (Team Heal)
Enemy and boss icons

Cursa's astral arm

Cursa (final form)
Darkmess Eye (large)

Phantom/Final Phantom

Rockin' Phantom

Swingin' Phantom
Battle objects
Weapon Skin icons

Galactic Blade

Galactic Dual Slinger

Galactic Triple Troll
Gleaming Blade
Gleaming Boom-Brella
Gleaming Bowzooka

Gleaming Discruptor
Gleaming Dual Slinger
Gleaming Kaboomer
Gleaming Sharpshooter
Gleaming Triple Troll
Megabug Blade
Megabug Boom-Brella
Megabug Bowzooka

Megabug Discruptor
Megabug Dual Slinger
Megabug Kaboomer
Megabug Sharpshooter
Megabug Triple-Troll
Sassy Blade
Sassy Boom-Brella
Sassy Bowzooka
Sassy Discruptor
Sassy Dual Slinger
Sassy Kaboomer
Sassy SharpShooter
Sassy Triple Troll
Steampunk Blade

Steampunk Boom-Brella
Steampunk Bowzooka

Steampunk Discruptor
Steampunk Dual Slinger

Steampunk Kaboomer
Steampunk Sharpshooter
Steampunk Triple-Troll
Speedway Blade

Speedway Boom-Brella
Speedway Bowzooka
Speedway Discruptor
Speedway Dual Slinger
Speedway Kaboomer
Speedway Sharpshooter
Speedway Triple-Troll
The Gleaming Dukes
The Megabug Dukes

The Sassy Dukes
The Speedway Dukes
The Steampunk Dukes
The Vintage Dukes
The Wildwood Dukes

Vintage Blade

Vintage Boom-Brella
Vintage Bowzooka
Vintage Dual Slinger

Vintage Discruptor

Vintage Kaboomer
Vintage Sharpshooter

Vintage Triple-Troll

Wildwood Blade
Wildwood Boom-Brella
Wildwood Bowzooka
Wildwood Discruptor
Wildwood Dual Slinger
Wildwood Kaboomer
Wildwood Sharpshooter

Wildwood Triple-Troll


World icons

Prologue (Peach's Castle/Darkmess Manta)

Object icons

Planet Coin (Beacon Beach)

Planet Coin (Pristine Peaks)

Planet Coin (Palette Prime)

Planet Coin (Terra Flora)

Planet Coin (Barrendale Mesa)

Planet Coin (Melodic Gardens)

Planet Coin (Space Opera Network)

Teleport Flag (Beacon Beach)

Teleport Flag (Pristine Peaks)

Teleport Flag (Palette Prime)

Teleport Flag (Terra Flora)

Teleport Flag (Barrendale Mesa)


Item icons

Super Effect icons

Burn resistance

Burn weakness

Frostbite resistance

Frostbite weakness

Gust resistance

Gust weakness

Ooze weakness

Ooze weakness

Shock resistance

Shock weakness

Splash resistance

Splash weakness
Battle icons

Flippable attribute

HP Recovered

+Max HP

Star Bits

Undashable attribute

Quest icons

Giant Enemy Quest

Locked Quest

Hidden Quest

Main Quest

New Side Quest

Quest

Spark Quest
Skill Tree icons
Health

Extra Health

HP Chill Out

Health Sponge
Spark

Spark Gift

Spark Guard

Spark Refresher

Spark Energy
Miscellaneous icons

Beep-0 Tacticam

"Defeat All" objective

Enemy icon

Gather 'Round/Whoopsgottago

Rabbid Mario's overalls

"Reach Area" objective

"Reach Area" goal

Reflect/Fortify

Shop icon

Unseen
Models
Playable characters

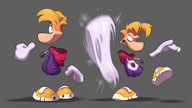
Rabbid Mario (naked)


Supporting characters


Creatures
Boar


Enemies


Bosses


Objects
Flamingo floatie

Luma hologram
Rabbid Mario's overalls


Box art
American cover
Canadian cover
North American cover (Cosmic Edition)
North American cover (Gold Edition)
European cover (Cosmic Edition)
European cover (Gold Edition)
South African cover (Cosmic Edition)
South African cover (Gold Edition)
Saudi Arabian cover
Saudi Arabian cover (Cosmic Edition)
Saudi Arabian cover (Gold Edition)
Japanese cover
Korean cover (Cosmic Edition)
Korean cover (with English logo)
Korean cover (Gold Edition)
Generic English cover
Generic English cover (Gold Edition)

Mario + Rabbids Sparks of Hope Battle Nintendo Switch bundle box art with neon blue and red Joy-Con, distributed by Active Gulf (backside render)
Mario + Rabbids Sparks of Hope Battle Nintendo Switch bundle box art with neon blue and red Joy-Con, distributed by Active Gulf (frontside render)


.jpg)
.jpg)


Pre-release box art
Pre-release French box art
Pre-release French Gold Edition box art
Pre-release French Cosmic Edition box art


Miscellaneous
Commemorative coin given to Ubisoft employees

Play Nintendo


My Nintendo wallpapers
Cover art (desktop)
Cover art (smartphone)
Cursa (desktop)
Cursa (smartphone)


Merchandise
Rabbid Mario figure
Rabbid Peach figure
Artbook
Lithographs
Sticker sheet
Phone ring holder
Starburst plush
Keychain
Keychain
Keychain


| Mario + Rabbids Sparks of Hope | ||
|---|---|---|
| Protagonists | Heroes | Beep-0 • Bowser • Edge • JEANIE • Luigi • Mario • Peach • Rabbid Luigi • Rabbid Mario • Rabbid Peach • Rabbid Rosalina • Rayman* |
| Sparks | Aquadash • Aquanox • Aquaquake • Berserk* • Cryobolide • Cryodash* • Cryogeddon • Cryoquake* • Decibel • Drizzle • Electrodash • Electroid • Electrogeddon • Electroquake* • Ethering • Exosphere • Gargantu-fan • Glitter • Mayhem* • Movie Director* • Oozer Master • Pulser • Pyrogeddon • Pyrostar • Quiz Host* • Reflector • Regenesis • Scoper Master • Screech • Selfie* • Squashette Master • Starburst • Toxicomet • Toxiquake • Twinkle • Vampastra • Vampdash • Vampgeddon* • Wildclaw Master • Zephyrdash • Zephyrquake • Zephystar | |
| Antagonists | Cursa • Darkmess Manta • Phantom* • Spark Hunters (Bedrock, Daphne, Kanya*, Midnite) | |
| Supporting/minor characters | Alkementor • Allegra* • Augie • Bea • Bloopers • Captain Orion • Chain Chomps • Cheep Cheeps • Coin Coffers • Conkdors • Crowber • Da Da • DJ Cheep Tuna • Dorrie* • Dragoneel • Dr. Vent • Dryad • Genius Girl • Gerspard • Hinky • Lumas • Madame Bwahstrella • Megabug (MegaDragonBowser) • Melospheres* • Momma • Penguins • Pokey • Professor Backpack • Rabbid Kong • Rabbid Mechakoopas • Rabbids • Rosalina • SALESBOT 9.99+TX • Sillyfishes • Sparks • Spawny* • Sullivan • Sweetlopek • Telesio • The Fork • Toads • Toadette • Victor • Woodrow | |
| Enemies and obstacles | Bob-omb • Darkmess Eye • Darkmess portal • Darkmess Puddle • Depleter • Flamin' Golem* • Fieldbreaker* • Ghostly Walker • Goomba (Armored) • Magikoopa • Medician • Oozer • Scoper (Lone Wolf, Bravado*) • Spellraiser • Squasher (Squashette) • Stone Mask • Stooge (Flamin', Sea) • Shockin' Golem* • Tidal Golem* • Wildclaw (Deep Freeze, Magnafowl, Riptide) | |
| Bosses | Giant Wildclaw • Giant Goomba • Midnite • Giant Squashette • Bedrock • Giant Depleter • Wiggler • Giant Magikoopa • Daphne • Giant Magnafowl • Darkmess Bowser (Darkmess Rabbid Mechakoopa) • Darkmess Edge • Cursa • Proto Mecha King Bob-omb* • Mecha King Bob-omb* • Kraken* • Giant Flamin' Stooge* • Phantom* | |
| Items and objects | Blue Coin • Blue Key ring* • Boat* • Cleansing Elixir • Coin (Stack) • Cooldown Clock • Darkmess Egg • Green Coin • Green Ring • Immunity Charm • Jump Panel • Move Boost • Multi Dash • P Switch • Planet Coin • Planet Key • POW Block • Purified Darkmess Energy Crystal • Red Coin • Red Ring • Ring* • Star Bit • Star Potion • Super Mushroom • Super Mushroom Bag • Super Mushroom Chest • Super Mushroom Chest DX • Teleport Flag • Treasure Chest • Warp Pipe • Wiggler Train • WM ARC | |
| Weapons | Blaster* • Boom-Brella • Bowzooka • Discruptor • Dual Slinger • Flying Blade • Kaboomer • Sharpshooter • The Dukes • Triple-Troll | |
| Movement abilities | Dash • Punch* • Glide • Stomp • Team Jump | |
| Techniques | Counter Blow • Ennui • Exhaust • Heal • Hero Sight • Plunger Guard* • Rabbid Mechakoopas • Steely Stare • Stormblade • Team Barrier | |
| Super Effects | Burn • Empowered • Invisible • DEF-Up • Shock • Frostbite • Gust • Ooze • Sleep • Splash • Vamp • Exhaust | |
| Spark abilities | Powers | Burn Attack • Fortify • Frenzy* • Frostbite Attack • Frostbite Dash* • Gather 'Round • Gust Attack • Gust Dash • Hypnotize* • Kong Cameo • Ooze Attack • Reflect • Regen • Revive • Self-Service* • Shock Attack • Shock Dash • Shockwave Frostbite* • Shockwave Gust • Shockwave Ooze • Shockwave Shock* • Shockwave Splash • Skyrain Burn • Skyrain Frostbite* • Skyrain Lifesteal* • Skyrain Shock • Splash Attack • Splash Dash • Summon Oozer • Summon Scoper • Summon Squashette • Summon Wildclaw • Turbocharge • Unseen • Vamp Attack • Vamp Dash • Whoopsgottago |
| Bonuses | Athlete • Attack Master • Burn Protector • Critical Buddy • Frostbite Protector • Gust Protector • Healing Amplifier • Healing Booster • Ooze Protector • Physical Protector • Shock Protector • Splash Protector | |
| Beep-0 Powers | Scan Power • Wave Power | |
| Planets and locations | Mushroom Kingdom | Peach's Castle • Darkmess Manta |
| Beacon Beach | Beacon Town • Lighthouse • Sunrise Temple • Beacon Beach Secret Zone | |
| Pristine Peaks | Winter Palace • Pristine Peaks Secret Zone | |
| Palette Prime | Paletteville • Spellbound Woods • Abandoned Well • Palette Prime Secret Zone | |
| Terra Flora | Everbloom Tree • Mt. Spout • Terra Flora Secret Zone | |
| Barrendale Mesa | Momma's Garage • Windmill • Barrendale Mesa Secret Zone | |
| Cursa's stronghold | Comet Observatory | |
| Melodic Gardens* | Music Jungle* • Concert Pond* • Swamp* • Flooded Ruins* | |
| Space Opera Network* | Network Reception* • Main TV Studio* • Backing Studio* • Western Set* • Pirate Set* • Medieval Set* | |
| Other | Darkmess Dimension | |
| Miscellaneous | Bestiary • Darkmess • Gallery • Glitches • Level up progressions • Small birds • Memories • Quests • Quotes • Rayman in the Phantom Show* • Secret Zone • Skill Prism • "Phantom Returns"* • Probes • Skill Trees • Spark statistics • Soundtrack (DLC) • Tacticam • The Last Spark Hunter* • The Tower of Doooom* • Staff • Weapon Skins | |