Yoshi Tour (2021): Difference between revisions
No edit summary |
m (Text replacement - "([Cc])olor-link" to "$1olor link") |
||
| (31 intermediate revisions by 17 users not shown) | |||
| Line 1: | Line 1: | ||
{{ | {{tour infobox | ||
|image=[[File:MKT Yoshi Tour 2021.png|200px]] | |image=[[File:MKT Yoshi Tour 2021.png|200px]] | ||
|start=March 23, 2021<br>11:00 p.m. (PT) | |start=March 23, 2021<br>11:00 p.m. (PT) | ||
| Line 7: | Line 5: | ||
|cups=12 | |cups=12 | ||
|rank=[[Yoshi Cup]] (week 1)<br>[[Waluigi Cup]] (week 2) | |rank=[[Yoshi Cup]] (week 1)<br>[[Waluigi Cup]] (week 2) | ||
|coin=[[ | |coin=[[N64 Royal Raceway]] | ||
|before=[[Mario Tour|<<]] | |before=[[Mario Tour (2021)|<<]] | ||
|after=[[Ninja Tour|>>]] | |after=[[Ninja Tour (2021)|>>]] | ||
}} | }} | ||
The '''Yoshi Tour''' was the fortieth tour of ''[[Mario Kart Tour]]'', which began on March 24, 2021 and ended on April 6, 2021. | The '''Yoshi Tour''' was the fortieth tour of ''[[Mario Kart Tour]]'', which began on March 24, 2021 and ended on April 6, 2021. Like the [[Yoshi Tour (2020)|Yoshi Tour in 2020]], this tour was set around {{wp|Easter}}. [[Yoshi (species)|Blue Yoshi]], [[Yoshi (species)|White Yoshi]], and [[Birdo|Birdo (Black)]] were added as new drivers in this tour, while [[Yoshi|Yoshi (Egg Hunt)]] returned as one of the spotlight drivers in the first week. The tour also introduced a new bonus challenge, [[Snap a Photo]]. The [[Lakitu]] referee wore a spring-themed outfit during this tour. This tour's [[Coin Rush (Mario Kart Tour)|Coin Rush]] course was N64 Royal Raceway, which was reused from the [[Peach Tour]]. The menu's background featured the lighthouse from Yoshi Circuit as the landmark of this tour. | ||
This was the first tour since the [[Mario vs. Luigi Tour (2020)|2020 Mario vs. Luigi Tour]] nine tours prior to not introduce a new course to the game, though this tour introduced the R/T variants of [[SNES Donut Plains 2]] and [[N64 Royal Raceway]]. | |||
==Spotlights== | ==Spotlights== | ||
{| align=center width= | {|align=center width=90% cellspacing=0 border=1 cellpadding=3 style="border-collapse:collapse; font-family:Arial;text-align:center" | ||
|-style="background: #89A" | |-style="background: #89A" | ||
|colspan=3|'''Yoshi Pipe 1'''<br>March 23, 2021, 11:00 p.m. (PT) – <br>April 6, 2021, 10:59 p.m. (PT) | |colspan=3|'''Yoshi Pipe 1'''<br>March 23, 2021, 11:00 p.m. (PT) – <br>April 6, 2021, 10:59 p.m. (PT) | ||
|colspan= | |colspan=4|'''Yoshi Pipe 2'''<br>March 30, 2021, 11:00 p.m. (PT) – <br>April 6, 2021, 10:59 p.m. (PT) | ||
|- | |- | ||
|colspan=3|[[File:MKT Tour40 YoshiPipe1.png|x150px]] | |colspan=3|[[File:MKT Tour40 YoshiPipe1.png|x150px]] | ||
|colspan= | |colspan=4|[[File:MKT Tour40 YoshiPipe2.png|x150px]] | ||
|-style="background: #ABC" | |-style="background: #ABC" | ||
! style="width: 15%;"|Drivers | !style="width: 15%;"|Drivers | ||
! style="width: 15%;"|Karts | !style="width: 15%;"|Karts | ||
! style="width: 15%;"|Glider | !style="width: 15%;"|Glider | ||
! style="width: | !style="width: 7.5%;"|High-End Spotlight Driver | ||
! style="width: | !style="width: 15%;"|Super Spotlight Drivers | ||
!style="width: 7.5%;"|High-End Spotlight Kart | |||
!style="width: 15%;"|Super Spotlight Karts | |||
|- | |- | ||
|[[File:MKT Artwork YoshiEggHunt.png|100x100px]][[File:MKT Artwork WhiteYoshi.png|100x100px]] | |[[File:MKT Artwork YoshiEggHunt.png|100x100px]][[File:MKT Artwork WhiteYoshi.png|100x100px]] | ||
|[[File:MKT Icon BrightBunny.png|90x90px]][[File:MKT Icon WhiteTurboYoshi.png|90x90px]] | |[[File:MKT Icon BrightBunny.png|90x90px]][[File:MKT Icon WhiteTurboYoshi.png|90x90px]] | ||
|[[File:MKT Icon BrightGlider.png|85x85px]] | |[[File:MKT Icon BrightGlider.png|85x85px]] | ||
|[[File: | |[[File:MKT Artwork BirdoBlack.png|100x100px]] | ||
|[[File:MKT Icon | |[[File:MP9 Birdo Main Artwork.png|100x100px]][[File:MKT Artwork BirdoYellow.png|100x100px]][[File:MKT Artwork BirdoLightBlue.png|100x100px]] | ||
|[[File:MKT Icon BlackTurboBirdo.png|100x100px]] | |||
|[[File:MKT Icon TurboBirdo.png|100x100px]][[File:MKT Icon LightblueTurboBirdo.png|100x100px]][[File:MKT Icon YellowTurboBirdo.png|100x100px]] | |||
|- | |- | ||
|[[Yoshi|Yoshi (Egg Hunt)]] and [[Yoshi (species)|White Yoshi]] | |[[Yoshi|Yoshi (Egg Hunt)]] and [[Yoshi (species)|White Yoshi]] | ||
|[[Bright Bunny]] and [[White Turbo Yoshi]] | |[[Bright Bunny]] and [[White Turbo Yoshi]] | ||
|[[Bright Glider]] | |[[Bright Glider]] | ||
|[[Birdo]] | |[[Birdo|Birdo (Black)]] | ||
|[[Turbo Birdo]] | |[[Birdo]], [[Birdo|Birdo (Yellow)]] and [[Birdo|Birdo (Light Blue)]] | ||
|[[Black Turbo Birdo]] | |||
|[[Turbo Birdo]], [[Light-blue Turbo Birdo]], and [[Yellow Turbo Birdo]] | |||
|} | |} | ||
==Special pipe== | ==Special pipe== | ||
{| align=center width=65% cellspacing=0 border=1 cellpadding=3 style="border-collapse:collapse; font-family:Arial; text-align:center" | {|align=center width=65% cellspacing=0 border=1 cellpadding=3 style="border-collapse:collapse; font-family:Arial;text-align:center" | ||
|-style="background: #89A" | |-style="background: #89A" | ||
|colspan=3|'''Banana Pipe'''<br>March 27, 2021, 11:00 p.m. (PT) – <br>April 1, 2021, 10:59 p.m. (PT) | |colspan=3|'''Banana Pipe'''<br>March 27, 2021, 11:00 p.m. (PT) – <br>April 1, 2021, 10:59 p.m. (PT) | ||
| Line 50: | Line 53: | ||
|colspan=3|[[File:MKT Tour40 BananaPipe.png|x150px]] | |colspan=3|[[File:MKT Tour40 BananaPipe.png|x150px]] | ||
|-style="background: #ABC" | |-style="background: #ABC" | ||
! style="width: 50%;"|Drivers | !style="width: 50%;"|Drivers | ||
! style="width: 50%;"|Gliders | !style="width: 50%;"|Gliders | ||
|- | |- | ||
|[[File:MKT Artwork MarioSunshine.png|90x90px]][[File:Dixie Kong - Donkey Kong Country Tropical Freeze.png|90x90px]][[File:Funky Kong Artwork - Donkey Kong Country Tropical Freeze.png|100x100px]][[File:MKT Artwork DonkeyKongJrSNES.png|100x100px]] | |[[File:MKT Artwork MarioSunshine.png|90x90px]][[File:Dixie Kong - Donkey Kong Country Tropical Freeze.png|90x90px]][[File:Funky Kong Artwork - Donkey Kong Country Tropical Freeze.png|100x100px]][[File:MKT Artwork DonkeyKongJrSNES.png|100x100px]] | ||
| Line 59: | Line 62: | ||
|[[Sunset Balloons]], [[Banana Wingtip]], [[Great Sail]], and [[Tropical Glider]] | |[[Sunset Balloons]], [[Banana Wingtip]], [[Great Sail]], and [[Tropical Glider]] | ||
|} | |} | ||
;Names in other languages | ;Names in other languages | ||
{{foreign names | {{foreign names | ||
| Line 72: | Line 72: | ||
==Cups== | ==Cups== | ||
{| align=center width=90% cellspacing=0 border=1 cellpadding=3 style="border-collapse:collapse; font-family:Arial; text-align:center" | {|align=center width=90% cellspacing=0 border=1 cellpadding=3 style="border-collapse:collapse; font-family:Arial;text-align:center" | ||
{{ | {{MKT cup table row | ||
|C=Yoshi||Ra=1 | |C=Yoshi||Ra=1 | ||
|R1=[[ | |R1=[[GCN Yoshi Circuit]]||R1.I=YoshiCircuitGCN YoshiEggHunt||R1.1=1,000||R1.2=1,500||R1.3=2,000||R1.4=2,600||R1.5=5,100 | ||
|R2=[[Choco Mountain|N64 Choco Mountain T]]||R2.I=ChocoMountainTN64 Nabbit||R2.1=2,000||R2.2=3,000||R2.3=4,000||R2.4=5,100||R2.5=10,100 | |R2=[[N64 Choco Mountain|N64 Choco Mountain T]]||R2.I=ChocoMountainTN64 Nabbit||R2.1=2,000||R2.2=3,000||R2.3=4,000||R2.4=5,100||R2.5=10,100 | ||
|R3=[[Royal Raceway|N64 Royal Raceway R/T]]||R3.I=RoyalRacewayRTN64||R3.1=2,100||R3.2=3,100||R3.3=4,200||R3.4=5,200||R3.5=10,400 | |R3=[[N64 Royal Raceway|N64 Royal Raceway R/T]]||R3.I=RoyalRacewayRTN64 WhiteYoshi||R3.1=2,100||R3.2=3,100||R3.3=4,200||R3.4=5,200||R3.5=10,400 | ||
|CN=Ring Race||C.I=Tour40 YoshiCupChallenge||CC=Toad (Pit Crew)||CT=[[ | |CN=[[Ring Race]]||C.I=Tour40 YoshiCupChallenge||CC=[[Toad|Toad (Pit Crew)]]||CT=[[SNES Donut Plains 2]]||C.1=12||C.2=20||C.3=28 | ||
}} | }} | ||
{{ | {{MKT cup table row | ||
|C=Daisy||Ra= | |C=Daisy||Ra= | ||
|R1=[[ | |R1=[[3DS Toad Circuit]]||R1.I=ToadCircuit3DS Daisy||R1.1=1,000||R1.2=1,500||R1.3=2,000||R1.4=2,500||R1.5=4,800 | ||
|R2=[[Tokyo Blur | |R2=[[Tour Tokyo Blur|Tokyo Blur 4R]]||R2.I=TokyoBlur4R BirdoBlack||R2.1=1,500||R2.2=2,300||R2.3=3,000||R2.4=3,800||R2.5=7,300 | ||
|R3=[[RMX Rainbow Road 1]]||R3.I=RMXRainbowRoad1 CatPeach||R3.1=1,900||R3.2=2,900||R3.3=3,900||R3.4=4,800||R3.5=9,300 | |R3=[[RMX Rainbow Road 1]]||R3.I=RMXRainbowRoad1 CatPeach||R3.1=1,900||R3.2=2,900||R3.3=3,900||R3.4=4,800||R3.5=9,300 | ||
|CN=Snap a Photo||C.I=Tour40 DaisyCupChallenge||CC=Yoshi (Egg Hunt)||CT=GCN Yoshi Circuit T||C.1=1||C.2=2||C.3=3 | |CN=[[Snap a Photo]]||C.I=Tour40 DaisyCupChallenge||CC=[[Yoshi|Yoshi (Egg Hunt)]]||CT=GCN Yoshi Circuit T||C.1=1||C.2=2||C.3=3 | ||
}} | }} | ||
{{ | {{MKT cup table row | ||
|C=Waluigi||Ra=2 | |C=Waluigi||Ra=2 | ||
|R1=SNES Donut Plains 2R/T||R1.I=DonutPlains2RTSNES||R1.1=2,000||R1.2=3,300||R1.3=4,400||R1.4=5,500||R1.5=10,200 | |R1=SNES Donut Plains 2R/T||R1.I=DonutPlains2RTSNES BirdoBlack||R1.1=2,000||R1.2=3,300||R1.3=4,400||R1.4=5,500||R1.5=10,200 | ||
|R2=[[ | |R2=[[GBA Sunset Wilds]]||R2.I=SunsetWildsGBA YoshiEggHunt||R2.1=1,300||R2.2=2,000||R2.3=2,800||R2.4=3,500||R2.5=6,400 | ||
|R3=[[Waluigi Pinball | |R3=[[DS Waluigi Pinball|DS Waluigi Pinball T]]||R3.I=WaluigiPinballTDS Waluigi||R3.1=1,600||R3.2=2,500||R3.3=3,400||R3.4=4,300||R3.5=7,900 | ||
|CN=Time Trial||C.I=Tour40 WaluigiCupChallenge||CC=Toadette||CT=Tokyo Blur 4R||C.1=1:08.00||C.2=1:03.00||C.3=0:58.00 | |CN=[[Time Trial (Mario Kart Tour)|Time Trial]]||C.I=Tour40 WaluigiCupChallenge||CC=[[Toadette]]||CT=Tokyo Blur 4R||C.1=1:08.00||C.2=1:03.00||C.3=0:58.00 | ||
}} | }} | ||
{{ | {{MKT cup table row | ||
|C=Baby Rosalina||Ra= | |C=Baby Rosalina||Ra= | ||
|R1=[[RMX Mario Circuit 1]]||R1.I=RMXMarioCircuit1 MetalMario||R1.1=1,400||R1.2=2,300||R1.3=3,200||R1.4=4,000||R1.5=7,100 | |R1=[[RMX Mario Circuit 1]]||R1.I=RMXMarioCircuit1 MetalMario||R1.1=1,400||R1.2=2,300||R1.3=3,200||R1.4=4,000||R1.5=7,100 | ||
|R2=GCN Yoshi Circuit R||R2.I=YoshiCircuitRGCN BabyRosalina||R2.1=1,300||R2.2=2,100||R2.3=2,900||R2.4=3,600||R2.5=6,500 | |R2=GCN Yoshi Circuit R||R2.I=YoshiCircuitRGCN BabyRosalina||R2.1=1,300||R2.2=2,100||R2.3=2,900||R2.4=3,600||R2.5=6,500 | ||
|R3=Tokyo Blur 4T||R3.I=TokyoBlur4T FunkyKong||R3.1=1,700||R3.2=2,900||R3.3=3,900||R3.4=4,900||R3.5=8,700 | |R3=Tokyo Blur 4T||R3.I=TokyoBlur4T FunkyKong||R3.1=1,700||R3.2=2,900||R3.3=3,900||R3.4=4,900||R3.5=8,700 | ||
|CN=Break Item Boxes||C.I=Tour12 MetalMarioCupChallenge||CC=Luigi||CT=3DS Toad Circuit||C.1=5||C.2=10||C.3=14 | |CN=[[Break Item Boxes]]||C.I=Tour12 MetalMarioCupChallenge||CC=[[Luigi]]||CT=3DS Toad Circuit||C.1=5||C.2=10||C.3=14 | ||
}} | }} | ||
{{ | {{MKT cup table row | ||
|C=Bowser||Ra= | |C=Bowser||Ra= | ||
|R1=DS Waluigi Pinball||R1.I=WaluigiPinballDS DonkeyKongJrSNES||R1.1=1,200||R1.2=2,000||R1.3=2,800||R1.4=3,500||R1.5=6,000 | |R1=DS Waluigi Pinball||R1.I=WaluigiPinballDS DonkeyKongJrSNES||R1.1=1,200||R1.2=2,000||R1.3=2,800||R1.4=3,500||R1.5=6,000 | ||
|R2=GBA Sunset Wilds T||R2.I=SunsetWildsTGBA BlackYoshi||R2.1=2,200||R2.2=3,700||R2.3=5,000||R2.4=6,300||R2.5=10,800 | |R2=GBA Sunset Wilds T||R2.I=SunsetWildsTGBA BlackYoshi||R2.1=2,200||R2.2=3,700||R2.3=5,000||R2.4=6,300||R2.5=10,800 | ||
|R3=[[Rainbow Road | |R3=[[3DS Rainbow Road|3DS Rainbow Road T]]||R3.I=RainbowRoadT3DS Bowser||R3.1=2,100||R3.2=3,500||R3.3=4,800||R3.4=6,000||R3.5=10,400 | ||
|CN=Steer Clear of Obstacles||C.I=Tour15 KingBooCupChallenge||CC=King Boo||CT=RMX Mario Circuit 1||C.1=1||C.2=2||C.3=3 | |CN=[[Steer Clear of Obstacles]]||C.I=Tour15 KingBooCupChallenge||CC=[[King Boo]]||CT=RMX Mario Circuit 1||C.1=1||C.2=2||C.3=3 | ||
}} | }} | ||
{{ | {{MKT cup table row | ||
|C=Bowser Jr.||Ra= | |C=Bowser Jr.||Ra= | ||
|R1=Tokyo Blur 4||R1.I=TokyoBlur4 Nabbit||R1.1=1,400||R1.2=2,400||R1.3=3,300||R1.4=4,100||R1.5=6,900 | |R1=Tokyo Blur 4||R1.I=TokyoBlur4 Nabbit||R1.1=1,400||R1.2=2,400||R1.3=3,300||R1.4=4,100||R1.5=6,900 | ||
|R2=[[Kalimari Desert|N64 Kalimari Desert R/T]]||R2.I=KalimariDesertRTN64||R2.1=1,600||R2.2=2,800||R2.3=3,800||R2.4=4,700||R2.5=7,900 | |R2=[[N64 Kalimari Desert|N64 Kalimari Desert R/T]]||R2.I=KalimariDesertRTN64 BowserJr||R2.1=1,600||R2.2=2,800||R2.3=3,800||R2.4=4,700||R2.5=7,900 | ||
|R3=RMX Rainbow Road 1R||R3.I=RMXRainbowRoad1R||R3.1=1,900||R3.2=3,300||R3.3=4,500||R3.4=5,700||R3.5=9,500 | |R3=RMX Rainbow Road 1R||R3.I=RMXRainbowRoad1R MetalMario||R3.1=1,900||R3.2=3,300||R3.3=4,500||R3.4=5,700||R3.5=9,500 | ||
|CN=Vs. Mega Metal Mario||C.I=Tour7 DryBowserCupChallenge||CC=Any character||CT=3DS Rainbow Road||C.1=50cc||C.2=100cc||C.3=150cc | |CN=[[Vs. Mega]] [[Metal Mario]]||C.I=Tour7 DryBowserCupChallenge||CC=Any character||CT=3DS Rainbow Road||C.1=50cc||C.2=100cc||C.3=150cc | ||
}} | }} | ||
{{ | {{MKT cup table row | ||
|C=Peachette||Ra= | |C=Peachette||Ra= | ||
|R1=3DS Toad Circuit R||R1.I=ToadCircuitR3DS WhiteYoshi||R1.1=1,200||R1.2=2,200||R1.3=3,000||R1.4=3,800||R1.5=6,100 | |R1=3DS Toad Circuit R||R1.I=ToadCircuitR3DS WhiteYoshi||R1.1=1,200||R1.2=2,200||R1.3=3,000||R1.4=3,800||R1.5=6,100 | ||
|R2=GCN Yoshi Circuit T||R2.I=YoshiCircuitTGCN Peachette||R2.1=1,400||R2.2=2,500||R2.3=3,400||R2.4=4,300||R2.5=7,000 | |R2=GCN Yoshi Circuit T||R2.I=YoshiCircuitTGCN Peachette||R2.1=1,400||R2.2=2,500||R2.3=3,400||R2.4=4,300||R2.5=7,000 | ||
|R3=GBA Sunset Wilds R||R3.I=SunsetWildsRGBA BirdoBlack||R3.1=1,500||R3.2=2,800||R3.3=3,800||R3.4=4,800||R3.5=7,700 | |R3=GBA Sunset Wilds R||R3.I=SunsetWildsRGBA BirdoBlack||R3.1=1,500||R3.2=2,800||R3.3=3,800||R3.4=4,800||R3.5=7,700 | ||
|CN=Time Trial||C.I=Tour8 BowserCupChallenge||CC=Dry Bones||CT=DS Waluigi Pinball||C.1=2:45.00||C.2=2:15.00||C.3=2:04.00 | |CN=Time Trial||C.I=Tour8 BowserCupChallenge||CC=[[Dry Bones]]||CT=DS Waluigi Pinball||C.1=2:45.00||C.2=2:15.00||C.3=2:04.00 | ||
}} | }} | ||
{{ | {{MKT cup table row | ||
|C=King Boo||Ra= | |C=King Boo||Ra= | ||
|R1=N64 Choco Mountain R||R1.I=ChocoMountainRN64 DonkeyKongJrSNES||R1.1=1,700||R1.2=3,100||R1.3=4,200||R1.4=5,300||R1.5=8,300 | |R1=N64 Choco Mountain R||R1.I=ChocoMountainRN64 DonkeyKongJrSNES||R1.1=1,700||R1.2=3,100||R1.3=4,200||R1.4=5,300||R1.5=8,300 | ||
|R2=[[ | |R2=[[DS Airship Fortress]]||R2.I=AirshipFortressDS KingBoo||R2.1=1,600||R2.2=3,000||R2.3=4,100||R2.4=5,200||R2.5=8,100 | ||
|R3=3DS Rainbow Road||R3.I=RainbowRoad3DS Birdo||R3.1=1,900||R3.2=3,500||R3.3=4,700||R3.4=6,000||R3.5=9,400 | |R3=3DS Rainbow Road||R3.I=RainbowRoad3DS Birdo||R3.1=1,900||R3.2=3,500||R3.3=4,700||R3.4=6,000||R3.5=9,400 | ||
|CN=Goomba Takedown||C.I=Tour26 PeachCupChallenge||CC=Waluigi||CT=RMX Rainbow Road 1||C.1=20||C.2=35||C.3=45 | |CN=[[Goomba Takedown]]||C.I=Tour26 PeachCupChallenge||CC=[[Waluigi]]||CT=RMX Rainbow Road 1||C.1=20||C.2=35||C.3=45 | ||
}} | }} | ||
{{ | {{MKT cup table row | ||
|C=Dry Bowser||Ra= | |C=Dry Bowser||Ra= | ||
|R1=3DS Rainbow Road R||R1.I=RainbowRoadR3DS IceMario||R1.1=2,000||R1.2=3,800||R1.3=5,200||R1.4=6,600||R1.5=10,000 | |R1=3DS Rainbow Road R||R1.I=RainbowRoadR3DS IceMario||R1.1=2,000||R1.2=3,800||R1.3=5,200||R1.4=6,600||R1.5=10,000 | ||
|R2=RMX Mario Circuit 1T||R2.I=RMXMarioCircuit1T DryBowser||R2.1=1,800||R2.2=3,400||R2.3=4,600||R2.4=5,900||R2.5=8,900 | |R2=RMX Mario Circuit 1T||R2.I=RMXMarioCircuit1T DryBowser||R2.1=1,800||R2.2=3,400||R2.3=4,600||R2.4=5,900||R2.5=8,900 | ||
|R3=SNES Donut Plains 2R/T||R3.I=DonutPlains2RTSNES BirdoYellow||R3.1=2,300||R3.2=4,400||R3.3=6,000||R3.4=7,700||R3.5=11,600 | |R3=SNES Donut Plains 2R/T||R3.I=DonutPlains2RTSNES BirdoYellow||R3.1=2,300||R3.2=4,400||R3.3=6,000||R3.4=7,700||R3.5=11,600 | ||
|CN=Combo Attack||C.I=Tour25 DryBonesCupChallenge||CC=Baby Peach||CT=N64 Royal Raceway T||C.1=10||C.2=15||C.3=21 | |CN=[[Combo Attack]]||C.I=Tour25 DryBonesCupChallenge||CC=[[Baby Peach]]||CT=N64 Royal Raceway T||C.1=10||C.2=15||C.3=21 | ||
}} | }} | ||
{{ | {{MKT cup table row | ||
|C=Luigi||Ra= | |C=Luigi||Ra= | ||
|R1=DS Waluigi Pinball R||R1.I=WaluigiPinballRDS Luigi||R1.1=1,500||R1.2=3,000||R1.3=4,100||R1.4=5,200||R1.5=7,600 | |R1=DS Waluigi Pinball R||R1.I=WaluigiPinballRDS Luigi||R1.1=1,500||R1.2=3,000||R1.3=4,100||R1.4=5,200||R1.5=7,600 | ||
|R2=3DS Toad Circuit T||R2.I=ToadCircuitT3DS Peachette||R2.1=1,800||R2.2=3,500||R2.3=4,800||R2.4=6,100||R2.5=8,900 | |R2=3DS Toad Circuit T||R2.I=ToadCircuitT3DS Peachette||R2.1=1,800||R2.2=3,500||R2.3=4,800||R2.4=6,100||R2.5=8,900 | ||
|R3=DS Airship Fortress R||R3.I=AirshipFortressRDS BirdoLightBlue||R3.1=1,700||R3.2=3,400||R3.3=4,600||R3.4=5,800||R3.5=8,600 | |R3=DS Airship Fortress R||R3.I=AirshipFortressRDS BirdoLightBlue||R3.1=1,700||R3.2=3,400||R3.3=4,600||R3.4=5,800||R3.5=8,600 | ||
|CN=Glider Challenge||C.I=Tour4 YoshiCupChallenge||CC=Yoshi||CT=GCN Yoshi Circuit||C.1=250||C.2=500||C.3=750 | |CN=[[Glider Challenge]]||C.I=Tour4 YoshiCupChallenge||CC=Yoshi||CT=GCN Yoshi Circuit||C.1=250||C.2=500||C.3=750 | ||
}} | }} | ||
{{ | {{MKT cup table row | ||
|C=Donkey Kong||Ra= | |C=Donkey Kong||Ra= | ||
|R1=RMX Mario Circuit 1R||R1.I=RMXMarioCircuit1R YoshiEggHunt||R1.1=1,500||R1.2=3,100||R1.3=4,200||R1.4=5,400||R1.5=7,700 | |R1=RMX Mario Circuit 1R||R1.I=RMXMarioCircuit1R YoshiEggHunt||R1.1=1,500||R1.2=3,100||R1.3=4,200||R1.4=5,400||R1.5=7,700 | ||
|R2=N64 Royal Raceway R/T||R2.I=RoyalRacewayRTN64||R2.1=2,400||R2.2=4,900||R2.3=6,700||R2.4=8,500||R2.5=12,200 | |R2=N64 Royal Raceway R/T||R2.I=RoyalRacewayRTN64 WhiteYoshi||R2.1=2,400||R2.2=4,900||R2.3=6,700||R2.4=8,500||R2.5=12,200 | ||
|R3=RMX Rainbow Road 1T||R3.I=RMXRainbowRoad1T DonkeyKong||R3.1=2,600||R3.2=5,200||R3.3=7,100||R3.4=9,000||R3.5=12,900 | |R3=RMX Rainbow Road 1T||R3.I=RMXRainbowRoad1T DonkeyKong||R3.1=2,600||R3.2=5,200||R3.3=7,100||R3.4=9,000||R3.5=12,900 | ||
|CN=Do Jump Boosts||C.I=Tour13 MarioCupChallenge||CC=Mario||CT=N64 Kalimari Desert||C.1=5||C.2=9||C.3=13 | |CN=[[Do Jump Boosts]]||C.I=Tour13 MarioCupChallenge||CC=[[Mario]]||CT=N64 Kalimari Desert||C.1=5||C.2=9||C.3=13 | ||
}} | }} | ||
{{ | {{MKT cup table row | ||
|C=Wendy||Ra= | |C=Wendy||Ra= | ||
|R1=DS Airship Fortress T||R1.I=AirshipFortressTDS KingBobomb||R1.1=3,200||R1.2=6,500||R1.3=9,000||R1.4=11,400||R1.5=15,900 | |R1=DS Airship Fortress T||R1.I=AirshipFortressTDS KingBobomb||R1.1=3,200||R1.2=6,500||R1.3=9,000||R1.4=11,400||R1.5=15,900 | ||
|R2=N64 Choco Mountain||R2.I=ChocoMountainN64 Wendy||R2.1=2,000||R2.2=4,100||R2.3=5,700||R2.4=7,300||R2.5=10,100 | |R2=N64 Choco Mountain||R2.I=ChocoMountainN64 Wendy||R2.1=2,000||R2.2=4,100||R2.3=5,700||R2.4=7,300||R2.5=10,100 | ||
|R3=N64 Kalimari Desert R/T||R3.I=KalimariDesertRTN64 BirdoYellow||R3.1=2,100||R3.2=4,300||R3.3=6,000||R3.4=7,600||R3.5=10,600 | |R3=N64 Kalimari Desert R/T||R3.I=KalimariDesertRTN64 BirdoYellow||R3.1=2,100||R3.2=4,300||R3.3=6,000||R3.4=7,600||R3.5=10,600 | ||
|CN=Big Reverse Race||C.I=Tour40 WendyCupChallenge||CC=Any character||CT=SNES Donut Plains 2||C.1=50cc||C.2=100cc||C.3=150cc | |CN=[[Big Reverse Race]]||C.I=Tour40 WendyCupChallenge||CC=Any character||CT=SNES Donut Plains 2||C.1=50cc||C.2=100cc||C.3=150cc | ||
}} | }} | ||
|} | |} | ||
===Signature kart sets=== | ===Signature kart sets=== | ||
Drivers with a corresponding cup were bumped one rank up in every course of their cup. | Drivers with a corresponding cup were bumped one rank up in every course of their cup. | ||
{| class="wikitable" style="text-align: center" width=50% | {|class="wikitable"style="text-align:center"width=50% | ||
!width=10%|Cup | !width=10%|Cup | ||
!width=30%|Driver | !width=30%|Driver | ||
| Line 176: | Line 173: | ||
|- | |- | ||
|Third course of every cup | |Third course of every cup | ||
|[[File:MKT Icon Birdo.png|50px|link=Birdo]][[File:MKT Icon BirdoLightBlue.png|50px|link=Birdo | |[[File:MKT Icon Birdo.png|50px|link=Birdo]][[File:MKT Icon BirdoLightBlue.png|50px|link=Birdo|Birdo (Light Blue)]][[File:MKT Icon BirdoYellow.png|50px|link=Birdo|Birdo (Yellow)]][[File:MKT Icon BirdoBlack.png|50px|link=Birdo|Birdo (Black)]] | ||
|[[File:MKT Icon TurboBirdo.png|50px|link=Turbo Birdo]][[File:MKT Icon LightblueTurboBirdo.png|50px|link=Light-blue Turbo Birdo]][[File:MKT Icon YellowTurboBirdo.png|50px|link=Yellow Turbo Birdo]][[File:MKT Icon BlackTurboBirdo.png|50px|link=Black Turbo Birdo]] | |[[File:MKT Icon TurboBirdo.png|50px|link=Turbo Birdo]][[File:MKT Icon LightblueTurboBirdo.png|50px|link=Light-blue Turbo Birdo]][[File:MKT Icon YellowTurboBirdo.png|50px|link=Yellow Turbo Birdo]][[File:MKT Icon BlackTurboBirdo.png|50px|link=Black Turbo Birdo]] | ||
|— | |— | ||
| Line 243: | Line 240: | ||
==Rewards== | ==Rewards== | ||
Gold cells indicate rewards that are exclusive to Gold Pass members. | Gold cells indicate rewards that are exclusive to Gold Pass members. | ||
{|class="wikitable" style="margin:auto; text-align:center" | {|class="wikitable"style="margin:auto;text-align:center" | ||
|- | |- | ||
![[File:MKT Icon GrandStar.png|20x20px]] 15 | ![[File:MKT Icon GrandStar.png|20x20px]] 15 | ||
| Line 273: | Line 270: | ||
|style=background:silver|[[Red Kiddie Kart]] | |style=background:silver|[[Red Kiddie Kart]] | ||
|style=background:gold|[[Yoshi (species)|Red Yoshi]] | |style=background:gold|[[Yoshi (species)|Red Yoshi]] | ||
|style=background:silver|[[ | |style=background:silver|[[Ludwig]] | ||
|style=background:gold|[[Turbo Yoshi]] | |style=background:gold|[[Turbo Yoshi]] | ||
|style=background:silver|[[BaNaNa Parafoil]] | |style=background:silver|[[BaNaNa Parafoil]] | ||
| Line 282: | Line 279: | ||
|} | |} | ||
<br> | <br> | ||
{|class="wikitable" style="margin:auto; text-align:center" | {|class="wikitable"style="margin:auto;text-align:center" | ||
|- | |- | ||
!Grand Stars!![[File:MKT Icon GrandStar.png|20x20px]]!!15!!30!!45!!60!!70!!80!!100!!120!!130!!140!!150!!160!!170!!180!!190!!200!!205!!210!!215!!220!!225!!230!!235!!240!!245!!250!!255!!Total!!Grand total | !Grand Stars!![[File:MKT Icon GrandStar.png|20x20px]]!!15!!30!!45!!60!!70!!80!!100!!120!!130!!140!!150!!160!!170!!180!!190!!200!!205!!210!!215!!220!!225!!230!!235!!240!!245!!250!!255!!Total!!Grand total | ||
| Line 347: | Line 344: | ||
===1.5 Year Anniv. Log-In Bonus=== | ===1.5 Year Anniv. Log-In Bonus=== | ||
To commemorate the 1.5-year anniversary since the official global launch of ''Mario Kart Tour'', a 14-day "1.5 Year Anniv. Log-In Bonus" served as the log-in bonus of this tour. | To commemorate the 1.5-year anniversary since the official global launch of ''Mario Kart Tour'', a 14-day "1.5 Year Anniv. Log-In Bonus" served as the log-in bonus of this tour. | ||
{|class="wikitable" style="margin:auto; text-align:center" width=25% | {|class="wikitable"style="margin:auto;text-align:center"width=25% | ||
|- | |- | ||
!Day | !Day | ||
| Line 400: | Line 397: | ||
MKT Artwork BlueYoshi.png|[[Yoshi (species)|Blue Yoshi]] | MKT Artwork BlueYoshi.png|[[Yoshi (species)|Blue Yoshi]] | ||
MKT Artwork WhiteYoshi.png|[[Yoshi (species)|White Yoshi]] | MKT Artwork WhiteYoshi.png|[[Yoshi (species)|White Yoshi]] | ||
MKT Artwork BirdoBlack.png|[[Birdo | MKT Artwork BirdoBlack.png|[[Birdo|Birdo (Black)]] | ||
</gallery> | </gallery> | ||
| Line 416: | Line 413: | ||
===Courses=== | ===Courses=== | ||
<gallery> | <gallery heights=50px> | ||
MKT Icon | MKT Icon Donut Plains 2RT.png|[[SNES Donut Plains 2]] (R/T) | ||
MKT Icon | MKT Icon Royal Raceway RT.png|[[N64 Royal Raceway]] (R/T) | ||
</gallery> | </gallery> | ||
| Line 427: | Line 424: | ||
==Paid banners== | ==Paid banners== | ||
{| align=center width=960px cellspacing=0 border=1 cellpadding=3 style="border-collapse:collapse; font-family:Arial; text-align:center" | {|align=center width=960px cellspacing=0 border=1 cellpadding=3 style="border-collapse:collapse; font-family:Arial;text-align:center" | ||
|-style="background: #ABC" | |-style="background: #ABC" | ||
!Name | !Name | ||
| Line 477: | Line 474: | ||
==Challenges== | ==Challenges== | ||
{{ | {{MKT challenge table | ||
|TCR1=[[File:MKT Icon QuickTicket.png|70px]] [[Quick ticket]] ×1 | |TCR1=[[File:MKT Icon QuickTicket.png|70px]] [[Quick ticket]] ×1 | ||
|T1.1=061 | |T1.1=061 | ||
| Line 483: | Line 480: | ||
|T1.1S=1 | |T1.1S=1 | ||
|T1.2=041 | |T1.2=041 | ||
|T1.2E=Land 5 hits with {{Color | |T1.2E=Land 5 hits with {{Color link|#A1A1FF|Red Shell|Red Shells}}. | ||
|T1.2S=1 | |T1.2S=1 | ||
|T1.3=119-1 | |T1.3=119-1 | ||
|T1.3E=Do 50 {{Color | |T1.3E=Do 50 {{Color link|#A1A1FF|Mini-Turbo}} boosts. | ||
|T1.3S=1 | |T1.3S=1 | ||
|T1.4=012 | |T1.4=012 | ||
| Line 501: | Line 498: | ||
|T1.7S=2 | |T1.7S=2 | ||
|T1.8=184 | |T1.8=184 | ||
|T1.8E=Earn a total score of 15,000 or higher in the {{Color | |T1.8E=Earn a total score of 15,000 or higher in the {{Color link|#A1A1FF|Yoshi Cup}}. | ||
|T1.8S=2 | |T1.8S=2 | ||
|T1.9=027 | |T1.9=027 | ||
|T1.9E=Use {{Color | |T1.9E=Use {{Color link|#A1A1FF|point-boost ticket|point-boost tickets}} 3 times. | ||
|T1.9S=2 | |T1.9S=2 | ||
|TCR2=[[File:MKT Icon CoinRushTicket.png|70px]] [[Coin Rush ticket]] ×1 | |TCR2=[[File:MKT Icon CoinRushTicket.png|70px]] [[Coin Rush ticket]] ×1 | ||
|T2.1=115 | |T2.1=115 | ||
|T2.1E=Do 5 {{Color | |T2.1E=Do 5 {{Color link|#A1A1FF|Rocket Start|Rocket Starts}}. | ||
|T2.1S=1 | |T2.1S=1 | ||
|T2.2=018 | |T2.2=018 | ||
|T2.2E=Land 3 hits with {{Color | |T2.2E=Land 3 hits with {{Color link|#A1A1FF|Green Shell|Green Shells}}. | ||
|T2.2S=1 | |T2.2S=1 | ||
|T2.3=004 | |T2.3=004 | ||
|T2.3E=Land 3 hits with {{Color | |T2.3E=Land 3 hits with {{Color link|#A1A1FF|Bob-omb|Bob-ombs}}. | ||
|T2.3S=1 | |T2.3S=1 | ||
|T2.4=074 | |T2.4=074 | ||
|T2.4E=Send Greeting {{Color | |T2.4E=Send Greeting {{Color link|#A1A1FF|Coin|Coins}} to a friend. | ||
|T2.4S=2 | |T2.4S=2 | ||
|T2.5=158 | |T2.5=158 | ||
|T2.5E=Do 10 {{Color | |T2.5E=Do 10 {{Color link|#A1A1FF|Mini-Turbo}} boosts in a single race using a driver with a ribbon. | ||
|T2.5S=2 | |T2.5S=2 | ||
|T2.6=101 | |T2.6=101 | ||
| Line 529: | Line 526: | ||
|T2.7S=2 | |T2.7S=2 | ||
|T2.8=182 | |T2.8=182 | ||
|T2.8E=Earn a total score of 20,000 or higher in the {{Color | |T2.8E=Earn a total score of 20,000 or higher in the {{Color link|#A1A1FF|Waluigi Cup}}. | ||
|T2.8S=2 | |T2.8S=2 | ||
|T2.9=247 | |T2.9=247 | ||
| Line 539: | Line 536: | ||
|G.1S=1 | |G.1S=1 | ||
|G.2=086 | |G.2=086 | ||
|G.2E=Land 15 hits with {{Color | |G.2E=Land 15 hits with {{Color link|#A1A1FF|Banana|Bananas}}. | ||
|G.2S=1 | |G.2S=1 | ||
|G.3=021 | |G.3=021 | ||
|G.3E=Activate {{Color | |G.3E=Activate {{Color link|#A1A1FF|Frenzy}} mode 5 times. | ||
|G.3S=1 | |G.3S=1 | ||
|G.4=057 | |G.4=057 | ||
|G.4E=Use a {{Color | |G.4E=Use a {{Color link|#A1A1FF|level-boost ticket}}. | ||
|G.4S=2 | |G.4S=2 | ||
|G.5=247 | |G.5=247 | ||
|G.5E=Land 3 hits with {{Color | |G.5E=Land 3 hits with {{Color link|#A1A1FF|Yoshi's Egg}}. | ||
|G.5S=2 | |G.5S=2 | ||
|G.6=133 | |G.6=133 | ||
|G.6E=Do 50 {{Color | |G.6E=Do 50 {{Color link|#A1A1FF|Trick|Jump Boosts}} on an RMX course. | ||
|G.6S=2 | |G.6S=2 | ||
|G.7=216 | |G.7=216 | ||
| Line 557: | Line 554: | ||
|G.7S=2 | |G.7S=2 | ||
|G.8=159 | |G.8=159 | ||
|G.8E=Earn a total score of 25,000 or higher in the {{Color | |G.8E=Earn a total score of 25,000 or higher in the {{Color link|#A1A1FF|Daisy Cup}}. | ||
|G.8S=2 | |G.8S=2 | ||
|G.9=322 | |G.9=322 | ||
| Line 564: | Line 561: | ||
}} | }} | ||
<br> | <br> | ||
{| align=center width=30% cellspacing=0 border=1 cellpadding=3 style="border-collapse:collapse; font-family:Arial; text-align:center" | {|align=center width=30% cellspacing=0 border=1 cellpadding=3 style="border-collapse:collapse;font-family:Arial;text-align:center" | ||
|- | |- | ||
!colspan=3 style="background: #EEEEFF"|'''Premium Challenges''' | !colspan=3 style="background: #EEEEFF"|'''Premium Challenges''' | ||
| Line 578: | Line 575: | ||
|width=10% style="background:linear-gradient(#F2E18F,#B9800F)"|[[File:MKT Artwork FireBro.png|50x80px]] | |width=10% style="background:linear-gradient(#F2E18F,#B9800F)"|[[File:MKT Artwork FireBro.png|50x80px]] | ||
|-style="color: #FFF" | |-style="color: #FFF" | ||
|style="background:linear-gradient(#864D00,#A26000); border-top:1px solid #B9800F;"|{{Color | |style="background:linear-gradient(#864D00,#A26000);border-top:1px solid #B9800F;"|{{Color link|#A1A1FF|Minion Paper Glider}} ×1 | ||
|style="background:linear-gradient(#864D00,#A26000); border-top:1px solid #B9800F;"|{{Color | |style="background:linear-gradient(#864D00,#A26000);border-top:1px solid #B9800F;"|{{Color link|#A1A1FF|Koopa Clown}} ×1 | ||
|style="background:linear-gradient(#864D00,#A26000); border-top:1px solid #B9800F;"|{{Color | |style="background:linear-gradient(#864D00,#A26000);border-top:1px solid #B9800F;"|{{Color link|#A1A1FF|Fire Bro}} ×1 | ||
|-style="color: #FFF" | |-style="color: #FFF" | ||
|style="background:linear-gradient(#A26000,#C88512); border-top:1px solid #A26000;"|''Land 5 hits with Green Shells.'' | |style="background:linear-gradient(#A26000,#C88512);border-top:1px solid #A26000;"|''Land 5 hits with Green Shells.'' | ||
|style="background:linear-gradient(#A26000,#C88512); border-top:1px solid #A26000;"|''Land 10 hits with Bananas.'' | |style="background:linear-gradient(#A26000,#C88512);border-top:1px solid #A26000;"|''Land 10 hits with Bananas.'' | ||
|style="background:linear-gradient(#A26000,#C88512); border-top:1px solid #A26000;"|''Land 10 hits with Bob-ombs.'' | |style="background:linear-gradient(#A26000,#C88512);border-top:1px solid #A26000;"|''Land 10 hits with Bob-ombs.'' | ||
|-style="height: 80px" | |-style="height: 80px" | ||
|width=10% style="background:linear-gradient(#F2E18F,#B9800F)"|[[File:MKT Icon Coins 3.png|70px]] | |width=10% style="background:linear-gradient(#F2E18F,#B9800F)"|[[File:MKT Icon Coins 3.png|70px]] | ||
| Line 590: | Line 587: | ||
|width=10% style="background:linear-gradient(#F2E18F,#B9800F)"|[[File:MKT Icon Point-boostticket3.png|70px]] | |width=10% style="background:linear-gradient(#F2E18F,#B9800F)"|[[File:MKT Icon Point-boostticket3.png|70px]] | ||
|-style="color: #FFF" | |-style="color: #FFF" | ||
|style="background:linear-gradient(#864D00,#A26000); border-top:1px solid #B9800F;"|{{Color | |style="background:linear-gradient(#864D00,#A26000);border-top:1px solid #B9800F;"|{{Color link|#A1A1FF|Coin|Coins}} ×3,000 | ||
|style="background:linear-gradient(#864D00,#A26000); border-top:1px solid #B9800F;"|{{Color | |style="background:linear-gradient(#864D00,#A26000);border-top:1px solid #B9800F;"|{{Color link|#A1A1FF|Ruby|Rubies}} ×10 | ||
|style="background:linear-gradient(#864D00,#A26000); border-top:1px solid #B9800F;"|Glider {{Color | |style="background:linear-gradient(#864D00,#A26000);border-top:1px solid #B9800F;"|Glider {{Color link|#A1A1FF|point-boost ticket}} ×3 | ||
|-style="color: #FFF" | |-style="color: #FFF" | ||
|style="background:linear-gradient(#A26000,#C88512); border-top:1px solid #A26000;"|''Do 50 Jump Boosts.'' | |style="background:linear-gradient(#A26000,#C88512);border-top:1px solid #A26000;"|''Do 50 Jump Boosts.'' | ||
|style="background:linear-gradient(#A26000,#C88512); border-top:1px solid #A26000;"|''Participate in a race.'' | |style="background:linear-gradient(#A26000,#C88512);border-top:1px solid #A26000;"|''Participate in a race.'' | ||
|style="background:linear-gradient(#A26000,#C88512); border-top:1px solid #A26000;"|''Do 100 Mini-Turbo boosts.'' | |style="background:linear-gradient(#A26000,#C88512);border-top:1px solid #A26000;"|''Do 100 Mini-Turbo boosts.'' | ||
|-style="height: 80px" | |-style="height: 80px" | ||
|width=10% style="background:linear-gradient(#F2E18F,#B9800F)"|[[File:MKT Icon Level-boostticket3.png|70px]] | |width=10% style="background:linear-gradient(#F2E18F,#B9800F)"|[[File:MKT Icon Level-boostticket3.png|70px]] | ||
| Line 602: | Line 599: | ||
|width=10% style="background:linear-gradient(#F2E18F,#B9800F)"|[[File:MKT Icon Level-boostticket9.png|70px]] | |width=10% style="background:linear-gradient(#F2E18F,#B9800F)"|[[File:MKT Icon Level-boostticket9.png|70px]] | ||
|-style="color: #FFF" | |-style="color: #FFF" | ||
|style="background:linear-gradient(#864D00,#A26000); border-top:1px solid #B9800F;"|Normal glider {{Color | |style="background:linear-gradient(#864D00,#A26000);border-top:1px solid #B9800F;"|Normal glider {{Color link|#A1A1FF|level-boost ticket}} ×1 | ||
|style="background:linear-gradient(#864D00,#A26000); border-top:1px solid #B9800F;"|Super glider level-boost ticket ×1 | |style="background:linear-gradient(#864D00,#A26000);border-top:1px solid #B9800F;"|Super glider level-boost ticket ×1 | ||
|style="background:linear-gradient(#864D00,#A26000); border-top:1px solid #B9800F;"|High-End glider level-boost ticket ×1 | |style="background:linear-gradient(#864D00,#A26000);border-top:1px solid #B9800F;"|High-End glider level-boost ticket ×1 | ||
|-style="color: #FFF" | |-style="color: #FFF" | ||
|style="background:linear-gradient(#A26000,#C88512); border-top:1px solid #A26000;"|''Get 1st place in a race 10 times.'' | |style="background:linear-gradient(#A26000,#C88512);border-top:1px solid #A26000;"|''Get 1st place in a race 10 times.'' | ||
|style="background:linear-gradient(#A26000,#C88512); border-top:1px solid #A26000;"|''Get 1st place in a race 15 times.'' | |style="background:linear-gradient(#A26000,#C88512);border-top:1px solid #A26000;"|''Get 1st place in a race 15 times.'' | ||
|style="background:linear-gradient(#A26000,#C88512); border-top:1px solid #A26000;"|''Get 1st place in a race 20 times.'' | |style="background:linear-gradient(#A26000,#C88512);border-top:1px solid #A26000;"|''Get 1st place in a race 20 times.'' | ||
|} | |} | ||
<br> | <br> | ||
{|class="wikitable" style="margin:auto; text-align:center" width=30% | {|class="wikitable"style="margin:auto;text-align:center"width=30% | ||
!colspan=2|Total Points Challenge | !colspan=2|Total Points Challenge | ||
|- | |- | ||
| Line 657: | Line 654: | ||
===All-Clear Pipe=== | ===All-Clear Pipe=== | ||
The All-Clear Pipe randomly shot out one of the following regular High-End items. | The All-Clear Pipe randomly shot out one of the following regular High-End items. | ||
{|class="wikitable" style="margin:auto; text-align:center" | {|class="wikitable"style="margin:auto;text-align:center" | ||
!colspan=2|High-End items obtainable from the All-Clear Pipe during the 2021 Yoshi Tour | !colspan=2|High-End items obtainable from the All-Clear Pipe during the 2021 Yoshi Tour | ||
|- | |- | ||
!High-End drivers | !High-End drivers | ||
|[[Dry Bowser]], [[ | |[[Dry Bowser]], [[Metal Mario]], [[Pink Gold Peach]], [[Cat Mario|Cat Peach]], [[Pauline]], [[King Bob-omb]], [[Peachette]], [[Yoshi (species)|Black Yoshi]], [[Funky Kong]], [[Ice Mario (Super Mario Galaxy)|Ice Mario]] | ||
|- | |- | ||
!High-End karts | !High-End karts | ||
| Line 672: | Line 669: | ||
===Yoshi Pipe 1=== | ===Yoshi Pipe 1=== | ||
{|class="wikitable" style="margin:auto; text-align:center" | {|class="wikitable"style="margin:auto;text-align:center" | ||
!colspan=16|Items obtained from a new Yoshi Pipe 1 in the Yoshi Tour (2021) | !colspan=16|Items obtained from a new Yoshi Pipe 1 in the Yoshi Tour (2021) | ||
|- | |- | ||
| Line 709: | Line 706: | ||
|} | |} | ||
<br> | <br> | ||
{|class="wikitable"style="margin:auto;text-align:center" | |||
{|class="wikitable" style="margin:auto; text-align:center" | |||
!Class | !Class | ||
!Parts | !Parts | ||
| Line 728: | Line 724: | ||
|- | |- | ||
!High-End drivers | !High-End drivers | ||
|[[Dry Bowser]], [[ | |[[Dry Bowser]], [[Metal Mario]], [[Pink Gold Peach]], [[Cat Mario|Cat Peach]], [[Pauline]], [[King Bob-omb]], [[Peachette]], [[Yoshi (species)|Black Yoshi]], [[Birdo|Birdo (Black)]], [[Funky Kong]], [[Ice Mario (Super Mario Galaxy)|Ice Mario]] | ||
|0.0909% | |0.0909% | ||
|- | |- | ||
| Line 740: | Line 736: | ||
|- | |- | ||
!Super drivers | !Super drivers | ||
|[[Donkey Kong]], [[Toad]], [[Bowser]], [[Luigi]], [[Mario]], [[Peach]], [[Yoshi]], [[Daisy]], [[Lakitu]], [[King Boo]], [[Toadette]], [[Bowser Jr.]], [[Waluigi]], [[Wario]], [[Rosalina]], [[Birdo]], [[Diddy Kong]], [[Hammer Bro]], [[Boomerang Bro]], [[Fire Bro]], [[Ice Bro]], [[Red Yoshi]], [[Black Shy Guy]], [[Pink Shy Guy]], [[Toad|Toad (Pit Crew)]], [[Monty Mole]], [[Birdo | |[[Donkey Kong]], [[Toad]], [[Bowser]], [[Luigi]], [[Mario]], [[Peach]], [[Yoshi]], [[Daisy]], [[Lakitu]], [[King Boo]], [[Toadette]], [[Bowser Jr.]], [[Waluigi]], [[Wario]], [[Rosalina]], [[Birdo]], [[Diddy Kong]], [[Hammer Bro]], [[Boomerang Bro]], [[Fire Bro]], [[Ice Bro]], [[Red Yoshi]], [[Black Shy Guy]], [[Pink Shy Guy]], [[Toad|Toad (Pit Crew)]], [[Monty Mole]], [[Birdo|Birdo (Light Blue)]], [[Birdo|Birdo (Yellow)]], [[Roving Racers|Red Koopa (Freerunning)]] | ||
|0.3103% | |0.3103% | ||
|- | |- | ||
| Line 766: | Line 762: | ||
===Yoshi Pipe 2=== | ===Yoshi Pipe 2=== | ||
{|class="wikitable" style="margin:auto; text-align:center" | {|class="wikitable"style="margin:auto;text-align:center" | ||
!colspan=16|Items obtained from a new Yoshi Pipe 2 in the Yoshi Tour (2021) | !colspan=16|Items obtained from a new Yoshi Pipe 2 in the Yoshi Tour (2021) | ||
|- | |- | ||
| Line 810: | Line 806: | ||
|} | |} | ||
<br> | <br> | ||
{|class="wikitable"style="margin:auto;text-align:center" | |||
{|class="wikitable" style="margin:auto; text-align:center" | |||
!Class | !Class | ||
!Parts | !Parts | ||
| Line 817: | Line 812: | ||
|- | |- | ||
!High-End Spotlight Drivers | !High-End Spotlight Drivers | ||
|[[Birdo | |[[Birdo|Birdo (Black)]] | ||
|1.0000% | |1.0000% | ||
|- | |- | ||
| Line 825: | Line 820: | ||
|- | |- | ||
!High-End drivers | !High-End drivers | ||
|[[Dry Bowser]], [[ | |[[Dry Bowser]], [[Metal Mario]], [[Pink Gold Peach]], [[Cat Mario|Cat Peach]], [[Pauline]], [[King Bob-omb]], [[Peachette]], [[Yoshi (species)|Black Yoshi]], [[Birdo|Birdo (Black)]], [[Funky Kong]], [[Ice Mario (Super Mario Galaxy)|Ice Mario]] | ||
|0.1667% | |0.1667% | ||
|- | |- | ||
| Line 837: | Line 832: | ||
|- | |- | ||
!Super Spotlight Drivers | !Super Spotlight Drivers | ||
|[[Birdo]], [[Birdo | |[[Birdo]], [[Birdo|Birdo (Light Blue)]], [[Birdo|Birdo (Yellow)]] | ||
|1.0000% | |1.0000% | ||
|- | |- | ||
| Line 871: | Line 866: | ||
===Banana Pipe=== | ===Banana Pipe=== | ||
{|class="wikitable" style="margin:auto; text-align:center" | {|class="wikitable"style="margin:auto;text-align:center" | ||
!colspan=16|Items obtained from a new Banana Pipe | !colspan=16|Items obtained from a new Banana Pipe | ||
|- | |- | ||
| Line 901: | Line 896: | ||
|} | |} | ||
<br> | <br> | ||
{|class="wikitable"style="margin:auto;text-align:center" | |||
{|class="wikitable" style="margin:auto; text-align:center" | |||
!Class | !Class | ||
!Parts | !Parts | ||
| Line 916: | Line 910: | ||
|- | |- | ||
!Super drivers | !Super drivers | ||
|[[Donkey Kong]], [[Toad]], [[Bowser]], [[Luigi]], [[Mario]], [[Peach]], [[Yoshi]], [[Daisy]], [[Lakitu]], [[King Boo]], [[Toadette]], [[Bowser Jr.]], [[Waluigi]], [[Wario]], [[Rosalina]], [[Birdo]], [[Diddy Kong]], [[Hammer Bro]], [[Boomerang Bro]], [[Fire Bro]], [[Ice Bro]], [[Red Yoshi]], [[Black Shy Guy]], [[Pink Shy Guy]], [[Toad|Toad (Pit Crew)]], [[Monty Mole]], [[Birdo | |[[Donkey Kong]], [[Toad]], [[Bowser]], [[Luigi]], [[Mario]], [[Peach]], [[Yoshi]], [[Daisy]], [[Lakitu]], [[King Boo]], [[Toadette]], [[Bowser Jr.]], [[Waluigi]], [[Wario]], [[Rosalina]], [[Birdo]], [[Diddy Kong]], [[Hammer Bro]], [[Boomerang Bro]], [[Fire Bro]], [[Ice Bro]], [[Red Yoshi]], [[Black Shy Guy]], [[Pink Shy Guy]], [[Toad|Toad (Pit Crew)]], [[Monty Mole]], [[Birdo|Birdo (Light Blue)]], [[Birdo|Birdo (Yellow)]], [[Roving Racers|Red Koopa (Freerunning)]] | ||
|0.3448% | |0.3448% | ||
|- | |- | ||
| Line 943: | Line 937: | ||
==Token Shop== | ==Token Shop== | ||
The limited-time event where [[event token]]s appeared began on March 24, 2021 and ended on April 6, 2021. Event tokens could be earned from landing banana hits. | The limited-time event where [[event token]]s appeared began on March 24, 2021 and ended on April 6, 2021. Event tokens could be earned from landing banana hits. | ||
{|class="wikitable"style="margin:auto;text-align:center"width=50% | |||
{|class="wikitable" style="margin:auto; text-align:center" width=50% | |||
!colspan=3|'''Token Shop''' (March 24, 2021 - April 6, 2021) | !colspan=3|'''Token Shop''' (March 24, 2021 - April 6, 2021) | ||
|- | |- | ||
| Line 989: | Line 982: | ||
==Tier Shop== | ==Tier Shop== | ||
The shop featured a variety of set and randomized items available for purchase. The item slots in the shop are unlocked based on the highest tier of players. | The shop featured a variety of set and randomized items available for purchase. The item slots in the shop are unlocked based on the highest tier of players. This was the first tour to feature the tour's namesake character in both the Tier Shop and Token Shop. | ||
{|class="wikitable"style="margin:auto;text-align:center"width=50% | |||
{| class="wikitable" style="margin:auto; text-align:center" width=50% | |||
!colspan=3|Items available in Tier Shop (March 24, 2021 - March 30, 2021) | !colspan=3|Items available in Tier Shop (March 24, 2021 - March 30, 2021) | ||
|- | |- | ||
| Line 1,041: | Line 1,033: | ||
==Profiles== | ==Profiles== | ||
*'''''Mario Kart Tour'' Twitter''' | *'''''Mario Kart Tour'' Twitter''' | ||
**''"It's almost been 1.5 years since {{color|#MarioKartTour | **''"It's almost been 1.5 years since {{color|blue|#MarioKartTour}} was released. Thank you for playing! Starting in the Mario Tour, multiple events will be held through three consecutive tours! You can expect challenges that span across tours, and even a new course! We hope you look forward to it!"''<ref name=Twitter1>@mariokarttourEN (March 10, 2021). [https://twitter.com/mariokarttourEN/status/1369543588347060224 ''Twitter'']. Retrieved March 10, 2021.</ref> | ||
**''"The Mario Tour is wrapping up in {{color|#MarioKartTour | **''"The Mario Tour is wrapping up in {{color|blue|#MarioKartTour}}. Next up is the Yoshi Tour! There are new things coming like a driver being a part of the rewards for placing in the upper ranks. We hope you look forward to it!"''<ref>@mariokarttourEN (March 18, 2021). [https://twitter.com/mariokarttourEN/status/1372789984390868995 ''Twitter'']. Retrieved March 19, 2021.</ref> | ||
**''"These Yoshis have gathered just in time for spring. It's time for the Yoshi Tour in {{color|blue|#MarioKartTour}}! Our trusted host Lakitu has changed into his spring attire too!"''<ref>@mariokarttourEN (March 24, 2021). [https://twitter.com/mariokarttourEN/status/1374604390363848710 ''Twitter'']. Retrieved August 22, 2021</ref> | |||
==Gallery== | ==Gallery== | ||
| Line 1,082: | Line 1,075: | ||
{{MKT}} | {{MKT}} | ||
[[Category:Mario Kart Tour | [[Category:Mario Kart Tour tours]] | ||
[[it:Tour Yoshi (2021)]] | [[it:Tour Yoshi (2021)]] | ||
Latest revision as of 17:42, December 31, 2024
| Yoshi Tour | |
|---|---|
| |
| Start date | March 23, 2021 11:00 p.m. (PT)[?] |
| End date | April 6, 2021 10:59 p.m. (PT)[?] |
| Number of cups | 12 |
| Ranked cups | Yoshi Cup (week 1) Waluigi Cup (week 2) |
| Coin Rush course | N64 Royal Raceway |
| << List of tours >> | |
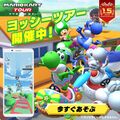
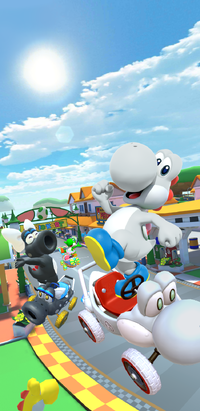
The Yoshi Tour was the fortieth tour of Mario Kart Tour, which began on March 24, 2021 and ended on April 6, 2021. Like the Yoshi Tour in 2020, this tour was set around Easter. Blue Yoshi, White Yoshi, and Birdo (Black) were added as new drivers in this tour, while Yoshi (Egg Hunt) returned as one of the spotlight drivers in the first week. The tour also introduced a new bonus challenge, Snap a Photo. The Lakitu referee wore a spring-themed outfit during this tour. This tour's Coin Rush course was N64 Royal Raceway, which was reused from the Peach Tour. The menu's background featured the lighthouse from Yoshi Circuit as the landmark of this tour.
This was the first tour since the 2020 Mario vs. Luigi Tour nine tours prior to not introduce a new course to the game, though this tour introduced the R/T variants of SNES Donut Plains 2 and N64 Royal Raceway.
Spotlights[edit]
| Yoshi Pipe 1 March 23, 2021, 11:00 p.m. (PT) – April 6, 2021, 10:59 p.m. (PT) |
Yoshi Pipe 2 March 30, 2021, 11:00 p.m. (PT) – April 6, 2021, 10:59 p.m. (PT) | |||||
|
| |||||
| Drivers | Karts | Glider | High-End Spotlight Driver | Super Spotlight Drivers | High-End Spotlight Kart | Super Spotlight Karts |
|---|---|---|---|---|---|---|
 
|

|
  
|
||||
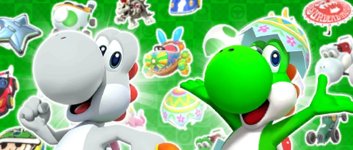
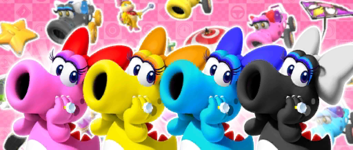
| Yoshi (Egg Hunt) and White Yoshi | Bright Bunny and White Turbo Yoshi | Bright Glider | Birdo (Black) | Birdo, Birdo (Yellow) and Birdo (Light Blue) | Black Turbo Birdo | Turbo Birdo, Light-blue Turbo Birdo, and Yellow Turbo Birdo |
Special pipe[edit]
| Banana Pipe March 27, 2021, 11:00 p.m. (PT) – April 1, 2021, 10:59 p.m. (PT) | ||
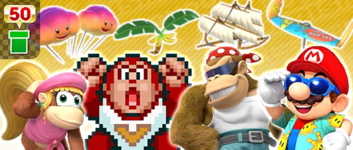
| ||
| Drivers | Gliders | |
|---|---|---|
|
||
| Mario (Sunshine), Dixie Kong, Funky Kong, and Donkey Kong Jr. (SNES) | Sunset Balloons, Banana Wingtip, Great Sail, and Tropical Glider | |
- Names in other languages
| Language | Name | Meaning | Notes |
|---|---|---|---|
| Japanese | スペシャルバナナドカン[?] Supesharu Banana Dokan |
Special Banana Pipe | |
| German | Bananen-Röhre[?] | Banana Pipe |
Cups[edit]
Yoshi Cup Ranked cup (week 1) |
GCN Yoshi Circuit |
N64 Choco Mountain T |
N64 Royal Raceway R/T |
Ring Race | ||||
 SNES Donut Plains 2 |
Toad (Pit Crew) | |||||||
Daisy Cup |
3DS Toad Circuit |
Tokyo Blur 4R |
RMX Rainbow Road 1 |
Snap a Photo | ||||
 GCN Yoshi Circuit T |
Yoshi (Egg Hunt) | |||||||
Waluigi Cup Ranked cup (week 2) |
SNES Donut Plains 2R/T |
GBA Sunset Wilds |
DS Waluigi Pinball T |
Time Trial | ||||
 Tokyo Blur 4R |
Toadette | |||||||
Baby Rosalina Cup |
RMX Mario Circuit 1 |
GCN Yoshi Circuit R |
Tokyo Blur 4T |
Break Item Boxes | ||||
 3DS Toad Circuit |
Luigi | |||||||
Bowser Cup |
DS Waluigi Pinball |
GBA Sunset Wilds T |
3DS Rainbow Road T |
Steer Clear of Obstacles | ||||
 RMX Mario Circuit 1 |
King Boo | |||||||
Bowser Jr. Cup |
Tokyo Blur 4 |
N64 Kalimari Desert R/T |
RMX Rainbow Road 1R |
Vs. Mega Metal Mario | ||||
 3DS Rainbow Road |
Any character | |||||||
Peachette Cup |
3DS Toad Circuit R |
GCN Yoshi Circuit T |
GBA Sunset Wilds R |
Time Trial | ||||
 DS Waluigi Pinball |
Dry Bones | |||||||
King Boo Cup |
N64 Choco Mountain R |
DS Airship Fortress |
3DS Rainbow Road |
Goomba Takedown | ||||
 RMX Rainbow Road 1 |
Waluigi | |||||||
Dry Bowser Cup |
3DS Rainbow Road R |
RMX Mario Circuit 1T |
SNES Donut Plains 2R/T |
Combo Attack | ||||
 N64 Royal Raceway T |
Baby Peach | |||||||
Luigi Cup |
DS Waluigi Pinball R |
3DS Toad Circuit T |
DS Airship Fortress R |
Glider Challenge | ||||
 GCN Yoshi Circuit |
Yoshi | |||||||
Donkey Kong Cup |
RMX Mario Circuit 1R |
N64 Royal Raceway R/T |
RMX Rainbow Road 1T |
Do Jump Boosts | ||||
 N64 Kalimari Desert |
Mario | |||||||
Wendy Cup |
DS Airship Fortress T |
N64 Choco Mountain |
N64 Kalimari Desert R/T |
Big Reverse Race | ||||
 SNES Donut Plains 2 |
Any character | |||||||
Signature kart sets[edit]
Drivers with a corresponding cup were bumped one rank up in every course of their cup.
| Cup | Driver | Kart | Glider |
|---|---|---|---|
| Second course of every cup | |||
| Third course of every cup | — | ||
| — | — | ||
| — | — | ||
| — | — | ||
| — | — | ||
| — | — | ||
| — | — | ||
| — | — | ||
| — | — | ||
| — | — | ||
| — | — | ||
| — | — | ||
| — | — |
Rewards[edit]
Gold cells indicate rewards that are exclusive to Gold Pass members.

|
||||||||||
| Piranha Plant Parafoil | Yoshi | Red Kiddie Kart | Red Yoshi | Ludwig | Turbo Yoshi | BaNaNa Parafoil | Red Turbo Yoshi | Barrel Train | Heart Balloons | Waluigi |
| Grand Stars | 15 | 30 | 45 | 60 | 70 | 80 | 100 | 120 | 130 | 140 | 150 | 160 | 170 | 180 | 190 | 200 | 205 | 210 | 215 | 220 | 225 | 230 | 235 | 240 | 245 | 250 | 255 | Total | Grand total | |
|---|---|---|---|---|---|---|---|---|---|---|---|---|---|---|---|---|---|---|---|---|---|---|---|---|---|---|---|---|---|---|
| Free pipe launch | 1 | 1 | 1 | 1 | 1 | 1 | 6 | |||||||||||||||||||||||
| Coin | 100 | 100 | 100 | 100 | 100 | 500 | 1300 | |||||||||||||||||||||||
| 300 | 500 | 800 | ||||||||||||||||||||||||||||
| Rubies | 5 | 3 | 3 | 3 | 3 | 3 | 20 | 50 | ||||||||||||||||||||||
| 5 | 5 | 5 | 5 | 5 | 5 | 30 | ||||||||||||||||||||||||
| Item tickets | 2 | 2 | 2 | 2 | 8 | 23 | ||||||||||||||||||||||||
| 2 | 2 | 2 | 3 | 3 | 3 | 15 | ||||||||||||||||||||||||
| Star tickets | 1 | 1 | 2 | 3 | ||||||||||||||||||||||||||
| 1 | 1 | |||||||||||||||||||||||||||||
| Point-boost tickets | 1 | 1 | 1 | 3 | 5 | |||||||||||||||||||||||||
| 1 | 1 | 2 | ||||||||||||||||||||||||||||
| 1 | 1 | 1 | 3 | 5 | ||||||||||||||||||||||||||
| 1 | 1 | 2 | ||||||||||||||||||||||||||||
| 1 | 1 | 1 | 3 | 5 | ||||||||||||||||||||||||||
| 1 | 1 | 2 | ||||||||||||||||||||||||||||
| Level-boost ticket | 3 | 12 | ||||||||||||||||||||||||||||
| 9 | ||||||||||||||||||||||||||||||
1.5 Year Anniv. Log-In Bonus[edit]
To commemorate the 1.5-year anniversary since the official global launch of Mario Kart Tour, a 14-day "1.5 Year Anniv. Log-In Bonus" served as the log-in bonus of this tour.
| Day | Reward |
|---|---|
| 1 | Rubies ×5 |
| 2 | Coins ×1,000 |
| 3 | Item tickets ×5 |
| 4 | Point-boost ticket (glider) ×3 |
| 5 | Coins ×1,000 |
| 6 | Rubies ×5 |
| 7 | Point-boost ticket (kart) ×3 |
| 8 | Coin Rush ticket ×1 |
| 9 | Point-boost ticket (driver) ×3 |
| 10 | Rubies ×5 |
| 11 | Level-boost ticket (High-End glider) ×1 |
| 12 | Level-boost ticket (High-End kart) ×1 |
| 13 | Level-boost ticket (High-End driver) ×1 |
| 14 | Coins ×1,000 |
New content[edit]
Drivers[edit]
Karts[edit]
Gliders[edit]
Courses[edit]
SNES Donut Plains 2 (R/T)
N64 Royal Raceway (R/T)
Bonus challenges[edit]
Paid banners[edit]
| Name | Availability | Cost | Contents | Banner image |
|---|---|---|---|---|
| Value Pack | March 24, 2021 – April 6, 2021 | US$1.99 |
|

|
| Purple Bunny Pack | March 24, 2021 – April 6, 2021 | US$19.99 |
|
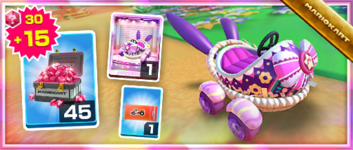
|
| Bright Balloons Pack | March 24, 2021 – April 6, 2021 | US$39.99 |
|
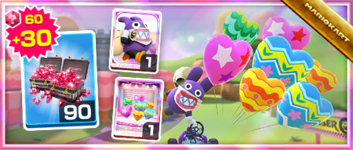
|
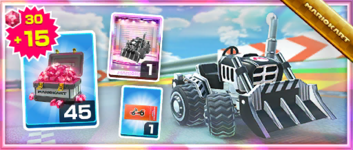
| Black Dozer Pack | March 31, 2021 – April 6, 2021 | US$19.99 |
|
|
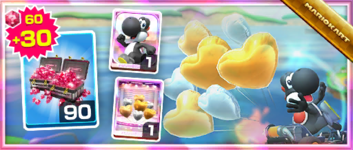
| Silver-and-Gold Hearts Pack | March 31, 2021 – April 6, 2021 | US$39.99 |
|
|
Challenges[edit]
| Tour Challenges 1 | Tour Challenges 2 | Gold Challenges | ||||||||
|---|---|---|---|---|---|---|---|---|---|---|
| Completion reward: |
Completion reward: |
Completion reward: | ||||||||
 |
 |
 |
 |
 |
 |
 |
 |
 | ||
| Get a Fantastic combo a total of 3 times. | Land 5 hits with Red Shells. | Do 50 Mini-Turbo boosts. | Do 5 Rocket Starts. | Land 3 hits with Green Shells. | Land 3 hits with Bob-ombs. | Get 1st place in a race 5 times. | Land 15 hits with Bananas. | Activate Frenzy mode 5 times. | ||
 |
 |
 |
 |
 |
 |
 |
 |
 | ||
| Get an item from the Tier Shop. | Do 50 Mini-Turbo boosts using a driver wearing a shell. | Earn a score of 7,000 or higher on 3 T courses. | Send Greeting Coins to a friend. | Do 10 Mini-Turbo boosts in a single race using a driver with a ribbon. | Get a combo count of ×30 or higher. | Use a level-boost ticket. | Land 3 hits with Yoshi's Egg. | Do 50 Jump Boosts on an RMX course. | ||
 |
 |
 |
 |
 |
 |
 |
 |
 | ||
| Cause opponents to crash 5 times using a driver with a hat. | Earn a total score of 15,000 or higher in the Yoshi Cup. | Use point-boost tickets 3 times. | Earn a score of 7,000 or higher using a driver with an extended tongue. | Earn a total score of 20,000 or higher in the Waluigi Cup. | Race in every course of every cup, including bonus challenges. | Earn a score of 9,000 or higher using a driver wearing gloves. | Earn a total score of 25,000 or higher in the Daisy Cup. | Drive a distance of 16,000 or more on a 3DS course. | ||
| Premium Challenges | ||
|---|---|---|
| Cost: US$4.99 | ||
| Three in a row reward: | ||
| Completion reward: | ||

| ||
| Minion Paper Glider ×1 | Koopa Clown ×1 | Fire Bro ×1 |
| Land 5 hits with Green Shells. | Land 10 hits with Bananas. | Land 10 hits with Bob-ombs. |
| Coins ×3,000 | Rubies ×10 | Glider point-boost ticket ×3 |
| Do 50 Jump Boosts. | Participate in a race. | Do 100 Mini-Turbo boosts. |
| Normal glider level-boost ticket ×1 | Super glider level-boost ticket ×1 | High-End glider level-boost ticket ×1 |
| Get 1st place in a race 10 times. | Get 1st place in a race 15 times. | Get 1st place in a race 20 times. |
| Total Points Challenge | |
|---|---|
| Points | Rewards |
| 600,000 |
|
| 550,000 |
|
| 500,000 |
|
| 400,000 |
|
| 300,000 |
|
| 150,000 |
|
Initial pipe appearance rates[edit]
All-Clear Pipe[edit]
The All-Clear Pipe randomly shot out one of the following regular High-End items.
| High-End items obtainable from the All-Clear Pipe during the 2021 Yoshi Tour | |
|---|---|
| High-End drivers | Dry Bowser, Metal Mario, Pink Gold Peach, Cat Peach, Pauline, King Bob-omb, Peachette, Black Yoshi, Funky Kong, Ice Mario |
| High-End karts | B Dasher, Badwagon, Cat Cruiser, Sports Coupe, Circuit Special, Bruiser, Wild Wing, Bumble V, Steel Driver, Macharon, Wildfire Flyer, Red B Dasher, P-Wing, Green Apple Kart, Poison Apple Kart, Dozer Dasher, Banana Master, Offroader, Head Honcho, Pink Wing, Koopa King, Cact-X, Sushi Racer, Green Circuit, Crawly Kart, Cact-Ice |
| High-End gliders | Swooper, Cloud Glider, Gold Glider, Pink Gold Paper Glider, Dry Bowser Umbrella, Blizzard Balloons, Starchute, Silver Starchute, Crimson Crane, Butterfly Sunset, Strawberry Donut, Heart Balloons, Great Sail, Tropical Glider, 8-Bit Star, Silver Bells, Cheep Cheep Masks |
Yoshi Pipe 1[edit]
Yoshi Pipe 2[edit]
Banana Pipe[edit]
| Items obtained from a new Banana Pipe | |||||||||||||||
|---|---|---|---|---|---|---|---|---|---|---|---|---|---|---|---|
| Item | Normal |
Super |
High-End | ||||||||||||
| Driver | Kart | Glider | Driver | Kart | Glider | Driver | Kart | Glider | |||||||
| Amount | 14 | 11 | 9 | 5 | 4 | 3 | 2 | 0 | 2 | ||||||
Token Shop[edit]
The limited-time event where event tokens appeared began on March 24, 2021 and ended on April 6, 2021. Event tokens could be earned from landing banana hits.
| Token Shop (March 24, 2021 - April 6, 2021) | ||
|---|---|---|

|
||
| Yoshi Amount: 1 |
Egg 1 Amount: 1 |
Eggshell Glider Amount: 1 |
| Ruby ×3 Amount: 5 |
Coin ×500 Amount: 10 |
Coin Rush ticket Amount: 1 |
| Point-boost ticket (driver) Amount: 5 |
Point-boost ticket (kart) Amount: 5 |
Point-boost ticket (glider) Amount: 5 |
| Item ticket Amount: 10 |
Level-boost ticket (Normal glider) Amount: 3 |
Level-boost ticket (Super glider) Amount: 1 |
| Star ticket Amount: 5 |
Points-cap ticket (Normal glider) Amount: 1 |
Points-cap ticket (Super glider) Amount: 1 |
Tier Shop[edit]
The shop featured a variety of set and randomized items available for purchase. The item slots in the shop are unlocked based on the highest tier of players. This was the first tour to feature the tour's namesake character in both the Tier Shop and Token Shop.
| Items available in Tier Shop (March 24, 2021 - March 30, 2021) | ||
|---|---|---|

|
||
| Yoshi Amount: 1 |
Dozer Dasher Amount: 1 |
Parachute Amount: 1 |
| Items available in Tier Shop (March 31, 2021 - April 6, 2021) | ||

|
||
| Lakitu Amount: 1 |
Offroader Amount: 1 |
BaNaNa Parafoil Amount: 1 |
| Items available in Tier Shop (March 24, 2021 - April 6, 2021) | ||
| Level-boost ticket (Normal) Amount: 3 per week |
Level-boost ticket (Normal) Amount: 3 per week |
Level-boost ticket (Normal) Amount: 3 per week |
OR |
OR |
OR |
| Level-boost ticket (Super) Amount: 2 per week OR Level-boost ticket (High-End) Amount: 1 per week |
Level-boost ticket (Super) Amount: 2 per week OR Level-boost ticket (High-End) Amount: 1 per week |
Level-boost ticket (Super) Amount: 2 per week OR Level-boost ticket (High-End) Amount: 1 per week |
OR OR |
OR OR |
OR OR |
| Points-cap ticket (Normal) Amount: 1 per week |
Points-cap ticket (Super) Amount: 1 per week |
Points-cap ticket (High-End) Amount: 1 per week |
Profiles[edit]
- Mario Kart Tour Twitter
- "It's almost been 1.5 years since #MarioKartTour was released. Thank you for playing! Starting in the Mario Tour, multiple events will be held through three consecutive tours! You can expect challenges that span across tours, and even a new course! We hope you look forward to it!"[1]
- "The Mario Tour is wrapping up in #MarioKartTour. Next up is the Yoshi Tour! There are new things coming like a driver being a part of the rewards for placing in the upper ranks. We hope you look forward to it!"[2]
- "These Yoshis have gathered just in time for spring. It's time for the Yoshi Tour in #MarioKartTour! Our trusted host Lakitu has changed into his spring attire too!"[3]
Gallery[edit]
Promotional image from Nintendo Co., Ltd.'s LINE account
Names in other languages[edit]
| Language | Name | Meaning | Notes |
|---|---|---|---|
| Japanese | ヨッシーツアー[?] Yosshī Tsuā |
Yoshi Tour | |
| Chinese (simplified) | 耀西巡回赛[?] Yàoxī Xúnhuísài |
Yoshi Tour | |
| Chinese (traditional) | 耀西巡迴賽[?] Yàoxī Xúnhuísài |
Yoshi Tour | |
| French | Saison de Yoshi[?] | Yoshi's Season | |
| German | Yoshi-Tour-Saison[?] | Yoshi Tour Season | |
| Italian | Tour Yoshi[?] | Yoshi Tour | |
| Korean | 요시 투어[?] Yosi Tueo |
Yoshi Tour | |
| Portuguese | Temporada Yoshi[?] | Yoshi Season | |
| Spanish | Temporada de Yoshi[?] | Yoshi's Season |
Trivia[edit]
- This was the first tour to lack a Smash Small Dry Bones bonus challenge.


